This tutorial will guide you on how to install Fedora 32 Workstation in dual boot with Microsoft Windows 10 Operating System pre-installed on a BIOS firmware machine.
If your computer has no pre-installed operating system and you plan to install Fedora Linux in dual-boot with a Microsoft operating system, you should first install Windows on your machine before installing Fedora Linux.
However, try to disable Fast Boot and Secure Boot options in UEFI firmware based machines if you plan to install Fedora in dual boot with Windows.
Also, if Windows installation was performed in UEFI mode (not in Legacy Mode or CSM – Compatibility Support Module), Fedora installation should also be performed in UEFI mode.
The installation procedure of Fedora Linux alongside a Microsoft Windows 10 OS requires no special configurations to be made in BIOS-based motherboards, except maybe changing the BIOS boot order.
The only requirement is, you must allocate a free space on the disk with at least 20 GB in size in order to use it later as a partition for Fedora installation.
Requirements
- Download Fedora 38 Workstation ISO Image
- Download Fedora 38 Server ISO Image
Preparing Windows Machine for Dual-Boot for Fedora
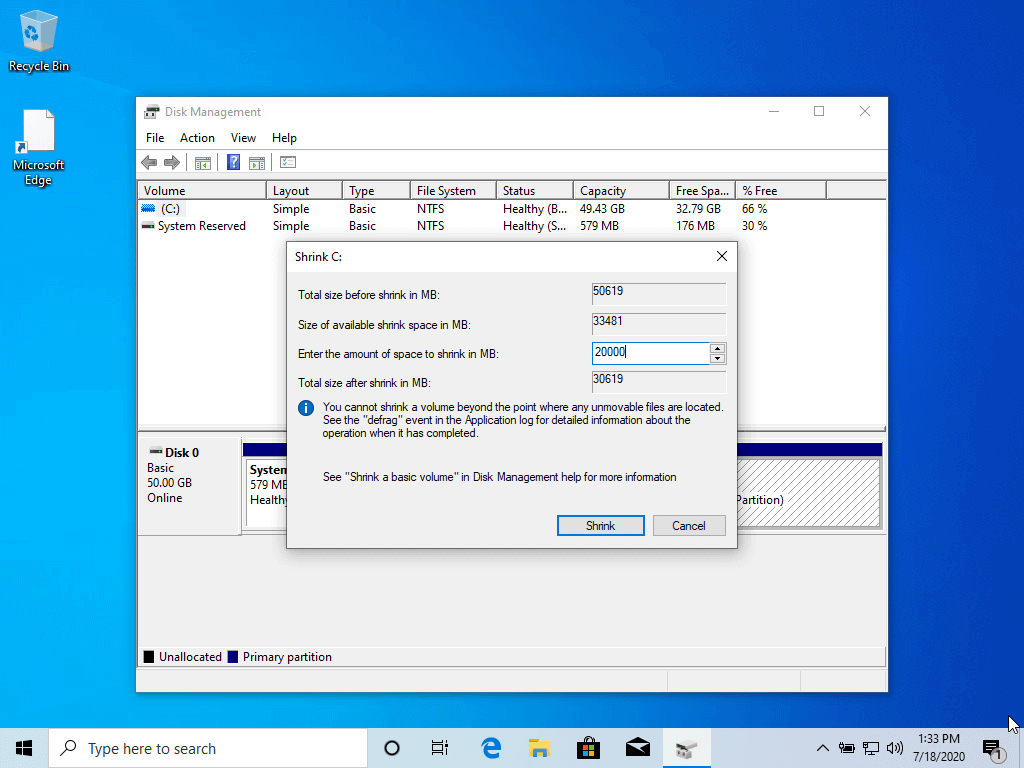
Open your windows Disk Management utility and right-click on C: partition and select Shrink Volume in order to resize the partition for Fedora installation.
Give at least 20000 MB (20GB) depending on the size of C: partition and hit Shrink to start partition resize as shown below.
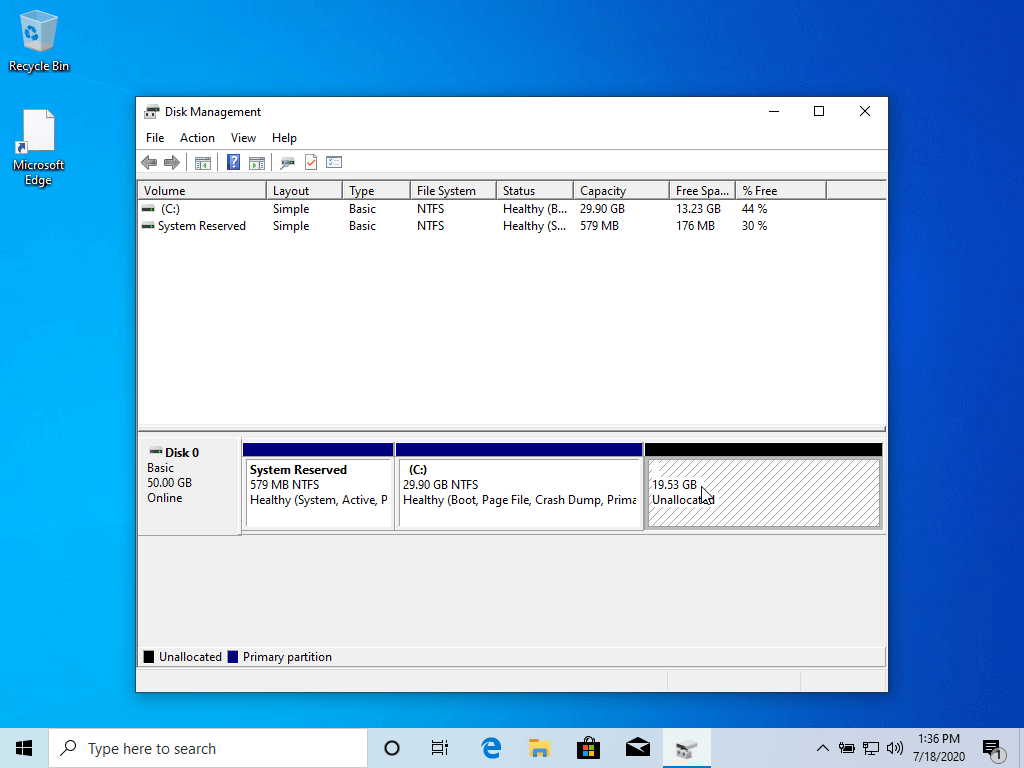
After resizing partition, you will see a new unallocated space on the hard drive. Leave it as default and reboot the system in order to proceed with the Fedora installation.
Install Fedora 32 with Windows Dual-Boot
1. On the first step, download the Fedora DVD ISO image and burn it to a DVD disk or create a bootable USB flash drive using the Fedora Media Writer tool or other utility.
To create a bootable Fedora USB drive compatible with installation performed in UEFI mode, use Rufus utility or Etcher. Also, check out 10 useful tools to make a bootable USB drive from an ISO image.
Place Fedora bootable media into your machine appropriate drive, restart the machine and instruct the BIOS or UEFI firmware to boot from DVD/USB bootable media.
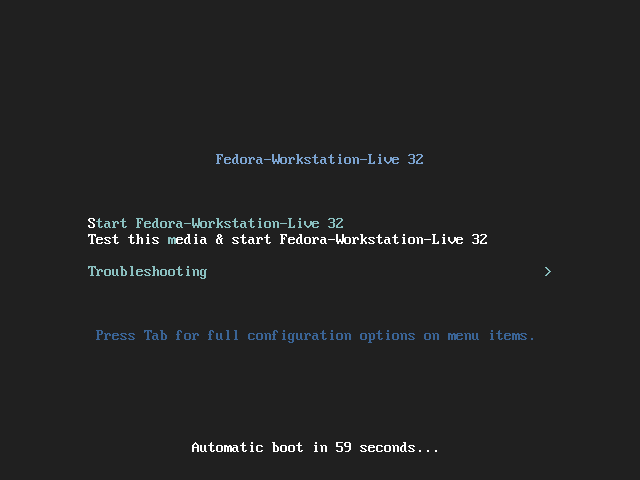
2. On the first installation screen, select Install Fedora Workstation Live 32 and press [enter] key to continue.
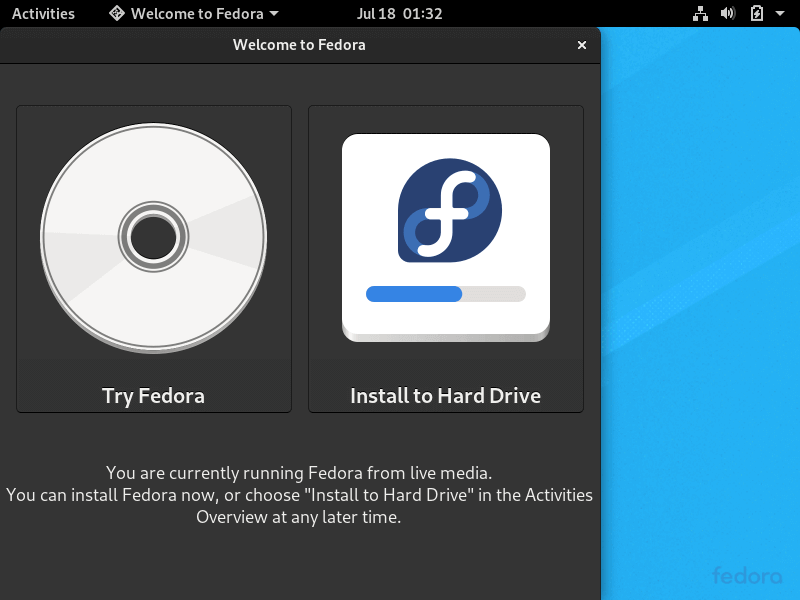
3. After the installer loads the Fedora Live system, click on Install to Hard Drive option in order to start the installation process.
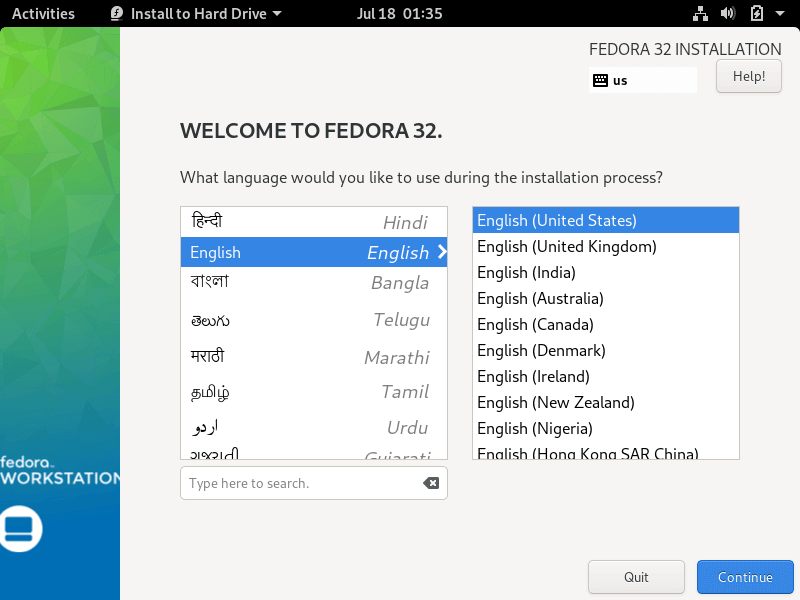
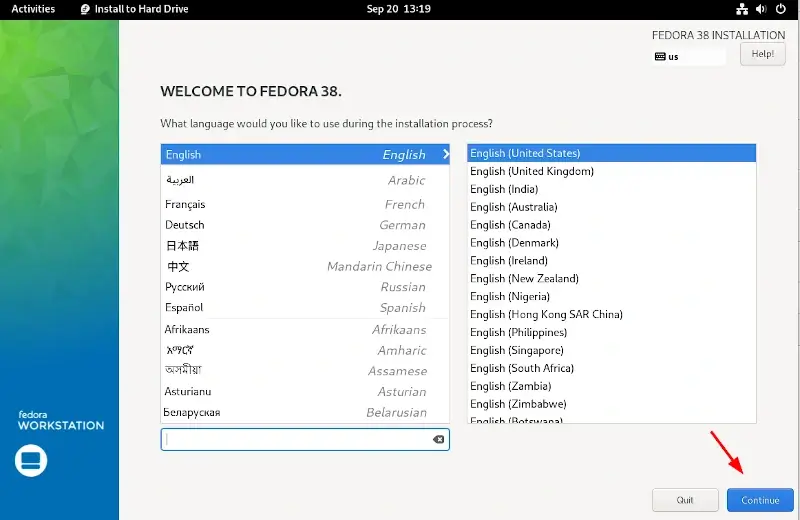
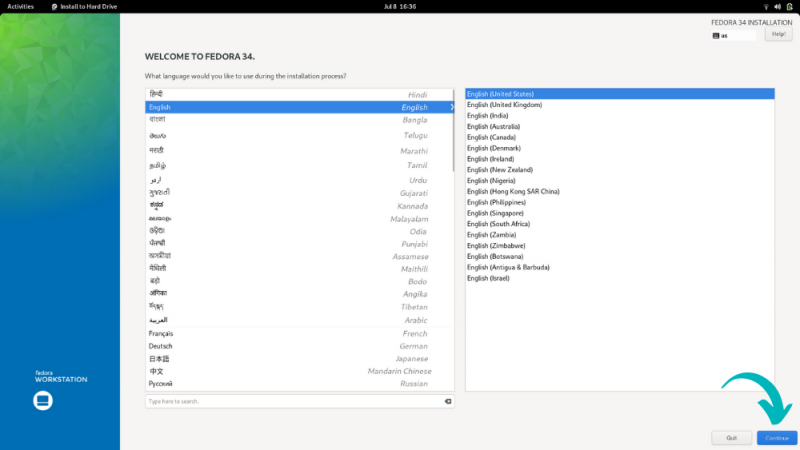
4. On the next screen, select the language that will be used during the installation process and hit on the Continue button.
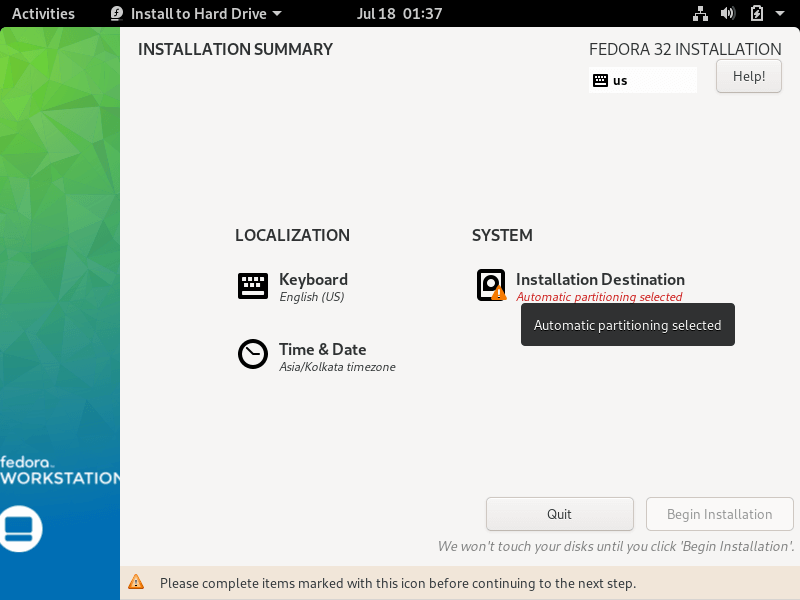
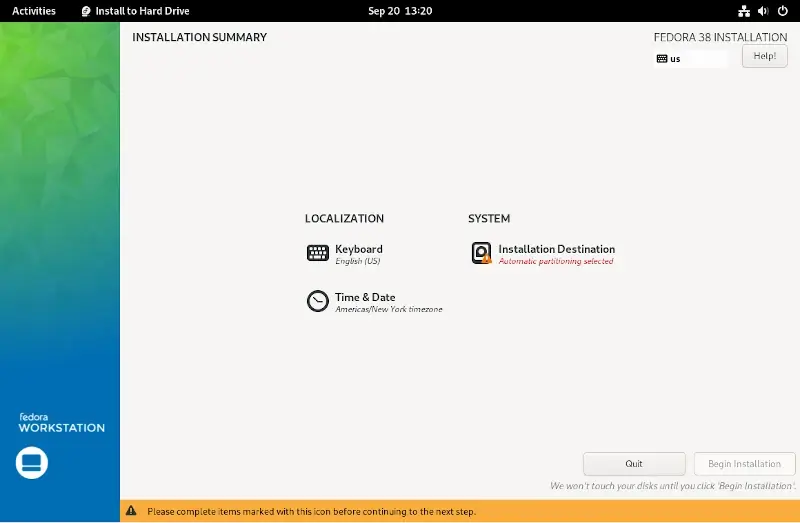
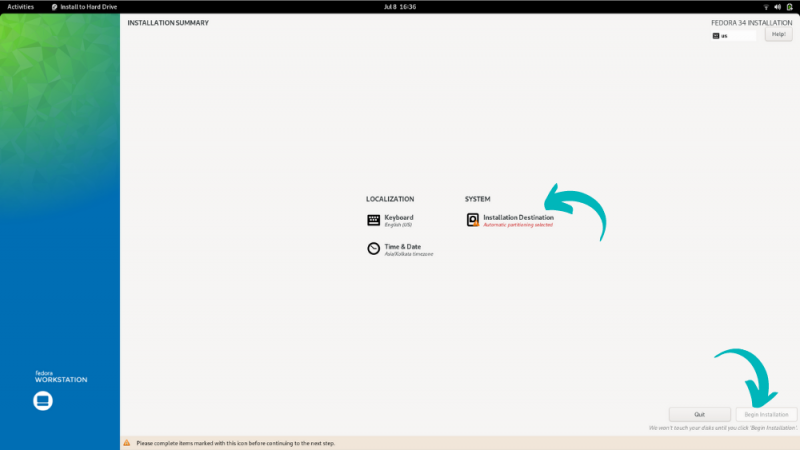
5. The next screen will present you Fedora Installation Summary menu. First, click on the Keyboard menu, choose your system keyboard layout, and hit on the top Done button to complete this step and go back to the main menu, as illustrated in the below images.
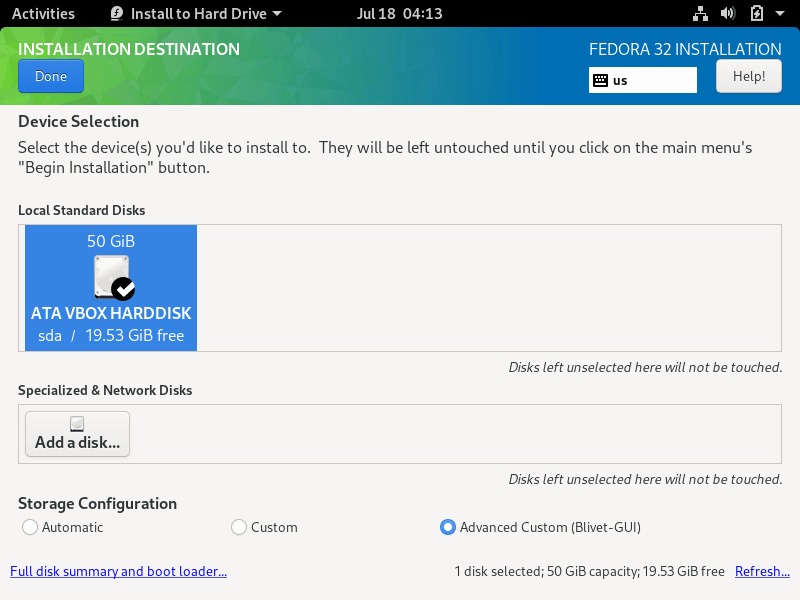
6. Next, click on the Installation Destination menu, check your machine hard disk and select the Advanced Custom (Blivet-GUI) option to configure the storage. Again, hit on the Done button to enter the Blivet GUI Partitioning program.
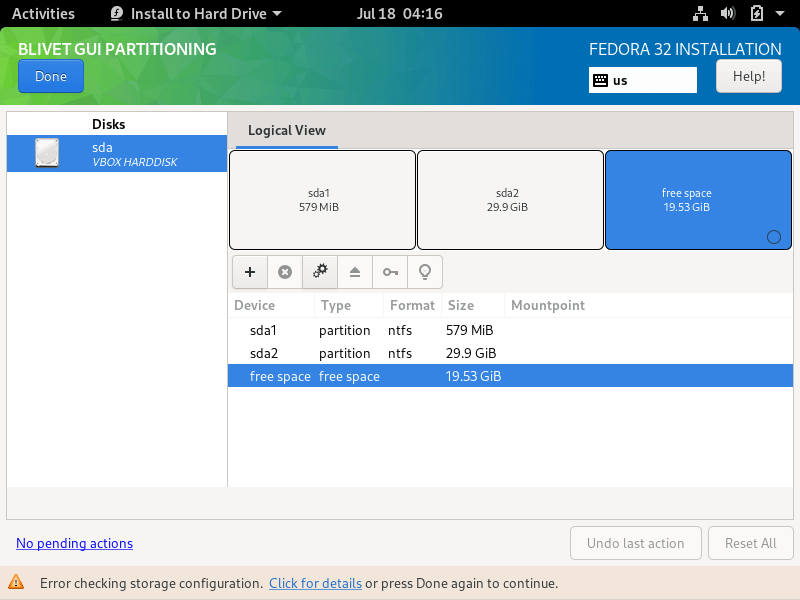
7. In this step, select the free space that resulted after shrinking the Windows partition will be used for installing Fedora Workstation. Select the free space and hit on the + button to create a new partition
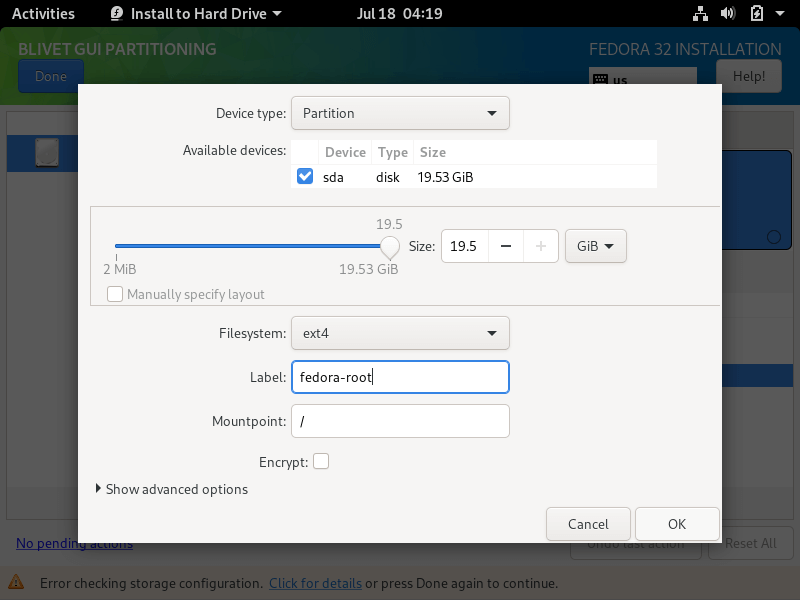
8. On partition settings window, enter the size of the partition, select a file system type, such as the robust ext4 file system to format the partition, add a label for this partition and use /(root) as the mount point of this partition.
When you finish hit the OK button to apply the new configuration. Use the same procedure to create the swap partition or other partitions for your system. In this tutorial, we’ll create and install Fedora on a single partition mounted in /(root) tree and we’ll configure no swap space.
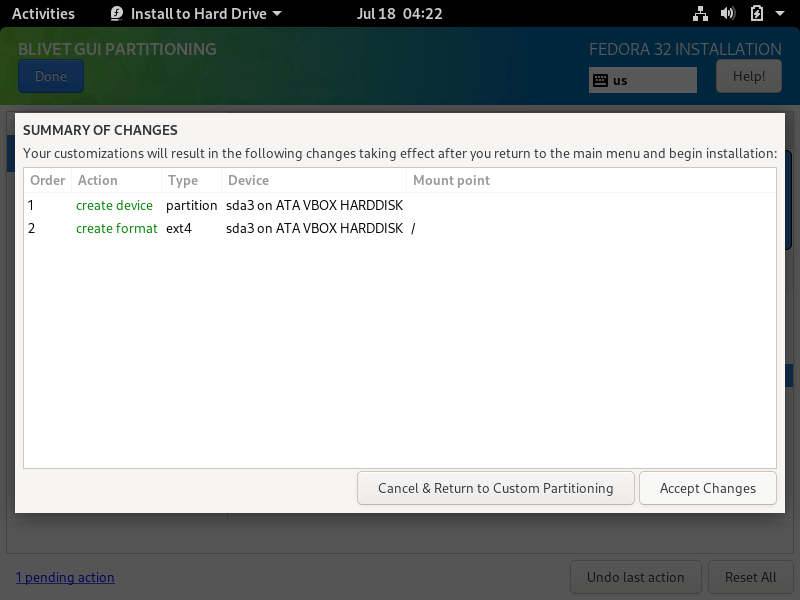
9. After you’ve created the partitions, review the partition table and press the top Done button twice to confirm configuration and hit on Accept Changes button from the pop-up Summary of Changes window to apply storage partition configurations and return to the main menu.

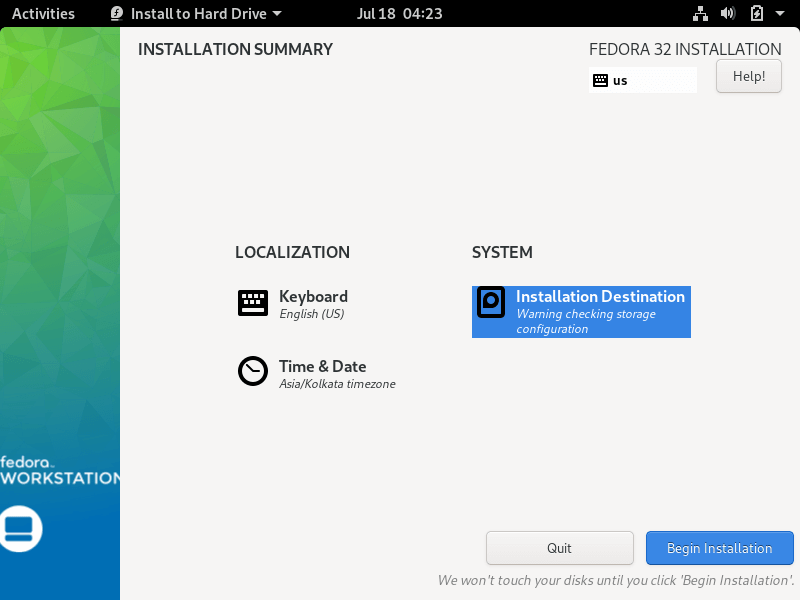
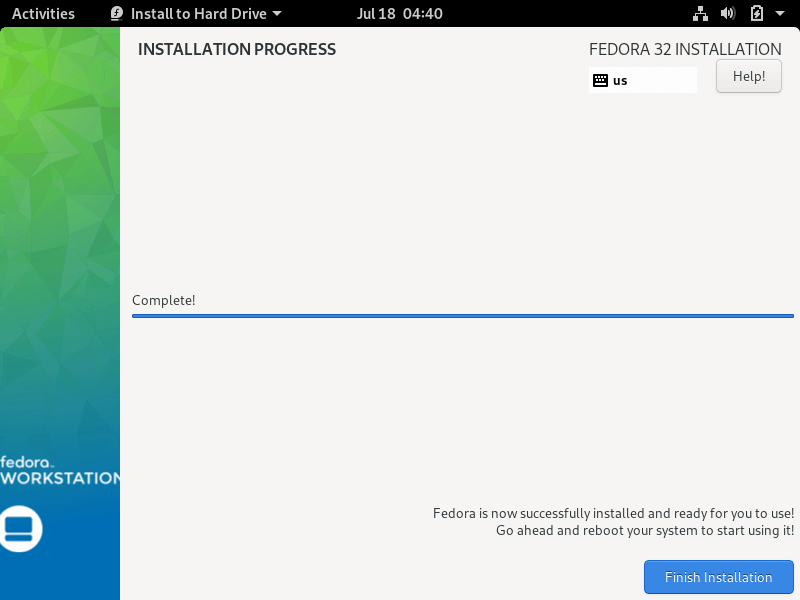
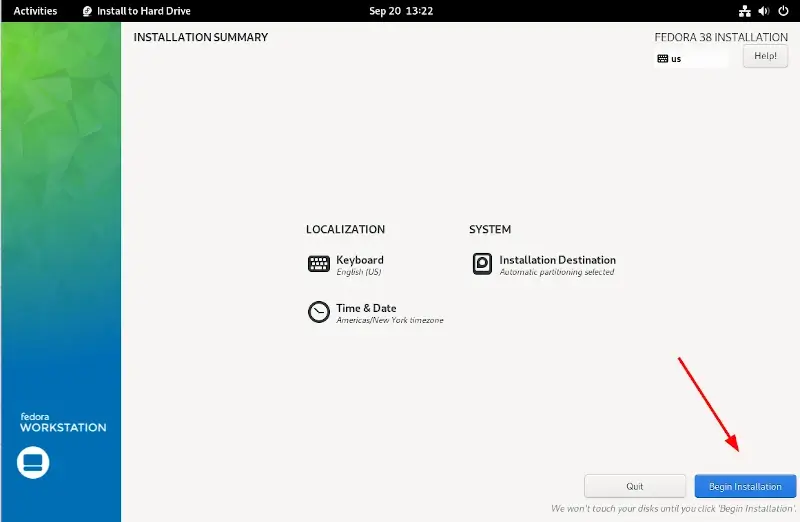
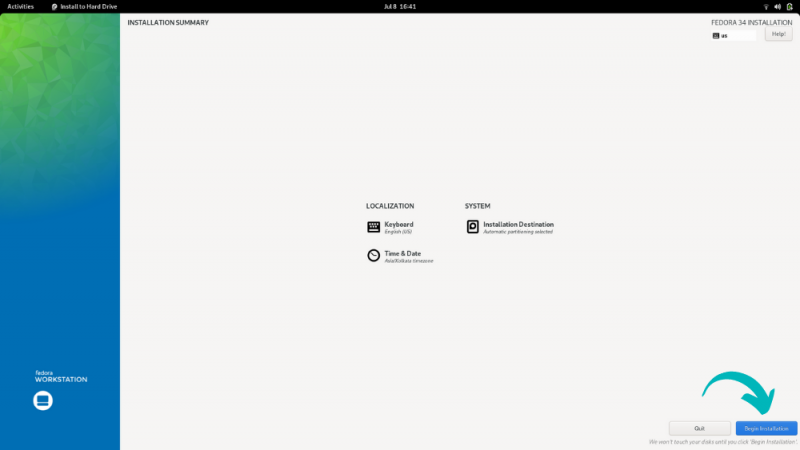
10. To start the installation process, just hit on the Begin Installation button, as illustrated in the following image.
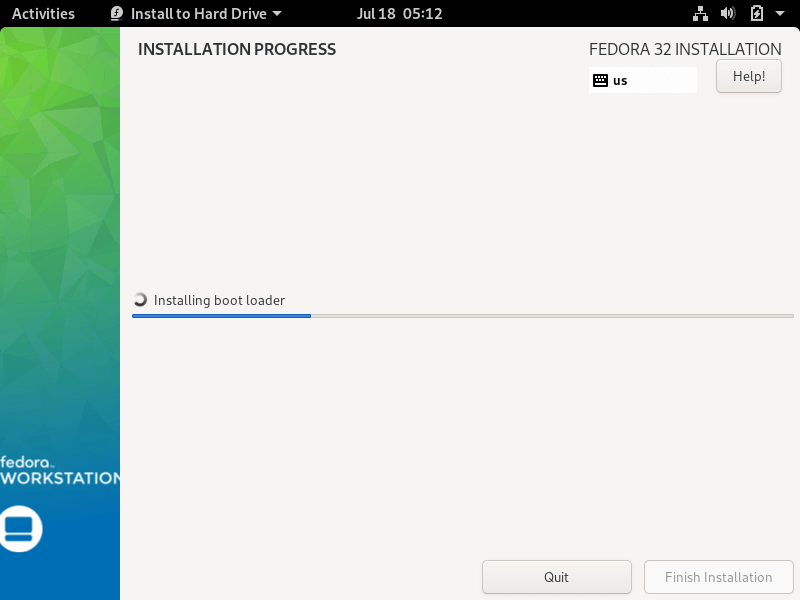
11. After the installation completes, eject Fedora installation media and reboot the machine.
Fedora 32 Post Installation
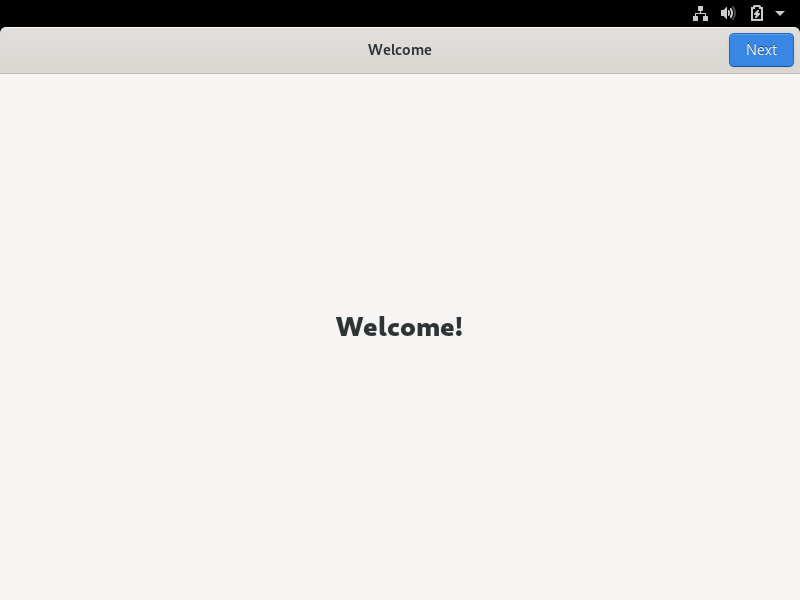
12. After the system boots up, follow the Fedora post-installation instructions as shown.
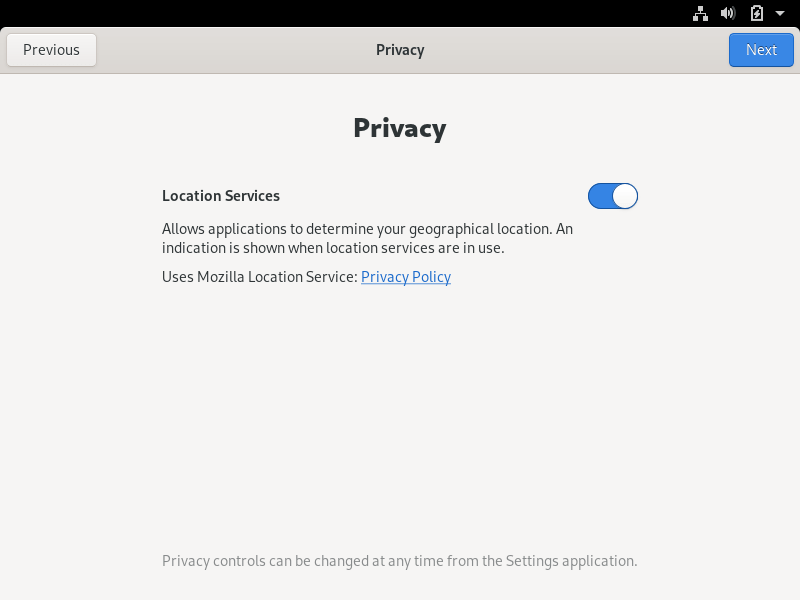
12. Allow applications to determine your location.
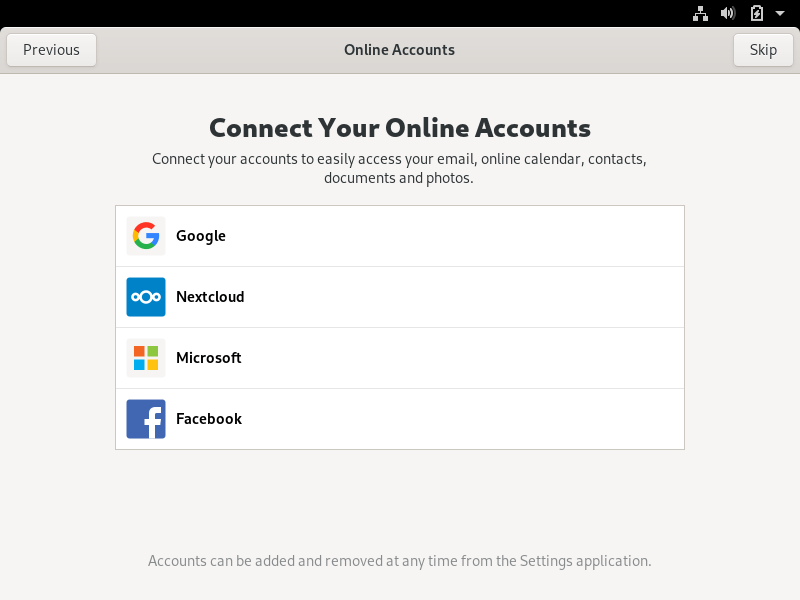
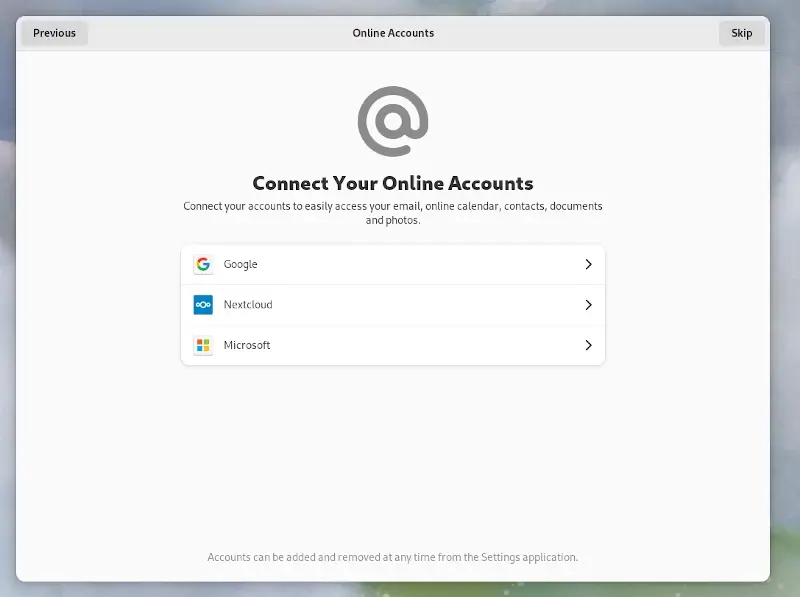
13. Connect online accounts to access your email accounts, contacts, documents, photos and more.
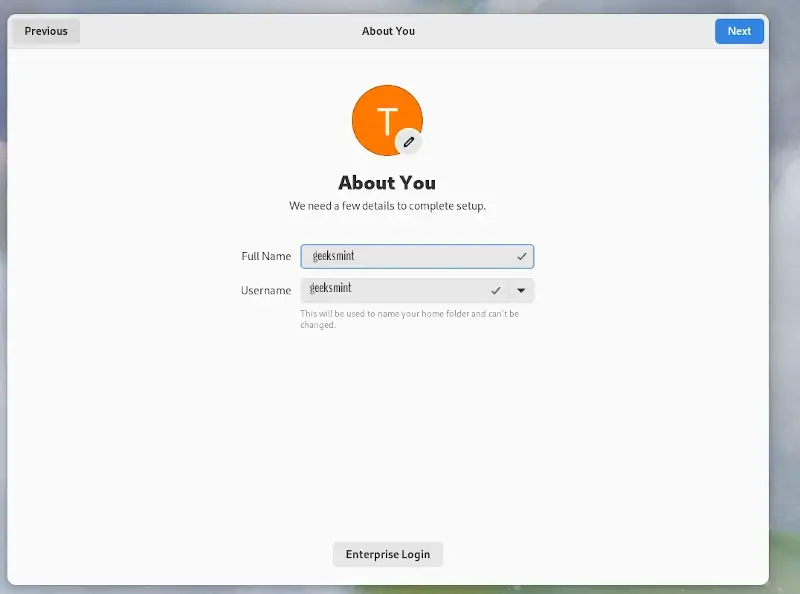
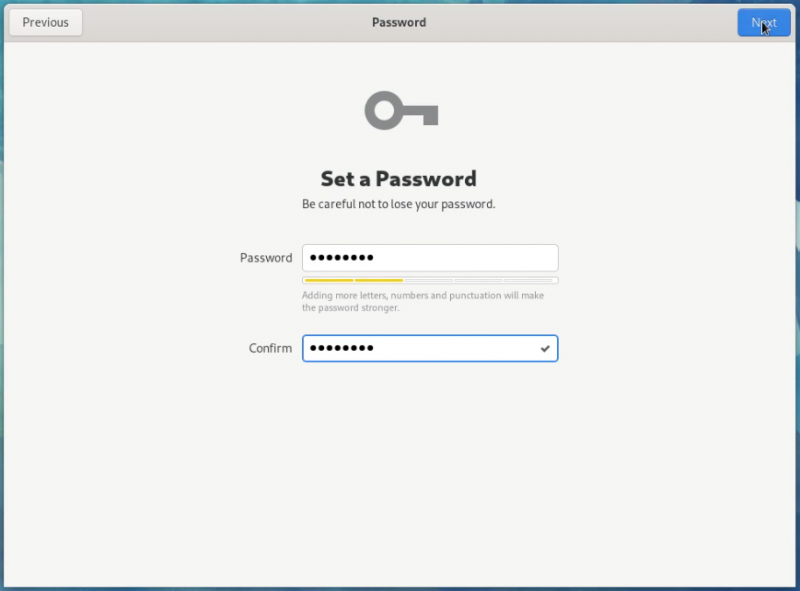
14. Next, add the name of a new user and set up a strong password for the new account.

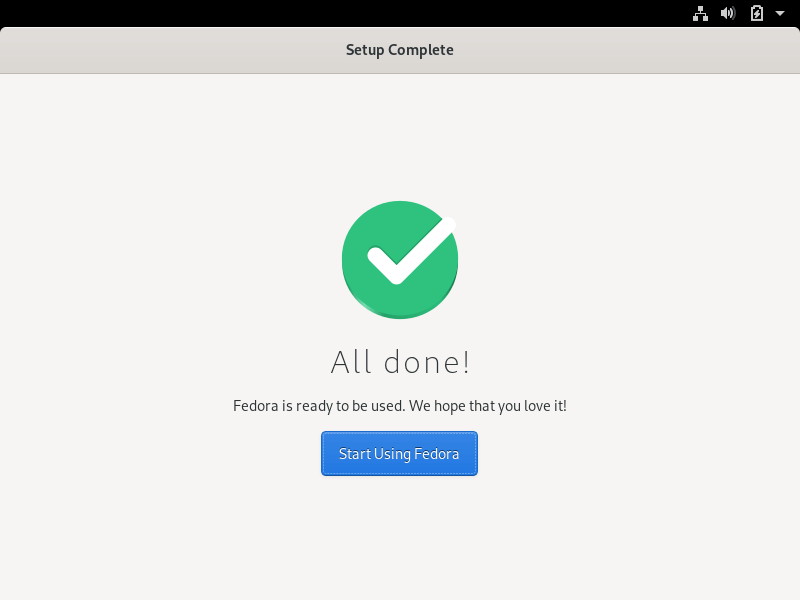
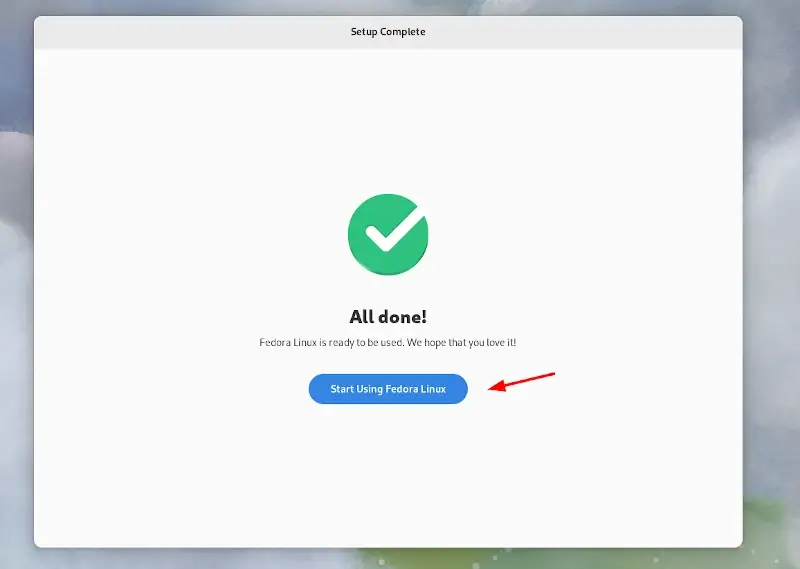
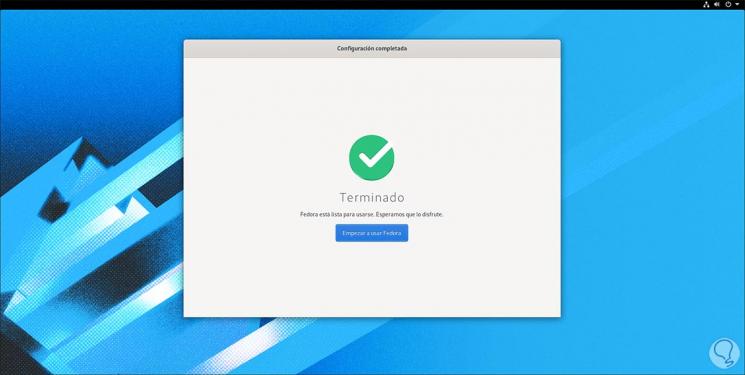
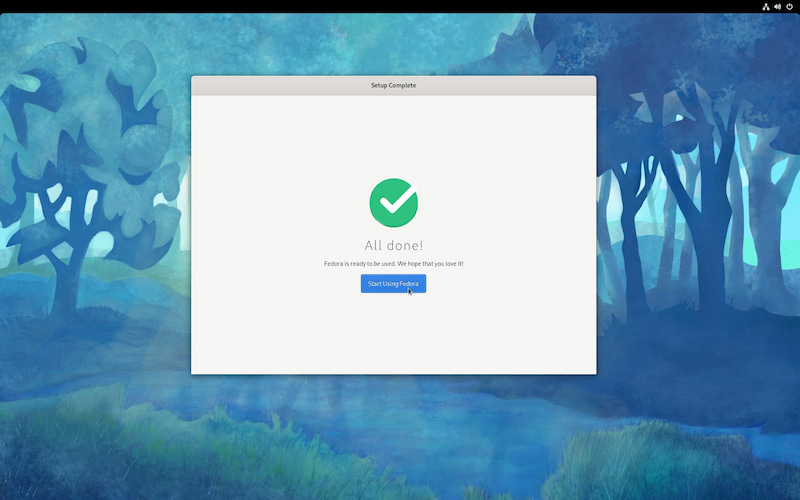
15. Finally, your Fedora system is ready to use.
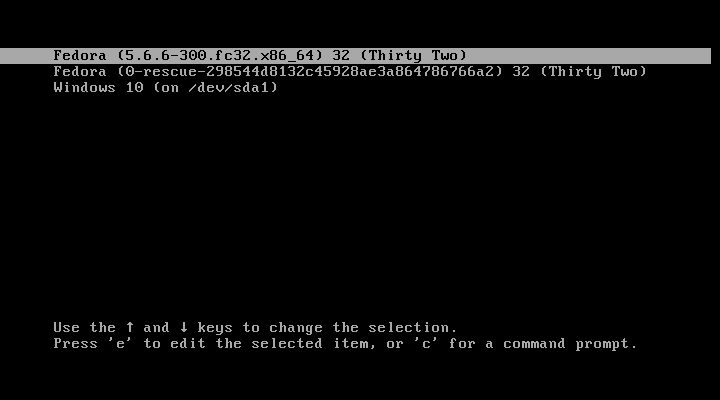
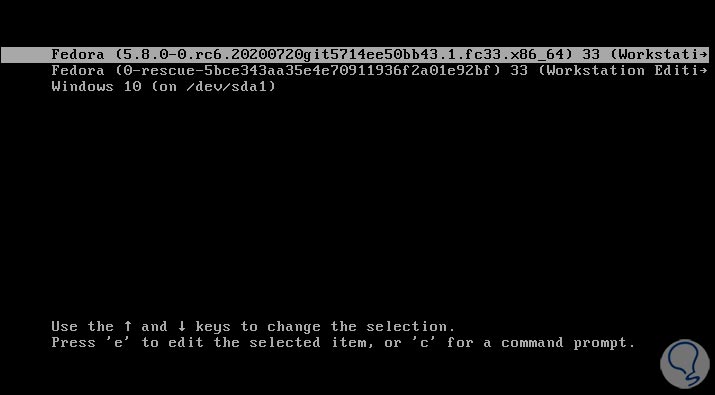
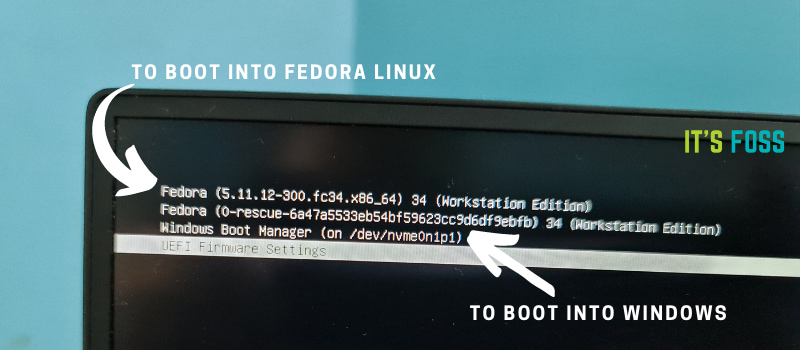
16. After reboot, you will be directed to the GRUB menu, where for 5 seconds you can choose what operating system you want the machine to boot from Fedora or Windows.
Sometimes, in cases of dual-booting Linux-Windows in UEFI firmware machines, the GRUB menu is not always displayed after reboot. If that’s your case, boot the machine in to Windows 10, open a Command prompt with elevated privileges and execute the following command in order to restore the GRUB menu.
bcdedit /set {bootmgr} path \EFI\fedora\shim.efi
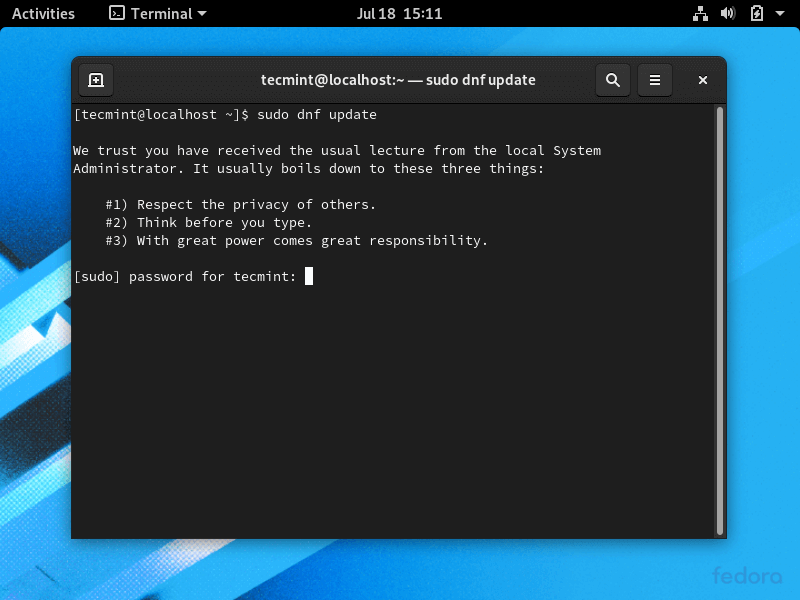
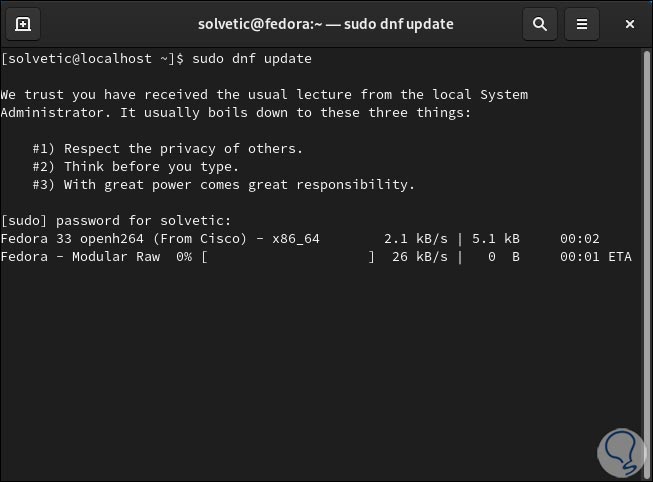
17. Log in to Fedora Desktop with the account and open a Terminal console and update the fedora system by issuing the below command.
$ sudo dnf update
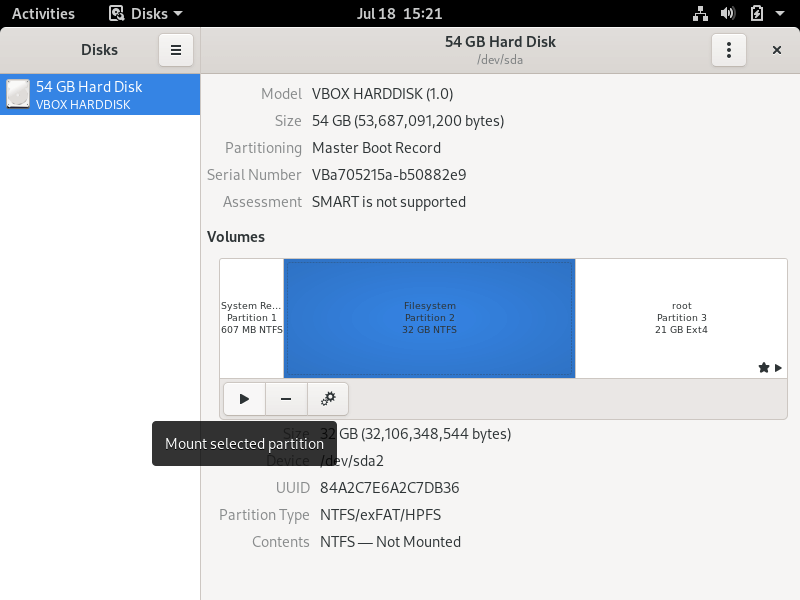
18. In case you want to access a Windows partition under Linux, open Disks utility, select the Windows NTFS partition, and hit on mount button (the button with a triangle sign).
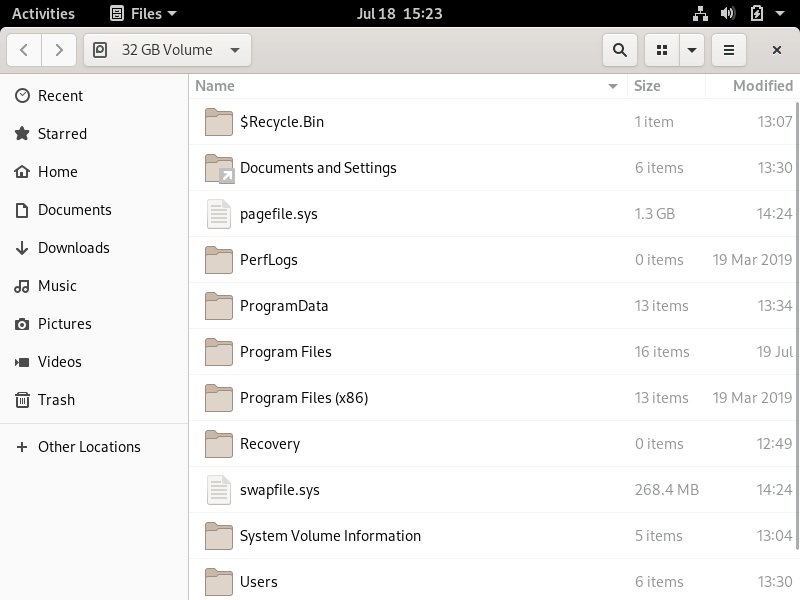
19. To browse the mounted Microsoft Windows partition, open Files -> Other Locations and double-click on NTFS partition Volume to open the NTFS partition.
Congratulations! You’ve successfully installed the latest version of Fedora 32 Workstation in dual-boot with Windows 10. Reboot the machine and select Windows from the GRUB menu in order to switch the operating system back to Windows 10.
Dual booting is the practice of installing multiple operating systems on the same PC. It’s a popular and convenient way of running multiple operating systems such as Linux and Windows on the same host without having to opt for virtualization which does not provide a bare-metal experience which sometimes would be necessary.
In this tutorial, we will walk you through the process of having a dual-boot setup of Windows 10 and the latest Fedora. At the time of writing this guide, Fedora 38 is the latest version.
Prerequisites
For this guide, you need to have the following:
- Windows 10 is installed on your PC, which will be the primary OS on which we will create a partition for installing Fedora.
- A fast and stable internet connection for downloading the Fedora ISO image.
- At least 8GB USB drive to be used as an installation medium.
Create a Free Space On Your Hard Drive
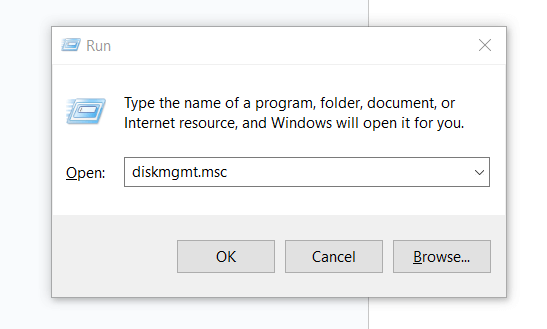
With Windows 10 as the primary OS, you need to reserve a partition on which you will install Fedora 38. To achieve this, first, launch the disk management utility by pressing the ‘Windows logo Key + R‘. Next, type ‘diskmgmt.msc‘ and hit ENTER.
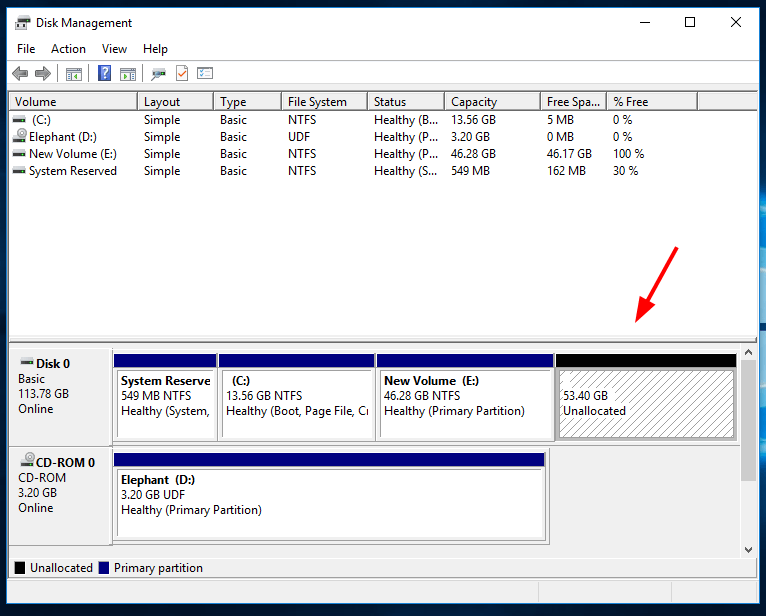
This opens the ‘Disk Management‘ console that displays the current disk partitions on the Windows system.
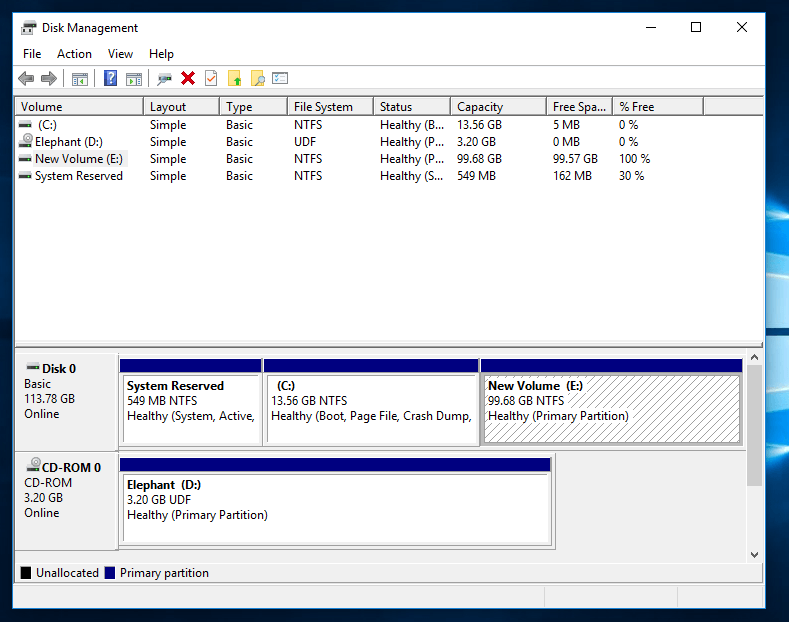
Next, we will create a reserved partition for Fedora 38. To do this, we will need to identify a volume and shrink some space. To demonstrate this, we will shrink some space on Volume E and create a new partition.
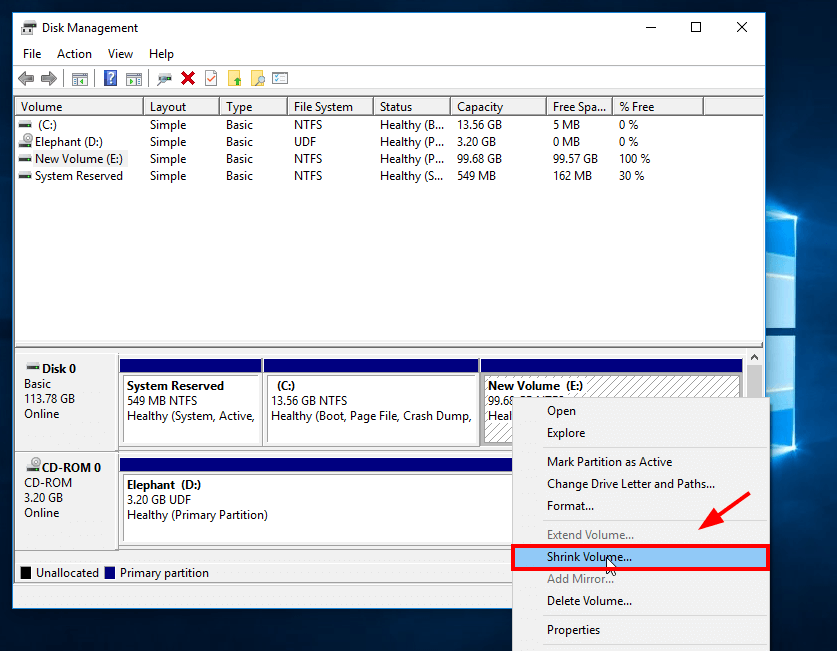
Therefore, we right-click on ‘New Volume E‘ and select ‘Shrink space‘.
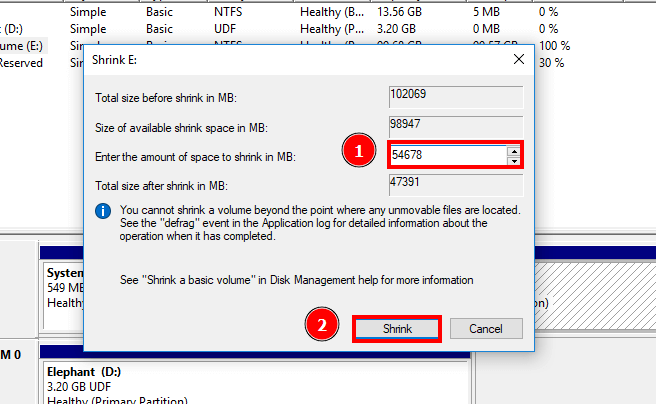
Next, specify the amount of space to shrink which will be the size of the partition reserved for installing Fedora 38. In our case, we have specified 54678MB which is approximately 54GB.
Next, click ‘Shrink‘.
Below is our reserved partition which now appears as an unallocated partition.
Create a Bootable USB Drive of Fedora in Windows
The second step is to make a live USB medium for Fedora. First, download the latest Fedora ISO file from the official Fedora download page.
Once you have downloaded the ISO image, use a tool like Rufus or Balena Etcher to make the USB drive bootable.
Also, check out the following useful tools to make a bootable USB drive from an ISO image.
Next, plug in the USB medium to your PC and reboot. Be sure to configure the BIOS settings and set the USB installation media to have the highest boot priority so that the system can boot from it.
Start the Installation of Fedora
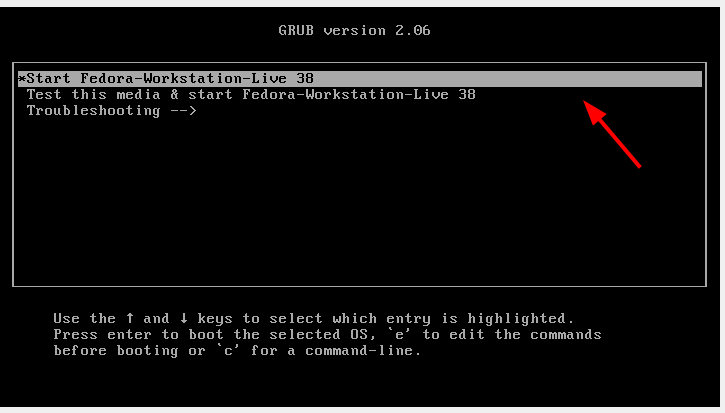
Once the system reboots, the GRUB bootloader will appear on your screen as shown. The first option is selected by default. So hit ENTER to begin the installation.
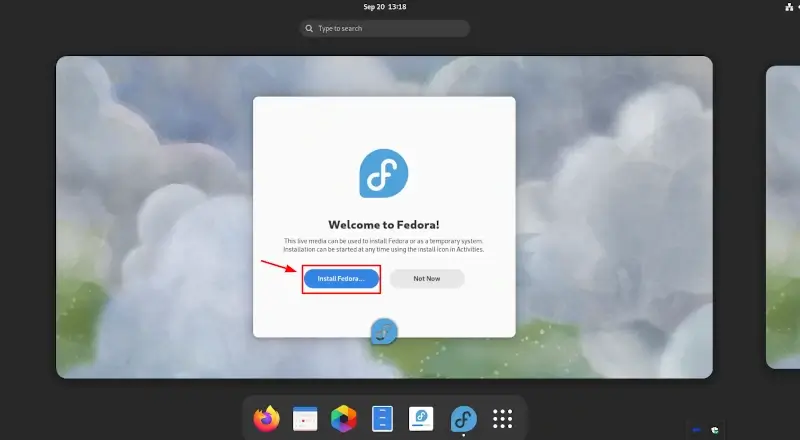
Shortly afterward, the Fedora 38 welcome screen will be displayed. Click the ‘Install Fedora’ button to begin the installation.
Next, select your preferred installation language and click ‘Continue’.
Moving on, the next step is to configure the partition table on your hard drive. So, click ‘Installation Destination’.
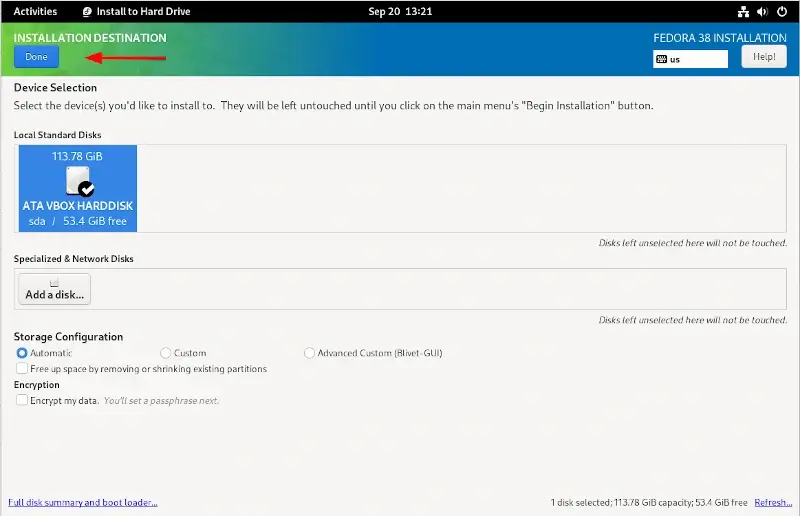
The PC hard drive is displayed Under ‘Device selection‘ with the amount of free space available for the installation. This should correspond to the reserved space created earlier in Windows. In our case, we have 53.4GB free of space.
By default, the automatic partitioning scheme is selected. We will go with this which places all the partitions under the root filesystem (/).
Next, click ‘Done’.
Once done, click the button to commence the installation of Fedora 38.
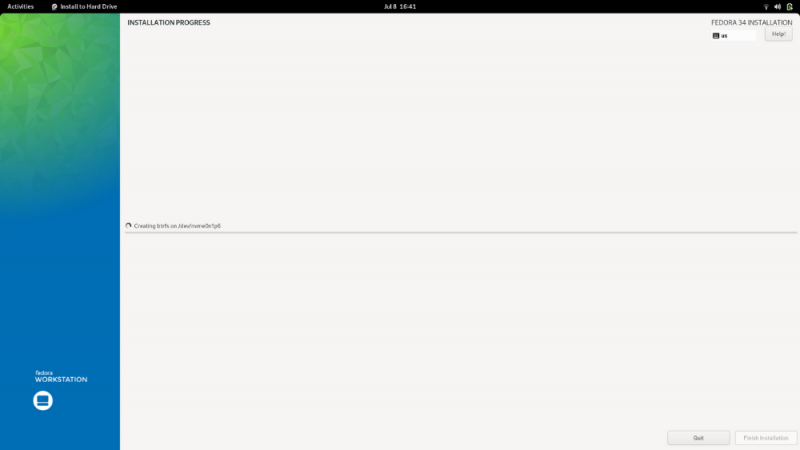
The installation will begin and will take some time depending on the state of your hard drive. In our case, this took roughly 15 minutes.

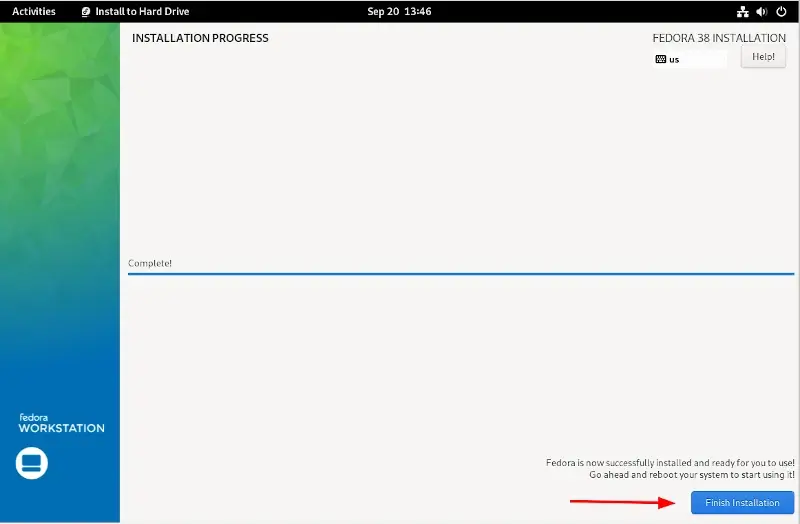
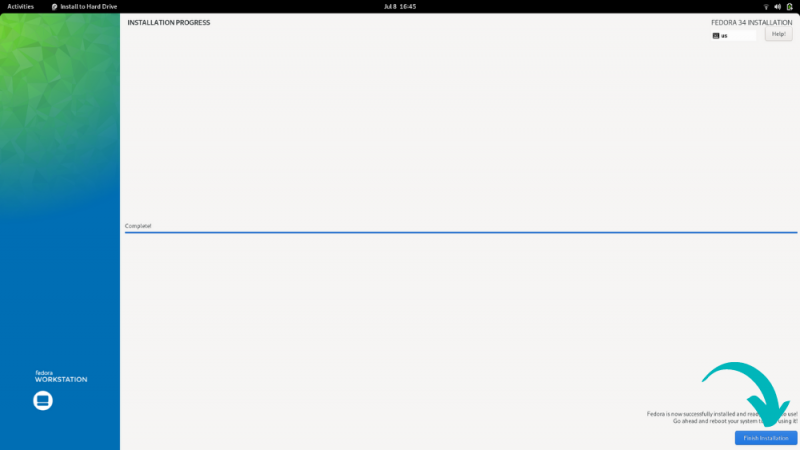
Once the installation is complete, click ‘Finish Installation’.
Be sure to reboot the system, and upon system reboot, you will see the Windows 10 entry on the GRUB menu as shown.
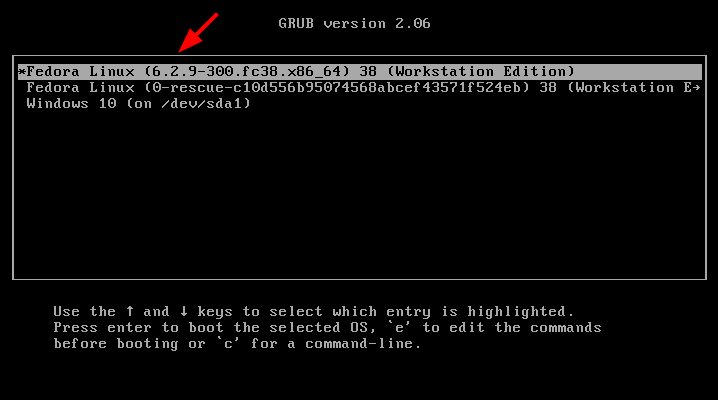
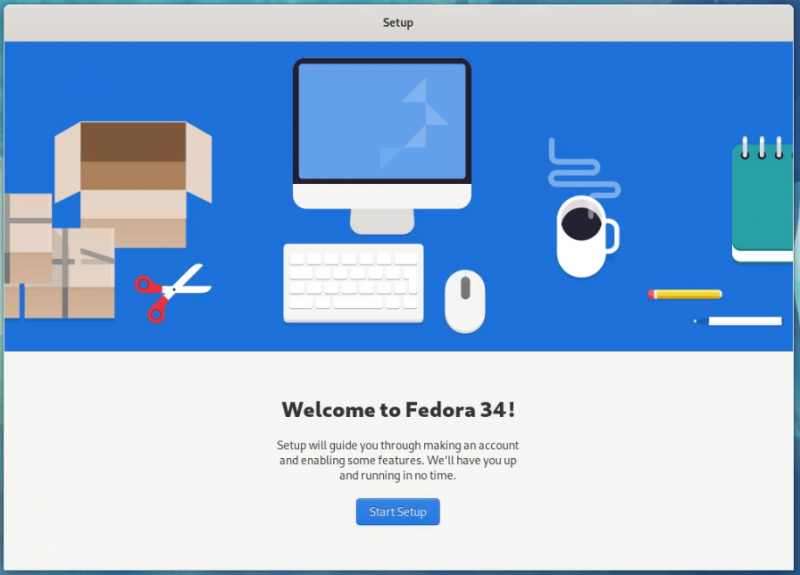
We will select the first option to finish setting up Fedora. Once Fedora starts up, click ‘Start Setup’ to continue setting it up.

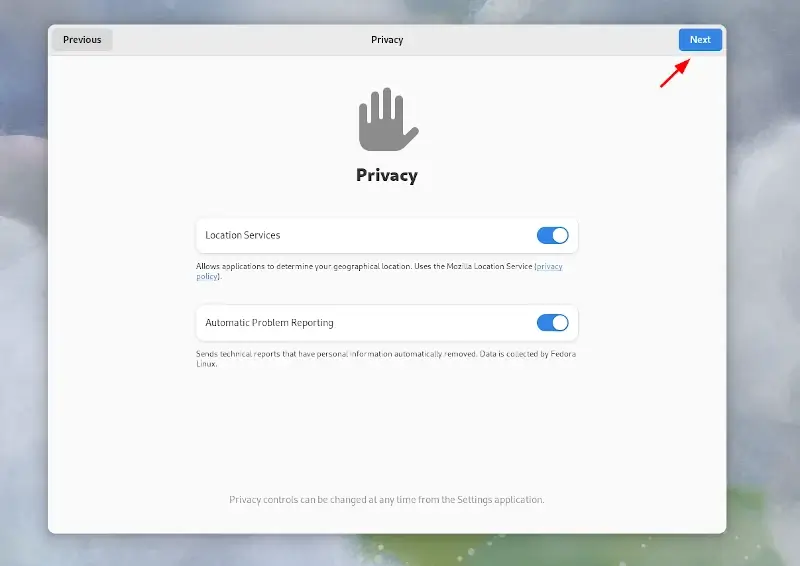
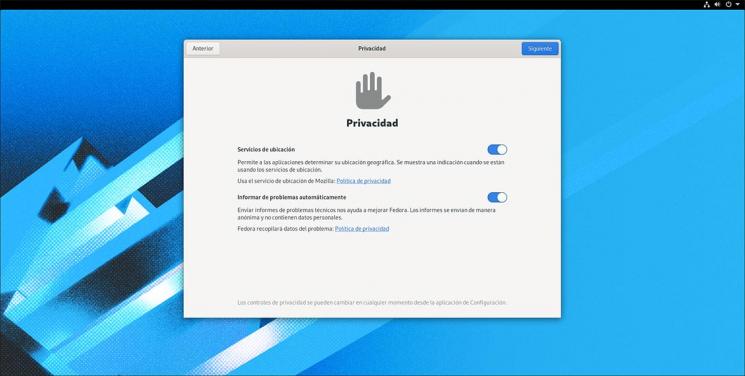
Decide whether to turn location services and automatic problem reporting on or off and hit ‘Next’.
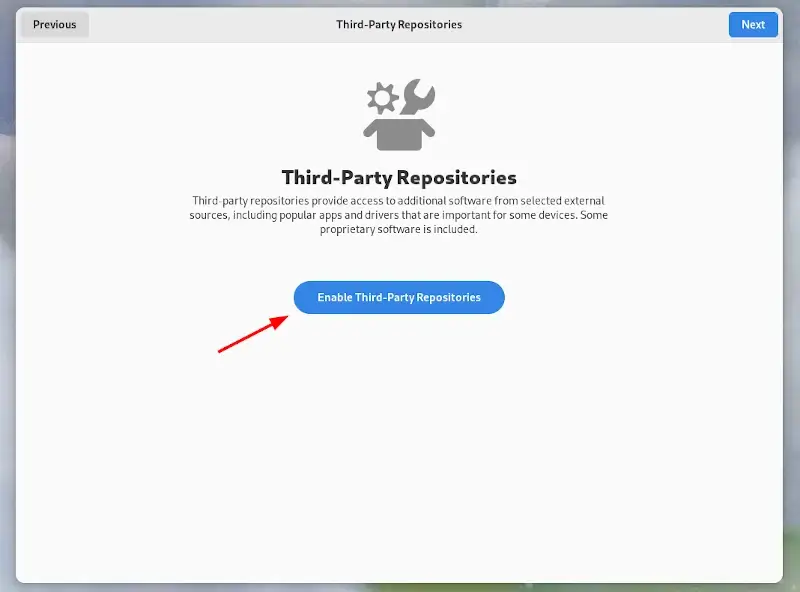
Next, click ‘Enable Third-Party Repositories’ if you want to have the benefit of having third-party repositories enabled by default. Then click ‘Next’.
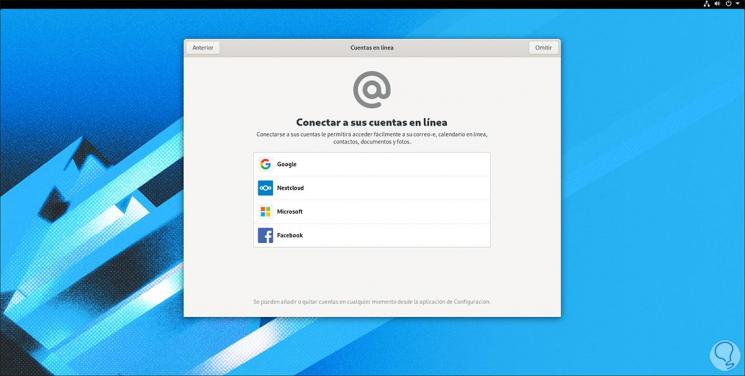
Choose whether to add any of your online accounts. You can skip this step if you wish to connect to them later. In this case, we will click ‘Skip’.
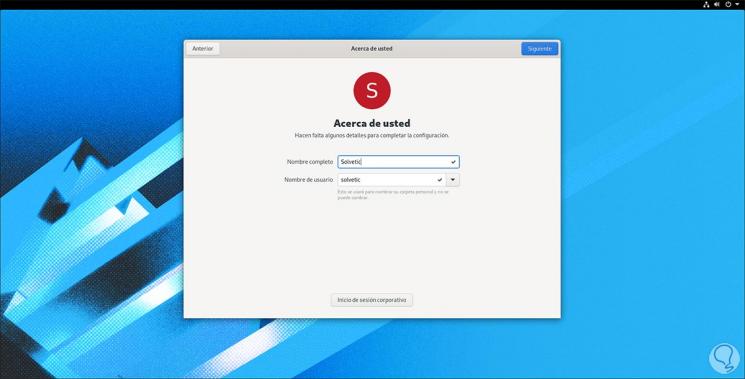
Next, type in your full name and username to create a regular login user. Then click ‘Next’.
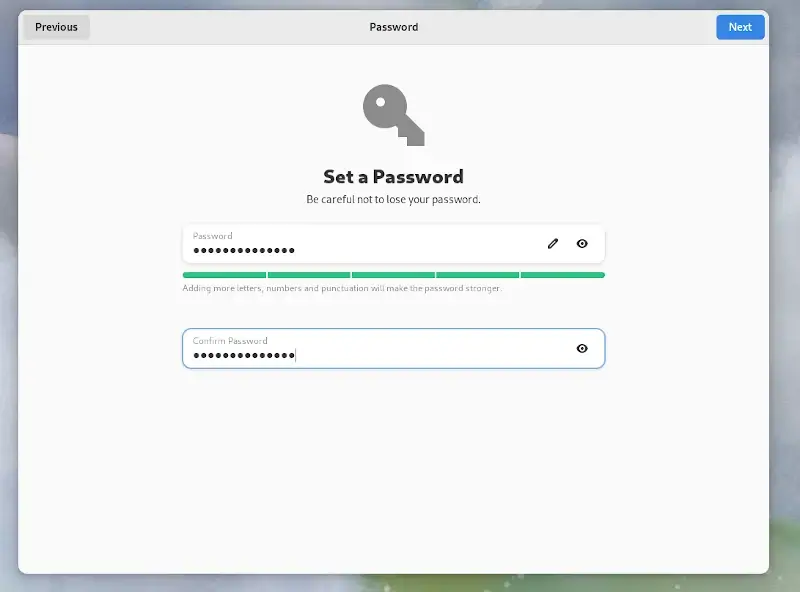
Be sure to also provide the user’s password. Then click ‘Next’.
Finally, click ‘Start Using Fedora Linux’ to finish the Setup.
Conclusion
This wraps up our guide on the installation of a dual boot setup of Fedora 38 and Windows 10. Your feedback and comments are welcome.
The new updates of the operating systems are always well received, since they offer news and improvements for the usability of the user in most cases, as well as correction of different errors..
Fedora has made available to its users the Fedora 33 Rawhide beta which will be officially released in October 2020 as the new update of this popular system. In this latest version we will be able to see different novelties among which are the following.
Fedora 33 Rawhide
- Updates in DNF
- Security enhancements in services like Apache HTTP Server, Postfix, Sendmail and more
- New updates for package management
- Greater interaction with kernel modules and constant kernel updates
- EOL module integration
- OpenSSL3.0
- PERL 5.32
- Python 3.9
- RPM 4.16
- java-11-openjdk added as system JDK
- System-resolved improvements
- Erlang 23
As it is a beta version, it is advisable for TechnoWikis to try it in a virtual environment , but if you trust Fedora and use Windows 10 at the same time, TechnoWikis has interesting news for you and it will be possible to use it on the same Windows computer 10 and Fedora 33 using the same hardware resources..
TechnoWikis will explain through this tutorial how to create this dual boot on the computer and then simply define with which system you will log in.
Fedora 33 Rawhide is available for download at the following link:
Fedora 33
Please note, if the Windows 10 operating system installation was in UEFI mode (but not in Legacy or CSM mode), the Fedora installation should also be processed in this same UEFI mode..
1. How to configure Windows 10 disk to install Fedora 33
The first step will be to configure the hard disk in Windows 10 where Fedora 33 has to be installed.
Step 1
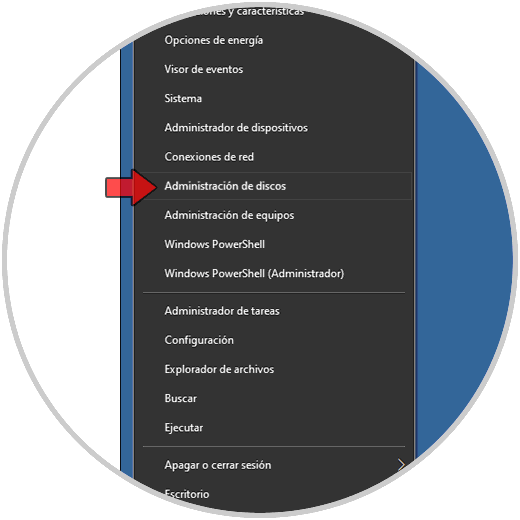
To do this we right-click on the Start menu (or use the Windows + X keys) and select «Disk Management»:
Step 2
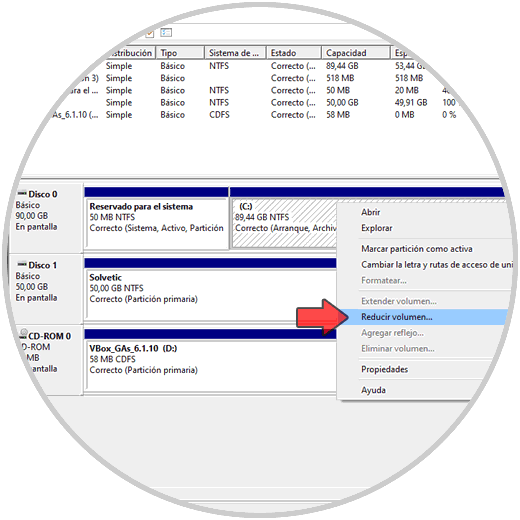
In the administrator we will right-click on the C drive (where Windows 10 is installed) and select «Reduce volume»:
Step 3
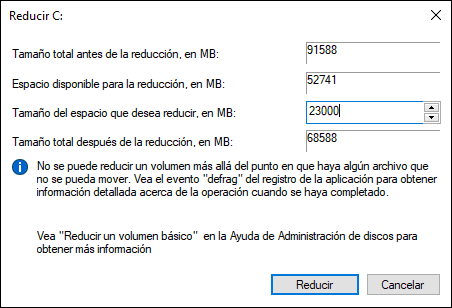
After this we will enter the size to be set for fedora 33, in this case 23 GB:
Step 4
We click on “Reduce” and we will see the following as a result:
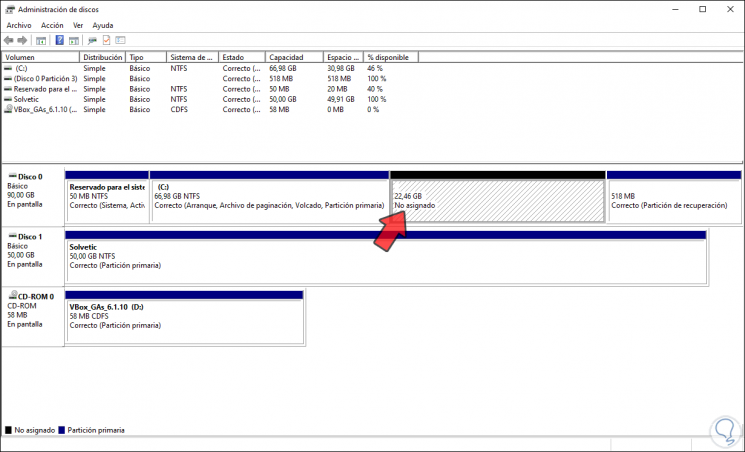
The space on the hard disk for Fedora 33 we leave it as it is with the legend «Not assigned», that is, we will not apply any type of format on it.
2. How to prepare ISO image of Fedora 33
After this, the ISO image that we have downloaded must be configured as a bootable medium, be it
DVD or USB.
Step 1
In this case we recommend using Fedora Media Writer which is available at the following link:
Fedora Media Writer
After installing it we will see the following. There we select the option «Custom image» and select the Fedora 33 image that we have previously downloaded:
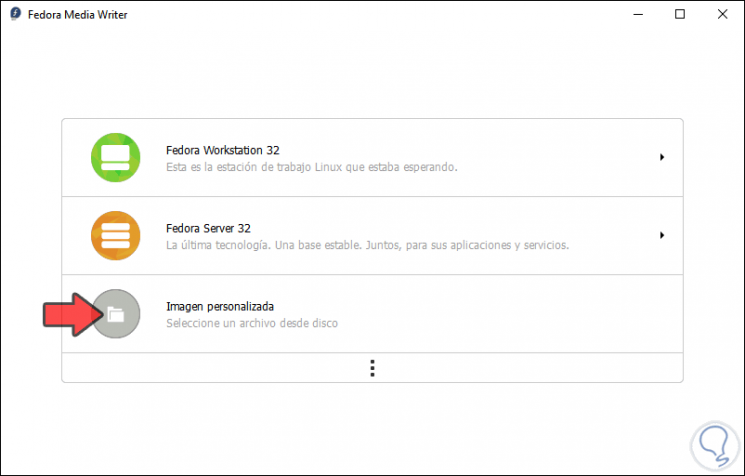
Step 2
We click «Open»
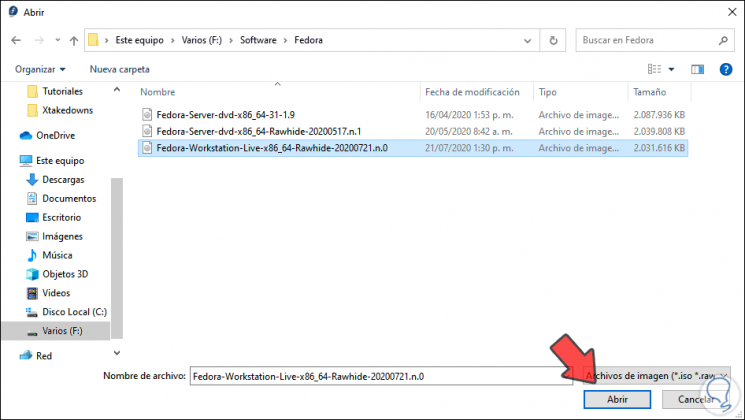
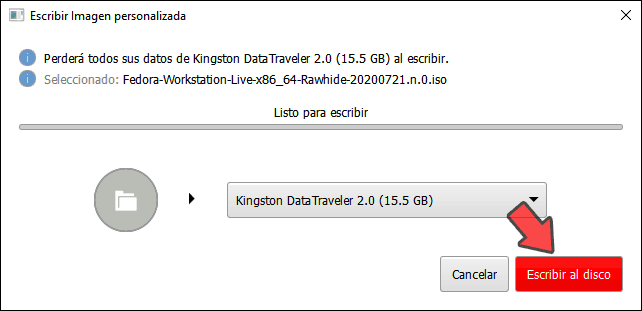
Step 3
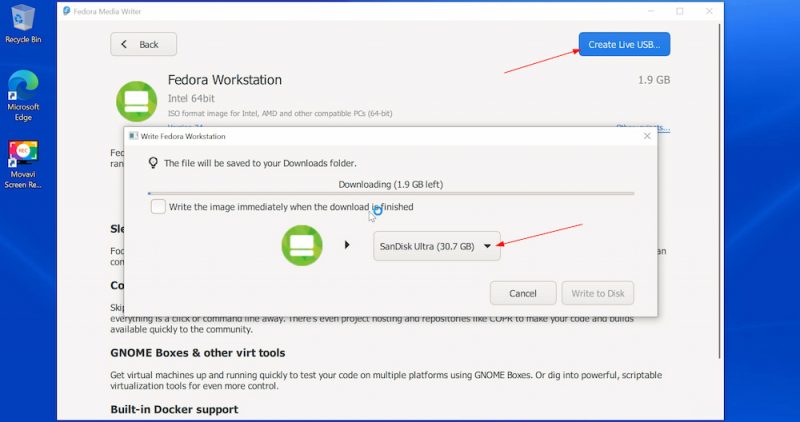
After this we select the medium where Fedora 33 will be installed. To complete the process we click on «Write to disk».
3. Set up dual boot between Windows 10 and Fedora 33
Step 1
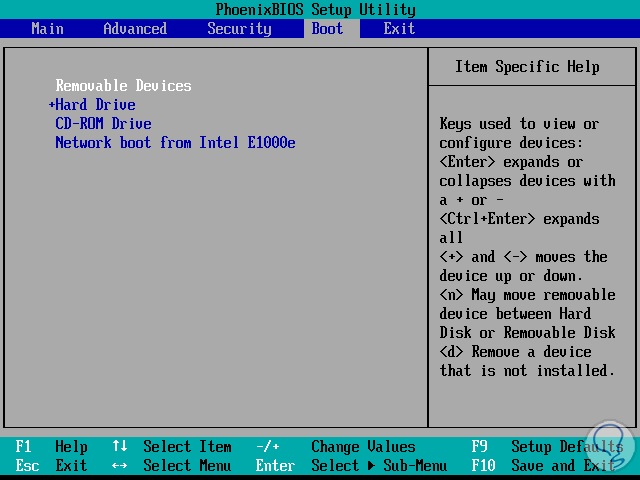
Once the boot media is created, we go to the BIOS or UEFI configuration of the computer to select the type of media from which we will boot:
- Removable Devices: USB
- CD-ROM Drive: DVD
Press the F10 key and we will see that the system will start from Fedora 33 Rawhide:
Step 2
We select the option “Start Fedora-Workstation-Live Rawhide” in order to access the Fedora 33 live use medium:
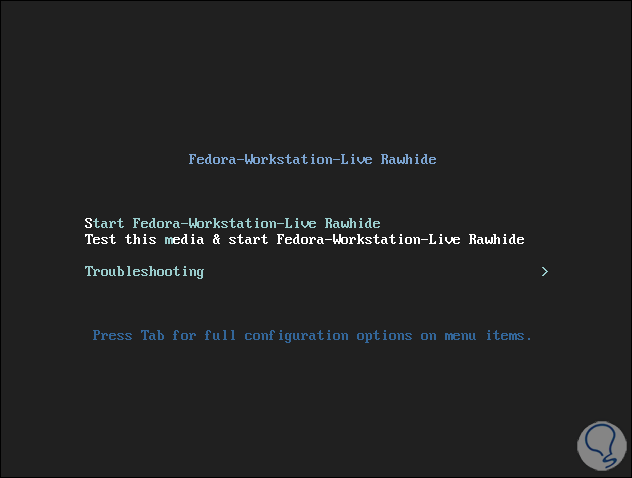
Step 3
There we can navigate and get to know the system, but nothing will be stored, we click on “Install to Hard Drive”

Step 4
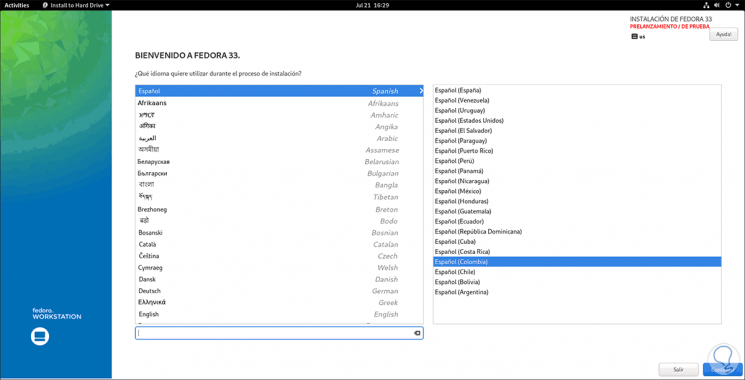
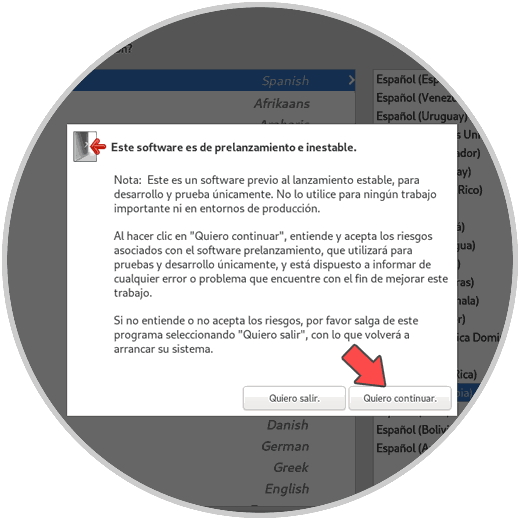
then the following will be displayed where we select the installation language of Fedora 33. We click «Continue» and we will see the following warning:
Step 5
We click on «I want to continue» and we will see the following:
Step 6
In this case we must click on “Installation destination” in order to select where to install Fedora 33,

Step 7
In this case we select the disk where Windows 10 is installed and activate the “Advanced Custom (Blivet GUI) box:
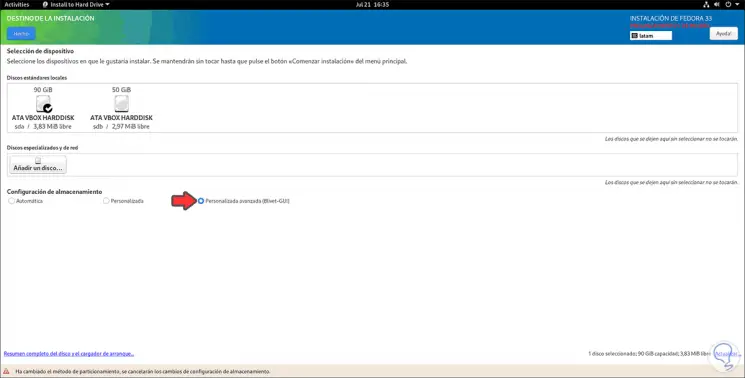
Step 8
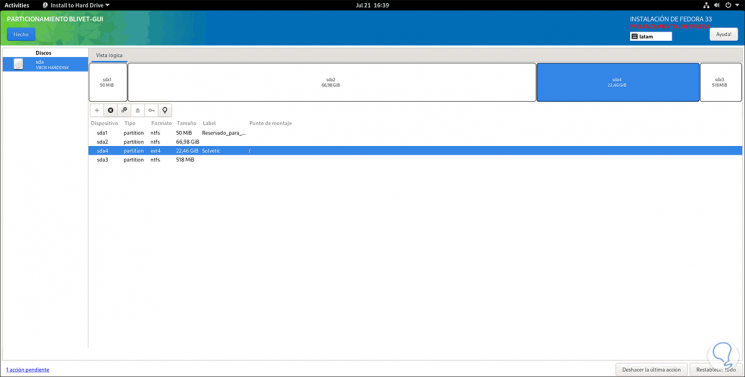
We click on the «Done» button and we will see the structure of the selected disk:

Step 9
There we select the box with the free space:

Step 10
We click on the + sign and now define the following:
- In the «File system» field we select «ext4»
- In «Label» we can enter some name to the unit
- In «Mount point» we enter / to set the root
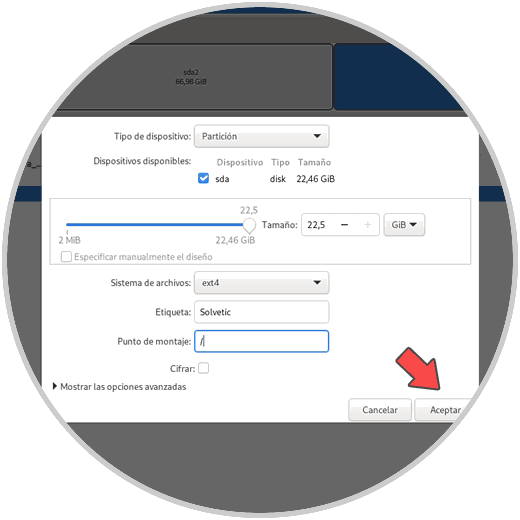
Step 11
We click «OK» and we will see the changes in the selected disk or partition:
Step 12
We click on the «Done» button and the following window will be launched with the new partition structure:
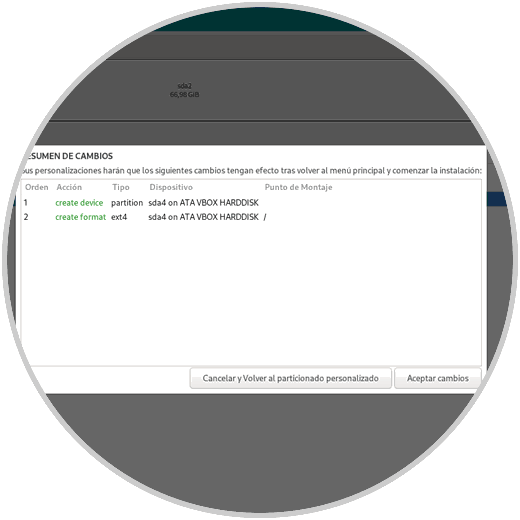
Step 13
If we agree, we click on the «Accept changes» button and we will be redirected to the main window:
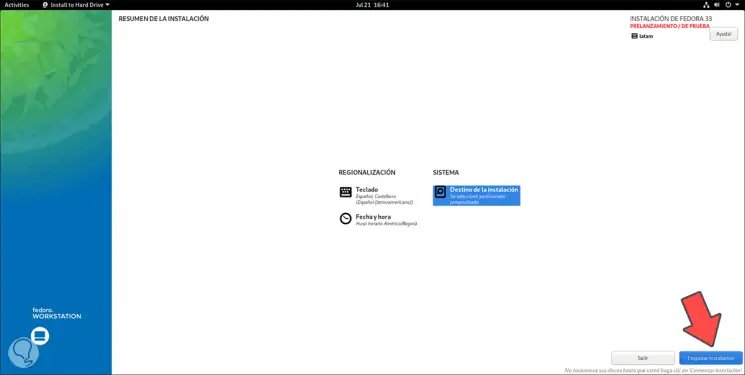
Step 14
We click on “Start installation” to start the Fedora 33 installation process with Windows 10:

Step 15
When the process reaches its end we will see the following:

Step 16
We click «Finish installation» and we must reboot the system and when you log in, the initial configuration of Fedora 33 will open:
Step 17
We click Next and configure some system services:
Step 18
After this it will be possible to link accounts online if we wish:
Step 19
Next, we enter the username for Fedora 33:
Step 20
We enter the desired password:
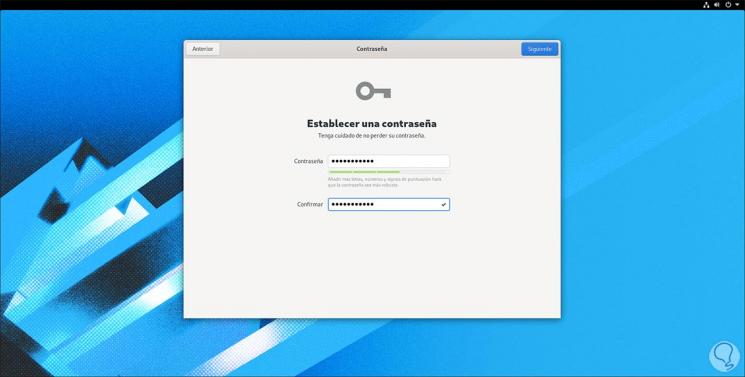
Step 21
We click Next and with this we have configured Fedora 33 with Windows 10:
Step 22
When the computer is restarted or turned on, we can select which operating system we want to start with:
Step 23
On some computers with Linux and Windows dual boot and with UEFI firmware, the GRUB menu will be displayed after the restart, in which case we must access the Windows 10 computer and at the command prompt console (as administrators) execute:
bcdedit / set {bootmgr} path \ EFI \ fedora \ shim.efi
We can access Fedora 33 and update it with the following command:
sudo dnf Update
Step 24
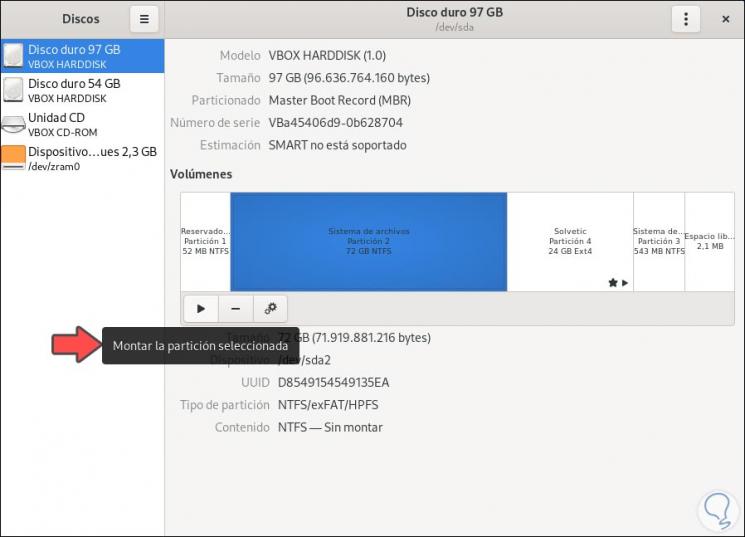
If we want to access the Windows 10 partition from Linux, we must access Disks and there select the Windows 10 drive and click on the button «Mount the selected partition»:
Step 25
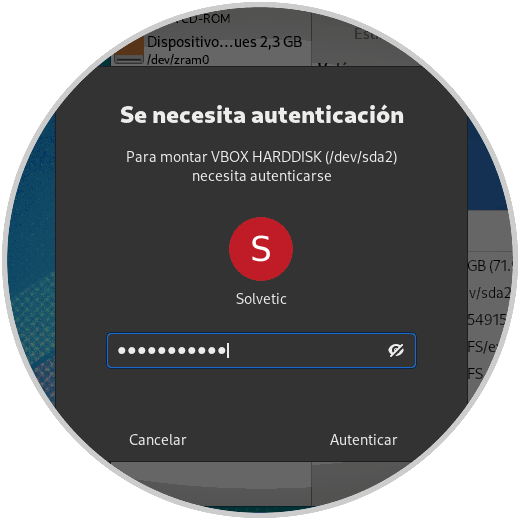
We must enter the administrator password:
Step 26
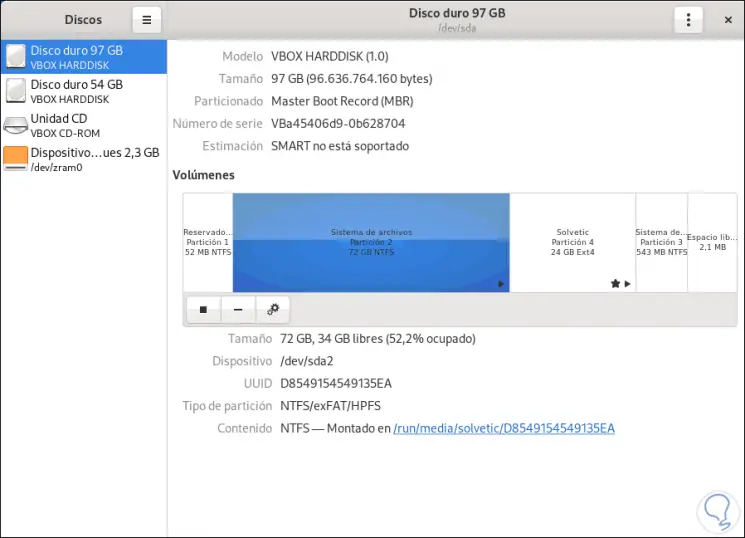
We click Authenticate and the unit will be mounted:
Step 27
To access this unit we will go to Files — Other locations and select the Windows 10 partition to see its contents:
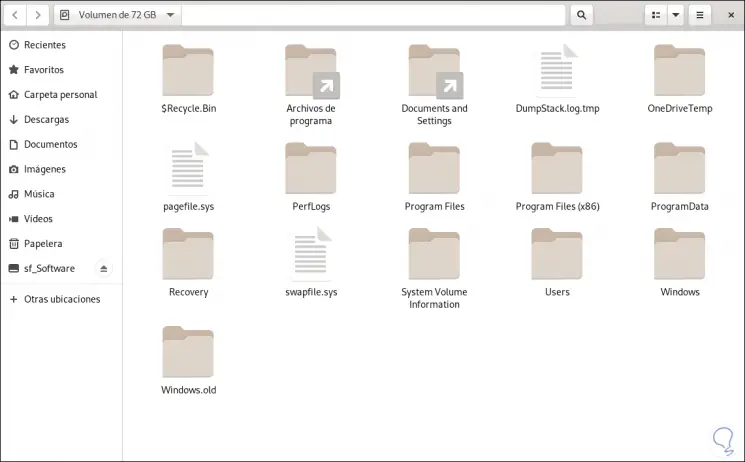
With this method, Fedora 33 has been installed together with Windows 10.
Brief: This detailed tutorial shows you how to dual boot Fedora Linux with Windows 10, step-by-step, accompanied by proper screenshots.
Dual booting Linux and Windows is one of the popular ways to enjoy the full potential of the two operating systems. You have both Linux and Windows installed on the same system and you can choose which one to use after starting your system.
If you have a system with Windows installed already, you’ll learn how to install Fedora alongside Windows in this tutorial.
Installing Fedora alongside Windows

The tutorial has been performed on a system with Windows already installed, GPT partitioning and UEFI boot. It should be applicable to other systems with MBR partitioning and legacy BIOS system as well, but I cannot confirm that.
Note: If your Windows system uses BitLocker encryption, it will be a good idea to disable it first before you go on installing Fedora.
Requirements
Here’s what you’ll need to follow this tutorial:
- A system preinstalled with Windows
- Good speed internet connection
- A USB key (pen drive) with at least 4 GB in size
- Optional: External USB disk for making back up of your existing data on Windows.
- Optional: Windows recovery or bootable disk (if you encounter any major boot issues, you can fix with it).
Let’s see the steps.
Step 1: Make a backup of data on your Windows system [optional]
Backup is always a good idea. You will be dealing with the disk partitions. In the rare unfortunate case, if you make a mistake and delete the wrong partition, you’ll lose your data.
The simplest way would to be to copy the data in Documents, Videos, Music, Pictures and other folders to an external USB disk. You can use an external HDD (slower but cheaper) or SSD (faster but expensive) and copy the important files and folders on it.
[lasso box=”B08GTXVG9P” link_id=”20925″ ref=”sandisk-500gb-extreme-portable-ssd-up-to-1050mb-s-usb-c-usb-3-2-gen-2-external-solid-state-drive-sdssde61-500g-g25″ id=”101803″]
[lasso box=”B08JKFY8FH” link_id=”20926″ ref=”toshiba-canvio-advance-1tb-portable-external-hard-drive-usb-3-0-black-hdtca10xk3aa” id=”101806″]
Step 2: Make some free space for Fedora installation
You need to create a partition where you’ll be installing Fedora. If you just have C drive, shrink it. If you have D, E or F drive, see if you can move their data to some other partition and delete or shrink one of them. Anything above 40 GB should be comfortable enough space for Fedora.
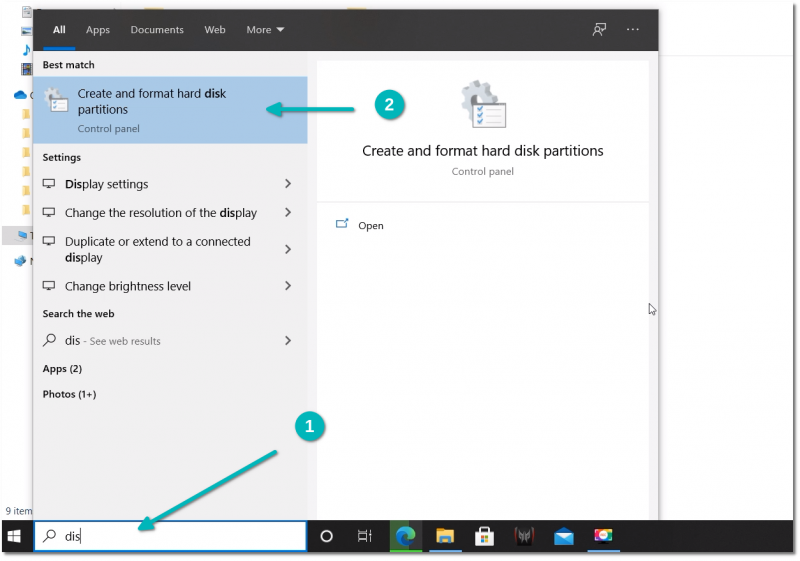
In the Windows menu, search for ‘disk partitions’ and go to ‘Create and format hard disk partitions’.
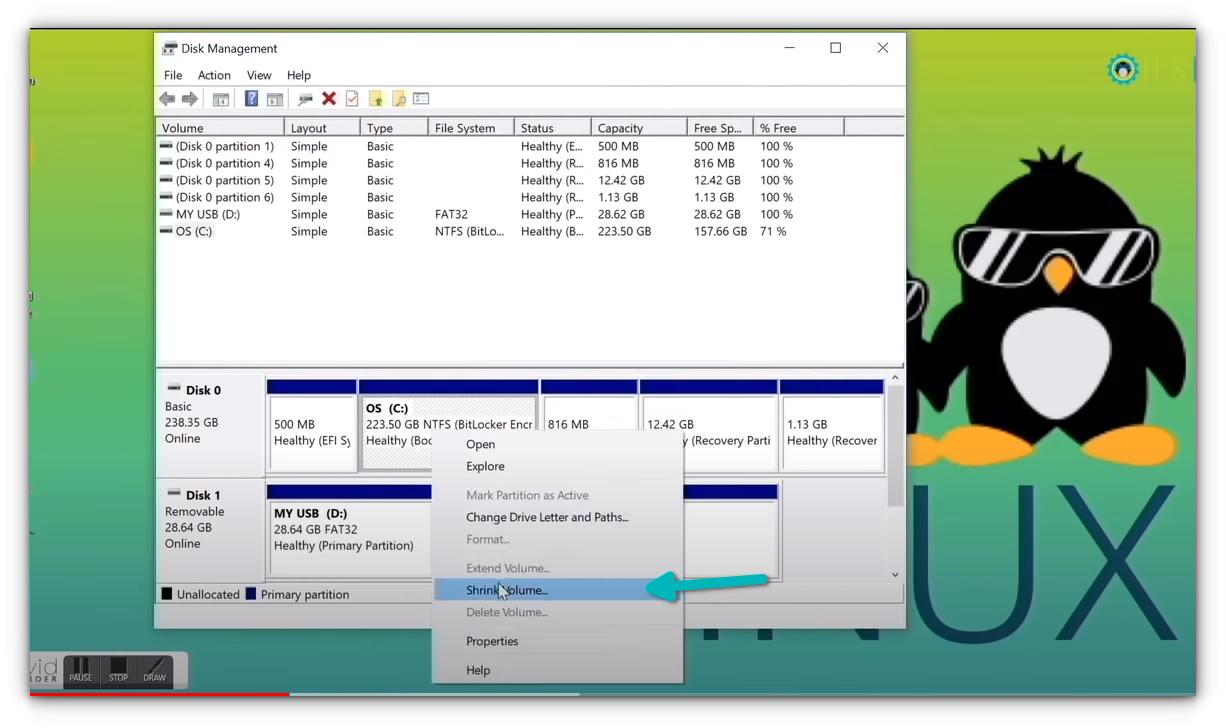
In the Disk Management tool, right-click on the drive which you want to partition and select shrink volume.
If you have just one partition like this, you need to make some free space out of it for Linux. If you have several partitions of considerable size, use any of them except C drive because it may erase the data.
Step 3: Making a live USB of Fedora in Windows
Now, this can be done in different ways. You can download the ISO and use Etcher or Rufus or some other tool to write the ISO image to the USB disk.
However, Fedora provides a dedicated tool for downloading and making live USB. I am going to use that in this tutorial. The Fedora team put some effort in creating this tool, so why not use it.
But first, plug in the USB key. Now, go to the download page of Fedora:
You’ll see the option to download the Fedora Media Writer tool for Windows.
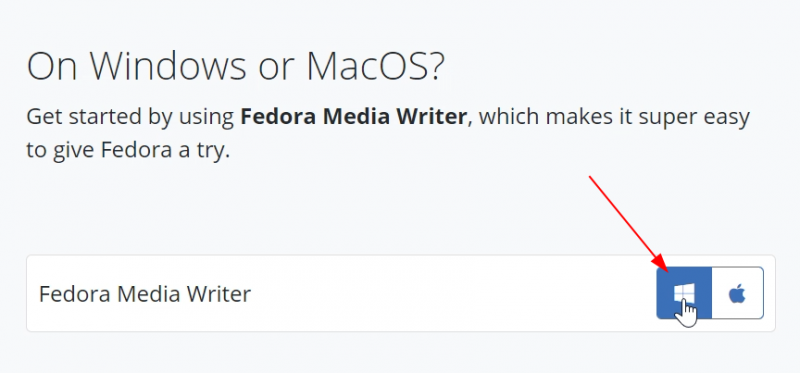
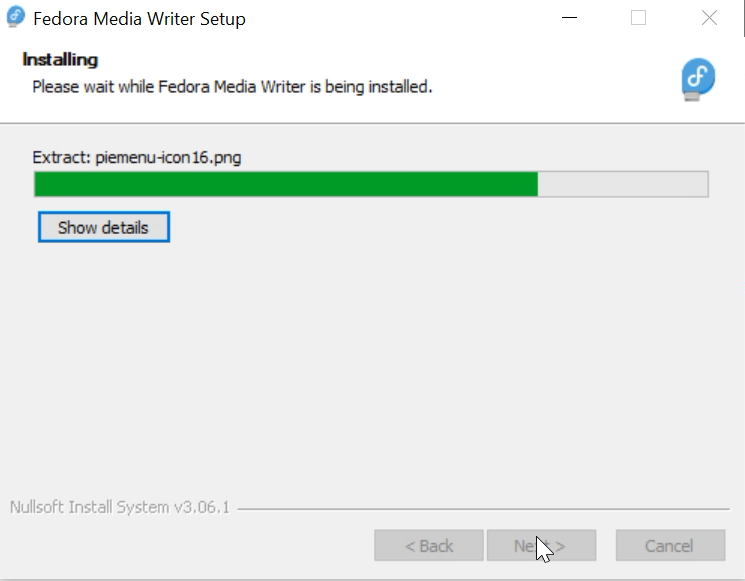
It will download an exe file. Once downloaded, go to your downloads folder and double-click the FedoraMediaWriter exe file to install the Fedora Media Writer tool. Just keep on hitting next.
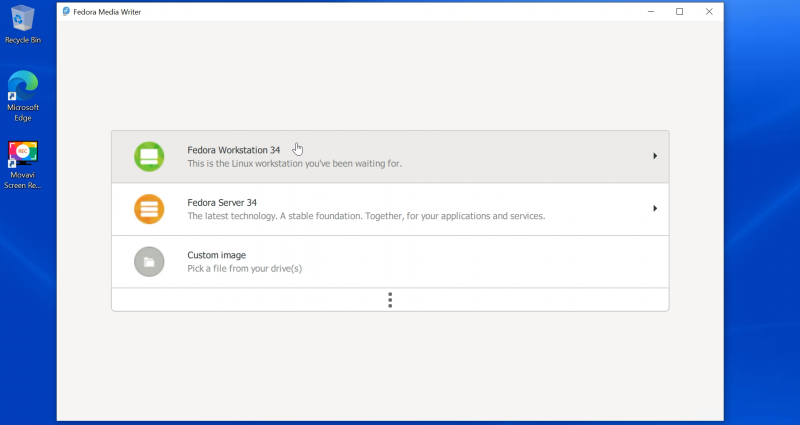
Once installed, run the Fedora Media Writer tool. But before that, make sure that you have plugged in the USB.
It will give you the option to install various editions of Fedora. For desktops, go with Workstation.
On the next screen, you’ll get the option to create live USB. When you hit that button, it starts downloading the ISO. It will also recognize your inserted USB key.
You need to have a good speed internet connection to download the 2 GB of ISO in a comfortable time span.
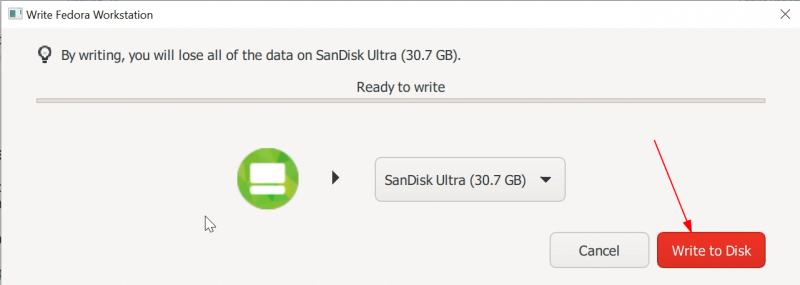
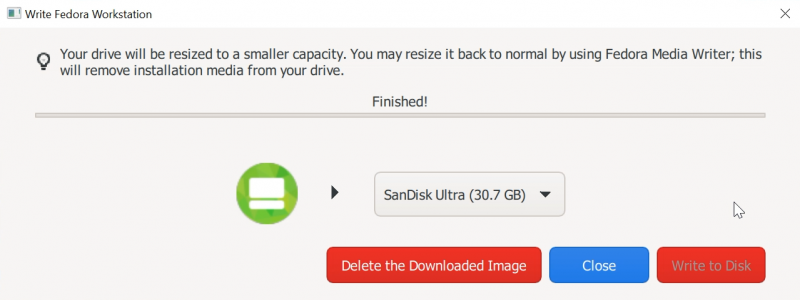
After downloading the ISO, it checks the download automatically and then gives you the option to write the ISO image to the USB disk, i.e. create the live USB. Hit the “Write to Disk” button.
It will take a couple of minutes to complete the process. It displays “Finished” message and you can close the Fedora Media Writer tool now.
Good! So now you have the Fedora live USB ready with you. Time to use it for installing Fedora with Windows.
Step 4: Boot from live USB and install Fedora
Some systems do not allow you to boot from live USB with secure boot. If that’s the case with you, please disable secure boot.
At the screen that shows the logo of your system manufacturer, press the F2 or F10 or F12 key. You may try pressing all of them one by one if you are not sure of the key. But be quick when you do that otherwise it will boot into the operating system.
This key is different for different brand of computers. Some may even use Esc or Del keys for this purpose.
In some rare cases, you may have to access the UEFI boot settings from within Windows.
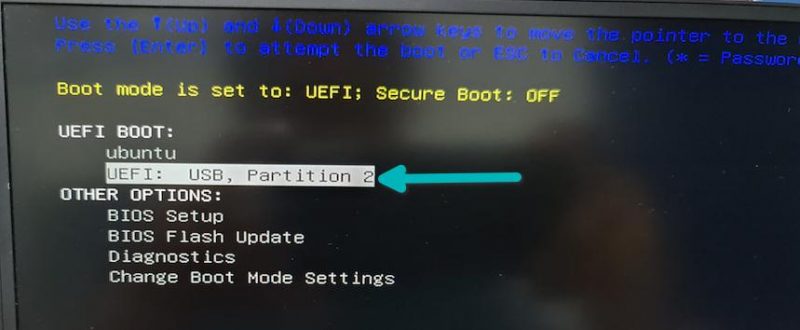
In the BIOS settings, normally, you should see a screen like this. Here, you use the arrow keys to move down to USB option and press enter to boot from the USB. Please note that the screen may look different in different systems.
If things go right, you should see a screen like below. Go with the first option “Start Fedora Workstation”:

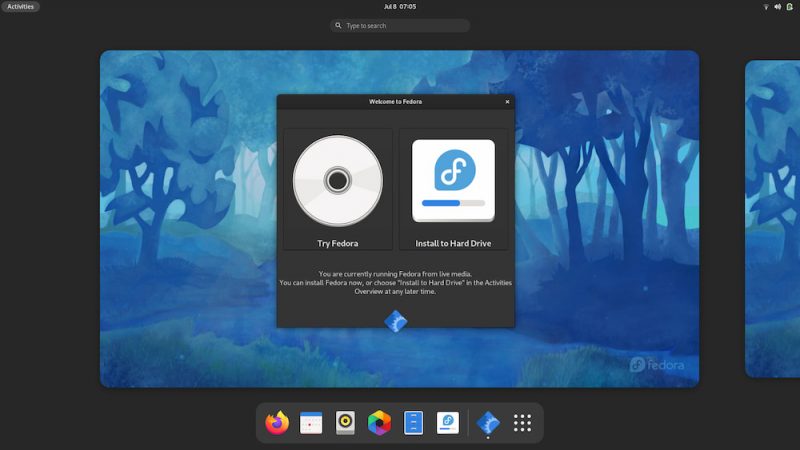
After some seconds, you should boot into the live Fedora session and see the option to try or install it. Go with “Install to Hard Drive”.
It will ask to choose the language of choice for the installation process.
The next screen is important. If you had created the free space in the step 2, you should be able to hit on the “Begin Installation”. If you see an exclamation mark on the disk icon under System, click on it and see what kind of disk configuration you can use here.
If you have more than one disk, you can choose which disk to use for Fedora.
Select the disk and click on Done. You may see a warning message now. In my case, I did not create free space in the step 2 and hence it complained that there is not enough free space to install Fedora.
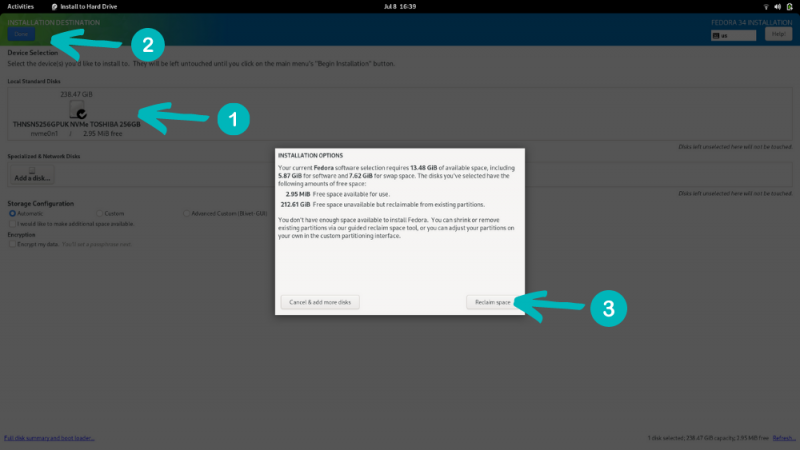
I clicked on reclaim space and shrank the Windows partition here.
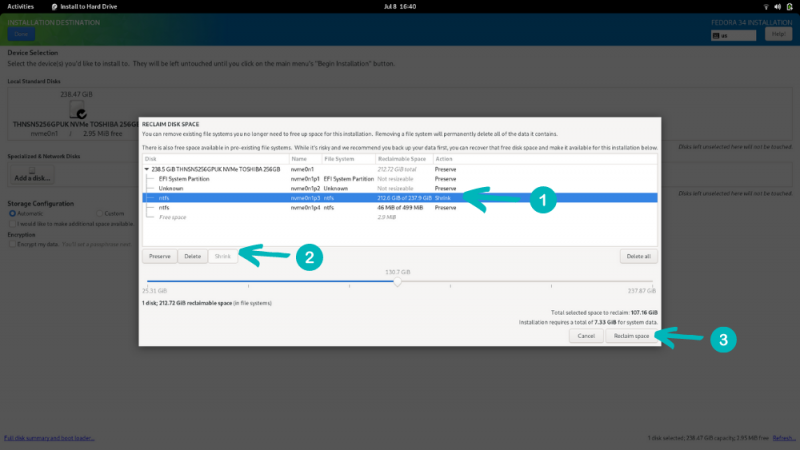
After this, the “Begin Installation” option appeared to start the installation.
Now it’s just a waiting game. It will take a few minutes to extract files and install them.
When the process completes, you’ll see the “Finish Installation” button. Hit it.
You’ll be back to Fedora live session. Click the top right corner to bring down the menu and select Restart.

When the system starts now, you should see the Grub bootloader screen with option to boot into Fedora and Windows.
Step 5: Complete Fedora setup
You are almost there. Did you notice that Fedora didn’t ask you to enter username and password? Many distributions like Ubuntu ask you to create an admin user during the installation itself. On the other hand, Fedora gives you this option when you log in to the installed system for the first time.
When you first log in, it runs a setup and creation of user and password is part of this initial setup.

Once you do that, you are ready to enjoy Fedora Linux.
That’s it. You can enjoy Fedora Linux and Windows in dual boot mode on the same system.
If you have any questions or if you are facing any issues while following this tutorial, please let me know in the comment system.

Are you curious to work with the Linux Operating System inside your PC/Laptop? Then you’re at the right place. This guide helps you in the hassle-free installation of Fedora Linux on your System.
Now, we are going to install Fedora Workstation v35 on our system.
What is Fedora?
Fedora Linux is a Linux distribution developed by the community-supported Fedora Project which is sponsored primarily by Red Hat, a subsidiary of IBM, with additional support from other companies.
If you want to know more about Linux and its distributions, check it out here.
Prerequisites
- 35GB+ free space in HDD/SSD
- 8/16GB Pen drive
- Windows 11/10
Note: This guide is only for the system which has UEFI BIOS and the type of SSD/HDD is GPT and System Type is x64-based.
How to check the BIOS Mode of your system?
- Click Start Button
- Search msinfo32 (or) System Information in the search bar
- Check BIOS Mode Property
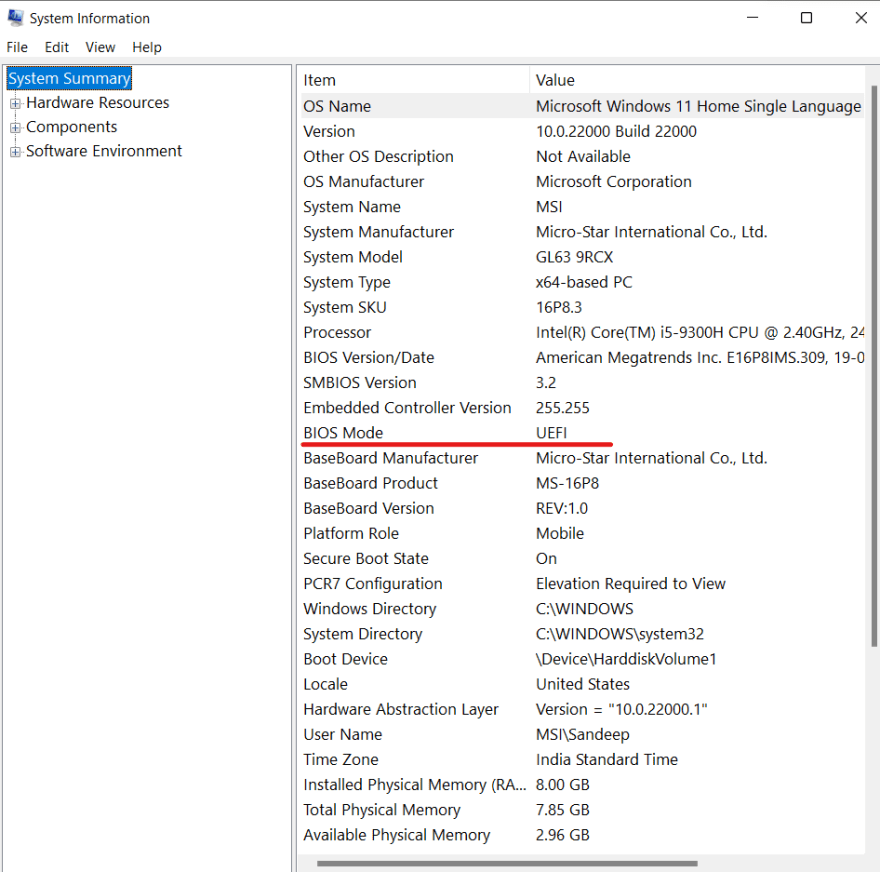
If it’s UEFI, you’re good to go.
How to check the SSD/HDD Mode of your system?
- Click Start Button
- Search for
cmd - Run
cmdas administartor - Type
diskpartand press enter. - Next, type
list diskand press enter.
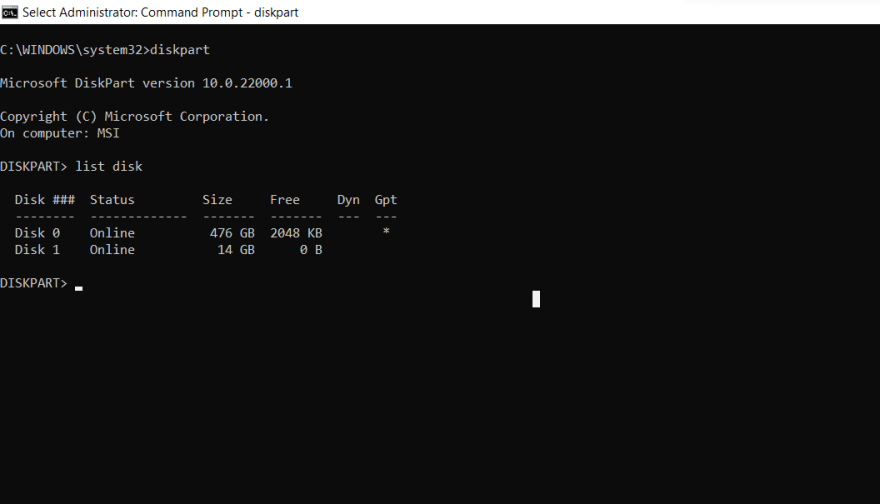
If you see * under GPT of Disk 0, you’re ready for installation of Fedora Linux in your System.
Softwares Required
- Fedora Workstation ISO

- Rufus for making USB bootable. Click here to know more.
Now, it’s time to create a bootable USB. So, format your USB beforehand.
Create a Bootable USB using Rufus
- Open Rufus and plug your clean USB stick into your computer.
- Rufus will automatically detect your USB. Click on Device and choose the USB you want to use from the drop-down menu.
- Make sure the Boot Selection option is set to Disk or ISO image then click Select. Rufus will open a file explorer browser window, locate the ISO image which you downloaded named
Fedora-Workstation-Live-x86_64-XX-X.X.isoto burn onto the USB, and select it.
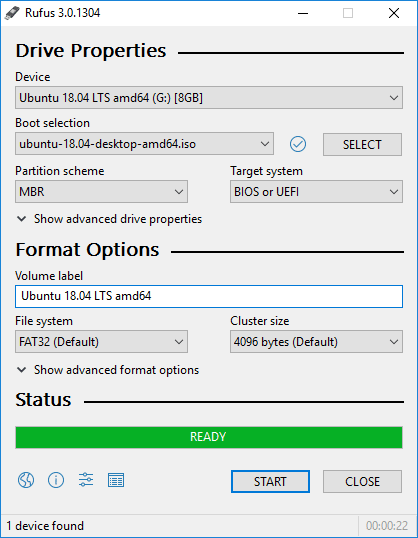
- Leave other options as default and click Start.
- You’ll get a warning saying that any data on the USB will be destroyed (this is normal). Click OK and Rufus will start creating the ISO image on the USB.
- Let it run in the background, jump to the next section.
- Once Rufus has finished creating the ISO image on the USB, you can close it and your bootable USB is ready to go!
Make a new Unallocated Partition.
-
Press the
Windows key + Ron your keyboard to open the Run utility, or search for it in the Start menu. -
Type
diskmgmt.mscand press OK. -
A menu will appear with a list of all your hard drives. Right-click on the drive you want to partition and select Shrink Volume.
-
You’ll be asked how much you want the drive to shrink. The amount you enter will be the amount of space left for your new partition. The
total size after shrinkwill be the space left in the original partition. -
Enter a value and Click Shrink. (Note: If you want 50GB partition, the value is 50 x 1024 = 51200).
-
Now, you’ll find a new Unallocated Partition under Disk 0.


Reboot your system into BIOS Mode.
- To boot into BIOS, Press the below keys before OEM Logo (Brand Logo) appears. the key may be
ESC,Del,F1,F2,F10,F12. If still, it’s not booting into BIOS, Check the below step. - Google your system model with BIOS mode at the end. You’ll find the solution.
- After booting into BIOS, disable
Secure Bootand Change the Boot Drive priority toUSB. - Save the Changes and Reboot.
Boot into Fedora
- If all steps have been performed correctly, you will see the below image.
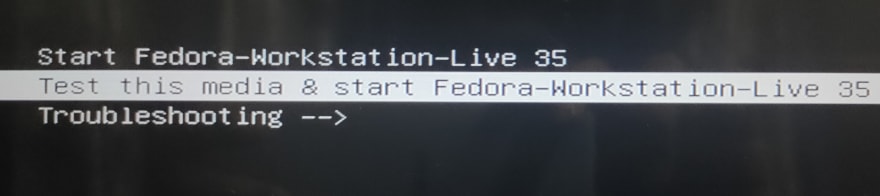
- Select
Test this media & start Fedora Workstation-Live XX - Wait for some time, you’ll see a window with two options.
- Click Install to Hard Drive. Again, wait for < 1 min.
- You will land on the below Window.
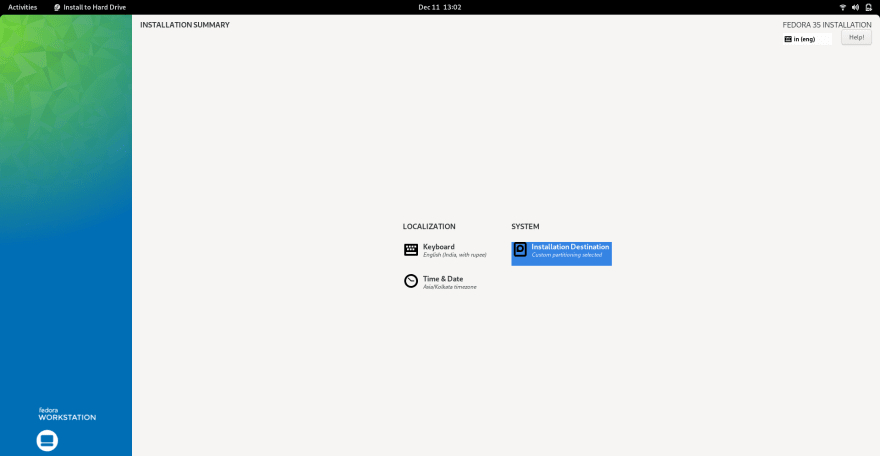
-
Click on the
Keyboardoption, Select your Keyboard Language and Click Continue. -
Similarly, Click on the
Date & Timeoption, Select your Time Zone and Click Done.
Installation
- Now, Click
Installation Destination.
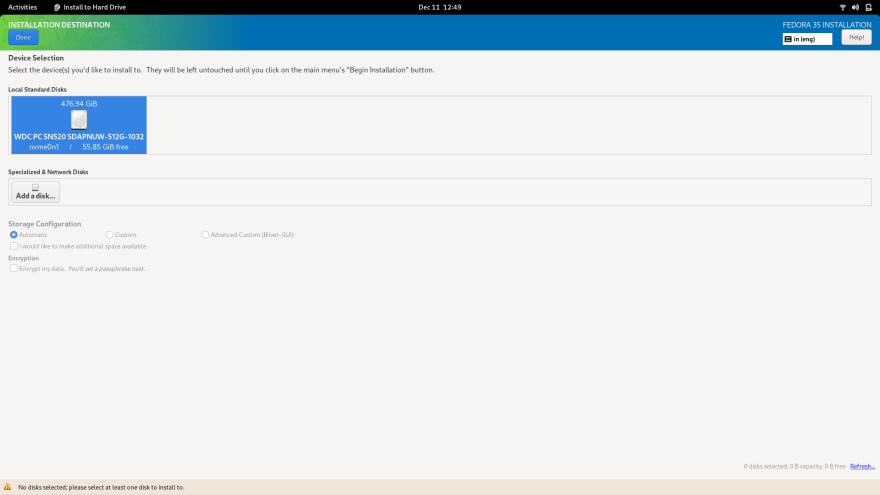
- Select your disk, Choose Custom under Storage Configuration and Click on Done.
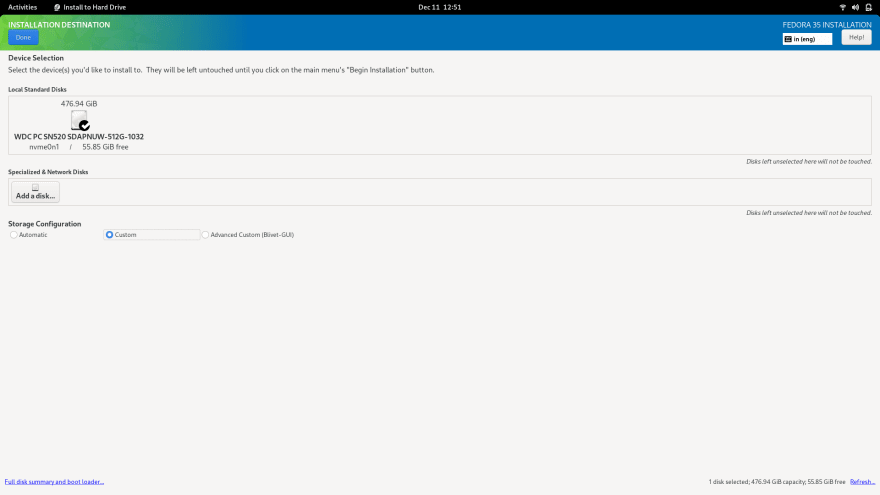
- Now, you’ll be in the below window and also verify that the Available Space is your Unallocated Partition Space.

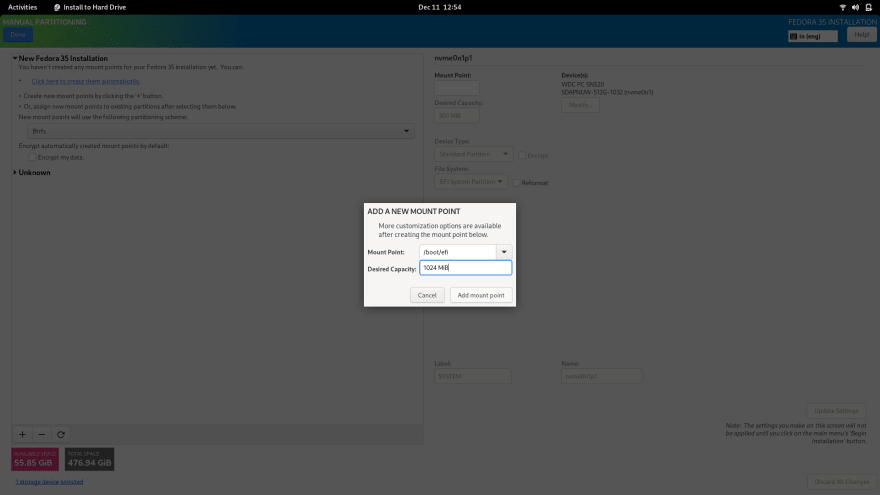
- Click on the + icon, a popup appears, Choose
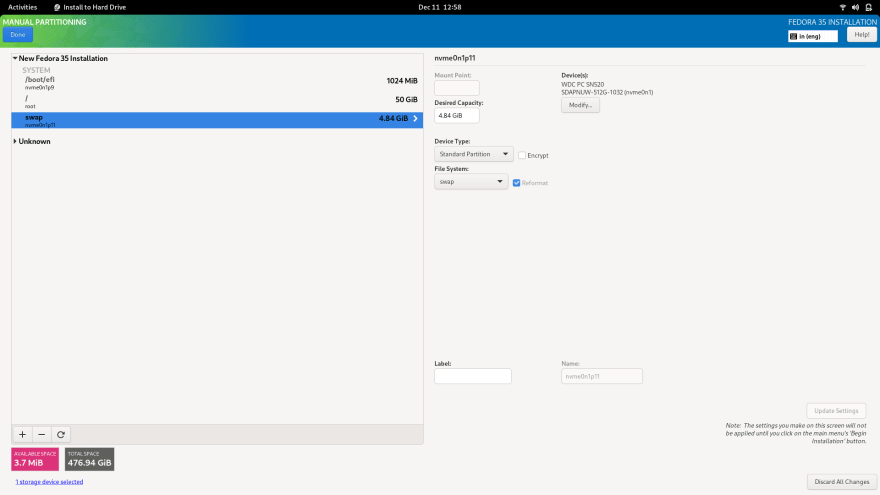
/boot/efiUnder Mounting Point which is System’s EFI partition. Enter1024MiBin Desired capacity. Click on Add mount Point.
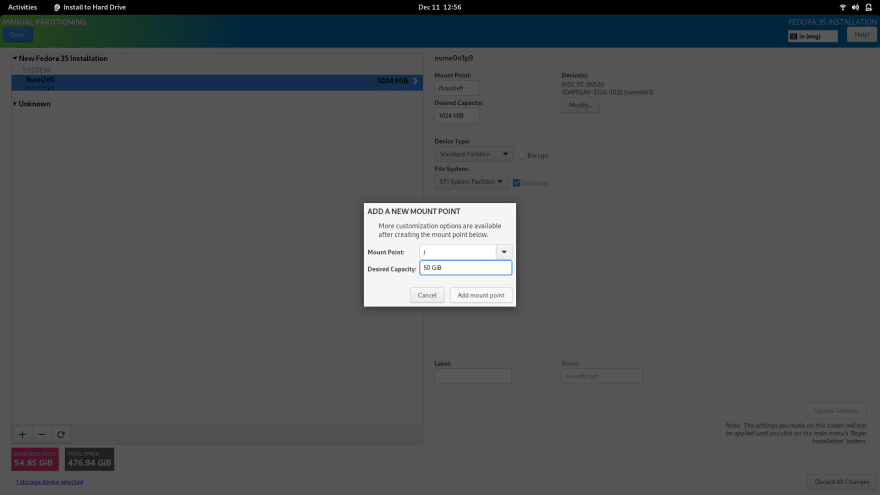
- Similarly, Click on the + icon again, In popup, Choose
/Under Mounting Point which is called Root Partition. Subtract 5GiB from Available Space and Enter remaining space in Desired capacity (Ex: 50 GiB). Click on Add mount Point. And Verify it’sDevice Typewhich is Btrfs.
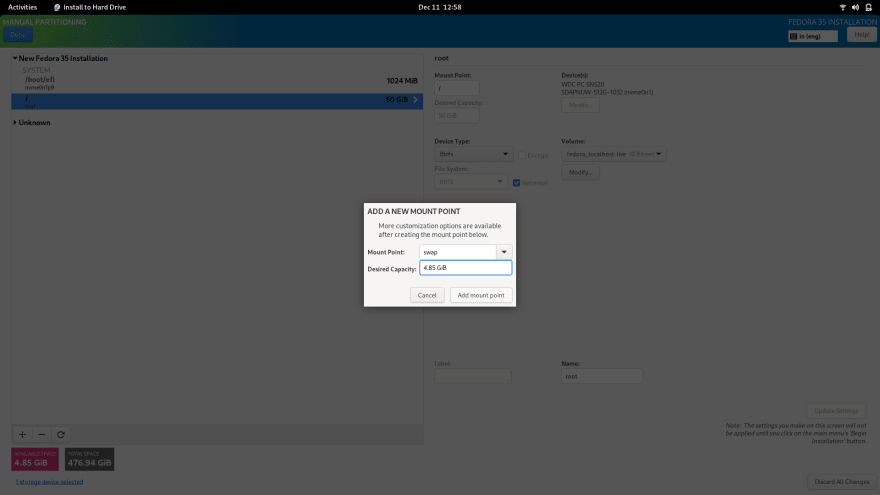
- Similarly, Click on the + icon again, In Pop up, Choose
swapUnder Mounting Point, which is swap memory. Enter the remaining space in Desired capacity (Ex: 5 GiB). Click on Add mount Point.
- Finally, you’ll see all the partitions created.
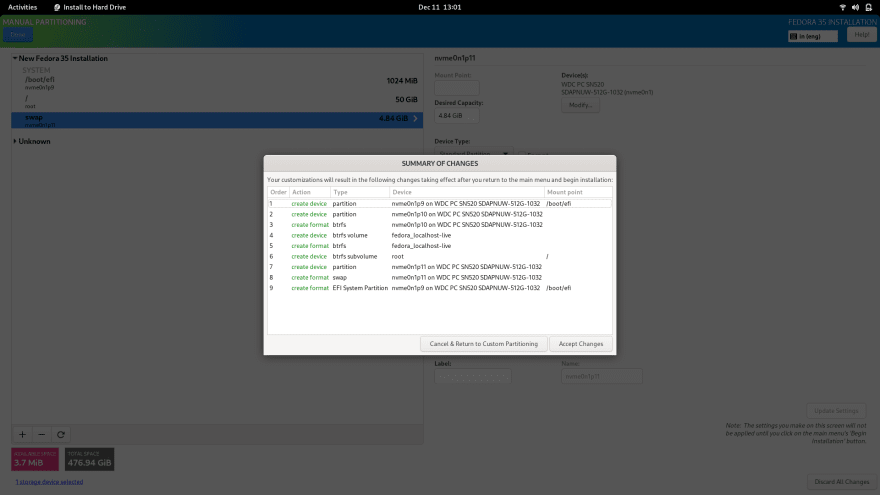
- Now, click on Done. Verify the Summary of Changes. And click on Accept Changes.
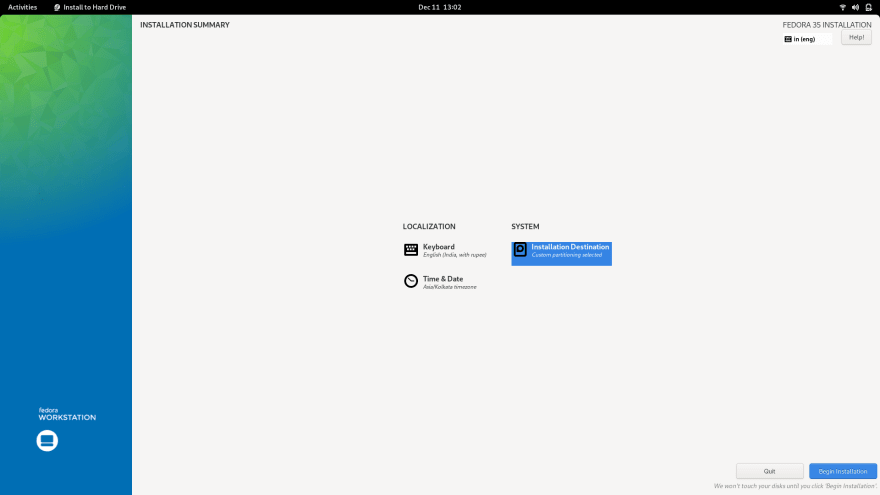
- You’ll see the below window. Now, click on Begin Installation.
Relax for 10-15 mins.
- Click on Finish Installation.
The system will restart automatically and you’ll see the GRUB Bootloader, Select Fedora, and Press Enter.
Enter your details and you’ll be finally booted into Fedora Linux.

Thanks for following the guide. Hope this helps you in some way 