Internet Information Services (IIS) is a web server that satisfies requested HTML files or pages. It is offered as an optional feature in Windows that allows you to host and manage websites locally on your computer.
If you are a developer and wish to test out a website before publishing it, or want to run an internal Content Management System (CMS) for an organization, then you need to enable IIS on the server to host it.
This post shows you how to enable or disable the feature if needed, how to check its version, and for whom it is useful.
Table of contents
- What is Internet Information Services (IIS)
- How to Enable IIS on Windows
- How to Check if IIS is Installed
- How to Check IIS Version
- From Internet Information Services (IIS) Manager
- From Registry Editor
- From PowerShell
- Closing Words
What is Internet Information Services (IIS)
As we mentioned, IIS is used to host HTML websites or static pages that can be accessed from the internet or the intranet. An IIS web server accepts requests from remote computers and then returns the appropriate response using ASP.NET.
IIS works through different protocols and languages. HTML is used to create the elements, which include text, placement holders, actionable buttons, hyperlinks, etc.
The ASP.NET Core framework is the latest generation of Active Server Pages (ASP), which is a server-side script engine that produces interactive webpages. When a request comes to the IIS server from the internet, it forwards it to the ASP.NET Core application, which in turn processes the request and sends its response back to the IIS server and the client who initially originated the request.
IIS has been released with different versions for the different operating systems. So, to check which version is on your PC, you must first install it. However, the table below lists which IIS version is shipped with which operating system.
| IIS Version | Operating System |
| IIS 1.0 | Windows NT 3.51 |
| IIS 2.0 | Windows NT 4.0 |
| IIS 3.0 | Windows NT 4.0 SP 2 |
| IIS 4.0 | Windows NT 4.0 (option pack) |
| IIS 5.0 | Windows 2000 |
| IIS 5.1 | Windows XP Professional |
| IIS 6.0 | Windows XP Professional Windows Server 2003 |
| IIS 7.0 | Windows Vista Windows Server 2008 |
| IIS 7.5 | Windows 7 Windows Server 2008 R2 |
| IIS 8.0 | Windows 8 Windows Server 2012 |
| IIS 8.5 | Windows 8.1 Windows Server 2012 R2 |
| IIS 10.0 Version 1607 | Windows 10 Version 1607 Windows Server 2016 |
| IIS 10.0 Version 1709 | Windows 10 Version 1709 Windows Server Version 1709 |
| IIS 10.0 Version 1809 | Windows 10 1809 Windows Server 2019 |
How to Enable IIS on Windows
Perform the following steps to enable IIS on a Windows PC:
-
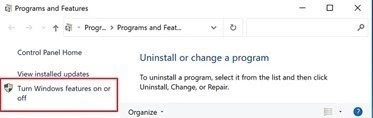
Open Windows Features by typing in optionalfeatures in the Run Command box.
 On Windows 1")
Open Windows optional features -
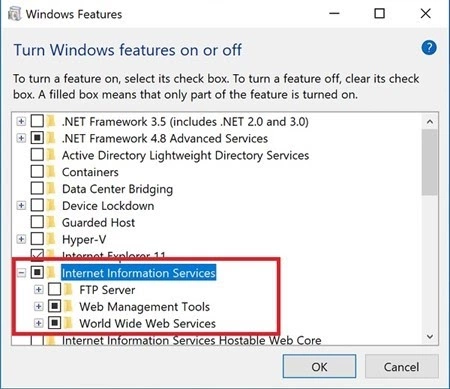
From the Windows Features window, scroll down and expand Internet Information Services. Then check the boxes below it to enable the selective IIS features.
 On Windows 2")
Enable IIS -
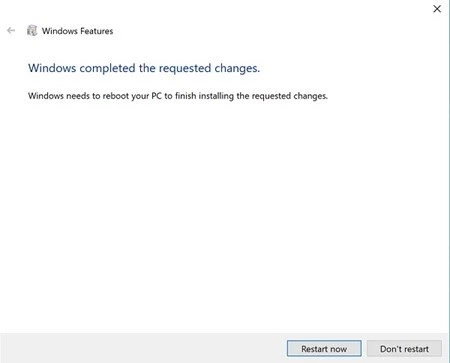
Once done, click Ok. The wizard will now attempt to apply the changes.
-
Once completed, click Close.
Close window
 On Windows 1")
 On Windows 2")
 On Windows 3")
IIS will now be installed on your PC.
If you no longer require it in the future, disabling it is just as easy. Simply open the Windows Features again and uncheck the IIS options.
How to Check if IIS is Installed
To confirm that IIS is installed on your computer, open any web browser, paste the following in the address bar, and then hit Enter.
http://localhost/
You should now see a screen somewhat like the one below.
Note: The display can be different depending upon which version of IIS is running on your PC.
 On Windows 4")
How to Check IIS Version
From Internet Information Services (IIS) Manager
To check which IIS version has been installed on your PC, perform the following:
-
Search for “IIS Manager” from the Search box in the taskbar and open it.
Open IIS Manager -
From the manager, click Help from the top ribbon menu, then click About Internet Information Services.
about IIS -
You will now find the complete IIS version in the pop-up window.
IIS version From Registry Editor
You can also determine the IIS version from Windows Registry. Here is how:
Note: Misconfiguration of critical values in the system’s registry could be fatal for your operating system. Therefore, we insist that you create a system restore point before proceeding forward with the process.
-
Open the Registry Editor by typing in regedit in the Run Command box.
Regedit -
Now paste the following into the address bar at the top for quick navigation:
Computer\HKEY_LOCAL_MACHINE\SOFTWARE\Microsoft\InetStp
Quick navigation to InetStp -
You can now see the IIS version in front of the VersionString value in the right pane of the Editor.
-
 On Windows 5")
 On Windows 6")
 On Windows 7")
 On Windows 8")
 On Windows 9")
From PowerShell
To obtain the IIS version using Windows PowerShell, run the following cmdlet in an elevated PowerShell instance:
Get-ItemProperty -Path registry::HKEY_LOCAL_MACHINE\SOFTWARE\Microsoft\InetStp\ | Select-Object On Windows 10")
You should then be able to see the IIS version in the data listed below the command.
Closing Words
Not everyone needs to enable IIS on their computers. We recommend you disable it if you do not need it.
IIS is only required if you plan to host a website or static HTML page on your computer. That said, enabling or disabling it is a piece of cake thanks to the Windows interface.
IIS, short for Internet Information Services, is a Microsoft version of a web server.
To operate any kind of server like FTP, ASP.NET or local and remote management on your Windows 10, you need to keep the IIS feature enabled on your OS.
Do you want to know how to do that? Then, tag along. Here I will explain three different methods to enable Internet Information Services in Windows 10. Let’s begin.
The interesting fact about IIS is that it’s pre-installed with Windows and is deactivated by default. That’s why it is available for free with Windows Server. Since it’s a user-friendly GUI, many prefer IIS over Apache or NGINX and take full advantage of Microsoft Stack.
The process of turning IIS on is very simple and straightforward. These methods work not only on Windows 10 but also on other operating systems like Windows 8, Windows 8.1, and Windows 11. Let’s see how it’s done.
Follow our guide to fix cFosSpeed driver preventing Windows 11 installation.
Here are the steps to turn on IIS in Windows 10:
From Windows Feature
From Command Prompt
The installation will be finished once the PC reboot. See our most recent article if you want to change the command prompt’s color and font.
From Windows PowerShell
After the restart, you can use Internet Information Services(IIS) Manager without any trouble.
Read more on should you re-install Windows with a new CPU?
FAQs
How do I know if IIS is installed?
To know whether IIS is installed or not, go to the search icon and type Internet Information Services(IIS) Manager there. If the application shows there, it means the IIS has successfully been installed on your PC.
Where is IIS in Windows 10?
To locate IIS in Windows 10, type Administrative Tools on the Windows search bar. There you will see the Internet Information Services(IIS) Manager application.
Is IIS included with Windows 10?
Yes, the latest version of IIS 10.0 is included with Windows 10. It is also added in the Windows Server 2016.
Conclusion
Using the IIS, you can effortlessly make your own website. But before you start using Internet Information Services, ensure it runs properly. If you face any trouble, uninstall the IIS completely and reinstall the application by following any of the three methods.
Hope you have installed IIS on your Windows 10 and are using it without any complications. Don’t hesitate to ask any questions in the comment section. I will gladly answer them.
Peace!
Steven Arends
Steven Arends is a computer science graduate and tech enthusiast with over 10 years of experience in the field. He has a vast collection of computer hardware and loves exploring the latest advancements. As a contributing author to 10Scopes, Steven shares his expertise to make the world of technology more accessible and easier to understand for all readers.
All Microsoft Supported Downloads
IIS Compression
Published on 05/23/2018 by Microsoft
Windows
IIS Compression is a collection of compression scheme providers that add support for Brotli compression and provide a better implementation of Gzip and Deflate compression than those that ship with IIS.
Web Platform Installer
Published on 02/06/2018 by Microsoft
Windows
The Microsoft Web Platform Installer (WebPI) was retired on December 31, 2022. For more information please see this blog post: https://blogs.iis.net/iisteam/web-platform-installer-end-of-support-feed
IIS CORS Module
Published on 11/10/2017 by Microsoft
Windows
The Microsoft IIS CORS Module is an extension that enables web sites to support the CORS (Cross-Origin Resource Sharing) protocol.
All Community Contributed Downloads
No matter which version of Windows you’re using, this article gives you a complete and step-by-step guideline on how to install IIS on Windows 10 and other platforms such as Windows server 2019, 2012, and 2012.
Microsoft has hit the tech market with its excellent IIS service, which has topped all the rivals and been the most popular web server for Windows. You can make sure of your web application and website’s high performance after installing IIS on your Windows server. As the name gives us a hint, IIS works best on Windows OS. However, you could use it on other platforms like Linux, but it won’t give you reliable performance.
What is IIS?
Internet Information Services (IIS) is a flexible and standard web server from Microsoft that runs on Windows systems to serve the requested pages or HTML files. The IIS server runs on the Microsoft .NET platform on Windows OS.
Also Read: Install and Update .NET Framework on Windows 10
The IIS server receives requests from remote computers and, in return, responds with the correct response. That allows web servers to share and transmit data to all local and online networks.
Information sent to users is displayed in many ways, such as static web pages, through file exchanges such as downloads and uploads, and text, images, and more.
Windows 10 VPS Hosting
Get yourself an efficient Windows 10 VPS for remote desktop, at the cheapest price out there. FREE Windows 10 running on NVMe SSD storage and high-speed internet.
Check Out Windows 10 VPS Plans
How Does IIS Work?
IIS operates with the help of standard protocols and programming languages. For things like text, buttons, image insertion, direct link/character, and hyperlinks, IIS uses HTML. HTTP is used to exchange information between a web server and a user.
HTTPS – HTTP over Secure Sockets Layer (SSL) uses Transport Layer Security or SSL to encrypt additional data security communications. File Transfer Protocol (FTP), or its secure alternative, FTPS, can transfer files. Additional supported agreements include Simple Mail Transfer Protocol (SMTP), sending and receiving email. The processes mentioned above and other languages and conventions together form an appropriate IIS package.
Also Read: Best Windows 10 VPS
How To Install IIS on Windows 10?
If you are using virtual machines such as Windows VPS, you must connect to Windows via Remote Desktop. The following steps are also helpful if you’re looking for how to install IIS on Windows 8, or Windows 8.1.
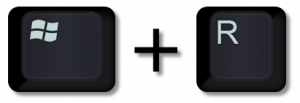
Step 1: open the launch section
Press the Windows + R key to open the launch section.
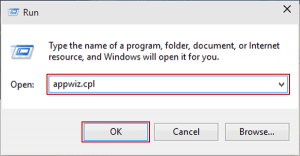
Step 2: Type appwiz.cpl
Now type appwiz.cpl in that section and hit Enter. That opens Programs and Features in Windows 10.
Step 3: Turn off Windows features
On the Apps and Features page, click Close or turn off Windows features.
Step 4: Check the IIS services
In the list of features, search the Internet Information Service (IIS), check the IIS services according to your needs, and press OK.
Step 5: Restart the computer
After the installation, restart your computer to complete the installation.
You can now access IIS in your browser by entering the 127.0.01 address on the local network. Moreover, you can have access to your IIS web server remotely by entering your server’s IP address in your browser. It looks like this: 185.156.x.x
Please note: Your IIS directory on your device is: C: \ inetpub \ wwwroot. You can copy this directory and have access to your website files or other files via an IIS web server using your browser.
Note: These steps are almost the same if you’re looking for how to install IIS on Windows 7.
Unquestionable Stability
Get a free Windows 7 operating system on a Windows 7 VPS plan from Cloudzy — equipped with the latest hardware, including NVMe storage.
Get a Windows 7 VPS
How To Install IIS on Windows Server 2012
The process is almost the same for other versions of the Windows server. The following steps are also helpful if you’re looking for how to install iis on Windows Server 2016.
Also Read: How to install Linux Bash on Windows 10?
Step 1: open the launch section
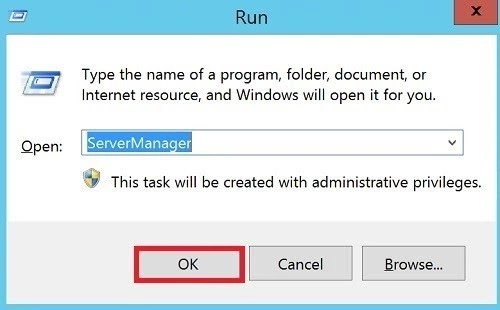
To install IIS on Windows Server, press the Windows + R keys to open Run.
Step 2: open the launch section
Type ServerManager in the launch box and click OK. That opens the Programs and Features box on Windows Server 2012. [ or any other version you’re using.]
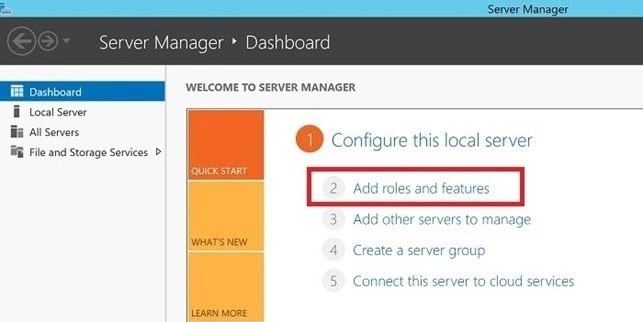
Step 3: Add roles and features
Click on the “Add roles and features” in the newly opened window.
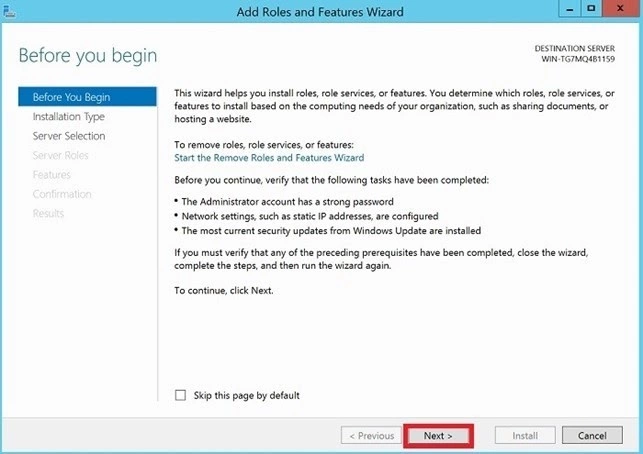
Step 4: Installation Wizard
Now, the Installation Wizard will appear Click Next.
Step 5: Select role-based
Look for roles based on a role or based on a feature and click Next.

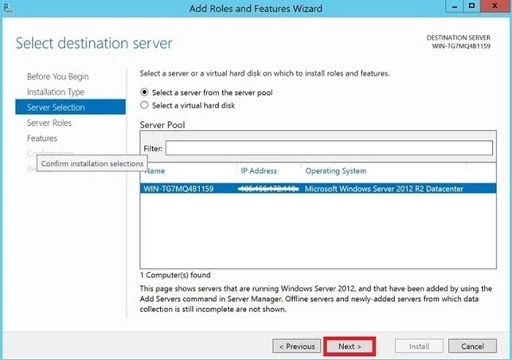
Step 6: Select a server from the server pool
Now, click on the “Select a server from the server pool” from the window, then select Server and click Next.
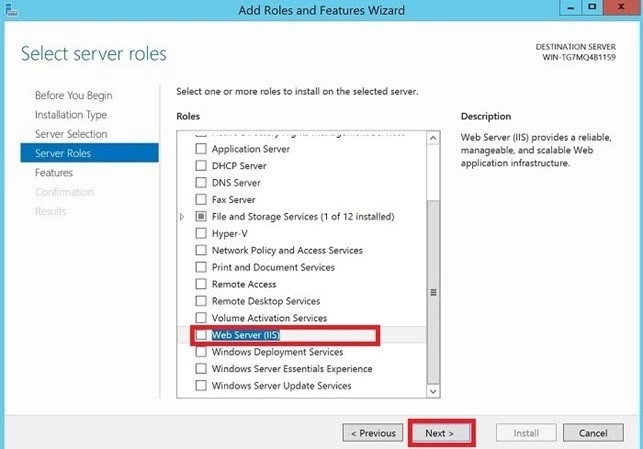
Step 7: Check the Web Server (IIS) section
When you get to the Series Roles section, scroll down to the list, then check the Web Server (IIS) section and hit Next.
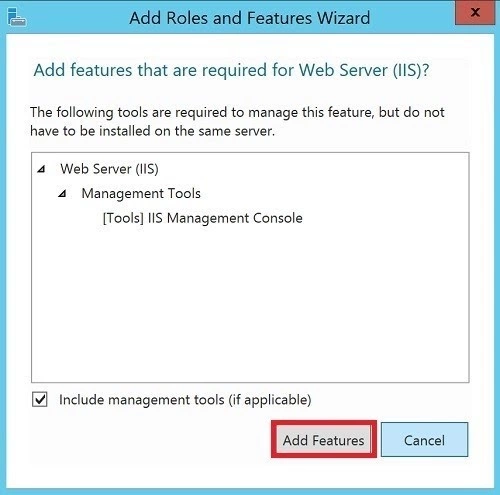
Step 8: Click on Add Features
Click on Add Features, do not forget that the checkbox click “Install management tool (if available)”
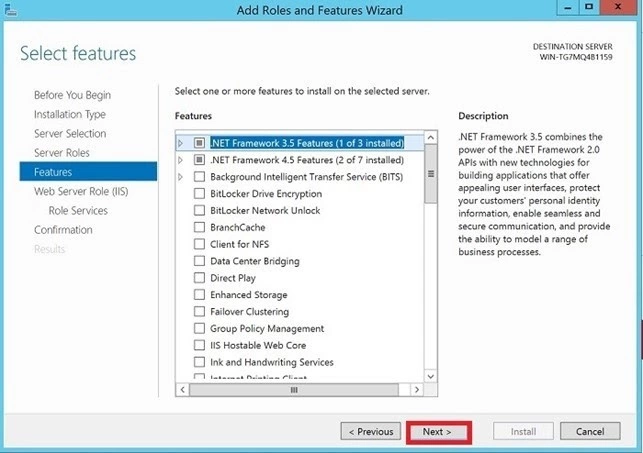
Step 9: Click on the Next
Keep the default features as they already are, then click on the Next.
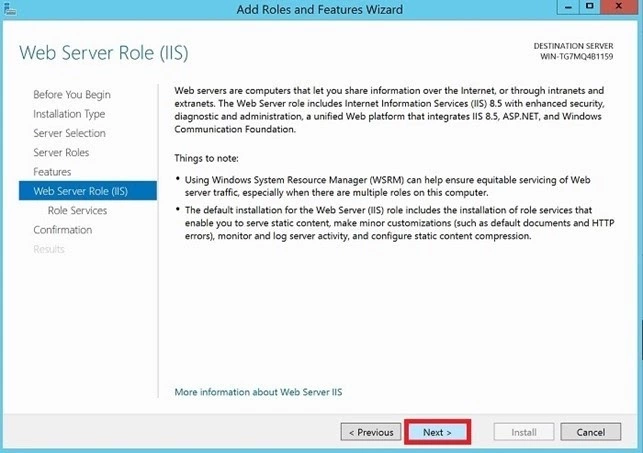
Step 10: Click on the Next
Click on the “Next” when you’re done with the Web Server Roles (IIS) text.
Step 11: Select web Server roles and Click Next
Click on the “Next” after selecting the Web Server roles as shown in the following image.
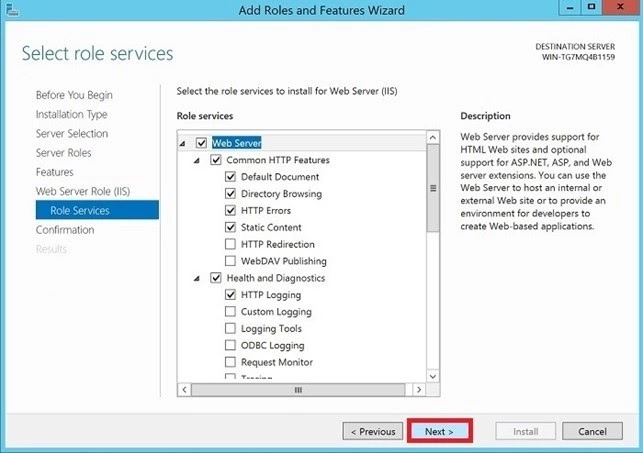
Step 12: Install selections
Click on the “Install.”

When the installation is finished, close the installation wizard. You will see the main Internet Information Services (IIS) interface similar to the one shown below.
Please note: Your IIS directory on your device is C: \ inetpub \ wwwroot. Now you can copy and access your website files or other files via an IIS web server using your browser.
Note: All the procedures mentioned above will also help you on how to install IIS on Windows Server 2019.
Windows 10 VPS Hosting
Get yourself an efficient Windows 10 VPS for remote desktop, at the cheapest price out there. FREE Windows 10 running on NVMe SSD storage and high-speed internet.
Check Out Windows 10 VPS Plans
Conclusion
You just did it! Now that article has helped you on how to install IIS on Windows 10 and it’s running nice and smooth on your server; it’s time to ensure that your website is 100% functioning correctly, you’ll need a secure and cost-effective server.
Cloudzy proudly offers you its top-performing and budget-friendly cheap Windows Virtual Private Server and Remote desktop VPS services to help you have a 100% safe, smooth and reliable online presence.
If you start working with Cloudzy today, you’ll join a big club of happy customers who enjoyed having budget-friendly VPS servers with cutting-edge technology, worldwide locations, and 24/7 committed customer support. If you need more info on our service or no-obligation quotes, we’re just one simple call away!
Служба IIS (Internet Information Services) необходима для работы ASP.NET серверной части СпрутМонитор.
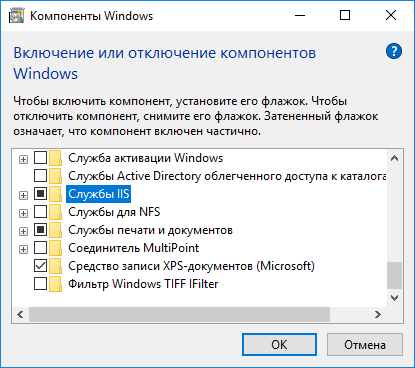
1. Перейдите в Панель Управления -> Программы -> Установка программ. Щелкните на пункт меню (слева) Включение и отключение компонентов Windows.
2. Отметьте пункт Службы IIS, и нажмите кнопку ОК:
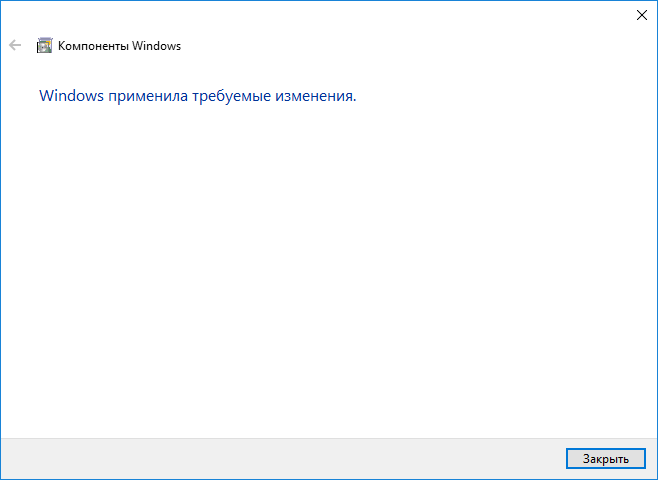
3. Дождитесь окончания установки всех необходимых компонентов:
4. После завершения установки, рекомендуется перезагрузить компьютер.
5. Запустите браузер и перейдите по адресу http://localhost/. Если открылась тестовая страница IIS, значит установка произведена успешно.
См. также: Установка серверной версии СпрутМонитор.