What this posting is about
This posting is a “cook book” of bringing up a Raspberry Pi Model 3 on the i2p privacy overlay network. This is somewhat like the Tor .onion Dark Net, but a little different. Tor uses 3 hops in a tunnel and uses the same hops for send and receive. Only your traffic is in your tunnel. The i2p network lets you choose how many hops to use for your service (so you can trade more security for less performance, or more performance for less security) but with the default of 3. It also blends different users traffic into the same tunnels (so is called ‘garlic routing’ instead of ‘onion routing’) and it uses different tunnels for send and receive. Also tunnels are swapped every 10 minutes making tracing very difficult even with some access to the underlying network equipment.
I found if very easy, nearly trivial, to install i2p on 2 very different Linux machines. All of them were based on some flavor of Debian, so the process was essentially the same. “apt install i2p”. That’s it. This ought to work on your choice of: Raspbian, Debian, Devuan, Armbian, or Ubuntu. I know that it works on Armbian and Debian on other hardware.
Anyone interested in my Tail Of Woe read on. Those just wanting it to work, skip down to the WORKED! heading.
Armbian – No Joy
When you check the Armbian download pages, you find no Raspberry Pi. Reading the discussion page for that, they are dead set against doing a Raspberry Pi port. Why? Mostly they don’t like the closed source boot loader. They also talk dirt about the hardware some (poor I/O bandwidth, light weight video cores, etc.) and make some claims of failure prone hardware. I’ve not seen that. I did have one of the original Pi single core boards die on me, but it was being hauled back and forth from California to Florida and used & handled without any static protection at all. Its mate, also bought about 8? years ago, has been running continuously for a few years now as DNS, Time, and Squid proxy server. But whatever, they have no OS for the Pi, so ‘moving on’:
Devuan – No Joy on Ascii
I’m going to do this install trial first on Devuan, the SystemD free OS version. Furthermore, I’m going to do it ‘backlevel’ by one release.
Why? Well, 2 reasons really. First off, the ASCII release is still in the mirrors as a regular release. For the new 3.0 Beowulf, Devuan have gone to more of a “user community” process for builds for ARM chips, and that’s a bit more chaotic. I want something more standardized for this posting. Then secondly, if it works in Ascii, then it’s been around a good while and that’s nice to know too. Sometimes things don’t make it into the ARM chip world as fast as they do in the Intel side of things.
You may, if you wish, follow all the regular install instructions for any of those Debian based OS alternatives on the R. Pi and it all ought to work the same after the OS is installed.
Download and install a Devuan OS
This section includes a long detailed careful example of loading an OS onto a uSD card. I’ll not be repeating that in other sections.
As mentioned, I’m downloading a copy of the 2.0 Ascii build that’s one level back-leveled. I’m getting mine from here:
http://mirror.alpix.eu/devuan/devuan_ascii/embedded/
u-boot/                                            06-Jun-2018 11:28                   -
README.txt                                         06-Jun-2018 11:28                2795
SHA256SUMS                                         06-Jun-2018 11:28                2412
SHA256SUMS.asc                                     06-Jun-2018 11:28                1528
ddroid-2018-06-05.zip                              06-Jun-2018 11:28             5778067
devuan_ascii_2.0.0_arm64_raspi3.img.xz             06-Jun-2018 11:28           160068308
devuan_ascii_2.0.0_arm64_raspi3.tar.gz             06-Jun-2018 11:28           231711445
devuan_ascii_2.0.0_armel_raspi1.img.xz             06-Jun-2018 11:28           152467380
devuan_ascii_2.0.0_armel_raspi1.tar.gz             06-Jun-2018 11:28           220286010
devuan_ascii_2.0.0_armhf_beagleboneblack.img.xz    06-Jun-2018 11:28           153267156
devuan_ascii_2.0.0_armhf_beagleboneblack.tar.gz    06-Jun-2018 11:28           215303387
devuan_ascii_2.0.0_armhf_chromeacer.img.xz         06-Jun-2018 11:28           197930992
devuan_ascii_2.0.0_armhf_chromeacer.tar.gz         06-Jun-2018 11:28           294143167
devuan_ascii_2.0.0_armhf_droid4.img.xz             06-Jun-2018 11:28           138730596
devuan_ascii_2.0.0_armhf_droid4.tar.gz             06-Jun-2018 11:28           194227526
devuan_ascii_2.0.0_armhf_n9.img.xz                 06-Jun-2018 11:28           140260756
devuan_ascii_2.0.0_armhf_n9.tar.gz                 06-Jun-2018 11:28           195496761
devuan_ascii_2.0.0_armhf_n900.img.xz               06-Jun-2018 11:28           137080000
devuan_ascii_2.0.0_armhf_n900.tar.gz               06-Jun-2018 11:28           197467631
devuan_ascii_2.0.0_armhf_n950.img.xz               06-Jun-2018 11:28           140166116
devuan_ascii_2.0.0_armhf_n950.tar.gz               06-Jun-2018 11:28           195477021
devuan_ascii_2.0.0_armhf_odroidxu4.img.xz          06-Jun-2018 11:28           151147248
devuan_ascii_2.0.0_armhf_odroidxu4.tar.gz          06-Jun-2018 11:28           215414703
devuan_ascii_2.0.0_armhf_raspi2.img.xz             06-Jun-2018 11:28           159664056
devuan_ascii_2.0.0_armhf_raspi2.tar.gz             06-Jun-2018 11:28           225220011
devuan_ascii_2.0.0_armhf_sunxi.img.xz              06-Jun-2018 11:28           136928708
devuan_ascii_2.0.0_armhf_sunxi.tar.gz
Though any mirror from their mirrors page ought to still have the embedded/ascii builds in it:
https://www.devuan.org/get-devuan
In your browser, just click on the version you need (raspi3 in this case) and it ought to start to download.
Those looking for the newer Beowulf 3.0 build can try here:
https://arm-files.devuan.org/
Though as I type this, there is no Beowulf build (though the forum pages show people who are running it as an experimental install straight from the armel / armhf / aarch64 repositories for generic builds.)
../
README.txt                                         19-Nov-2020 21:44    5671
SHA256SUMS                                         25-Dec-2020 13:50     688
devuan_beowulf_3.0.0_arm64_npir2s_0.2.img.xz       20-Dec-2020 23:10    468M
devuan_beowulf_3.0.0_arm64_orangepi_one_plus_0...> 25-Dec-2020 13:51    462M
devuan_beowulf_3.0.0_arm64_rockpi4_0.2.img.xz      05-Apr-2020 23:49    525M
devuan_beowulf_3.0.0_arm64_rockpro64_0.2.tar.xz    08-May-2020 18:34    249M
devuan_beowulf_3.0.0_armel_rpi1_0.3.img.xz         05-Apr-2020 23:49    473M
devuan_beowulf_3.0.0_armhf_olinuxino_lime2_0.5...> 04-Jun-2020 21:39    456M
So that’s why I’m using Ascii for this… Just a ‘download install and go’.
The image is an xz compressed file, so you need to uncompress it. This is done with the unxz program. If you don’t have it installed, as root issue “apt-get install unxz”.
Then you can just do:
ems@OdroidN2:/T1/ext/Downloads$ unxz devuan_ascii_2.0.0_arm64_raspi3.img.xz
ems@OdroidN2:/T1/ext/Downloads$ ls -l devuan_ascii_2.0.0_arm64_raspi3.img
-rw-r--r-- 1 ems ems 1982857216 Feb 12 20:34 devuan_ascii_2.0.0_arm64_raspi3.img
Here you can see that the 160 MB we downloaded have expanded into 1.9 GB. XZ does a great job of compression 
Now we put it on a uSD card. IF you are on a Windows box, I can’t help you, but a lot of folks talk about something called “etcher”. Being a Linux / Unix guy, I have a dozen of them available, so just do it with “dd”. (Which stands for “convert and copy” because “cc” was already taken by the “C Compiler”… *nix is full of inside jokes like that…)
At this point there’s an obligatory Noobs Nag: IF you do a “dd” wrong, you can completely destroy your system, any attached disk, and everything you care about. NOTHING in *Nix will protect you from yourself. If you want to play in this world, “grow a set” and buy a lot of mental bandaids. You will need them.
For those who are not afraid or need no nagging:
The hard / important bit here is to KNOW just what the proper device name is for your target uSD card. These are typically put into some kind of adapter so that they can talk to a USB port, then stuck into that USB port. Your job is to triple check that you know what your machine disks are named AND what the uSD is named. Often when you first insert the adapter, you will get a “file manager” window pop up and ask if you want to have it mounted. Sometimes you don’t get that. Feel free to mount it to the system and have a good look at it. You want to know what letter is assigned to it in the /dev/sd{X} device address.
FWIW, my favorite “paranoia check” that I do when I have important archive disks and such up and running (when the pain of a mistake is brutal) is to launch “gparted”. This is a nice graphical look at all the “disks” attached, what their names are, and what the partitions look like. It lets me see sizes and lets me look over the target device before nuking it. Somtimes I realize maybe there’s something on that uSD card I’d like to keep.
IF your base system is running from a real hard disk, it is usually /dev/sda (with numbers for each partition so /dev/sda1 might be boot and /dev/sda2 swap and /dev/sda3 / etc.) If you are using an SBC (Single Board Computer) with emmc or uSD for booting, it will show up as /dev/mmcblk{X}/p{Y} on a ‘df’ (disk free) and as similar names in gparted. Here’s a partial df of my current system:
ems@OdroidN2:/T1/ext/Downloads$ df

Filesystem     1K-blocks     Used Available Use% Mounted on
udev             1637948        0   1637948   0% /dev
tmpfs             380132      644    379488   1% /run
/dev/mmcblk1p1  16453544 12249348   3982300  76% /
tmpfs            1900648    99616   1801032   6% /dev/shm
tmpfs               5120        4      5116   1% /run/lock
tmpfs            1900648        0   1900648   0% /sys/fs/cgroup
/dev/mmcblk1p3  10057972    22664   9521056   1% /SD/ext
/dev/mmcblk0p2   7251432  6411364    535128  93% /mmc/ext
/dev/mmcblk0p1    130798    42954     87844  33% /mmc/BOOT
tmpfs            2097152   106732   1990420   6% /tmp
armbian-ramlog     51200    30500     20700  60% /var/log
/dev/sda4      830428208 85390716 702847516  11% /T1/ext
tmpfs             380128   226628    153500  60% /run/user/1000
The device /dev/mmcblk0 is the emmc chip that contains Ubuntu as shipped from the factory. The /dev/mmcblk1 device is the uSD card that boots into Armbian. Yes, I set this one up to dual boot. The “pX” part is the individual partitions on the “disk”. The other stuff tends to be some neat trick stuff that Armbian does, like put /tmp on a tmpfs temporary partition in memory as it does with run locks and other active stuff, saving your uSD from the hit. The /T1/ext partition is on a Real Hard Disk on a USB plug, and shows up as /dev/sda4 as it is the 4th partition on that disk}.
So first do a “df” and note all the things you do NOT want as targets. /dev/mmc{anything} and /dev/sda on this system. Then plug in your adapter with the target uSD. (Note that if you do NOT already have a disk on the system, your adapter may show up as /dev/sda… )
At this point, you could also inspect things with gparted. IF you don’t already have it installed, just as root do “apt-get install gparted”.
On my present system, plugging in the adapter did NOT cause it to auto-mount the chip. IF it does that, it will show up in a new ‘df’ command. You will eventually need to do a “umount /dev/sd{whatever}” in that case to make it available to molest.
For me, I just ‘guessed’ that it would go in the next slot after ‘a’ which is ‘b’ and did a basic partition check with “file”. Again, if you don’t have the ‘file’ command installed, as root, do “apt-get install file”.
ems@OdroidN2:/T1/ext/Downloads$ file -s /dev/sdb1
/dev/sdb1: Linux rev 1.0 ext4 filesystem data, UUID=a738ae0c-b3ea-4fd9-947a-2cbfbf16116d (extents) (64bit) (large files) (huge files)
ems@OdroidN2:/T1/ext/Downloads$ file -s /dev/sdb2
/dev/sdb2: cannot open `/dev/sdb2' (No such file or directory)
ems@OdroidN2:/T1/ext/Downloads$ file -s /dev/sdb3
/dev/sdb3: cannot open `/dev/sdb3' (No such file or directory)
So this shows me there is only one partition, it is an ext4 type (so a linux is on it most likely), and I may want to have a bit of a think about nuking it if I don’t know for sure why I put that on it in the first place.
Looking at it with gparted:

gparted view of uSD
Here we can see that there’s something in the first partition for about 1 GB. That’s almost certainly a bare dd onto the chip of some system.img that has not been expanded into the whole chip. We can also see that there’s another 2.6 GB not allocated to anything (that can likely have that image in the first partition extended into it to give it some room to grow. Some systems do that automagically at first boot. For others, gparted has a ‘grow file system’ option.)
As I don’t remember what that image was, I’m briefly going to mount it, look it over, and then umount it so I can do things with it, or make a backup prior to nuking it.
So I “become root” via sudo bash, then check that I’ve got a mount point I can use. I typically make a directory named “/SD” for mounting SD cards, and in it have ‘ms’ for any Microsoft format partitions like Fat32 or NTFS and an ext directory for mounting linux partitions:
ems@OdroidN2:/T1/ext/Downloads$ cd /
ems@OdroidN2:/$ sudo bash
[sudo] password for ems:
root@OdroidN2:/# ls /
dev   lib         mmc  proc  sbin     srv  usr
SD       T1      bin   etc   lost+found  mnt  root
selinux  sys  var MACHINE_README  SG2      boot  home
media       opt  run       tmp
root@OdroidN2:/# ls /SD
ext  ms
Note that “MACHINE_README” is a file I put one on each chip to tell me what it is and what I used it for. This can make sorting out the chips easier So my working machine has one of those. Now lets mount the Mystery Chip and see what it has on it.
root@OdroidN2:/# mount /dev/sdb1 /SD/ext
root@OdroidN2:/# ls /SD/ext
bin   dev  home  lost+found  mnt  proc  run   selinux  sys  usr
boot  etc  lib   media       opt  root  sbin  srv      tmp  var
OK, no “MACHINE_README” so not likely anything I used for more than a test case.
root@OdroidN2:/# cat /SD/ext/etc/hostname
odroidxu4
root@OdroidN2:/# cat /SD/ext/etc/debian_version
10.5
So I did boot it up and gave it a name. It is for the Odroid XU4. Also it is a Debian of 10.5 version. Rather generic and relatively new. IIRC this was a test of a Beowulf install that worked, but I realized the chip was just way small for it. Checking the end of the password file for any user logins added:
root@OdroidN2:/# tail /SD/ext/etc/passwd
gnats:x:41:41:Gnats Bug-Reporting System (admin):/var/lib/gnats:/usr/sbin/nologin
nobody:x:65534:65534:nobody:/nonexistent:/usr/sbin/nologin
_apt:x:100:65534::/nonexistent:/usr/sbin/nologin
systemd-timesync:x:101:102:systemd Time Synchronization,,,:/run/systemd:/usr/sbin/nologin
systemd-network:x:102:103:systemd Network Management,,,:/run/systemd:/usr/sbin/nologin
systemd-resolve:x:103:104:systemd Resolver,,,:/run/systemd:/usr/sbin/nologin
messagebus:x:104:105::/nonexistent:/usr/sbin/nologin
_chrony:x:105:111:Chrony daemon,,,:/var/lib/chrony:/usr/sbin/nologin
avahi-autoipd:x:106:113:Avahi autoip daemon,,,:/var/lib/avahi-autoipd:/usr/sbin/nologin
sshd:x:107:65534::/run/sshd:/usr/sbin/nologin
No user logins. So never did do any add-user or anything really. My first step after test install is to do the adduser thing.
So pretty much I can know this is an experimental chip that’s not in use for anything at the moment. Good to go on the nuking it.
WHY spend so much time on how to “look over a chip”? Because once nuked, there’s no going back…
OK, now to stuff the image onto the chip:
root@OdroidN2:/T1/ext/XU4# df /SD/ext
Filesystem     1K-blocks   Used Available Use% Mounted on
/dev/sdb1        1148472 974348     97736  91% /SD/ext
root@OdroidN2:/T1/ext/XU4# umount /SD/ext
Now on THIS system we know the uSD card is at /dev/sdb and we want to overwrite the whole thing, not just a single partition, so we use that name without any number at the end. Note too that we had to ‘umount’ unmount the “disk” prior to writing the raw image to it.
root@OdroidN2:/T1/ext/RPiM3# dd bs=20M of=/dev/sdb if=devuan_ascii_2.0.0_arm64_raspi3.img
94+1 records in
94+1 records out
1982857216 bytes (2.0 GB, 1.8 GiB) copied, 235.628 s, 8.4 MB/s
That gives the basic Operating System installation. BUT, it doesn’t use the whole chip, nor does it ‘auto expand’ to use the whole chip as does Armbian. So first we launch gparted again, and tell it to grow the file system into the rest of the space available. I’ve done that, and captured images. They will be included a bit later for those unfamiliar with the process.
Essentially, the only ‘odd bit’ is you can’t just say “leave zero space after” as it assumes you want to do a MOVE instead of a GROW. So you have to find the “XXX MB max size” near the top of the panel and change the file system size number in the panel, then if you click on any of the other entries (like ‘free’ or whatever) you will see it change all the numbers appropriately. At that point you do the “accept” stuff and eventually click the green check mark at the top and it grows the file system.
Now I need to swap systems and boot it up. It will boot up into a simple root login where the default password for Devuan is “toor”. As the terminal is not as convenient as a full on windowing environment, the very first thing I do is:
apt-get update
apt-get upgrade
apt-get install task-lxde-desktop
That will install about 2.2 GB of “stuff” in 1108 files. Then you can reboot and launch a proper window environment and we’ll continue from there.
And… “only” 2 hours and 26 minutes later… a “apt install i2p” and an “apt-get install i2prouter” both failed to find a target. OK…
Looks like at least Devuan Ascii 2.0 didn’t bother to port it. Welcome to the world of REAL Systems Admin. This is when your boss asks you “You said it would be up in about an hour. It’s been 3 already. Why isn’t it up?” and you get to tell them that “I’m starting over from scratch with a different OS version as that one won’t do it”. And dread the 5 to 12 hours it would take to get it into their head that it isn’t always deterministic and there was no real good way to know in advance if it was there or not until you tried it… or pour through a listing of in-vs-out contents… But “it is what it is”, so, moving on.
Starting Over with Debian Buster – No Joy.
Pretty much everything above stays the same, but this time I’m going to try straight Debian.
https://raspi.debian.net/verified/20210210_raspi_3_buster.img.xz
Sidebar on Why: Why am I showing all this cruft and mistakes? Because this is what being a Systems Admin really is like, and when you are building systems and downloading operating systems and doing all this stuff, that’s exactly what you are. A Systems Administrator (and maybe a little bit of a Systems Programmer if you need to hack some stuff…). This is The Life. Deal with it…
So I did all that same stuff as above with this build here’s a sample:
ems@OdroidN2:/T1/ext/RPiM3$ file -s /dev/sdb1
/dev/sdb1: DOS/MBR boot sector, code offset 0x3c+2, OEM-ID "mkfs.fat", sectors/cluster 4, reserved sectors 4, root entries 512, Media descriptor 0xf8, sectors/FAT 256, sectors/track 32, heads 64, sectors 262144 (volumes > 32 MB), serial number 0xeea4304a, unlabeled, FAT (16 bit)
ems@OdroidN2:/T1/ext/RPiM3$ file -s /dev/sdb2
/dev/sdb2: Linux rev 1.0 ext4 filesystem data, UUID=589c7999-62be-47ac-8847-32b62fd9fdc9 (extents) (64bit) (large files) (huge files)
ems@OdroidN2:/T1/ext/RPiM3$ file -s /dev/sdb3
/dev/sdb3: cannot open `/dev/sdb3' (No such file or directory)
ems@OdroidN2:/T1/ext/RPiM3$
Then did the same dd onto the chip, booted it, and then did the same update stuff.
root@OdroidN2:/T1/ext/RPiM3# dd bs=20M of=/dev/sdb if=20210210_raspi_3_buster.img
75+0 records in
75+0 records out
1572864000 bytes (1.6 GB, 1.5 GiB) copied, 224.766 s, 7.0 MB/s
And One More Time we do the boot the chip, update, upgrade, install a windows environment and try the i2p install and find out in a few hours if it worked… But this time there wasn’t enough space on the uSD card.
So I got to do it all over AGAIN, but only doing “apt-get install lxde” and leaving out a bunch of the desktop stuff / applications. “Only” 782 files and 36 minutes…
It booted up nicely into the graphical interface. I installed ‘htop’ to monitor things with “apt-get install htop”, and launched it… and the system hung. Just went unresponsive. Long story short, it did this a couple of more times with a browser and a terminal window. So once again “moving on”…
There may well be a better build of Debian Buster out there somewhere, but I’ve not found it. Didn’t really look either. I don’t remember visiting raspi.debian before, then again things do change sometimes. Rather than looking for a better Debian source, I decided to just download Raspian and give it a go.
Raspberry Pi OS aka Raspian – it WORKED!
But not without some suffering. Again mostly related to the use of a 4 GB uSD card. This uSD card is also very slow so things like “apt-get upgrade” take time reading and writing it. I’d figured if Debian fit, Raspian ought to fit. It doesn’t.
Download OS from here:
https://www.raspberrypi.org/software/operating-systems/
Well, really, it BARELY does. But as soon as you do the update / upgrade it fills the space and you get a failed upgrade. I got to toss log files, Chromium browser, a couple of programming tools I never use, etc. then got the upgrade to complete. EVENTUALLY I got to where I could do the install of i2p.
It was simple and worked first time. Either put “sudo” in front of the first command, or just do “sudo bash” and then become root. Then it is just:
apt install i2p
It installs just fine. Next, you exit root and as a simple user, launch it:
i2prouter start
This starts the router and launches your default browser to finish the configuration. As I’d deleted Chromium, it launched Dillo that was unable to handle the ‘click a language hit next’. So I got to exit Dillo, do a “i2prouter stop”, and a “apt-get install firefox-esr” then launch the i2prouter again and was this time put into Firefox. Along the way, learned that FFox is about 1/2 the size of the 340 MB or so Chromium…
In the end, I had a nice running i2p router, on wifi to my “TV_net”, and a console open on FireFox. With about 38 MB (and shrinking) of free space. Have I mentioned you ought to use at least an 8 GB uSD card? :-{
So in summary, to run a Raspberry Pi i2p router, the easiest way to do it is simple. Get an 8 GB or larger uSD card, install Raspberry Pi OS aka Raspbian on it. As root do “apt install i2p” then start it running when the install finishes. Done that way, ought to be about an hour all told. Done my way was 2 days, on and off…
After some suitable time away from keyboard, I’ll look for a better Debian image and maybe give Ubuntu a try. I’ll also dig though my box of bits and find a 16 GB uSD card… or buy one.
![]() Subscribe to feed
Subscribe to feed
Здравствуйте.
Есть ли готовые решения для I2P роутеров? (Вроде, купил железку аля Raspberry Pi, поставил специальный дистр, который превращает эту железку в I2P роутер, с приятным веб-интерфейсом).
Есть ли нет (или есть, но с деревянными реализациями), стоит ли начать работать в этом направлении? (Речь идет об OpenSource).
-
Вопрос задан
-
5430 просмотров
Пригласить эксперта
Но ведь I2P-софт что качается с сайта, и есть реализация I2P-роутера. В чем, собственно, проблема-то?
Таких решений нет и вряд ли они кому-нибудь нужны. Уж поверьте. Вдруг вы в неё свою закладку поставите или мало ли что ещё. Это же не приставка для цифрового ТВ, а «программа» обеспечивающая вашу анонимность и приватность!
Стесняюсь спросить:
а что мешает взять железку «аля Raspberry Pi», накатить яву и поставить i2p с офсайта? На выходе вы получите «I2P роутер, с приятным веб-интерфейсом».
Есть готовое решение: https://freedombox.org
В комплекте OpenVPN, I2P, TOR и много чего еще. Работает на raspberry можно заставить ее работать как роутер.
-
Показать ещё
Загружается…
09 окт. 2023, в 20:31
30000 руб./за проект
09 окт. 2023, в 19:26
1500 руб./в час
09 окт. 2023, в 18:18
1000 руб./за проект
Минуточку внимания
Установка LAMP и создание I2P сайта на Raspberry Pi
а) Устанавливаем Apache + PHP:
sudo apt-get install apache2 php5 libapache2-mod-php5Делаем рестарт Apache:
sudo service apache2 restartТеперь введите IP-адрес Raspberry Pi и вы должны увидеть надпись на странице «It works!». Значит Apache установлен и работает.
Чтобы включить Htaccess нужно изменить конфиг файл:
sudo nano /etc/apache2/sites-enabled/000-defaultменяем везде строку
AllowOverride Noneна
AllowOverride ALLЖмем [Ctrl]+[X] затем Y проверяем путь и нажимаем Enter и еще раз перезагружаем Apache.
б) Установка MySQL-сервера:
sudo apt-get install mysql-server mysql-client php5-mysqlПосле установки пароля для root пользователя жмем Enter и ждем окончания установки.
в) Установка PhpMyAdmin:
sudo apt-get install phpmyadminВ процессе установки Вас попросят ввести пароль root пользователя (который мы установили в предыдущем пункте).
Это нужно чтобы установить свои таблицы с настройками.
Также Вас попросят установить пароль в админ панель базы данных.
После удачной установки вновь сделаем рестарт Apache.
Сделаем помощь Apache, подключив конфигурации для веб-сервера от phpmyadmin.
Для этого выполним:
sudo nano /etc/apache2/apache2.confИ в самый конец файла вставим:
Include /etc/phpmyadmin/apache.confЖмем [Ctrl]+[X] затем Y проверяем путь и подтверждаем Enter.
И опять повторно перезапускаем Apache.
Пробуем зайти в PMA (http://ip-адрес Raspberry Pi/phpmyadmin)
На этом установка LAMP завершена.
Перейдем к установке I2P и запуску сайта.
Скачиваем jar инсталятор.
cd /home/pi
wget https://geti2p.net/ru/download/0.9.11/https/download.i2p2.de/i2pinstall_0.9.11.jar/download
Далее в Paspberry Pi введите:
java -jar i2pinstall_0.9.11.jarP.S. Если вы попытаетесь установить его через SSH у вас ничего не выйдет.
Для установки через SSH:
java -jar i2pinstall_0.9.11.jar -consoleПосле успешной установки запустите I2P роутер:
/home/pi/i2p/i2prouter startИ дождитесь пока туннели не запустятся (это примерно 2 минуты).
После того как туннели запустятся переходим к запуску сайта.
а) Заходим в менеджер туннелей и находим кнопку — Новый серверный туннель: создать.
Нажимаем на ее, предварительно выбрав в выпадающем списке «HTTP».
б) В появившийся форме заполняем несколько полей:
- Название(N). Нужно для отображения в списке туннелей (назвать можно по любому, но чтобы не запутаться называем также как и домен сайта)
- Адрес(H). Оставляем неизменным: 127.0.0.1
- Порт(P). Также оставляем неизменным: 80
- Имя веб-сайта(W). Адрес сайта который вы будете использовать. Заполнять без http://
Поле Локальный адрес назначения(L) не заполнять, оно автоматически заполнится после создания тоннеля.
ВНИМАНИЕ! После создания туннеля сделайте бэкап файла указанного в поле Файл секретного ключа(k).
Этот файл, в котором будет храниться ключ, по которому генерируется адрес туннеля. Иначе, при его потере, вы потеряете доменное имя. Оно будет забито за вами, но вы не будете иметь к нему доступ.
Он находится в корне папки /home/pi/i2p
Также желательно поставить галочку возле Автозапуск(A). Это необходимо в случаи аварийного отключения света в доме или по другими причинам перезагрузки Raspberry Pi. В дальнейшем при запуске I2P данный туннель будет запущен автоматически.
Дальнейшие настройки не трогаем (пока что, если надо будет вы их измените в процессе эксплуатации сайта) и жмем внизу страницы кнопку «Сохранить».
Все серверный туннель вашего сайта создан.
Осталось положить файлы сайта в /var/www и все! Сайт полностью запущен в I2P сети.
Примечание. Необязательно выполнять. Нужно только тем администраторами, которые собираются хостить на Paspberry Pi несколько I2P сайтов. Для этого нужно произвести соответствующую настройку Apache Virtual Hosts.
Для этого выполните:
cd /etc/apache2/sites-available
sudo touch namei2psite // создали файл namei2psite (назвать можете как и домен сайта)
nano namei2psite
И вставим это содержимое:
    DocumentRoot /home/pi/www/namei2psite //путь к директории с сайтом
    ServerName namei2psite.i2p //url сайта

    Options FollowSymlinks
    AllowOverride All
Сохраним файл и выйдем из nano.
Теперь создадим для другого сайта.
Скопируем файл namei2psite:
sudo cp namei2psite namei2psite2И изменим строку DocumentRoot и Directory на папку где лежим сайт namei2psite2
Создадим симлинк (символическую ссылку на один файл в другой директории):
ln -s /etc/apache2/sites-available/namei2psite /etc/apache2/sites-enabled/namei2psite
ln -s /etc/apache2/sites-available/namei2psite2 /etc/apache2/sites-enabled/namei2psite2
После чего делаем рестарт Apache и сайты работают.
Примечание. Для лучшего понимания ОС, стоит добавить перенаправление созданного хоста на 127.0.0.1 в файл в /etc/hosts. Так мы укажем ОС, что сайт хостится у нас.
Добавите в конец файла:
127.0.0.1       namei2psite.i2p
127.0.0.1       namei2psite2.i2p
Делаем рестарт Apache.
На этом настройка и установка I2P сайта завершена.
Удачи в освоении I2P сети.
Иногда бывает что в доме отключают свет и после его включения Paspberry Pi запускается, но i2p router не запускается вместе с ним. Чтобы это исправить достаточно добавить в автозагрузку скрипт запуска роутера.
Делается это так:
sudo nano /etc/crontabИ в конец файла добавьте эту строчку:
@reboot pi /home/pi/i2p/i2prouter startПерезагрузите Paspberry Pi и проверьте что после его запуска i2p router сам запуститься.
0
1
В распберри
$ uname -a
Linux raspberrypi 3.2.27+ #250 PREEMPT Thu Oct 18 19:03:02 BST 2012 armv6l GNU/Linux
воткнул флешку и усб wifi, сделал чтоб по умолчанию коннектилось к домашней wifi сети, поставил transmission, проверил порт входящих соединений (роутер TPLink, uPnP) — все отлично, торренты раздает на ура, закачивает не очень быстро, но работает. Далее, поставил i2prouter, все нормально. Запускается:
i2prouter-nowrapper
далее, по top видно, что java кушает ресурсы, и по сети что-то гоняет.
Но вот как подключиться к консоли i2p роутера непонятно.
Нашел в ~/.i2p/clients.config такие строки:
clientApp.0.args=7657 ::1,192.168.1.102 ./webapps/
clientApp.1.args=sam.keys 192.168.1.102 7656 i2cp.tcp.host=192.168.1.102 i2cp.tcp.port=7654clientApp.4.args=http://192.168.1.102:7657/
тут 192.168.1.102 — это уже я прописал. Пробовал писать туда айпи распберри, айпи рабочего компа — в любом случае при открытии в браузере http://192.168.1.102:7657 — файрфокс не может установить соединение с сервером. Хотя на http://192.168.1.102:9091 — transmmisson коннектится нормально.
Что я делаю не так?
Если на рабочем буке в огнелисе добавить прокси с айпи распберри и портом 4444 — тоже не работает.

Privacy is a big thing for everyone online, so it stands to reason that you want to protect yourself when you’re at home and on the move. After several false starts, I’ve settled on a relatively cheap option that makes connecting all of my hardware safe at home and, more importantly, when I’m travelling by using a Raspberry Pi.
There is also the added convenience of having a single network — that all my devices already know and automatically connect to — for my devices to connect to, identifying as a “single device” when I connect to other networks. With my choice of hardware, I’m also able to power this via a portable battery bank which means airports, cafes or any other public Wi-Fi, not just hotels where I have mains power available, are usable with that same protection for my devices.
It’s important to note at this point that if you’re not comfortable using a command line interface and at least somewhat (not needing network engineer level) knowledgeable about networks, this probably isn’t a project for you at this stage.
What is it, and what do you get?
Once set up, you have a single device — The Raspberry Pi — to take with you and connect to any hotel or public Wi-Fi, that the re-broadcasts a separate SSID utilising OpenWRT for you to connect to. Once connected, all of your traffic will be routed through your chosen VPN, encrypting and protecting your traffic from prying eyes.
What you need
You can make this as simple or as complex as you want to, but today we’ll make this as simple as possible. As a starting point, you’ll need to purchase some hardware:
- A Raspberry Pi (anything from a model 3 up will do)
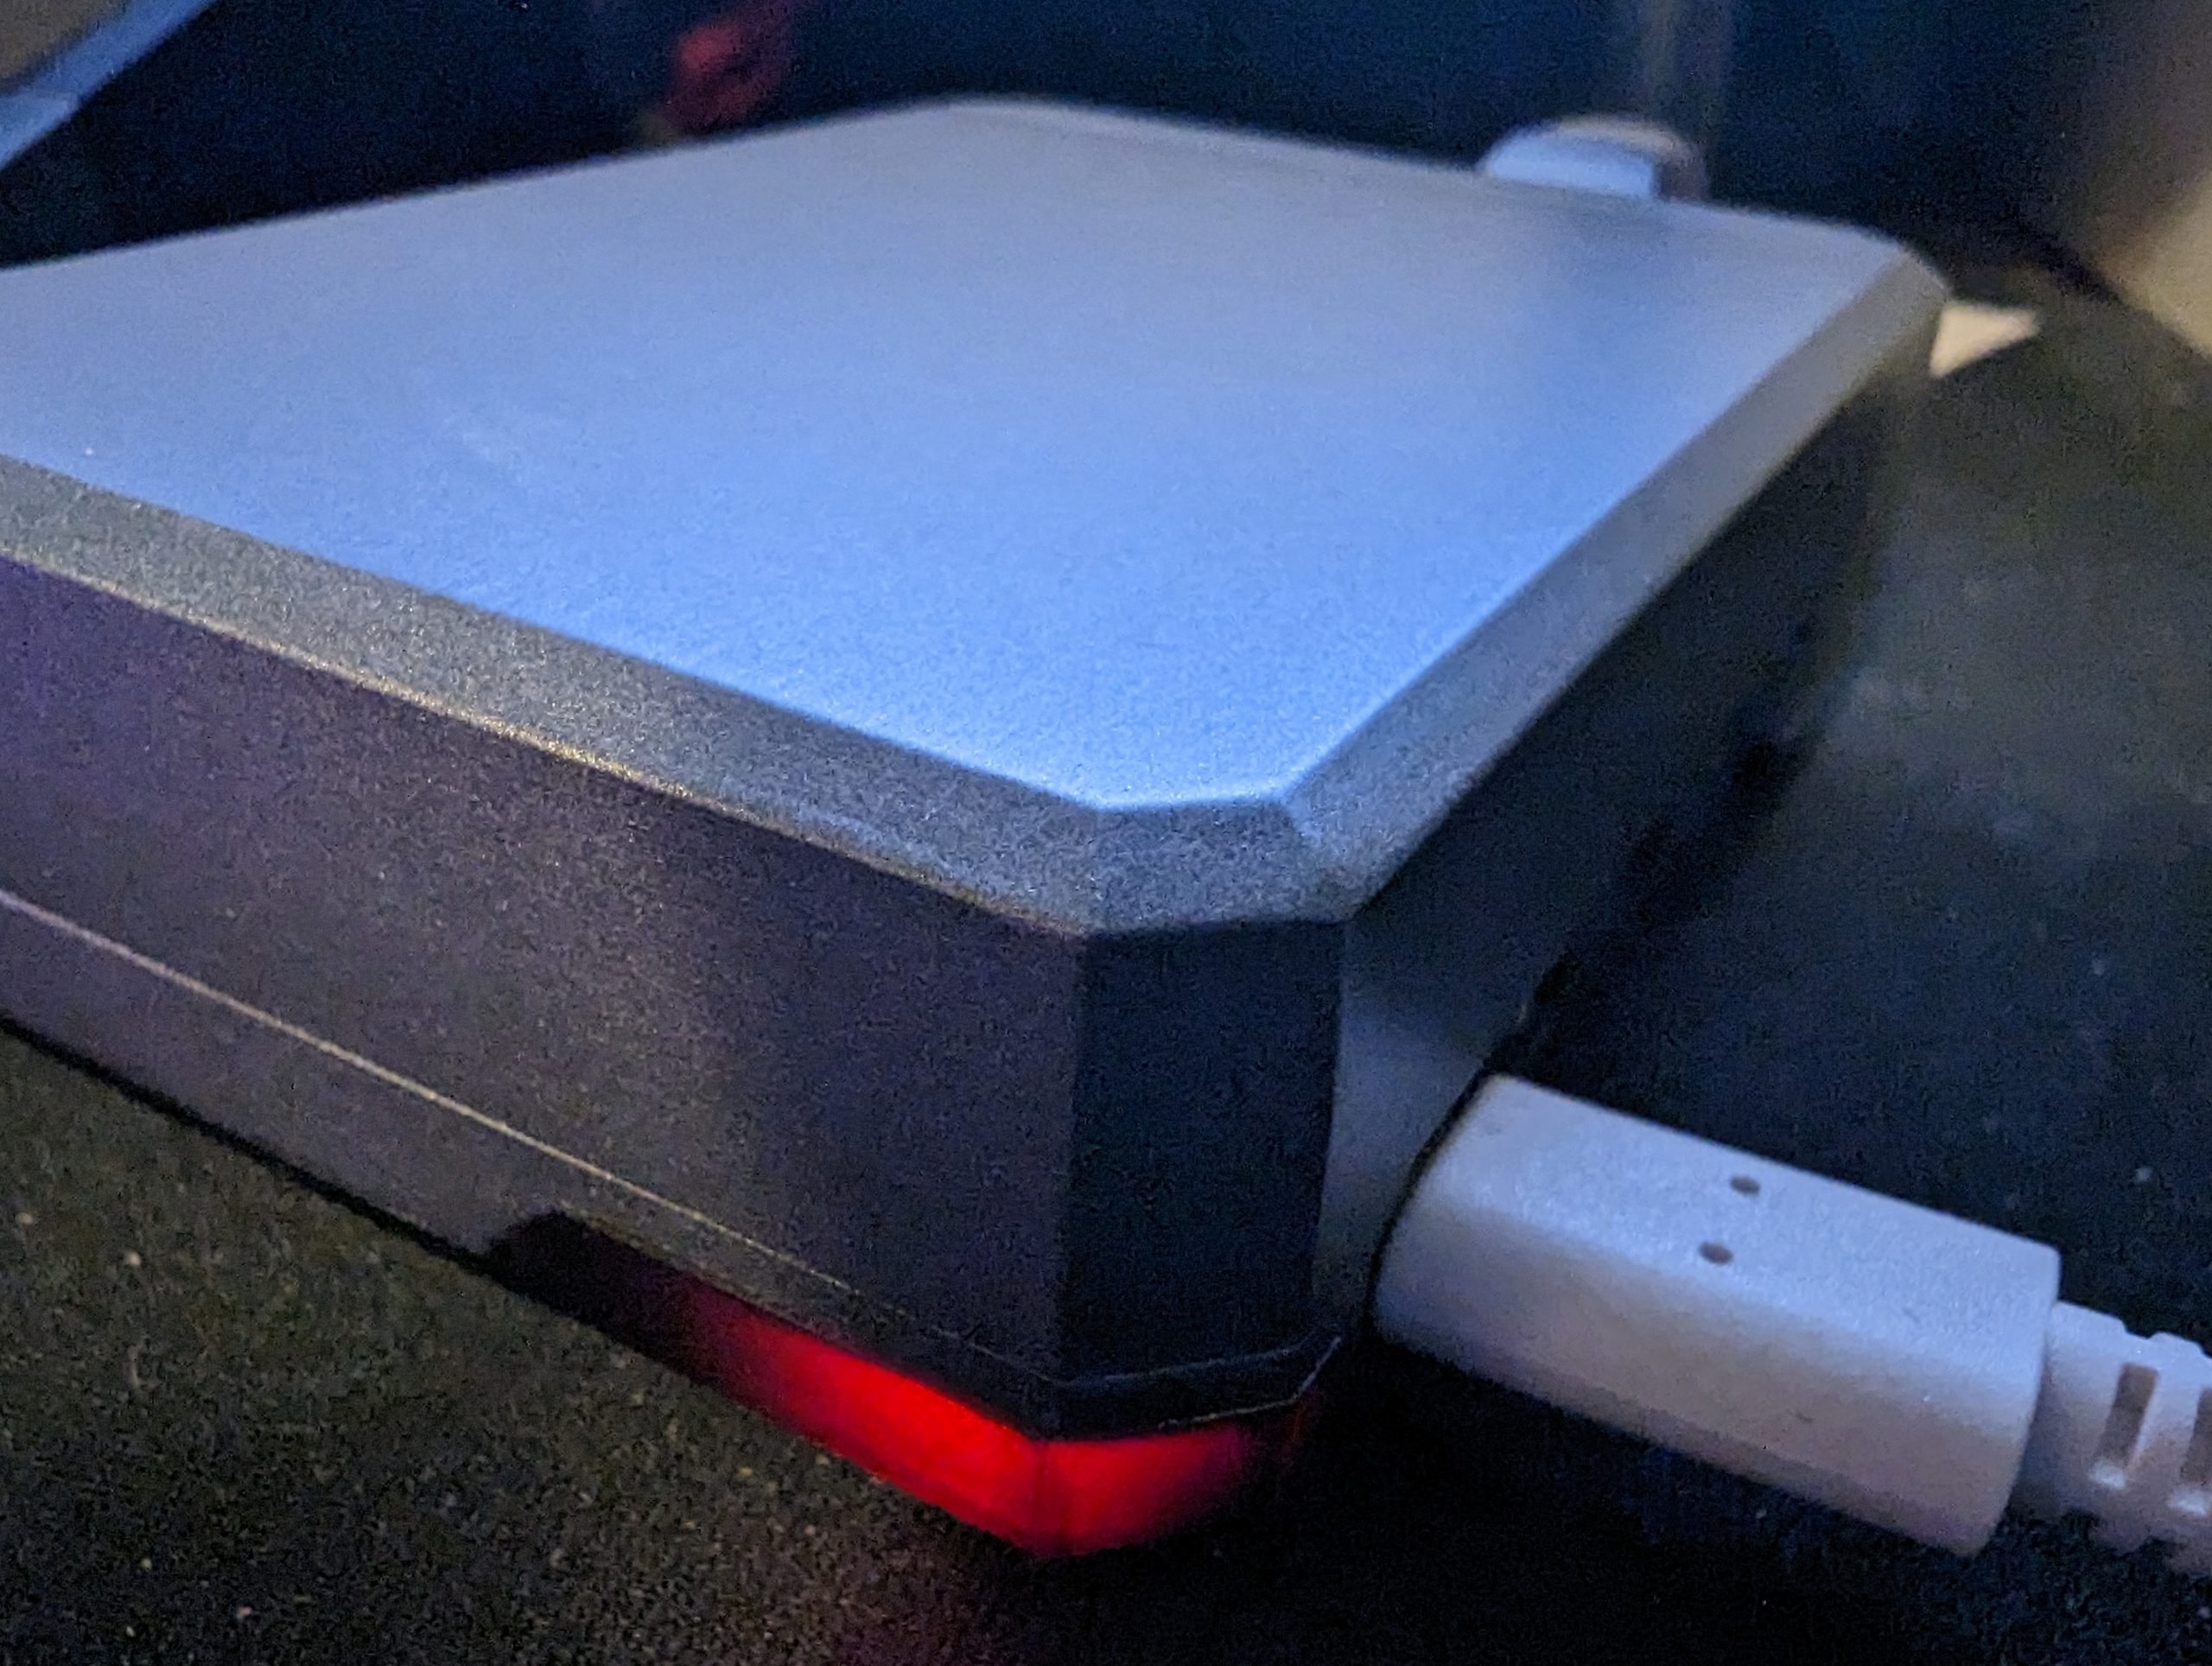
- A suitable case
- A 32GB MicroSD card
- A suitable power supply for portable use — more on this later — and a mains power pack
- An SD Card reader for your computer or laptop
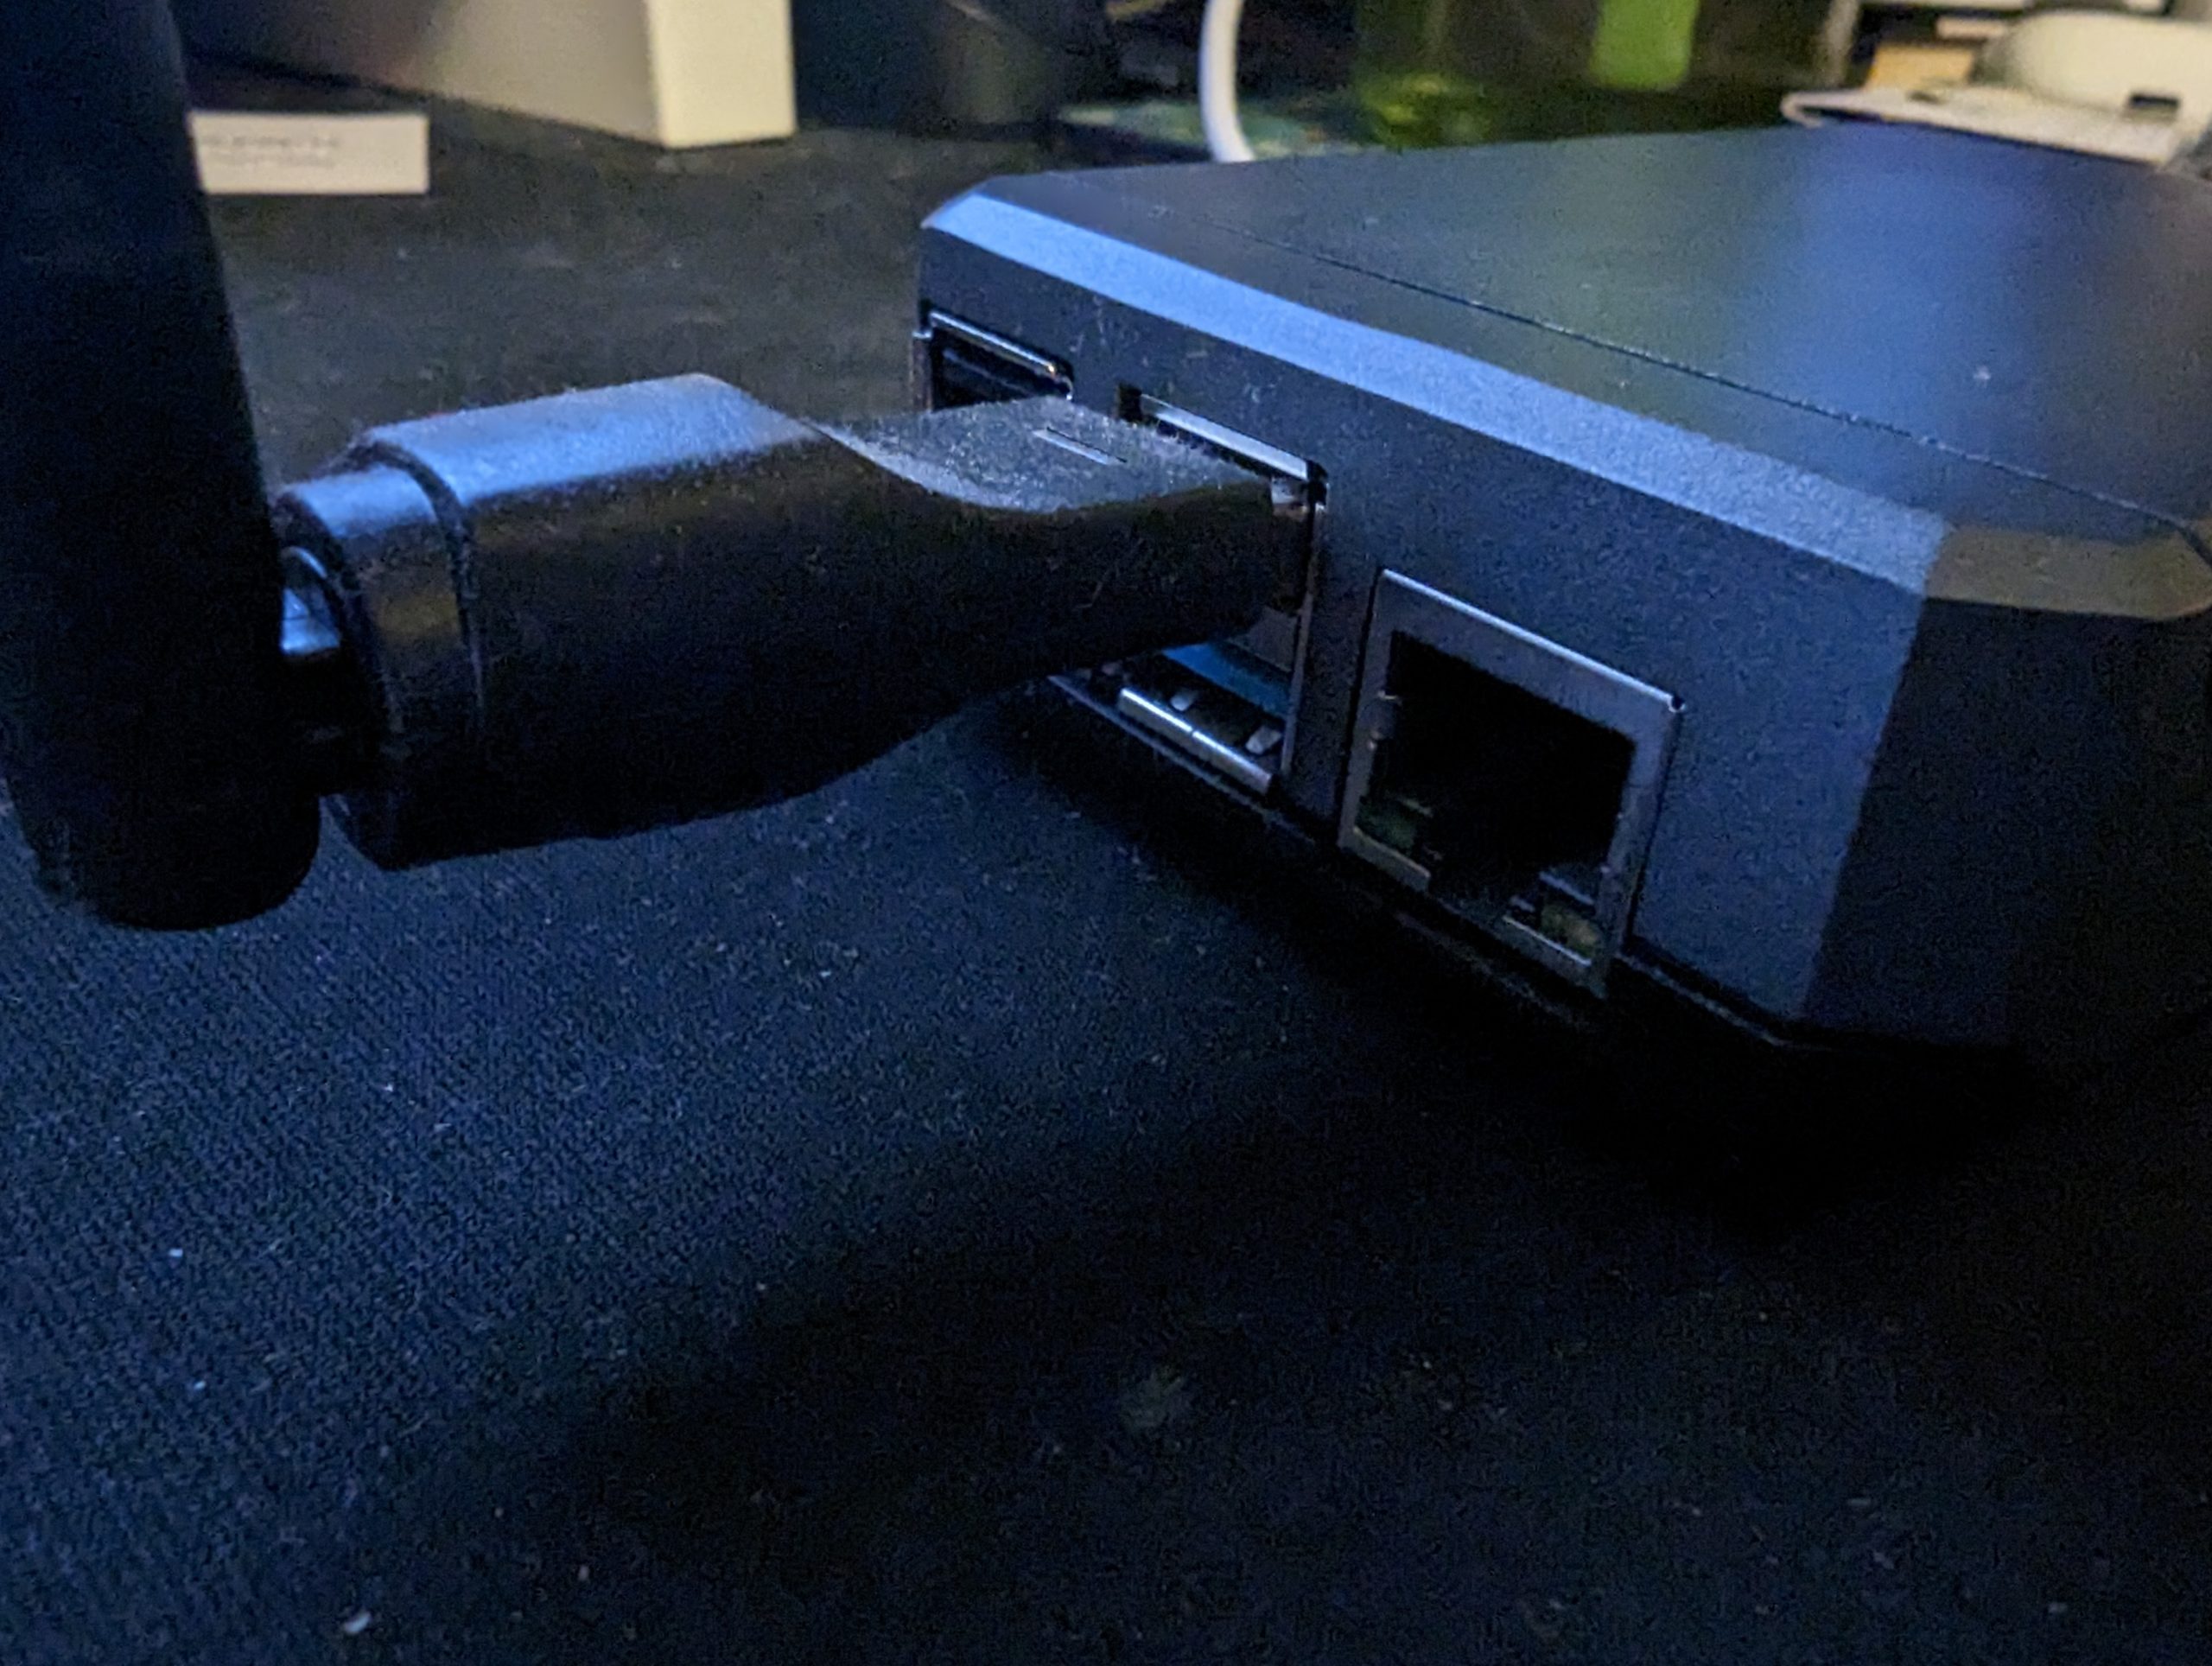
- An adaptor to give you a second Wi-Fi network
With this in hand, you’ve got everything you need to set up your own travel router with an automatically connecting VPN to protect all of your devices while you’re on the move.
Dual Wi-Fi, OpenWRT and VPN: The setup
You can skip this bit if you’ve previously installed a downloaded image on Raspberry Pi. For anyone who hasn’t, you can check out the install guide on RaspberryPi.org. The process has become significantly easier over the past couple of years, now requiring minimal technical knowledge to get started.
You’ll need to install the version of OpenWRT appropriate to your Raspberry Pi by using the Raspberry Pi Imager. Once you’ve got your card in the reader and the imager open, it’s a case of identifying the download file, the SD card and hit write.

The next step is to put the SD Card in your Raspberry Pi, boot it up and start the fun.
Login and basic setup
There are several ways to handle the initial setup for your OpenWRT Raspberry Pi. Perhaps the easiest would be to plug it into your monitor, keyboard and mouse. But if you can either jump into your router or use a network scanning tool, you can identify the IP of your Raspberry Pi and complete the set-up via command line install if you don’t have spare peripherals or simply prefer this option.
To complete this, you can connect via your preferred interface, whether that’s power shell on windows, Putty or any of the many SSH clients for Windows, Mac and Linux. You’ll need to make basic changes to your Raspberry Pi’s interface to access it because it will have DCHP turned on by default. This is a good thing for the intended use of OpenWRT but not so great for our purposes during installation: While entertaining at times, DHCP wars isn’t a game you’ll typically win.
A couple of notes: By default, your Raspberry Pi will have a default IP of 192.168.1.1 which will likely cause short-term problems because; if you’re using the default DHCP setup on your home router, then this is probably the IP of your router.
If you’re not using the default setup, it won’t match your IP range and you may be unable to connect.
So you’ll need to either:
- Manually assign an IP to the machine you’re working from
- Turn your router (and internet – EEEEP!) off while you set this up
- Directly connect your working machine to the Raspberry Pi
In my case, this was a USB to Ethernet adaptor connected from my laptop to the Raspberry Pi while still connected to the Internet via Wi-Fi. One way or the other, you need an IP in the 192.168.1.X range with the default gateway becoming 192.168.1.1
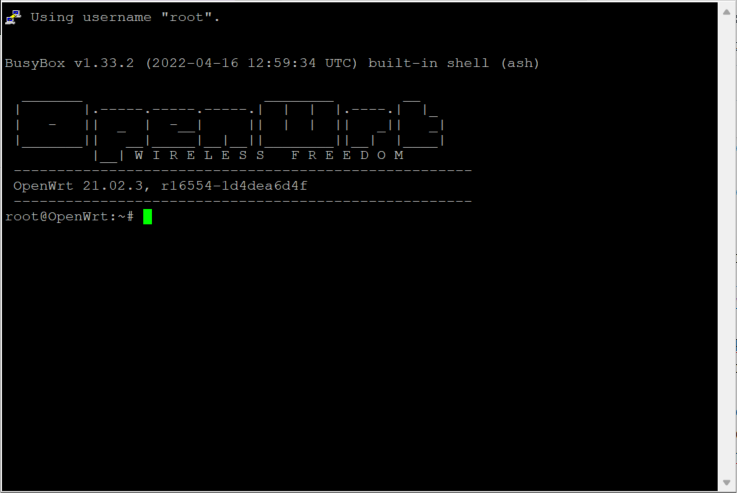
Once you have an IP in the correct address range, you can SSH into the machine with the default username root and get ready to start the detailed setup. A quick point of note is that there won’t be any password for SSH or access to the web interface at this point: Change that before you do anything else!
The next trick is configuring some of the network interface changes needed starting in the /etc/config/network file.
Network setup
Under the config interface ‘lan’ you’ll need to add a single setting and — personal preference — change the default IP range. Then configure two new interfaces, one for your WAN connection to the Raspberry Pi, one for your VPN.
The LAN changes
I prefer not to have any of the networks I have control over running the most common IP ranges as mentioned earlier: 192.168.1.X so I change it. In this case I’ve changed it to 10.10.10.X and added the option to force link (keeps the link live even if the device isn’t connected to the web) which is important later.
New interfaces to add
The two interfaces to add are for your WAN and VPN links, mine look like this: Feel free to simply copy and paste them.
config interface ‘outwan’
option proto ‘dhcp’
option peerdns ‘0’
option dns ‘8.8.8.8 1.1.1.1’
Simply put, outwan is the name I chose for the interface, and it is the outbound interface that will connect the Raspberry Pi to the Internet. It will take its IP address from the DHCP server it connects to. On the tail of this, the DNS option tells the Pi to ignore the DNS provided by the router and use 8.8.8.8 (Google) and 1.1.1.1 (Cloudflare).
The second is to add an interface for VPN which we’ll configure in detail later.
config interface ‘vpn’
option ifname ‘tun0’
option proto ‘none’
This creates an interface for us to use for the VPN to connect automatically when the Internet is online later.
The last step at this stage is to make a quick change to the /etc/config/firewall file and change the setting of REJECT to ACCEPT under config zone ‘wan’ for option input. This will allow traffic through from the outside connection and that’s important if you want Internet traffic flow.

Once you’ve saved these changes, you can undo any manual network changes you made to your setup and reboot your Raspberry Pi. At this point, you can log into your Raspberry Pi and use the root login to access the web interface if you want to complete the installation here. I’m reasonably comfortable in CLI and tried to challenge myself as I’m still learning a lot about the Linux world, so I stuck with doing the installation via SSH.
In theory, the Raspberry Pi now has DHCP running and will assign your machine an IP address once it has rebooted. You’ll need to keep your machine segregated from the rest of your network for a short while longer, though…
Wi-Fi setup
If you continue in the command line here, remember that your Raspberry Pi has now changed IP address. You’ll need to connect your Raspberry Pi to your Internet to grab drivers for the next step. To achieve this, you’ll need to make a few little changes to the wireless configuration.
Your specific needs may vary depending on the hardware you purchased, but for me, I needed to do a few things, including:
Install the drivers: opkg install kmod-rt2800-lib kmod-rt2800-usb kmod-rt2x00-lib kmod-rt2x00-usb kmod-usb-core kmod-usb-uhci kmod-usb-ohci kmod-usb2 usbutils openvpn-openssl luci-app-openvpn nano
I’m unsure whether it was the combination or one of the specific drivers above, but it’s now working.
I had a horrible time with this next section, so I messed around with my home network to hardwire the Raspberry Pi and still have Internet access. I eventually worked around the issue through the help of OpenWRT documentation and doing some extensive Googling for the USB Wi-Fi adaptor I purchased.
I then had to edit /etc/config/wireless, adding the following lines under ‘radio1’ to enforce a connection mode for the wireless hardware and disable guard interval which, for this use case, won’t make any discernible difference to performance.
option hwmode ’11a’
option short_gi_40 ‘0’
You’ll also need to change the existing line as follows to enable the interface and make sure its high throughput is 20MHz for the 802.11n USB stick I purchased
option htmode ‘HT20’
option disabled ‘0’
Once you’ve done this, save the changes, reboot your Raspberry Pi and plug in your USB Wi-Fi adaptor.
Then you’ll need to ensure the two wireless interfaces are configured correctly. One is for your devices (laptop, phone, tablet etc) to connect to your Raspberry Pi, and the other is for your Raspberry Pi to connect to the Wi-Fi wherever you happen to be.
For me (with sensitive information removed), the interfaces look like this in the /etc/config/wireless file; aside from SSID and passwords, this was automatically populated for me.
For the connection to the RaspberryPi:
config wifi-iface ‘default_radio1’
option device ‘radio1’
option network ‘lan’
option mode ‘ap’
option ssid ‘Your_Network_Name_here’
option encryption ‘psk2’
option key ‘Your_Password_goes_here’
For the RaspberryPi to connect to other networks:
config wifi-iface ‘wifinet1’
option device ‘radio0’
option mode ‘sta’
option network ‘wwan’
option ssid ‘Connected-WiFi-SSID’
option encryption ‘psk2’
option key ‘Password_for_WiFi’
Now your interfaces are configured in OpenWRT, your hardware is connected and wireless networks are sorted out.
You should be able to save your network changes by entering uci commit wireless followed by wifi into the command line; these commands save the interface and start the Wi-Fi with your new settings. At this point, you can connect to the Wi-Fi you’ve created and — assuming you’ve connected it to your home Wi-Fi — use your Raspberry Pi that you’ve just configured as a router – Well done!
This is where a little forethought comes into play. I’ve saved the web interface for OpenWRT in my browser so I can easily connect anytime I fire up the device. This will allow me to quickly change the connected Wi-Fi to hotels, cafes or other networks I may be near at the time.
The next step, though, takes it from a functional device to a safe and functional option for a travel router: Adding a permanent, automatically connecting VPN connection.
VPN Configuration
I’ve used a few providers over time, but for a while now have been using NordVPN — **not sponsored** — and if you’re yet to get a VPN and are keen, feel free to use my referral link. Becasue NordVPN is my current provider, that’s how this setup will progress. Other providers may have some setting differences that you’ll need to consult their documentation on.
This is where I confess my mistake…
I had already completed a chunk of the NordVPN installation prior to locating it, but I ended up using the documentation here as a guide to overcome a couple of minor issues with connectivity. The guide above is quick and simple, if I had my time over; I’d use that as a starting point instead of overcomplicating things for myself.
Again, if you’re more comfortable in the web interface, head there and complete the instruction set that Nord has provided.
NordVPN has a server selector that allows you to choose an individual server based on your needs. Once you’ve located one that you’re happy with, grab the UDP config file to your machine and copy it — use SCP, it’s quick and easy — to your Raspberry Pi and, for the sake of easy setup of the final steps, change the name to something meaningful like VPN.conf or client.conf which you’ll be able to customise later.
There’s a bit of a “gotcha” here that — the above-listed documentation identified — will undoubtedly catch a few people out, myself included when connecting to Nord VPN services.
If you’re using Google Sign-in services with 2FA (as you should be!) for your VPN service, then your username and password won’t work on this setup. You’ll need to log in to the account webpage and get the “Manual Setup” username and password. These details will need to be entered in a new file on your device, which I’ve called client.auth (stored in /etc/openvpn alongside client.conf) and referenced as auth-user-pass client.auth within the client.conf file with the username on one line and the password on the second.
Once you’ve completed the VPN instructions, your set is complete, and your router is ready.
This has been an exciting and enjoyable project to put together. As part of that learning, I’ve made mistakes and learned a lot along the way; I wanted to thank everyone (there are too many to list) who has helped by sharing their knowledge.
This article is not sponsored by any of the companies mentioned within it; these are simply the hardware and service choices I made along the way. Given the continued shortage of Raspberry Pi hardware, I may invest in other options with good availability and do some further testing with them.
What fun projects like this would you like to see us tackle next?
- DEVICES
- Raspberry Pi 4
- COMPANIES
- OpenWRT
- Raspberry Pi