Get rid of the stop code Hypervisor error on Windows 11 in 4 steps
by Sonia Martin
Sonia is a tech enthusiast that fell in love with Windows after having experienced working on a different OS. Being above all, a down-to-earth kind of person, she… read more
Updated on
- Powered by Microsoft, Hyper-V is the go-to technology to create and manage virtual machines with ease.
- However, users reported that the Hypervisor is not running in Windows 11 as it should.
- It might be anything from incorrect settings to missing updates that trigger the Windows 11 Hypervisor error.
- Don’t worry, we’ll show you how to promptly identify the culprit and apply the proper fixes.
XINSTALL BY CLICKING THE DOWNLOAD
FILE
The hypervisor is Microsoft’s very own technology that enables users to create and manage virtual machines.
From creating and removing virtual machines, and backups, to maintaining performance, and allocating resources, this miraculous tool does it all. Let’s take a closer look.
What is Hypervisor error?
A hypervisor is a piece of software that can generate and operate virtual machines. It is often referred to as a virtual machine monitor, or VMM (VMs).
By essentially dividing up the host computer’s resources, like as memory and processing power, a hypervisor makes it possible for a single computer to host numerous guest virtual machines.
How we test, review and rate?
We have worked for the past 6 months on building a new review system on how we produce content. Using it, we have subsequently redone most of our articles to provide actual hands-on expertise on the guides we made.
For more details you can read how we test, review, and rate at WindowsReport.
What causes Hypervisor error?
- Outdated Drivers
- Missing or failed Windows updates
- Bad disk sectors
- Corrupted Files
- Incorrect or conflictual settings
How can I fix the Hypervisor error in Windows 11?
- What causes Hypervisor error?
- How can I fix the Hypervisor error in Windows 11?
- 1. Check if your CPU supports virtualization and enable it in BIOS
- 2. Update your drivers
- 3. Restart the corresponding service
- 4. Use Command Prompt
Before moving on to more complex troubleshooting steps, try the following:
- Reinstall the Hyper-V feature from Windows Features
- Install the latest Windows updates or on the contrary, uninstall problematic updates if the Hypervisor error appeared after performing this operation (Here’s how to easily uninstall updates in Windows 11)
- Update your BIOS (If you need help, we prepared a step-by-step guide to show you how to enter and update your BIOS in Windows 11)
- Use the built-in tools to scan your disks for signs of corruption: chkdsk C: /f /r /x
- Use System Restore to turn Windows to a previous state in which the Hypervisor worked
- Try a third-party solution such as WMware Workstation and forget all about Hyper-V not running in Windows 11
1. Check if your CPU supports virtualization and enable it in BIOS
An easy way to fix Hypervisor error in Windows 11 is to check if your CPU supports virtualization and then to enable it in BIOS. Here’s how to do it:
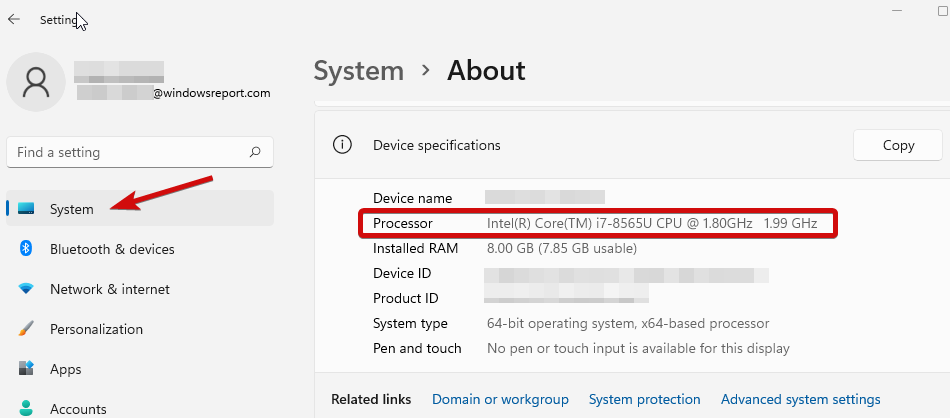
- To fix the Windows 11 Hypervisor error blue screen, open the Settings app and head over to the System section.
2. Under Device specifications, check the details corresponding to your processor.
3. Next, go to the manufacturer’s site and check that your CPU supports virtualization (use the exact details you obtained during the previous step).
4. If it does, you’ll need to make sure that virtualization is enabled in your BIOS.
5. To do that, access your BIOS (If you need help, here’s how to enter BIOS on a Windows PC).
6. Click on Advanced Mode, then go to the Advanced tab.
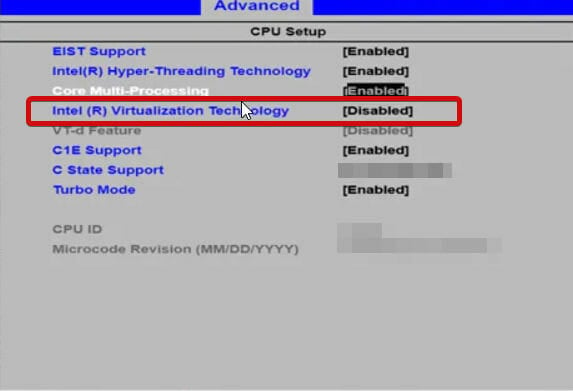
7. Select CPU Setup/Configuration and set Intel R Virtualization Technology (for Intel) or SVM Mode (for AMD) to Enabled.
8. Make sure you save the changes before you exit this screen.
2. Update your drivers
Missing or otherwise faulty drivers are notorious suspects when it comes to system errors such as stop code Hypervisor error in Windows 11. Keeping them in good shape is essential regardless of the version of Windows you’re currently running.
Now, there are numerous methods to update your drivers in Windows 11, but we reckon nothing beats an automatic tool that does the job for you. It’s quicker, more accurate and it saves you a lot of headaches.
Sometimes, malfunctioning drivers can cause multiple system errors. If this happens to your PC, you may need to update or reinstall certain drivers entirely. As the process is not quite straightforward, we recommend using a reliable driver updater for the job.
Here’s how to do it:
- Download and install Outbyte Driver Updater.
- Launch the software.
- Wait for the app to detect all faulty drivers.

- Now, it will show you all the malfunctioning drivers listed to select the ones to Update or Ignore.
- Click on Update & Apply Selected to download and install the newest versions.
- Restart your PC to ensure the applied changes.


Outbyte Driver Updater
Secure your Windows PC with Outbyte from various errors caused by problematic drivers.
Disclaimer: this program needs to be upgraded from the free version in order to perform some specific actions.
3. Restart the corresponding service
- Hold the Windows key and type R to open the Run dialog box.
- Type in services.msc and hit Enter.
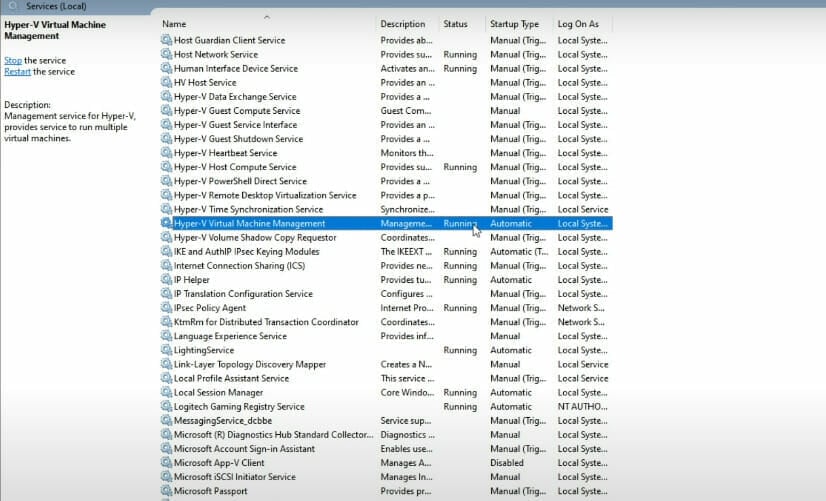
- In the list, locate the Hyper-V Virtual Machine Management.

- Right-click on this entry and if it is running, select Stop.
- Finally, restart the service and check it it helped solve the Can’t start because Hypervisor is not running in Windows 11.
- Fix: Hypervisor is not running on Windows 10
- How to install Hyper-V in Windows 11
- How to disable Hyper-V in Windows 11
- 5+ best virtual machines for Windows 10/11
- Fix: Can’t Install Hyper-V in Windows 10
4. Use Command Prompt
- Open the Command prompt with administrative priviledges.

- In the new window, type the following command and press Enter:
bcdedit /set hypervisorlaunchtype auto
- Restart and check to see if it is working correctly.

After that is how you can easily fix the hypervisor_error on Windows 11. While it’s a common error, sometimes it can be challenging to properly solve it. If you encounter any connection errors on the way, be sure to check our article about Hyper-V not connecting on Windows 11.
We’ve also dealt with the hypervisor error on Windows 10 and solved it in just a few steps, but if you’ve found a simpler fix, please leave it in the comments section below and we’ll be sure to check it out.
![]()
Категория: программы
Исправьте эту ошибку BSOD с помощью этих советов для Windows 10 и 11.
Стоп-код синего экрана Windows HYPERVISOR_ERROR мучает многих пользователей Windows.
Если вы тоже столкнулись с этой ошибкой, вы пришли по адресу.
Читайте далее, чтобы узнать, что такое ошибка «синий экран смерти» и возможные способы устранения HYPERVISOR_ERROR в Windows 10 и 11.
Что такое синий экран смерти в Windows?
Синий экран смерти (BSOD) — это ошибка, которая заставляет каждого пользователя Windows беспокоиться о состоянии своего ПК с Windows.
Обычно она характеризуется тем, что на ваш компьютер внезапно нападает синий экран с улыбающимся смайликом и кодом ошибки.
Если вы недавно столкнулись с этой ошибкой, это означает, что ваш ПК с Windows столкнулся с фатальной ошибкой и должен завершить работу всех программ и служб, чтобы предотвратить дальнейшее повреждение.
Как аппаратные, так и программные проблемы могут привести к появлению синего экрана Windows.
Возможно, у вашего ПК проблема с неработающей оперативной памятью или жестким диском или даже перегрев.
Чаще всего пользователи сталкиваются с ошибками синего экрана во время планового обновления Windows или после изменения конфигурации системы.
Лучшим способом выявить причину синего экрана вашего компьютера является стоп-код ошибки.
Стандартные коды ошибок синего экрана включают в себя CRITICAL_PROCESS_DIED и DPC_WATCHDOG_VIOLATION, а также HYPERVISOR_ERROR.
Что такое ошибка синего экрана HYPERVISOR_ERROR в Windows 10 и 11?
Стоп-код HYPERVISOR_ERROR указывает на проблему с программным обеспечением виртуализации Hypervisor в Windows 10 и 11.
Платформа гипервизора Windows (Hyper-V) позволяет пользователям запускать и управлять виртуальными машинами на ПК с Windows.
С помощью функции Windows Hyper-V вы можете запускать дистрибутивы Linux через VirtualBox или VMware и даже запускать Android или iOS на Windows.
Если вы столкнулись со стоп-кодом ошибки Hypervisor BSOD, возможно, проблема в конфигурации программного обеспечения вашей системы.
Синий экран Hyper-V обычно вызывается неправильными настройками Hyper-V, проблемами с памятью компьютера, поврежденными секторами данных и даже устаревшими драйверами.
К счастью, мы составили список возможных способов устранения ошибки Hypervisor Blue Screen.
Поскольку причин возникновения ошибки может быть несколько, мы рекомендуем попробовать различные способы устранения, чтобы помочь решить проблему.
Как исправить ошибку «Синий экран гипервизора» в Windows 10 и 11
Существует несколько возможных способов устранения ошибки синего экрана Hyper-V в Windows.
Для устранения ошибки синего экрана вам не потребуется устанавливать стороннюю диагностическую службу или программу для устранения неполадок.
1. Убедитесь, что Hyper-V включен
Возможно, Windows Hyper-V неправильно настроена на вашем компьютере, что приводит к сбою.
Перезапуск функции Hyper-V иногда может быть самым простым решением проблемы с ошибкой синего экрана.
Вот как можно перезапустить Hyper-V в Windows 10 и 11:
Нажмите Win + R, чтобы открыть диалоговое окно «Выполнить».
В поле Open: введите optionalfeatures и нажмите OK.
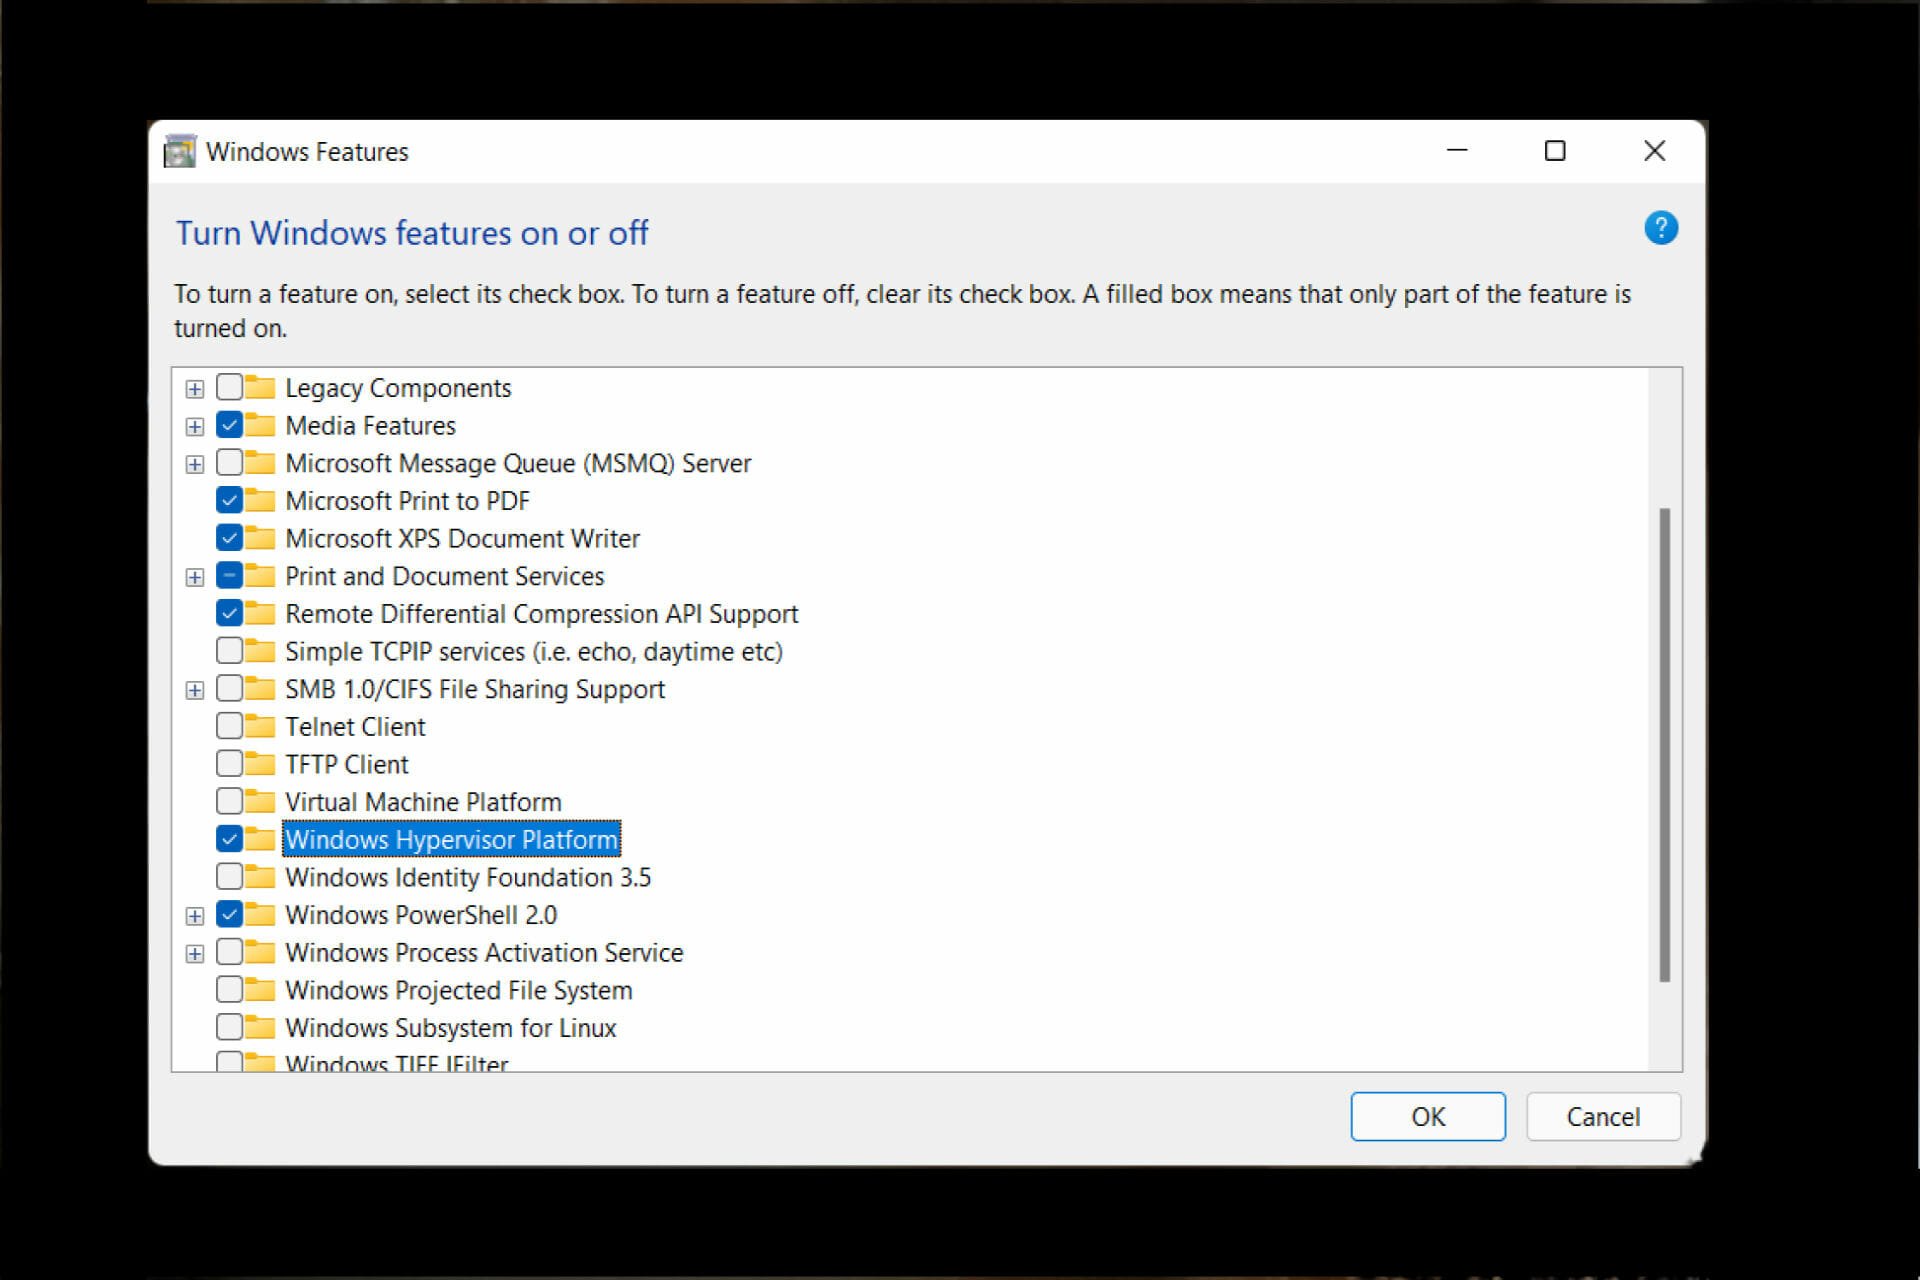
Во всплывающем окне «Возможности Windows» прокрутите страницу, чтобы найти Hyper-V.
Если он уже включен, снимите флажок. Если опция не отмечена, выберите ее и нажмите OK.
При появлении запроса разрешите Windows перезагрузиться, чтобы изменения вступили в силу.
2. Используйте программу Windows Memory Diagnostics
Программа диагностики памяти Windows автоматически сканирует основную память (RAM) компьютера и выявляет потенциальные проблемы.
После обнаружения проблем операционная система автоматически попытается их устранить.
Если синий экран Hyper-V вызван неисправной оперативной памятью или SSD/HDD, утилита Windows Memory Diagnostic — лучший способ устранить проблему.
Чтобы воспользоваться утилитой Windows Memory Diagnostics в Windows 10 и 11, выполните следующие действия:
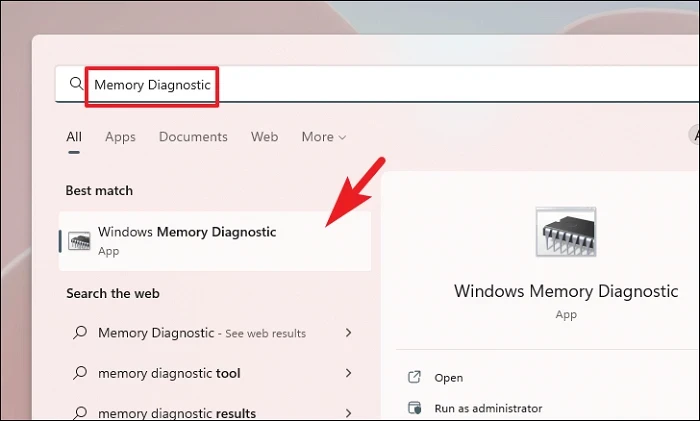
Запустите меню «Пуск», найдите «Диагностика памяти Windows» и выберите «Лучший вариант».
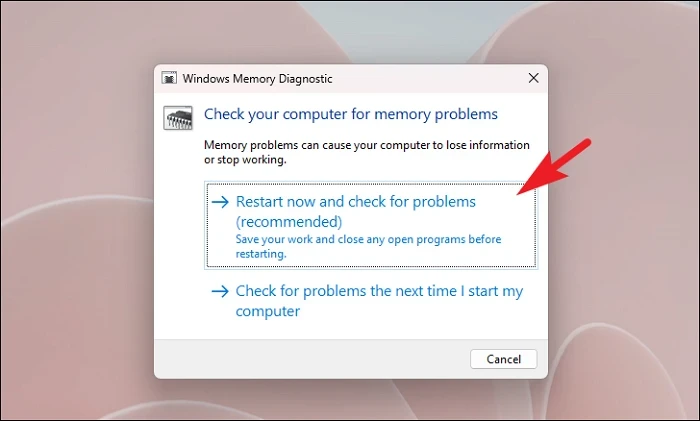
После сохранения всех открытых файлов выберите Перезагрузить сейчас и проверить наличие проблем (рекомендуется).
После этого ПК с Windows перезагрузится и просканирует модули памяти на наличие проблем.
После завершения сканирования Windows загрузится автоматически.
3. Перезапустите службу Hyper-V
ОС Windows полагается на фоновые и фоновые службы для обеспечения синхронизации и нормальной работы оборудования и программного обеспечения.
Проблемы с конфигурацией службы Windows могут привести к сбоям BSOD.
Мы рекомендуем перезапустить службу виртуализации Hyper-V, чтобы устранить ошибку синего экрана:
Запустите меню Пуск, выполните поиск служб и выберите Лучшее соответствие.
Прокрутите, чтобы найти службу Hyper-V Virtual Machine Management или Hyper-V Remote Desktop Virtualization.
Щелкните службу правой кнопкой мыши и выберите Остановить.
Через несколько минут щелкните службу правой кнопкой мыши и выберите Запустить.
Перезагрузите компьютер, чтобы изменения вступили в силу.
4. Обновите драйверы и Windows
Устаревшие драйверы являются основной причиной проблем с синим экраном.
Мы настоятельно рекомендуем обновить драйверы ваших устройств до последних возможных версий.
Обычно ошибка синего экрана Hyper-V возникает, если драйверы дисплея, контроллеры памяти или системные устройства имеют устаревший неисправный драйвер.
Вы можете обновить драйверы устройств через Device Manager.
Проверьте наличие обновления Windows
Что еще более важно, вы должны убедиться, что в вашей системе установлены последние обновления Windows.
Повторяющиеся обновления Windows могут быть неприятны, но они помогают поддерживать стабильность и оптимальную работу системы.
Вы можете перейти в Настройки > Обновление Windows, чтобы установить все доступные обновления.
5. Сканирование обслуживания образа развертывания
Если на вашем компьютере повреждены системные файлы, они могут привести к сбою в работе функции Hyper-V, вызывая ошибку синего экрана.
Если образ ОС Windows поврежден, необходимо немедленно его восстановить.
Хотя это может показаться сложным, все, что вам нужно сделать, это запустить Deployment Image Servicing Scan через терминал Windows или командную строку.
Выполните следующие шаги, чтобы выполнить сканирование Deployment Image Servicing Scan в Windows 10 и 11:
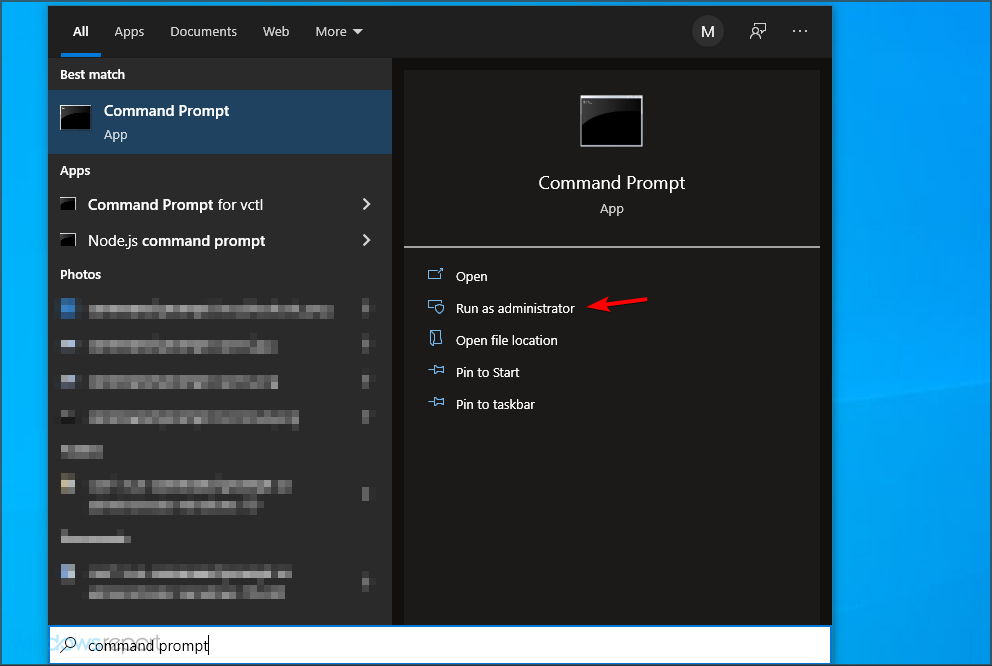
Запустите меню Пуск, найдите Терминал или Командную строку, щелкните правой кнопкой мыши результат и запустите его от имени администратора.
Введите следующую команду в окне терминала и нажмите Enter.
DISM.exe /Online /Cleanup-image /Restorehealth
Перезагрузите компьютер после завершения сканирования.
Устранение ошибки синего экрана Windows Hyper-V
Функция Windows Hyper-V может дать сбой и вызвать призрачный синий экран смерти.
Чтобы устранить стоп-код HYPERVISOR_ERROR, можно воспользоваться приведенными выше способами устранения возможных неполадок.
Для устранения проблем с гипервизором в Windows можно также устранить возможные проблемы с жестким диском.
Если вам нужен по настоящему хороший и профессиональный веб хостинг или свой высокопроизводительный сервер, то смело переходите по ссылке и заказывайте!
Дорогие читатели, если вам понравилась статья, то поддержать меня в это нелёгкое время вы можете по реквизитам ниже, даже 20 грн или 1 доллар, могут по настоящему накормить автора статей, я буду вам очень признателен за помощь.
Куить мне кофе — BuyMeACoffee
MonoBank — 5375 4141 1115 1527
PayPal — переход на донат
Payeer — P66937101
Summary: The Hypervisor error is an annoying issue, affecting a lot of Windows 11 users trying to run virtual machines on their computers. This article will discuss the causes behind this issue and methods to fix it. We shall also be looking at a complete data recovery solution for recovering data from a corrupted virtual machine image.

Contents
- What is the Hypervisor Error?
- What Causes the Hypervisor Error in Windows 11?
- What are the Methods to Fix the Hypervisor Error?
- Pro Tip
- Conclusion
The Hypervisor is Microsoft’s in house technology that enables users to run virtual machines on their systems. This versatile technology is used by many application developers and advanced users to create and manage virtual machines easily. But like any other piece of code, this too has its flaws. Many users have recently reported encountering the Hypervisor error BSoD on their Windows 11 systems. Let’s look at this issue in detail.
What is the Hypervisor Error?
The Hypervisor error is a BSoD associated with Windows virtual machine platform. This error screen is generated when the Hypervisor stops working or crashes with a stop code HYPERVISOR_ERROR, having a bug check value of 0x00020001. This can happen due to outdated or incompatible device drivers, bad drive sectors, corrupted virtual machine image files, and more. It can also affect users using Windows Sandbox or any other third party virtual machine software. Let’s look at the causes behind the occurrence of this error screen in more detail.
What Causes the Hypervisor Error in Windows 11?
- Outdated device drivers/windows OS
- Bad drive sectors
- Corrupted system files
- Incorrect/conflicting settings
What are the Methods to Fix the Hypervisor Error?
Now that we know about the causes behind the Hypervisor error blue screen, let’s dive deeper and learn the methods to fix it. But before moving forward, do the following –
- Reinstall Hyper-V from Windows features.
- Update BIOS
- Run Windows Driver Verifier
Method 1: Check if Your System Supports Virtualization
This is a basic check to see if your Windows 11 system supports virtualization. This is an easy way to fix the hypervisor error BSoD in Windows 11 computers. If your system supports Hyper-V, you can check if it is enabled or not. To do this –
- Open the Settings app.
- Click on System and then About in the left pane.
- Copy the details of your processor and search for its specification on the internet to check if the manufacturer’s website lists virtualization under its specifications.

- If it does, make sure the virtualization is enabled on your system.
- If not, to enable virtualization, you need to access your system’s BIOS.
- Once inside system BIOS, go to the Advanced tab, and check the status of Intel (R) Virtualization Technology.

- If it is disabled, enable it.
- Save the changes and exit the BIOS.
Notes –
- BIOS key is different for each device. Check yours by looking at the boot sequence. On some computers, virtualization is in the Performance section.
- The above method, however, is for intel users. AMD users will find different terminologies for this method. You can refer to the motherboard’s manual to learn more.
Method 2: Update Device Drivers & Windows OS
This is another simple way to eliminate the Hypervisor error BSoD on your Windows 11 computer. Outdated device drivers and OS can cause the system to generate this error screen, thereby hampering your work. Simply follow the steps mentioned below to update system drivers and Windows OS.
To update device drivers –
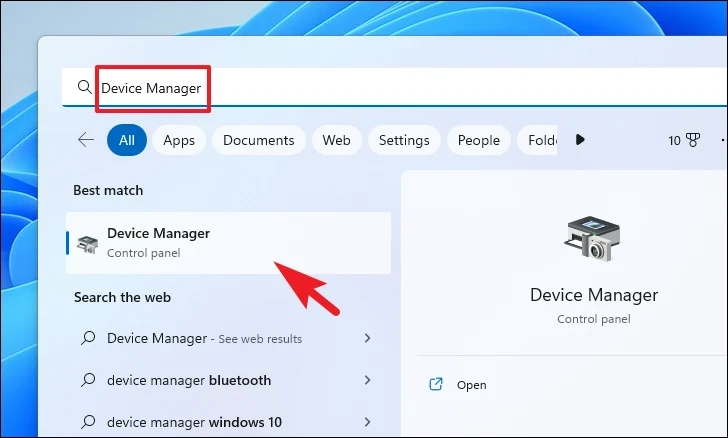
- Press WIN + X and click on Device Manager from the list.
- Double-click on all the devices to expand them.
- Find all the entries with an exclamation mark.
- Right-click on each of them one-by-one and click on Properties.
- Under the Driver tab, click on Update driver.
To update Windows OS –
- Press WIN + I to open Settings.
- Click Update & Security.
- Click Windows Update and then Check for updates.
Method 3: Use Command Prompt (Administrator)
Sometimes, the Hypervisor blue screen error is caused due to missing or damaged system files. This can lead to several other glitches and BSODs. Users can use the following commands in elevated command prompt to deal with this issue –
Chkdsk and Deployment Imaging Servicing and Management scans check and repair the existing installed OS files along with the system files. Once inside, type chkdsk C: /f /r /x and hit Enter. Once done, restart your system and see if this resolves the issue.
After this, type the following commands and run them one by one –
- DISM.exe /Online /Cleanup-image /Scanhealth and hit Enter.
- DISM.exe /Online /Cleanup-image /Restorehealth and hit Enter.
Finally, type the following command to ensure that Hyper-V service launches when the system boots up.
- bcdedit /set hypervisorlaunchtype auto
Method 4: Restart the Corresponding Service
Sometimes, when a user tries to run a virtual machine on the computer, it fails to do so and generates the hypervisor error blue screen, which leads to system crash. This can be fixed by starting the corresponding service related to Microsoft virtual machine platform. To do so –
- Press WIN + R.
- Type services.msc and hit Enter.
- Locate Hyper-V Virtual Machine Management in the list and select it.

- Right-click on this entry and check its status. If it is running, stop it.

- Restart the service to see if this fixes the issue.
Pro Tip
If you are still encountering the HYPERVISOR_ERROR BSoD, then your virtual machine image might be corrupted. In such a case, you can use an all-in-one data recovery toolkit to recover your data.
Stellar Toolkit for Data Recovery is a highly advanced data recovery software, which is used by industry experts to recover data from crashed NAS, RAID, Virtual machines, and other storage devices. This software offers a simple and clean UI, which makes it highly user friendly.
Its advanced data recovery algorithms easily help you recover data lost in numerous data loss scenarios like accidental deletion, drive crash, malware attack, and more. You can use it to recover data from your corrupted virtual machine in a couple of few easy to follow steps. To use this software –
- Download Stellar Toolkit for Data Recovery from its official website and install it.
- Launch it and select the type of data you wish to recover.

- Select the location from where you wish to recover your lost data and click Scan.

- The software will scan for lost data and display it on the screen.

- You can preview the files to check them and if satisfied with the results, you can save them onto your desired storage media by clicking Recover.
Note – If you are unable to find the desired files, you can perform Deep scan. During this, the software performs in-depth check in each sector of the drive and previews all the data that can be recovered.
Conclusion
The Hypervisor error blue screen on Windows 11 computers is a pestering issue, which is mostly generated in the case of when a virtual machine either doesn’t start or its image get corrupted. In this article, we discussed the causes behind this error and the ways to fix this issue. We also shared an ingenious way to recover lost data from a corrupted virtual machine image. We hope you found this article helpful and recovered your VM data easily using the above mentioned methods.
About The Author
Keshav Katyal
A passionate writer, driven by his interest in everything tech, Keshav Katyal has always been captivated by the latest gadgets since childhood. His interest in gadgets grew when he got his first gaming console, the Nintendo Game Boy Advanced. Hours and days of tinkering with gadgets encouraged the inner geek in him who now loves writing about the latest technologies.
Hypervisor along with Virtual Machine Platform allows you to run virtual machines on your Windows PC. It is responsible for resource allocation management. However, many users are facing an error with it rendering the Virtual Machine unusable.
The Hypervisor could throw out an error or not perform its job properly if you have outdated drivers, bad sectors on your primary or secondary storage drives, corrupted system files, interfering third-party apps, conflictual settings, or an outdated Windows version.
Fortunately, since Hypervisor is a piece of software that has no special hardware components installed just for it to work, you can resolve this issue on your own using the list of methods mentioned in this guide.
That being said, do keep in mind you might have to try more than one method to resolve the issue on your system.
1. Run Memory Diagnostics
Windows Memory Diagnostic tool helps you diagnose and find issues with the RAM module installed physically on your computer. If the issue is hardware-based, this will significantly help you pinpoint the issue.
Head to the Start Menu and type Memory Diagnostic to perform a search. After that, from the search results, click on the ‘Windows Memory Diagnostic’ tile to proceed.
Then, either click on the ‘Restart Now and check for problems’ option to restart the PC immediately or click on the ‘Check for problems the next time I start my computer’ option based on when you are comfortable with performing the check.
2. Install Missing Drivers or Update Device Drivers
Hypervisor errors can also surface due to outdated, missing, or corrupt drivers. A simple fix to the situation is to update all the drivers installed on your computer.
Note: You can follow the below-mentioned process for both installing the missing driver and updating drivers on your Windows PC.
First, head to the Start Menu and type Device Manager to perform a search. Then, from the search results, click on the ‘Device Manager’ tile.
Now, on the device manager screen look for the ‘question mark’ icon on any of the categories in the list. Then, click on the chevron (downward arrow) preceding the said option to expand it.
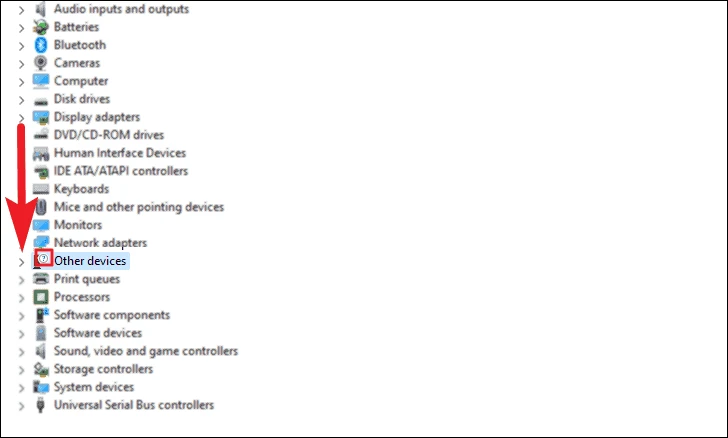
Then, from the list of components, double-click on the option having the exclamation mark.

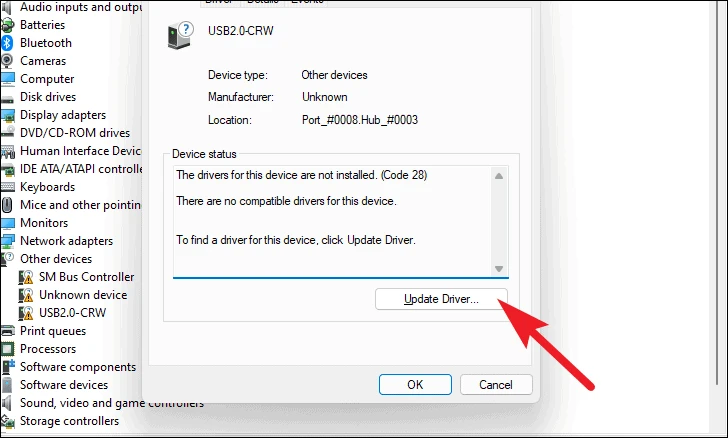
After that, the issue will be displayed in the ‘Device Status’ text area. Now, click on the ‘Update Driver’ option to continue. This will open a separate window.
Now, from the separate window, click on the ‘Search automatically for drivers’ option to let Windows search for a driver for you. Otherwise, if you already have a driver package in your local storage, click on the ‘Browse my computer for drivers’ option.
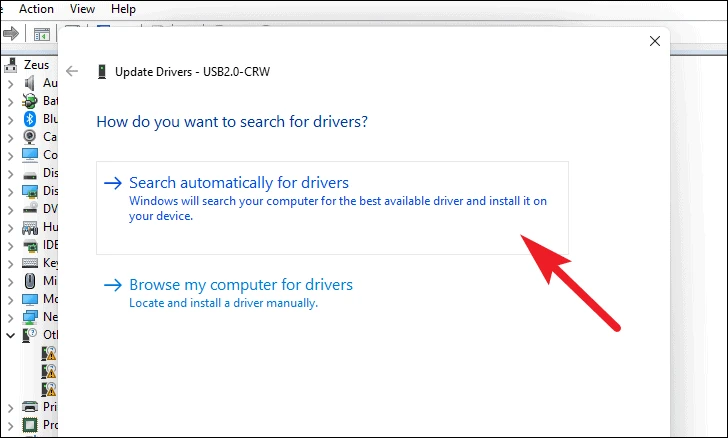
Note: If you are updating a driver, skip the next step and manually head to the ‘Windows Update’ tab in the ‘Settings’ app and follow the method.
Though it is rare, it is a possibility that Windows might not be able to find a driver for it. If that’s the case, click on the ‘Search for updated drivers on Windows Update’ option. This will open a Settings window.
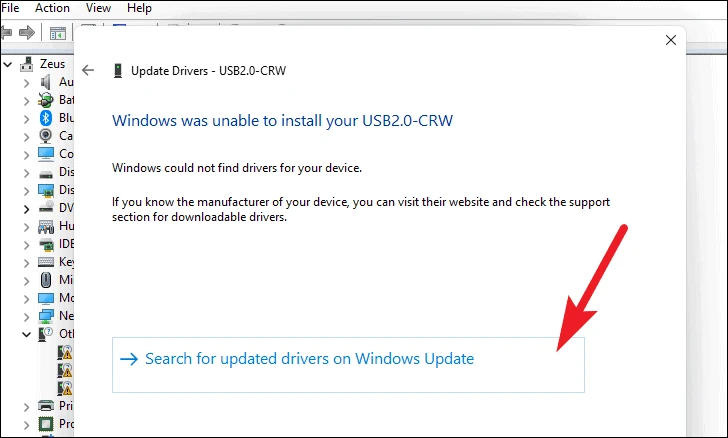
After that, on the ‘Windows Update’ screen, click on the ‘Advanced options’ tile present in the list.
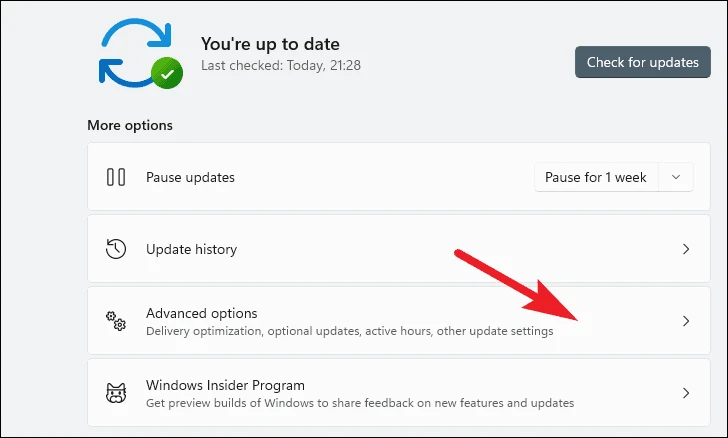
Then, scroll down to locate and click on the ‘Optional Updates’ tile.
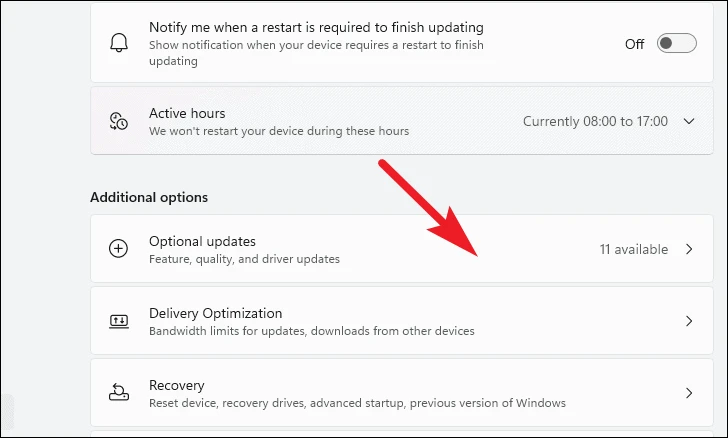
After that, select all available drivers by clicking on the individual checkbox preceding each option in the list. Then, click on the ‘Download & install’ button.
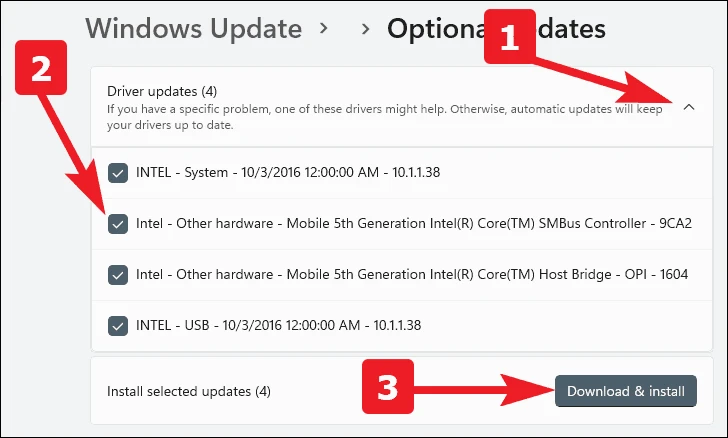
Once downloaded, all the drivers will be installed on your next boot-up or restart depending upon the nature of the said updates.
3. Run CHKDSK
CHKDSK scan will check your hard disk for the physical bad sector and logical errors as well. This will help you to pinpoint problems with your secondary storage device.
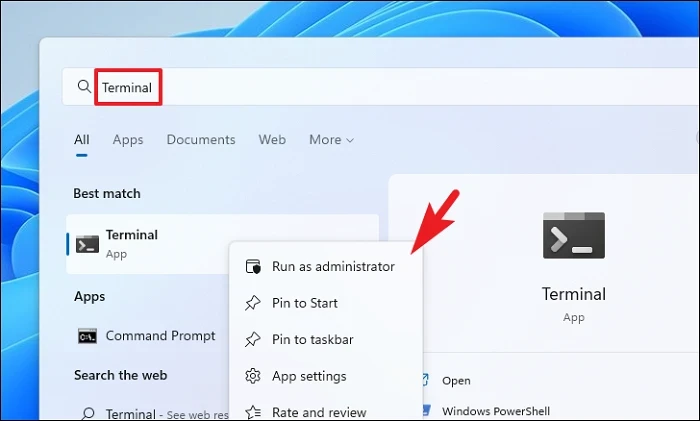
First, head to the Start Menu and type Terminal to perform a search for it. After that, right-click on the ‘Terminal’ tile and choose the ‘Run as administrator’ option to proceed.
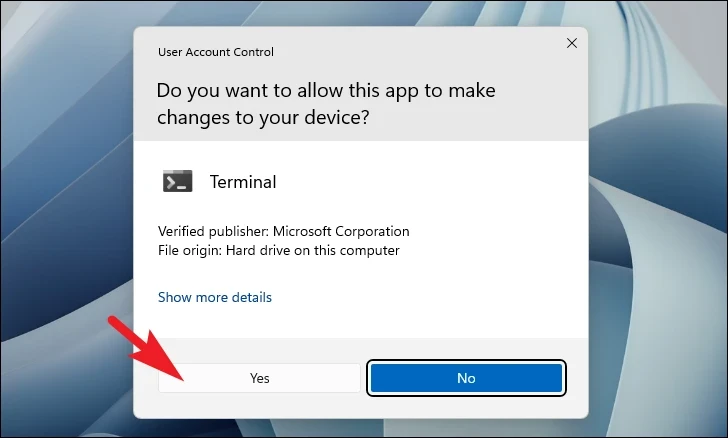
Then, enter credentials for admin on the UAC screen if not logged in with an admin account. Otherwise, click on the ‘Yes’ button to proceed.

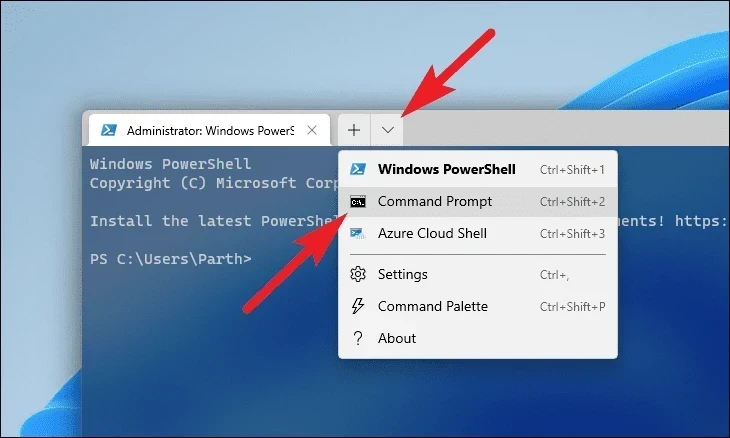
After that, click on the chevron (downward arrow) and then choose the ‘Command Prompt’ option to continue. This will open the Command Prompt in a separate tab.
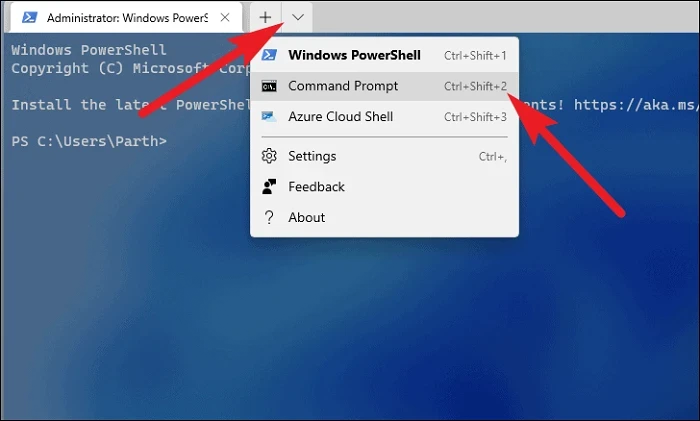
Next, type or copy+paste the below-mentioned command and hit Enter on your keyboard to execute the command.
chkdsk /f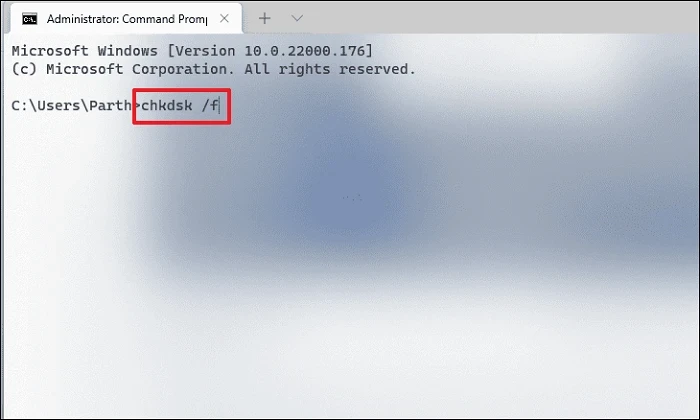
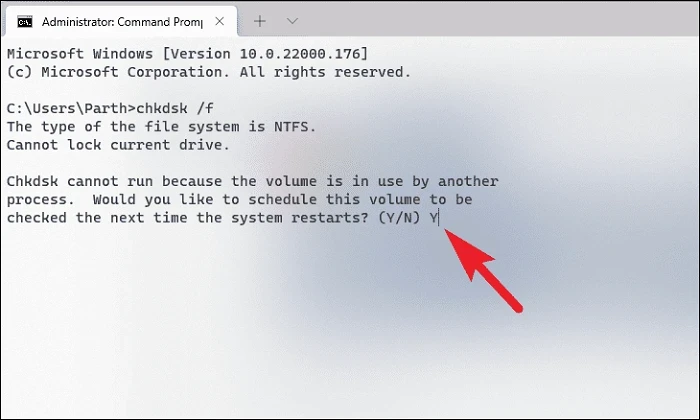
After that, press the Y key to schedule the scan to be initiated when you boot up your PC next time.
4. Run SFC and DISM Scan
System File Checker and Deployment Image Servicing and Management scans will check and repair the existing operating system files installed on your device along with other system files.
First, head to the Start Menu and type Terminal to search for it. Then, right-click on the ‘Terminal’ tile and choose the ‘Run as administrator’ option to proceed.

Next, if you are not logged in with an admin account, enter the credentials for one. Otherwise, click on the ‘Yes’ button to proceed.
After that, click on the ‘chevron’ (downward arrow) icon and click on the ‘Command Prompt’ option.
Then, type or copy+paste the below-mentioned command and hit Enter on your keyboard. This will restore your currently installed OS image on your device.
DISM/ Online /Cleanup-Image /RestoreHealth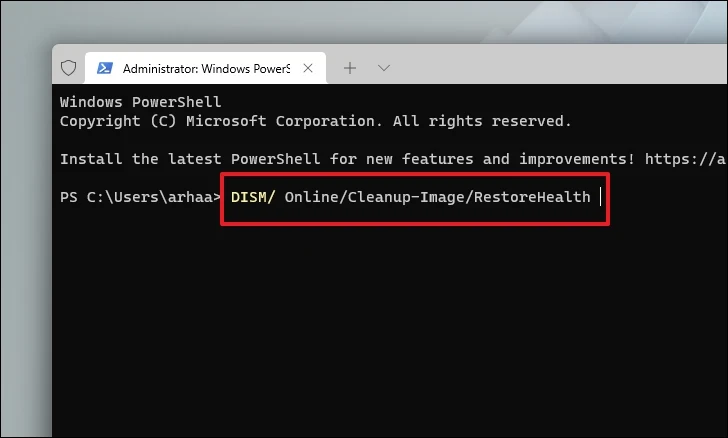
Once completed, type or copy+paste the following command to check and repair the system files on your PC.
SFC /scannow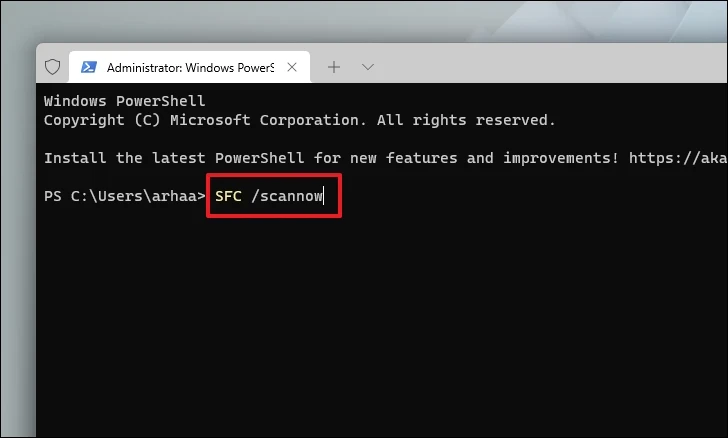
If after the scan, you get the message that the scan was successful, see if you’re still getting the error. If it finds corrupted files in the scan, remove those files and the error should be resolved by now.
5. Disable and Re-enable Hypervisor
Many times, a simple service behind the process is stuck or is in a deadlock which in turn prevents the Hypervisor to work correctly on your computer. To resolve this scenario, simply disable the Hypervisor and re-enable it.
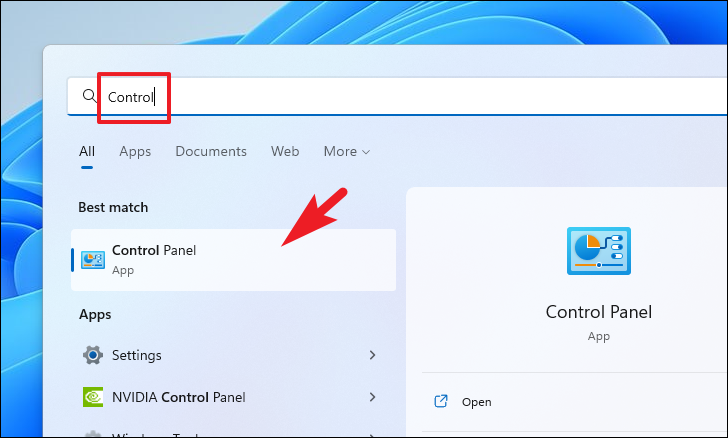
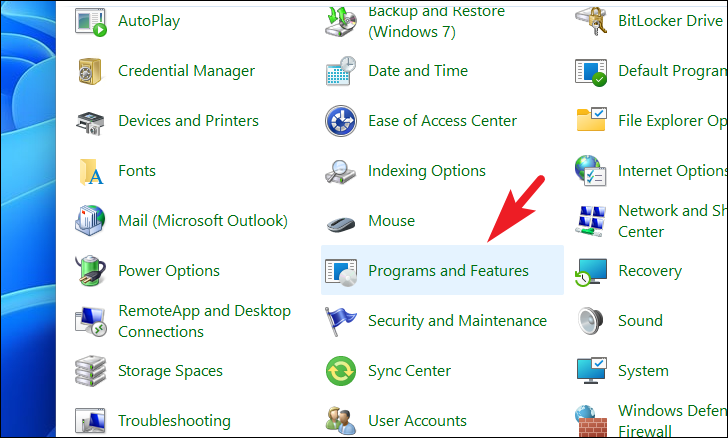
First, head to the Start Menu and type Control to perform a search. After that, click on the ‘Control Panel’ tile to open it.
Then, click on the ‘Programs and Features’ option from the grid.
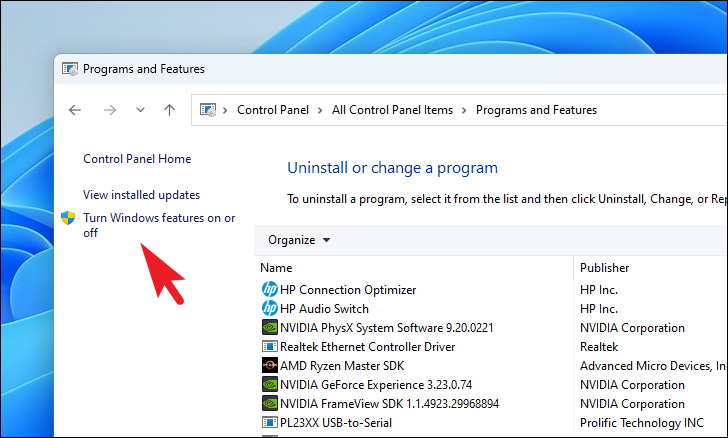
Next, click on the ‘Turn Windows features on or off’ option to continue. This will open a separate window on your screen.
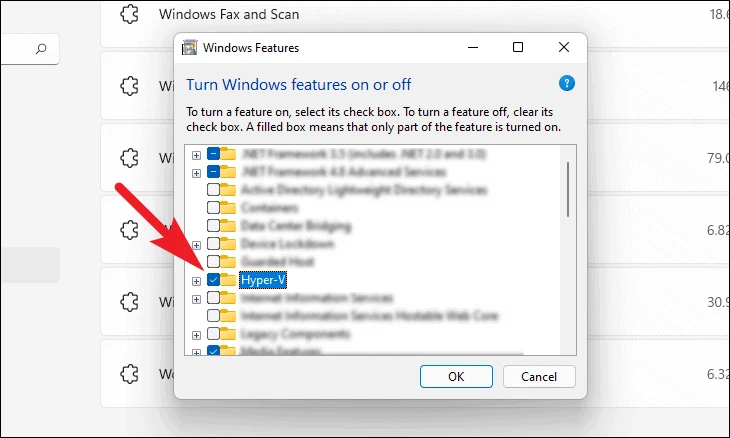
Then, locate and click on the checkbox preceding the ‘Hyper-V’ option to uncheck it.
After that, click on the checkbox preceding the ‘Virtual Machine Platform’ option to uncheck it. Then, click on the ‘OK’ button to proceed.
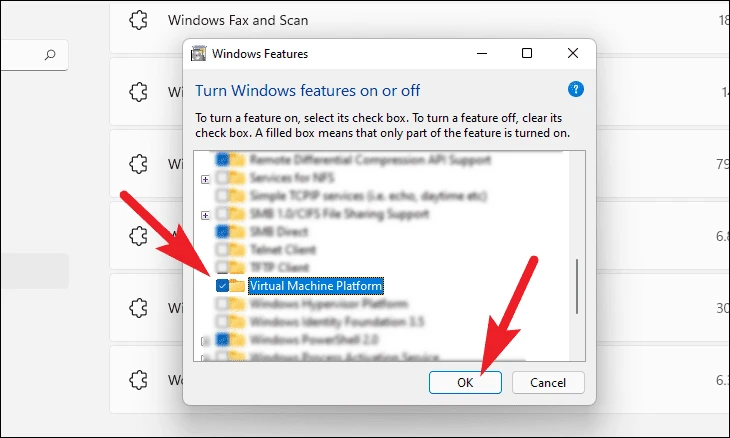
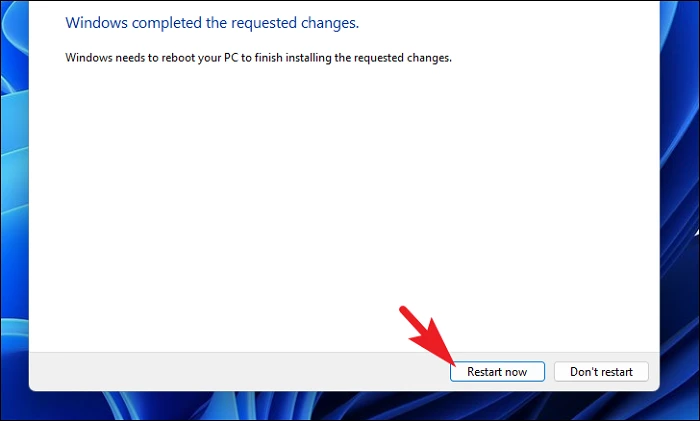
Windows will then apply the settings to your PC. Once the process has been completed, click on the ‘Restart now’ button to apply the changes.
Once the PC has restarted, repeat the process again to turn on the Hypervisor on your PC.
6. Turn on Driver Verifier
Driver verifier is a built-in utility of Windows that allows you to scan and fix deep-rooted issues with an installed driver on your computer.
First, head to the Start Menu and type Terminal to perform a search. Then, from the search results, right-click on the ‘Terminal’ tile and click on the ‘Run as administrator’ option.
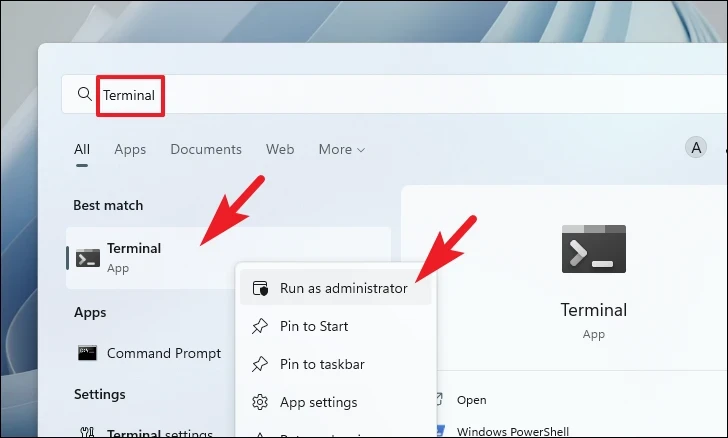
Now, a UAC (User Account Window) will appear on your screen. If you are not logged in with an admin account, enter the credentials for it. Otherwise, click on the ‘Yes’ button to proceed.

After that, click on the ‘chevron’ on the title bar and select the ‘Command Prompt’ option.

Now, on the ‘Command Prompt’ tab, type or copy+paste the below-mentioned command and hit Enter to execute. This will open a separate window on your screen.
verifier
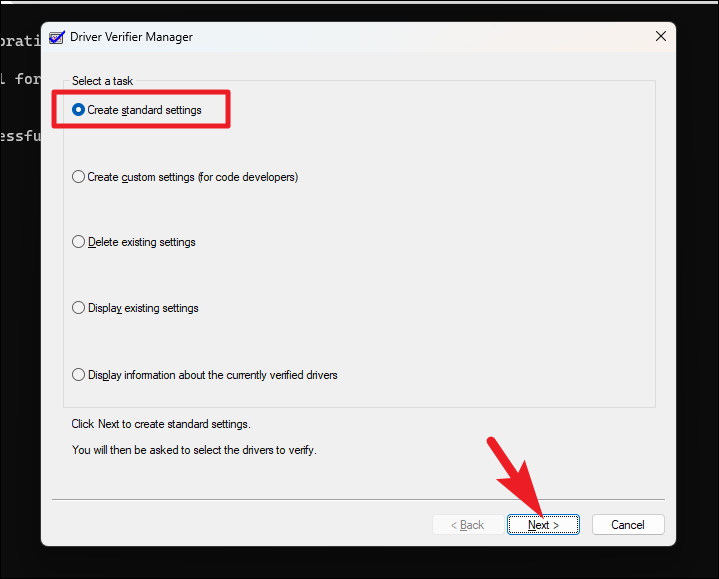
Next, click on the radio button preceding the ‘Create standard settings’ option and then click on the ‘Next’ button to continue.
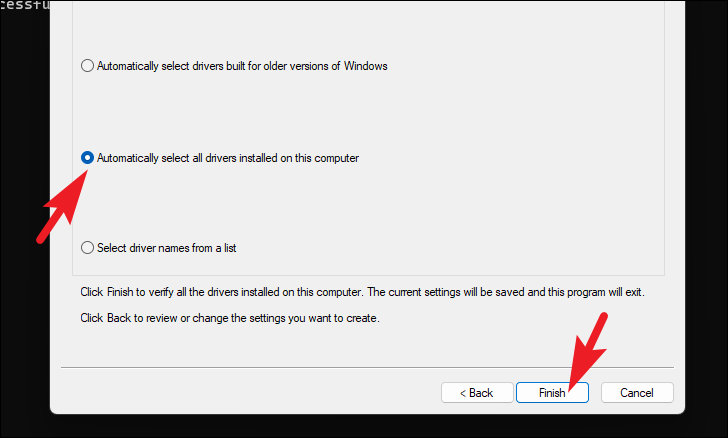
On the next screen, click on the ‘Automatically select all drivers installed on this computer’ option. Then, click on the ‘Finish’ button.
After that, restart your PC. The driver verifier will now run in the background and diagnose the drivers.
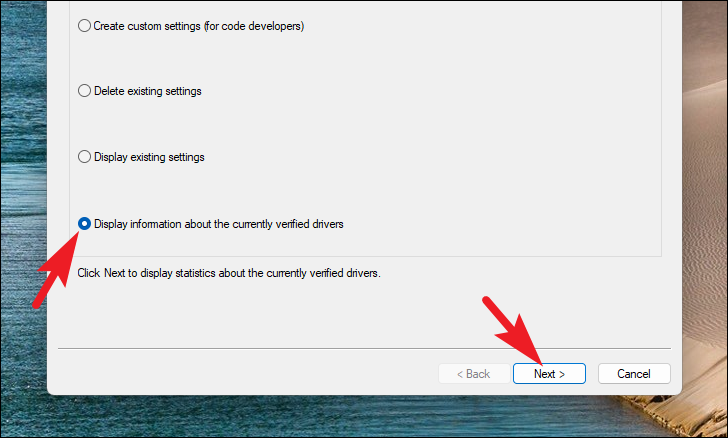
To learn which driver caused the issue on your computer, open the Driver Verifier Manager again using the steps showcased earlier in this section. Then, click on the ‘Display information about the currently verified drivers’ option and then click on the ‘Next’ button.
Once you have fixed faulty drivers, you will need to stop Driver Verifier as it will keep on running in the background after every sign in to your computer which may cause an overload and will unnecessarily hog resources.
To do so, head to the ‘Command Prompt’ on the Terminal using the steps showcased previously. Then, type or copy+paste the below-mentioned command and hit Enter to execute.
verifier/reset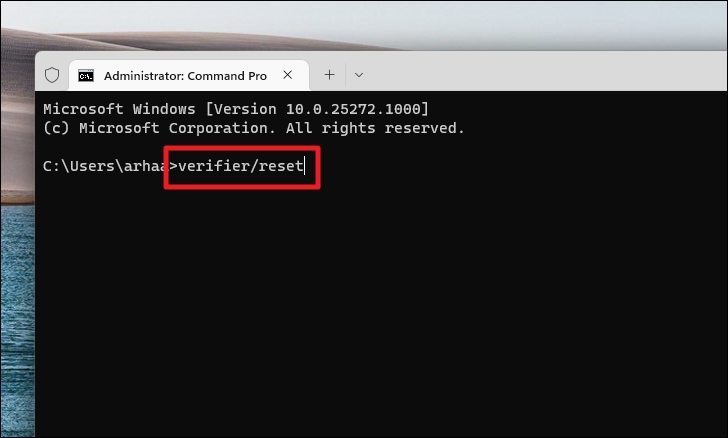
7. Perform a Clean Boot
A third-party software/service often interferes with the system and generates this error. Hence, starting the system in the clean boot can help you determine if the actual culprit behind the issue is a third-party software/service.
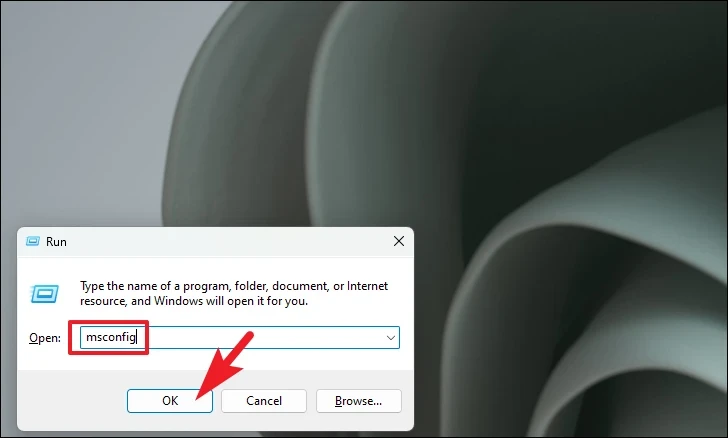
First, press the Windows+R keys together on your keyboard to bring up the Run utility. Then, type msconfig and press Enter on the keyboard to continue.
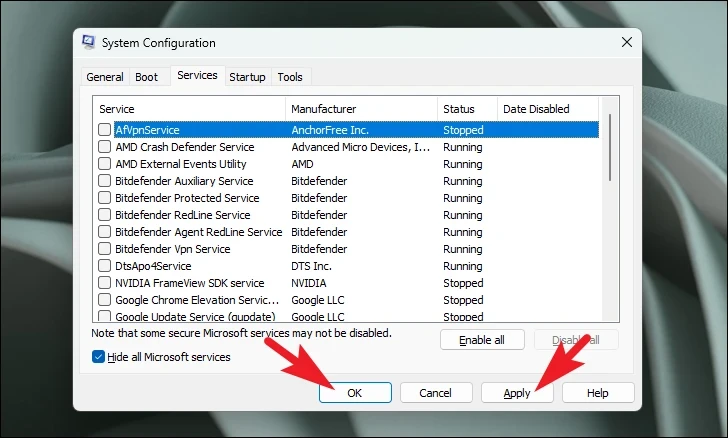
From the General tab, click on the radio button preceding the ‘Selective startup’ option and then click on the checkbox preceding the ‘Load system services’ option to proceed.

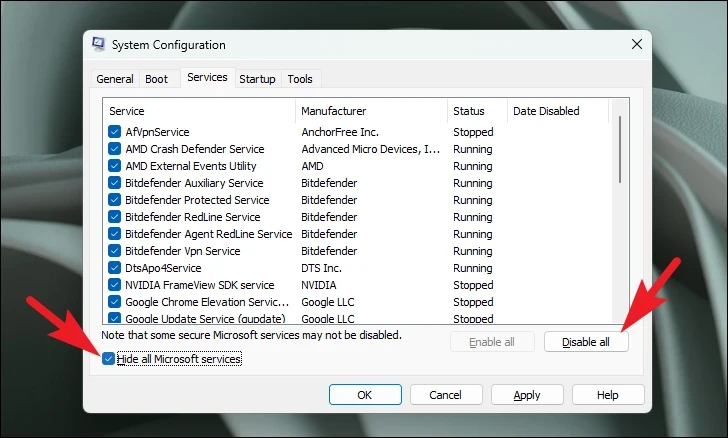
Then, head to the ‘Services’ tab and click on the checkbox preceding the ‘Hide all Microsoft services’ option. Then, click on the ‘Disable all’ button. Finally, click the ‘Apply’ button and then click on the ‘OK’ button to close the window.
Now, restart the PC from the Start Menu. Once the PC is restarted in the clean boot environment, you can check if you are still facing the issue. If not, you can enable processes one by one and check which one is causing the issue.
8. Update your BIOS
An out-of-date BIOS version is one of the culprits for this issue since BIOS handles the primary input/output of your PC along with the kernel systems.
Since BIOS entry methods, BIOS interfaces, and BIOS settings vary greatly from one motherboard manufacturer to another, it is impossible to provide you with detailed steps.
Thus, enter safe mode on your Windows 11 PC. Then, follow the steps to update the BIOS from your manufacturer’s website. After that, check if the issue was resolved.
9. Roll Back to a System Restore Point
If you have a reason to believe that a recent software upgrade or a third-party software installation might be the culprit behind the issue, you can roll back to a system restore point if you have created one.
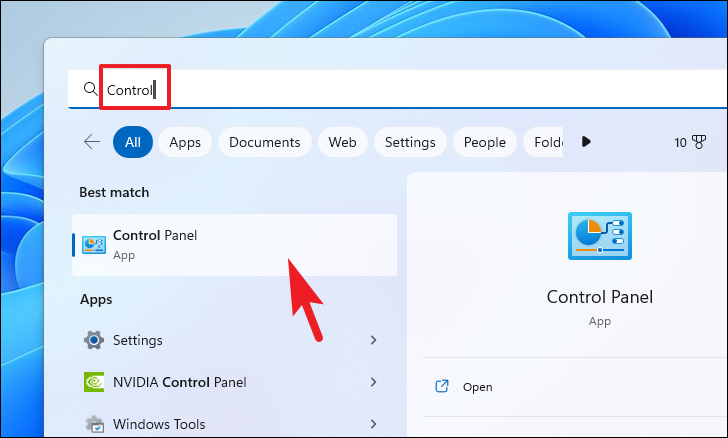
First, head to the Start Menu and type Control to perform a search. Then, from the search results, click on the ‘Control Panel’ tile to proceed.
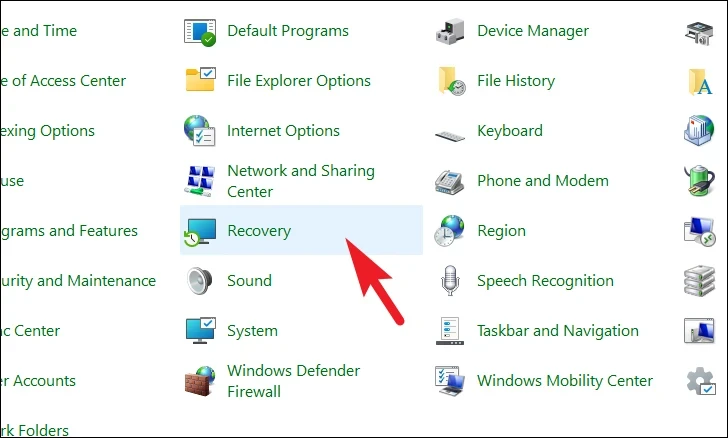
After that, locate and click on the ‘Recovery’ tile from the grid of icons.
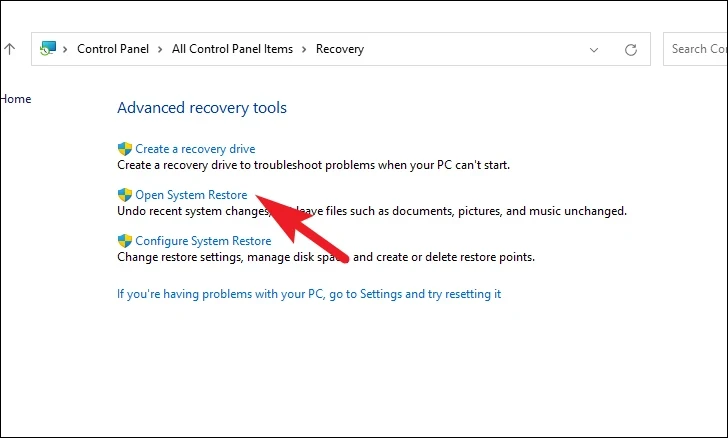
Next, click on the ‘Open System Restore’ option from the list. This will open a separate window on your screen.
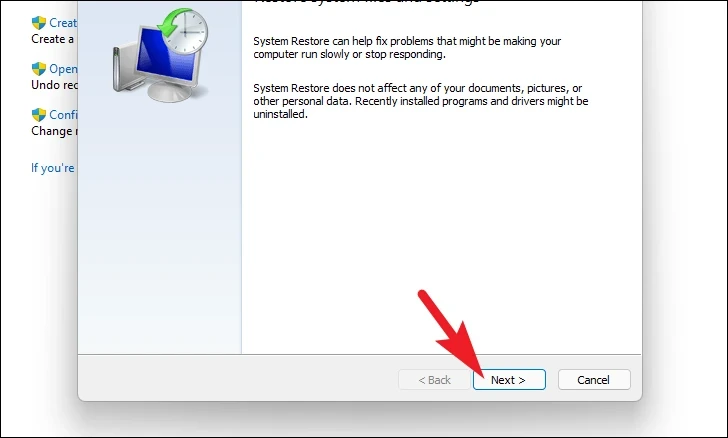
From the separately opened window, click on the ‘Next’ button.
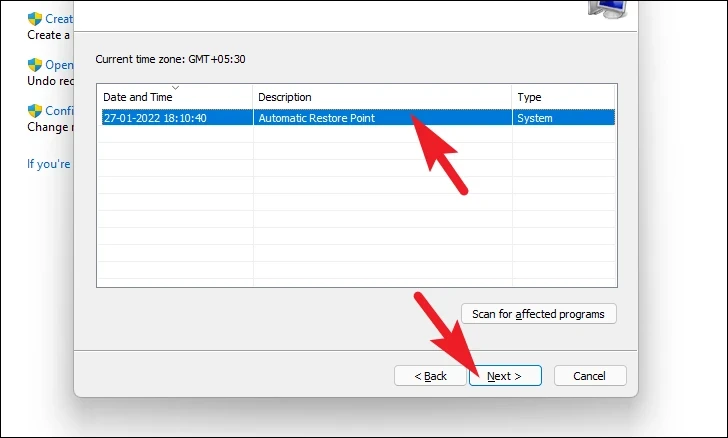
All created system restore points will be listed on the screen. Click to select the desired one and then click on the ‘Next’ button to initiate the rolling back process.
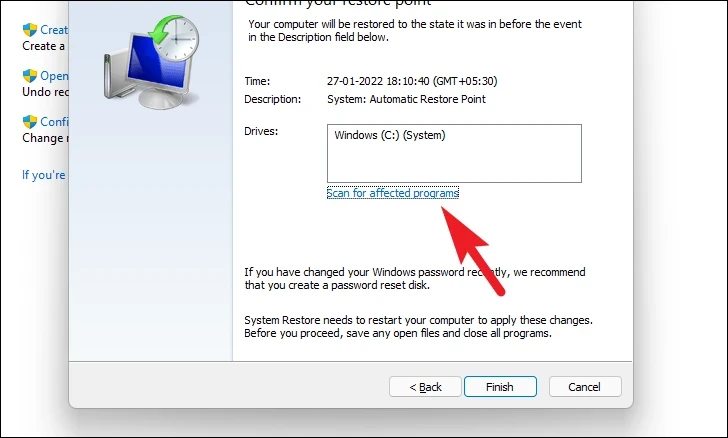
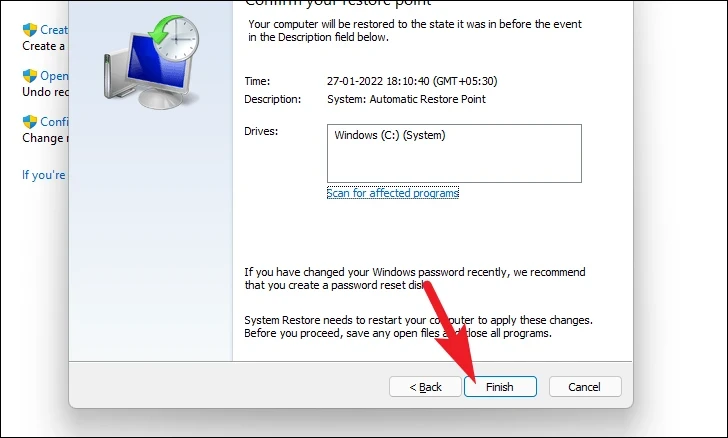
Next, a list of drives that the rollback will impact will be displayed along with the timestamp of the restore point created. You can also check the programs that will be affected; click on the ‘Sca for the affected programs’ button. A new window will appear on the screen.
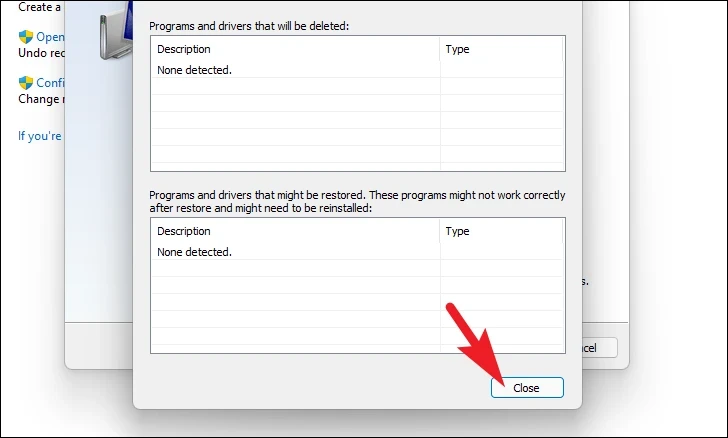
On the new window, you can view the programs that will be deleted and the ones that will be restored (since no programs will be affected on the test PC, the list in the screenshot below is empty). Click on the ‘Close’ button to navigate to the previous window.
Finally, click on the ‘Finish’ button to initiate the rollback process
Once the rollback is complete, check if you the error is gone. Otherwise, move on to the next fix.
10. Reset your PC
In case no method has been able to fix the issue on your PC, the last resort is to reset your PC. Thankfully, you will not lose your personal files and folders. However, resetting your PC will remove all the programs that you have installed and also bring all the settings to their default configurations.
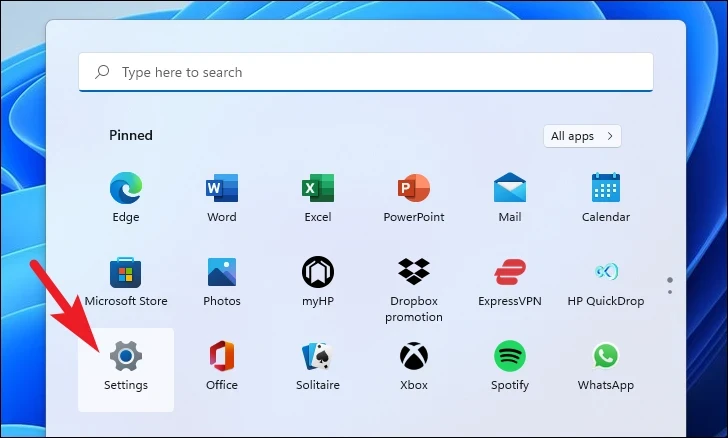
To reset your PC, head to the Start Menu, and click on the ‘Settings’ icon. Alternatively, type Settings in the menu to perform a search.
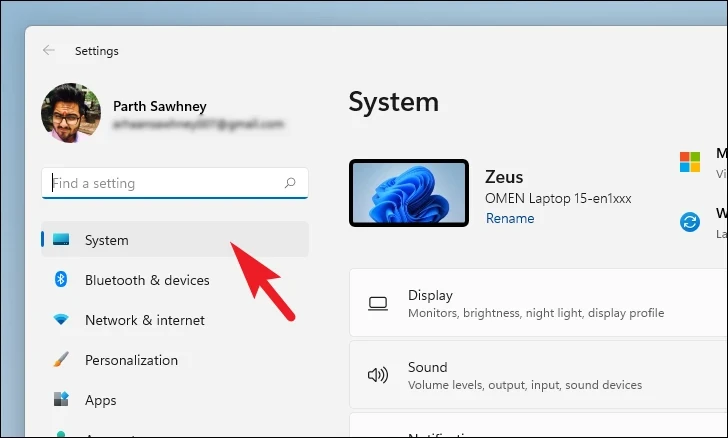
After that, from the Settings window, make sure you have selected the ‘System’ tab present on the left sidebar.
Then, from the right section of the window, scroll down to locate and click on the ‘Recovery’ tile to proceed.
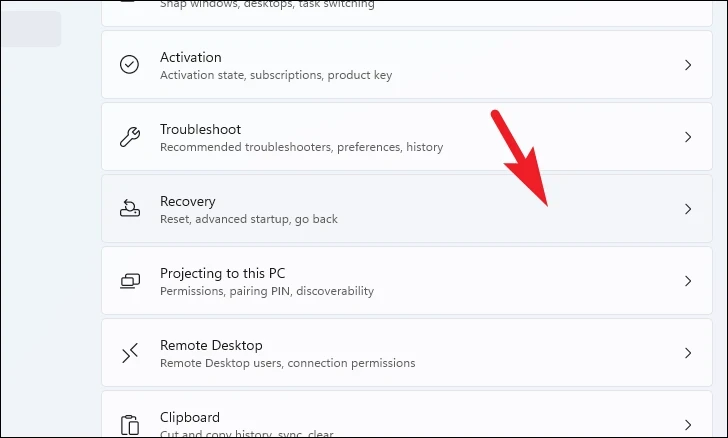
Next, on the ‘Recovery’ settings screen, locate the ‘Reset this PC’ tile and click on the ‘Reset PC’ button present on the far right edge of the tile. This will open a separate window on your screen.

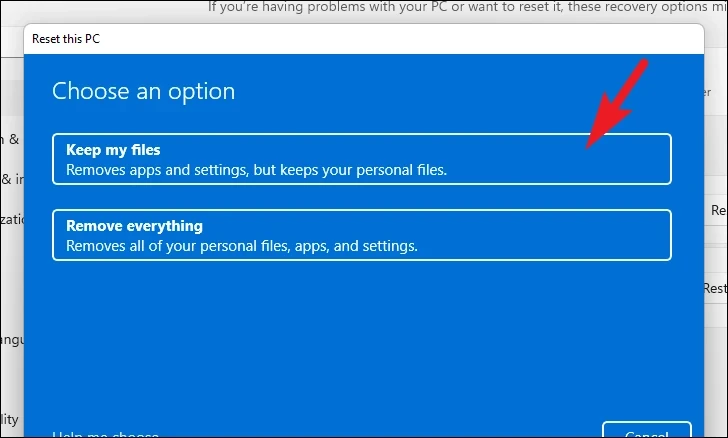
Now, from the separately opened window, click on the ‘Keep my files’ tile to proceed. In case you wish to remove all your personal files as well when resetting, click on the ‘Remove everything’ option.
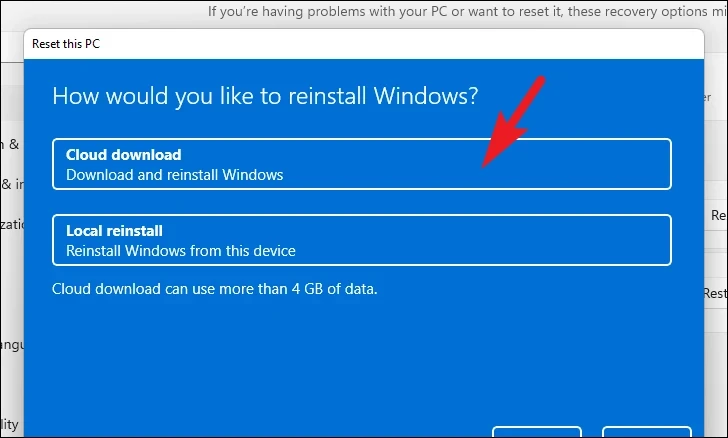
On the next screen, you will need to choose a method for reinstalling the operating system on your machine. Since there could be an issue with the copy already present on your system, it is recommended that you click on the ‘Cloud downloads’ option.
Note: ‘Cloud download’ will require an active internet connection and will consume upwards of 4GB of data.
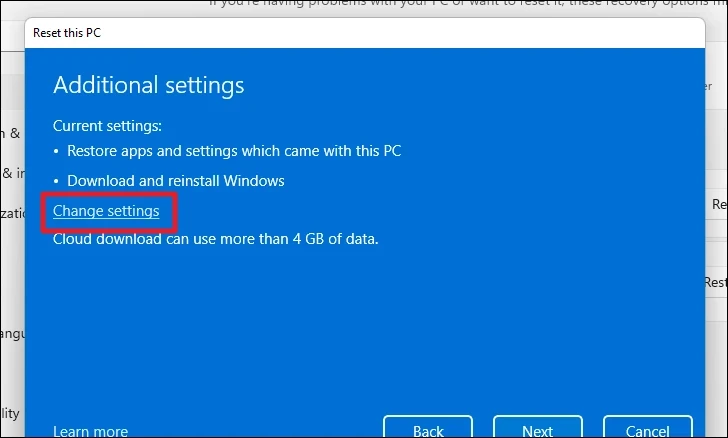
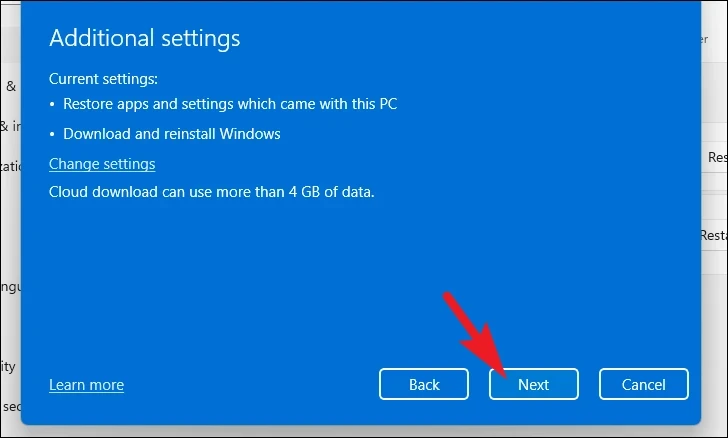
After that, Windows will list the settings that you have chosen. In case you wish to change any of them, click on the ‘Change settings’ option to continue.
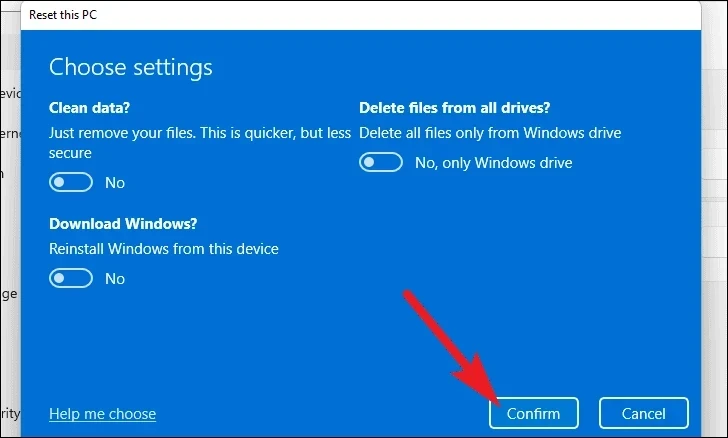
If you chose to change the settings, you can configure the following settings on the next screen, You can choose to not restore the apps and settings by clicking on the toggle switch present under the ‘Restore preinstalled apps?’ option and bringing it to the ‘No’ position. You can even switch from the cloud download to local installation by clicking on the toggle switch present under the ‘Download Windows?’ option to change the installation method. Once adjusted according to your preference, click on the ‘Confirm’ button to proceed.
After that, from the main window, click on the ‘Next’ button to continue.
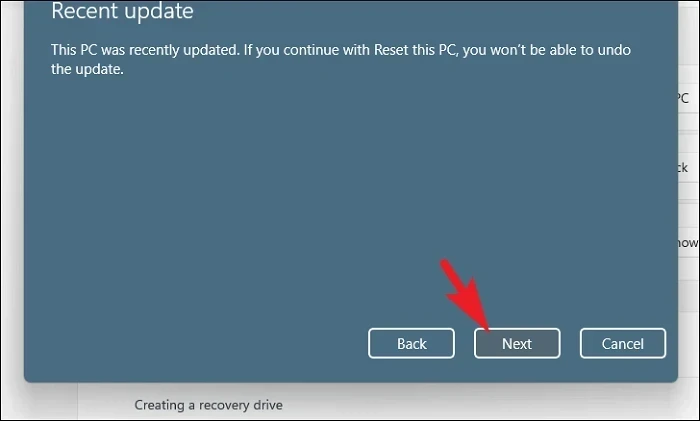
In case your PC was updated recently, you will receive a message on the screen stating that you will not be able to roll back once you reset the PC. To continue, click on the ‘Next’ button.
After that, Windows will list out all the impacts resetting your PC will have on your system. Read them carefully and click on ‘Reset’ to commence the resetting process.

That’s about it. One of the methods mentioned above is bound to resolve the Hypervisor error on your PC.
Table of Contents
- What is Hypervisor BSOD Error?
- Ways to fix Hypervisor BSOD Error
- 1. Update Drivers
- 2. Disable Hyper-V
- 3. Update Windows
- 4. Run Memory Diagnostics
- 5. Checking System files
What is Hypervisor BSOD Error?
Actually, Hypervisor_error is a kind of blue screen of death (BSOD) error in Windows OS.
This error indicates a problem or failure within the hypervisor. A hypervisor is a software that lets you run multiple operating systems at the same time on one computer by sharing its resources such as storage, CPU, and memory.
The Hypervisor_error in Windows 10 or 11 can occur due to a variety of factors, including:
- Corrupted or outdated drivers, can lead to issues with the hypervisor.
- Faulty memory module, which can also cause hypervisor-related errors.
- Conflicts with certain antivirus programs can interfere with the hypervisor and trigger the error.
- Windows updates can potentially cause hypervisor errors.
Ways to fix Hypervisor BSOD Error
So, let’s look at some of the ways you can try to fix this Hypervisor_error in Windows 10 or 11.
1. Update Drivers
You can manually update your driver or update using driver tools.
To manually update drivers, follow these steps:
- Press the Windows + R keys on your keyboard.
- Type «devmgmt.msc» (without quotes) and press Enter. This will open the Device Manager.
- Locate the driver you want to update. For example, if you want to update the Display Driver, click on the corresponding driver in the list.
- Right-click on the driver and select «Update Driver.»
- Choose the option «Search automatically» to download and install the latest driver from the internet.
By following these steps, you can update each driver individually based on your requirements.
If you prefer to update all your drivers at once, you can utilize software such as DriverEasy, Driver Booster, Device Doctor, Driverpack Solution, etc.
2. Disable Hyper-V
If you are not running multiple virtual machines on a single physical computer, each virtual machine can operate with its own operating system and applications, just like a physical computer. If you don’t want to utilize this feature, you have the option to disable the Hyper-V features on your Windows machine.
Follow these steps to disable the Hyper-V features on your Windows machine:
- Press Windows + R to open the Run Command.
- Type «Control» and click on the Ok button to open the Control Panel.
- Click on «Programs».
- Under «Programs and Features», click on «Turn Windows features on or off».
- Search for «Hyper-V» or «Windows Hypervisor Platform» and uncheck the box if it is checked.
- Click on the Ok button to save the changes.
3. Update Windows
Microsoft regularly releases updates to address bugs and security vulnerabilities, which means updating Windows might resolve the Hyper-V error. Follow these steps to check for and install Windows updates:
- Search for «Settings» and click on the «Settings» app from the list of results.
- Click on «Windows Update«.
- Next, click on «Check for updates«.
- If your system is already up to date, you will see a message stating «You are up to date,» indicating that no new updates are available. In my case, since my system is already updated, I receive this message.
- If updates are available, they will be downloaded and applied to your Windows machine.
4. Run Memory Diagnostics
Here are the steps for running a memory diagnostics test in Windows.
- Press Windows + R and type «mdsched.exe» in the Run dialog box, then press Enter.
- Select the first option, which is «Restart now and check for problems (recommended).«
- Your computer will restart, and the memory diagnostic test will run automatically.
- After the diagnostic test is completed, your computer will restart again.
5. Checking System files
You can check whether system files are corrupted or not and fixed them automatically. These corrupted system files can also cause Hyper-V-related issues.
Open Command Prompt as Adminstrator and then type sfc /scannow and press Enter. Then this will try to find an error and try to fix it if there are any errors.