
Обычно, когда говорят о web-сервере, подразумевают решения на базе платформы Linux. Но если ваша инфраструктура развернута на основе Windows Server то логично будет использовать веб-сервер IIS. Вопреки распространенному мнению, это весьма популярная платформа, которая позволяет работать как с большинством популярных CMS, так и имеет широкий спектр систем, предназначенных для работы именно на Windows и IIS.
Научиться настраивать MikroTik с нуля или систематизировать уже имеющиеся знания можно на углубленном курсе по администрированию MikroTik. Автор курса, сертифицированный тренер MikroTik Дмитрий Скоромнов, лично проверяет лабораторные работы и контролирует прогресс каждого своего студента. В три раза больше информации, чем в вендорской программе MTCNA, более 20 часов практики и доступ навсегда.
Несомненным достоинством IIS является его тесная интеграция с другими технологиями и средствами разработки Microsoft. В частности веб-решения для IIS могут использовать богатые возможности .NET и легко взаимодействовать с настольными приложениями на этой платформе. Если же вас это пока не интересует, то к вашим услугам богатый выбор готовых CMS, в том числе написанных специально для IIS. Сегодня мы рассмотрим как установить и настроить IIS для работы с веб-решениями на базе ASP.NET и установим одну из популярных CMS для этой платформы.
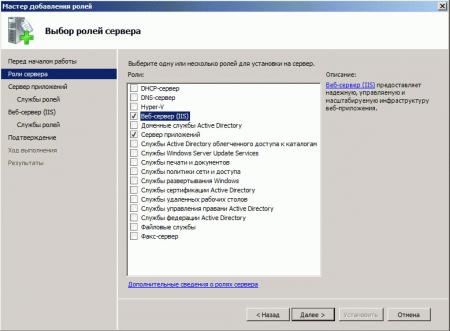
Для установки веб-сервера на платформе Windows перейдем в оснастку Роли в Диспетчере сервера и выберем установку ролей Веб-сервер (IIS) и Сервер приложений.
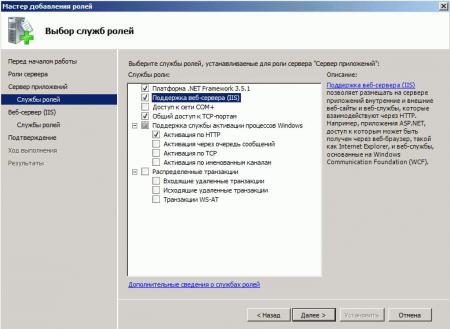
Но не спешите нажимать Далее, слева, под названием каждой роли, доступна опция Службы ролей, перейдем на нее и установим для Сервера приложений следующие опции: Поддержка веб-сервера (IIS), Общий доступ к TCP-портам и Активация через HTTP.
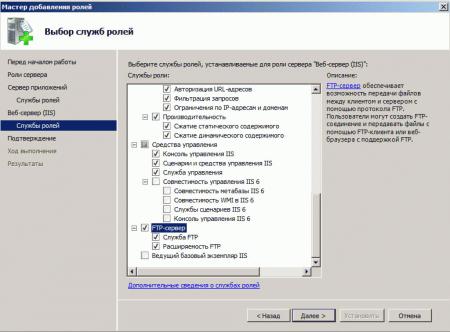
А для веб-сервера установите службу FTP-сервер.
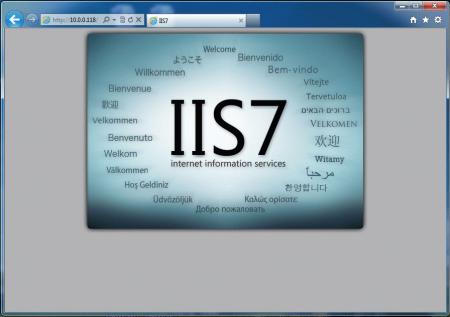
После чего установите выбранные роли. Для проверки работоспособности IIS наберите в браузере IP-адрес вашего сервера, вы должны будете увидеть стандартную страницу-заглушку веб-сервера.
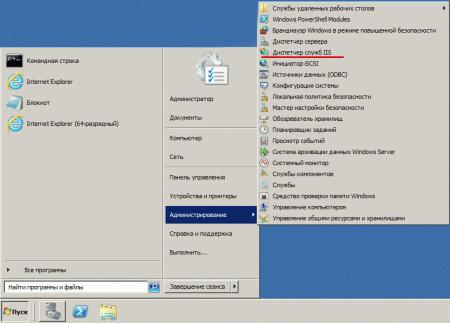
Теперь перейдем в к настройке сервера, для этого откроем Диспетчер служб IIS (находится в Пуск — Администрирование).
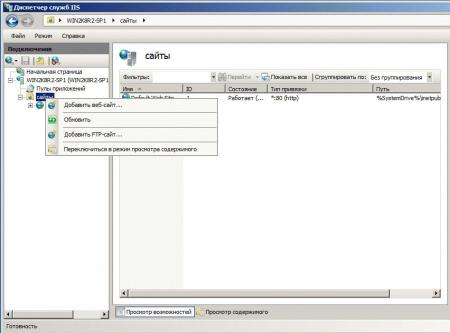
Первым делом создадим новый сайт, для этого щелкните правой кнопке на пункте Сайты в боковом меню Диспетчера IIS и выберите Создать новый сайт.
В открывшемся окне укажите имя сайта, путь к корневой папке (по умолчанию сайты пользователей располагаются в C:\inetpub\wwwroot), которую следует предварительно создать и укажите имя узла (доменное имя сайта), в нашем случае iissite.local
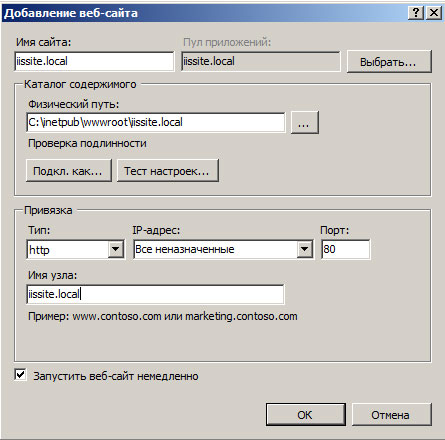
Не забудьте добавить A-запись с именем вашего сайта на DNS-сервер или пропишите необходимые строки в файлы hosts тех рабочих станций, откуда будете обращаться к сайту
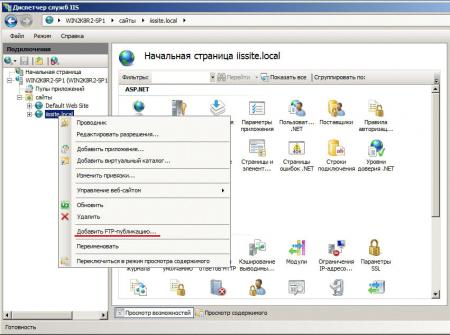
В принципе вы уже можете размещать в папке сайта web-страницы и получать к ним доступ через браузер, но для полноценной работы с сайтом не помешает FTP-доступ к нему. Для этого щелкните правой кнопкой по названию вашего сайте в боковом меню и выберите Добавить FTP-публикацию
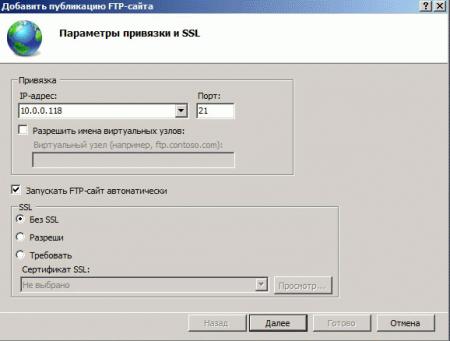
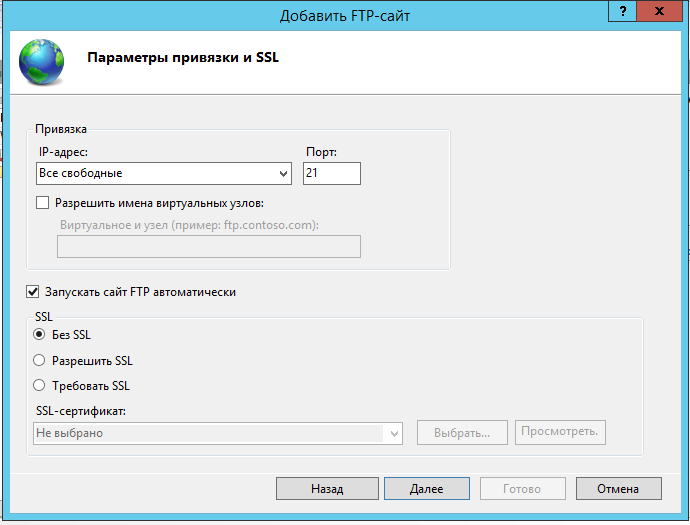
Далее укажите привязку FTP-cлужбы к сетевым интерфейсам и портам, а также настройте параметры безопасности. Если вы собираетесь использовать SSL, то учтите что вам потребуется сертификат, хотя если вы будете использовать FTP-доступ только для собственных нужд, то можно обойтись самоподписанным сертификатом. Не забудьте поставить галочку для автоматического запуска FTP-сайта.
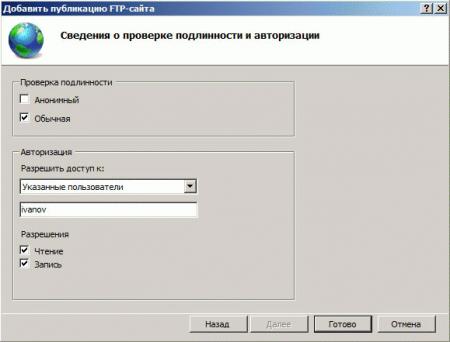
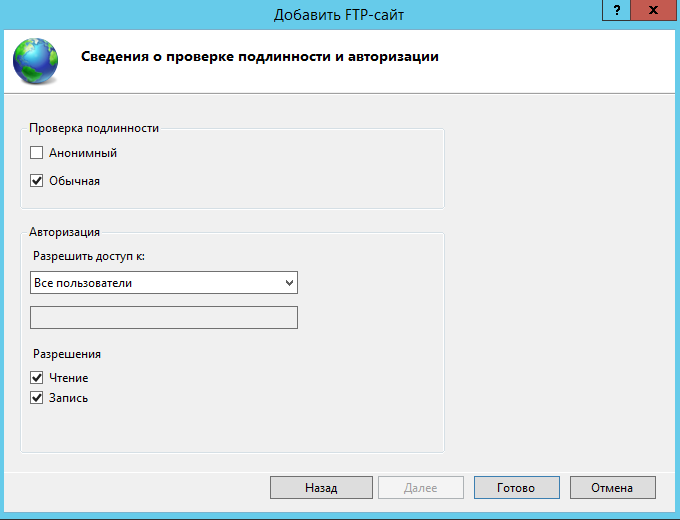
На следующей странице укажите параметры доступа к серверу, мы советуем указывать конкретных пользователей, которые будут работать с данным сайтом.
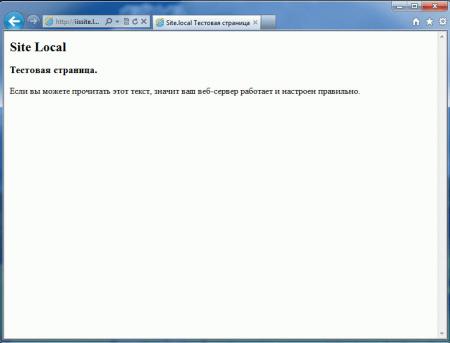
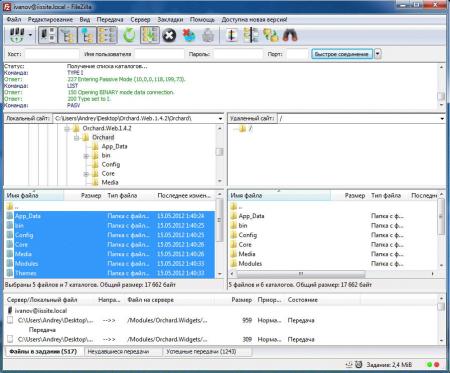
Попробуйте подключиться через FTP используя любой клиент и загрузите проверочную html страницу с именем index.html, пример такой страницы мы приводили здесь. Если все сделано правильно, то, набрав в браузере имя нашего сайта, вы увидите такую страницу:
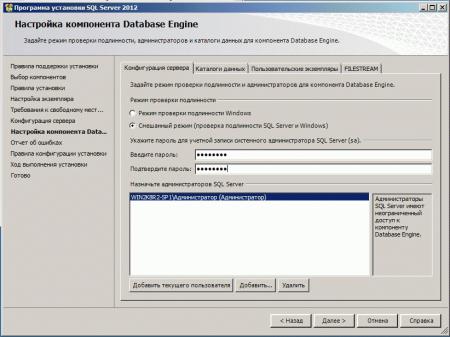
Веб-сервер настроен и вы можете использовать его для размещения HTML-страниц, однако современные сайты используют для хранения своих данных СУБД, поэтому следующим шагом установим MS SQL Express 2012, возможностей которого с лихвой хватит для наших задач. Установка производится со значениями по умолчанию, кроме Режима проверки подлинности, который следует переключить в Смешанный режим и задать пароль суперпользователю SQL-сервера sa.
Теперь попробуем установить какую либо популярную CMS созданную на базе технологии ASP.NET, обширный выбор таких решений представлен в галерее web-приложений Microsoft. Обратите внимание, что по кнопке скачать вы получите пакет для установки через Web PI, для установки на IIS вам потребуется перейти на сайт разработчика и скачать полный пакет с CMS
Мы будем устанавливать Orchard CMS, для получения пакета пройдите по ссылке и выберите Загрузить как zip, распакуйте полученный архив и закачайте в корень сайта содержимое папки Orchard.
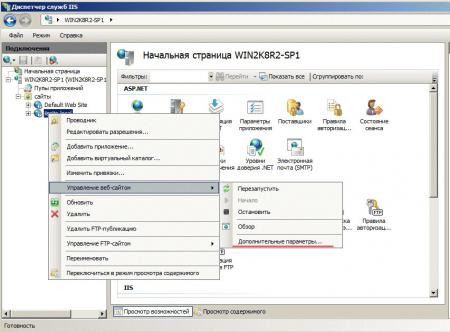
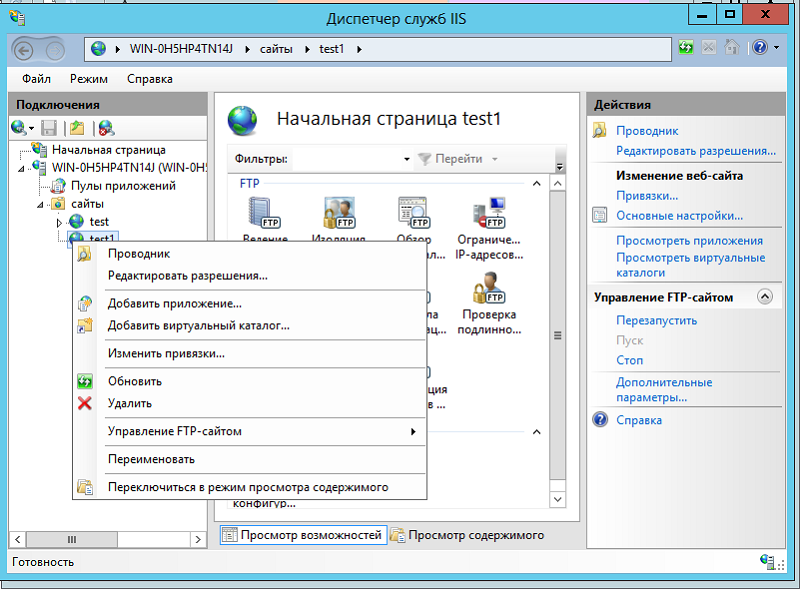
Данная CMS создана на базе ASP.NET 4, поэтому настроим наш сайт на использование необходимых технологий. Для этого щелкните правой кнопкой на имени сайта в боковом меню и выберите Управление веб-сайтом — Дополнительные параметры
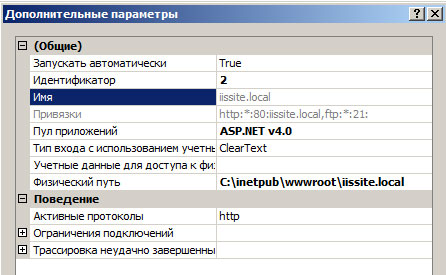
В открывшемся окне измените параметр Пул приложений, указав там ASP.NET v.4
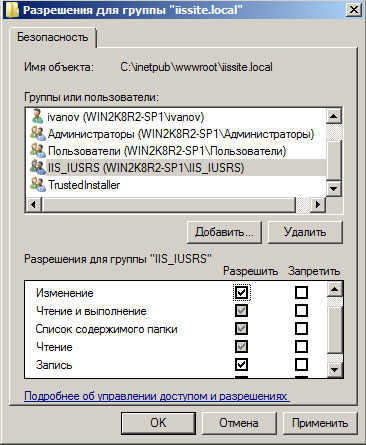
Затем установите необходимые права на папку с сайтом, вам нужно добавить пользователю IIS_IUSRS возможность записи и изменения содержимого данной папки.
Также не забудьте создать базу данных для сайта, для этого зайдите в SQL Server Management Studio и, щелкнув правой кнопкой на пункте Базы данных в боковом меню, создайте новую базу.

Для установки CMS наберите в браузере адрес сайта и следуйте указаниям скрипта установки. Никаких сложностей там нет, единственное затруднение может вызвать правильное указание параметров подключения к SQL-серверу. Укажите что вы используете SQL Server (или SQL Express)
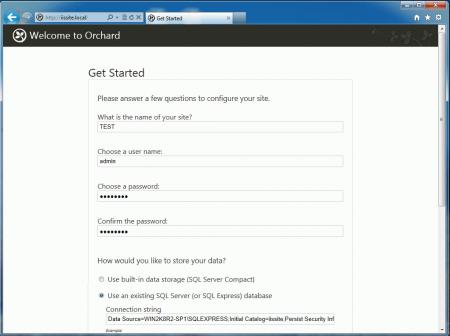
В строке подключения ниже укажите следующее:
server=SERVERNAME\SQLEXPRESS;database=iissite;user=sa;password=sapasswd;где:
- server=SERVERNAME\SQLEXPRESS — имя сервера, на котором установлен SQL-сервер, и экземпляра SQL-сервера.
- database=iissite — имя базы данных (в нашем случае iissite)
- user=sa — пользователь СУБД (в нашем случае sa)
- password=sapasswd — пароль пользователя sa.
Так как наш сайт предназначен для внутреннего использования и использует изолированный экземпляр SQL, то мы использовали для доступа к серверу параметры пользователя sa, если же вы собираетесь размещать на веб-сервере несколько сайтов и администрировать их будут разные пользователи, то заведите на SQL сервере дополнительных пользователей и для подключения используйте их учетные данные, не забыв ограничить им доступ только к «своим» базам.
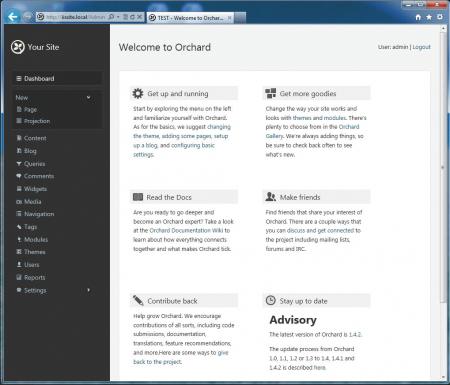
Спустя некоторое время, необходимое для установки CMS, в вашем браузере отобразиться страница сайта с тестовым содержимым. Можете переходить в админ-панель и настраивать сайт согласно ваших потребностей.
Несмотря на то, что мы рассмотрели установку только одного «движка», установка других CMS производится аналогичным образом и сложностей вызвать не должна
В следующей части нашей статьи мы расскажем как добавить нашему серверу поддержку PHP для запуска на нем популярных CMS написанных на этом языке.
Научиться настраивать MikroTik с нуля или систематизировать уже имеющиеся знания можно на углубленном курсе по администрированию MikroTik. Автор курса, сертифицированный тренер MikroTik Дмитрий Скоромнов, лично проверяет лабораторные работы и контролирует прогресс каждого своего студента. В три раза больше информации, чем в вендорской программе MTCNA, более 20 часов практики и доступ навсегда.

Лично я предпочитаю пользоваться веб-сервером на .nix системах, но иногда бывает необходимо развернуть web-сервер на Windows. Рассмотрим такой вопрос как установка веб-сервера на Windows Server. На примере Windows Server 2012. Хотя в остальных версиях процесс установки особо не отличается.
Первым делом нужно установить IIS. Делается это довольно просто. Диспетчер серверов -> Управление -> Добавить роли и компоненты -> Установка веб-сервера (IIS). Подробнее в видео.
Тег video не поддерживается вашим браузером.
Скачайте видео.
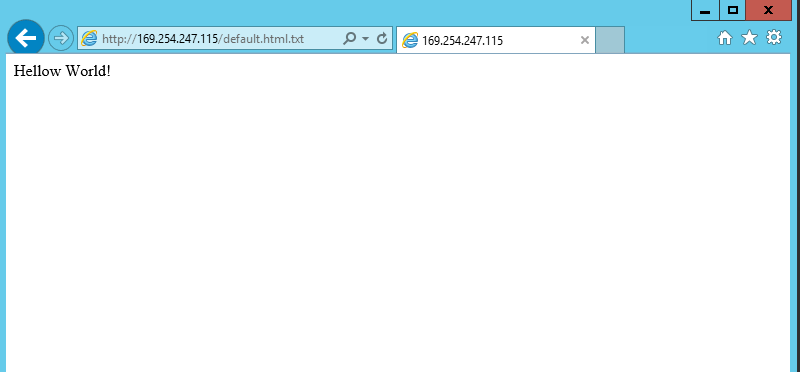
Создайте тестовую страницу, откройте блокнот, напишите любой текст и сохраните в C:\Inetpub\wwwroot под названием Default.html (в моем случае это txt файл — Default.html.txt).
Настройка веб-сервера
Создайте тестовую страницу, откройте блокнот, напишите любой текст и сохраните в C:\Inetpub\wwwroot под названием Default.html (в моем случае это txt файл — Default.html.txt).
Что бы настроить web-сервер откройте Диспетчер служб IIS: Пуск -> Администрирование -> Диспетчер служб IIS. Слева будет отображаться web-узел по умолчанию.
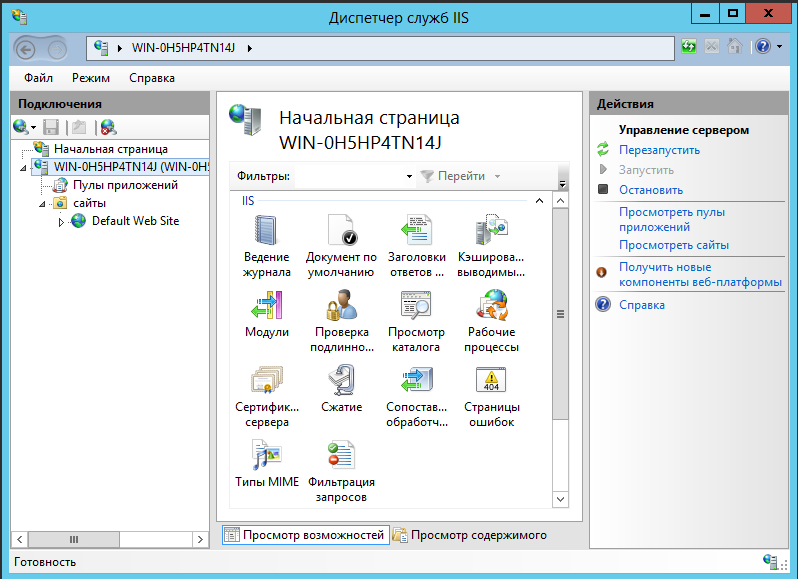
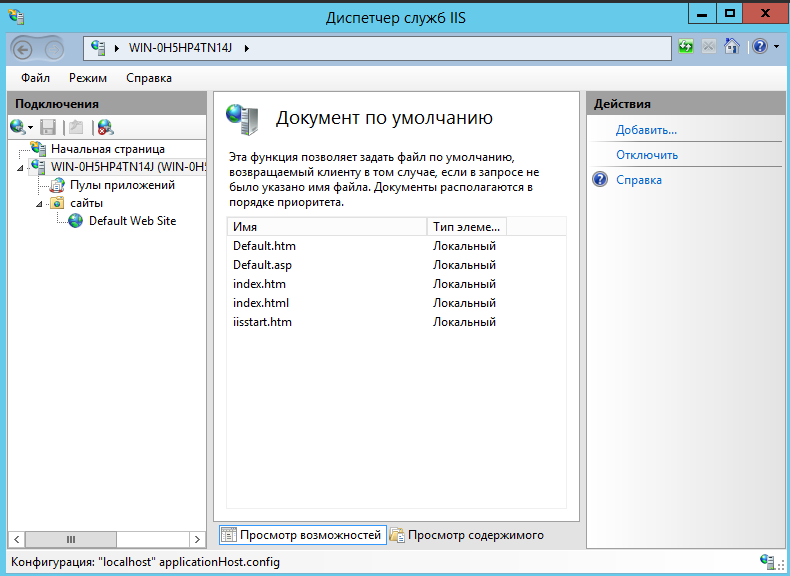
Для добавления web-страницы по умолчанию нужно выбрать сервер, а затем выбрать Документ по умолчанию.
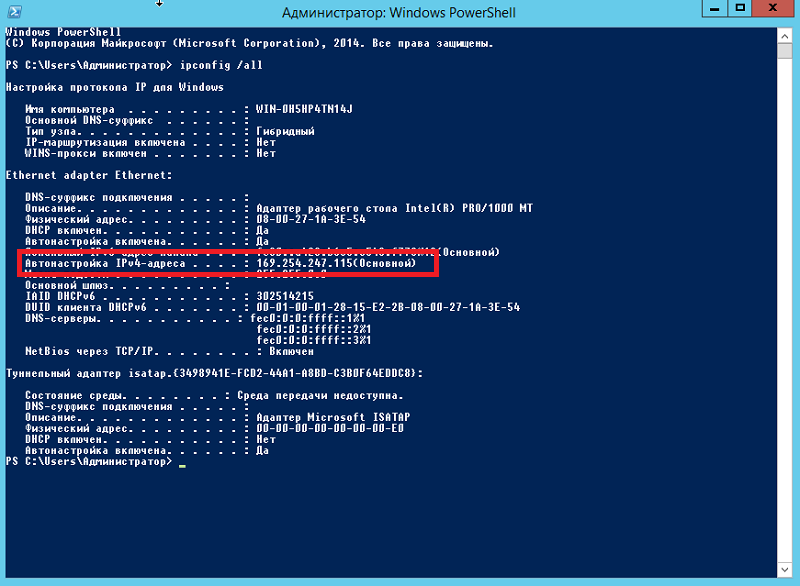
Далее нам нужно узнать (если не знаем) IP-адрес сервера. Для этого заходим в PowerShell и выполняем команду – ipconfig /all.
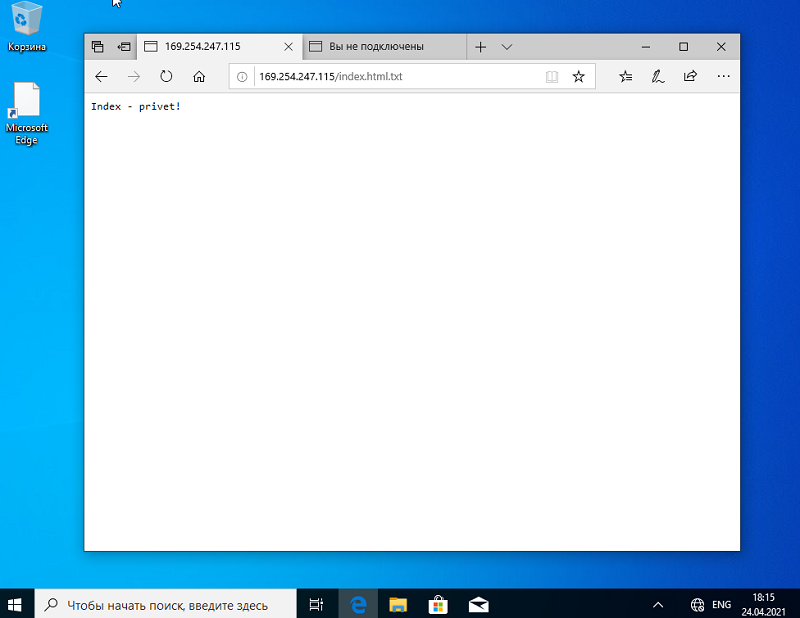
Запускаем браузер и набираем IP-адрес и названием страницы по умолчанию. В моем случае это 169.254.252.180/Default.html.txt.
Попробуйте открыть эту страницу с другого рабочего места в сети. 
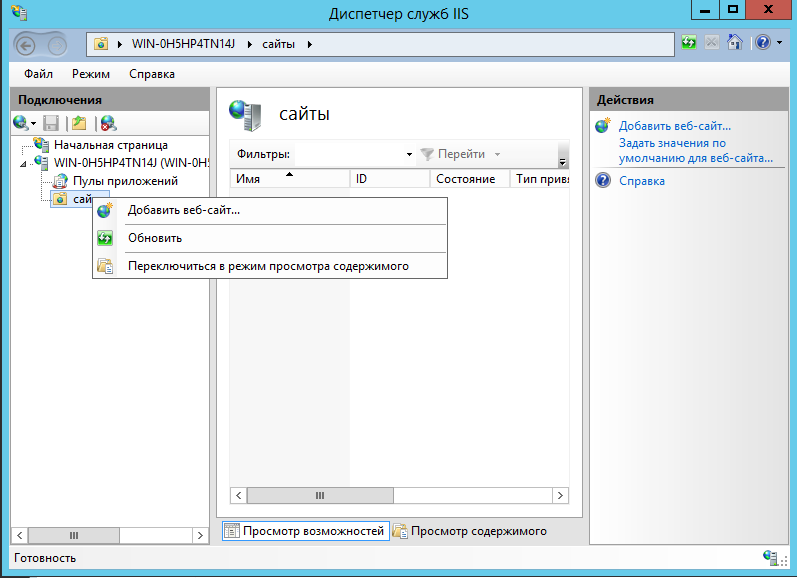
Создайте новый web-узел. Создайте папку для нового сайта на диске C. В моем случае это папка www. Создайте в папке тестовую страницу (как Default.html ранее). Удалите текущий узел, щелкните правой кнопкой мыши на узле «сайты» и выберите команду «Добавить веб-сайт».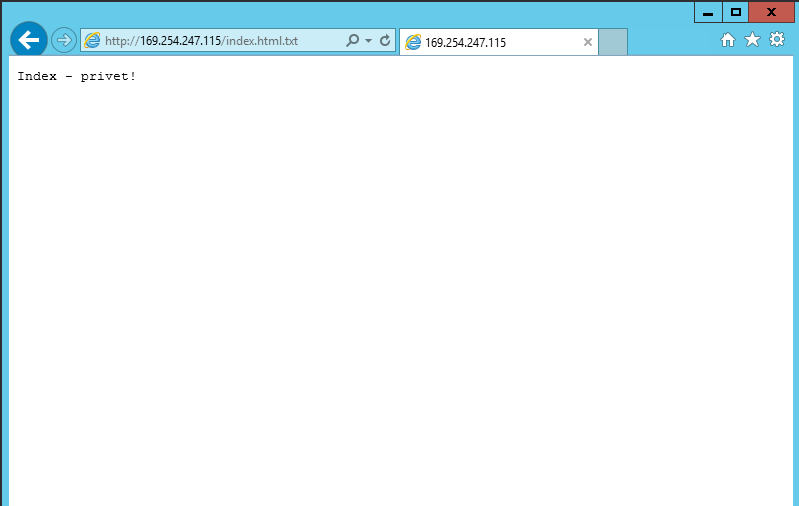
Заполните поля:
- Имя сайта.
- Физический путь.
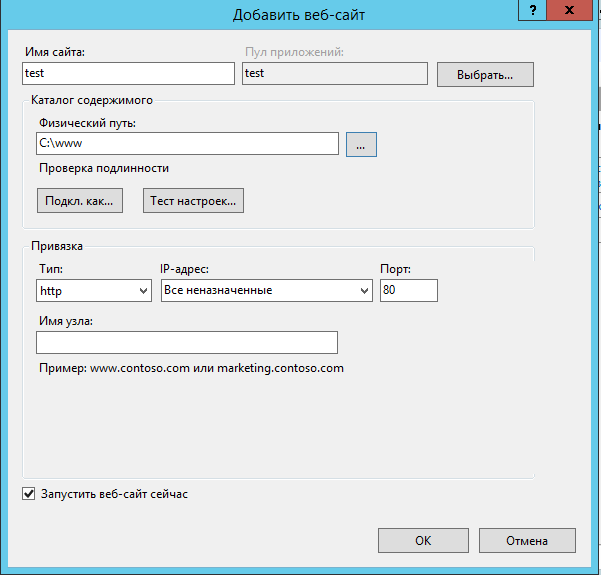
Нажмите ОК и проверьте работоспособность сайта на сервере.
Проверьте работоспособность сайта на другом компьютере в сети.
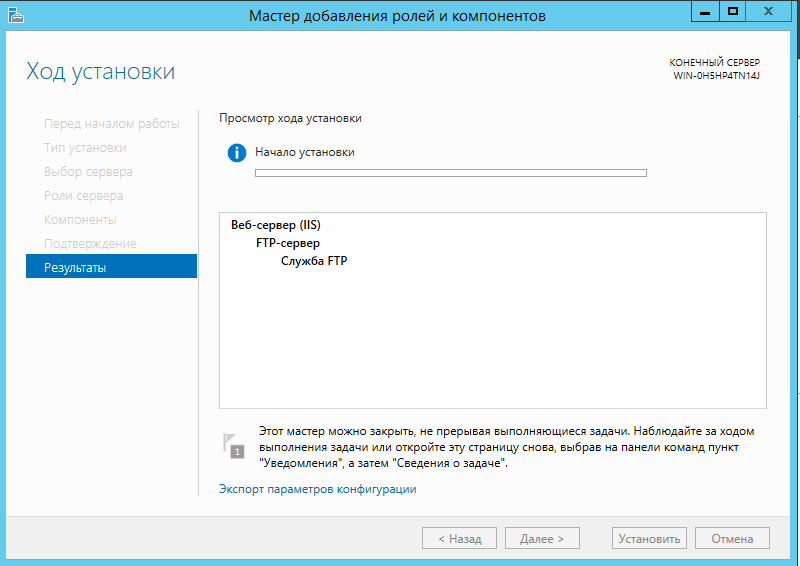
Установка FTP-сервера
Установите FTP-сервер. Он устанавливается так же, как и веб-сервер IIS (Диспетчер серверов -> Управление -> Добавить роли и компоненты -> FTP-сервер).
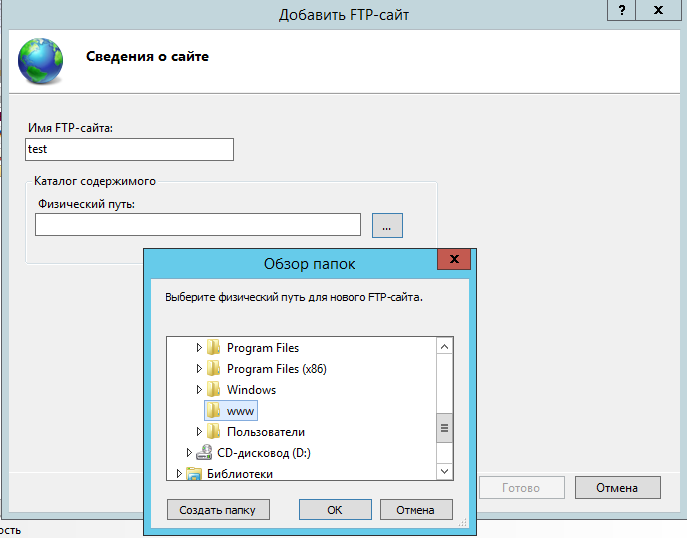
В диспетчере служб IIS нажмите «Добавить FTP-сайт». Откроется окно добавления нового FTP-сайта. Задайте имя сайта и физический путь.
Укажите параметры привязки SSL.
Настройте разрешения. Предоставьте пользователям разрешения на чтение информации и на запись.
Далее необходимо создать виртуальный каталог веб-сервера. Это необходимо для того, чтобы веб-сервер мог получить доступ к корневому каталогу службы FTP.
Задайте псевдоним и физический путь. Обычно они совпадают с именем и (test) и каталогом сайта (C -> www).
Настройки брандмауэра
Для того, что бы FTP соединение работало корректно нудно настроить брандмауэр.
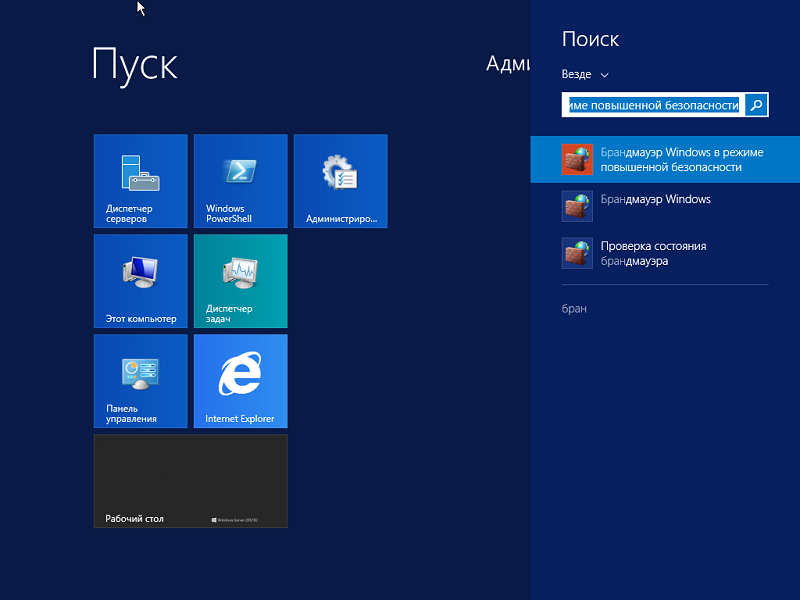
Откройте брандмауэр в режиме повышенной безопасности.
В вертикальном меню слева выберите Правила для входящих подключений.
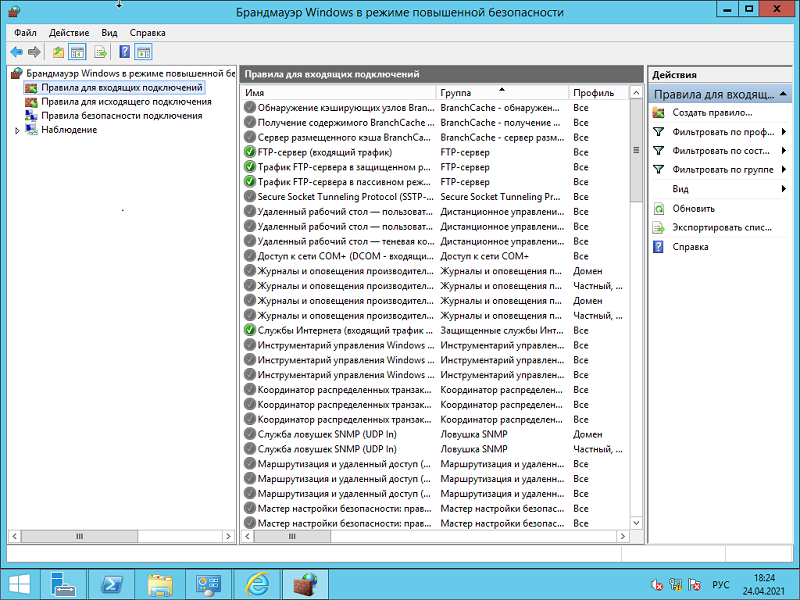
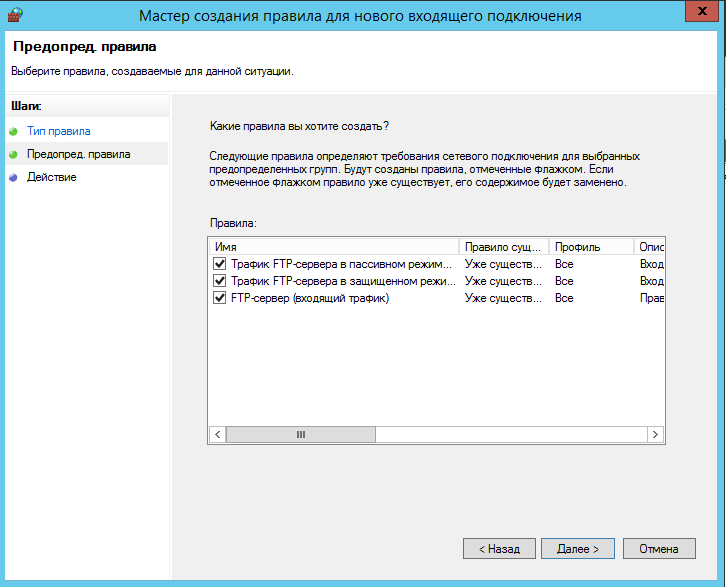
Выберите в вертикальном меню справа Создать правило. Выберите тип правила: Преопределенные: FTP-сервер. Далее установите все правила.
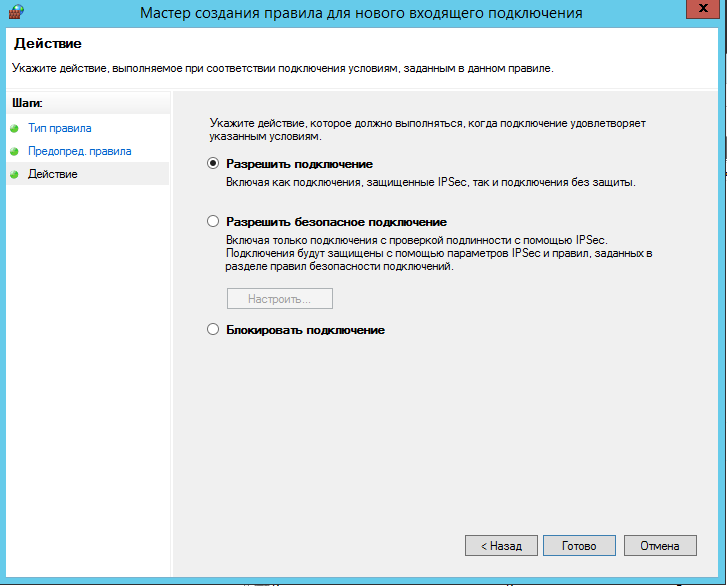
Далее выберите действие — разрешить подключение.
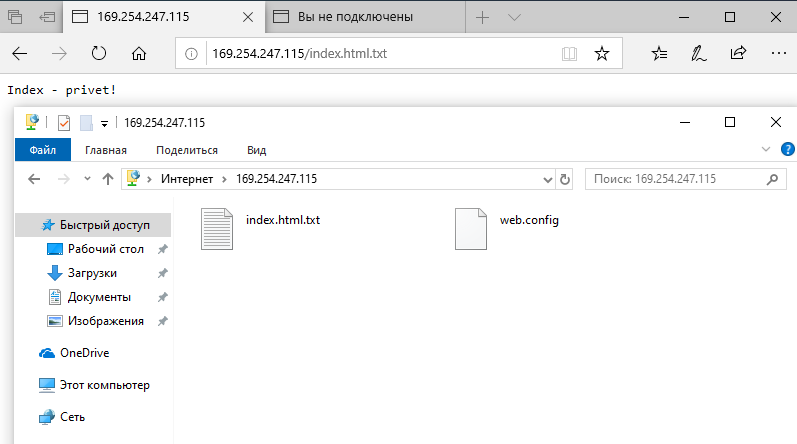
Подключитесь с помощью FTP с другого компьютера в локальной сети. Для этого наберите в браузере: ftp://IP-адрес сервера после чего введите логин и пароль от сервера.

FTP-соединение установлено!
Итак, в этой статье мы рассмотрели такую тему как установка веб-сервера на Windows Server. Если у вас появились вопросы обязательно задайте их в комментариях.

Анатолий Бузов / об авторе
Обучаю HTML, CSS, PHP. Создаю и продвигаю сайты, скрипты и программы. Занимаюсь информационной безопасностью. Рассмотрю различные виды сотрудничества.
Internet Information Services(IIS) is a web server created by Microsoft. IIS web server accepts requests from remote client computers and returns the appropriate response. Web Server(IIS) provides a reliable, manageable, and scalable Web application infrastructure.
Table of Contents
- Install Internet Information Services (IIS)
- Configure the default site on IIS
Demo environment
- Computer Name: server1.test.com
- Operating System: Windows Server 2022 Datacenter
- IP Address: 192.168.0.3
Install Internet Information Services (IIS)
Steps for Install Internet Information Services
- Open Add roles and features Wizard
- Select installation type
- Select destination server
- Select server roles
- Select features
- Confirm installation selections
1. Open Add roles and features Wizard
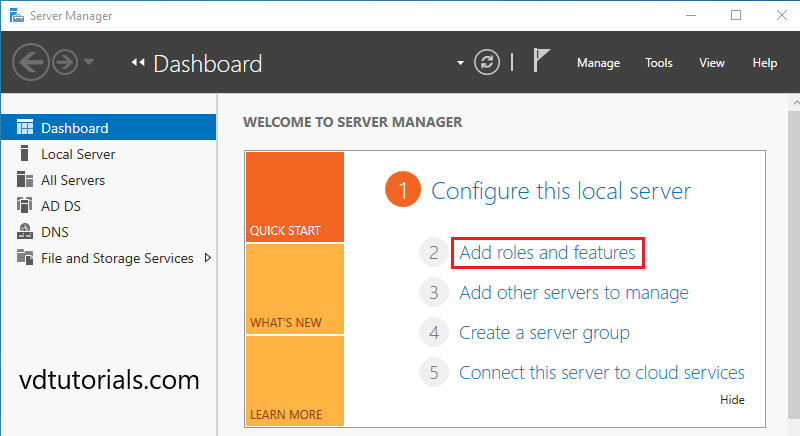
Open the Server Manager dashboard and click Add roles and features.
Before you begin, click Next.

2. Select installation type
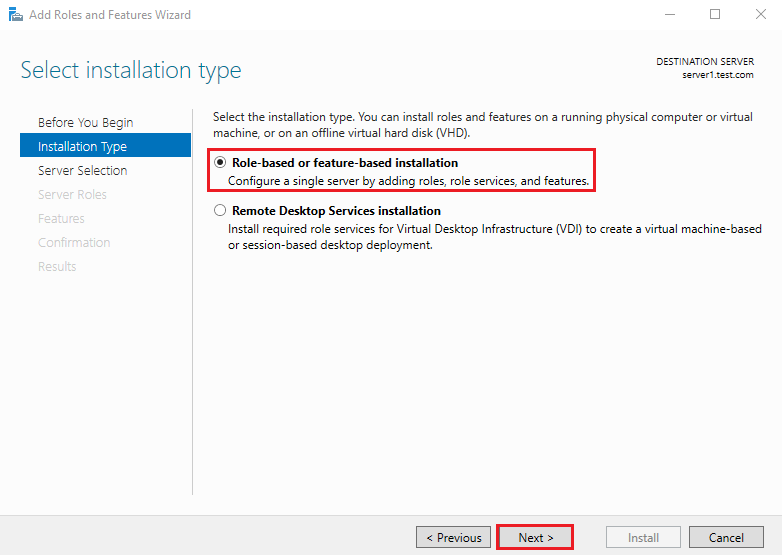
Select Role-based or feature-based installation and click Next.
3. Select destination server
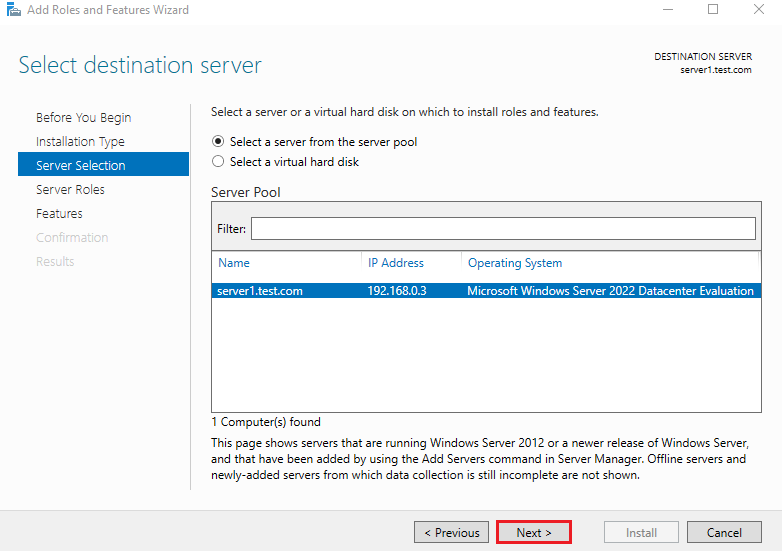
Select a Host to which you’d like to add services and click Next.
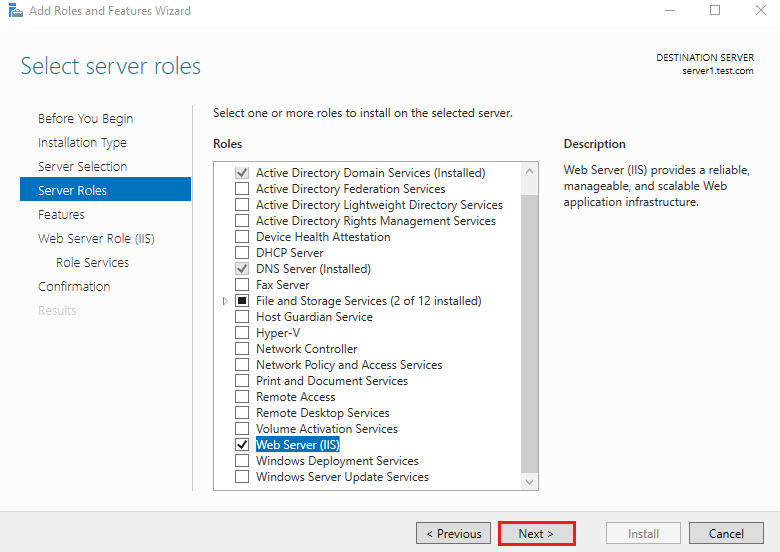
4. Select server roles
Choose the Web Server (IIS) box from the server roles page.
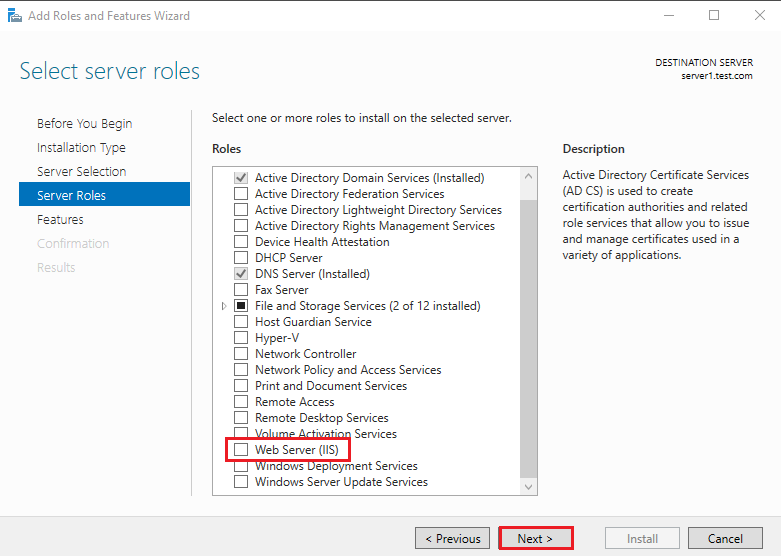
As soon as you choose Web Server (IIS) a new window appears. Click Add Features.
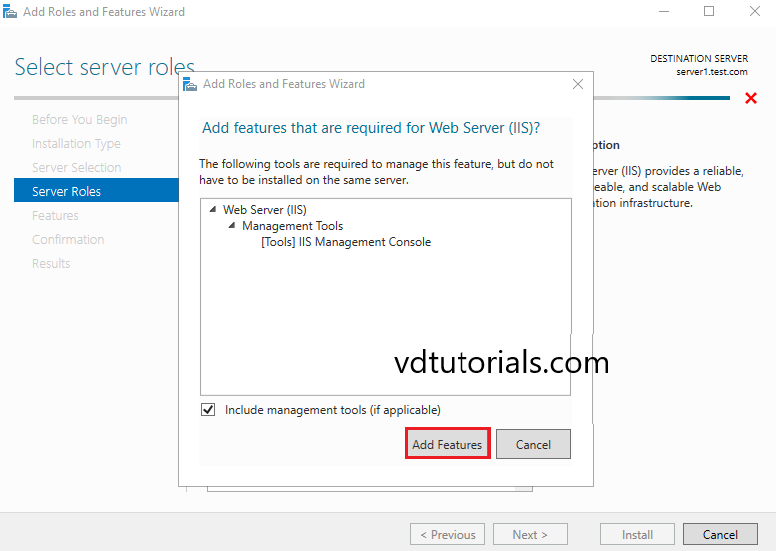
Please ensure the Web Server (IIS) option is selected and click Next.
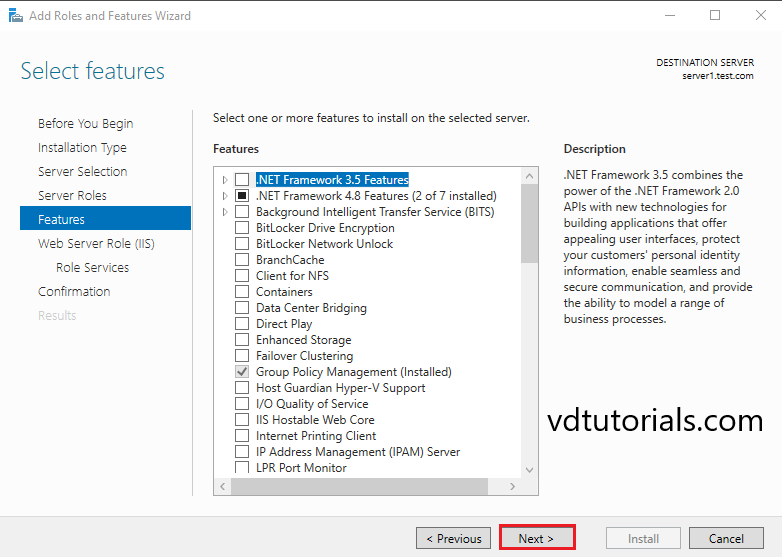
5. Select features
On the select features console, just click Next because we do not require any extra features at the moment.
On the Web Server Role (IIS) console, you can read brief information about the Web Server (IIS). Click Next to continue.
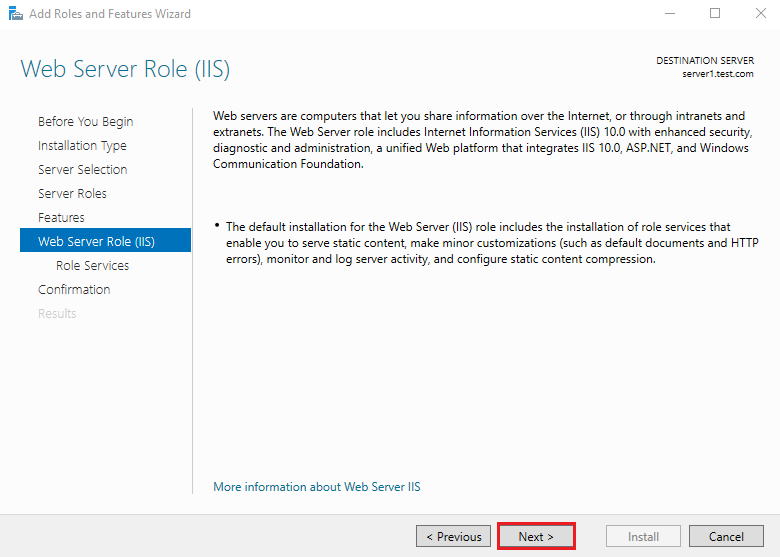
Click Next to continue.
6. Confirm installation selections
Verify installation selections and click Install.
After finishing Installation, click Close.
Run Web browser and verify IIS is running normally.
Configure the default site on IIS
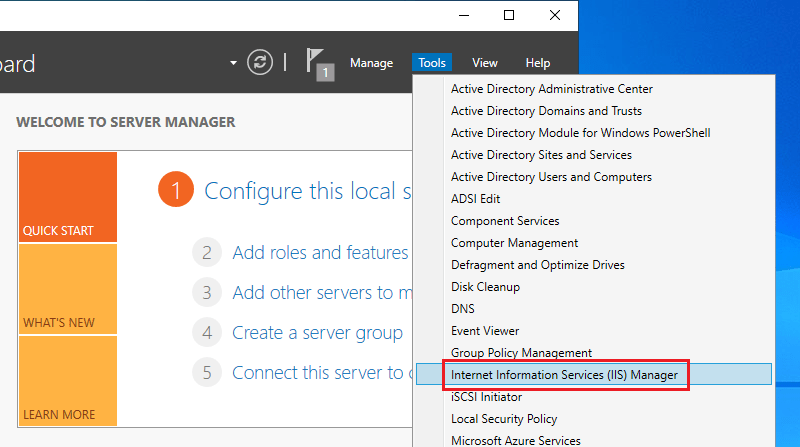
Open the Server Manager dashboard, click Tools, and select Internet Information Services(IIS) Manager.
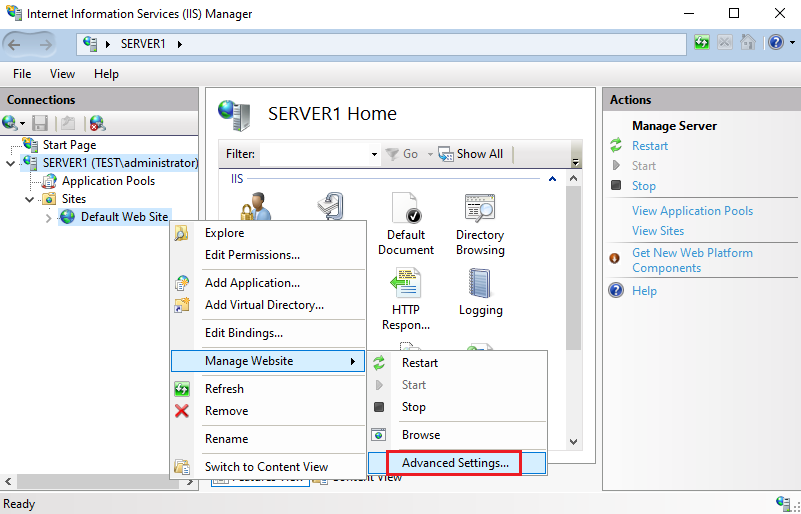
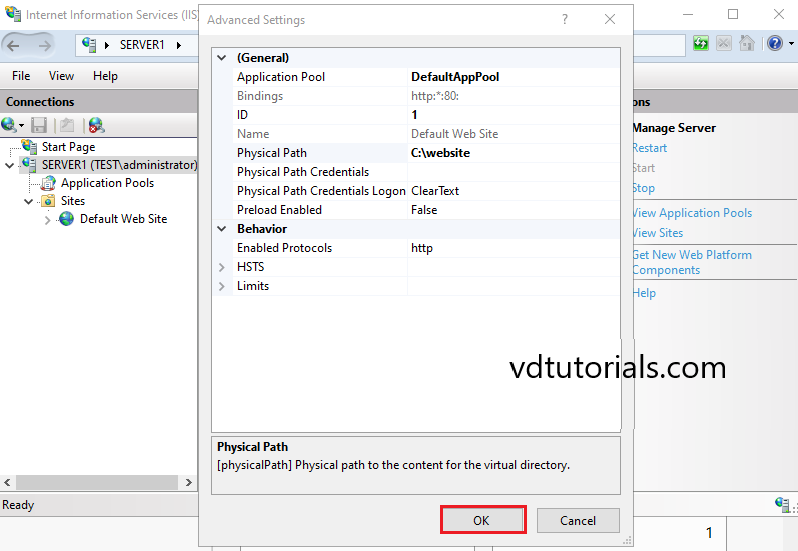
Right-click on Default Web Site, Click Manage Website, and select Advanced Settings.
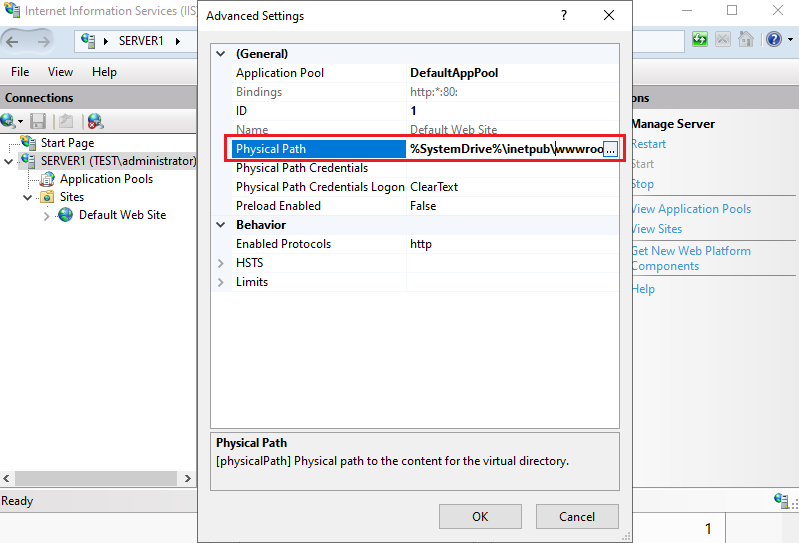
In Advanced Settings, click on Physical Path to choose a different document root.
Select the document root folder. (C:\website)
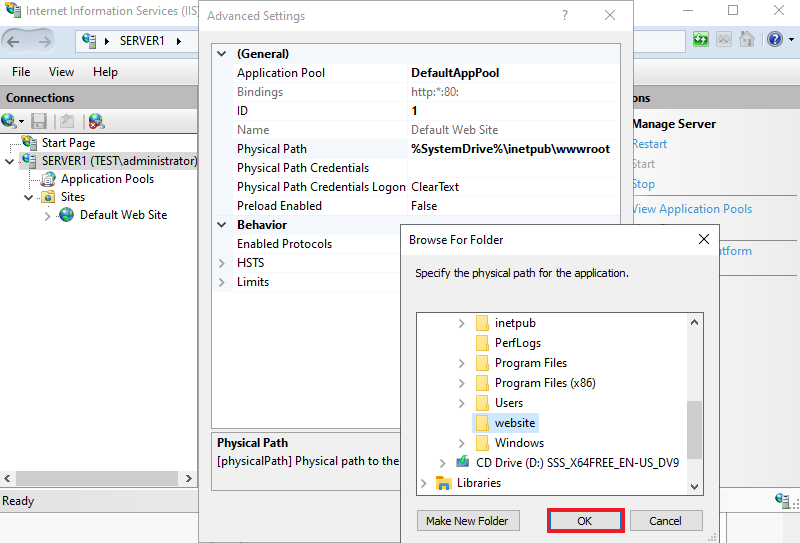
Click OK to continue.
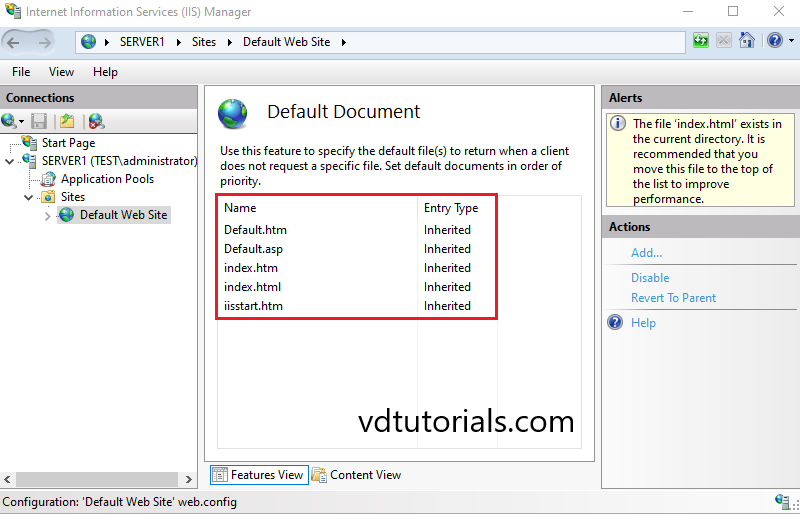
The Default documents feature in IIS Manager helps you to specify the default files.
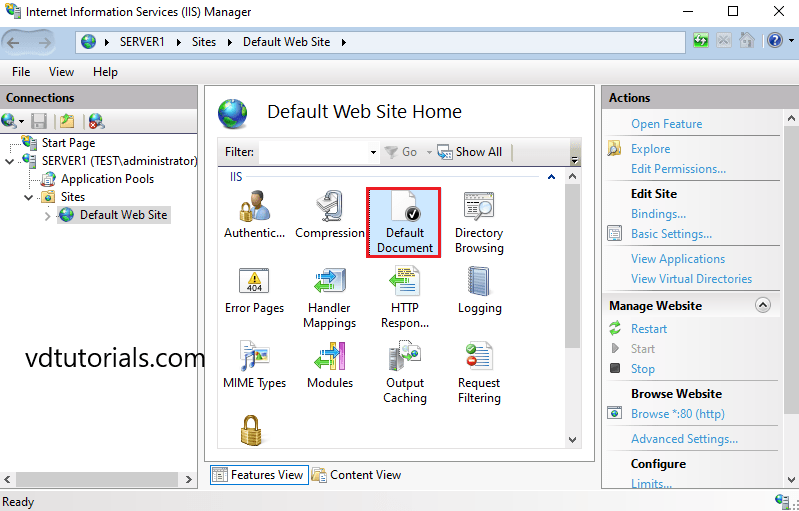
Default Documents.
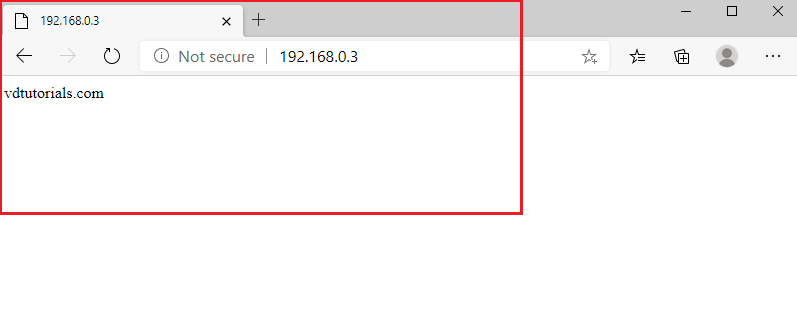
Create an index.html file in the document root and Verify access with a Web browser.
In this guide from the Windows Tutorials, we intend to teach you How To Install and Configure Apache on Windows Server 2022.
Apache HTTP Server is a free and open-source web server that delivers web content through the internet. It is commonly referred to as Apache and after development, it quickly became the most popular HTTP client on the web.
- Install and Configure Apache on Windows Server 2022
Install and Configure Apache on Windows Server 2022
With this tutorial, you will learn to install and configure Apache on your Windows Server.
Now follow the steps below to complete this guide.
Installing Apache on Windows Server 2022
First, you need to download Apache from the ApacheLounge. Depending on your Windows Server, choose the 32 or 64-bit version of Windows.
Note: Be sure you installed the latest 14.30.30704 Visual C++ Redistributable for Visual Studio 2015-2022.
When your download is completed, open your downloaded file and extract it to a suitable location like c:/Apache24 or etc.
Now you need to make some configuration changes.
Configure Apache
Now that you have extracted Apache on your Windows server, you need to configure it.
Open the conf subdirectory and open the httpd.conf file with a text editor like Notepad.
We assume that you have extracted the file in the c:/Apache24.
You need to update the ${SRVROOT} variable point to the new location like this:
Define SRVROOT "C:/Apache24"
Also, you need to locate the following lines and change them to the new location that you have extracted Apache:
ServerRoot "C:/Apache24"
DocumentRoot "C:/Apache24/htdocs"
<Directory "C:/Apache24/htdocs">
ScriptAlias /cgi-bin/ "C:/Apache24/cgi-bin/"
After that you need to uncomment and set the server name point to your server name or its IP address:
ServerName www.example.com:80
Next, locate the following line and add the “ExecCGI” in front of it:
Options Indexes FollowSymLinks ExecCGI
After that, find the line below and uncomment it by removing the # from the beginning of the line:
AddHandler cgi-script .cgi
And also add the following line:
AddHandler cgi-script .pl
At the end of the file add the following line:
ScriptInterpreterSource Registry
When you are done, save and close the file.
Now you can start Apache on your Windows Server 2022.
Open a command/PowerShell prompt in the “bin” folder at the location where you extracted Apache.
In a command prompt you can start Apache with the following command:
httpd.exe
You can start Apache in a PowerShell prompt with the following command:
& "c:\Apache24\bin\httpd.exe"
Now you can verify that your Apache is running on your server by typing 127.0.0.1 in your web browser.
http://127.0.0.1
You will see:
If you see this in your web browser means that your Apache is running on your Windows Server 2022.
Conclusion
Apache HTTP web servers are used by over 67% of all web servers in the world. Apache web servers are easy-to-customize environments, they’re fast, reliable, and highly secure. This makes Apache web servers a common choice by best-in-class companies.
At this point, you learn to Install and Configure Apache on Windows Server 2022.
I hope you enjoy using it.
Even today, IIS is a popular choice for many web developers or web application hosting services, as it offers many features and can be easily integrated with other Microsoft products. However, for people, especially from a non-windows background, it can be complex to set up and Configure IIS on the Windows Server. We tried to solve this problem through this post. We created this post for those who struggle to configure IIS on the Windows platform.
We will start this post with what IIS is, its important pros and cons, its installation, important roles and features, and finally, a step-by-step procedure to configure IIS on the Windows server.
What Is IIS Server?
Internet Information Services (IIS, formerly Internet Information Server) is an extensible web server created by Microsoft for use with the Windows NT family. IIS supports HTTP, HTTPS, FTP, FTPS, SMTP, and NNTP. It has been an integral part of the Windows NT family since Windows NT 4.0, though it may be absent from some editions (e.g. Windows XP Home edition), and is not active by default.
IIS is a set of Internet-based services that share a common graphical user interface (GUI). The IIS management console allows an administrator to configure the services, administer security, and manage website content. In addition to the management console, IIS provides a set of graphical utilities for performing common tasks, such as creating and editing websites, managing user accounts, and configuring security settings.
General Pros And Cons Of Using IIS Server:
Benefits Of Using IIS:
- IIS is a feature-rich web server that can be easily integrated with other Microsoft products.
- IIS is easy to set up and manage, making it a good choice for small businesses or those new to web hosting.
Drawbacks Of Using IIS:
- IIS can be complex to set up and manage, especially if you are not familiar with Microsoft products.
- IIS is often the target of attacks due to its popularity, so it is important to keep your IIS installation up-to-date and secure
Installation Of IIS Server
IIS is not installed by default on Windows 10 or Windows Server 2016. It can be added through the “Turn Windows features on or off” dialog in the Control Panel or using the following PowerShell cmdlets:
Install-WindowsFeature Web-Server
Install-WindowsFeature Web-Asp-Net
Install-WindowsFeature Web-Mgmt-Console
Once IIS is installed, the services can be started and stopped using the “net start,” and “net stop” commands. The default website can be accessed at http://localhost.
Roles And Features Of IIS Server
IIS has a modular design that allows functionality to be added or removed via “roles” and “features.” By default, IIS includes the following roles and features:
- Web Server (IIS) role: This is the core component of IIS and includes the web server, configurable security settings, and management tools.
- Common HTTP Features: This includes static content, default document, directory browsing, and HTTP errors.
- Dynamic Content: This includes ASP.NET, server-side Includes, and WebDAV publishing.
- Application Development: This includes .NET Extensibility, ISAPI Extensions, and ISAPI Filters.
- Health and Diagnostics: This includes HTTP logging, request tracing, and custom errors.
- Security: This includes request filtering, IP and domain restrictions, and Basic authentication.
- Performance: This includes caching and compression.
- Management Tools: This includes the IIS Management Console and IIS Management Scripts and Tools.
IIS can be managed using the IIS Manager GUI or through a command-line interface using the “appcmd” tool.
Adding The Components Of IIS Server
IIS can be extended by installing additional roles and features, such as ASP.NET, PHP, or a media streaming server. These components can be added through the “Turn Windows features on or off” dialog in the Control Panel or using the following PowerShell cmdlets:
Install-WindowsFeature Web-Asp-Net
Install-WindowsFeature Web-PHP
Install-WindowsFeature Web-Media-Streaming
IIS is a flexible and versatile web server that can be configured to suit a wide variety of needs. It can be used for simple websites or complex web applications and is an essential component of any Windows Server deployment.
IIS can be found on Windows Server 2021, Windows Server 2019, Windows Server 2016, Windows Server 2012, Windows Server 2008, and Windows Server 2003. It is also available as a free download for Windows 10.
IIS is a popular web server used by many businesses and organizations. It is easy to set up and configure and can be customized to suit your specific needs. IIS is a reliable and secure web server that will keep your website running smoothly.
Time needed: 10 minutes
How to Configure IIS on the Windows Server 2019?
- Set up Web Server (IIS) Role- Open the ‘Add Roles and Features’
Let’s begin this process by setting up the IIS role. Open the ‘Add Roles and Features.’ In Server Manager, go to Manage –> Add Roles and Features.

- Select Installation Type
Click Next button in the ‘Add Roles and Features’ wizard. Select Role based or Feature based installation since it is a role based. Click Next.

- Select the Destination Server
The Destination server is the Server on that you are going to install the WebServer (IIS) Role.In this demo,since we are going to install IIS on the local server local server, select that local server then click Next.

- Select ‘Web Server (IIS)’ role
Select ‘Web Server (IIS)’ role then click on Next.

- Add the ‘Add Features’
Click on ‘Add Features’ button to add the IIS features.

- Select the roles to install IIS on the selected server
Click Next to continue ‘Server Roles‘ and ‘Features‘.

- Select features to install IIS on the selected server

- Choose the Web Server Role
Click Next as we are installing Web Server Roll (IIS) with Default Role services.

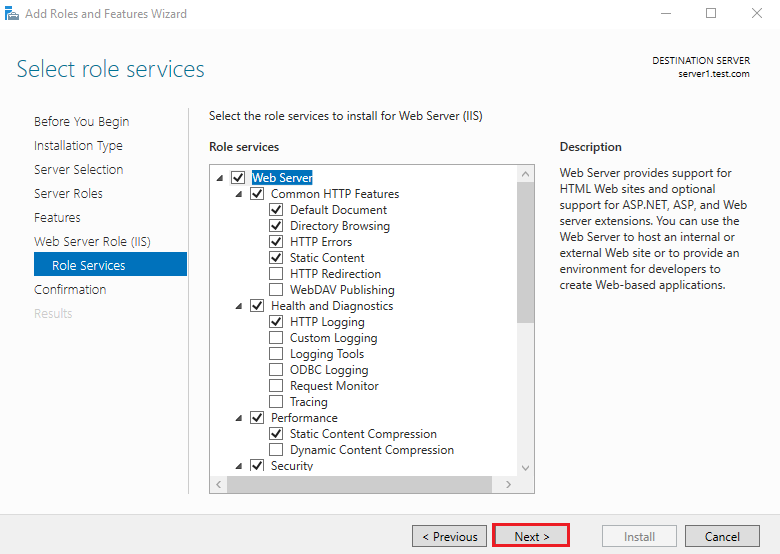
- Select the role service to install for IIS Web Server
Leave the default selection as it is as the default ‘Role Services’ are good to configure Basic IIS site. Click Next.

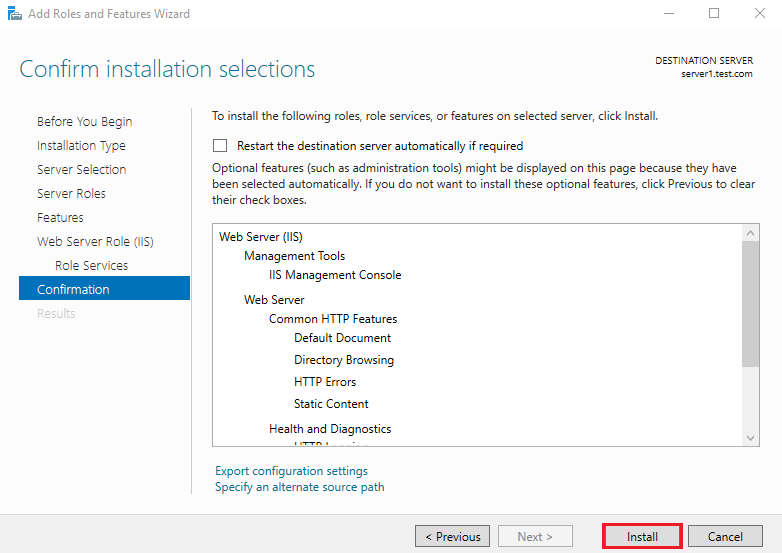
- Confirm the installation configuration of ‘Web Server (IIS)’ role
Verify the settings and Click on the Install button to being the installation of ‘Web Server (IIS)‘ role.

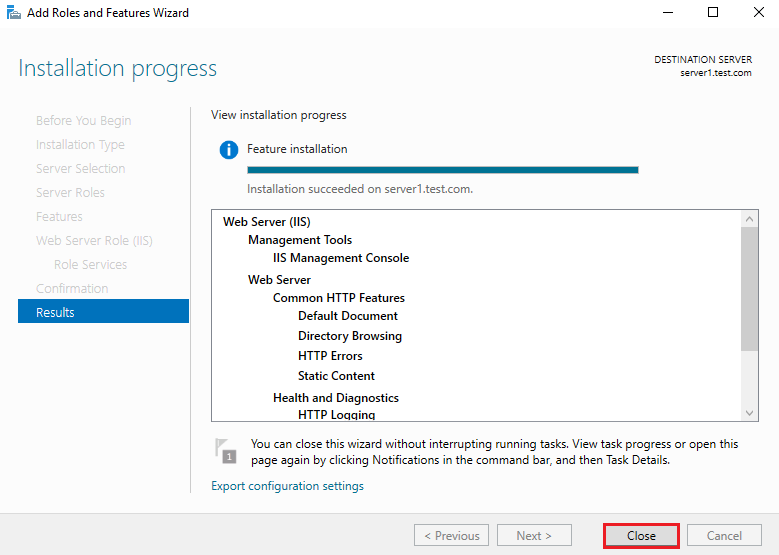
- Close the configuration wizard after successful installation
Click on the Close button upon the completion of the configuration wizard.
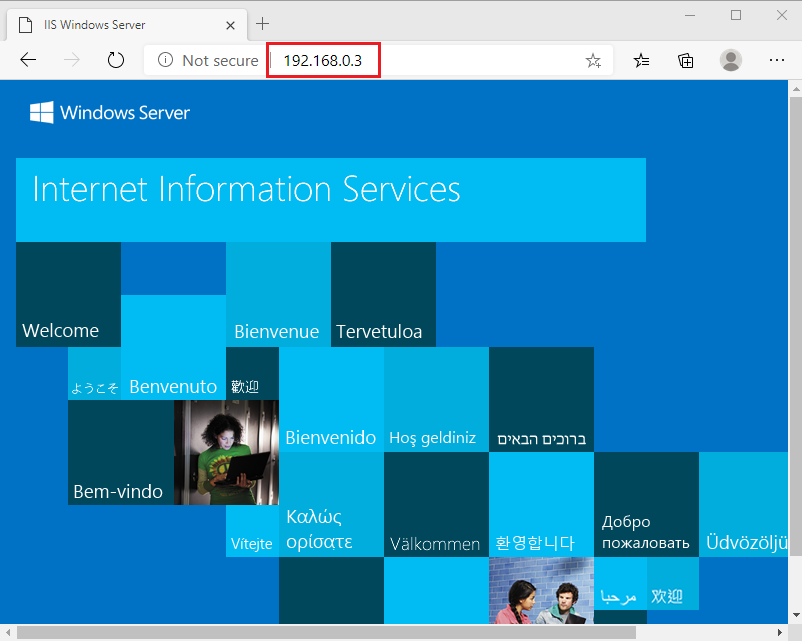
- Verify the IIS web server is running
You can verify your IIS serer by visiting its default page. To verify the Default Webpage, open browser in the server and type Server HoastName or IP Address in the Address bar and click enter.


That’s it. See how easy to configure IIS on the Windows Server.
We hope this post will show you step by step procedure to Configure IIS on the Windows Server. Please share this post and help to secure the digital world. Visit our social media page on Facebook, LinkedIn, Twitter, Telegram, Tumblr, & Medium and subscribe to receive updates like this.
Frequently Asked Questions:
1. What is IIS?
IIS (Internet Information Services) is a web server software created by Microsoft that runs on Windows Server operating systems. It allows you to host and manage websites, web applications, and services. IIS supports various web technologies, including ASP.NET, PHP, and WebSocket.
2. Why should I configure IIS on a Windows Server?
Configuring IIS on a Windows Server enables you to host and manage websites and web applications on your server. This is useful for deploying web applications, creating internal or external websites, and providing web-based services for your organization or customers.
3. What are the prerequisites for installing IIS on Windows Server?
Before installing IIS on a Windows Server, you should have a Windows Server operating system installed and configured with a static IP address. You should also have administrator privileges to install and configure IIS.
4. How can I install IIS on Windows Server?
To install IIS on a Windows Server, follow these steps:
1. Open the “Server Manager” dashboard.
2. Click “Add roles and features.”
3. In the “Add Roles and Features Wizard,” click “Next” until you reach the “Server Roles” tab.
4. Select the “Web Server (IIS)” role and click “Next.”
5. On the “Features” tab, ensure that the required features are selected and click “Next.”
6. On the “Web Server Role (IIS)” tab, click “Next.”
7. On the “Role Services” tab, select the desired IIS role services and click “Next.”
8. Review the installation summary and click “Install” to begin the installation.
9. Once the installation is complete, click “Close.”
5. How can I create a website using IIS on Windows Server?
To create a website using IIS on Windows Server, follow these steps:
1. Open the “Internet Information Services (IIS) Manager” from the “Server Manager” dashboard or by searching for it in the Start menu.
2. In the “Connections” pane, expand the server node, and right-click the “Sites” folder.
3. Click “Add Website.”
4. Enter a site name and the physical path where your website files are located (e.g., C:\inetpub\wwwroot\mysite).
5. Set the desired binding options, such as the IP address, port, and host name, and click “OK.”
6. How can I secure my IIS web server?
To secure your IIS web server, consider implementing the following security best practices:
1. Keep your server and IIS up to date with the latest security patches and updates.
2. Enable HTTPS and use SSL/TLS certificates for encryption.
3. Configure appropriate authentication and authorization settings for your website or web application.
4. Implement URL filtering and request filtering to block unwanted requests.
5. Disable unused IIS features and services.
6. Regularly monitor and analyze IIS logs for potential security threats.
7. How can I optimize the performance of my IIS web server?
To optimize the performance of your IIS web server, consider implementing the following best practices:
1. Enable output caching for static content and dynamic content (when applicable).
2. Use compression to reduce the size of response data.
3. Configure application pool recycling settings to manage server resources efficiently.
4. Use a Content Delivery Network (CDN) to distribute static content across multiple locations.
5. Monitor server performance and adjust settings as needed.
8. Can I run multiple websites on a single IIS server?
Yes, you can run multiple websites on a single IIS server by creating multiple sites and configuring the appropriate bindings for each site.
9. What is the default location for website files on an IIS server?
The default location for website files on an IIS server is the “C:\inetpub\wwwroot” directory. You can store your website files in this directory, or you can create a custom directory for each website and specify the path when adding a new website in IIS Manager.
10. Can I host PHP applications on an IIS server?
Yes, you can host PHP applications on an IIS server by installing the PHP runtime and configuring IIS to process PHP files. To do this, follow these steps:
1. Download and install the PHP runtime for Windows from the official PHP website.
2. Configure IIS to use the PHP runtime for processing PHP files by adding a handler mapping in IIS Manager.
3. Test your PHP application by creating a sample PHP file in your website directory and accessing it through a web browser.
11. How do I enable logging for my IIS website?
To enable logging for your IIS website, follow these steps:
1. Open IIS Manager and navigate to your website in the Connections pane.
2. In the Features view, double-click the “Logging” icon.
3. In the Logging settings, select the “Enable” checkbox.
4. Configure the desired log format, log directory, and other settings as needed.
5. Click “Apply” in the Actions pane to save your changes.
12. How can I redirect HTTP to HTTPS on my IIS website?
To redirect HTTP to HTTPS on your IIS website, you must first enable HTTPS by obtaining and installing an SSL/TLS certificate. After enabling HTTPS, follow these steps:
1. Install the “URL Rewrite” module for IIS if it’s not already installed.
2. Open IIS Manager and navigate to your website in the Connections pane.
3. In the Features view, double-click the “URL Rewrite” icon.
4. Click “Add Rule(s)” in the Actions pane and select “Blank Rule.”
5. Configure the rule with the following settings:
Name: “HTTP to HTTPS Redirect”
Match URL: “Requested URL” = “Matches the Pattern”, “Using” = “Regular Expressions”, “Pattern” = “(.*)”
Conditions: “Input” = “{HTTPS}”, “Type” = “Matches the Pattern”, “Pattern” = “^OFF$”
Action: “Action type” = “Redirect”, “Redirect URL” = “https://{HTTP_HOST}/{R:1}“, “Redirect type” = “Permanent (301)”
6. Click “Apply” in the Actions pane to save your changes.
13. How do I configure custom error pages in IIS?
To configure custom error pages in IIS, follow these steps:
1. Open IIS Manager and navigate to your website in the Connections pane.
2. In the Features view, double-click the “Error Pages” icon.
3. Click “Add” in the Actions pane to create a new custom error page.
4. Enter the HTTP status code for the error and select the desired response action (e.g., “Execute a URL on this site” or “Respond with a 302 redirect”).
5. Specify the URL or file path for the custom error page and click “OK.”
6. Repeat the process for any additional custom error pages you want to configure.
14. How do I enable directory browsing on my IIS website?
To enable directory browsing on your IIS website, follow these steps:
1. Open IIS Manager and navigate to your website in the Connections pane.
2. In the Features view, double-click the “Directory Browsing” icon.
3. Click “Enable” in the Actions pane
15. How do I configure MIME types in IIS?
To configure MIME types in IIS, follow these steps:
1. Open IIS Manager and navigate to your website or server in the Connections pane.
2. In the Features view, double-click the “MIME Types” icon.
3. To add a new MIME type, click “Add” in the Actions pane, then enter the file extension and corresponding MIME type. Click “OK” to save the new MIME type.
4. To edit or remove an existing MIME type, select the MIME type in the list and click “Edit” or “Remove” in the Actions pane.
16. How do I configure custom HTTP response headers in IIS?
To configure custom HTTP response headers in IIS, follow these steps:
1. Open IIS Manager and navigate to your website in the Connections pane.
2. In the Features view, double-click the “HTTP Response Headers” icon.
3. Click “Add” in the Actions pane to create a new custom HTTP response header.
4. Enter the header name and value, then click “OK” to save the new header.
5. To edit or remove an existing header, select the header in the list and click “Edit” or “Remove” in the Actions pane.
17. How do I configure the maximum file upload size in IIS?
To configure the maximum file upload size in IIS, follow these steps:
1. Open IIS Manager and navigate to your website in the Connections pane.
2. In the Features view, double-click the “Request Filtering” icon.
3. In the “Request Filtering” settings, click “Edit Feature Settings” in the Actions pane.
4. In the “Edit Request Filtering Settings” window, set the “Maximum allowed content length” value to the desired file size limit (in bytes) and click “OK.”
18. Can I run multiple versions of the .NET Framework on a single IIS server?
Yes, you can run multiple versions of the .NET Framework on a single IIS server by configuring separate application pools for each version. To do this, follow these steps:
1. Open IIS Manager and navigate to the “Application Pools” node in the Connections pane.
2. Click “Add Application Pool” in the Actions pane to create a new application pool.
3. In the “Add Application Pool” window, set the desired .NET Framework version and other settings, then click “OK.”
4. Assign your web applications to the appropriate application pool according to their .NET Framework version requirements.
19. How do I configure an FTP site on my IIS server?
To configure an FTP site on your IIS server, you must first install the FTP Server role service. After installing the FTP Server role service, follow these steps:
1. Open IIS Manager and navigate to the server node in the Connections pane.
2. Right-click the “Sites” folder and click “Add FTP Site.”
3. Enter a site name and the physical path where your FTP files are located (e.g., C:\inetpub\ftproot\mysite).
4. Configure the desired binding options, such as the IP address and port, then click “Next.”
5. Configure the desired authentication and authorization settings for your FTP site, then click “Finish.”
20. How do I back up and restore my IIS configuration?
To back up and restore your IIS configuration, use the “appcmd” command-line tool or the “Configuration Editor” in IIS Manager. To back up the configuration using the “appcmd” tool, open a Command Prompt with administrator privileges and run the following command:
appcmd add backup <backup_name>

Arun KL
Hi All, I am Arun KL, an IT Security Professional. Founder of “thesecmaster.com”. Enthusiast, Security Blogger, Technical Writer, Editor, Author at TheSecMaster. To know more about me. Follow me on LinkedIn