Mainly, professional gamers and social media users want to play games and other entertainment apps at once on PCs. The reason is to enhance their user experience. Conversely, professional people prefer using the Android apps on their systems, especially those related to work. This helps lower the chances of distraction you might face while using mobile phones.
In simple terms, no matter what app you are using, it becomes easier to use on the widescreen compared to smartphones. Moreover, you will also find this program helpful if your phone is not accessible at a time.
This article entails how to download & install Bluestacks on Windows, its basic settings, and the procedure to run Android apps along with efficient software to record the screen. Let’s take a plunge into the details!
How to Download and Install Bluestacks on Windows PC
Released in 2011, Bluestacks became a well-known Android emulator for both Windows users. It assists you in filling the gap between the mobile and desktop ecosystem so you can run almost any android app desktop without consuming your phone battery. Though it carries out many functions like recording, it is considered an ideal software for mobile games because of its unique Game Center.
Simply, what you will get are smooth processing and improved accuracy. Furthermore, it provides you with better visibility on the wide PC screen. Also, you will get the advanced gaming experience along with the Bluestacks strategy guides. Most importantly, you can get its paid version for advanced customization features and quick customer support options.
You will learn the procedure soon if you are a beginner, but if you are a pro, you can easily benefit from this top-notch gaming glory!
Before moving forward, keep in mind the system requirements. These include the minimum 4GB RAM, 5GB free Device Space, Intel/AMD Processor, updated Graphics Drivers, and at least Windows 7 OS.
Now, let’s know the detailed steps for how to use Bluestacks on Windows 10, but firstly, there is a requirement to download and install Bluestacks on Windows:
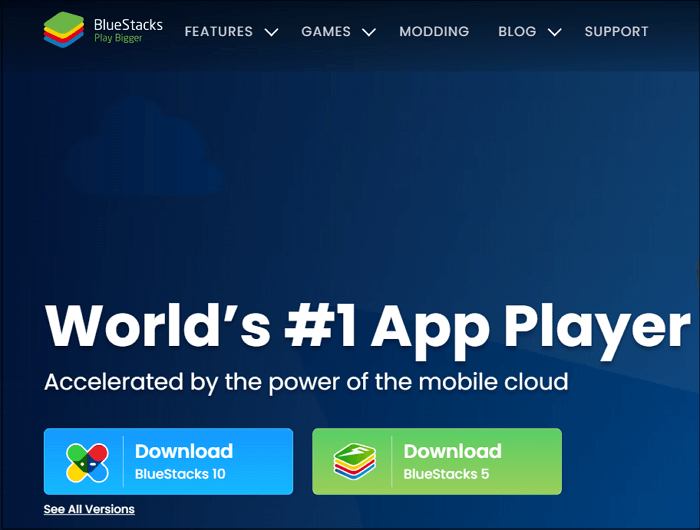
Step 1. First of all, you have to open the official website of this program on your PC. You will get the two versions; however, you need to click on the «See all versions» tab. It will take you to the next screen.
Step 2. Now, scroll down, where the section «For Windows» appears. Click on any «Download» button to proceed further. It will get downloaded instantly if the internet is stable. Here, you need to open the program.
Step 3. Next, press Yes > Install to begin your installation. Once done, it will start downloading all the parts, which takes some time.

Basic Settings for Bluestacks
Now that you have learned the download and installation method and system requirements, the next stage is to master its basic settings. These will help you improve your experience and make the most out of this software. Otherwise, you will encounter issues during the app running process. Indeed, no one wants to take this risk, so let’s begin!
Here is all you need to know about the basic settings for how to use Bluestacks properly:
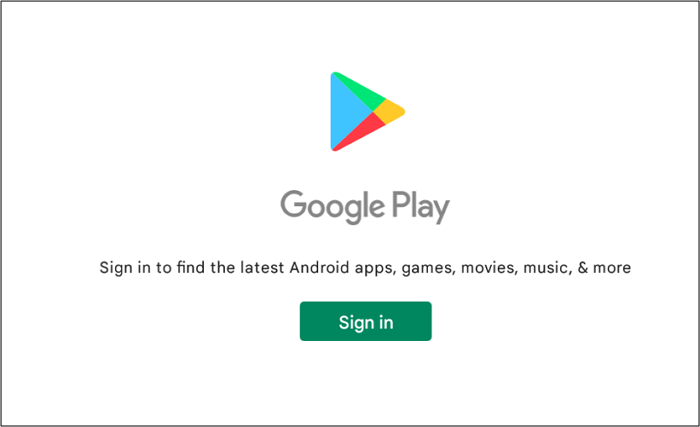
Step 1. After launching the software on your Windows system, you will see the notification of signing in to your Google Play account. Sign-in is a must thing to do before running the Android apps.
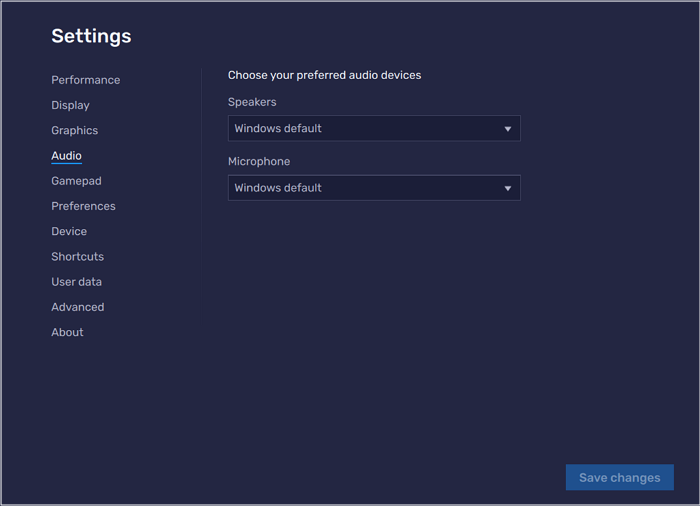
Step 2. Now, click the three bars icon from the top right-side menu. Here you can select the frame rate, resolution, pixels, speakers, and microphone. Even it is possible to choose the language and adjust the Gamepad input settings. Click «Save Changes» at the end.
Step 3. Finally, you can adjust volume, game controls, screen rotation, and others from the sidebar menu. Now, you are all done!
How to Use Bluestacks to Run Android Apps on PC
Here is the most crucial stage of using Bluestacks, where you are all set to run an Android app on your Windows system. It’s what you have previously worked out for. Indeed you will need the assistance to get through this stage, so look at the below content without wasting any time!
Let’s move forward toward the tutorial for how to use Bluestacks to run the Android apps on a PC effortlessly:
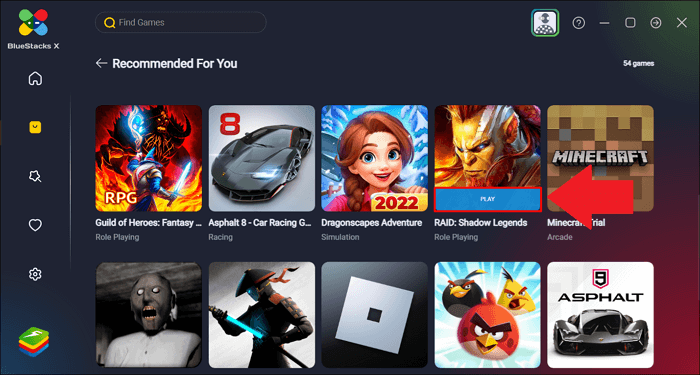
Step 1. The first step requires you to launch the software on your PC. Since you have logged in to Play Store during the basic settings, you need to search for the application you want to run. Choose an app to look into its details.
Step 2. Next, press the «Install» tab, and an installation notification appears on the right. After completion, click the installed application icon to get it opened. Each app you select will open in the new tab so you can switch these to move from one to another.
Step 3. All the controls will be available on the right-side column from where you can manage the tasks like taking screenshots, sharing location, or recording.
How to Record Android Screen on PC
Besides running various games or other apps on a single platform, people sometimes want to record the Android screens. Bluestacks also offer this feature, but it’s complex to use. Since it’s also unsuitable for professionals, it is wise to use lightweight software like EaseUS RecExperts. Below are the details!
Suppose you are looking for a full-fledged screen recorder with many features, simple functionality, and a user-friendly interface. In that case, EaseUS RecExperts must be your way to go. It helps you in the easy recording of your PC screen along with the flexibility of selecting the screen capture area, connecting the webcam, and setting the volume as per your demands. Additionally, you can benefit from this program’s auto-split and auto-stop functions.
As far as the recordings are concerned, they will be visible in the recordings tab after you finish. Even you are able to schedule this capturing task if required. While recording, you have the option to alter the video and audio settings like frame rate, sample rate, bitrate, quality, and output format. Last but not least, you can get technical support if you face any issues.
EaseUS RecExperts
- Suitable for even the beginners and naive users
- Adjust the audio and video preferences
- Offer the GPU hardware acceleration technology
- Let you use the hotkeys for quick processing
- Support formats like FLV, MKV, MOV, GIF, MP4, etc.
Here’s how to record Android screen on PC using EaseUS RecExperts:
Step 1. Run EaseUS RecExperts on your device and you will see two recording modes. You can choose «Full Screen»to record the whole screen or choose «Region» to select the recording area manually before recording.

Step 2. After that, you can choose to record the webcam, system sound, microphone or record none of them as you like. You can also set auto split, auto recording with various functions on the interface.
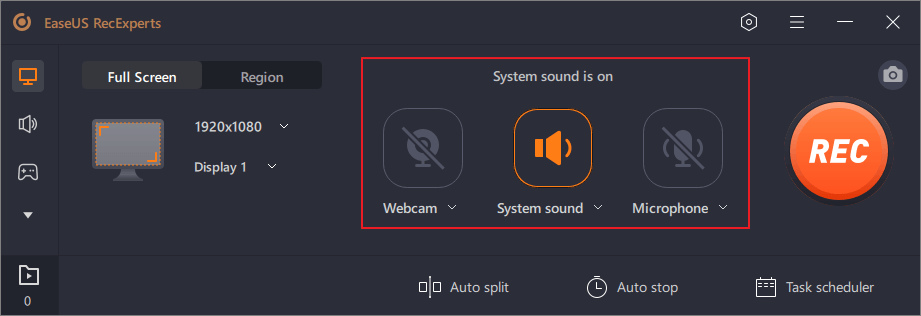
Step 3. Then, you can click the red «REC» button to start recording. Here will be a menu bar on your screen. To pause the recording, click on the white double vertical bar; to end the recording, click on the red square sign.
![]()
Step 4. After recording, you will be led to the list interface. Here you can view or edit your recordings. To start a new recording, just click on the «REC» button on the top of the interface.

The Bottom Line
Many scenarios demand you to run/play multiple apps or games simultaneously on PCs, and Bluestacks proves beneficial in that case. Though running the Bluestacks program for beginners seems challenging, you can easily download, install, and run any Android app by following the above-detailed procedures.
However, what to do if you want to record the screen? Try the EaseUS RecExperts without delaying a moment. It does not aid you in quick and efficient recording but also offers a unique and extensive range of features.
Using Bluestacks on Windows 10 is a great way to access Android apps on your computer. Bluestacks is an Android emulator that allows you to run Android apps on your Windows 10 PC. This guide will walk you through the steps of setting up and using Bluestacks on Windows 10.
Step 1: Download and Install Bluestacks
The first step is to download and install Bluestacks on your Windows 10 PC. You can download the Bluestacks installer from the official website. Once the download is complete, double-click the installer to begin the installation process. Follow the on-screen instructions to complete the installation.
Step 2: Sign Up for a Bluestacks Account
Once the installation is complete, you will need to sign up for a Bluestacks account. This will allow you to access the Google Play Store and download apps. To sign up, click the “Sign Up” button on the Bluestacks home screen. Enter your email address and create a password.
Step 3: Log in to Your Google Account
Once you have created your Bluestacks account, you will need to log in to your Google account. This will allow you to access the Google Play Store and download apps. To log in, click the “Sign In” button on the Bluestacks home screen. Enter your Google account credentials and click “Sign In”.
Step 4: Download Apps
Once you have logged in to your Google account, you can begin downloading apps. To do this, click the “Google Play Store” icon on the Bluestacks home screen. Search for the app you want to download and click “Install”. The app will be downloaded and installed on your computer.
Step 5: Use the App
Once the app is installed, you can begin using it. To open the app, click the “My Apps” icon on the Bluestacks home screen. Select the app you want to use and click “Open”. The app will open and you can begin using it.
Using Bluestacks on Windows 10 is a great way to access Android apps on your computer. With this guide, you should now have a better understanding of how to set up and use Bluestacks on Windows 10.
Exploring the Benefits of Bluestacks for Windows 10
Bluestacks is a popular Android emulator for Windows 10 that allows users to run Android apps and games on their PC. This technology has revolutionized the way people use their computers, providing a convenient and efficient way to access the full range of Android apps and games. In this article, we will explore the benefits of Bluestacks for Windows 10 users.
One of the primary benefits of Bluestacks is its ease of use. The software is designed to be intuitive and user-friendly, allowing users to quickly and easily install and run Android apps and games on their PC. Additionally, the software is regularly updated to ensure compatibility with the latest versions of Windows 10.
Another benefit of Bluestacks is its performance. The software is designed to run Android apps and games smoothly and efficiently, allowing users to enjoy a seamless experience. Additionally, the software is optimized for gaming, allowing users to enjoy a lag-free gaming experience.
Bluestacks also offers a wide range of customization options. Users can customize the look and feel of their Android apps and games, as well as adjust the settings to suit their preferences. This allows users to tailor their experience to their individual needs.
Finally, Bluestacks is a secure platform. The software is regularly updated to ensure that users are protected from malicious software and other security threats. Additionally, the software is designed to protect users’ privacy, ensuring that their data is kept safe and secure.
In conclusion, Bluestacks is a powerful and convenient tool for Windows 10 users. The software is easy to use, offers excellent performance, and provides a wide range of customization options. Additionally, the software is secure, ensuring that users’ data is kept safe and secure. For these reasons, Bluestacks is an excellent choice for Windows 10 users.
How to Optimize Performance with Bluestacks on Windows 10
Bluestacks is an Android emulator that allows users to run Android apps and games on their Windows 10 computers. It is a great way to enjoy the Android experience on a larger screen. However, it can be difficult to optimize performance with Bluestacks on Windows 10. Here are some tips to help you get the most out of your Bluestacks experience.
1. Update Bluestacks: Make sure you are running the latest version of Bluestacks. This will ensure that you have the latest features and bug fixes. You can check for updates in the Bluestacks settings menu.
2. Adjust the RAM and CPU: Bluestacks allows you to adjust the amount of RAM and CPU that it uses. You can increase the RAM and CPU to get better performance, but be aware that this will also increase the amount of power that Bluestacks uses.
3. Disable Unnecessary Apps: If you are not using certain apps, you can disable them to free up resources. This will help improve performance.
4. Disable Background Apps: If you have any apps running in the background, they can slow down Bluestacks. You can disable them in the settings menu.
5. Disable Unnecessary Services: Some services can be disabled to free up resources. You can find these services in the Windows Services Manager.
6. Disable Unnecessary Visual Effects: Visual effects can slow down Bluestacks. You can disable them in the Windows Performance Options.
7. Disable Unnecessary Startup Items: Some programs can start up automatically when you turn on your computer. You can disable these programs in the Task Manager.
By following these tips, you can optimize performance with Bluestacks on Windows 10. This will help you get the most out of your Bluestacks experience.
Troubleshooting Common Issues with Bluestacks on Windows 10
Bluestacks is a popular Android emulator for Windows 10 that allows users to run Android apps on their computers. While it is a great tool for running Android apps, it can sometimes experience issues. This article will provide some tips for troubleshooting common issues with Bluestacks on Windows 10.
1. Bluestacks won’t launch: If Bluestacks won’t launch, the first thing to do is to check if your computer meets the minimum system requirements. Bluestacks requires at least 4GB of RAM and a graphics card with at least 1GB of memory. If your computer meets the requirements, try restarting your computer and then launching Bluestacks again.
2. Bluestacks is running slow: If Bluestacks is running slow, try closing any other applications that are running in the background. This will free up system resources and should help improve the performance of Bluestacks. Additionally, you can try disabling the “App Sync” feature in Bluestacks, as this can sometimes cause performance issues.
3. Bluestacks won’t install apps: If Bluestacks won’t install apps, try restarting the emulator and then trying to install the app again. Additionally, make sure that you have enough storage space on your computer for the app. If you still can’t install the app, try downloading the app from a different source.
4. Bluestacks won’t connect to the internet: If Bluestacks won’t connect to the internet, make sure that your computer is connected to the internet and that your firewall is not blocking the connection. Additionally, try restarting your router and then launching Bluestacks again.
These are some tips for troubleshooting common issues with Bluestacks on Windows 10. If you are still having issues, you can contact Bluestacks support for further assistance.
The Best Apps to Use with Bluestacks on Windows 10
Bluestacks is an Android emulator for Windows 10 that allows users to run Android apps on their PC. With Bluestacks, users can access a wide range of apps and games, including popular titles such as Clash of Clans, Subway Surfers, and Candy Crush Saga. Here are some of the best apps to use with Bluestacks on Windows 10:
1. WhatsApp: WhatsApp is a popular messaging app that allows users to send and receive messages, photos, videos, and audio messages. With Bluestacks, users can access WhatsApp on their PC and stay connected with their friends and family.
2. Instagram: Instagram is a popular photo-sharing app that allows users to share photos and videos with their followers. With Bluestacks, users can access Instagram on their PC and stay up to date with their friends’ posts.
3. Netflix: Netflix is a popular streaming service that allows users to watch movies and TV shows. With Bluestacks, users can access Netflix on their PC and enjoy their favorite shows and movies.
4. Spotify: Spotify is a popular music streaming service that allows users to listen to their favorite songs. With Bluestacks, users can access Spotify on their PC and enjoy their favorite music.
5. Google Play Store: The Google Play Store is the official app store for Android devices. With Bluestacks, users can access the Google Play Store on their PC and download their favorite apps and games.
These are just some of the best apps to use with Bluestacks on Windows 10. With Bluestacks, users can access a wide range of apps and games and enjoy them on their PC.
How to Get the Most Out of Bluestacks on Windows 10
Bluestacks is an Android emulator for Windows 10 that allows users to run Android apps and games on their PC. It is a great way to enjoy the full Android experience on a larger screen. With Bluestacks, users can access the Google Play Store, download apps, and customize their Android experience. Here are some tips to help you get the most out of Bluestacks on Windows 10.
1. Update Bluestacks: Make sure you keep Bluestacks up to date. This will ensure that you have the latest features and bug fixes. You can check for updates in the Bluestacks settings menu.
2. Install Apps: You can install apps from the Google Play Store or from other sources. To install apps from other sources, you will need to enable the “Unknown Sources” option in the Bluestacks settings.
3. Customize Your Experience: Bluestacks allows you to customize your experience with various settings. You can change the resolution, language, and other settings to make Bluestacks work best for you.
4. Use Keyboard Shortcuts: Bluestacks has a number of keyboard shortcuts that can make your experience more efficient. You can find a list of the shortcuts in the Bluestacks settings menu.
5. Use Multiple Accounts: Bluestacks allows you to use multiple accounts. This is useful if you want to use different apps or games with different accounts.
By following these tips, you can get the most out of Bluestacks on Windows 10. With Bluestacks, you can enjoy the full Android experience on your PC.
206
206 people found this article helpful
How to Use Bluestacks to Run Android Apps on Windows
Gain access to Google Play Store apps on your computer
Updated on September 6, 2022
What to Know
- Install: Download and install BlueStacks. Sign in to your Google Play Store account.
- In BlueStacks, open Google Play. Select an Android app and choose Install. The app downloads to BlueStacks.
- Choose the Android app icon in BlueStacks to run the app. Use the controls in the sidebar to adjust options for the game.
This article explains how to install BlueStacks and use it to run Android apps on a Windows computer. It includes the requirements to run BlueStacks.
How to Install BlueStacks
BlueStacks is software that brings Android N (7.1.2) to a Windows computer. It gives you the ability to use the mouse and keyboard from your system with Android apps. Unlike a smartphone with a fixed-size screen, you can resize BlueStacks windows to make apps larger or full screen.
Install BlueStacks and sign in to the Google Play Store to download and run Android apps on your laptop or desktop.
-
Open a browser and go to www.bluestacks.com.
-
Select Download BlueStacks.
-
Save, then run the downloaded file. The download and install process may take some time, especially if you have a slow internet connection or a slow computer.
If you encounter a problem, turn off your antivirus software.
-
BlueStacks should automatically start after it installs. This may take some time, depending on the connection and your computer.
-
Once started, BlueStacks gives you the opportunity to sign in to your Google Play account. You’ll need to go through the Google Play sign-in process to access, install, and use Android apps from the Play Store.
-
After you complete the Google Play sign in, you’re set to install Android apps.
How to Install and Use Android Apps From the Google Play Store With BlueStacks
After BlueStacks is installed on your PC, you can download and install Android apps to use from that computer.
-
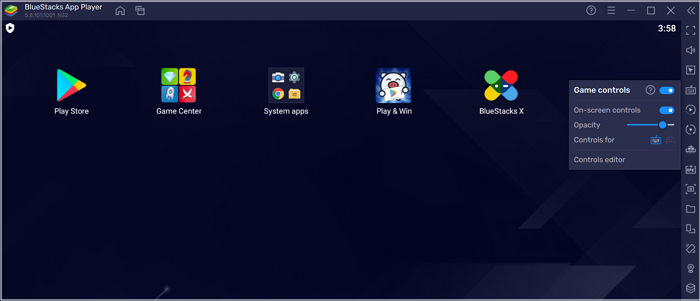
If BlueStacks isn’t open and running, select BlueStacks to start it.
-
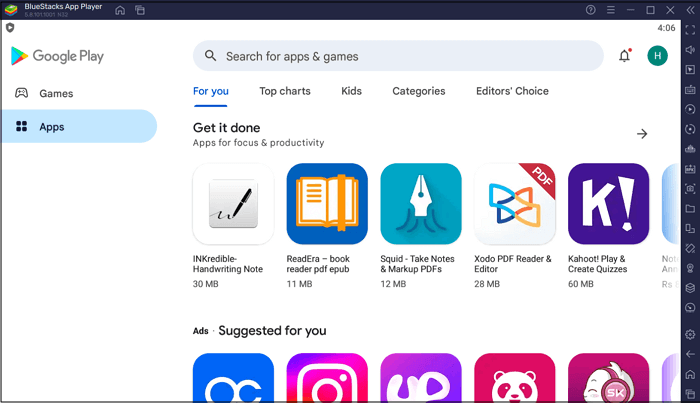
Select Google Play to open the Play Store.
-
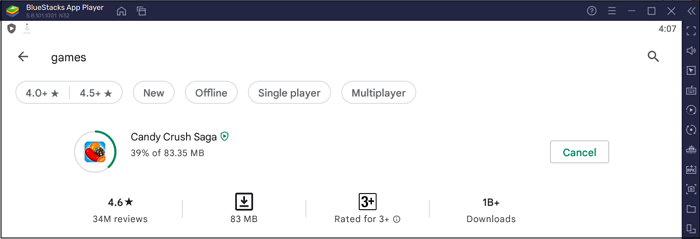
Browse or search for the Android app you want to install. Select the app to see it’s details.
-
Select Install to download the app to your computer. The system displays an icon for each installed Android app within the BlueStacks app.
-
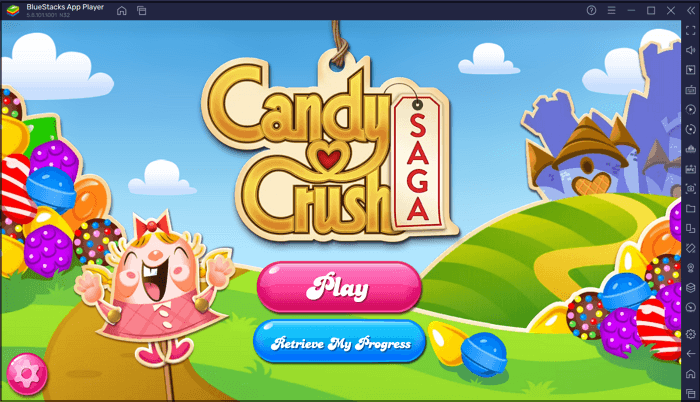
Select the app icon to run the installed Android app.
-
In BlueStacks, each app opens in a separate tab. Switch between tabs to switch between running Android apps.
-
By default, BlueStacks displays a sidebar with several controls to the right of the Android apps. Use these controls to adjust app volume, change keyboard controls, capture screenshots or recordings, set your location, virtually shake the device, or rotate the BlueStacks screen.
-
Optionally, pay (for example, $3.33 per month) to upgrade a BlueStacks account to remove ads.
What You Need to Use BlueStacks
To run BlueStacks 4, you need:
- A computer with Microsoft Windows 7 or newer.
- An up-to-date graphics driver.
- An Intel or AMD processor.
- At least 2 GB of RAM.
- At least 5 GB of storage available.
You’ll also need an administrator account on your Windows PC to install BlueStacks. For the best experience, you’ll want Microsoft Windows 10, 8 GB (or more) of RAM, SSD storage, and a fast graphics card or capabilities.
BlueStacks also works on macOS. For that to work, you’ll need:
- macOS Sierra (10.12 or more recent) with up-to-date drivers and system software.
- At least 4 GB of RAM.
- At least 4 GB of storage space.
As with Windows, you’ll need an administrator account to install BlueStacks on macOS.
More About BlueStacks
Not every Android app offers a Windows, macOS, or web-based equivalent. BlueStacks is an easy way to gain access to Android apps on your Windows computer.
BlueStacks can run multiple Android apps at once, and each app opens in a new tab within BlueStacks. It also offers a multi-instance mode that runs multiple instances of the same app, which may appeal to productivity buffs and gamers. BlueStacks also enables streaming Android gameplay live to Twitch.
An older version of BlueStacks, BlueStacks 3, is no longer supported. Although, many support pages for that version remain available.
FAQ
-
How do I use Instagram on PC without Bluestacks?
-
How do I use Snapchat with Bluestacks?
It is no longer possible to use Snapchat with Bluestacks. There is, however, a dedicated Snapchat app you can use on your computer instead.
-
Can I use Android apps on my PC without Bluestacks?
It is possible to run Android apps on a PC without Bluestacks, but it still requires some work. You can either run Android apps on your PC using an emulator, or you can run the app on your phone while using your PC as a display.
Thanks for letting us know!
Get the Latest Tech News Delivered Every Day
Subscribe
From mobile phones and tablets to laptops and desktops, there is a comprehensive variety of operating systems that power our devices and let us use them optimally. However, it’s not uncommon for people to get creative and try the functionality and working of one operating system on the other. This is commonly known as emulation, and there are plenty of emulators out there doing a specific job.
If we look closely at a more narrow space, it is worth pointing out Android emulation in recent times, which has grown significantly. Android emulators on Windows mimic the functionality of the mobile operating system and allow us to experience Android apps and games on full-blown desktop operating systems. When such a topic springs up, BlueStacks is the first thing that pops in mind, the world-famous Android emulator for Windows PCs.
This article will talk about how to install BlueStacks on Windows 10 and Windows 11, so you never have to look for another guide for accomplishing this purpose. Let’s jump right in without wasting any further time.
BlueStacks explained
As mentioned just now, BlueStacks is an Android emulator. It replicates the core mechanics of Android on Windows, so our Windows PCs can run Android games and applications without gaining access to a mobile phone in any way. It’s pretty advanced software that enables mobile gaming on a desktop.
While there are many Android emulators, none are better than BlueStacks. First of all, it is a legitimate company running this product for a decade, more or less. It’s highly secure, works just as intended, and is high-quality from top to bottom.
You will experience some issues during your time playing Android apps simply because of the nature of this whole operation. Still, none of it is going to be too unmanageable. From purely a performance point of view, BlueStacks is more efficient than rival competitors, including MEmu, another Android emulator praised for its Android app emulation capability.
BlueStacks, on the other hand, is faster than any other emulator out there, offering a full-fledged Android experience and letting you perform unimaginable stuff on your Windows PC. For instance, you can download tons and tons of mobile apps on your computer, but you get a virtual Android phone running on the PC that’s fully capable of doing anything a mobile can do.
We’ve gone enough now on what BlueStacks is and how it works. Let’s get on with the installation part of the software now and further this article with some installation steps. The following section will walk you through the download and installation of BlueStacks on both Windows 10 and Windows 11.
Installing BlueStacks on Windows 10 and Windows 11
The good news is that the installation procedure of BlueStacks is identical on both Windows 10 and Windows 11. Therefore, you can follow the guidelines given below on any operating system and get favorable results. With that being said, let’s get right to the steps for BlueStacks installation.
1. To get started, use this link to go to the official BlueStacks website. As soon as you are there, click on “Download BlueStacks 10” to download the setup file of the software at hand. We recommend going with BlueStacks 10 at the start since it offers more of a lightweight experience and determines whether your device can handle high performance and GPU load or not.
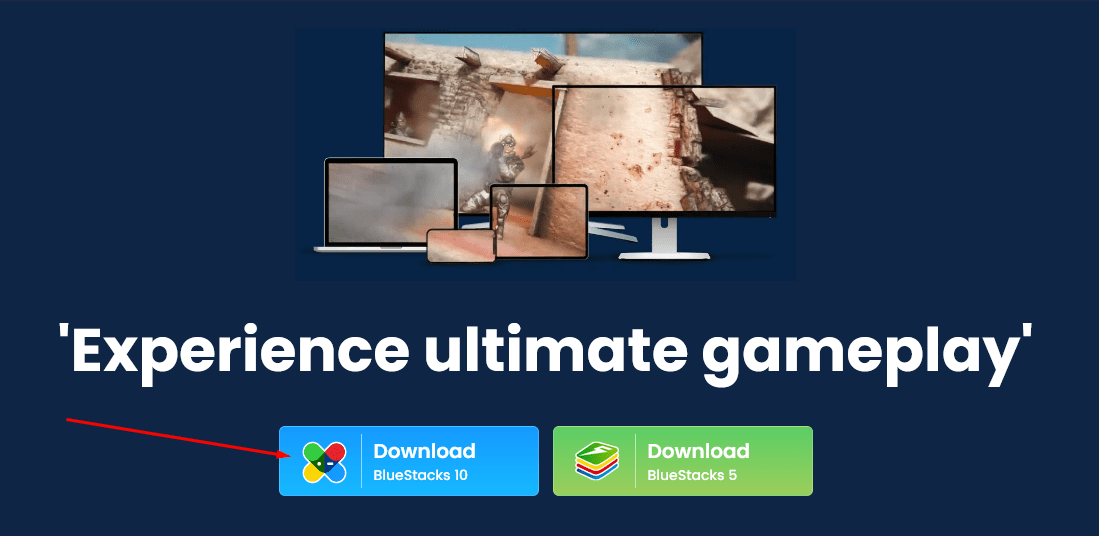
Downloading BlueStacks 10
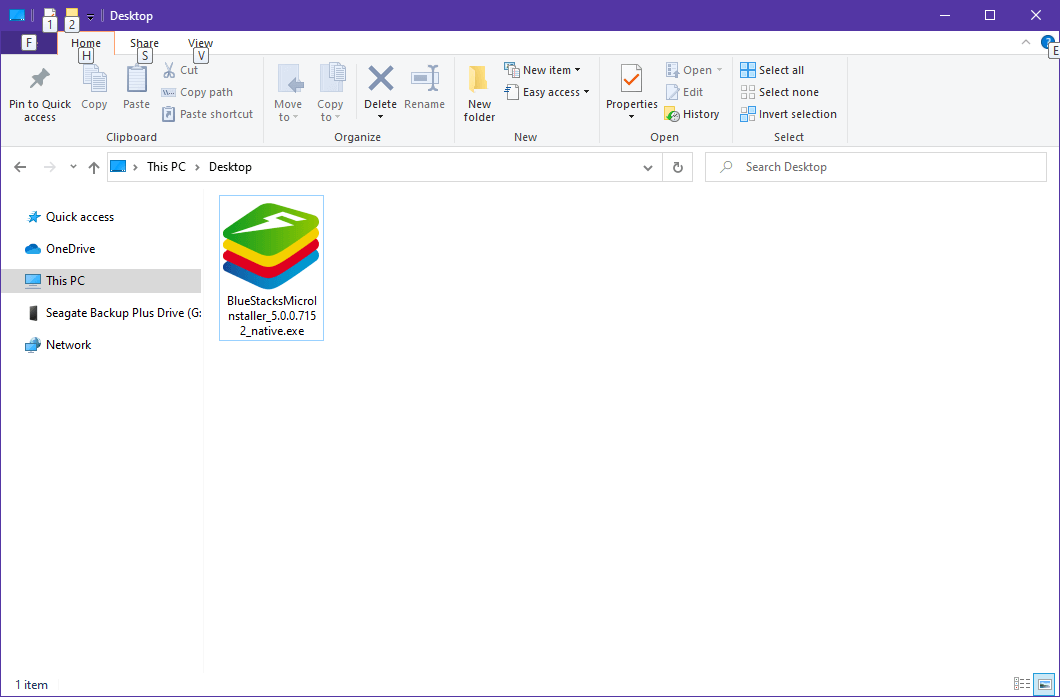
2. After the setup file finishes downloading, go to the Windows Explorer app to find it. Double-click on the setup file right after locating it to launch the program and subsequently begin the installation of BlueStacks in one of the following steps.
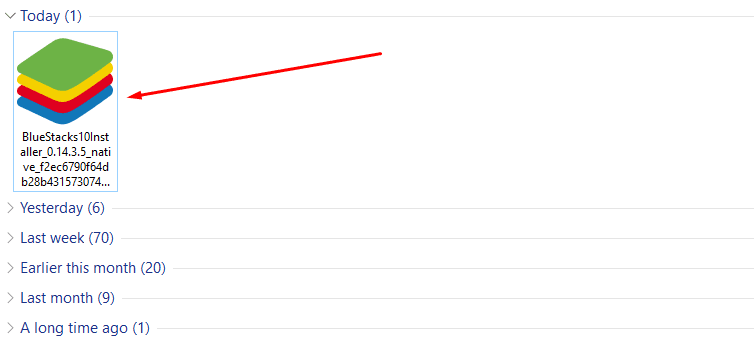
Running the BlueStacks 10 setup
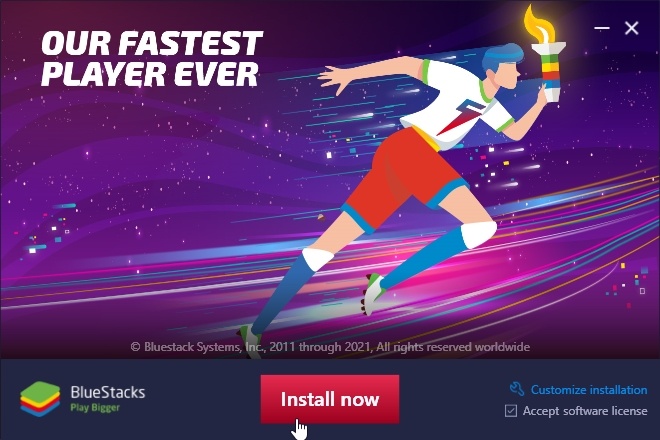
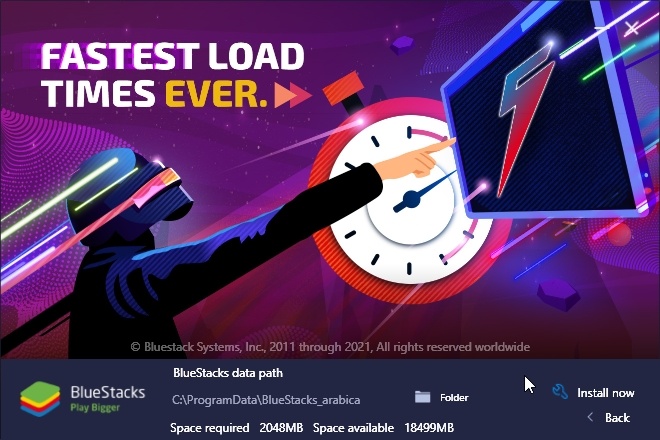
3. After launching the setup file, the program will take a brief moment to get everything ready. When it does, the following window will launch on your Windows PC, prompting you to click on “Install Now” and begin the installation. Before you do that, however, you can click on the “Customize installation” button to tweak some options related to the download. These include changing the destination path of the app’s installation. When you’re ready, go forth with the installation.
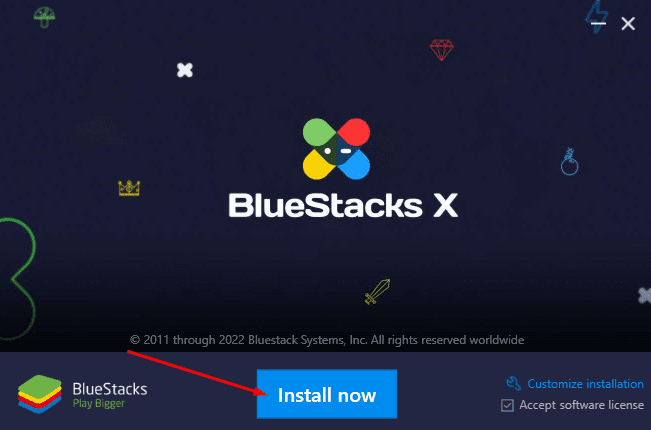
Clicking on “Install Now”
4. In this step, you have to wait until the BlueStacks 10 finishes installing on your Windows PC. After clicking on “Install Now,” a progress tracker will appear and walk you through the download percentages of the software.

Download commenced
5. As soon as the download finishes, you will be taken straight into the user interface of BlueStacks. We have been relatively impressed with how well-designed the graphical elements of the emulator have been put together. Congratulations! You have successfully installed BlueStacks on your Windows 10 or Windows 11 PC.
BlueStacks 10 installed
Now that you have the emulator all up and running on your PC let’s look at how it functions.
Navigating the user interface of BlueStacks
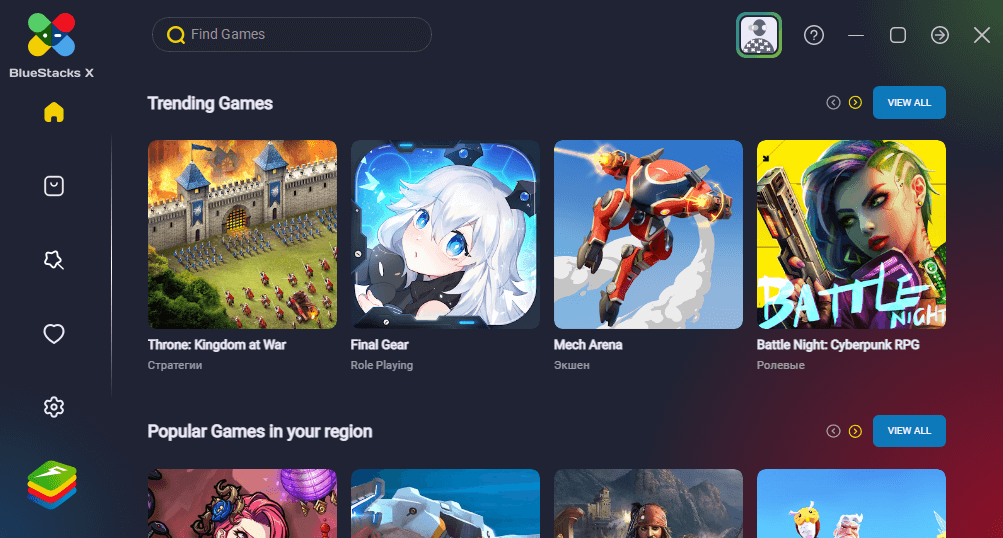
As mentioned just now, BlueStacks boasts a highly interactive user interface that’s well-organized and designed with a lot of thought. When you first launch the application on your Windows PC, you’ll observe the “Home” section. This is where you can see games trending on various Android marketplaces, especially the Google Play Store.
If you start scrolling down a little, you’ll observe another section called “Popular Games In Your Region.” This is a locale-based suggestion that analyzes the stats of the area of your residence and displays entries accordingly. Other than the contents of the “Home” section, the sidebar to the left is quite possibly the most important part of BlueStacks’ user interface.
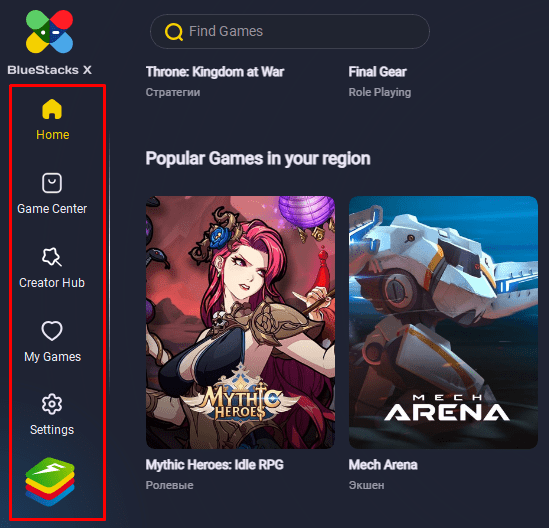
BlueStacks X sidebar
You can use it to control the emulator and engineer it following your preferences. In addition, what’s essential about this sidebar is the icon present at its very bottom. The BlueStacks App Launcher launches a separate window that allows you to enjoy Android apps inside.
You can try the App Launcher on its own or boot it directly after hovering over a specific game and selecting the “Play” button on it. The BlueStacks App Launcher will start reading essential components for the game to start. To illustrate with an example, we’ve tried playing Valor Legends, as you can see in the screenshot below.
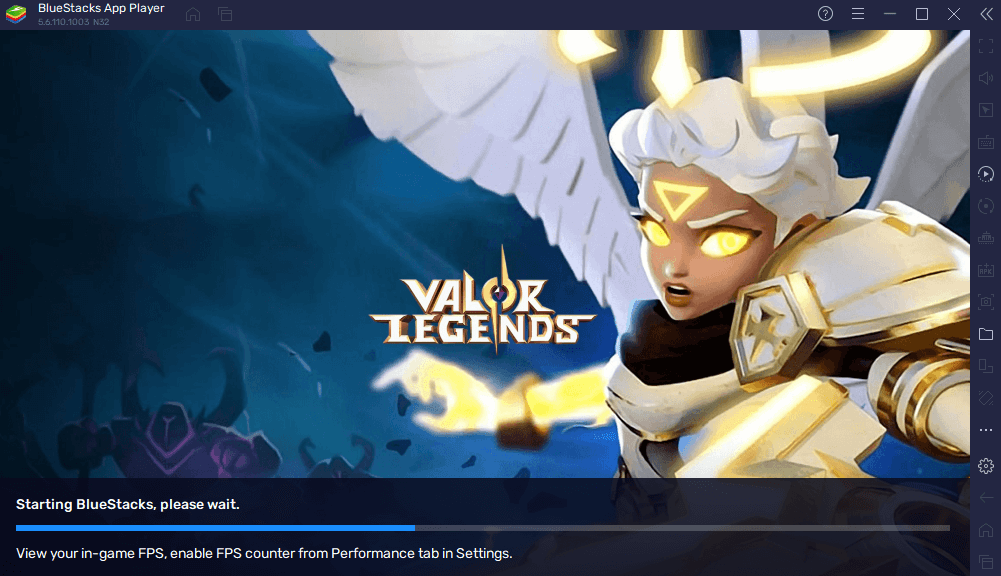
Trying Valor Legends in BlueStacks X
The BlueStacks App Player comprises another sidebar to the right and offers to play a set of controls to enhance the overall Android emulation. It’s pretty rich in terms of features, and we highly recommend experimenting and seeing what works the best for you.
That’s all about installing and using BlueStacks in Windows 10 and Windows 11! It is time to conclude the article.
Conclusion
BlueStacks is a well-grounded Android emulator that serves as the “best mobile gaming platform for Windows.” You can install it on your PC effortlessly, considering that you know what to do. In this guide, we’ve outlined the steps needed to be performed to install BlueStacks on both the current-gen and the next generation of Windows.
We hope that you’ve found this guide helpful. Do let us know down in the comments section whether you were able to get BlueStacks on your Windows or not. We would love to read your feedback!
The new BlueStacks 5 has finally been released, bringing players the absolute best of the best when it comes to playing mobile games on PC. This new big step is meant to take what BlueStacks 4, the best Android app player on the market, has to offer, and improve upon it to bring the fastest and lightest emulator ever. Seriously, you haven’t experienced true speed until you try out BlueStacks 5. Take a look at our features overview article if you want to learn what this emulator does differently.
Now that BlueStacks 5 is available for download, you’ll probably want to install and give it a whirl, and see what the fuss is all about. Luckily for you, installing BlueStacks 5 is very simple and only takes a few steps:
- Go to our website and download the BlueStacks 5 installer.
- Run the installer and let it work its magic.
- When it’s finished, BlueStacks 5 will launch automatically and you’ll be taken to the home screen once it loads.
Once it installs, you can look for games on the Play Store and download them just like on your phone. The process is mostly automatic and takes only a few minutes. However, in case you need further assistance, here are detailed step-by-step instructions on how to install our Android emulator.
BlueStacks 5 System Requirements
Before you install or update to BlueStacks 5, you need to make sure your PC fulfills the minimum requirements to run our emulator. These requirements are the following:
Minimum System Requirements
- OS: Microsoft Windows 7 and above.
- Processor: Intel or AMD Processor.
- RAM: Your PC must have at least 4GB of RAM.
- HDD: 5GB Free Disk Space.
- You must be an Administrator on your PC.
- Up to date graphics drivers from Microsoft or the chipset vendor.
Recommended System Requirements
- OS: Microsoft Windows 10
- Processor: Intel or AMD Multi-Core Processor with Single Thread benchmark score > 1000.
Graphics: Intel/Nvidia/ATI, Onboard or Discrete controller with benchmark score >= 750.
You can go through the detailed guide we have made on how to find the benchmark score of your processor (CPU) and graphics card (GPU). - Please ensure Virtualization is enabled on your PC/Laptop.
- RAM: 8GB or higher
- HDD: SSD (or Fusion/Hybrid Drives)
- Internet: Broadband connection to access games, accounts and related content.
- Up to date graphics drivers from Microsoft or the chipset vendor.
- You can install BlueStacks even if you have a virtual machine such as Microsoft Virtual PC, VMWare Workstation, or Oracle Virtualbox, installed on the same PC. However, please note, that you may run into some performance issues.
Once you’ve verified that your PC can run BlueStacks, we can go ahead and proceed with the installation.
Downloading BlueStacks 5
BlueStacks is very easy to install, mostly because all you need is a small installer file, and our software will do the rest for you, including downloading necessary files, and actually installing the emulator on your PC.
You can find this downloader on our official website, by clicking on the corresponding “Download” button. Make sure you ALWAYS download BlueStacks updates and clients from our website as our files are certified malware-free and we can’t take responsibility for issues caused by installers downloaded from third-party sites.
Installing BlueStacks 5
Once you have your installer downloaded, simply double click on it to start the installation.
As we mentioned above, the process is mostly automatic. However, you can freely select the install directory by clicking on the “Customize” button just beside the text field in the installer. Please keep in mind that every single app or game you install on BlueStacks will be stored in this directory, so make sure you have plenty of space for all the mobile games you’ll want to play on PC.
Note: Updating to a newer version of BlueStacks 5 is very much the same, only instead of creating a fresh install, the installer will prompt to update your existing version. No additional steps or input is necessary if this is the case, and you won’t lose any of your installed data or games by updating your BlueStacks via the installer.
Setting Up Your Google Account in BlueStacks 5
Once you’ve installed BlueStacks 5, there’s still one more step you need to do before playing: linking your Google account. This is necessary for accessing important services such as the Play Store, which is from where you’ll be downloading most, if not all, your games.
Linking a Google account is very simple, and is one of the first things you’ll do after installing BlueStacks since you’ll be prompted to do so by the emulator. In this text screen, you just need to input your Google user and password, and you’ll be ready to start installing games on BlueStacks.
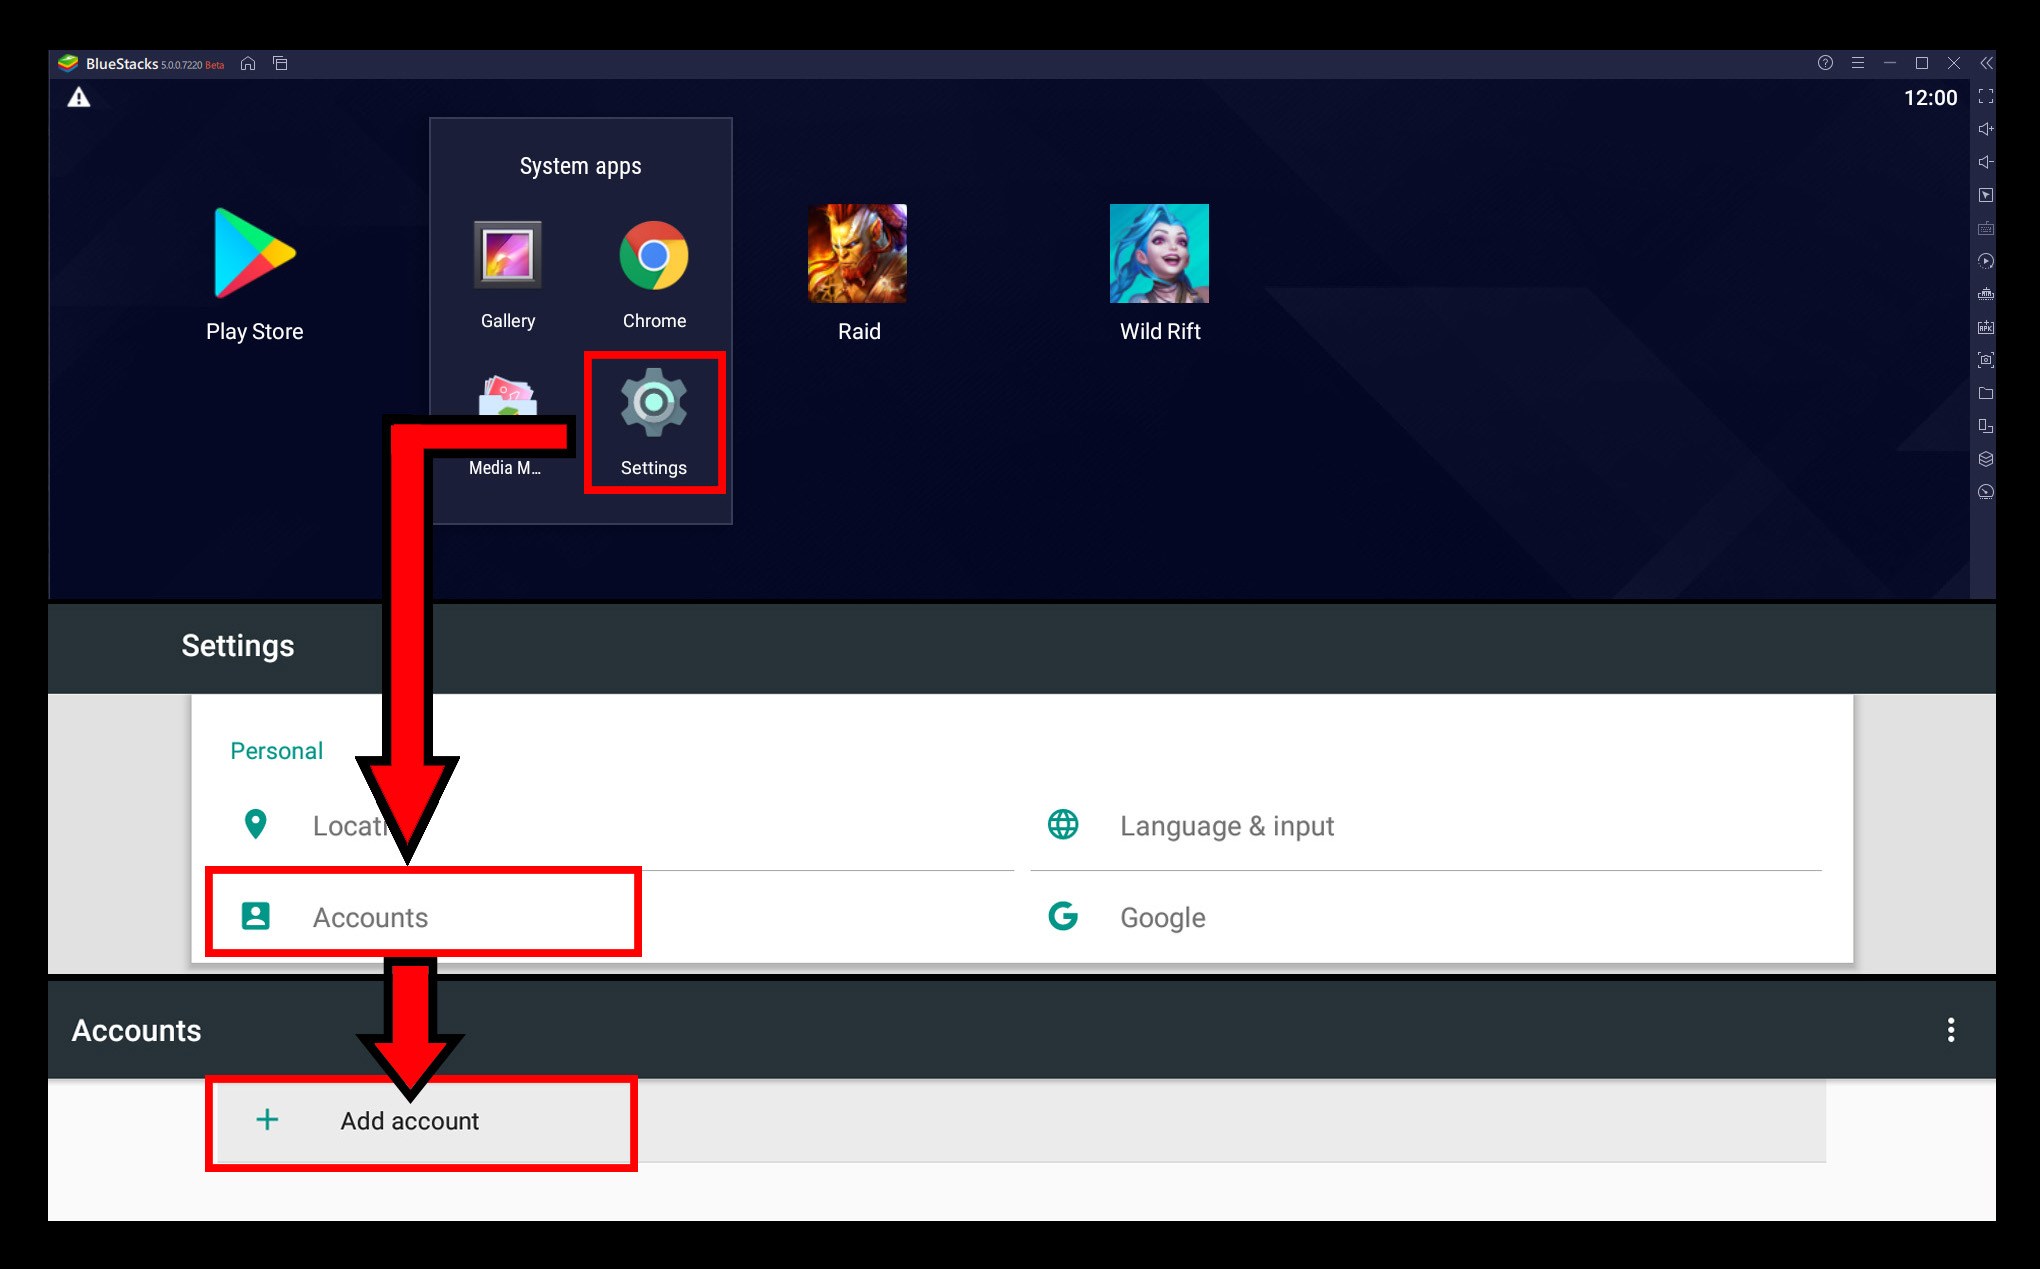
Note: If for any reason you didn’t get the initial Google setup screen upon launching BlueStacks, you can still add your account via the Android settings menu on the home screen, in the “Accounts” submenu. Alternatively, if you try to access the Play Store, you’ll also be prompted to link an account if you haven’t done so already.