Windows 10 is a big operating system with hundreds of features. Like any other operating system or software, most PC users never use all the features offered in Windows 10. For instance, the built-in XPS Viewer is alien to most PC users even though it’s been around since the launch of Windows 7.
Advanced PC users often like to turn off features that they are not interested in. Although Windows 10 doesn’t offer a way to turn on or off all the features, you can turn off many features under Control Panel.
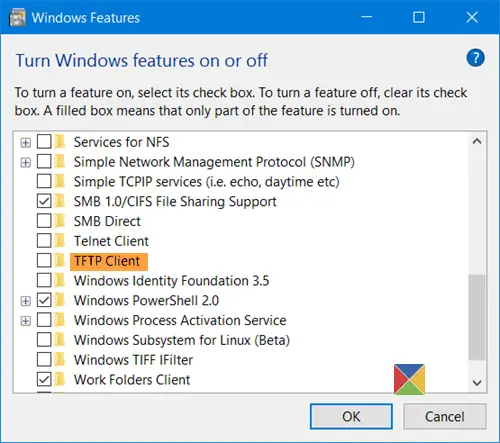
As you can see in the picture below, you can turn on or off .Net Framework, Hyper-V, Internet Explorer, Microsoft Print to PDF, XPS Viewer, Telnet Client, Work Folder Client, Windows Fax and Scan, Windows PowerShell, and more.
You can’t use this method to turn off built-in apps in Windows 10. If you want to remove an app, please refer to how to uninstall the default Windows 10 apps guide. Also, turning off a feature will not remove it from Windows 10. If you want to completely get rid of a feature from Windows 10, you need to use a Windows 10 ISO image-customizing tool such as NTLite.
As said earlier, Windows 10 doesn’t allow you to turn on or off all the features. Some features are essential for the smooth running of the operating system, and some other features such as Start menu and File Explorer can be turned off by installing third-party alternatives.
Follow the given below directions to turn on or off Windows 10 features.
Step 1: Open Control Panel by typing Control Panel in the Start menu or taskbar search field and then pressing Enter key.
Step 2: Under the Programs section, click Uninstall a program link. This will open the Programs and Features window.
Step 3: In the left-pane of Programs and Features window, click Turn Windows features on or off the link to open Windows Features window with a list of features that you can turn on or off.
Step 4: Go through the features list. If the checkbox next to a feature is selected, it means that the feature is turned on. A full checkbox means only part of the function is turned on.
Click the plus icon to see all features under that category. For instance, you can see Windows Media Player by expanding Media Features.
To turn off a feature, uncheck the checkbox next to it. When you see the following confirmation dialog, click the Yes button to turn off the feature. You might be asked to turn on or off a feature.
We recommend you turn off only features that you no longer use or prefer to use third-party software instead of the default one.
Also, check out how to turn on or off touchpad gestures in Windows 10 guide.
In this tutorial I will show you, how to reach the Windows Features options in Windows 10 and how to use it to enable and disable Windows Features in Windows 10.
You can use the Windows Features to turn on or off the following features:
- .NET Framework 3.5
- .NET Framework 4.6
- Active Directory Lightweight Directory Services
- Embedded Shell Launcher
- Hyper-V
- Internet Information Services
- Internet Information Services Hostable Web Core
- Legacy Components
- Media Features
- Microsoft Message Queue
- MultiPoint Connector
- Print and Document Services
- Print as a PDF
- RAS Connection Manager Administration Kit
- Remote Differential Compression API Support
- RIP Listener
- Simple Network Management Protocol (SNMP)
- Simple TCPIP Services
- SMB 1.0 / CIFS File Sharing Support
- Telnet Client
- TFTP Client
- Unified Write Filter
- Windows Indentity Foundation
- Windows PowerShell 2.0
- Windows Process Activation Service
- Windows TIFF Ifilter
- Work Folders Client
- XPS Services
- XPS Viewer
Depending on your installation and device, some features might not be available or you might have more features. The above list was given as a way of showing you some features, features can change in upcoming updates.
How-to Enable or Disable Windows Features in Windows 10
1. Begin by opening the Control Panel, you can do this by typing “Control Panel” in the Cortana search bar or by right-clicking the Start logo and then choose Control Panel

2. In Control Panel click on Programs
3. Within programs click on Programs and Features
4. In the left pane you will now see the button Turn Windows Features on or off, click on that.
5. A UAC (User Account Control) message might appear, click on Yes or fill in an Administrator password.
You can now turn on and off certain features. I suggest you be careful with disabling features as Windows or your software might need them to function properly. In some cases Windows will warn you before you can disable features.
I hope this tutorial helped you to turn on or off Windows Features in Windows 10.
As a business owner, you might be wondering how to maintain strong relationships with your…
If you’ve been searching for the best way to get your online business up and…
Are you eager to make your reaction GIFs and memes? Reaction GIFs have become a…
If there’s one streaming platform that has taken over the world in a flash, that’s…
Windows Operating System is equipped with many addons and components which may extend the functionality of Windows without using any third party software. Some of these components are enabled or installed by default. But all features need not to be enabled because it will slow down the performance of your computer. Moreover all users do not require all that features to be enabled. Some components are also required by third party software to function correctly e.g., .NET Framework 3.5.
Table of contents
- Explore Windows Features Using Command Prompt
- 1- How to turn Windows features on or off?
- 2- How to turn Windows features on or off using command line?
- 3- Enable or Disable Windows features using PowerShell
- 4- Adding Windows features from a Windows installation source
- Using Command Prompt
- Using PowerShell
- Enabling/Disabling features in Windows XP
We will discuss how to turn on/off those features using command prompt and manually. Moreover we will also describe how to find and open optional features using a command line. Further, we will briefly elaborate on how to install Windows features from the installation source using command prompt and PowerShell.
Explore Windows Features Using Command Prompt
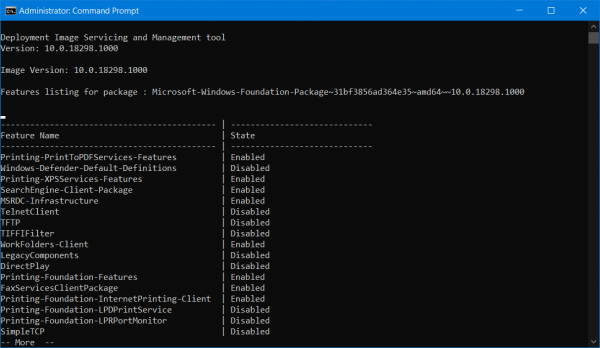
To get a list of Windows Features using Command prompt, follow the steps below:
- Open command prompt in administrative mode.
- Type the following command
DISM /online /get-features /format:table | more
It will display all the list of features enabled or disabled on your computer. Here format:table and more are optional and are used to improve the readability of the features.

Keep on pressing Enter until you get the full list. You can remove more options if you don’t want to get the full list.
If you do not open it in administrative mode you will encounter the following error.
1- How to turn Windows features on or off?
You can enable any Windows feature or you can disable them. Some features are disabled by default.
- To open the Windows Features screen, go to Run –> optionalfeatures (This can also be accessed by opening Start Menu –> Control Panel –> Programs and Features –> Turn Windows features on or off)
- To enable a feature, check the checkbox beside the component.
- To disable a feature, un-check the checkbox beside the component.

2- How to turn Windows features on or off using command line?
Windows Features can be enabled or disabled using command line. For checking the status of the features type the command mentioned above. In order to enable any feature, follow the steps below:
- Open command prompt in administrative mode and run the following command:
DISM /online /get-features /format:table | more - Copy the name of feature you want to enable.
- Now run the following command in command prompt:
DISM /online /enable-feature /featurename:[paste the feature name here] - For example, if you want to enable Hyper-V which provides services and tools for running and creating virtual machine type the following command
DISM /online /enable-feature /featurename:Microsoft-Hyper-V -All
This will install and enable all the components of Hyper-V - You may need to restart the computer to install some components.
Disabling Windows features is very similar to enabling them. Follow the steps below to disable any feature.
- Open command prompt in administrative mode and run the following command:
DISM /online /get-features /format:table | find “Enabled” | more
This command will list down all the enabled features in Windows. (You can also make use of Findstr command.) - Copy the name of the feature you want to disable.
- Now run the following command in command prompt:
DISM /online /disable-feature /featurename:[paste the feature name here] - For example, if you want to disable Hyper-V, type the following command
DISM /online /disable-feature /featurename:Microsoft-Hyper-V -All
To get detailed information about a specific component, run the following command:
DISM /online /get-featureinfo/featurename:[featurname]
You will get detailed information about the feature name, description, properties, status and whether it requires restart or not.
3- Enable or Disable Windows features using PowerShell
The benefit of PowerShell over using a command prompt is that PowerShell commands check if the feature is already enabled. If it is already enabled, the installation action is not performed saving computing time.
To get information about windows features through Powershell, open PowerShell in administrative mode and then type
Get-WindowsOptionalFeature -Online

If you want to get information regarding specific features, type
Get-WindowsOptionalFeature -Online -FeatureName *Type feature name*
In order to enable/disable any feature use the following commands.
Enable-WindowsOptionalFeature -Online -FeatureName “Type feature name” -all
Disable-WindowsOptionalFeature -Online -FeatureName “Type feature name”
4- Adding Windows features from a Windows installation source
If a feature is not available for installation in installed Windows, we will need to give external source address to install the feature. The external source can be Windows installation ISO or any drive. Make sure that the path should be given correctly and installation media should be correctly installed. Moreover, you need to know exactly the feature name you wan to add.
Using Command Prompt
To add any Windows feature, open the command prompt in administrator mode and run the following command:
Dism.exe /online /enable-feature /featurename:Type Feature name /All /Source:C:\Sources\sxs /LimitAccess
Here is the installation media is C drive. You should change the installation media according to the requirement you want to install the feature. Once successfully installed remove the installation media.
Using PowerShell
The window feature can be installed by PowerShell using the following command
Install-WindowsFeature Feature Name –Source “C:\Sources\sxs”
Enabling/Disabling features in Windows XP
All the above mentioned methods work in Windows Vista, Windows 7, Windows 8.1 and Windows 10. But if you want to use a command prompt for adding/removing features in Windows XP, you’ll need to follow the instructions below:
pkgmgr d/n
What are your favorite Windows features and which ones do you enable as essentials when you Install Windows?
The Windows operating system offers several additional features that most of us may not need. But they are there if you need them! In this post, we will see how to Turn Windows features On or Off via the Control Panel, and how to add, remove or manage some Optional Features using Windows 11/10 Settings. PowerShell and Command Prompt methods have also been discussed here.
While the default installation is good for most of us, there may be some features that IT Pro’s, System Administrators or Developers may need. Windows allows you to install and activate such features. You can turn some features on or off using the Control Panel, or you may need to use the Settings app in Windows 11/10 if you need to add some optional features.
What are Optional features?
As the name implies, Windows Optional features are the features that may or may not be required by Windows users. Windows OS has an option to add or remove these features. We have already explained the process to manage Optional features in Windows 11/10 in this article.
How do I add or remove Windows features?
The option to add or remove Windows features is available in the Control Panel or Windows Settings. We have described the process to install Windows features on Windows 11/10 computers above in this post. You can do it in 5 ways.
1] Turn Windows features On or Off using Control Panel
The steps to turn Windows features on or off via Control Panel are the same for both Windows 11 and Windows 10 computers. Hence, it does not matter whether you are a Windows 11 or Windows 10 user, the procedure that we have explained below implies to both of these operating systems.
From the Start Menu, open the Control Panel and click on the Programs and Features applet.

Here on the left side, you will see a link – Turn Windows features on or off. Click on it to open the following panel.
Here you will see the features that are available to you. You may expand a feature by clicking on the ‘+’ sign and select only those features you want to enable. Once you select the feature you want to turn on or deselect one which you want to turn off, click on OK. Windows will start applying the changes and ask you to restart your computer if need be.

On a Windows Pro PC, you will see the following features that you can enable or disable at will.
- .NET Framework 3.5
- .NET Framework 4.6 Advanced Services
- Active Directory Lightweight Services
- Containers
- Data Center Bridging
- Device Lockdown
- Hyper-V
- Internet Explorer 11
- Internet Information Services
- Internet Information Services Hostable Web Core
- Legacy Components like DirectPlay
- Media Features
- Microsoft Message Que Server
- Microsoft Print to PDF
- MultiPoint Connector
- Print and Document Services
- RAS Connection Manager Administration Kit
- Remote Differential Compression API Support
- RIP Listener
- Services for NFS
- Simple Network Management Protocol
- Simple TCPIP services
- SMB 1.0/CIFS Sharing Support
- SMB Direct
- Telnet Client
- TFTP Client
- Windows Identity Foundation 3.5
- Windows PowerShell 2.0
- Windows Process Activation Service
- Windows Subsystem for Linux
- Windows TIFF IFilter
- Work Folders Client
- XPS Services
- XPS Viewer.
See this post if your Turn Windows Features on or off is blank or empty.
2] Manage Optional features via Windows Settings
Windows 11
Windows 11 users have to go through the procedure explained below to manage optional features via Settings.
- Launch Windows 11 Settings app.
- Go to “Apps > Optional features.”
- Install or Optional features as per your requirements.
Let’s discuss these steps in detail.
1] Press Win + I keys to launch the Settings app.
2] In the Settings app, select Apps from the left pane. Now, click on the Optional features tab on the right side.

3] After that, Windows will show you a list of all the optional features installed on your system. If you do not want any of these features, you can uninstall them. For this, click on the down arrow next to the feature that you want to remove and then click on the Uninstall button. Don’t worry you can install the uninstalled feature anytime via the Add an optional feature option.

You have to wait till Windows uninstalls that feature.
4] Now, let’s see how you can install an Optional feature in Windows 11. Microsoft has made some features optional in Windows operating system, as they may or may not be required by the users. Notepad and Wordpad are among the optional features in Windows 11/10. This is the reason why some users have found Notepad or Wordpad missing from their computers.

To install an Optional feature in Windows 11, launch the Settings app and go to “Apps > Optional features.” Now, click on the View features button on the top right side. After that, Windows will show you the list of all the available features that are available for installation on your computer. Now, select a feature from the list and click Next. After that, click Install.

You can also view Optional feature history by clicking on the View history button.
Windows 10
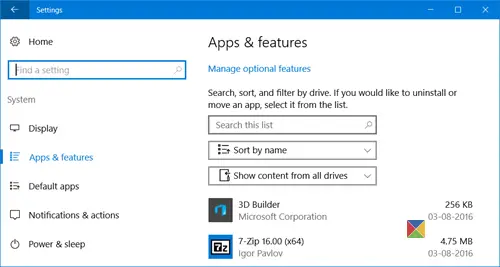
Windows 10 lets you add, remove or manage optional features via its Settings. To access this part, from the WinX Menu, open Settings > System and select Apps & features from the left side.
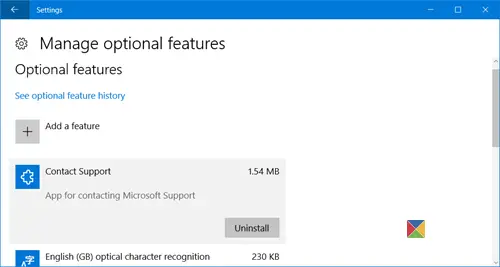
Clicking on the Manage optional features link will open the following box for you.

To remove an app or a feature, select the feature and click on the Uninstall button.
To add a feature, click on the “+ Add a feature” link as shown above. The following window will open.
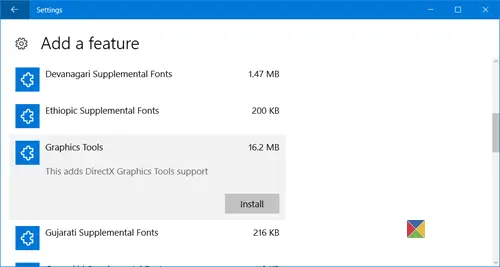
Here you can select the feature and click on the Install button.
Clicking on the See optional feature history will open the following panel, where you will be able to see a history of all the optional features that you added or removed.
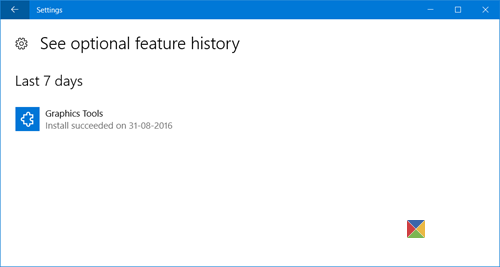
In this way, you can install Graphics Tools, Windows Developer Mode, Fonts and several other optional features like it.
3] Enable or Disable Optional Windows Features using Powershell
Windows Powershell is indeed a very powerful tool. You can do a lot of things with this command line too. While using this, we will first populate the list of available features, then we will be downloading the desired feature, and finally, we will be talking about enabling and disabling that feature.
So first, to populate the list of features, enter this command,
Get-WindowsOptionalFeature -Online
After that, in order to install any feature from the list of features, enter this command:
Get-WindowsOptionalFeature -Online -FeatureName *Type feature name*
Then, to enable any downloaded feature, enter this command,
Enable-WindowsOptionalFeature -Online -FeatureName “Type feature name” -all
Finally, to disable any enabled feature, enter this command,
Disable-WindowsOptionalFeature -Online -FeatureName “Type feature name”
4] Turn On or Off Optional Windows Features using Command Prompt
Start by pressing WINKEY + X button combo or right-click on the Start button and click on Command Prompt (Admin) or just search for cmd in the Cortana search box, right click on the Command Prompt icon and click on Run as Administrator. Click on Yes for the UAC or User Account Control prompt that you get.
Now, type in the following command to populate the list of available features:
DISM /online /get-features /format:table | more
All you need to do now is copy the name of the feature that you need to enable.
Now, to enable the feature, enter the following command:
DISM /online /enable-feature /featurename:[Enter the name of the feature here] -All
Now, to disable any feature that is enabled on your computer, you need to follow some separate steps.
First, you need to check what all features are enabled. To populate a list of enabled features, enter this command,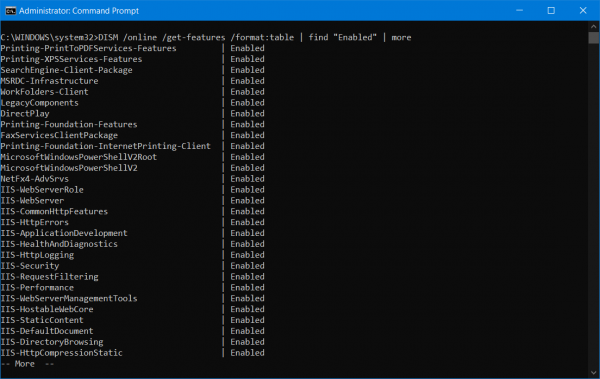
DISM /online /get-features /format:table | find “Enabled" | more
Now, to disable the Enabled feature, enter this command,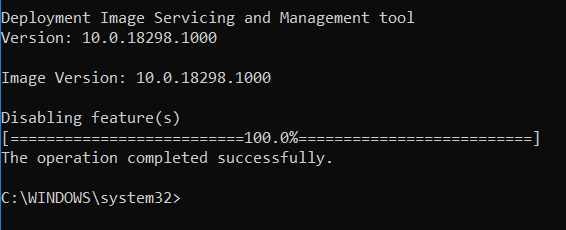
DISM /online /disable-feature /featurename:[Enter the name of the feature here] -All
As a bonus, if you wish to check information in detail about a specific feature, enter this command,
DISM /online /get-featureinfo/featurename:[Enter the name of the feature here]
5] Enable or Disable Optional Windows Features using an external installation source
You can also fetch the latest features from an updated offline source.
This source can be an ISO or any other type of image or just a folder.
For that, all you need to do is decide if you want to use the Command Prompt or Windows Powershell.
If you are using the Command Prompt, enter this command,
Dism.exe /online /enable-feature /featurename:< /All /Source:<Enter the path of the feature here>
And if you tend to use Windows Powershell command line, you can do it too. Just enter this command,
Install-WindowsFeature –Source “<Enter the path of the feature here>”
To get the latest features, you need to get the latest version of the image of the operating system that you are trying to install the feature from.
I hope this helps!
Related: Turn Windows features on or off stuck on Please wait.
Всем привет! Сегодня мы поговорим про включение и отключение компонентов в системе. Мы посмотрим, как их открыть в любой из существующих версий Windows (10, 11, 7 или 8). Я расскажу вам, как установить или наоборот выключить дополнительные пакеты, которые система использует для работы с определенными программами или протоколами.
Содержание
- Способ 1: Панель управления
- Способ 2: Параметры Windows 10
- Способ 3: Параметры Windows 11
- Способ 4: Командная строка
- Задать вопрос автору статьи
Способ 1: Панель управления

Давайте посмотрим, как же нам открыть раздел Windows Features на любой версии Windows (10, 11, 8, 8.1, 7, XP и т.д.). Для этого мы можем воспользоваться «Панелью управления». Хорошо, что её пока не выпилили на свежих версиях «Окон».
ВНИМАНИЕ! Еще один важный момент – через «Панель управления» можно включить и отключить компоненты, которые уже установлены в системе. Если же вам нужно установить какие-то компоненты, которых еще нет в ОС, то используем вариант с использованием параметров системы (две следующие главы).
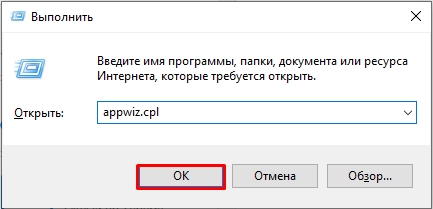
- Одновременно зажимаем клавиши:
+ R
- Теперь открываем пункт:
appwiz.cpl
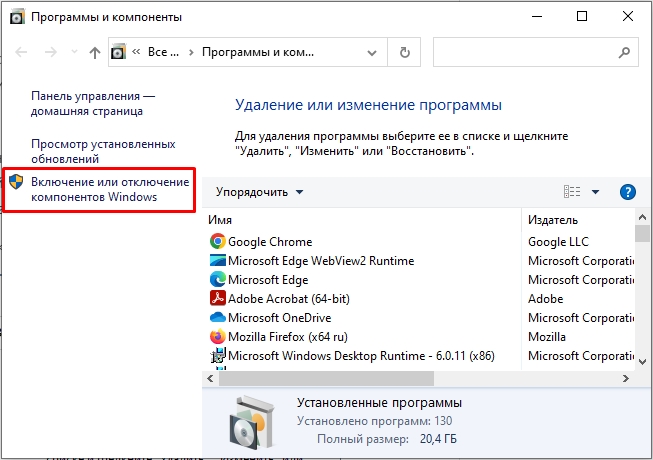
- Слева выберите ту же ссылку, как на картинке ниже.
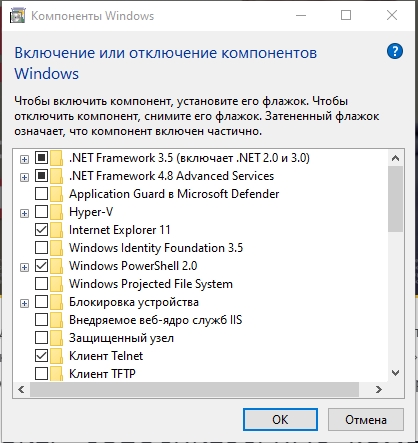
- Теперь включаем или отключаем нужные компоненты и жмем «ОК». Если вас попросят перезапустить систему – сделайте это, чтобы изменения вступили в силу.
Открыть и установить компоненты в Windows 10 можно через стандартное меню системы.
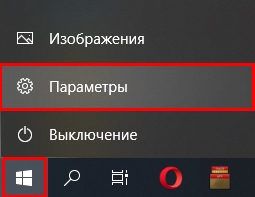
- Откройте «Пуск» и зайдите в «Параметры».
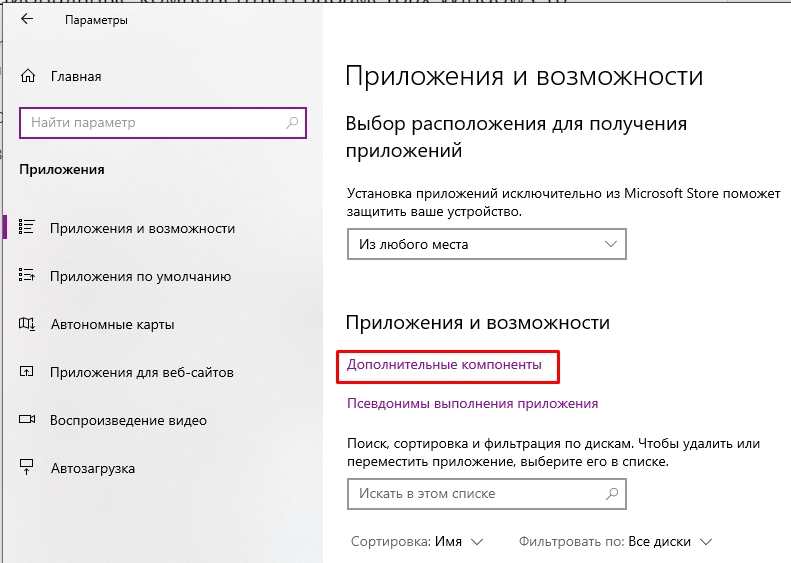
- Среди всего многообразия найдите раздел «Приложения».

- В правой области окошка найдите ссылку «Дополнительные параметры».
- Если вам нужно добавить пакет, в самом верху нажмите по значку плюсика.
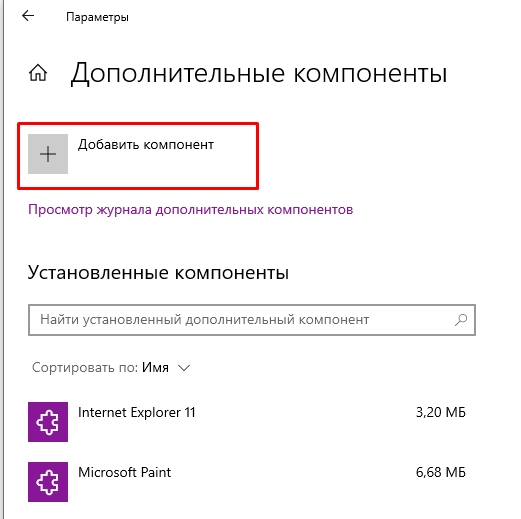
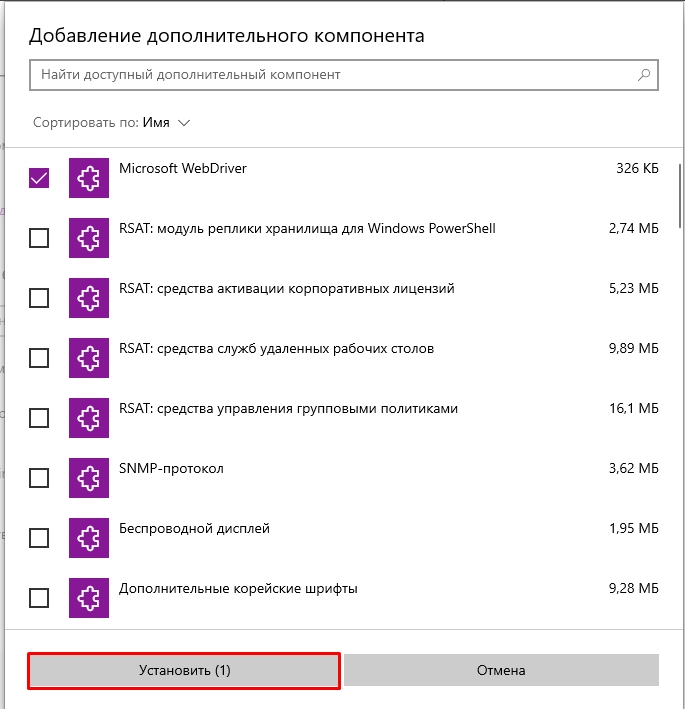
- Выделяем нужный и жмем по кнопке установки. Вы также можете воспользоваться строкой поиска. Компонент будет загружен с сервера и установлен к вам на компьютер.
- Если же вам нужно наоборот удалить пакет – просто выберите его из списка ниже, кликните по нему левой кнопкой мыши и выберите команду «Удалить».
Способ 3: Параметры Windows 11
- Чтобы быстро открыть параметры системы одновременно зажмите две клавиши:
+ I
- В левом блоке выберите раздел «Приложения».
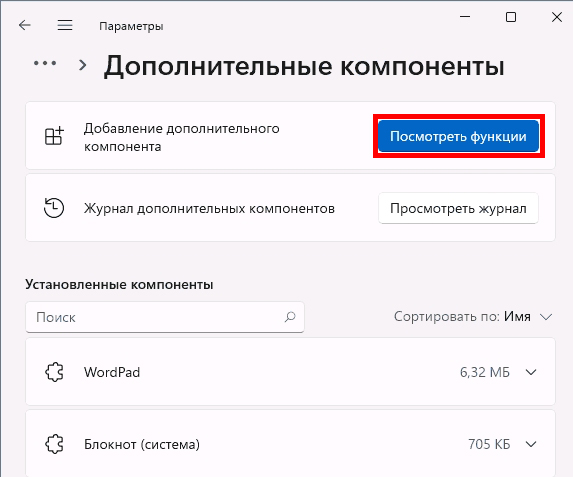
- Далее справа находим пункт «Дополнительные компоненты».
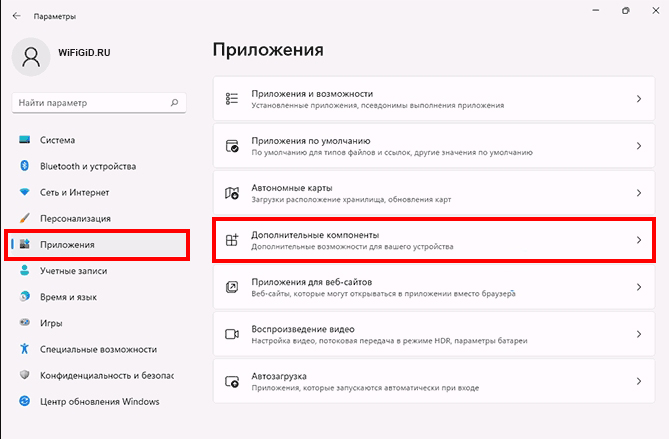
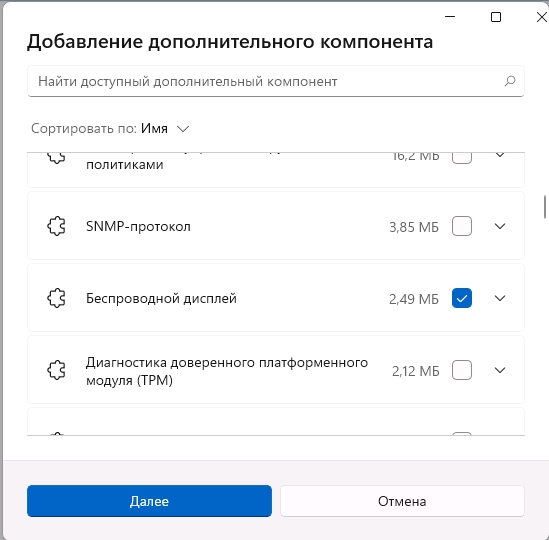
- Внизу вы увидите список уже установленных пакетов, если вам нужно что-то выключить, находим нужный, выделяем и деактивируем. Если же вам нужно что-то установить – в самом верху нажмите по кнопке «Посмотреть функции».
- Все аналогично как и в десятой версии «Окон», находим нужный компонент, выделяем и жмем «Далее». После этого устанавливаем к себе в операционную систему.
Способ 4: Командная строка
Инсталлировать дополнительный пакет можно с помощью консоли. Для этого запускаем командную строку с правами администратора. Сначала нам нужно узнать список всех доступных компонентов. Также вы увидите, что уже установлено. Вводим:
Dism /online /Get-Features
Как только вы нашли нужный пакет, используем команду установки:
Dism /online /Enable-Feature /FeatureName:ИМЯ_КОМПОНЕНТА /All
После этого он будет установлен. Напомню, что таким же образом можно использовать команды для скриптов, которые запускаются из-под Windows. На этом все, дорогие друзья портала WiFiGiD.RU. Если что-то осталось неясным – пишите в комментариях.