Windows 11 makes capturing your screen easier than ever. Get to know these screenshot taking methods and save important information to your PC in a moment’s notice.
How to screen snip on Windows 11
Using the Snipping Tool is one of the easiest ways to take a screenshot. If you’ve taken screenshots using Windows before, you’re probably familiar with the Snipping Tool. This version of the tool combines the original Snipping Tool with the Snip & Sketch Tool. Follow these instructions to open the Snipping Tool and get started:
- Press Windows logo key+Shift+S to open the Snipping Tool directly.
- After entering the keyboard shortcut, you’ll see a box at the top of your computer.
- Choose between the following screenshot options: (from left to right) rectangular selection, freehand selection, window, or full-screen capture.
- Pick the rectangular selection or use freehand selection to highlight a designated screenshot area for an active window or your full screen.
- Look for a thumbnail image of your selection at the lower-right-hand corner of your screen after capturing your screenshot.
- The Snipping Tool copies your screenshot directly to your clipboard, so you can paste (CTRL+V) your image into another app if needed.
How do I edit with the Snipping Tool?
Personalize your screenshot with the Snipping Tool’s user-friendly interface. Simply open the thumbnail at the bottom of your screen and select from the variety of tools available. Highlight, crop, color, and write on your screenshot using various shapes and fonts. If you’re working with a touchscreen, draw on your screenshot directly using your finger or a stylus. When you’re done, you can:
- Save your screenshot and any edits by selecting the floppy disk icon.
- Send your image to friends, family, or colleagues using the share option.
- Print your image.
- Open your image in another app via the menu options.
How to take a screenshot using the Print Screen key
Take a screenshot the old-fashioned way with the Print Screen key. The Print Screen key is at the top-right corner of most keyboards, and usually says Print Screen, PrtSc, PrtScn, or PrntScrn.
How to capture your working screen
Capture a screenshot from an active window, or the window you’re currently working in, by following these steps:
- Select the window you want to screenshot.
- Press ALT+Print Screen.
- Paste (CTRL+V) into an Office program or app of your choice.
How to capture your entire screen
Follow these steps to copy the entire image on your screen:
- Position everything you want to copy to your liking.
- Press Print Screen.
- Paste (CTRL+V) into an Office program or app of your choice.
How to save your screenshot as an image file
Take these steps to save your screenshot directly to your desktop as an image file in Windows 11:
- Press Windows+Print Screen.
- Find your screenshot in a PNG format by navigating to Pictures > Screenshots in your directory.
Looking for the perfect Windows 11 device? Explore all our Windows computers to find the best option for you.
What to Know
- PrtScn aka PrtSc screenshots the entire screen, saves to clipboard.
- Win+PrtSc auto-saves fullscreen screenshots to Pictures > Screenshots.
- Win+Shift+S lets you pick a window or section of the screen.
This article explains all the different ways you can screenshot in Windows 11.
Use PrtScn to Screenshot the Whole Screen
There are many ways to make screenshots in Windows 11, the most basic being to use the PrtScn (aka PrtSc) button on your keyboard. This captures the entire screen, including multiple displays if you have them, plus all visible windows, the taskbar and Start button, etc. You can then paste the screenshot into any program that supports image pasting.
However, there are several better ways to take a screenshot, depending on what you’re capturing and how you want to save it. Most methods require you to memorize some keyboard shortcuts, but there’s also a tool built-in to Windows 11 to help with taking screenshots.
On some computers, the Fn (function) key needs to be pressed along with PrtSc.
Fullscreen Screenshot and Auto-save to Folder
Win+PrtSc
This method is super useful if you’re taking lots of screenshots. Press and hold the Windows key and then press the PrtSc key on your keyboard.
The fullscreen screenshot will save to your Pictures > Screenshots folder. One way to navigate to that folder is to quickly search for folders: screenshot.
Screenshot Part of the Screen
Win+Shift+S
This three-button shortcut triggers a snipping tool much more useful than PrtSc on its own. It still lets you screenshot the whole screen, but there are also three other techniques you can use.
After striking those three keys together, the screen will dim and a small menu will show at the very top of the screen. There are four buttons which let you take different kinds of screenshots. Here’s how to use them:
- Rectangular Snip: You simply draw a box which contains what you’d like to capture. You would use this method to essentially screenshot a smaller part of the screen (and ignore the rest).
- Freeform Snip: You simply draw a shape which contains what you’d like to capture. This is useful if the rectangular snip is too restrictive to capture what you need.
- Window Snip: This allows you to capture the image of an open window. This is identical to the rectangular snip but lets you avoid needing a steady hand to get just that one window; it will automatically screenshot just one window without the taskbar, etc.
- Fullscreen Snip: Press to capture the whole screen. It’s identical to using PrtScr.
To avoid memorizing this shortcut, you can tie it to the PrtSc button so when you press it, this same menu shows up automatically. To do this, open Settings and search for print screen to modify the option called Use the Print Screen key to launch screen snipping.
After choosing one of those options, the image will be saved to the clipboard, where you can then paste into an email or some other program that accepts pasting pictures.
Or, if you select the prompt that pops up at the bottom of the screen after taking the screenshot, it’ll open in Snipping Tool. In there are markup tools like a pencil and highlighter. You can also easily crop the screenshot further, print it out, and save it as not only PNG but also JPG or GIF.
Delayed Screenshots With Snipping Tool
Pull up the search button from the taskbar and enter Snipping Tool to open the app. This tool was briefly covered above, but what we’ll look at now is the delayed screenshot function.
Taking screenshots of open menus and other areas of Windows can sometimes be difficult if triggering the screenshot breaks whatever it is you’re doing. Snipping Tool has a timed screenshot option, so you can do what you need to and then wait for the screenshot to happen automatically, hands-free.
With the program open, select No delay to find a menu. There are three options: Snip in 3 secs, Snip in 5 secs, and Snip in 10 secs. Select one, choose New, and then quickly arrange the screen how you need it for the screenshot. When the time you chose is reached, the four options mentioned above will display at the top of the screen.
Tips for Taking Screenshots in Windows 11
- Once an image is loaded in Snipping Tool, use the crop tool to further define which part of it you want to keep, without needing to retake the screenshot.
- If your desktop wallpaper includes colors or shapes, it sometimes shows through in the screenshot. You can avoid this by setting the wallpaper to all white.
- Create an outline around your screenshots created with Snipping Tool by opening the tool’s settings and enabling Snip outline. You can choose any border color you like.
- If your window screenshots need to be a specific height and width, the free Sizer tool can resize the window before you capture the screenshot.
- There are screenshot apps you can use instead. One reason you might want a dedicated app for taking screenshots is for increased capability. There’s a screenshot app, for example, which lets you take a screenshot of an entire web page, something you can’t do with the above steps.
FAQ
-
How do I take a screenshot on Windows 10?
Use the Windows+PrtSc keyboard combination to capture the whole screen or use the Snipping Tool to select a mode, choose a screenshot delay period, and adjust settings from the Options box. Another way to take screenshots on Windows 10 is to use the Game Bar by pressing Windows+G and selecting the Capture icon to take the screenshot.
-
How do I take screenshots on a Windows 11 laptop?
You have the same options detailed above to take screenshots using keyboard shortcuts or Snipping Tool. If your laptop model assigns more than one purpose to the PrtSc key, you might need to use the Fn+PrtSc keyboard combination to save full-screen shots.
Thanks for letting us know!
Get the Latest Tech News Delivered Every Day
Subscribe
Создать снимок экрана можно разными способами. В последней версии ОС от Microsoft для этого появились дополнительные инструменты. В статье вы узнаете, как сделать скриншот на Windows 11 при помощи встроенных средств и стороннего софта.
Комбинации клавиш Print Screen
Скриншоты можно создавать по хоткеям. Ниже мы расскажем, какую клавишу нужно нажать, чтобы сделать снимок экрана на компьютере.
Print Screen (иногда сокращается, например, до Prtscr или Prt Scr). Клавиша появилась еще на первых персональных компьютерах. Если нажать принтскрин на клавиатуре, изображение скопируется в буфер обмена. После вставьте в строку сообщений мессенджера, в офисное приложение/графический редактор.
Alt + Print Screen. Копирует изображение активного окна. Эту информацию также можно передать через мессенджер или вставить в документ.
Win + Print Screen. Сохраняет изображение на мониторе в PNG-файл. Скриншоты, которые создаются инструментами Windows, хранятся в библиотеке пользователя: Изображения → Снимки экрана.
Win + Alt + Print Screen. Создает PNG-файл с изображением текущего окна.
Встроенные приложения Windows
В операционной системе есть полезные программы для создания снимков монитора. Они предлагают больше настроек и режимов работы, чем стандартные функции с хоткеями.
Xbox Game Bar
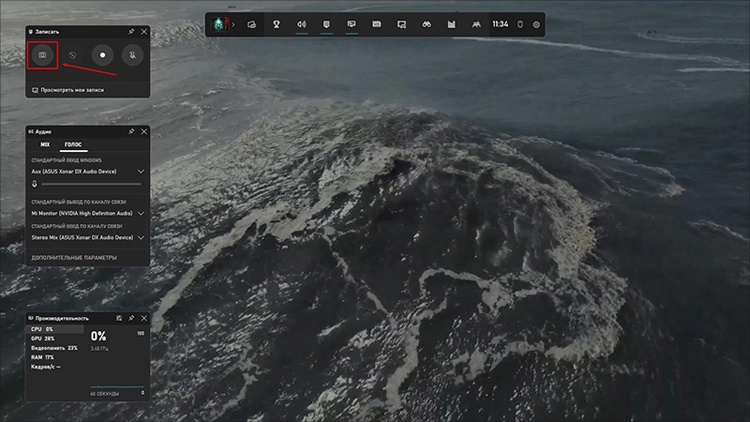
Приложение для геймеров. Позволяет просматривать игровые достижения, искать напарников для многопользовательских сражений, отслеживать производительность ПК. Также есть функции видеозахвата и скриншотов. Стоит учитывать, что программа предназначена главным образом для игр. Она может некорректно работать на рабочем столе. Например вместо обоев на скрине будет однотонная заливка.
Как пользоваться:
- Запустите приложение через меню Пуск или клавишами Win + G.
- Интерфейс Xbox Game Bar предстален несколькими плавающими панелями. Инструмент для снимков дисплея находится на панели Записать — кнопка со значком фотоаппарата, крайняя слева. Нажмите ее.
- Инструмент снимает весь экран или выделенное окно. Переключение между этими режимами происходит автоматически. Так, если окно открыто, не развернуто на весь экран и находится не в фокусе, то сохранится рабочий стол.
- Изображения создаются в PNG-формате. Расположены в библиотеке пользователя — Видео → Запись.
Ножницы
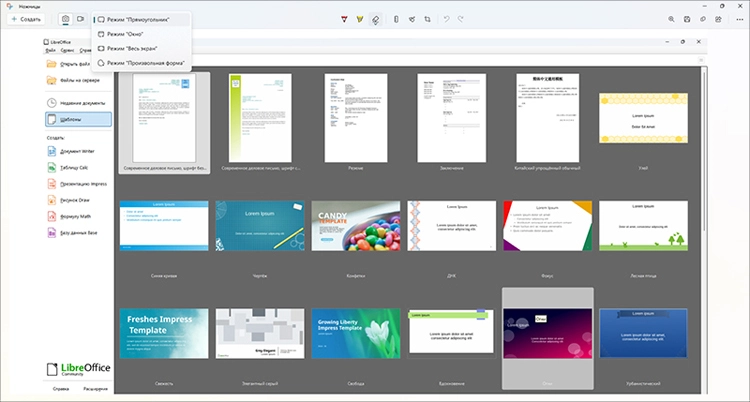
Программа со множеством дополнительных функций. Позволяет производить видеозапись дисплея. Умеет снимать в полноэкранном режиме, делать скриншот указанного окна и выделенной области с прямоугольной или произвольной формой. Можно добавлять к каждому снимку рамку с заданным цветом и толщиной. На созданных изображениях можно делать пометки, измерять расстояния и углы с помощью линейки и транспортира. Есть инструмент для кадрирования. Готовые файлы можно сохранять в JPEG/PNG.
Как пользоваться:
- Запустите Ножницы с помощью меню Пуск и нажмите Создать. Также можно использовать сочетание клавиш Win + Shift + S — при этом сразу активируется режим создания.
- На панели вверху в центре выберите способ создания. Далее выделите мышью область на экране или кликните по нужному окну. Полноэкранный снимок создается автоматически.
- Изображение скопируется в буфер обмена. Также происходит сохранение графического файла в папке Снимки экрана каталога Изображения в библиотеке Windows.
- Если вы делали скрин через хоткеи, кликните уведомление, которое появится в правой нижней части монитора, чтобы отредактировать файл в программе. Нажав на Создать, приложение откроется само.
- При необходимости кадрируйте снимок и сделайте на нем пометки. Чтобы сохранить изменения, кликните по значку дискеты вверху справа.
Фрагмент и набросок
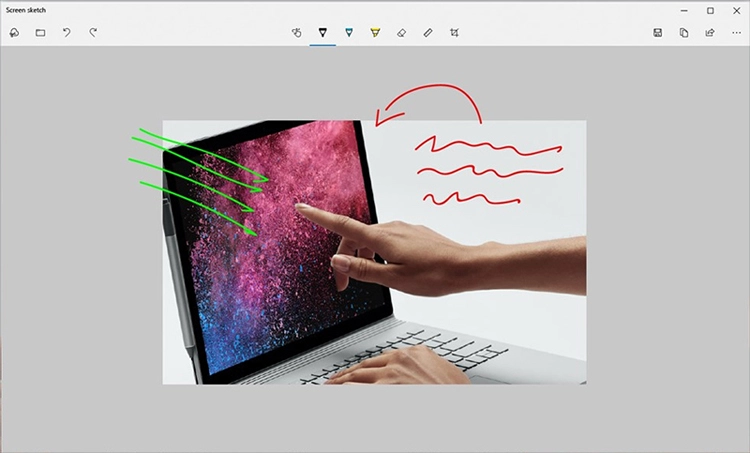
Так какое-то время называлось приложение Ножницы. У старой и обновленной версии почти одинаковый функционал. Из явных отличий — отсутствие видеозахвата.
Как пользоваться:
- Запустите программу через Пуск или клавишами Win + Shift + S.
- Выберите режим создания и сделайте снимок.
- Вставьте полученное изображение через буфер обмена.
- Если необходимо изменить файл, кликните по уведомлению в углу монитора. Внесите нужные правки и сохраните работу. Приложение не всегда автоматически делает файл. Поэтому, если он вам нужен, запустите режим редактирования и сохраните скриншот принудительно (нажмите кнопку с дискетой).
Бесплатные программы для создания снимков экрана
Специальные приложения содержат больше инструментов для создания и редактирования снимков дисплея. Этот софт умеет загружать изображения на интернет-сервер, что удобно, если вам нужно поделиться файлом с другими людьми — достаточно отправить им ссылку.
ФотоСКРИН
Простая и удобная программа на русском. Позволяет добавлять изображение с экрана в буфер обмена, сохранять его как PNG- или JPEG-файл или загружать на сервер. На снимок можно добавлять стрелки, выделения, надписи и отметки с нумерацией (например, так можно обозначать последовательность действий). Есть функция размытия фрагментов, что пригодится для скрытия конфиденциальных сведений.
Скачайте современное приложение для скриншотов бесплатно:
Скачать бесплатно
 Для Windows 11, 10, 8, 7 и XP
Как пользоваться:
- Откройте ФотоСКРИН. Через настройки можно включить автозагрузку приложения. Оно всегда будет работать в фоновом режиме и не придется каждый раз запускать его вручную.
- Одновременно нажмите левую и правую кнопку мыши.
- Выделите рамкой область на мониторе, которую нужно заскринить.
- При необходимости добавьте пометки.
- С помощью вертикальной панели справа выберите, что нужно сделать со скриншотом — скопировать, сохранить в виде файла или загрузить в интернет.
PicPick
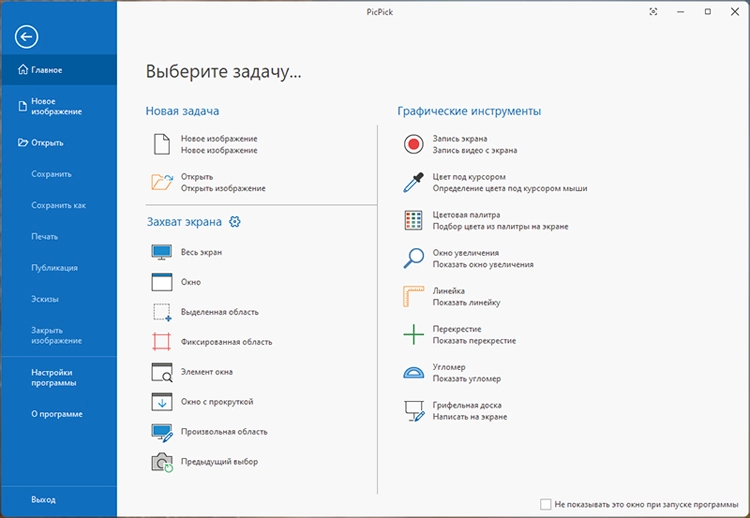
Продвинутое приложение для скриншотов. Есть функция видеозаписи со звуком. Позволяет рисовать на дисплее, как на грифельной доске, добавлять надписи и выделения. Предусмотрены угломер и линейка. Программа умеет сохранять окна с прокруткой — по итогу получится длинное вертикальное изображение.
Как пользоваться:
- Запустите PicPick.
- На вкладке в разделе Захват экрана выберите подходящий способ съемки и сделайте скриншот.
- Откроется редактор, в который автоматически импортируется созданный графический файл.
- Внесите нужные изменения и сохраните результат. Поддерживаются PNG, BMP, JPEG, GIF и PDF.
Выводы
Теперь вы знаете, как сделать скриншот на Виндовс 11. Метод с горячими клавишами позволяет копировать монитор ноутбука или ПК через буфер обмена или сохранять в PNG-формате. Xbox Game Bar имеет схожие возможности, но нестабилен на рабочем столе. Ножницы (прежде программа называлась Фрагмент и набросок) более удобны и надежны. ФотоСКРИН умеет добавлять снимки на сервер, накладывать выделения, стрелки и различные надписи. PicPick предлагает большой набор инструментов для редактирования. Однако для обычных пользователей такой функционал избыточен.
Microsoft’s desktop operating system has long had numerous options for capturing images from your PC’s screen, perhaps too many. Fortunately, Windows 11 simplifies the situation, and the latest OS update adds a new twist—screen video recording (see Snipping Tool, below).
Here are the best ways to take screenshots on your computer in Windows 11. The methods range from long-standing keyboard shortcuts to the more modern and capable tools that let you do things like set timers for the screenshots as well as edit and share them.
1. Use the PrtSc (Print Screen) Key and Paste
(Credit: PCMag)
Press the PrtSc key (sometimes spelled out as Print Screen) and the full desktop image copies to the clipboard. You then must paste the image into an app that will accept it, such as Paint, Paint 3D, or Adobe Photoshop.
If you want to capture only the active application window, add the Alt key, for Alt-PrtSc. Using this key combo saves the current window to the clipboard, and from there you must paste it into an imaging application. On Windows 11, the result can be a little strange because the rounded corners are extended to squared-off corners, since image files are always rectangular.
2. Use the PrtSc Key With OneDrive
(Credit: Microsoft)
You can also use PrtSc in combination with OneDrive to automatically create an image file of your screenshot in OneDrive. I’m including this method separately from the standard PrtSc option because the result is so different and saves you the extra steps of opening an app and pasting from the clipboard. Here’s how to set it up:
Click or right-click on OneDrive’s cloud icon on the right side of the taskbar. Choose Settings and then the Backup tab of the dialog box and check Automatically Save Screenshots I capture to OneDrive.
That one simple check box changes everything about PrtSc: You no longer have to open an image app or paste from the clipboard. Instead, an image file is automatically created in the OneDrive folder of your choice, which appears on the desktop just like a local file. You can also access it from any device where you can access OneDrive (there are clients for every platform). I always use this method when I think I may need to use the screenshot as an image file rather than just pasting it somewhere. It’s also handy when I don’t have time to save an image file in a separate step, such as during a live presentation.
3. Use the Windows Key-PrtSc Keyboard Shortcut
(Credit: PCMag)
Here’s yet another way to use the PrtSc key: Use Windows Key-PrtSc.
If you want to take screenshots and automatically save them somewhere other than OneDrive, you can hit the Windows Key together with the PrtSc key. This method causes the screen to dim briefly and places a PNG file in the Pictures > Screenshots folder by default. (Note the different placement of the PrtSc key on the keyboard in the image above.) You can also paste the shot anywhere right after using this method.
(Credit: Microsoft)
Windows 11 cleans up the previous screenshot tooling confusion in Windows by combining the earlier Snipping Tool with Windows 10’s terrific Snip & Sketch tool. The easiest way to get to the Snipping Tool is by pressing Windows Key-Shift-S. That keyboard shortcut gives you a choice to take a screenshot using a rectangular selection, freehand selection, window, or full-screen capture (that’s the order of the icons you choose from in the image above).
For the first two options, draw with the cursor to select the area you want to capture. For the second two choices, just click over the target.
(Credit: Microsoft/PCMag)
Once you release the cursor, you see a notification in the lower-right-hand corner showing a thumbnail image of the screenshot. You can ignore this if you just want to paste the screenshot into another app, since this method also copies the screenshot to the clipboard. Or you can click on the notification area’s thumbnail to open the Snipping Tool interface (shown below). Here, you can mark up the screenshot with a pen or highlighter, or you can crop it. You can use a ruler to draw straight lines, and the finger button lets you draw on a touch screen.
(Credit: Microsoft/PCMag)
Most importantly, you can save the screenshot and any edits using the 3.5-inch floppy disk icon (some visual metaphors never die). A Share button lets you send the image using Windows 11’s standard share panel, and you can also print the image or open it in another app from the menu options.
One beef I have with this utility’s crop feature is that it doesn’t offer aspect-ratio options. I’d like to be able to, for example, choose a 16:9 widescreen size, and I doubt I’m alone in that. As it is now, you have to take the image into Paint, Paint 3D, or some other image-editing program to get this simple capability. I also wish the Snipping Tool gave access to previous screenshots (as the OneDrive option above and the SnagIt option below do).
If you want to use a timer before snapping the screen, simply type Snipping in the Start menu and open the program window, rather than using the keyboard shortcut. If you change your mind after hitting Windows Key-Shift-S and don’t want to shoot the screenshot, the Esc key backs you out of the process.
Three last tricks:
-
You can change the behavior of the PrtSc key to open the Snipping Tool instead of copying the image to the clipboard. Head to Settings > Accessibility > Keyboard and check the Use the Print Screen Button to Open Screen Snipping box (the bottom option in the screenshot below).
-
If you have a Surface Pen stylus, double-tapping its eraser button opens the Snipping Tool.
-
If you enable Clipboard History, you’ll see your last few screenshots available for pasting when you hit Windows Key-V. That actually works with any of the screenshot methods here that copy the image to the clipboard.
Record Your Screen With the Snipping Tool
(Credit: Microsoft)
The February 2023 update to Windows 11 brings a new capability to the Snipping Tool: screen recording. To use this functionality, you must run the utility as the screen recording option doesn’t appear when you press Windows Key-Shift-S. Once the app is open, tap the movie camera icon, then press New. Choose a screen area to record, wait for a 3-2-1 countdown, and do your thing on the screen. Once you stop recording, you see a playback of the video, and you can save or share it just as with a still screenshot.
Recommended by Our Editors
5. Use a Third-Party Screenshot Utility
For many years I was a devout SnagIt user—it’s still a PCMag Editors’ Choice winner for screenshot utilities—particularly because I liked how it saved any screenshots you took for use later. (I now find that the built-in Windows screenshot tools serve my needs adequately.) SnagIt can also capture videos of screen action and window scrolling. Read our roundup of third-party screenshot utilities to learn more about the options available.
6. Use the Game Bar
(Credit: Microsoft)
Windows Key-G opens the Game bar. From there, if you go to the Capture window, you’ll see a camera icon. Tap that, and your screenshot is saved (somewhat counterintuitively) to the Videos/Captures folder under your main user folder. You can change the target folder in the main Windows Settings app. (Alternatively, you can tap the Windows Key-Alt-PrtScn shortcut to bypass opening the Game bar.)
7. Use Volume Up and Power Buttons on Surface Tablets
(Credit: Microsoft)
Taking screenshots on Surface tablets is different from doing it on a PC, unless you have a keyboard attached. The on-screen touch keyboard has no PrtSc key.
On the Surface Pro 8 and most of its predecessors, press the Volume Up and Power buttons at the same time to take a screenshot. Be careful to press the buttons simultaneously, or else you’ll end up turning off the screen.
The result of shooting this way is the same as pressing Windows Key-PrtSc; an image is saved to your Pictures>Screenshots folder.
Older Surface tablets used the Fn-Windows Key-Spacebar combination on their attached keyboards, and some had you press the power button and a hardware Windows button simultaneously. On the Dell Latitude tablet, you use the Power Button and Volume Down buttons simultaneously; you might have to experiment or dig into documentation if you have a less-popular tablet model. And as mentioned previously, double-tapping the back button on a Surface Pen opens the Snipping Tool.
How to Take a Screenshot on Any Device
There’s a good chance that you may need to take screenshots on your smartphone and other devices as well as on Windows 11 PCs. For those instances, head over to our story on how to take a screenshot on any device, which walks you through the processes used by all of your non-PC gadgets.
Like What You’re Reading?
Sign up for Tips & Tricks newsletter for expert advice to get the most out of your technology.
This newsletter may contain advertising, deals, or affiliate links. Subscribing to a newsletter indicates your consent to our Terms of Use and Privacy Policy. You may unsubscribe from the newsletters at any time.
Last updated on February 14th, 2022 at 07:44 am
Introduction
Microsoft haven’t changed much the way you can take screenshots in Windows 11. Taking a screenshot in the new Windows release is as easy and, unfortunately, as inconvenient as it was in Windows 10.
There are a few tools that could help you, however. Most screenshot taking programs allow you to automatically upload your screenshot to the cloud and get a link, so that you can share the image.
In this tutorial we will take a look at a few programs you can use to make taking and sharing screenshots easier.
Use Print Screen and MS Paint
This is the easiest method that doesn’t require any additional software.
Capture Screenshot
Press PrtSc button on your keyboard and Windows 11 will save your screenshot to the clipboard. If you press Alt+PrtSc instead, Windows will capture the active window.
Paste the contents of the clipboard
Now press the Windows button or click Start. Then type “paint“, and you will see the Paint app appearing in the search results.
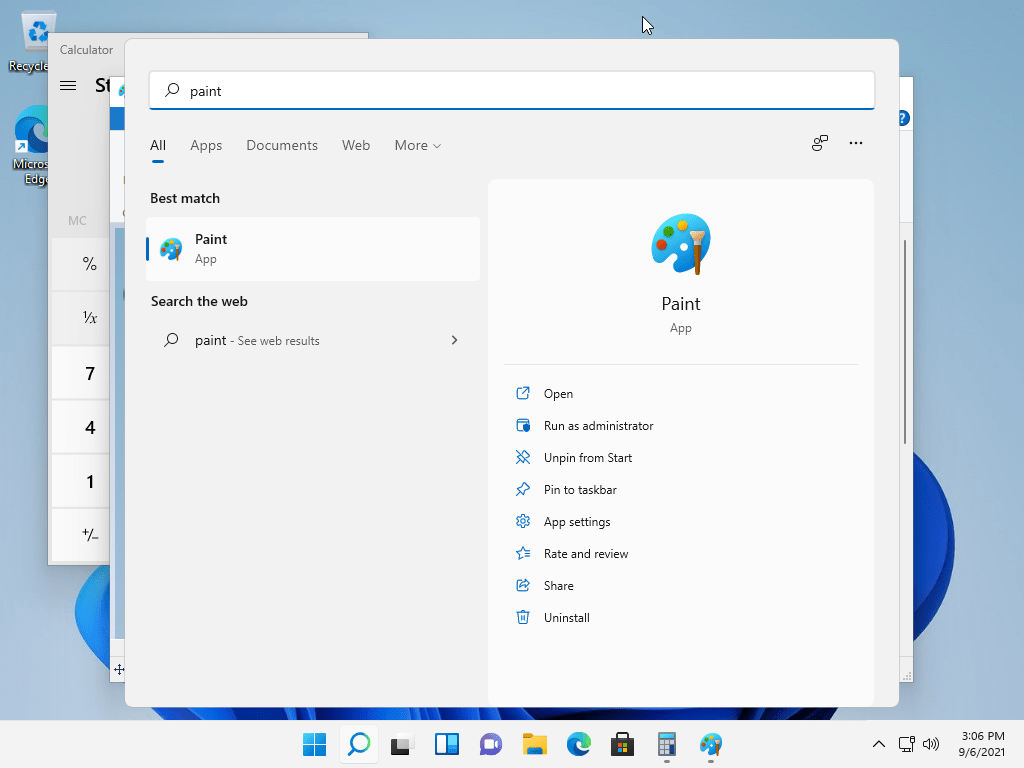
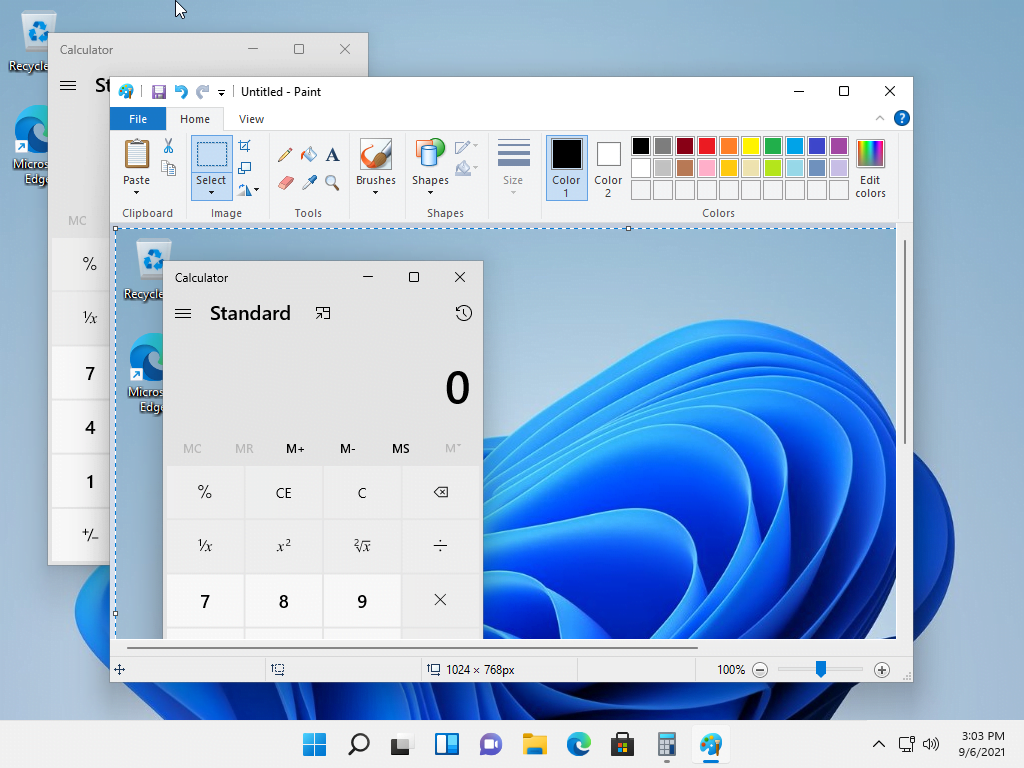
Click on it and the graphics editor window will appear. Now press Ctrl+V and you will see your screenshot in the Paint app.
Tip:
You can also paste the screenshot into any other program that supports pasting images from the clipboard, e.g. Word, Photoshop, etc.
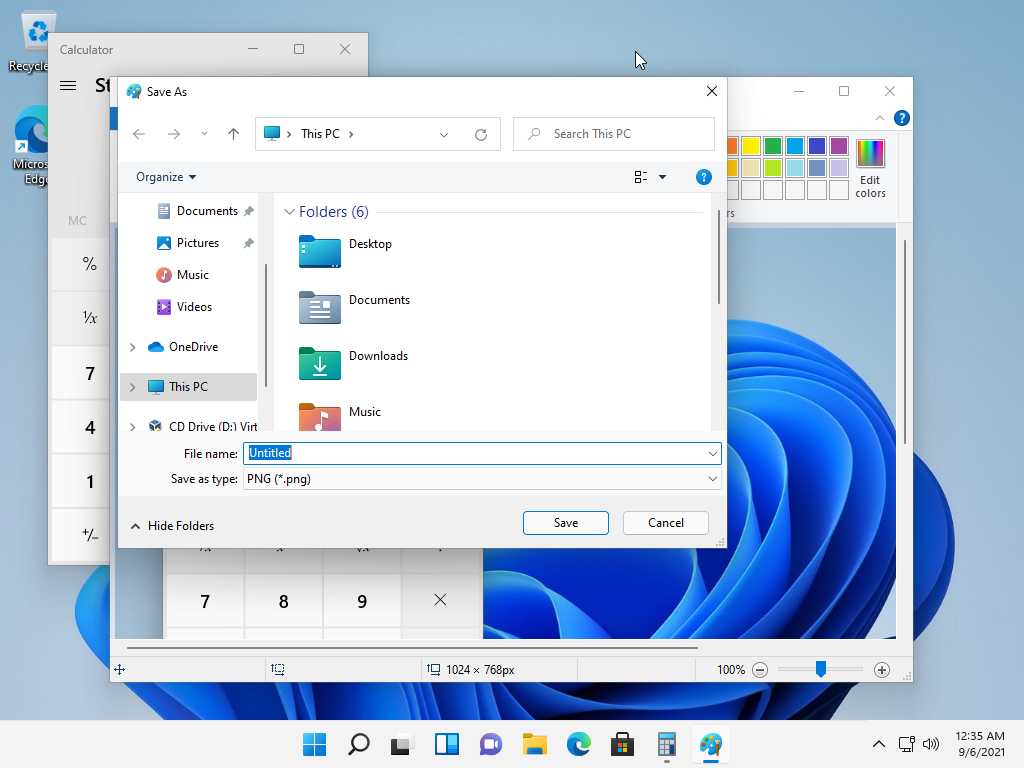
After that click File > Save to save the screenshot, select a desired folder and press Save.
If you want to upload the screenshot after capturing it, you need to do it manually.
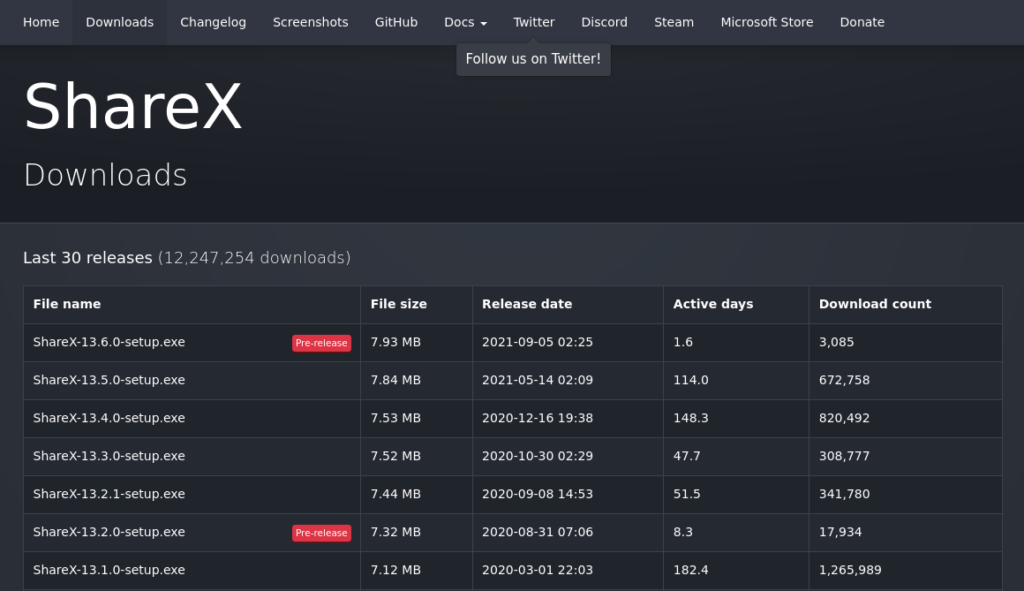
ShareX
ShareX allows you to automatically upload screenshots to an image hosting service and copy the image link to your clipboard. This means that you can take and share a screenshot with just 2 clicks, instead of doing the whole process manually.
Install ShareX
Head to the ShareX website and get the latest version, then double click on the downloaded file and install ShareX.
Launch ShareX and you will see a list of hotkeys.
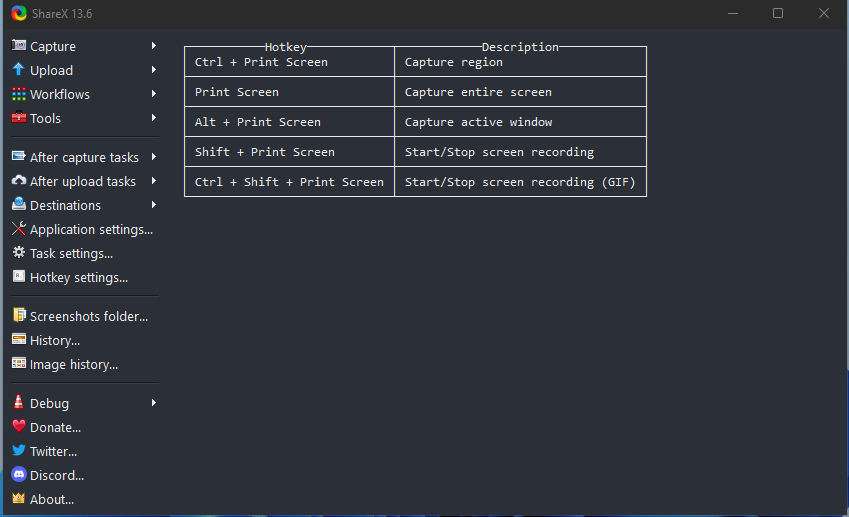
Capture Screenshot and Upload It to the Cloud
Press PrtSc to capture the entire screen, Ctrl + PrtSc to capture a region, or Alt + PrtSc to capture the active window. You will see a warning that ShareX is about to upload your screenshot to an image hosting service.
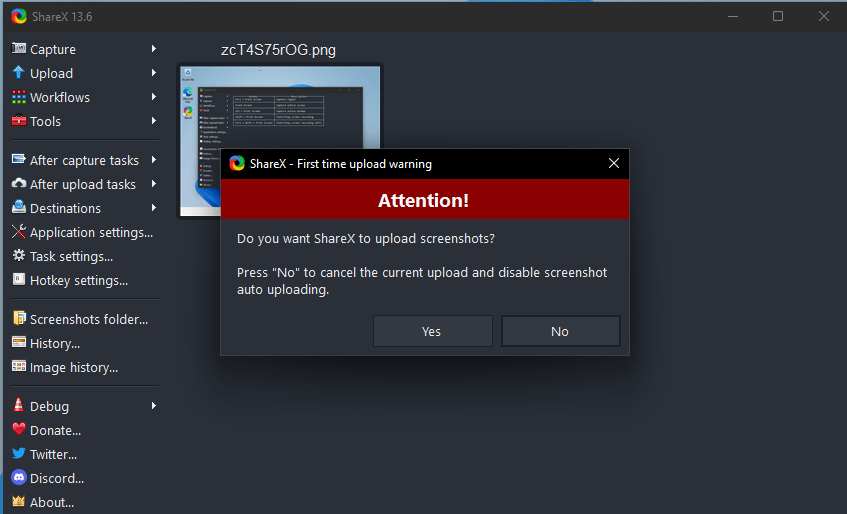
Select Yes if you want to upload the screenshot and get a link, otherwise select no.
Tip:
Make sure you don't have any sensitive information on the screen when you upload images to the image hosting service through ShareX.
If you selected Yes, just paste the image link into the desired program.
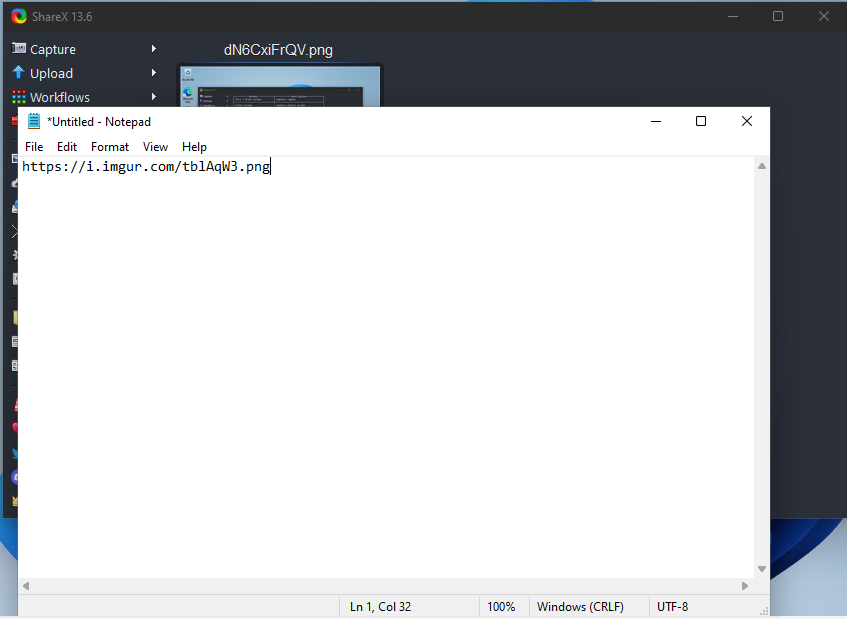
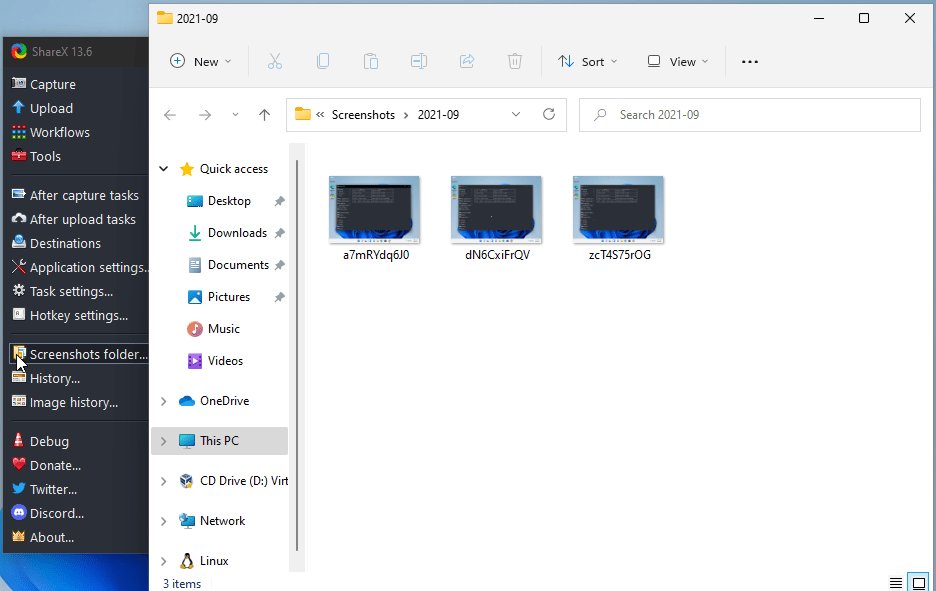
If you selected No, just click on Screenshots folder… in the left menu. ShareX will open a folder with your screenshots. You can also find your screenshots in C:\Users\[your_user_name]\Documents\ShareX\Screenshots folder.
Greenshot
Greenshot is a nice alternative to ShareX. It comes with a bunch of different plugins that allow you to upload screenshots to many different online services, such as Dropbox, Imgur, Flickr, Photobucket, etc.
Install Greenshot
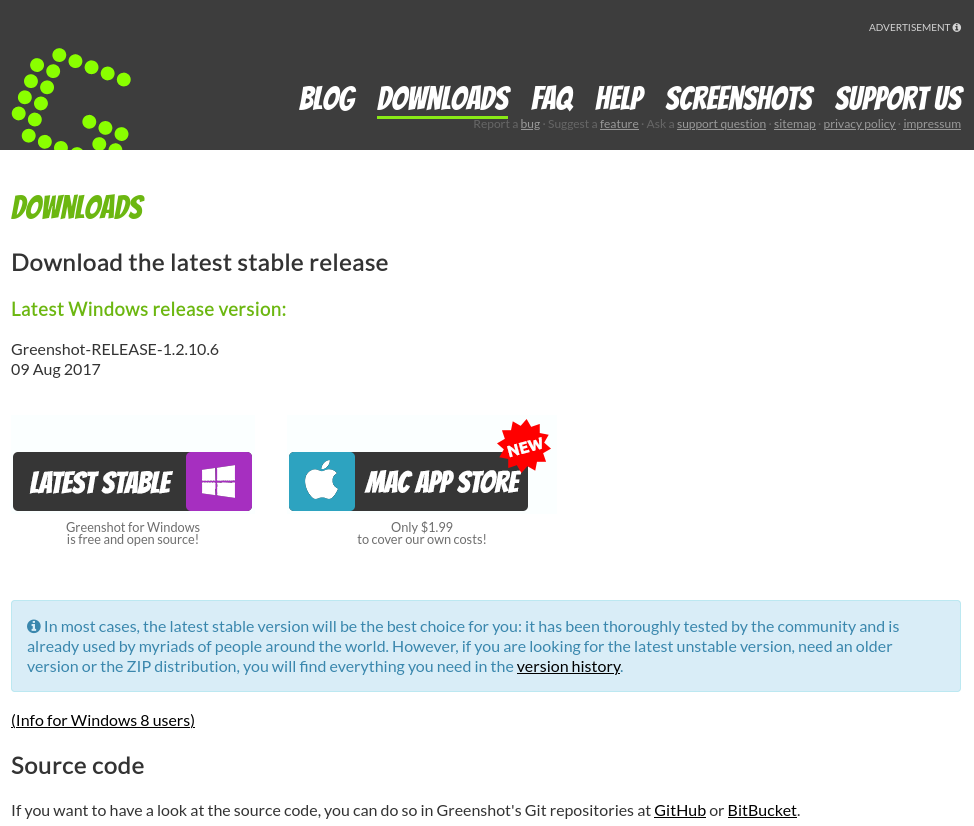
Head to the Greenshot website, download the latest version and install it.
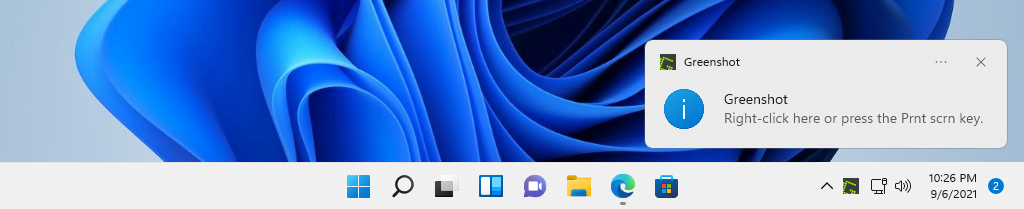
Launch Greenshot and it will show you a notification that the program loaded.
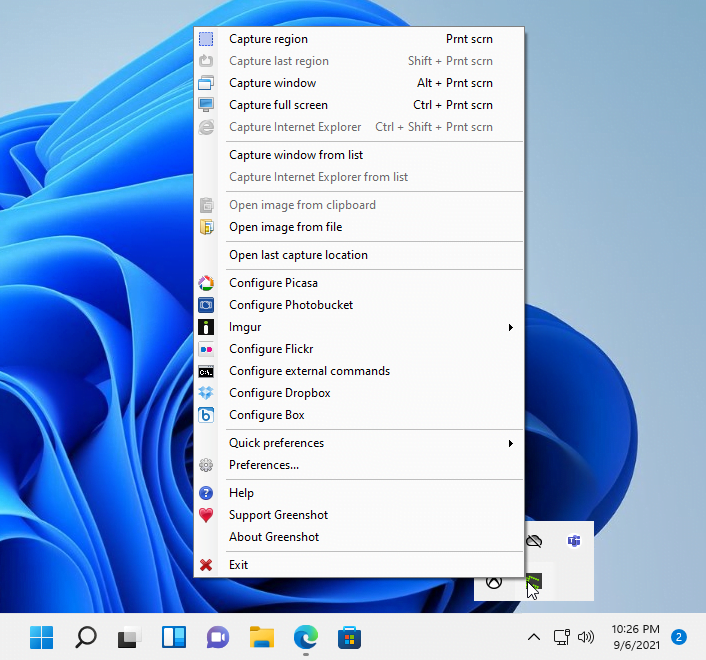
You can right-click on Greenshot icon in the taskbar corner to see the list of hotkeys and other options.
Capture Screenshot and Upload It or Save Locally
To take a screenshot press Print Screen to capture a region, Alt+PrtSc to capture the active window, or Ctrl+PrtSc to capture the entire screen. The menu will appear where you can select what you want to do with your screenshot.
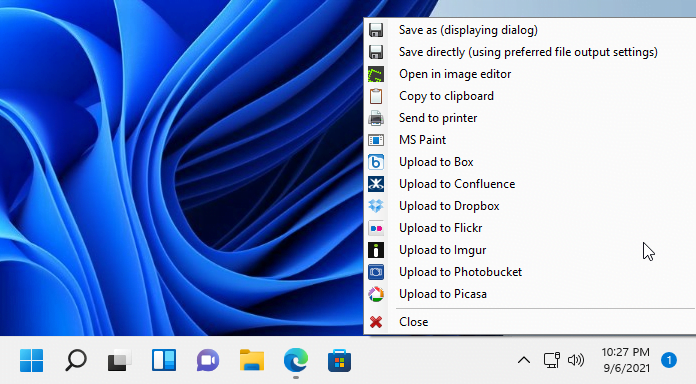
You can upload the screenshot to quite a few different websites or services or save it locally.