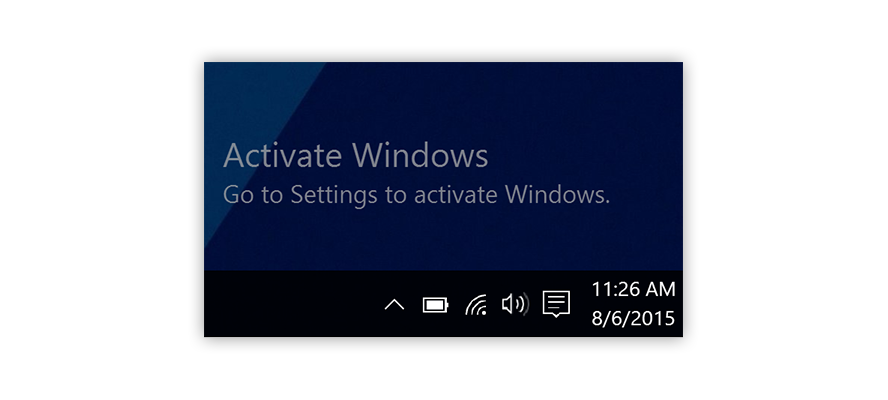
We’ve all been there, whether you obtained Windows legally, or applied some tricks to install it on your computer without paying a penny. The notorious “Activate Windows” watermark has made many people’s experience with their computers rather unpleasant. It may block your view, embarrass you when trying to record your screen, or distract you when watching movies or playing video games.
Today, we’re going to show you how to remove the “Activate Windows” watermark on Windows 10.
Jump to:
- What Is the “Activate Windows” Watermark?
- How To Remove the “Activate Windows” Watermark Permanently
- Do the Notepad Trick
- Modify Your Registry
- Change Ease of Access Settings
- Use a Windows 10 Watermark Remover
- Activate Your OS
- 1. Activate Using a Product Key
- 2. Activate Using a Digital License
- Summary: How To Remove Activate Windows 10 Watermark
- Watch this video: Your Windows License Will Expire Soon — Activate Windows 10 Permanently
- Final Words
What Is the “Activate Windows” Watermark?
Microsoft, just like any other company, doesn’t like it when its hard work gets pirated, exploited, and re-distributed for free. In an attempt to stop the piracy of their newest operating system, Windows 10, they came up with the idea of placing a watermark in the corner until the user legally activates Windows.
This might not seem like a huge issue, as the watermark doesn’t really get in your way. Instead, it sits on top of every window, app, and even your cursor.
While it’s not a ground-breaking method of stopping piracy, it was enough to drive you here and look up how you can get rid of it. Don’t worry — other than telling you the obvious solution, we’ve compiled some methods to help those who don’t want to spend money to remove the watermark.
It’s worth noting that most of these methods simply remove the “Activate Windows» watermark, and don’t actually activate your system. You still won’t be able to lift limitations such as not being able to customize your PC at all.
With that clarified, let’s get to work and remove the “Activate Windows” watermark on your Windows 10 system.
How To Remove the “Activate Windows” Watermark Permanently
Let’s take a look at how you can get rid of the pesky watermark in the corner of your screen in a few easy steps!
Do the Notepad Trick
One of the easiest and most recognized ways of removing the pesky little watermark in the corner of your screen is doing a simple trick with the pre-installed Notepad app. Yes, the Notepad app you use on a daily.
By pasting some text and using an administrator account, you can easily remove the “Activate Windows” watermark from appearing on your screen. Here’s how to do it.
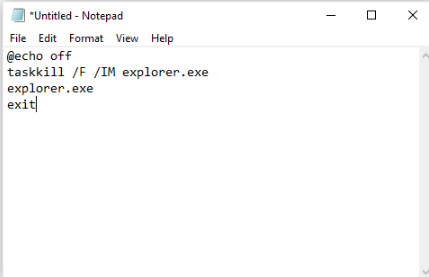
- Launch the Notepad application and create a new, blank note.
- Copy and paste the following block of text into your Notepad
@echo off
taskkill /F /IM explorer.exe
explorer.exe
exit
- Go to File, then click on Save as. Name the file Activation.bat and change the file format to All files.

- Choose the location where the file becomes easily reachable, and click the Save button. We recommend saving files like this on your Desktop to maximize accessibility.
- Right-click on the file and choose Run as administrator. If you don’t have this option, you’re not signed into an account with admin permissions.

- Restart your device and enjoy life without watermarks!


Check out our complete Guide on How to remove the Activate Windows 10 watermark
Modify Your Registry
The registry is something casual Windows users generally don’t meddle with unless it’s instructed in an online guide like this one! It’s a powerful way to customize your Windows 10 experience on a deeper level, allowing you to meddle with system configuration and application settings.
If this approach suits your style more, follow the next simple steps to remove the “Activate Windows” watermark using registry edits.
- Press down the Windows + R keys on your keyboard. This will bring up a window called Run.
- Type in regedit and press the OK key to bring up the Registry Editor. We’ll be using this tool to modify registry values.

- You can navigate the Registry Editor by clicking on the arrow symbol next to the name of a folder to expand it. Using this technique, navigate to HKEY_CURRENT_USER\Control Panel\Desktop.

- On the right side of the window, you’ll see a list of values appear while the Desktop folder is selected. Double-click on the PaintDesktopVersion value.

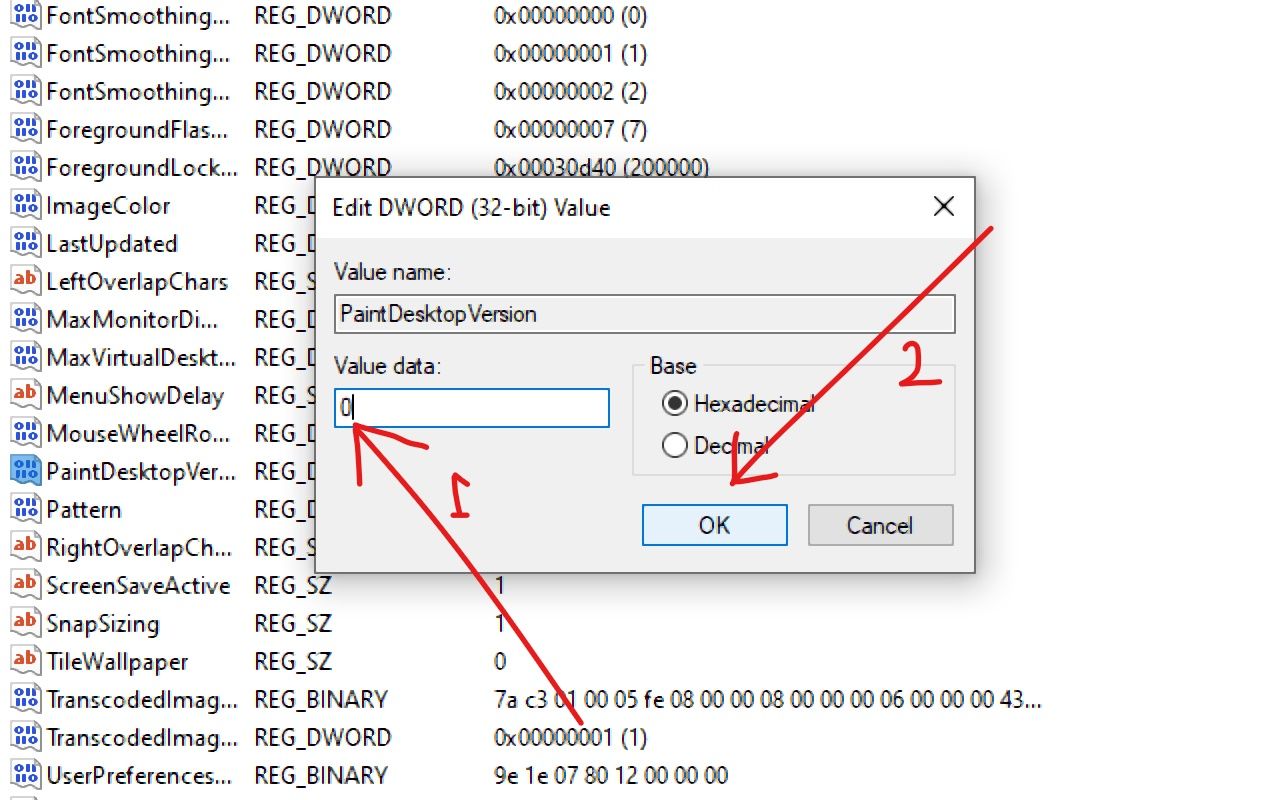
- Change the Value from 1 to 0, and click the OK button to save this modification in your system.
- Restart your PC and enjoy having no watermarks!


Change Ease of Access Settings
Did you know that changing a simple setting in your Windows 10 will immediately get rid of the watermark? If you answered no, you’re not alone. By simply disabling background images with Ease of Access, you can also remove the watermark that comes with Windows 10.
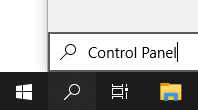
- Press the Windows + S keys on your keyboard to bring up the Search feature, then type in Control Panel.

- Click on the matching result to launch the classic Control Panel app.

- Click on the Ease of Access Center. Make sure your view mode is set to Large icons to see this menu.

- Click on the Make the computer easier to see link under the Explore all settings section.

- Scroll down until you see Remove background images (where available) and place a checkmark in the box to enable the feature.

- Click Apply and enjoy your watermark-free desktop.


Use a Windows 10 Watermark Remover
Many applications are available online that quickly remove the Windows 10 watermark for you. These applications are often shady and come from all corners of the internet — make sure you download with caution when searching on your own.
Our watermark remover app recommendation is Universal Watermark Disabler. We picked a program that can ensure you never have to see “Activate Windows” in the corner of your screen ever again. When you download it, simply launch it and follow the on-screen instructions.
Tip: Universal Watermark Disabler works for earlier versions of Windows as well. Make sure to give it a recommendation to your fellow tech-gurus who use an older OS.
Activate Your OS
Yes, it’d be unprofessional to not include the true, best way of getting rid of the “Activate Windows” watermark — activating Windows. If you already have a way to validate your copy of the operating system, rejoice! You can activate your system, remove limitations, and never see “Activate Windows” ever again.
You can purchase Windows 10 from the official website, or get a hold of it through various third-party resellers, online stores, and individuals selling a license or product key.
Here’s how you can actually activate Windows 10.
1. Activate Using a Product Key
- Locate your product key. It’s a 24-character long alphanumeric code, which you can find depending on where and how you purchased Windows 10. Look for it:
- In your email inbox.
- On the retailer’s website where you purchased Windows 10 from.
- On a physical piece of paper or sticker.
- Press the Windows + I keys on your keyboard to quickly bring up the Settings window.
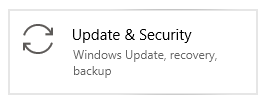
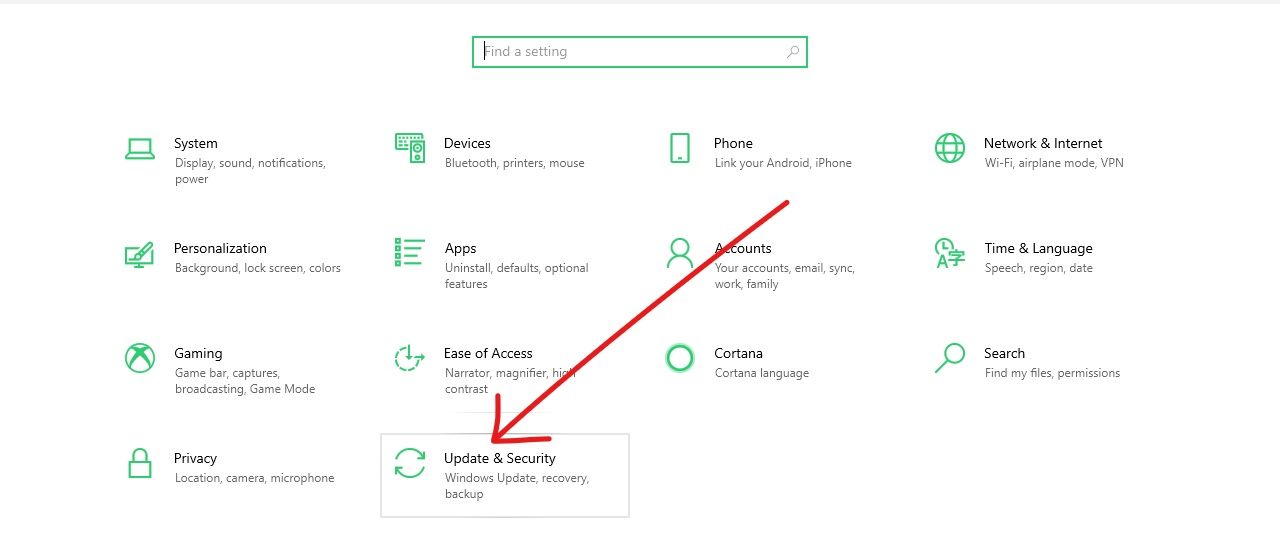
- Click on Update & Security.

- Choose Activation from the menu on the left, then click on Change product key.

- Enter your product key and click Next. Wait for Windows 10 to activate and enjoy your operating system without any watermarks or limitations!

2. Activate Using a Digital License
- Press the Windows + I keys on your keyboard to quickly bring up the Settings window.
- Click on Update & Security.
- Choose Activation from the menu on the left, then click on the Go to Microsoft Store option. If you can’t see this button, search Microsoft Store in your search bar.
- If the product page is not opened automatically, search for Windows 10 in the store.
- You’ll see one of two messages on this page:
- Install. Click on the button to get Windows 10 on your computer with a digital license activated.
- Buy. Purchase Windows 10 and have it activated right away. If you’ve already made a purchase, log into your Microsoft account which was used.
- Complete the installation and enjoy an activated, watermark-free system!
Summary: How To Remove Activate Windows 10 Watermark
In this article you’ve learned:
- How to get rid of the Activate Windows watermark
- The complete activate Windows watermark removal
- Why you’re seeing the Activate Windows watermark error
- How to remove Activate Windows permanently
- Windows watermark remover
- Why Activate Windows watermark keeps coming back
- How to remove the Activate Windows 10 watermark permanently
Watch this video: Your Windows License Will Expire Soon — Activate Windows 10 Permanently
Final Words
We believe this guide was able to help you successfully remove the “Activate Windows” watermark from your system. Please note that it’s possible for this watermark to periodically reappear — in this case, just come back and repeat any of these processes. Now, check out our help center for more guides, articles, and troubleshooting ticks and tricks for your better Window user experience. For more articles and help, subscribe to our newsletter. You will be the first to get a hold of our updated articles, discounts, coupons, and more. Subscribe below.
Read more
» How to remove the Activate Windows 10 watermark
» Bypass “An Administrator Has Blocked You From Running This App” Warning
» How To Use Ultimate Windows Tweaker 4 for Windows 10
» What to Do When Windows Update Keeps Failing on Windows 10
Are you getting the “Activate Windows- Go to settings to activate windows” watermark on your desktop? Or Looking for a way to remove Activate Windows watermark permanently from your desktop? This is because your Windows license has expired. If you have a product key then you can activate it directly, to remove activate Windows watermark. But if you don’t have one, here is how to remove Activate Windows 10 watermark without a product key.
Contents
- 1 How to remove the Activate Windows watermark?
- 1.1 Remove the active Windows watermark with help of cmd
- 1.2 Registry Tweak to remove Activate Windows watermark
- 1.3 Video how to remove windows watermark
- 1.4 Windows watermark remover tool
- 1.5 Disable Activate Windows Watermark by using Ease of Access
Here are the reasons why you might be seeing the “Activate Windows” watermark on your desktop:
- It is most commonly because Your Windows 10 operating system has not been activated with a valid license key.
- If you were using a trial version of Windows 10, the trial period has likely expired.
- The license key entered may be incorrect or invalid or There may have been an issue during the activation process.
- Again Significant hardware changes to your computer may trigger a reactivation prompt.
- You might be using a pirated or unauthorized version of Windows, which lacks a valid license.
- If there are network issues during the activation process, it may not complete successfully.
Remove the active Windows watermark with help of cmd
With a simple notepad trick, you can easily remove Activate Windows 10 Watermark from your desktop. Let’s see how to do it.
- First, open Notepad on your PC, You can do this by clicking on the start menu search type Notepad and hit the enter key. Now on Notepad type, the below commands :
@echo off
taskkill /F /IM explorer.exe
explorer.exe
exit

- Go to File and click “Save as”. Here select the location where you want to save the file. Then Change the save as type to All Files (*.*) and Give the file name as “ remove.bat”

- Now open the file location where you saved it. You will see a file as shown below image. Right-click on the remove.bat file and click on “Run as administrator”

A command prompt will be opened and closed itself, Now restart your laptop or desktop. That’s all there is no more “activate windows go to settings to activate windows” on your Desktop.
Registry Tweak to remove Activate Windows watermark
Here is another tweak to remove Activate Windows 10 watermark using the Windows registry editor.
- Open the Windows registry editor by Press Windows + R, type regedit, and hit the enter key.
- Then expand HKEY_CURRENT_USER\Control Panel\Desktop
- Double-click on the value “PaintDesktopVersion” in the right-hand window.
- Change the value “1” to a “0” and click OK to save changes.
- Close the registry editor and any other programs and restart your computer.

Video how to remove windows watermark
In addition, refer to this video for one more registry tweak that helps remove Active Windows watermark on Windows 10.
Windows watermark remover tool
Still, Activate Windows watermark keeps coming back. You can use a third-party Windows watermark remover tool, “Universal Watermark Disabler 1.0.0.6” which helps remove all kinds of watermarks in Windows 10.
Running this tool didn’t delete any branding strings (for example does not modify system files) only remove watermarks including Test Mode, Build string in the evaluation and pre-release builds,
- Download ‘Universal Watermark Disabler’ here,
- locate and unzip the file in the download folder
- save and close all applications running on your computer
- Finally, double-click on uwd.exe to run the tool, Click yes if UAC prompts for permission,
- Click on install, The application will run and automatically restart your computer.

- On the next start when you log in back to your machine you will notice the remove windows activation message disappear.
Disable Activate Windows Watermark by using Ease of Access
Yes, also you can also remove the Windows 10 activation watermark from the ease of access options.
- Press the Windows key + S type control panel and select the first result,
- Go to Ease of Access Centre (to get this option make sure to Change the control panel view by large icons)
- Click on Make the computer easier to see, scroll down to the bottom and check the mark on Remove background images (where available)
- Click ok and restart your PC and check the status of remove the Windows 10 activation watermark.

That’s all, did the above solutions help remove Activate the Windows watermark on Windows 10? Let us know in the comments below.
FAQ:
Why is there an “Activate Windows” watermark on my desktop?
- The watermark appears when your Windows operating system is not activated with a valid license key.
How can I activate Windows and remove the watermark?
- You can activate Windows by entering a valid license key. Go to Settings > Update & Security > Activation, and select “Change product key.” Enter your valid key to activate.
What if I don’t have a valid license key?
- You’ll need to buy a valid license key from an authorized retailer or directly from Microsoft.
Can I use Windows without activating it?
- Yes, you can use Windows without activating it, but there are limitations. You won’t be able to customize certain settings, and you’ll receive periodic reminders to activate.
Are there any free alternatives to obtaining a valid license key?
- No, Buying a valid license key through legal means is essential. Avoid using unauthorized or pirated keys, as it’s against Microsoft’s terms of service. In addition, the tips mentioned this post may help remove activate watermark on Windows 10.
I’ve entered a valid key, but the watermark is still there. What should I do?
- If you’ve entered a valid key and the watermark persists, try restarting your computer. If the issue persists, Run the troubleshooter or contact Microsoft Support for assistance.
Can I remove the watermark without activating Windows?
- While there are methods circulating online, it’s important to note that using such methods may violate Microsoft’s terms of service and could lead to legal consequences. It’s recommended to activate Windows through official channels.
Can I transfer my Windows license to a new computer?
- It depends on the type of license you have. Retail licenses can be transferred, but OEM licenses are typically tied to the original hardware.
What if I’m using a trial version of Windows?
- If you’re using a trial version, you’ll need to purchase a valid license key to activate Windows and remove the watermark.
I upgraded from an older version of Windows. Do I still need to activate it?
- A10: If you upgraded from a genuine, activated version of Windows, your license should carry over. However, if prompted, you may need to re-enter your license key.
Also, read:
- Laptop Buying Guide – What to Look for When Buying a Laptop
- SSD vs HDD Speed and Performance Comparison
- What Is The Difference Between A VPN And A Proxy and how do they work?
- How To Enable and configure Hyper V virtualization on Windows 10
- What is the Difference Between 32-Bit and 64-bit Windows 10 and Processor (CPU)

If you are using a non-activated version of Windows, there’s a high chance that you have seen the “Activate Windows 10 – Go to settings to activate Windows” watermark on your desktop. If you have got the product key from Microsoft Store or a retailer, you can use it to activate your WIndows 10 and that will remove the watermark.
If you don’t have the Product Key and it’s bothering you, you need not worry. Here are some tweaks which will help you hide or remove the Activate Windows watermark permanently.
Why do you get Activate Windows Watermark?
The reason why “Activate Windows” watermark appears is because your system doesn’t have an activated Windows installed. The other reason can be the expiration of your installed Windows product key. Having an activated Windows lets you access several features of Windows 10 like Windows Defender, Microsoft Office Installation, Security updates, personalization features, and more.
The best and easiest way to remove this watermark is to purchase a product key from any online retailer like Microsoft. Entering the product key will remove the Activate Windows watermark, and will let you access all the Windows 10 features.

If you don’t want to purchase any product key and want to get rid of the Activate Windows watermark, then here are few tweaks to remove Actiavte Windows watermark.
ALSO READ:
- How To Export Your Google Photos Library
- How To Fix the “Sim Not Provisioned MM 2” Error
- 11 Incredible Ways To Speed Up Your Slow Windows 10 PC
There are several ways to remove Activate Windows watermark. We will show you all the possible ways to remove Activate Windows watermark without using a product key.
1. Get rid of Activate Windows Watermark using Regedit
To remove the watermark using regedit, do the following:
1. Click Start and type in Regedit and hit Enter. Select “Yes” if prompted by UAC (User Account Control) box.
2. Now, navigate to HKEY_CURRENT_USER > Control Panel > Desktop.
3. Scroll down and find the PaintDesktopVersion and double click it to open.

4. Once opened, make sure that the Hexadecimal option is selected. Then, change the Value data to 0 and click OK to save changes.
5. Now, close the Registry Editor and restart your Windows PC/Laptop.
When you log in to your desktop again, the Activate Windows watermark should be removed.
2. Disable Activate Windows Watermark via Windows PowerShell
Using this method will activate the Windows on temporary basis (90 days/3 months). You might need to use this command again after 90 days to continue removing the Activate Windows watermark. Here’s how you can remove the watermark using PowerShell:
1. Click Start and type in PowerShell. On the right pane, select “Run as Administrator” option. Choose “Yes” if prompted by UAC.

2. Once PowerShell opens, type this command and hit Enter.
slmgr /renew
3. Close PowerShell and restart your Windows PC/Laptop.
Once restarted, you will get rid of the Activate Windows watermark for the next 90 days. If you see the watermark again, run this command again and you will be good to go.
3. Disable Activate Windows Watermark using CMD (Command Prompt)
It is a rare case but activating Test mode can often cause the Activate Windows watermark to appear. If you disable the Test Mode, you can hide the Activate Windows watermark. To turn this off, follow these steps:
1. Click Start and type in CMD. On the right pane, click on the “Run as Administrator” option. Select “Yes” if prompted by UAC.

2. Once Command Prompt opens up, type this command and hit Enter.
bcdedit -set TESTSIGNING OFF
3. If everything goes good, you’ll see “Operation completed successfully” as a result. Restart your Windows PC/Laptop.
Once you restart your PC, you’ll see that you got rid of the Activate Windows watermark.
4. Remove Activate Windows Watermark with a Script
Although there are many ways to remove the Activate Windows watermark, one of those methods is using a script. Running this script might get rid of the Activate Windows watermark.
1. Click Start > search for Notepad and hit Enter.

2. Once opened, copy and paste the below text to the Notepad.
@echo offtitle Activate Windows 7 / 8 / 8.1 / 10 for FREE!&cls&echo =====================================&echo #Copyright: MSGuides.com&echo =====================================&echo.&echo #Supported products:&echo – Windows 7 Professional&echo – Windows 7 Professional N&echo – Windows 7 Professional E&echo – Windows 7 Enterprise&echo – Windows 7 Enterprise N&echo – Windows 7 Enterprise E&echo – Windows 8 Core&echo – Windows 8 Core Single Language&echo – Windows 8 Professional&echo – Windows 8 Professional N&echo – Windows 8 Professional WMC&echo – Windows 8 Enterprise&echo – Windows 8 Enterprise N&echo – Windows 8.1 Core&echo – Windows 8.1 Core N&echo – Windows 8.1 Core Single Language&echo – Windows 8.1 Professional&echo – Windows 8.1 Professional N&echo – Windows 8.1 Professional WMC&echo – Windows 8.1 Enterprise&echo – Windows 8.1 Enterprise N&echo – Windows 10 Home&echo – Windows 10 Home N&echo – Windows 10 Home Single Language&echo – Windows 10 Home Country Specific&echo – Windows 10 Professional&echo – Windows 10 Professional N&echo – Windows 10 Education N&echo – Windows 10 Education N&echo – Windows 10 Enterprise&echo – Windows 10 Enterprise N&echo – Windows 10 Enterprise LTSB&echo – Windows 10 Enterprise LTSB N&echo.&echo.&echo ====================================&echo Activating your Windows… & cscript //nologo c:\windows\system32\slmgr.vbs /ipk FJ82H-XT6CR-J8D7P-XQJJ2-GPDD4 >nul&cscript //nologo c:\windows\system32\slmgr.vbs /ipk MRPKT-YTG23-K7D7T-X2JMM-QY7MG >nul&cscript //nologo c:\windows\system32\slmgr.vbs /ipk W82YF-2Q76Y-63HXB-FGJG9-GF7QX >nul&cscript //nologo c:\windows\system32\slmgr.vbs /ipk 33PXH-7Y6KF-2VJC9-XBBR8-HVTHH >nul&cscript //nologo c:\windows\system32\slmgr.vbs /ipk YDRBP-3D83W-TY26F-D46B2-XCKRJ >nul&cscript //nologo c:\windows\system32\slmgr.vbs /ipk C29WB-22CC8-VJ326-GHFJW-H9DH4 >nul&cscript //nologo c:\windows\system32\slmgr.vbs /ipk BN3D2-R7TKB-3YPBD-8DRP2-27GG4 >nul&cscript //nologo c:\windows\system32\slmgr.vbs /ipk 2WN2H-YGCQR-KFX6K-CD6TF-84YXQ >nul&cscript //nologo c:\windows\system32\slmgr.vbs /ipk NG4HW-VH26C-733KW-K6F98-J8CK4 >nul&cscript //nologo c:\windows\system32\slmgr.vbs /ipk XCVCF-2NXM9-723PB-MHCB7-2RYQQ >nul&cscript //nologo c:\windows\system32\slmgr.vbs /ipk GNBB8-YVD74-QJHX6-27H4K-8QHDG >nul&cscript //nologo c:\windows\system32\slmgr.vbs /ipk 32JNW-9KQ84-P47T8-D8GGY-CWCK7 >nul&cscript //nologo c:\windows\system32\slmgr.vbs /ipk JMNMF-RHW7P-DMY6X-RF3DR-X2BQT >nul&cscript //nologo c:\windows\system32\slmgr.vbs /ipk M9Q9P-WNJJT-6PXPY-DWX8H-6XWKK >nul&cscript //nologo c:\windows\system32\slmgr.vbs /ipk 7B9N3-D94CG-YTVHR-QBPX3-RJP64 >nul&cscript //nologo c:\windows\system32\slmgr.vbs /ipk BB6NG-PQ82V-VRDPW-8XVD2-V8P66 >nul&cscript //nologo c:\windows\system32\slmgr.vbs /ipk GCRJD-8NW9H-F2CDX-CCM8D-9D6T9 >nul&cscript //nologo c:\windows\system32\slmgr.vbs /ipk HMCNV-VVBFX-7HMBH-CTY9B-B4FXY >nul&cscript //nologo c:\windows\system32\slmgr.vbs /ipk 789NJ-TQK6T-6XTH8-J39CJ-J8D3P >nul&cscript //nologo c:\windows\system32\slmgr.vbs /ipk TX9XD-98N7V-6WMQ6-BX7FG-H8Q99 >nul&cscript //nologo c:\windows\system32\slmgr.vbs /ipk 3KHY7-WNT83-DGQKR-F7HPR-844BM >nul&cscript //nologo c:\windows\system32\slmgr.vbs /ipk 7HNRX-D7KGG-3K4RQ-4WPJ4-YTDFH >nul&cscript //nologo c:\windows\system32\slmgr.vbs /ipk PVMJN-6DFY6-9CCP6-7BKTT-D3WVR >nul&cscript //nologo c:\windows\system32\slmgr.vbs /ipk W269N-WFGWX-YVC9B-4J6C9-T83GX >nul&cscript //nologo c:\windows\system32\slmgr.vbs /ipk MH37W-N47XK-V7XM9-C7227-GCQG9 >nulecho ————————————&echo.&echo.&set i=1:serverif %i%==1 set KMS_Sev=kms7.MSGuides.comif %i%==2 set KMS_Sev=kms8.MSGuides.comif %i%==3 set KMS_Sev=kms9.MSGuides.comif %i%==4 goto notsupportedcscript //nologo c:\windows\system32\slmgr.vbs /skms %KMS_Sev% >nulcscript //nologo c:\windows\system32\slmgr.vbs /ato | find /i “successfully” && (echo.& echo ====================================== & echo. & choice /n /c YN /m “Would you like to visit my blog [Y,N]?” & if errorlevel 2 exit) || (echo The connection to the server failed! Trying to connect to another one… & echo Please wait… & echo. & echo. & set /a i+=1 & goto server)explorer “https://productkey.net”&goto halt:notsupportedecho ======================================&echo.&echo Sorry! Your version is not supported.:haltpause >nul
3. After pasting this text, go to File > Save As and give the file name as windows.cmd only. Choose “All files” from the Save as type dropdown menu.
4. Save the file on Desktop for easier access, and click Save.
5. Now close the notepad, and go to the Desktop. Right-click on the “windows.cmd” file and select “Run as administrator.” Choose “Yes” if prompted by UAC.
6. Once the script runs, restart your computer.
After restarting your PC/Laptop, the Activate Windows watermark will be gone.
5. Remove Activate Windows Watermark via Ease of Access
You can also remove the Activate Windows watermark using Ease of Access option, which is built in Windows. Before you go haywire, here’s how to do that.
1. Click Start and search for Ease of Access Display Settings.
2. Scroll down and toggle off “Show desktop background image” option.

3. Restart your PC/Laptop.
Once restarted, your background should be gone along with the Activate Windows watermark as well.
6. Remove Activate Windows Watermark using a BAT (Batch) File
There’s another notepad tweak that will let you remove the Activate Windows watermark, and that is done by creating a Batch (.BAT) file.
1. Click Start and type in Notepad and hit Enter.
2. Once opened, copy and paste the below command in the Notepad.
@echo off taskkill /F /IM explorer.exe explorer.exe exit
3. After pasting this text, go to File > Save As and give the file name as remove.bat only. Choose “All files” from the Save as type dropdown menu.

4. Save the file on Desktop for easier access, and click Save.
5. Now close the notepad, and go to the Desktop. Right-click on the “remove.bat” file and select “Run as administrator.” Choose “Yes” if prompted by UAC.
6. Once the command window opens up and closes off, restart your computer.
After restarting your PC/Laptop, the Activate Windows watermark will be hidden now.
7. Get rid of Activate Windows Watermark by Disabling WIndows 10 Tips
An easy way to disable the Activate Windows watermark permanently, is through disabling Windows 10 Tips. To disable them, follow the process below.
1. Go to Start and click on the Settings (⚙) icon.
2. Click on Settings, and then click on Notifications & actions from the left pane.
3. Now scroll down and find the option that says “Get tips, tricks, and suggestions as you use Windows” and toggle it OFF.

4. Once done, restart your PC/Laptop.
This shall get rid of the Activate Windows Watermark.
8. Hide Activate Windows Watermark using a Free Third-Party Tool
If none of the above tips worked, your last resort should be a third-party tool to remove the “Activate Windows” watermark. There are many tools available out there. These tools trick Windows to think it’s activated. We don’t recommend using this method, but this should be your last option if nothing works.

1. Download the Universal Watermark Disabler tool using the download link given below.
2. Unzip the file and make sure that all the applications are closed.
3. Double click on uwd.exe file. Click “yes” if prmopted by UAC. A window will popup on your screen.
4. Click on the “Install” button.
If necessary, restart your machine and you will be good to go. The Activate Windows watermark should be gone by now.
Conclusion
These were the 8 ways to remove and hide the Activate Windows watermark. Although, we recommend you to use a Product Key to activate Windows to activate your Windows 10 machine. Concluding this article, we hope we solved your problem when it comes to getting red of the activate windows watermark permanently.
If you have any further queries, let us know in the comments below. We will try our best to resolve them as soon as possible.
For the latest tech news and reviews, follow Tech Baked on Twitter, Facebook, Instagram, and join our Telegram Channel for daily tech news in your inbox.
 Иногда пользователи предпочитают работать в Windows 10 без активации и это вполне возможно (об этом в отдельном материале: Можно ли пользоваться Windows 10 без активации, как долго и с какими ограничениями), но через какое-то время в правом нижнем углу экрана появится надпись «Активация Windows» с пояснением: Чтобы активировать Windows, перейдите в раздел Параметры, предполагающим, что вы перейдете в Параметры — Обновления и безопасность — Активация и введете ключ продукта. Однако, убрать надпись с экрана можно и без этого.
В этой инструкции подробно о том, как навсегда убрать надпись Активация Windows на экране Windows 10 несколькими способами — вручную и с помощью сторонних программ, а также дополнительная информация, которая может оказаться полезной.
Убираем надпись «Активация Windows» с помощью редактора реестра
Первый способ — использовать редактор реестра для отключения показа надписи об активации Windows 10. Если вы уже пробовали этот метод, но параметры возвращались в исходное состояние, решение для этого также будет предложено в этом разделе.
Шаги будут следующими:
- Запустите редактор реестра: нажмите клавиши Win+R (Win — клавиша с эмблемой Windows), введите regedit и нажмите Enter.
- Перейдите к разделу реестра
HKEY_LOCAL_MACHINE\SOFTWARE\Microsoft\Windows NT\CurrentVersion\SoftwareProtectionPlatform\Activation
- Обратите внимание на параметр Manual в правой части окна редактора. Дважды нажмите по нему и задайте значение 1.
- Проделайте то же самое для параметра NotificationDisabled

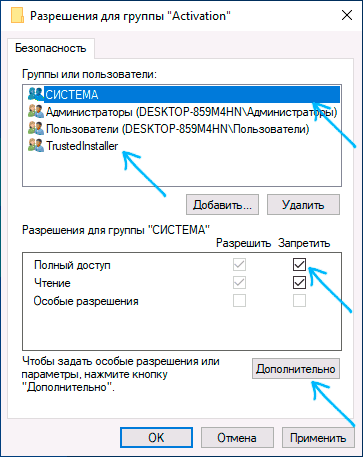
- После перезагрузки надпись исчезнет, но не торопитесь перезагружать: через некоторое время система может убрать ваши изменения. Чтобы этого не произошло, нажмите правой кнопкой мыши по разделу (папке) Activation слева и выберите пункт «Разрешения».
- Выбрав пункты «Система» и «TrustedInstaller» отметьте для них «Запретить» в списке разрешений и нажмите кнопку «Применить».

- Нажмите кнопку «Дополнительно», а на следующем экране нажмите «Отключить наследования», подтвердите, а затем удалите пункты TrustedInstaller и Система, для которых в «Тип» указано «Разрешить».
- Примените сделанные настройки и перезагрузите Windows

Также можно использовать следующий код, чтобы создать reg файл и внести изменения в реестр. В коде больше параметров, чем в шагах, описанных выше:
Windows Registry Editor Version 5.00

[HKEY_LOCAL_MACHINE\SOFTWARE\Microsoft\Windows NT\CurrentVersion\SoftwareProtectionPlatform\Activation]
"ActivationInterval"=dword:000dbba0
"Manual"=dword:00000001
"NotificationDisabled"=dword:00000001
"DownlevelActivation"=dword:00000002
Еще один метод в дополнение к вышеописанному — отключение службы «Быстрая проверка». Сделать это можно в services.msc (установить тип запуска службы в «Отключена», применить и перезагрузить компьютер), либо в редакторе реестра: в разделе реестра HKEY_LOCAL_MACHINE\SYSTEM\CurrentControlSet\Services\svsvc следует изменить параметр Start на 4, а затем перезагрузить компьютер.
Программа Universal Watermark Disabler
Еще один способ убрать надпись «Активация Windows» в углу экрана — использовать простую бесплатную утилиту Universal Watermark Disabler, скачать которую можно с официального сайта https://winaero.com/download.php?view.1794. После загрузки утилиты, распакуйте архив и запустите файл uwd.exe
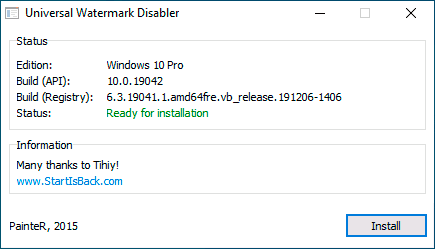
Нажмите кнопку «Install» (может потребоваться подтверждение установки в неподдерживаемой сборке, обычно всё работает), а после этого нажмите «Ок» для выхода из системы.
После автоматического выхода из системы и последующего входа надпись не всегда пропадает, но, если после этого выполнить перезагрузку компьютера или ноутбука — обычно исчезает (но, по моим тестам, не всегда).
Видео инструкция
Надеюсь, один из предложенных способов оказался работоспособным для вашей ситуации и надпись об активации в углу рабочего стола вас больше не побеспокоит.
![How to Get Rid of the Activate Windows Watermark [Windows 10 PC Activation Message Removal]](https://www.freecodecamp.org/news/content/images/size/w2000/2021/12/activate.png)
If you’re a Windows user, you might have seen the «Activate Windows» message that displays over every other thing – including your cursor. I guess they gave it a z-index of infinity.
This message gets displayed when you use a Windows OS that has an invalid or expired license. This keeps you from being able to personalize your desktop or get updates for Windows Defender – now Windows Security. You will also be unable to install Microsoft Office.
If this is the case, you can remove the watermark because it could have a negative effect on visual hierarchy and might be embarrassing if you’re taking screenshots or recording your desktop.
This happened to me when I was using freeCodeCamp for my first round of 100DaysOfCode.
In this article, I will show you 4 ways you can remove the Activate Windows watermark on your Windows 10 PC.
Some of the tweaks only remove the message but not the underlying problems, so you should pay attention to the last one, which will remove the message and activate your Windows as well.
Table of Contents
- How to Get Rid of the Activate Windows Watermark with PowerShell
- How to Get Rid of the Activate Windows Watermark with Notepad
- How to Get Rid of the Activate Windows Watermark by Using the Registry
- How to Get Rid of the Activate Windows Watermark with a Product Key
- Conclusion
PowerShell enables you to directly interact with your Windows OS with scripts.
There’s a PowerShell script you can execute that’ll eventually get rid of the Activate Windows message.
To execute the script, follow the steps below.
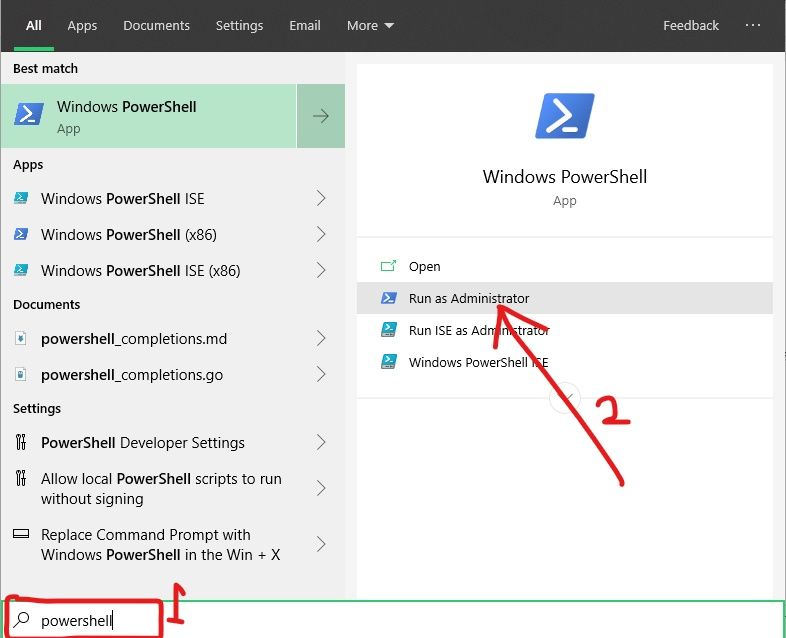
Step 1: Press WIN (Windows logo key) + S on your keyboard.
Step 2: Search for «powershell». You have to execute the script as an administrator, so click on «Run as Administrator» on the right.
Step 3: Type in «slmgr /renew» (without quotes) and hit ENTER.

Step 4: Restart your PC.
If you’ve made several tweaks with third-party apps in order to activate Windows, this fix might not work for you. If it doesn’t work for you, try the next one.
How to Get Rid of the Activate Windows Watermark with Notepad
As simple as Notepad looks to everyone, you can use it to remove the Activate Windows watermark. In fact, this way is one of the most popular to get rid of the message.
You can use Notepad to get rid of the message with the simple steps below.
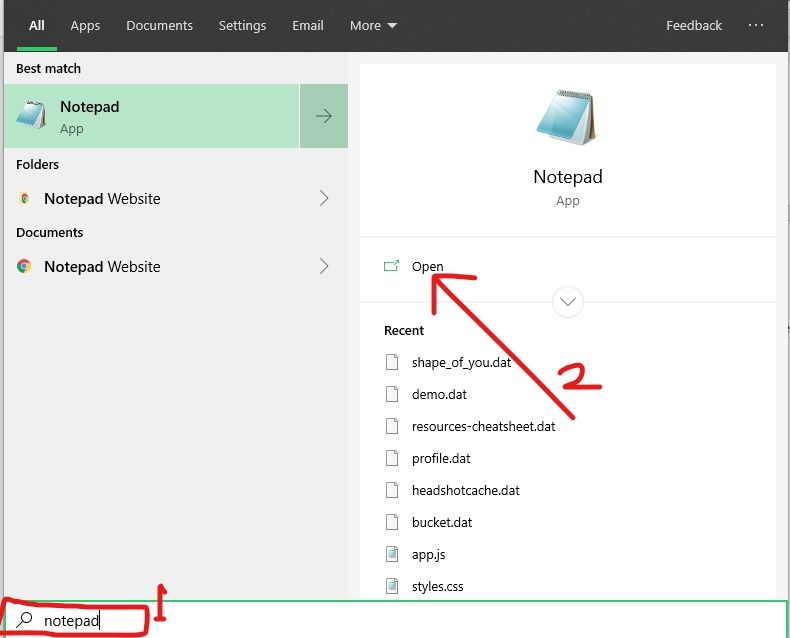
Step 1: Hit the WIN button on your keyboard and search for Notepad. Click Open on the right or the Notepad search result to launch the app.
Step 2: Make sure you’re working with a new, untiled file. Paste in the script below:
@echo off taskkill /F /IM explorer.exe explorer.exe exit
Step 3: Click File in the menu and select «Save as».
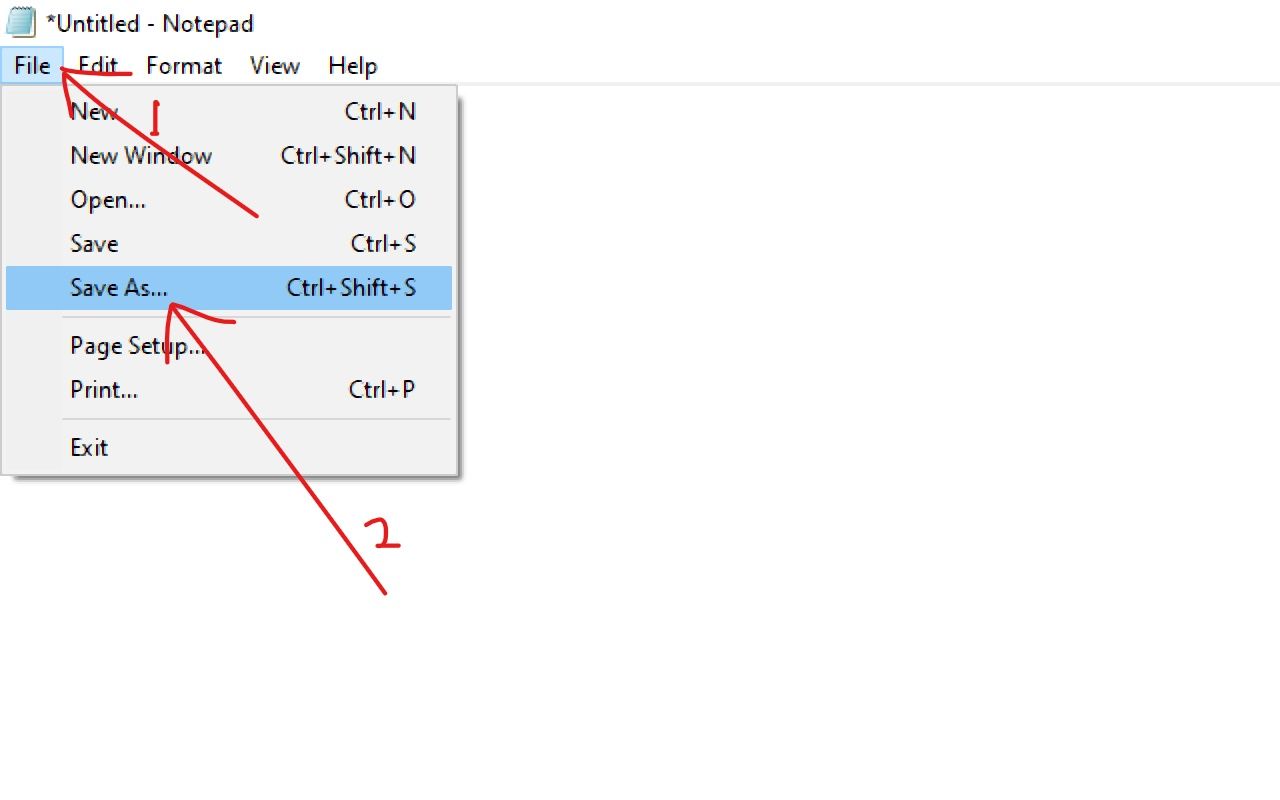
Step 4: Name the file «Activation.bat» and select «All files» as the format. Then save the file to any location you want.
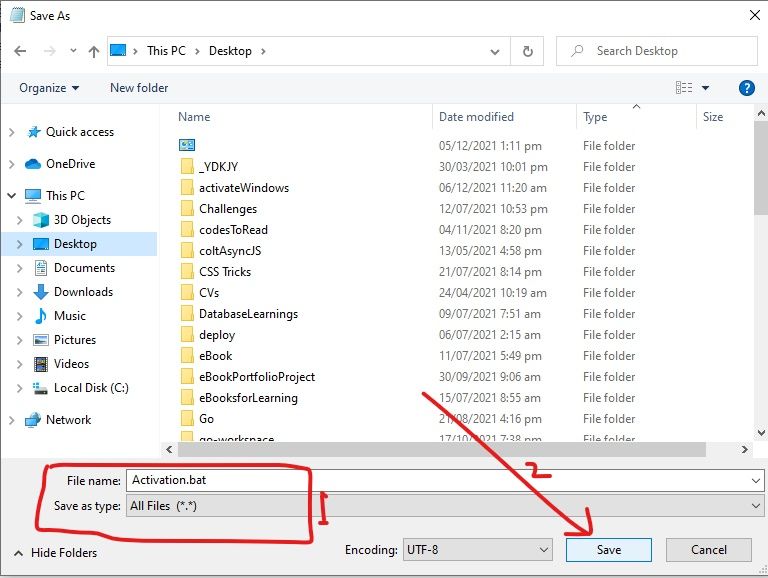
Step 5: Locate the file and right-click on it, then select «Run as Admissions».

The script will be executed quickly and will refresh your computer.
Step 6: Restart your PC.
How to Get Rid of the Activate Windows Watermark by Using the Registry
Windows 10 registry lets you make deeper changes that have significant effects on your computer.
You can get rid of the Activate Windows watermark by making a less complicated modification in the Registry, as done below.
Step 1: Right-click on Start and select Run.
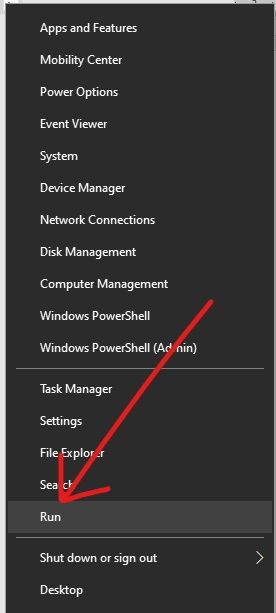
Step 2: Type in «regedit» (without quotes) into the Run dialogue and hit ENTER.

Step 3: Expand HKEY_CURRENT_USER, Control Panel, and then click Desktop.
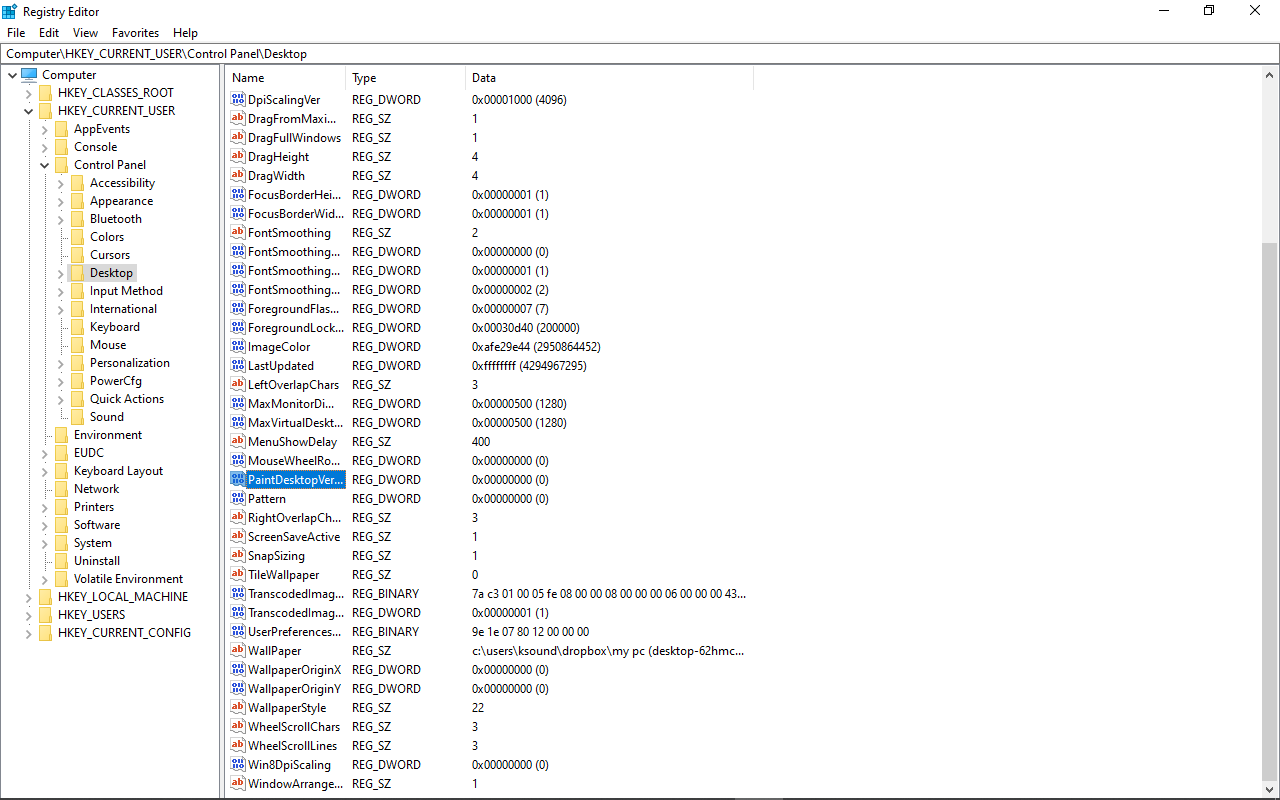
Step 4: Locate PaintDesktopVersion and double-click on it.
Step 5: Change the value from 1 to 0 and click Ok.
Step 6: Restart your computer.
How to Get Rid of the Activate Windows Watermark with a Product Key
The best way to get rid of the Activate Windows watermark is to do what the message says — activate Windows.
You can activate Windows with a product key you have to buy from Microsoft.
The steps below will help you use your product key to activate Windows:
Step 1: Click on Start and select Settings.
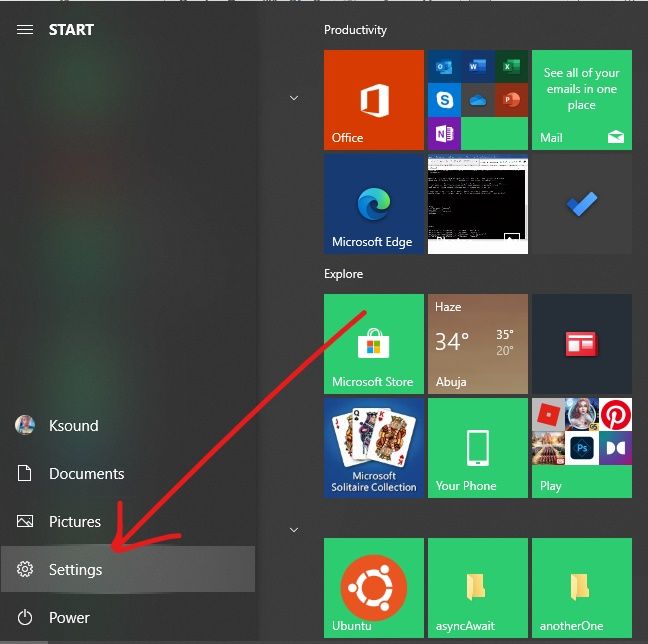
Step 2: Choose Updates and Security from the menu tiles.
Step 3: Switch to the Activation tab on the left and click on Change product key.

Step 4: Enter your 24-character alphanumeric product key and click Next.

Windows will get activated as long as the product key is correct.
Conclusion
I hope these ways to get rid of the Activate Windows watermark help you out.
If you find this article helpful, make sure to share it with your friends and family.
Thank you for reading.
Learn to code for free. freeCodeCamp’s open source curriculum has helped more than 40,000 people get jobs as developers. Get started