If you’re having problems with Windows 11 on your PC or you want a fresh copy of Windows 11 without the clutter of old files or apps, you can reinstall Windows 11 to try and fix your issues and return your PC to a cleaner state.
Check your disk space
If your PC isn’t performing as expected or if you’re having issues with Windows 11, it may be because of low disk space. Before you reinstall Windows 11, try freeing up disk space to see if that helps. For more info, see Free up drive space in Windows.
Before you begin
If you have personal data and files that you want to save, back them up to an external hard drive, USB thumb drive, SD card, or cloud location (such as OneDrive) before you begin to reinstall Windows 11.
Windows 11 must be activated after it’s reinstalled. Usually this happens automatically after you go online. For more info, see «Activating after reinstalling Windows» in Activate Windows.
In Windows 11, you must link your Microsoft account to the Windows 11 digital license on your PC before you can reactivate Windows. For more info, see «Associate your Windows license with your Microsoft account» in Reactivating Windows after a hardware change.
If you reinstall Windows 11 after you make a significant hardware change to your PC (such as replacing the motherboard), it may no longer be activated. You can use the Activation troubleshooter to reactivate Windows. For more info, see Using the Activation troubleshooter.
When you reinstall Windows 11, you’ll need to select the edition of Windows that matches your digital license. For example, if you’re running Windows 11 Home, you’ll need to install Windows 11 Home again.
To see which edition of Windows you’re running, go to Start > Settings > System > About . Your edition is listed under Windows specifications.
Types of reinstalls for Windows 11
The following chart provides info about the different options that you can choose for each type of reinstall including what happens to your apps, files, personal data, and how much disk space is required for the reinstall. Use this chart to help you decide which option to use to reinstall Windows 11.
We recommend that you first try to «Reset Windows 11,» then, if needed, «Reinstall Windows 11 using installation media,» and then, if needed, try a «Clean install of Windows 11 using installation media.»
Notes:
-
Reinstalling Windows 11 using installation media while choosing to ‘Keep nothing’ (a clean install) will automatically enable reserved storage if the partition you reinstall Windows to is 20GB or larger. Reserved storage sets aside disk space to be used by updates, apps, temporary files, and system caches, thus improving the day-to-day function of your PC by ensuring that critical OS functions always have access to disk space.
-
For devices with reserved storage, a reset or reinstall will first use the reserved storage space before using other disk space. For more info, see How reserved storage works in Windows.
|
Reinstall type |
Reinstall options you can choose |
What happens to your apps |
What happens to your personal |
What happens to data stored in other folders or drives |
Disk space required |
|
Reset Windows 11 |
Keep my files |
Apps that didn’t come with your PC are removed. |
Preserved |
Preserved |
Medium |
|
Reset Windows 11 |
Remove everything |
Apps that didn’t come with your PC are removed. |
Deleted |
Deleted |
Low |
|
Reinstall Windows 11 using installation media |
Keep Everything (Default) |
All apps and settings are preserved. |
Preserved |
Preserved |
High |
|
Reinstall Windows 11 using installation media |
Keep Personal Data |
All apps are removed. |
Preserved |
Preserved |
Medium |
|
Reinstall Windows 11 using installation media |
Keep Nothing |
All apps are removed. |
Deleted |
Deleted |
Low |
|
Clean install of Windows 11 using installation media |
N/A (This reinstall option deletes and recreates all disk partitions.) |
Deleted |
Deleted |
Deleted |
Very low |
Reset Windows 11
This option will take your device back to a state similar to when you turned it on for the first time, removing programs you have installed and removing personal files, depending on which option you select. Windows will handle everything automatically, and you won’t need to use an external storage device. Resetting your device is less impactful than the clean install option, though it will require sufficient disk space.
You can reset your PC from Settings or the Windows Recovery Environment (WinRE), which can be accessed through the sign-in screen. For the steps to reset Windows 11, see Reset or reinstall Windows.
If your PC doesn’t have sufficient space available to reset Windows 11, you’ll receive a notification. In this scenario, either free up additional space or use the steps in the next section to reinstall Windows 11.
Reinstall Windows 11 using installation media
This option will use a tool to create installation media which you can use to completely wipe the disk and install a fresh copy of Windows 11. This option requires you to use an external storage device such as a USB drive, and will give you an option to choose what to keep during installation.
Before you begin, make sure you have the following:
-
An internet connection
-
An external storage device such as a USB drive, SD card, or external hard drive with at least 8GB of available space.
Create the installation media
First, create the installation media that you’ll use to reinstall Windows 11.
-
Make sure you’ve backed up any files on your device that you wish to save onto an external storage device such as a USB drive, SD card, or external hard drive, or upload your files to OneDrive.
Note: If you use an external storage device to back up files, make sure it’s a different one than the one you’ll be using to download Windows 10 installation media.
-
Download the Windows 11 installation media to a separate external storage device that has at least 8GB of available space. Everything on this drive will be deleted to complete the download, so make sure it’s empty before you proceed. Here’s how:
-
On a working PC, go to the Microsoft software download website and select Download tool now.
-
When the download is complete, open the tool from your desktop, and then select Yes when asked if you’d like to allow the app to make changes to your device.
-
When the Windows 11 Setup guide appears, accept the license terms and agreements.
-
Select Create installation media (USB flash drive, DVD, or ISO file) for another PC, and then select Next.
-
Choose a language, edition, and architecture (64-bit or 32-bit), and then select Next.
-
Select USB flash drive, and then select Next.
-
Follow the steps to create installation media, and then select Finish.
-
Use the installation media to reinstall Windows 11
Connect the installation media you created to your PC and reinstall Windows 11.
-
Open File Explorer and select the drive with the installation media.
-
From the root directory of the drive, double-click setup.exe, and then select Yes when asked if you’d like to allow the app to make changes to your device.
-
Select Change to determine what to keep: Select one of the following options, and then select Next:
-
Keep personal files and apps – This will preserve your personal data, apps, and settings.
-
Keep personal files only – This will preserve your personal data and settings, but all your apps will be removed.
-
Keep nothing – This will remove all personal data, settings, and apps.
Warning: You cannot undo a reinstallation of Windows 10. Be sure to back up your files first if you choose the Keep nothing option.
-
-
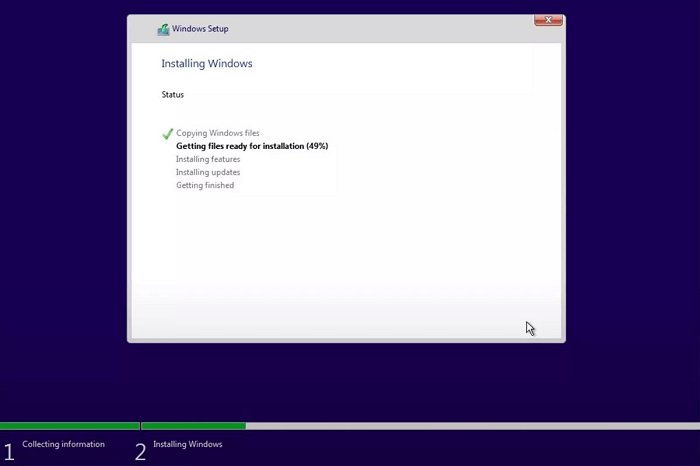
To finish, select Install to start reinstalling Windows 11 on your PC.
Your PC will restart several times during the reinstallation.
Clean install of Windows 11 using installation media
Warning:
-
A clean installation is an advanced option to help you start fresh on your device. We recommend following the below steps only if you’re confident in making these changes. For more help, contact support.
-
This will remove all your personal files, apps and drivers you installed, apps and customizations from your PC manufacturer, and changes you made in Settings.
This option will use a tool to create installation media which you can use to completely wipe the disk and install a fresh copy of Windows 11. This option requires you to use an external storage device such as a USB drive, and may take a few extra steps, though it will delete everything for the cleanest installation. This type of clean install deletes and recreates system partitions. It will delete all personal files on your device and the partition on your hard drive currently being used for your recovery drive.
Before you begin, make sure you have the following:
-
An internet connection
-
An external storage device such as a USB drive, SD card, or external hard drive with at least 8GB of available space
Create the installation media
First, create the installation media that you’ll use to perform a clean install of Windows 11.
-
Make sure you’ve backed up any files on your device that you wish to save onto an external storage device such as a USB drive, SD card, or external hard drive, or upload your files to OneDrive.
Note: If you use an external storage device to back up files, make sure it’s a different one than the one you’ll be using to download Windows 11 installation media.
-
Download the Windows 11 installation media to a separate 8GB-sized external storage device. Everything on this drive will be deleted to complete the download, so make sure it’s empty before you proceed. Here’s how:
-
On a working PC, go to the Microsoft software download website and select Download tool now.
-
When the download is complete, open the tool from your desktop, and then select Yes when asked if you’d like to allow the tool to make changes to your device.
-
When the Windows 11 Setup guide appears, accept the license terms and agreements.
-
Select Create installation media (USB flash drive, DVD, or ISO file) from another PC, and then select Next.
-
Choose a language, edition, and architecture (64-bit or 32-bit).
-
Follow the steps to create installation media, and then select Finish.
-
Use the installation media to perform a clean install
Connect the installation media you created to your PC and perform a clean install of Windows 11.
-
Next to Advanced startup, select Restart now.
-
Select Use a device, and then choose the device corresponding to the external storage device you’re using.
Note: If the Use a device option isn’t available, visit your device manufacturer’s website for details on how to boot from a USB flash drive.
-
When the first Windows screen appears, choose the options that best suit your needs, and then select Next.
-
Select Install now, and then check the I accept box. Select Next, and then select Custom: Install Windows only (advanced). Your device will now display a list of drives and partitions. If multiple disks are displayed, you’ll only need to delete all partitions from the disk where you want to install Windows.
-
Highlight each drive/partition in the list and select Delete. When the Windows Setup notification appears, select OK.
-
Complete step 5 for every drive in the list except the one that says Unallocated Space. When you’re finished, only Drive 0 Unallocated Space should remain.
-
Select Next.
-
The Windows setup screen will now display Installing Windows. When the installation is complete, your device will restart. When this happens, it may try to restart from the external storage device. If the initial Windows setup screen requests you choose you language/keyboard layout, remove the external storage drive from your device and select OK. This will restart your device.
-
Once the installation is complete and your device has restarted, select the preferences and settings you’d like for your device.
If you’re having problems with Windows 10 on your PC or you want a fresh copy of Windows 10 without the clutter of old files or apps, you can reinstall Windows 10 to try and fix your issues and return your PC to a cleaner state.
Check your disk space
If your PC isn’t performing as expected or if you’re having issues with Windows 10, it may be because of low disk space. Before you reinstall Windows 10, try freeing up disk space to see if that helps. For more info, see Free up drive space in Windows.
Before you begin
If you have personal data and files that you want to save, back them up to an external hard drive, USB thumb drive, SD card, or cloud location (such as OneDrive) before you begin to reinstall Windows 10.
Windows 10 must be activated after it’s reinstalled. Usually this happens automatically after you go online. For more info, see «Activating after reinstalling Windows 10» in Activate Windows.
Note: If Windows 10 was activated on your device after upgrading from Windows 7 or Windows 8.1, you have a digital license for Windows 10 that can automatically activate Windows 10 after you reinstall it. For more info, see «Activating after reinstalling Windows 10» in Activate Windows.
In Windows 10 (version 1607 or later), you must link your Microsoft account to the Windows 10 digital license on your PC before you can reactivate Windows. For more info, see «Associate your Windows 10 license with your Microsoft account» in Reactivating Windows after a hardware change.
If you reinstall Windows 10 after you make a significant hardware change to your PC (such as replacing the motherboard), it may no longer be activated. If you were running Windows 10 (Version 1607) before the hardware change, you can use the Activation troubleshooter to reactivate Windows. For more info, see Using the Activation troubleshooter.
Note: If you weren’t running Windows 10 before making the hardware change, or if the troubleshooter can’t re-activate Windows, contact support.
When you reinstall Windows 10, you’ll need to select the edition of Windows that matches your digital license. For example, if you’re running Windows 10 Home, you’ll need to install Windows 10 Home again.
Types of reinstalls for Windows 10
The following chart provides info about the different options that you can choose for each type of reinstall including what happens to your apps, files, personal data, and how much disk space is required for the reinstall. Use this chart to help you decide which option to use to reinstall Windows 10.
We recommend that you first try to «Reset Windows 10,» then, if needed, «Reinstall Windows 10 using installation media,» and then, if needed, try a «Clean install of Windows 10 using installation media.»
Notes:
-
Starting with the Windows 10 May 2019 Update (version 1903), reinstalling Windows 10 using installation media while choosing to ‘Keep nothing’ (a clean install) will automatically enable reserved storage if the partition you reinstall Windows to is 20GB or larger. Reserved storage sets aside disk space to be used by updates, apps, temporary files, and system caches, thus improving the day-to-day function of your PC by ensuring that critical OS functions always have access to disk space.
-
For devices with reserved storage, a reset or reinstall will first use the reserved storage space before using other disk space. For more info, see How reserved storage works in Windows 10.
|
Reinstall type |
Reinstall options you can choose |
What happens to your apps |
What happens to your personal |
What happens to data stored in other folders or drives |
Disk space required |
|
Reset Windows 10 |
Keep my files |
Apps that didn’t come with your PC are removed. |
Preserved |
Preserved |
Medium |
|
Reset Windows 10 |
Remove everything |
Apps that didn’t come with your PC are removed. |
Deleted |
Deleted |
Low |
|
Reinstall Windows 10 using installation media |
Keep Everything (Default) |
All apps and settings are preserved. |
Preserved |
Preserved |
High |
|
Reinstall Windows 10 using installation media |
Keep Personal Data |
All apps are removed. |
Preserved |
Preserved |
Medium |
|
Reinstall Windows 10 using installation media |
Keep Nothing |
All apps are removed. |
Deleted |
Deleted |
Low |
|
Clean install of Windows 10 using installation media |
N/A (This reinstall option deletes and recreates all disk partitions.) |
Deleted |
Deleted |
Deleted |
Very low |
Reset Windows 10
This option will take your device back to a state similar to when you turned it on for the first time, removing programs you have installed and removing personal files, depending on which option you select. Windows will handle everything automatically, and you won’t need to use an external storage device. Resetting your device is less impactful than the clean install option, though it will require sufficient disk space.
You can reset your PC from Settings or the Windows Recovery Environment (WinRE), which can be accessed through the sign-in screen. For the steps to reset Windows 10, see Reset or reinstall Windows.
If your PC doesn’t have sufficient space available to reset Windows 10, you’ll receive a notification. In this scenario, either free up additional space or use the steps in the next section to reinstall Windows 10.
Reinstall Windows 10 using installation media
This option will use a tool to create installation media which you can use to completely wipe the disk and install a fresh copy of Windows 10. This option requires you to use an external storage device such as a USB drive, and will give you an option to choose what to keep during installation.
Before you begin, make sure you have the following:
-
An internet connection
-
An external storage device such as a USB drive, SD card, or external hard drive with at least 8GB of available space.
Create the installation media
First, create the installation media that you’ll use to reinstall Windows 10.
-
Make sure you’ve backed up any files on your device that you wish to save onto an external storage device such as a USB drive, SD card, or external hard drive, or upload your files to OneDrive.
Note: If you use an external storage device to back up files, make sure it’s a different one than the one you’ll be using to download Windows 10 installation media.
-
Download the Windows 10 installation media to a separate external storage device that has at least 8GB of available space. Everything on this drive will be deleted to complete the download, so make sure it’s empty before you proceed. Here’s how:
-
On a working PC, go to the Microsoft software download website and select Download tool now.
-
When the download is complete, open the tool from your desktop, and then select Yes when asked if you’d like to allow the app to make changes to your device.
-
When the Windows 10 Setup guide appears, accept the license terms and agreements.
-
Select Create installation media (USB flash drive, DVD, or ISO file) for another PC, and then select Next.
-
Choose a language, edition, and architecture (64-bit or 32-bit), and then select Next.
-
Select USB flash drive, and then select Next.
-
Follow the steps to create installation media, and then select Finish.
-
Use the installation media to reinstall Windows 10
Connect the installation media you created to your PC and reinstall Windows 10.
-
Open File Explorer and select the drive with the installation media.
-
From the root directory of the drive, double-click setup.exe, and then select Yes when asked if you’d like to allow the app to make changes to your device.
-
Select Change to determine what to keep: Select one of the following options, and then select Next:
-
Keep personal files and apps – This will preserve your personal data, apps, and settings.
-
Keep personal files only – This will preserve your personal data and settings, but all your apps will be removed.
-
Keep nothing – This will remove all personal data, settings, and apps.
Warning: You cannot undo a reinstallation of Windows 10. Be sure to back up your files first if you choose the Keep nothing option.
-
-
To finish, select Install to start reinstalling Windows 10 on your PC.
Your PC will restart several times during the reinstallation.
Clean install of Windows 10 using installation media
Warning:
-
A clean installation is an advanced option to help you start fresh on your device. We recommend following the below steps only if you’re confident in making these changes. For more help, contact support.
-
This will remove all your personal files, apps and drivers you installed, apps and customizations from your PC manufacturer, and changes you made in Settings.
This option will use a tool to create installation media which you can use to completely wipe the disk and install a fresh copy of Windows 10. This option requires you to use an external storage device such as a USB drive, and may take a few extra steps, though it will delete everything for the cleanest installation. This type of clean install deletes and recreates system partitions. It will delete all personal files on your device and the partition on your hard drive currently being used for your recovery drive.
Before you begin, make sure you have the following:
-
An internet connection
-
An external storage device such as a USB drive, SD card, or external hard drive with at least 8GB of available space
Create the installation media
First, create the installation media that you’ll use to perform a clean install of Windows 10.
-
Make sure you’ve backed up any files on your device that you wish to save onto an external storage device such as a USB drive, SD card, or external hard drive, or upload your files to OneDrive.
Note: If you use an external storage device to back up files, make sure it’s a different one than the one you’ll be using to download Windows 10 installation media.
-
Download the Windows 10 installation media to a separate 8GB-sized external storage device. Everything on this drive will be deleted to complete the download, so make sure it’s empty before you proceed. Here’s how:
-
On a working PC, go to the Microsoft software download website and select Download tool now.
-
When the download is complete, open the tool from your desktop, and then select Yes when asked if you’d like to allow the tool to make changes to your device.
-
When the Windows 10 Setup guide appears, accept the license terms and agreements.
-
Select Create installation media (USB flash drive, DVD, or ISO file) from another PC, and then select Next.
-
Choose a language, edition, and architecture (64-bit or 32-bit).
-
Follow the steps to create installation media, and then select Finish.
-
Use the installation media to perform a clean install
Connect the installation media you created to your PC and perform a clean install of Windows 10.
-
Under Advanced startup, select Restart now.
-
Select Use a device, and then choose the device corresponding to the external storage device you’re using.
Note: If the Use a device option isn’t available, visit your device manufacturer’s website for details on how to boot from a USB flash drive.
-
When the first Windows screen appears, choose the options that best suit your needs, and then select Next.
-
Select Install now, and then check the I accept box. Select Next, and then select Custom: Install Windows only (advanced). Your device will now display a list of drives and partitions. If multiple disks are displayed, you’ll only need to delete all partitions from the disk where you want to install Windows.
-
Highlight each drive/partition in the list and select Delete. When the Windows Setup notification appears, select OK.
-
Complete step 5 for every drive in the list except the one that says Unallocated Space. When you’re finished, only Drive 0 Unallocated Space should remain.
-
Select Next.
-
The Windows setup screen will now display Installing Windows. When the installation is complete, your device will restart. When this happens, it may try to restart from the external storage device. If the initial Windows setup screen requests you choose you language/keyboard layout, remove the external storage drive from your device and select OK. This will restart your device.
-
Once the installation is complete and your device has restarted, select the preferences and settings you’d like for your device.
Need more help?
Want more options?
Explore subscription benefits, browse training courses, learn how to secure your device, and more.
Communities help you ask and answer questions, give feedback, and hear from experts with rich knowledge.
Find solutions to common problems or get help from a support agent.
by Ivan Jenic
Passionate about all elements related to Windows and combined with his innate curiosity, Ivan has delved deep into understanding this operating system, with a specialization in drivers and… read more
Updated on
XINSTALL BY CLICKING THE DOWNLOAD
FILE
How do I reinstall Windows 10 on my laptop or PC?
- Uninstall the previous OS version
- Install Windows 10
- Possible Windows 10 installation issues and their fixes
If you want to find out how to reinstall Windows 10 Technical Preview on your operating system then you only need to follow the instructions posted below and you will be done in just a few minutes of your time.
The reason as to why you would want to reinstall can be several but most users usually encounter registry errors in the usage of the operating system and the only way to completely fix it is by completely reinstalling the operating system.
Doing the steps below are as easy as they can get but you will have to follow them to the letter and be sure not to skip any one of them as it may take you a bit more time redoing them all over again.
In order to do this tutorial, you only need the Windows 10 Technical Preview ISO file and an 8GB USB stick but I am sure you have it if you installed it before on your operating system.
How we test, review and rate?
We have worked for the past 6 months on building a new review system on how we produce content. Using it, we have subsequently redone most of our articles to provide actual hands-on expertise on the guides we made.
For more details you can read how we test, review, and rate at WindowsReport.
Encountering Windows 10 cannot be installed to the disk error? Check this detailed guide to solve the issue in no time!
How to reinstall Windows 10 ton a PC or laptop?
First of all, we will be uninstalling the operating system:
- Start the device in the latest Windows 10 Technical Preview build.
- You will get to a “Choose an operating system” window.
- Left click or tap on the “Windows Rollback” feature you get in the window mentioned above.
- Now after you selected the Windows Rollback feature it will take you to a black window that says “Restoring your previous version of Windows”.
Note: This process will only take a few minutes and after it is done you will get back the previous version of Windows you used.
Note2: If you are using a virtual application to run your Windows 10 Technical Preview it should not affect your other version of Windows you are using but the steps are the same if you want to uninstall it from there.
Now we will install the Windows 10 Technical Preview:
- Left click or tap on the link posted below to get you started with the Windows Insider program.
- Left click here to download Windows 10 Technical Preview ISO
- Now in the website, you accessed above you will need to left click or tap on the “Get Started” button and follow the instructions in order to download the Windows 10 Technical Preview ISO.
- Now after you have finished downloading the ISO version of Windows you will need to make a bootable USB with it.
- Place the USB stick inside the Windows device.
Note: The USB stick should have at least 8 GB of memory. - Go to the location where the USB stick is and right click or hold tap on it.
- From the menu that appears we will need to left click or tap on the “Format…” feature.
- Under the “File System” topic select from the drop-down menu the “NTFS” feature.
- Check the box next to “Quick Format”.
- Left click or tap on the “Start” button to proceed with the formatting.
- Now you will be prompt with a message saying that it will format the USB stick and you will need to left click or tap on the “OK” button.
- Go on the Windows store and download the application: “Windows 7 USB/DVD DOWNLOAD TOOL” and don’t worry because this is a free application.
- After you downloaded and installed the “Windows 7 USB/DVD DOWNLOAD TOOL” application you will need to open it by running the executable file.
- Now in the first screen of the application above you need to left click or tap on the “Browse” button.
- Now browse to the location where you downloaded the Windows 10 Technical Preview ISO file and select it.
- After you selected the ISO file you need to left click or tap on the “Next” button to proceed.
- Next, you will get to a “Choose media type” screen and you will need to left click or tap on the “USB device” button.
- The next screen will tell you to select the USB device that you formatted earlier from the drop-down menu.
- After you selected it left click or tap on the “Begin copying” button.
- Wait for a couple of minutes for the process to finish.
- After the process has finished you will have a good to go bootable USB stick ready.
- Now with the USB stick plugged in you will need to reboot your operating system.
- After the device starts it will automatically get you to a “Windows Setup” window.
- Left click or tap on the “Next” button to proceed.
- In the next screen left-click or tap on the “Install Now” button situated in the middle of the screen.
- In the “Which type of installation you want?” screen left-click or tap on the “Custom: Install Windows only (Advanced)”
- Now in the “Where do you want to install Windows?” screen, you can choose the same directory as you used before or create a separate partition for this Windows only.
- Left click or tap on the “Next” button to proceed with the installation.
Note: The process will take up to half an hour depending on the device you have. - Your device will reboot after the installation process has finished.
- You should now have the “Settings” screen in front of you.
- Left click or tap on the “Use Express Settings” button situated in the lower side of the window.
- After the process above you will get to a “Sign in to your Microsoft account” screen in which you will need to write your Microsoft information.
- Left click or tap on the “Next” button after you are done in this window.
- Next, you will get to a “How should we set up your PC?” window.
- Left click or tap to select the “Set this up as a new PC instead” option.
- Next screen will be “OneDrive is our cloud storage” in which you need to left click or tap on the “Next” button.
- Wait a couple of minutes more for your apps to get installed properly.
- And voila, you are in your Windows 10 Technical Preview once more.
Which is the latest version of Windows 10? Find out from our constantly updated article!
Possible Windows 10 installation issues
Even if Windows 10 is a well-designed OS, there might be some problems with its installation. Several problems may occur, from the disk you are trying to install Windows to your laptop model.
We have decided to gather the most useful articles for this purpose so you can have a solid backup in case something goes wrong. Here they are:
- What to do if you can’t install Windows 10 on SSD
- Windows 10 simply won’t install (Fix)
- Windows 10 can’t be installed on GPT partition
- Fix: Windows 10 cannot be installed to this disk
- Windows 10 won’t install on Alienware laptops
So if you have a USB stick and an ISO file I don’t think you will have any issues following the steps above and get your Windows 10 Technical Preview reinstalled on your device.
Also if you have any questions regarding this subject please write us in the comments section of the page below and I will help you as soon as possible.
READ ALSO: Cyberlink Updates PowerDirector App for Windows Devices, [Free Download]
![]()
Easily refresh your computer by reinstalling Windows
This wikiHow teaches you how to reinstall Windows 10 from the Settings menu, from a recovery drive, or by using installation media.
-

1
Click the Start
menu. It’s usually at the bottom-left corner of the screen.
- If you’re using a laptop, make sure you plug it into a power source before starting the installation.
- If you’re unable to access the Windows desktop and you created a recovery drive, see this method.
- If you can’t access the Windows desktop and haven’t created a recovery drive, see this method.
-
2
Click Settings
. It’s at the bottom-left corner of the Start menu.
Advertisement
-
3
Click Update & security. It’s the icon of two curved arrows.
-
4
Click Recovery. It’s in the left panel.
-
5
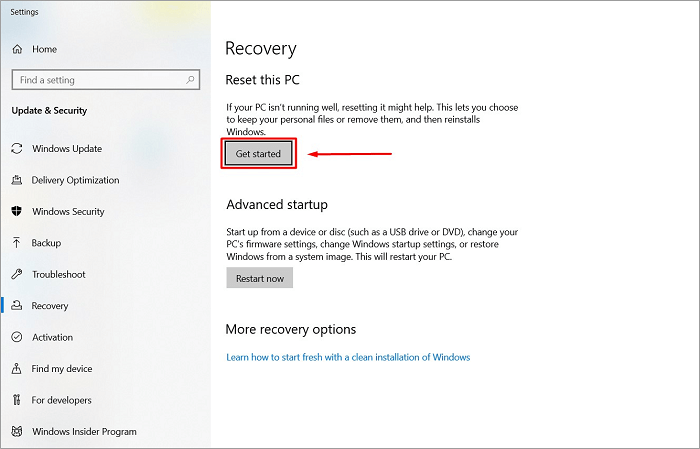
Click Get started under “Reset this PC.” It’s near the top of the right panel. A pop-up will appear.[1]
-
6
Choose what to do with your files.
- Click Keep my files to avoid losing personal data. Though any apps you’ve installed since you got your computer will be removed, your personal files (such as images and documents) will remain intact.
- Click Remove everything to erase all data on the computer, including your personal files, before reinstalling Windows.
-
7
Follow the on-screen instructions and click Reset when prompted. The options vary depending on your setup, but you’ll always be notified of which types of files will be removed and which will remain. Once you click Reset, the PC will reboot and begin to reinstall Windows.
- If you chose to remove everything, you’ll be asked if you want to clean the hard drive in addition to deleting your files (a good idea if you’re giving the computer to someone else), select Remove files and clean the drive if so.[2]
- If you chose to remove everything, you’ll be asked if you want to clean the hard drive in addition to deleting your files (a good idea if you’re giving the computer to someone else), select Remove files and clean the drive if so.[2]


Advertisement
-
1
Connect your USB recovery drive to the PC. If you created a recovery drive when the PC was working properly, you can use it to reinstall Windows.
- Use this method if you were unable to reinstall Windows 10 from the desktop or if your computer will not boot into Windows.
- If you don’t have a recovery drive, you can use a Windows 10 installation disc or drive.
- If you’re using a laptop, make sure you plug it into a power source before starting the installation.
-
2
Turn on the computer. If the computer was already on, reboot it now that the USB drive is attached. The PC will then boot from the recovery drive to the “Choose an option” screen.[3]
- If you don’t see the “Choose an option” screen, you may need to edit the PC’s BIOS settings so that the PC knows to boot from the USB drive. See Set Your Computer to Boot from USB Flash Drive#Boot from the Flash Drive to learn how.
-
3
Click Troubleshoot. A list of options will appear.
-
4
Click Recover from a drive. This will wipe all data off the PC and install a fresh version of Windows 10.
-
5
Follow the on-screen instructions to complete the installation. Once Windows is reinstalled, you’ll be prompted to set the computer up as if it were new.


Advertisement
-
1
Go to the Microsoft software download site on a working computer. If you’re unable to boot your computer and don’t have a recovery drive, you can download installation media from Microsoft and create your own installation disc or flash drive.[4]
- You’ll need either a blank USB flash drive with at least 8 GB of storage OR a blank DVD (Dual Layer preferred) and DVD burner drive.
- If you’re using a laptop, make sure you plug it into a power source before starting the installation.
-
2
Click Download tool now. It’s the blue button near the center of the page. A file manager window will appear.
-
3
Click Save to download the tool. It may take several minutes for the download to complete.
-
4
Double-click the downloaded tool. It’s called “MediaCreationTool1809.exe” (the number at the end may vary). It should be in the Downloads folder.
- You may have to click Yes or Allow to run the tool.
-
5
Review the agreement and click Accept. After a few seconds, you’ll be asked what you want to do.
-
6
Select Create installation media and click Next. Windows 10 will now download to the computer.
-
7
Click Accept when prompted. This downloads additional updates for the installation media.
-
8
Follow the on-screen instructions to create installation media. You’ll be prompted to select the type of media you’re creating (USB flash drive or DVD), and then walked through the media creation process. Once the media is created, remove the drive or DVD from the working computer.
-
9
Connect the installation media to the PC on which you want to reinstall Windows. Connect the USB flash drive or insert the DVD, depending on the type of media you created.
-
10
Turn on the computer. If the computer was already on, reboot it now that the USB drive is attached (or DVD is inserted). The PC will boot from the inserted media and start the install process.
-
11
-
12
Click Install now. You’ll be prompted to enter the Windows product key, which you’ll usually find on a sticker that’s attached to your PC.
- If you upgraded to Windows 10 from an earlier version for free or purchased Windows from the Microsoft Store, click Skip. Windows will activate itself automatically once installed.[5]
- If you upgraded to Windows 10 from an earlier version for free or purchased Windows from the Microsoft Store, click Skip. Windows will activate itself automatically once installed.[5]
-
13
Accept the terms and click Next. The remaining steps will walk you through the installation process.
-
14
Follow the on-screen instructions to reinstall Windows. You’ll be asked if you want to format the hard drive in addition to reinstalling—this is up to you, but it’s typically only necessary if you’re going to be giving the computer to someone else. Once Windows is reinstalled, you’ll be prompted to set the computer up as if it were new.


Advertisement
Add New Question
-
Question
Does installing Windows in one partition erase data from the other partition (i.e., the whole hard drive), or only on that partition where it is being installed?

It depends on the settings that you choose. In the most cases, only the partition where it is being installed will be erased.
-
Question
UEFI boot: how does that actually work?
The UEFI is a more modern form of BIOS that uses the TPM to validate the master boot record before it boots. Basically, it protects your computer against bootkits by ensuring that only the authentic boot is loaded.
-
Question
How to reinstall the USB port?
Markpenguin8232
Community Answer
You cannot simply «reinstall» a USB port, unless you are talking about hardware,which I assume you are not. What I’m going to assume yo meant is «how to erase the USB after flashing the ISO to it». In which case, hit Windows+R, type «diskmgmt.msc», press Enter, select the disk which says «Removable» under it, and press the Del key on every partition on the disk that isn’t allocated. The USB should only have unallocated space, now right-click on the unallocated space, and click «New Simple Volume». Keep clicking «Next» until you see «Finish». You may want to change the settings, in which case stop at a menu and change the settings. Changing the volume label is on the last screen.


Ask a Question
200 characters left
Include your email address to get a message when this question is answered.
Submit
Advertisement
Thanks for submitting a tip for review!
References
About This Article
Article SummaryX
To reinstall Windows 10 from your settings, click the Start menu, which is usually located at the bottom-left corner of the screen. From there, click the Setting button or the gear icon, which should be at the bottom-left corner of the Start menu. Select “Update and Security,” which has an icon that looks like 2 curved arrows. When you’re ready to update, click “Recovery,” then “Get Started” under “Reset this PC.” Follow the on-screen prompts, then click “Reset.” If you’re using a laptop, remember to plug it in before you get started! Keep reading to learn how to reinstall Windows from a recovery drive.
Did this summary help you?
Thanks to all authors for creating a page that has been read 134,332 times.
Is this article up to date?
Categories
- Transfer Programs from C Drive to D Drive
- Transfer Installed Software to New PC
- Transfer Files from Old PC to New PC
- Transfer Microsoft Office
- Find Office Product Key
- Move User Folder
- Move Google Chrome Bookmarks
When your Windows 10 PC fails, and every attempt at fixing it does not provide a fruitful result, the only way you would be left with would be to reinstall Windows 10. Can you reinstall Windows without losing programs? The best option in those circumstances can be to reset your PC or reinstall Windows 10.
| Workable Solutions | Step-by-step Troubleshooting |
|---|---|
| Step 1 – Transfer your existing programs and data to another PC | On the source PC, select «PC to PC» on the main screen of EaseUS Todo PCTrans …Full steps |
| Step 2 – Reset Windows | Go to Start > Settings > Update & Security > Recovery…Full steps |
| Step 3 — How to reinstall windows 10 | Use the Windows 10 CD or a bootable disk containing the Windows Media files…Full steps |
| Step 4 — Transfer your programs and data from another PC | Once the copy of Windows 10 is installed, you can restore your programs and other settings…Full steps |
Does reinstalling Windows delete everything?
Windows 10 is, after all, an operating system and can perhaps run into problems now and then. In such cases, you are forced to reset your PC or reinstall Windows 10 to keep things in good standing. There can be a wide range of reasons that can necessitate the need for reinstalling Windows 10. Again, a wide range of options can include a registry issue, program incompatibility, virus attack, and even a few unforeseen issues.
Reinstalling Windows 10 can be a good option and can perhaps help you keep your personal files intact. However, there are situations where a simple reinstallation may not work as expected, and resetting your PC is the only option to resolve the issue. The major issue with resetting a PC is that it deletes all your personal data and brings the PC back to a state when it was completely new.
However, you need not worry. A few options and methods can help you reinstall Windows 10 without losing programs or reinstall Windows without losing apps.
Reinstalling Windows 10 without losing programs can be quite easy and simple. However, you are expected to follow a few steps for achieving more positive results.
Step 1 – Transfer your existing programs and data to another PC
Before installing Windows 10, it would be advisable to safely save your programs, files, and other data. This can be helpful in assuring that your data stays safe and is not removed or deleted. One of the excellent tools that can play a major role in this context can be EaseUS Todo PCTrans.
The EaseUS Todo PCTrans software can be your best bet for achieving the best possible experience in terms of moving your applications, files, and user accounts quite comfortably from one PC to another.
The prime features offered by EaseUS Todo PCTrans can include
A seamless data migration option makes it an excellent option for achieving an exceptional data migration.
- It also provides you access to an option to transfer your programs and files from your old PC to a new PC.
- You can even migrate your user accounts and settings between PCs. You can even transfer the user account, personalization, and even power settings.
- A completely automatic and intuitive functionality would make it one of the excellent options. In addition, it can be an excellent option for fully managing your data effectively.
- Free Technical support offered as part of the package can be one of the excellent options ever for most of your needs in data transfer. So if you are stuck for any reason, you need not worry at all.
Step 1. Run EaseUS Todo PCTrans on both PCs
On the source PC, select «PC to PC» on the main screen of EaseUS Todo PCTrans and move on.

Step 2. Choose transfer direction — Old or New Computer
«New» — Transfer all data from remote old computer to current new computer.
«Old» — Transfer all data from current old device to a new computer.

Step 3. Connect two computers
1. Select your target PC to connect via its IP address or device name and click «Connect».
2. Enter the login password of your target PC and click «OK» to confirm.
If you didn’t see the target PC in the listed devices, you can also click «Add PC» to manually connect the target PC by inputting its IP address or device name.

Step 4. Select apps, programs, and software and transfer to the target computer
1. You can select and choose what you want to transfer from the current computer to the target PC.
2. After selecting desired applications and programs, click «Transfer» to start the transferring process.

Step 2 – Reset Windows
The steps to reset Windows 10 should rather be quite simple and easy to follow. This option to reset the Windows 10 is available if your PC is booting up properly. It is not much different from a clean install of Windows 10.
The steps would involve –
- Go to Start > Settings > Update & Security > Recovery
- Under the Reset the PC, click on the option for Get Started.
- Choose the option for Keep My Files or Remove everything. In any case, your user accounts and settings will be reset. Even your apps will be removed.
- Confirm the warning to agree that your apps will be uninstalled.
- Click on the Reset option to completely reinstalling Windows 10 without losing the apps
Step 3 — How to reinstall windows 10
-
If you are looking to reinstall Windows 10, you can use the Windows 10 CD or a bootable disk containing the Windows Media files. Follow the steps that you can follow –
- Create a media creation tool by following the media creation tool.
- Connect your newly created media creation tool to the PC through the USB port.
- Reboot your PC and boot from the USB drive. You can do this through the BIOS settings.
- Follow the instructions to reinstall Windows 10.
- You may need to enter your activation key if needed. You may even skip the step and sign in with your Microsoft account to activate your Windows 10 automatically later.
-
You may need to wait patiently until the reinstallation of Windows 10 is completed.
Step 4 — Transfer your programs and data from another PC
Once the copy of Windows 10 is installed, you can restore your programs and other settings with ease. EaseUS Todo PCTrans software can prove to be one of the excellent options for achieving the excellent options for your needs.
The steps offered by the service can prove to be one of the best options for achieving an excellent option for your needs in terms of achieving an excellent option ever for your needs.
The Concluding Thoughts
Resetting Windows 10 or reinstalling it can be a tougher choice. The risk of losing your apps, settings, programs, and other content can be a huge compromise. However, choosing the right backup and restore tools can prove to be one of the excellent options for achieving a great degree of performance.
The EaseUS Todo PCTrans can be one of the right tools for providing you access to a far better degree of performance ever. Make it one of the obvious options for practically every experience for almost all the experiences you may be looking ahead to. The steps here should help you arrive at the best options for your needs.
- To clean install Windows 10, boot PC with a USB bootable flash drive, continue with on-screen directions, skip activation, and select the “Custom” option. Then select the installation drive, click “Next,” and finish the out-of-the-box experience (OOBE).
- Also, you can do a clean installation of Windows 10 with the Media Creation Tool, Reset this PC feature, Advanced startup, or ISO file.
A clean install of Windows 10 is recommended for upgrading to the latest operating system version. The reason is that this method allows you to erase the hard drive and start with a fresh copy of Windows 10 without custom settings, drivers, apps, or files that may interfere with the upgrade process.
If you have had the same installation for a long time, this process can also help fix performance issues, problems shutting down and starting up, memory, and apps. Also, a clean installation is the process of choice to upgrade from an older version like Windows 7 or 8.1. Or you can use this option to delete all preloaded bloatware from the manufacturer image on a new computer.
Whatever the reason, Microsoft offers several ways to perform a clean install of Windows 10, including using a USB flash drive to set up the installation on an SSD (Solid-State Drive). You can use the Media Creation Tool to do a fresh install on a device already running Windows 10. It’s also possible to use the “Reset this PC” feature to quickly wipe out the hard drive and reinstall the operating system without additional tools. Or, if the computer does not start, you can use the Advanced startup options or mount the ISO file to File Explorer to complete a clean install.
This guide will teach you the different ways to perform a clean installation of Windows 10 on your computer, whether you plan to reinstall the same version or upgrade to a later release, including version 22H2, 21H2, 21H1, or 20H2.
- Clean install Windows 10 from USB
- Clean install Windows 10 from Media Creation Tool
- Clean install Windows 10 from Reset this PC (local)
- Clean install Windows 10 from Reset this PC (cloud)
- Clean install Windows 10 from WinRE
- Clean install Windows 10 from ISO file
Important: This process will delete everything on your device. It’s recommended to make a full backup of your computer before proceeding. You’ve been warned.
The best way to complete a fresh installation of Windows 10 is to use a USB flash drive, which you must first create using the Media Creation Tool, Command Prompt, or third-party tools like Rufus. Also, you must ensure the computer can start from USB, which means you may need to adjust the BIOS or UEFI settings. However, since most devices have different settings, you must check your manufacturer support website for more specific details.
To clean install Windows 10 from USB, use these steps:
-
Start the PC with the Windows 10 USB flash drive.
-
Press any key to continue.
-
Click the Next button.

-
Click the Install now button.

-
Click the “I don’t have a product key” option if you are doing a reinstallation. If Windows 10 was already activated after the installation, reactivation would happen automatically.

-
Select the edition of “Windows 10” that your license key activates (if applicable).

-
Check the “I accept the license terms” option.
-
Click the Next button.
-
Select the “Custom: Install Windows only (advanced)” option to perform a clean install.

-
Select each partition in the hard drive you want to install Windows 10 and click the Delete button. (Typically, the “Drive 0” is the drive that contains all the installation files.)
Warning: Deleting a partition also deletes all data on the drive. Also, it is not required to delete the partitions from a secondary hard drive.
-
Select the hard drive (Drive 0 Unallocated Space) to install Windows 10.

-
Click the Next button.
-
Select your region setting after the installation on the first page of the out-of-the-box experience (OOBE).

-
Click the Yes button.
-
Select your keyboard layout setting.
-
Click the Yes button.
-
Click the Skip button if you do not need to configure a second layout.
-
The computer will automatically connect to the network using an Ethernet connection. If you have a wireless connection, you must set up the link manually (a security key may be required).
-
Select the “Set up for personal use” option for Windows 10 Pro. (The “Home” edition does not have this option.)
-
Click the Next button.
-
Confirm your Microsoft account email to create an account.

-
Click the Next button.
-
Confirm your account password.
-
Click the Next button.
-
Click the “Create a PIN” button.
-
Create a new PIN password.
-
Click the OK button.
-
Confirm the privacy settings best suit your needs by turning on or off the toggle switch for each option.
-
Click the Accept button.
-
(Optional) On the “Customize your device” page, select one or more ways you plan to use the device to allow the setup to suggest tools and services customization during this experience.
-
Click the Accept button to continue. Or click the Skip button to skip this part of the setup.
-
Click the “No, thanks” button to skip linking your phone to your PC. (You can always do this from the Settings app.)
-
Click the Next button to allow OneDrive to automatically upload your Desktop, Pictures, and Documents folders to the cloud. Or click the “Only save files to this PC” option to skip this step.
-
Click the “No, thanks” button to skip the Microsoft 365 setup.
-
Click the Decline button to skip the OneDrive storage offer.
-
Click the “No Thanks” button to skip the Game Pass offer.
-
Click the “Not now” button to disable Cortana.


Once you complete the steps, Windows 10 will apply the settings and finish the setup.
Clean install Windows 10 from Media Creation Tool
You can also perform a clean installation using the Media Creation Tool with the option to keep nothing. This option is available for devices already using Windows 10, Windows 8.1, or Windows 7, and it provides an option to roll back to the previous installation.
To clean install Windows 10 with the Media Creation Tool, use these steps:
-
Open Microsoft support website.
-
Under the “Create Windows 10 installation media” section, click the “Download tool now” button.
-
Save the installer to the device.
-
Double-click the MediaCreationToolXXXX.exe file to launch the tool.
-
Click the Accept button.
-
Select the “Upgrade this PC now” option.

-
Click the Accept button again.
-
Click the “Change what to keep” option.
-
Select the Nothing option.
-
Click the Next button.
-
Click the Install button.
-
Select your region setting after the installation on the first page of the out-of-the-box experience (OOBE).
-
Click the Yes button.
-
Select your keyboard layout setting.
-
Click the Yes button.
-
Click the Skip button if you do not need to configure a second layout.
-
The computer will automatically connect to the network using an Ethernet connection. If you have a wireless connection, you must set up the link manually (a security key may be required).
-
Select the “Set up for personal use” option for Windows 10 Pro. (The “Home” edition does not have this option.)
-
Click the Next button.
-
Confirm your Microsoft account email to create an account.
-
Click the Next button.
-
Confirm your account password.
-
Click the Next button.
-
Click the “Create a PIN” button.
-
Create a new PIN password.
-
Click the OK button.
-
Confirm the privacy settings best suit your needs by turning on or off the toggle switch for each option.
-
Click the Accept button.
-
(Optional) On the “Customize your device” page, select one or more ways you plan to use the device to allow the setup to suggest tools and services customization during this experience.
-
Click the Accept button to continue. Or click the Skip button to skip this part of the setup.
-
Click the “No, thanks” button to skip linking your phone to your PC. (You can always do this from the Settings app.)
-
Click the Next button to allow OneDrive to automatically upload your Desktop, Pictures, and Documents folders to the cloud. Or click the “Only save files to this PC” option to skip this step.
-
Click the “No, thanks” button to skip the Microsoft 365 setup.
-
Click the Decline button to skip the OneDrive storage offer.
-
Click the “No Thanks” button to skip the Game Pass offer.
-
Click the “Not now” button to disable Cortana.


After you complete the steps, the setup will continue with the fresh installation of the operating system.
Clean install Windows 10 from Reset this PC (local)
Using the local image, you can also use the recovery settings to start fresh with a clean copy of Windows 10. However, unlike the USB, Media Creation Tool, and ISO file methods, you can only use this option to reinstall the same version of Windows 10 already on the computer. If you want to upgrade to a newer version, you will need to use one of the other alternative methods.
To clean install Windows 10 with the Reset this PC feature using the local image, use these steps:
-
Open Settings.
-
Click on Update & Security.
-
Click on Recovery.
-
Under the “Reset this PC” section, click the Get started button.

-
Click the “Remove everything” option to perform a fresh install of Windows 10.

-
Click the “Local reinstall” option.
-
(Optional) Click the Change settings option.
-
Configure the reinstallation options:
- Clean data: If this option is set to No (recommended), then the setup will only delete files, apps, and settings quickly. If the option is set to Yes, the setup will securely clean the drive before installing the operating system, but it will take longer.
- Delete files from all drives: Only the installation drive will be erased if the option is set to No (recommended). Otherwise, if this option is set to Yes, all the drives on the device will be deleted.
- Download Windows: If this option is set to No (recommended), the local image will be used for installation. If the option is set to Yes, the “Cloud download” option will be activated.
-
Click the Confirm button.
-
Click the Next button.
-
Click the Reset button.
-
Select your region setting after the installation on the first page of the out-of-the-box experience (OOBE).
-
Click the Yes button.
-
Select your keyboard layout setting.
-
Click the Yes button.
-
Click the Skip button if you do not need to configure a second layout.
-
The computer will connect to the network automatically if it uses an Ethernet connection. If you have a wireless connection, you must set up the link manually (a security key may be required).
-
Select the “Set up for personal use” option for Windows 10 Pro. (The “Home” edition does not have this option.)
-
Click the Next button.
-
Confirm your Microsoft account email to create an account.
-
Click the Next button.
-
Confirm your account password.
-
Click the Next button.
-
Click the “Create a PIN” button.
-
Create a new PIN password.
-
Click the OK button.
-
Confirm the privacy settings best suit your needs by turning on or off the toggle switch for each option.
-
Click the Accept button.
-
(Optional) On the “Customize your device” page, select one or more ways you plan to use the device to allow the setup to suggest tools and services customization during this experience.
-
Click the Accept button to continue. Or click the Skip button to skip this part of the setup.
-
Click the “No, thanks” button to skip linking your phone to your PC. (You can always do this from the Settings app.)
-
Click the Next button to allow OneDrive to automatically upload your Desktop, Pictures, and Documents folders to the cloud. Or click the “Only save files to this PC” option to skip this step.
-
Click the Decline button to skip the OneDrive storage offer.
-
Click the “No Thanks” button to skip the Game Pass offer.
-
Click the “No, thanks” button to skip the Microsoft 365 setup.
-
Click the “Not now” button to disable Cortana.


Once you complete the steps, a clean installation will be performed using the local image. If this is a branded computer, the setup will restore all the original settings previously available with the device. This means manufacturer-specific settings, drivers, applications, and tools. If you don’t want to reinstall the custom image provided by the manufacturer, use the “Cloud Download” option (see steps below).
Clean install Windows 10 from Reset this PC (cloud)
Windows 10 also includes the “Cloud Download” option in the “Reset this PC” feature, which allows you to reset the device with a clean installation, removing apps, files, and settings like the local image option. However, the difference is that when you select this option, the setup will download a fresh installation image from the Microsoft server.
This option has been designed to reinstall Windows 10 when the recovery feature is not working with the local image or using a branded computer with a custom image. If you choose this option, the setup will download the same version already installed on the device, which means you cannot use this method to upgrade the computer to a newer version. Also, if the device has a custom image from the manufacturer, this option will replace it with the one from Microsoft with all the standard settings and without custom drivers or trial software and tools.
To reinstall Windows 10 with the Reset this PC using the “Cloud Download” option, use these steps:
-
Open Settings.
-
Click on Update & Security.
-
Click on Recovery.
-
Under the “Reset this PC” section, click the Get started button.
-
Click the “Remove everything” option.
-
Click the “Cloud Download” option.
-
(Optional) Click the Change settings option.
-
Configure the reinstallation options: Clean data:
- Clean data: If this option is set to No (recommended), then the setup will only delete files, apps, and settings quickly. If the option is set to Yes, the setup will securely clean the drive before installing the operating system, but it will take longer.
- Delete files from all drives: Only the installation drive will be erased if the option is set to No (recommended). Otherwise, if this option is set to Yes, all the drives on the device will be deleted.
- Download Windows: If the option is set to Yes (recommended), the “Cloud download” option will be activated. If this option is set to No, then the local image will be used for installation.
-
Click the Confirm button.
-
Click the Next button.
-
Click the Reset button.
-
Select your region setting after the installation on the first page of the out-of-the-box experience (OOBE).
-
Click the Yes button.
-
Select your keyboard layout setting.
-
Click the Yes button.
-
Click the Skip button if you do not need to configure a second layout.
-
The computer will connect to the network automatically if it uses an Ethernet connection. If you have a wireless connection, you must set up the connection manually (a security key may be required).
-
Select the “Set up for personal use” option for Windows 10 Pro. (The “Home” edition does not have this option.)
-
Click the Next button.
-
Confirm your Microsoft account email to create an account.
-
Click the Next button.
-
Confirm your account password.
-
Click the Next button.
-
Click the “Create a PIN” button.
-
Create a new PIN password.
-
Click the OK button.
-
Confirm the privacy settings best suit your needs by turning on or off the toggle switch for each option.
-
Click the Accept button.
-
(Optional) On the “Customize your device” page, select one or more ways you plan to use the device to allow the setup to suggest tools and services customization during this experience.
-
Click the Accept button to continue. Or click the Skip button to skip this part of the setup.
-
Click the “No, thanks” button to skip linking your phone to your PC. (You can always do this from the Settings app.)
-
Click the Next button to allow OneDrive to automatically upload your Desktop, Pictures, and Documents folders to the cloud. Or click the “Only save files to this PC” option to skip this step.
-
Click the “No, thanks” button to skip the Microsoft 365 setup.
-
Click the Decline button to skip the OneDrive storage offer.
-
Click the “No Thanks” button to skip the Game Pass offer.
-
Click the “Not now” button to disable Cortana.


Once you complete the steps, the feature will take over and reset your device to the default settings by erasing and reinstalling a fresh copy of Windows 10 downloaded from the cloud.
Clean install Windows 10 from WinRE
If the computer does not start correctly and you want to reinstall Windows 10 to resolve the problem, the Windows Recovery Environment (WinRE) includes an option to perform a clean installation using the local or cloud image.
Technically, these are the same options available through the “Reset this PC” settings. However, you can also access the feature through the “Advanced startup” option, making it ideal for performing a clean installation of Windows 10 when the computer has problems. Or when you cannot boot the system to access the Settings app.
Again, you can only use this option to reinstall the same operating system version already installed on the computer. If you also want to upgrade to the latest version, you must use the Media Creation Tool, ISO file, or USB options.
To clean install Windows 10 from the Windows Recovery Environment, use these steps:
-
Start device.
-
Immediately after the Power-On Self-Test (POST), press the Power button again to shut down.
-
Repeat steps 1 and 2 twice, and in the third restart, the operating system should enter the Windows Recovery Environment (WinRE).
Quick note: Windows 10 has multiple ways to open the Advanced startup settings. You can use these other options if you cannot access the recovery environment.
-
Click the Advanced options button.

-
Click on Troubleshoot.

-
Click on the “Reset this PC” option.

-
Select the “Remove everything” option.

-
Click the Cloud download or Local reinstall option. Cloud download: Downloads a fresh image from the Microsoft servers and performs a fresh installation. Local reinstall: Uses the locally available image to install a clean copy of Windows 10.

-
Select the “Only the drive where Windows is installed” option. (The All drives option will delete the data on all drives. This option is usually recommended only when you want to decommission the device.)

-
Select the “Just remove my files or Full clean the drive” option.
- Just remove my files: Deletes the drive contents quickly.
- Full clean the drive: It also deletes everything on the drive but performs a secure erase that takes several hours—this option is suited when preparing to give away the device.

-
Click the Reset button.

-
Select your region setting after the installation on the first page of the out-of-the-box experience (OOBE).
-
Click the Yes button.
-
Select your keyboard layout setting.
-
Click the Yes button.
-
Click the Skip button if you do not need to configure a second layout.
-
The computer will connect to the network automatically if it uses an Ethernet connection. If you have a wireless connection, you must set up the connection manually (a security key may be required).
-
Select the “Set up for personal use” option for Windows 10 Pro. (The “Home” edition does not have this option.)
-
Click the Next button.
-
Confirm your Microsoft account email to create an account.
-
Click the Next button.
-
Confirm your account password.
-
Click the Next button.
-
Click the “Create a PIN” button.
-
Create a new PIN password.
-
Click the OK button.
-
Confirm the privacy settings best suit your needs by turning on or off the toggle switch for each option.
-
Click the Accept button.
-
(Optional) On the “Customize your device” page, select one or more ways you plan to use the device to allow the setup to suggest tools and services customization during this experience.
-
Click the Accept button to continue. Or click the Skip button to skip this part of the setup.
-
Click the “No, thanks” button to skip linking your phone to your PC. (You can always do this from the Settings app.)
-
Click the Next button to allow OneDrive to automatically create a backup of your Desktop, Pictures, and Documents folders to the cloud. Or click the “Only save files to this PC” option to skip this step.
-
Click the “No, thanks” button to skip the Microsoft 365 setup.
-
Click the Decline button to skip the OneDrive storage offer.
-
Click the “No Thanks” button to skip the Game Pass offer.
-
Click the “Not now” button to disable Cortana.


Once you complete the steps, the process will take over and reset your computer to the default settings by erasing and reinstalling a clean copy of Windows 10. The completion time will depend on your computer hardware configuration and selected reset configuration.
Clean install Windows 10 from ISO file
If you only have a Windows 10 ISO file, a USB flash drive or disc is not required to continue with the installation. You can always mount the ISO in File Explorer to launch a clean install or in-place upgrade on a device with the operating system already installed.
To clean install Windows 10 from an ISO file, use these steps:
-
Download the Windows 10 ISO without using the Media Creation Tool.
-
Right-click the ISO file and select the Mount option.

-
Select the virtual drive from the left navigation pane.
-
Double-click the Setup file to begin the Windows 10 installation.

-
(Optional) Click the “Change how Windows Setup downloads updates” option.
-
Select the “Not right now” option.
-
Click the Next button.
-
Click the Accept button to agree to the terms.
-
Click the “Change what to keep” option.
-
Select the Nothing option.
-
Click the Next button.
-
Click the Install button.
-
Select your region setting after the installation on the first page of the out-of-the-box experience (OOBE).
-
Click the Yes button.
-
Select your keyboard layout setting.
-
Click the Yes button.
-
Click the Skip button if you do not need to configure a second layout.
-
The computer will connect to the network automatically if it uses an Ethernet connection. If you have a wireless connection, you must set up the connection manually (a security key may be required).
-
Select the “Set up for personal use” option for Windows 10 Pro. (The “Home” edition does not have this option.)
-
Click the Next button.
-
Confirm your Microsoft account email to create an account.
-
Click the Next button.
-
Confirm your account password.
-
Click the Next button.
-
Click the “Create a PIN” button.
-
Create a new PIN password.
-
Click the OK button.
-
Confirm the privacy settings best suit your needs by turning on or off the toggle switch for each option.
-
Click the Accept button.
-
(Optional) On the “Customize your device” page, select one or more ways you plan to use the device to allow the setup to suggest tools and services customization during this experience.
-
Click the Accept button to continue. Or click the Skip button to skip this part of the setup.
-
Click the “No, thanks” button to skip linking your phone to your PC. (You can always do this from the Settings app.)
-
Click the Next button to allow OneDrive to automatically create a backup of your Desktop, Pictures, and Documents folders to the cloud. Or click the “Only save files to this PC” option to skip this step.
-
Click the Decline button to skip the OneDrive storage offer.
-
Click the “No Thanks” button to skip the Game Pass offer.
-
Click the “No, thanks” button to skip the Microsoft 365 setup.
-
Click the “Not now” button to disable Cortana.


Once you complete the steps, the clean installation process will begin, like using the Media Creation Tools or USB flash drive to upgrade the system.