![]()
Download Article
Easily install Windows 10 or 11 on Ubuntu Linux with this user-friendly guide
![]()
Download Article
- Create a Windows Partition
- Create a Bootable USB
- Install Windows
- Set Up Dual Boot
- Tips
|
|
|
|
This wikiHow guide teaches you how to install Windows on a PC that’s already running Ubuntu Linux. Before you get started, make sure you’ve already purchased a Windows license and product key. Don’t worry if you don’t have Windows install media, as you can create a bootable USB drive from a downloadable ISO image. Once you’ve installed Windows from Ubuntu, you can install a tool called EasyBCD that allows you to switch between operating systems (dual boot) easily.
Things You Should Know
- You’ll need a USB flash drive with at least 8 GB of space and a partition with 20 — 50GB of space to install Windows.
- Once you download an ISO image of Windows 10 or Windows 11 from Microsoft, you can use UNetbootin to create your install drive.
- Boot from the USB drive to install Windows.
-

1
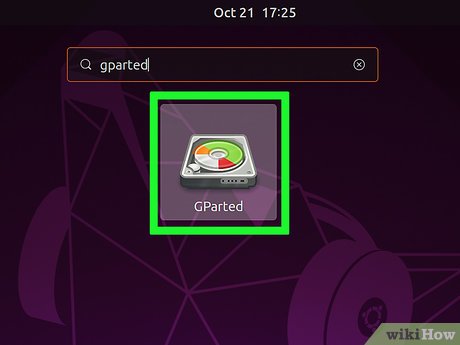
Open Gparted. You’ll use this tool to create a new partition for Windows. You’ll see a list of all drives and partitions.
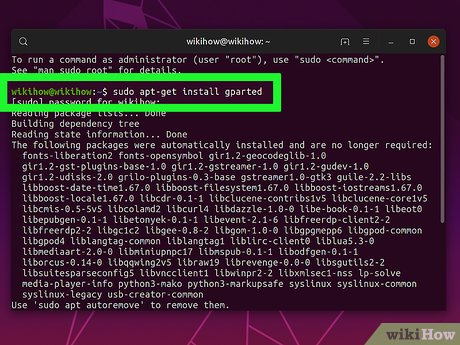
- If you haven’t already installed Gparted, you can download it from the Software Center or by running sudo apt-get install gparted from the command line.
-
2
Unmount the partition you want to shrink. Right-click the partition that contains the space you want to allocate to Windows and select Unmount.
- You won’t be able to unmount and shrink the Ubuntu partition while Ubuntu is running. If you want to allocate space from your Ubuntu partition, you’ll need to boot from a Ubuntu flash drive and use the Try Ubuntu feature rather than reinstalling Ubuntu. Then, you can run Gparted from there.
Advertisement
-
3
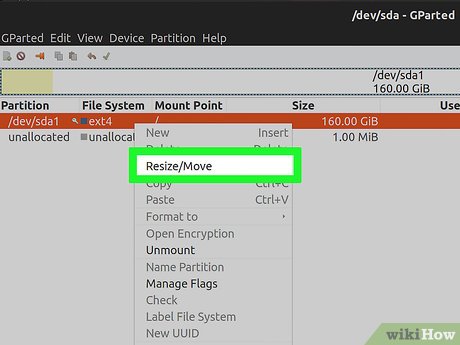
Right-click the partition you want to edit and select Resize/Move. This allows you to create a new partition from your unmounted one.
-
4
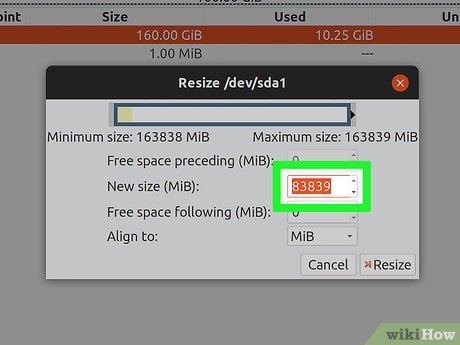
Enter the new partition size (in MB) and click Resize. You should allocate at least 20 GB (20000 MB) for Windows 10 or 64 GB (64000 MB) for Windows 11. If you plan to install apps and use Windows regularly, you’ll probably want to increase that amount.[1]
-
5
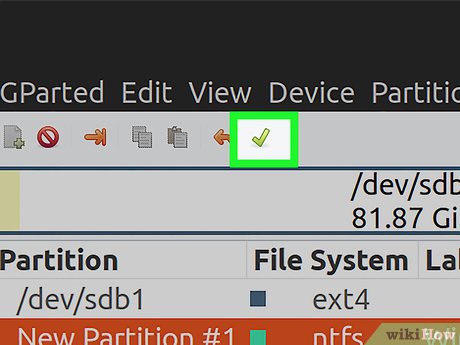
Click Apply to save your changes. You’ll see this green checkmark icon in the top toolbar. Once you do this, you’ll see your unallocated space.
-
6
Right-click the unallocated space and select New. This opens the «Create a New Partition» window.
-
7
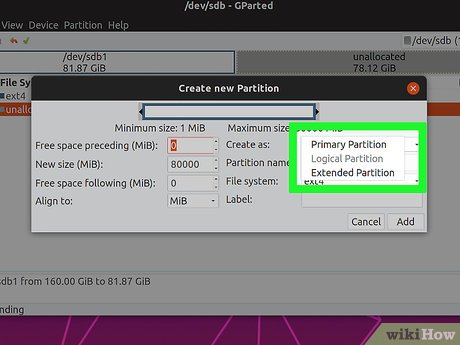
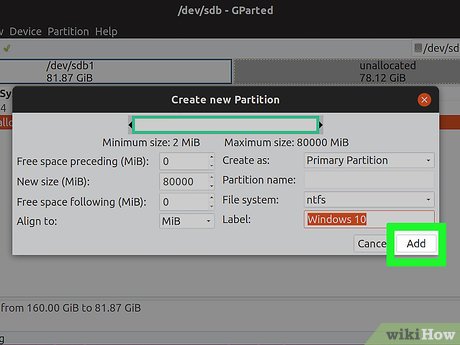
Enter the details for your new Windows partition and click Add.
- In the «New size» field, enter the size (in MB) of the partition you want to allocate to Windows (e.g., 50000).
- «Primary Partition» should already be selected from the «Create as» menu. If it’s not, select it now.
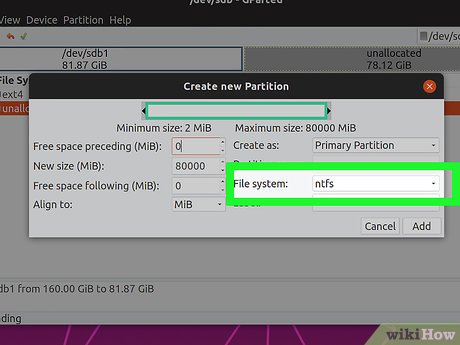
- Select ntfs from the «File System» menu.
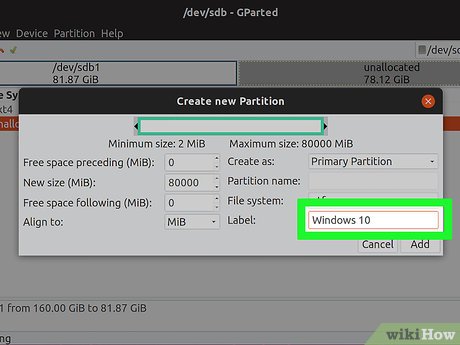
- In the Label field, type «Windows 10» or «Windows 11» as needed.
-
8
Click Apply. It’s the green check mark button at the top of Gparted.
-
9
Unmount the new partition. Now that you’ve created your Windows partition, unmount it by right-clicking it and selecting Unmount.


Advertisement
-
1
Download the Windows 10 or 11 installation media. You’ll need a blank USB drive with at least 8 GB of space to create install media. Any data on the USB drive will be erased during this process.[2]
- Windows 11: Go to https://www.microsoft.com/software-download/windows11. In the «Download Windows 11 Disk Image (ISO) for X64 devices» section, select a Windows 11 version, then click Download Now to save the image.
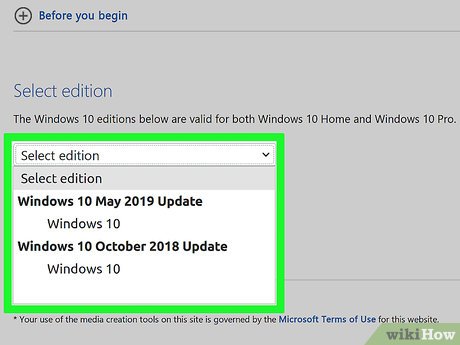
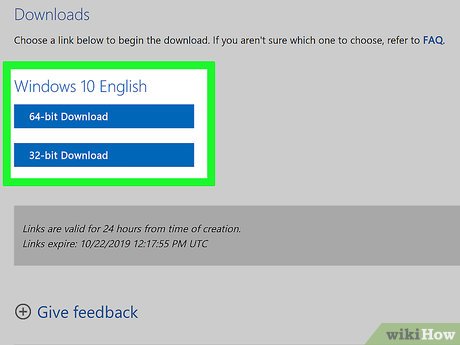
- Windows 10: Go to https://www.microsoft.com/en-us/software-download/windows10. Under the «Windows 10 2023» header, select a Windows 10 edition and click Confirm. Select a language, then click the download link for the version of Windows you want to install.
- You’ll need a blank USB drive with at least 8 GB of space to create install media. Any data on the USB drive will be erased during this process.[3]
-
2
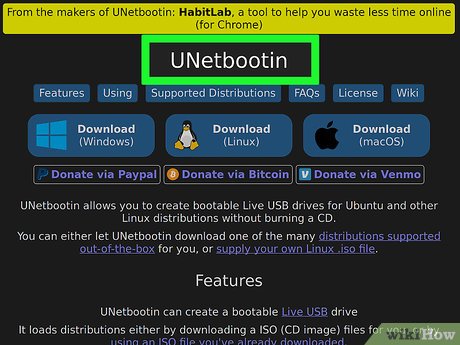
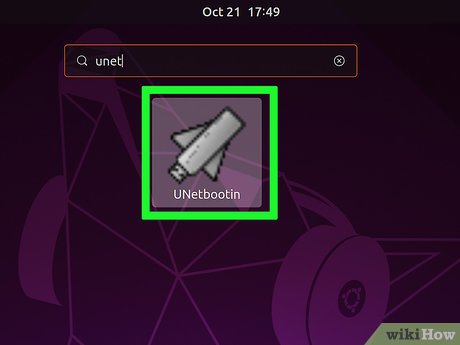
Install UNetbootin from the Software Center. This free application lets you create a bootable USB drive in Ubuntu. To learn more about UNetbootin, see https://unetbootin.github.io. To install:
- Open a Terminal window.
- Run the command sudo add-apt-repository ppa:gezakovacs/ppa to add the repository.
- Run sudo apt-get update to update your package lists.
- Run sudo apt-get install unetbootin to install.[4]
-
3
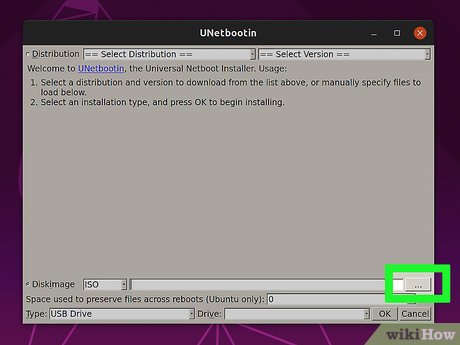
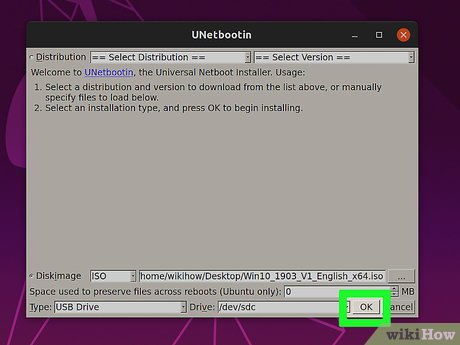
Open UNetbootin and insert your USB drive. Opening UNetbootin displays the welcome screen where you can choose your bootable drive parameters.
-
4
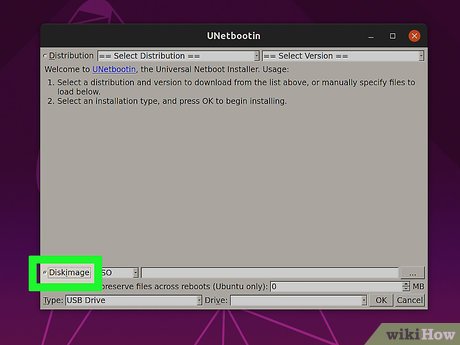
Select the «DiskImage» radio button. It’s toward the bottom-left corner of the window.
-
5
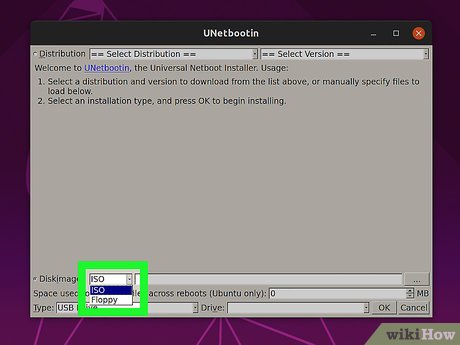
Select ISO from the «DiskImage» menu. It’s to the right of the radio button.
-
6
Click the three-dot … button. This opens your file browser.
-
7
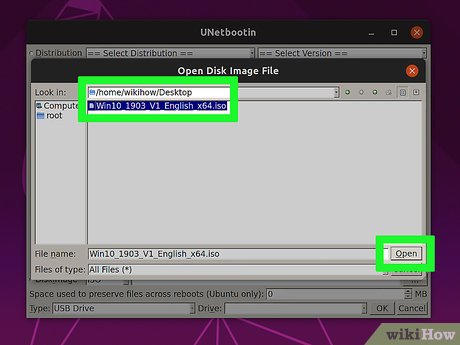
Select the file you downloaded from Microsoft and click Open. It’s the one that ends with .iso.
-
8
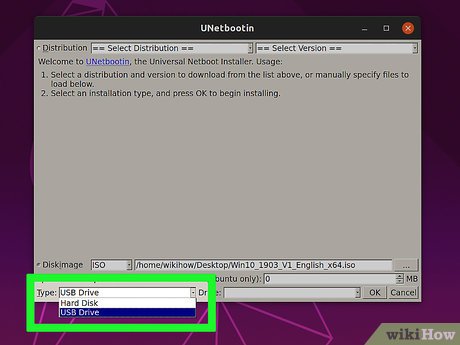
Select USB Drive from the «Type» menu. It’s at the bottom-left corner of the window.
-
9
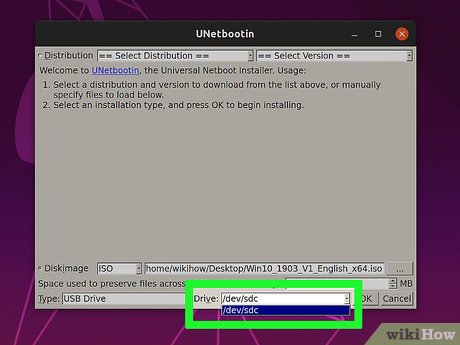
Select your USB drive from the «Drive» menu. This is the device label for your USB drive.
- If you can’t select your USB drive, it likely needs to be formatted to the FAT32 or NTFS file system. You can do this in the file manager by right-clicking the USB drive and selecting Format.
-
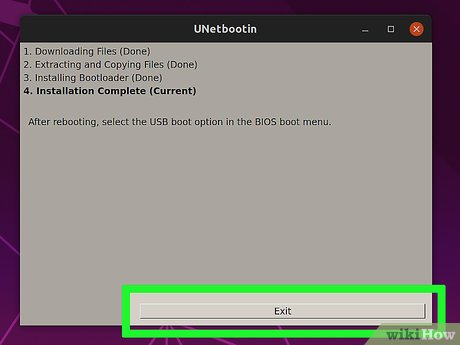
10
Click OK. This creates a bootable Windows 10 USB drive from the downloaded ISO image. Once the drive is ready, you’ll see «Installation Complete.»
- Click Exit to close UNetbootin.


Advertisement
-
1
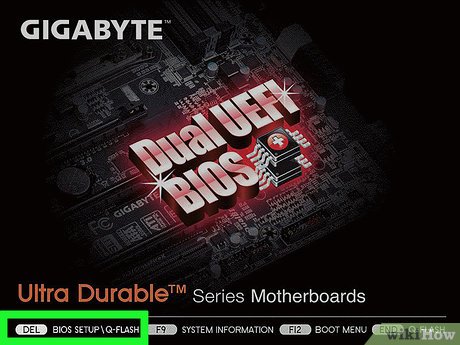
Restart your computer into the BIOS/UEFI. The steps to enter the BIOS/UEFI depend on your PC manufacturer and model. You’ll usually have to press a certain key (often F2, F10, F1, or Del) right after the computer starts booting.
- Insert the USB drive into a free USB port if you haven’t already.
-
2
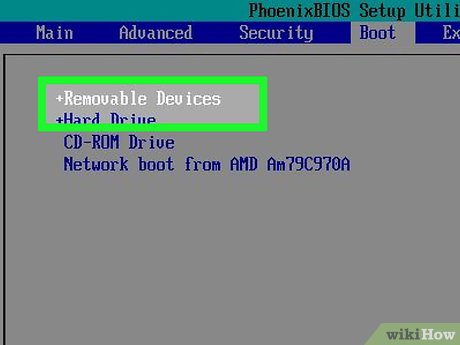
Set the USB drive to come first in the boot order. You’ll usually do this in a menu called «Boot» or «Boot Order.» The steps to change the boot order vary by PC, but you’ll usually have to select USB Drive and mark it as 1st Boot Device. Check your PC manufacturer’s website for more specific instructions about your BIOS/UEFI.
-
3
Save your changes and exit the BIOS/UEFI. Most BIOS/UEFI make the «Save» and «Exit» keys very clear somewhere on the screen. Once you exit the BIOS/UEFI, your computer will boot from your USB drive and display the «Windows Setup» window.
-
4
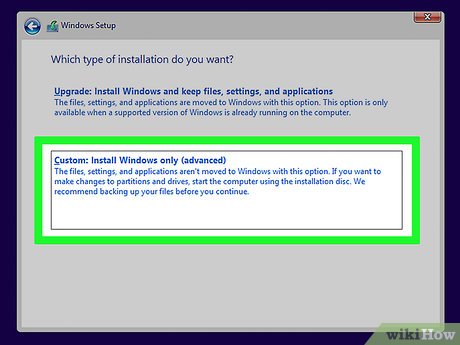
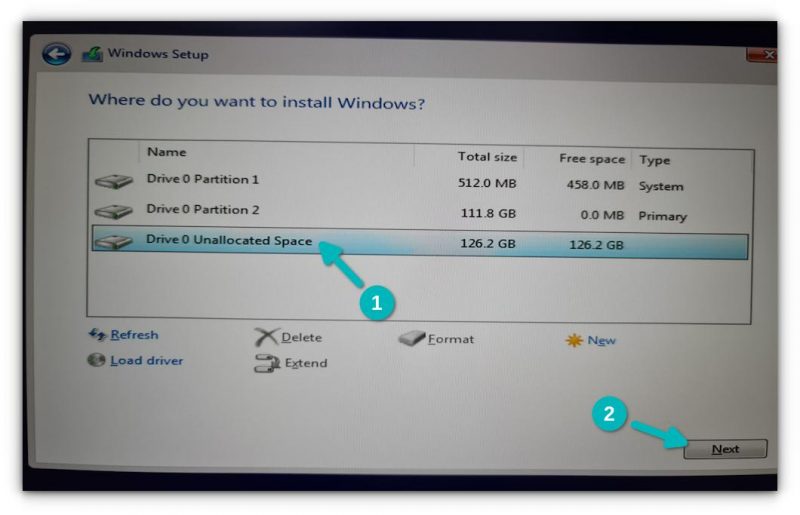
Click Custom: Install Windows only (advanced). It’s the second option on the window. A list of partitions will appear.
-
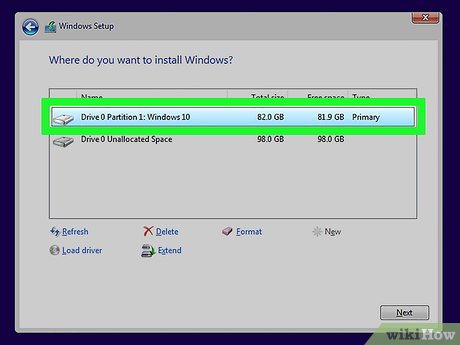
5
Select your Windows partition and click Next. This is the partition you just created. Windows will now install on the selected partition.
-
6
Follow the on-screen instructions to install Windows. Once you finish the setup, you’ll boot to the Windows desktop.
-
7


Advertisement
-
1
Download EasyBCD from Windows. EasyBCD is a free tool that lets you set up dual-boot from within Windows. To download.
- Open the Microsoft Edge web browser. You’ll find it in the Windows menu at the bottom-left corner of the screen.
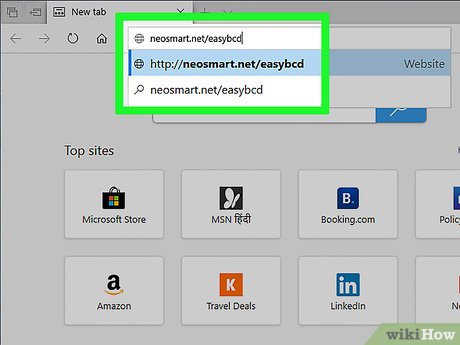
- Navigate to https://neosmart.net/EasyBCD.
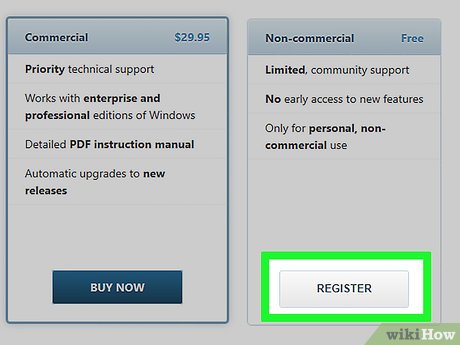
- Scroll down and click Register under «Non-commercial.» This brings you to a sign-up page.
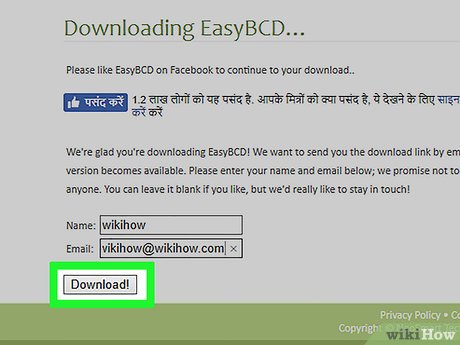
- Enter your name and email address and click Download. This should start the download immediately, but you might have to click Save or Download to confirm.
-
2
Click the file you just downloaded. The file starts with EasyBCD. You should see it near the bottom of the browser. If you don’t, press Ctrl+J to open the Downloads list and click it there.
- If prompted, click Yes to allow the installer to run.
-
3
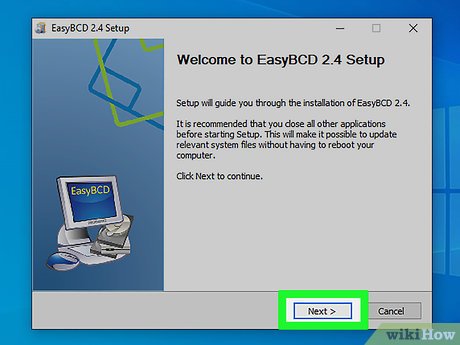
Follow the on-screen instructions to install EasyBCD. Once the app is installed, it will be added to the Start menu.
-
4
Open EasyBCD. It’s on the Start menu, which you can get to by clicking the Windows button at the screen’s bottom-left corner.
-
5
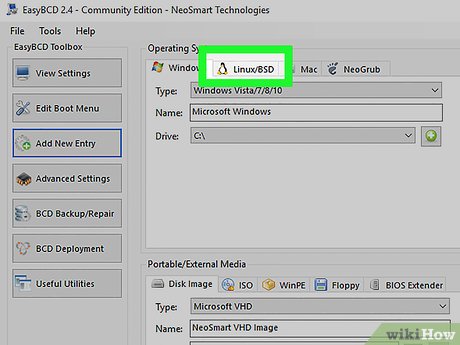
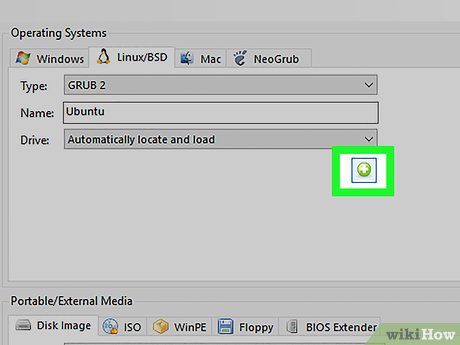
Click the Linux/BSD tab. It’s near the top of the app.
-
6
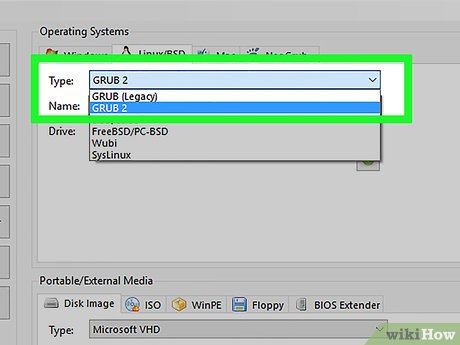
Select Grub 2 from the «Type» menu. It’s near the top of the tab.
-
7
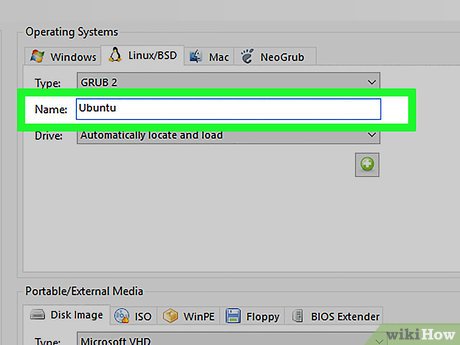
Type Ubuntu into the «Name» field. It’s right below the «Type» menu. This is how Ubuntu will appear in the boot menu.
-
8
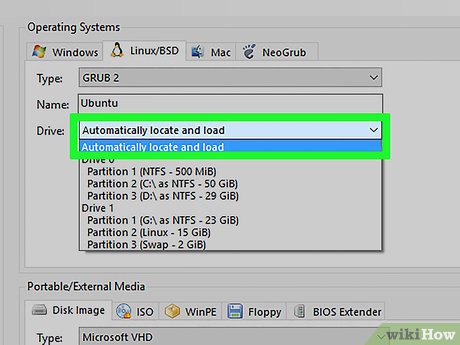
Select Automatically locate and load from the «Drive» menu.
-
9
Click the Add Entry button. It’s right below the «Drive» menu. This adds an option for Ubuntu to the standard Windows boot menu.[5]
-
10
Remove the USB drive and restart the PC. You can restart the PC by clicking the Start menu, selecting the Power button (it looks like a knob), and choosing Restart. When the PC comes back up, it will boot to a screen that allows you to select either Windows or Ubuntu. Selecting one or the other will boot into that operating system.


Advertisement
Ask a Question
200 characters left
Include your email address to get a message when this question is answered.
Submit
Advertisement
-
You must have a license to install Windows. If you don’t already have a Windows license, you won’t be able to activate Windows once installed.
Thanks for submitting a tip for review!
Advertisement
About This Article
Article SummaryX
1. Create a primary NTFS partition in Ubuntu.
2. Download the Windows 10 ISO from Microsoft.
3. Install UNetbootin from the Software Center.
4. Use UNetbootin to create a bootable USB Windows 10 drive.
5. Boot from the USB drive.
6. Follow the on-screen instructions to install Windows.
7. Connect to the internet and download EasyBCD.
8. Use EasyBCD to add Ubuntu to the boot menu.
Did this summary help you?
Thanks to all authors for creating a page that has been read 345,783 times.
Is this article up to date?
This wikiHow teaches you how to install Windows 10 on a PC that’s already running Ubuntu Linux. Before you get started, make sure you’ve already purchased a Windows license and product key. Don’t worry if you don’t have Windows install…
- How to install Ubuntu in parallel with Windows using USB
- How to Install Ubuntu Linux Without CD (Windows)
Part 1 of 4:
Creating a Primary NTFS Partition for Windows
-

Install Gparted if you haven’t already. Gparted is a free partition tool with a graphical user interface that’s pretty easy to use. You can download it from the Software Center or by running sudo apt-get install gparted from the command line.
- If you’ve already created a partition for Windows but it’s not a Primary Partition, you’ll have to create a new one.[1]
-
Open Gparted. You’ll see a list of all drives and partitions.
-
Right-click the partition or drive you want to edit and select Resize/Move. This allows you to create a new partition from an existing one.
-
Enter the new partition size (in MB) into the «Free space following» blank. You should allocate at least 20 GB (20000 MB) for Windows 10. If you plan to install apps and use Windows regularly, you’ll probably want to increase that amount.[2]
-
Select Primary Partition from the «Create as» menu. It’s on the right side of the window.
-
Select ntfs from the «File System» menu. It’s on the right side of the window.
-
Type Windows10 into the «Label» field. This is just so you can easily identify the partition.
-
Click Add. It’s at the bottom-right corner of the window.
-
Click the green check mark button. It’s in the toolbar at the top of Gparted. This creates the partition, which may take a little while. When the partition is ready, click Close at the bottom-right corner of the window.
Part 2 of 4:
Creating a Windows 10 Install Drive in Ubuntu
-
Install UNetbootin from the Software Center. This is a free application that lets you create a bootable USB drive in Ubuntu. To learn more about UNetbootin, see https://unetbootin.github.io.
- You’ll need either a blank USB drive with at least 8 GB of space to create install media. Any data on the USB drive will be erased during this process.[3]
- For help installing software on Ubuntu, see How to Install Software in Ubuntu.
-
Go to https://www.microsoft.com/en-us/software-download/windows10 in a web browser. If you don’t already have a bootable Windows DVD or USB drive, you can create a one from a downloadable ISO.
- You must have a license to install Windows 10. This means you should have already purchased Windows 10 and have a valid product key.
-
Select the latest version of Windows 10 and click Confirm. Additional options will expand at the bottom of the page.
-
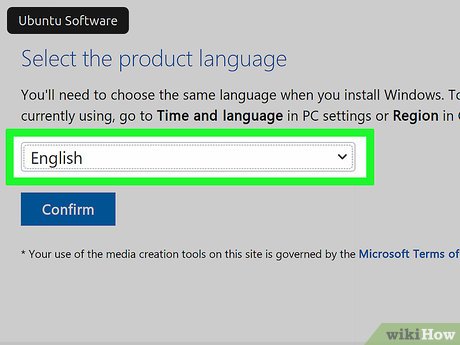
Select a language and click Confirm. You’ll choose the language from the drop-down menu below «Select the product language.»
-
Click 32-bit Download or 64-bit Download. This downloads the ISO to your default download location.
-
Open UNetbootin and insert your USB drive. Opening UNetbootin displays the welcome screen where you can choose your bootable drive parameters.
-
Select the «DiskImage» radio button. It’s toward the bottom-left corner of the window.
-
Select ISO from the «DiskImage» menu. It’s to the right of the radio button.
-
Click the three-dot … button. This opens your file browser.
-
Select the file you just downloaded from Microsoft. It’s the one that ends with .iso.
-
Select USB Drive from the «Type» menu. It’s at the bottom-left corner of the window.
-
Select your USB drive from the «Drive» menu. This is the device label for your USB drive.
- If you can’t select your USB drive, it likely needs to be formatted to the FAT32 file system. You can do this in the file manager by right-clicking the USB drive and selecting Format.[4]
-
Click OK. This creates a bootable Windows 10 USB drive from the downloaded ISO image. Once the drive is ready, you’ll see «Installation Complete.»
-
Click Exit to close UNetbootin.

Part 3 of 4:
Running the Windows Installer
-
Restart your computer into the BIOS/UEFI. The steps to enter the BIOS/UEFI depend on your PC manufacturer and model. You’ll usually have to press a certain key (often F2, F10, F1, or Del) right after the computer starts back up.
- Insert the USB drive into a free USB port if you haven’t already.
-
Set the USB drive to come first in the boot order. You’ll usually do this in a menu called «Boot» or «Boot Order.» The steps to do this vary by PC, but you’ll usually have to select USB Drive and mark it as 1st Boot Device. Check your PC manufacturer’s website for more specific instructions about your BIOS/UEFI.
-
Save your changes and exit the BIOS/UEFI. Most BIOS/UEFI make the «Save» and «Exit» keys very clear somewhere on the screen. Once you exit the BIOS/UEFI, your computer will boot from your USB drive and display the «Windows Setup» window.
-
Click Custom: Install Windows only (advanced). It’s the second option on the window. A list of partitions will appear.
-
Select the Windows10 partition and click Next. This is the partition you just created. Windows will now install on the selected partition.
-
Follow the on-screen instructions to install Windows. Once you finish the setup, you’ll boot to the Windows desktop.
-
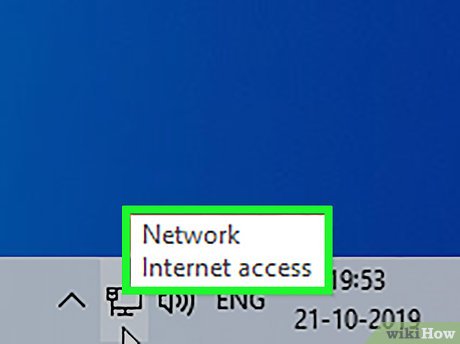
Connect to the internet in Windows. Now that Windows is installed, you’ll need to install a tool that allows you to dual-boot it with your existing Ubuntu installation.
- To learn how to connect to Wi-Fi, see How to Connect to WiFi in Windows 10 or How to Connect to the Internet.

Part 4 of 4:
Setting Up Dual Boot
-
Open the Microsoft Edge web browser. You’ll find it in Start menu, which is at the bottom-left corner of the screen. The final part of the process is setting up your computer to let you boot from either Windows 10 or Ubuntu at start up.
-
Navigate to https://neosmart.net/EasyBCD. EasyBCD is a free tool that lets you set up dual-boot from within Windows.
-
Scroll down and click Register under «Non-commercial.» This brings you to a sign-up page.
-
Enter your name and email address and click Download. This should start the download immediately, but you might have to click Save or Download to confirm.
-
Click the file you just downloaded. It’s the file that starts with EasyBCD. You should see it near the bottom of the browser. If you don’t, press Ctrl+J to open the Downloads list and click it there.
-
Click Yes to allow the app to run.
-
Follow the on-screen instructions to install EasyBCD. Once the app is installed, it will be added to the Start menu.
-
Open EasyBCD. It’s on the Start menu, which you can get to by clicking the Windows button at the bottom-left corner of the screen.
-
Click the Linux/BSD tab. It’s near the top of the app.
-
Select Grub 2 from the «Type» menu. It’s near the top of the tab.
-
Type Ubuntu into the «Name» field. It’s right below the «Type» menu. This is how Ubuntu will appear in the boot menu.
-
Select Automatically locate and load from the «Drive» menu.
-
Click the Add Entry button. It’s right below the «Drive» menu. This adds an option for Ubuntu to the standard Windows boot menu.[5]
-
Remove the USB drive and restart the PC. You can restart the PC by clicking the Start menu, selecting the Power button (it looks like a knob), and choosing Restart. When the PC comes back up, it will boot to a screen that allows you to select either Windows 10 or Ubuntu. Selecting one or the other will boot into that operating system.
Read more
- Ways to install Ubuntu on Windows, run in parallel or run separately
- How to install Hyper Terminal in Ubuntu 20.04
- How to Install Ubuntu in Windows
- Instructions for installing Ubuntu on VMware Workstation — Part 1
- How to install µTorrent (uTorrent) in Ubuntu 20.04
- How to install Ubuntu on a VMware virtual machine
When it comes to dual boot, the general idea is that you have a system preinstalled with Windows and then you install Linux alongside Windows. On the boot, you select whether you want to use Windows or Linux.
How about the opposite situation? What if you have a system that has only Linux installed on it and you want to install Windows alongside Linux in dual boot mode?
In this tutorial, I’ll show you exactly how you can install Windows after Ubuntu Linux in dual boot.
Dual booting Windows on an existing Ubuntu Linux system
I tested this tutorial on an Ubuntu system with UEFI and GPT partitioning scheme. In theory, the same steps should be applicable to most Linux distributions, if not all.
Requirements
Here’s all the stuff you need to carry out the procedure safely and easily:
- A bootable Windows 10 USB stick (USB key, Pen Drive) of at least 8 GB in size
- A live Ubuntu USB stick (USB key, Pen Drive) of at least 4 GB in size
- A computer with UEFI boot and only Ubuntu Linux installed on it
- Internet connection is needed for creating the bootable Windows and live Linux disk
- A way to back up your important data on an external disk (optional yet recommended)
You may also manage this tutorial with just one USB key. You create the live Linux USB first, make the partition for Windows using this live Linux USB, and then use the same USB key as a bootable Windows USB.
I highly recommend that you read the entire tutorial first before you start following the steps.
Step 0: Make a backup of important data
Here’s the thing. You are going to play with disk partitions and boot settings. If you mess it up, you’ll lose the data.
Having a back up on an external disk will give you a safety net. In the worst case, if things go wrong, you can install either of Windows or Linux and copy the data back on your system.
How do you make a backup? The simplest method is to have an external USB or SSD disk and copy files from Documents, Music, Pictures and other folders where you have kept your files.
Step 1: Create a bootable Windows USB
If you have access to a Windows system, you can follow the instructions on the Microsoft website to create a bootable Windows media.
If you only have a Linux system, creating a bootable Windows USB could be tricky. Thankfully, a handy open source tool called Ventoy helps a lot in this case.
I have written in detailed about creating bootable Windows 10 USB on Linux. Please refer to the guide for detailed instructions. I’ll mention the crucial parts here.
Plug in your USB with at least 8 GB of size and format it. Now, download the ISO of Microsoft Windows.
Next, download the latest Ventoy release. Extract the folder and run the VentoyWeb.sh script with sudo. It will give you the URL when you run it. Copy this URL and paste it in a browser.
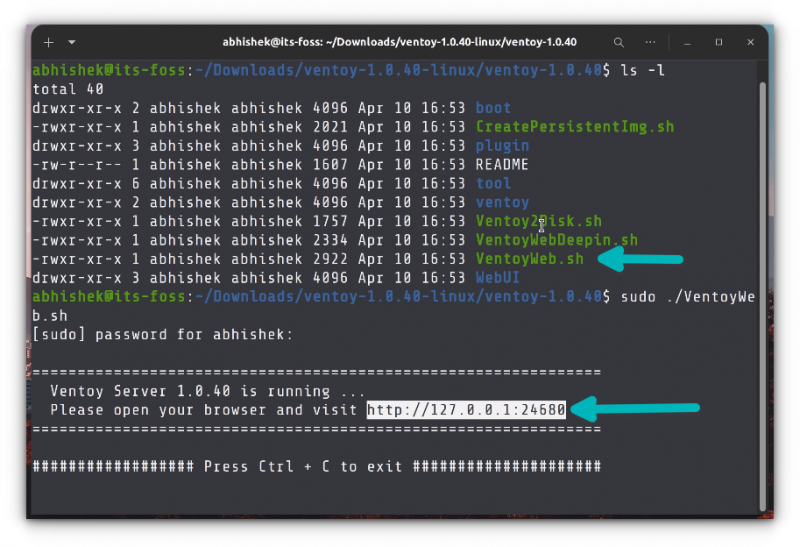
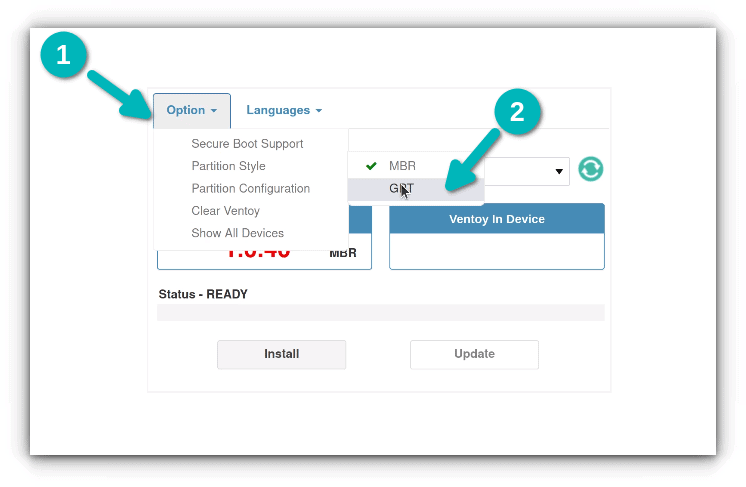
It will open a web page with Ventoy running in it. Go for UEFI installation and hit the install button.
Once installed, you’ll see two partitions on the USB disk: VTOYEFI and Ventoy. You need to copy the download Windows ISO image to Ventoy partition.
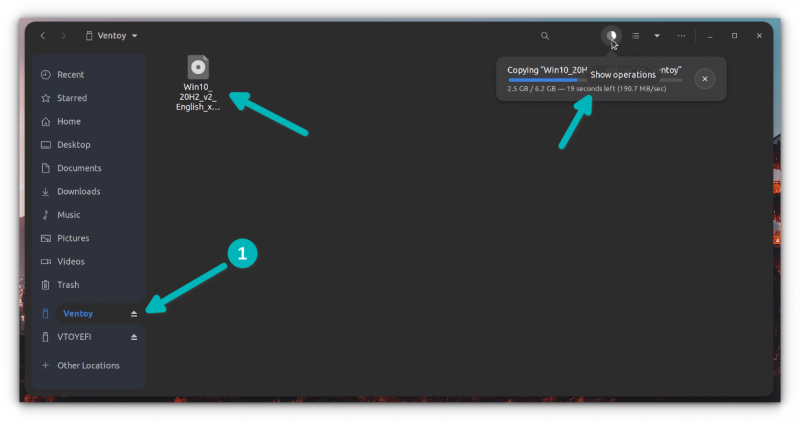
Once the copying finishes, DO NOT RUSH to plug out the USB just yet. Click on the unmount option from the file manager.
Okay. So now that you have a bootable Windows USB, it will be a good idea to test it out and see if works.
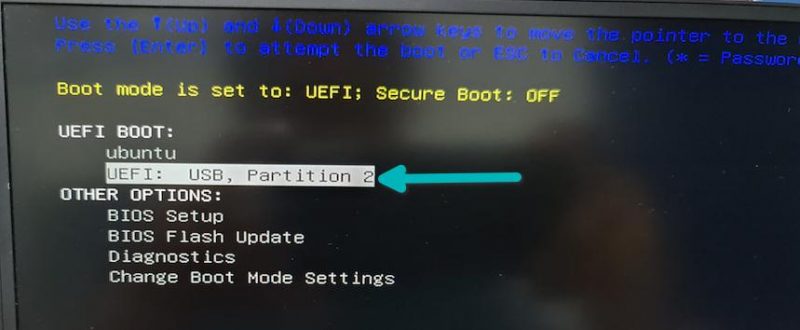
How do you do that? Plug in the Windows USB, reboot your system. When the system is turning on again and showing the logo of your system’s manufacturer, press F2/F10/F12 keys to access the BIOS settings.
When you are in the BIOS, choose to boot from the USB. In some cases, you may have to disable secure boot from the BIOS settings.
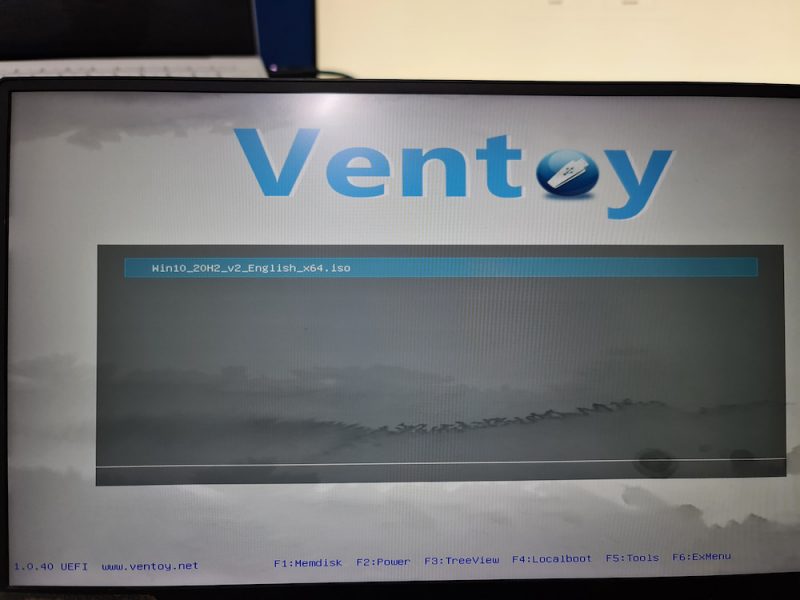
If the bootable Windows USB creation was a success, you should see Ventoy screen and select to boot into Win10.
After this, you’ll see some screen about Windows installation. Don’t go with the installation part yet. Close it and power down your system and then boot into Linux again.
This check was necessary because you need to have a working bootable Windows USB. Without that, there will be no point in following the rest of the tutorial.
Remove the bootable Windows USB at this stage.
Step 2: Create a live Ubuntu Linux USB
You may wonder why you need a live Ubuntu USB here when you already have Linux installed properly.
The reason is that you need to modify the existing partition and make some free space where you’ll be installing Windows. But you cannot modify an already mounted partition in Linux. When you are using Linux, your disk is mounted. You won’t be able to modify it and create a new partition in it.
This is why you need a live Linux USB. You boot from the live USB and make the necessary partition on the disk from the live session.
Now that you know the reason, let’s go on with creating live Ubuntu USB. First, download the ISO image of Ubuntu from its website. Any version of Ubuntu will work.
Now, plug in the USB with at least 4 GB in size.
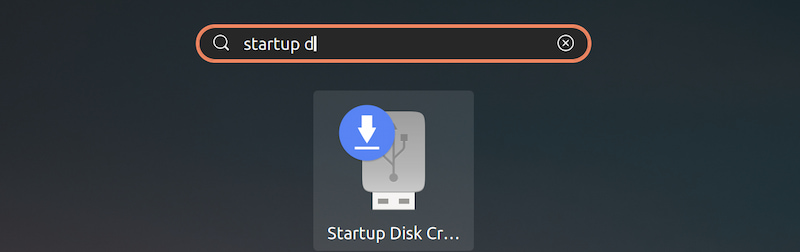
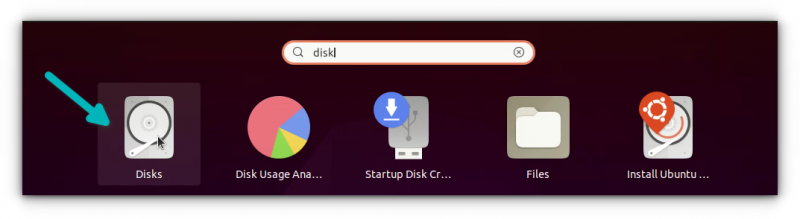
On Ubuntu, you can find the Startup Disk Creator tool. You may also use Etcher on Linux. The choice is yours. Here, I’ll use Startup Disk Creator.
The process is really simple. Your plugged in USB should be recognized. It should also automatically find the Ubuntu ISO. If not, you can always browse to it. With that set, just hit the “Make Startup Disk” button.

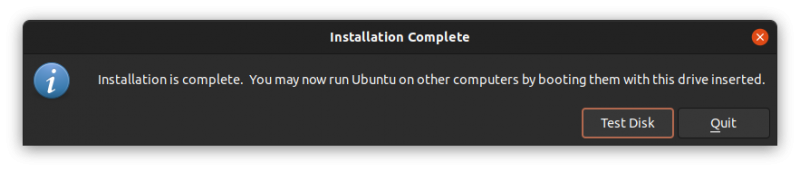
It should take a few minutes to create the live Ubuntu USB. You can hit the Quit button below.
Step 3: Boot from live USB and make free space for Windows
Alright. Now you boot from the live Linux USB.
Restart the system. When it is powering on and displaying the manufacturer’s logo, press F2/F10/F12 keys to access the BIOS settings. In here, go to the boot order and boot from the Linux USB.
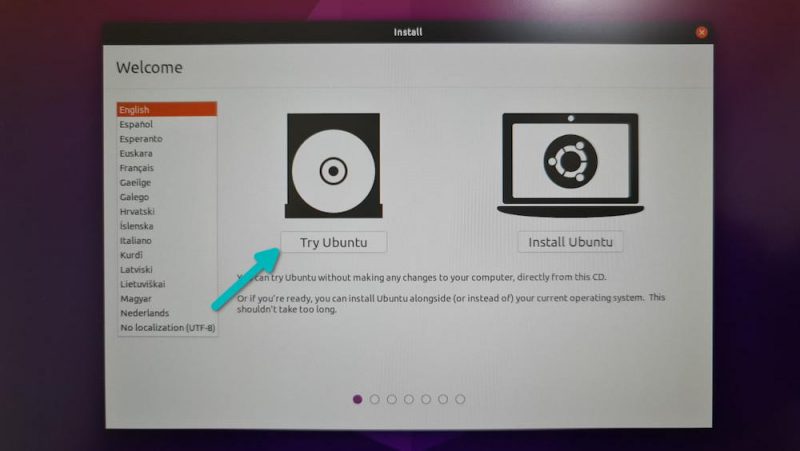
When you see this screen, go for Try Ubuntu.
Now that you are in the live session, open the Disk application. It is already installed.
In the Disks application, carefully select the main hard disk/SSD of your computer. This is where you have Linux installed. As you can see in the picture below, I have ESP partition (for UEFI boot settings) and a single Linux partition. This is the partition that needs to be resized to make free space for Windows.
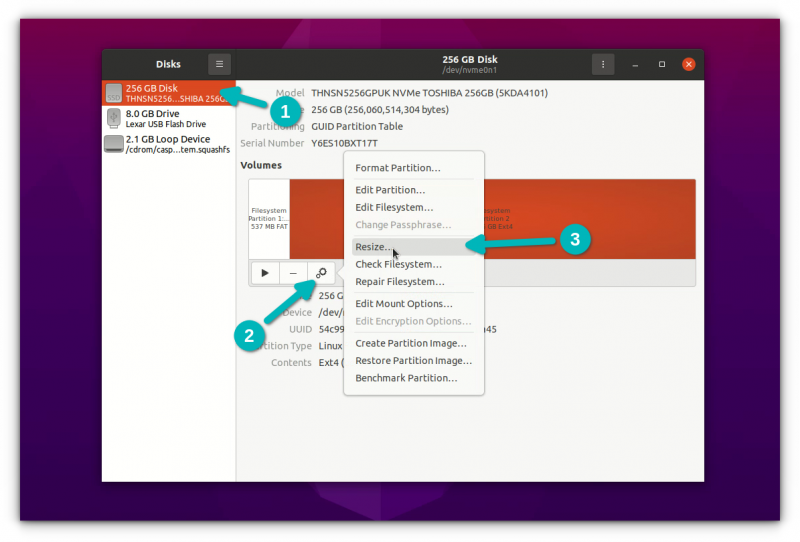
If you have a root, swap and home partition setup, you should resize the home partition.
In the resizing, it will show a minimal size. You cannot shrink the disk below this point. You’ll be leaving some extra space for Linux usage, of course.
Note that the “partition size” is for Linux partition. In the picture below, I reduced the Linux partition to 120 GB from 256 GB. This gives a 136 GB of free space for Windows installation.
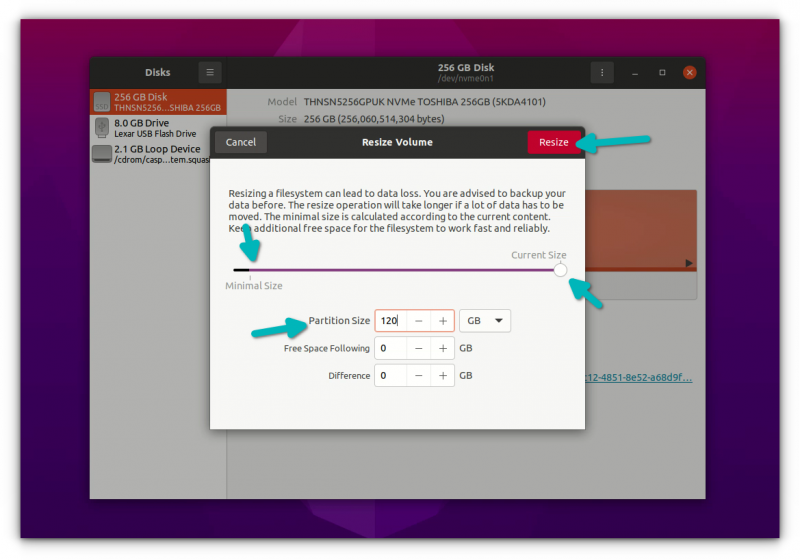
When you hit the resize button, it could take up to a couple of minutes to complete the resizing process.
As you can see in the picture below, now I have three partitions on my system. One is 500 MB of ESP partition (for UEFI boot), 120 GB of Ext4 partition for Linux and 136 GB of free space.
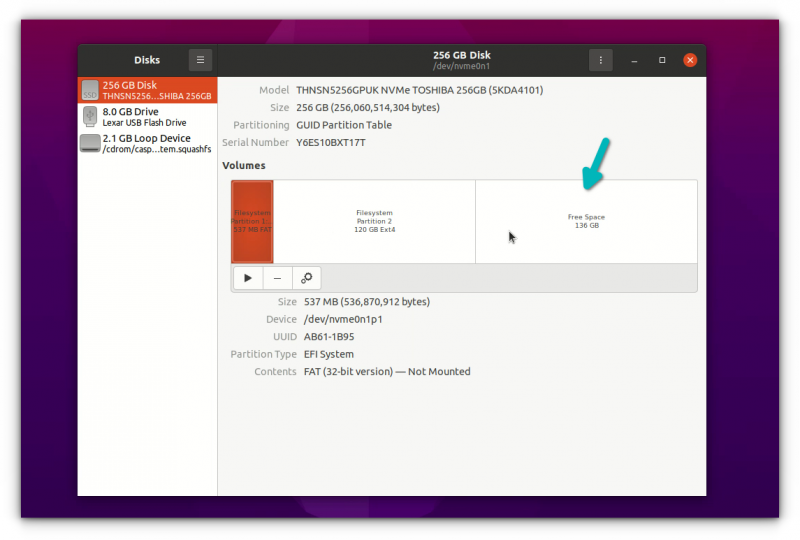
You now have dedicated free space where you are going to put Windows. Shut down your system now.
Step 4: Boot from Windows USB and start installing Windows
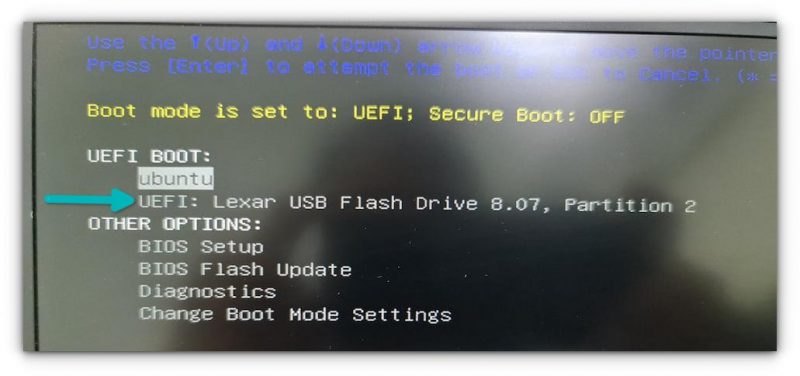
Plug in your bootable Windows UBS. Once again, restart your system, access the BIOS settings and boot from the USB. By now, you know how to do this. You already did this in step 1 while checking the bootable Windows USB.
You should see the Ventoy screen if you created the bootable Windows USB with it. Hit enter.
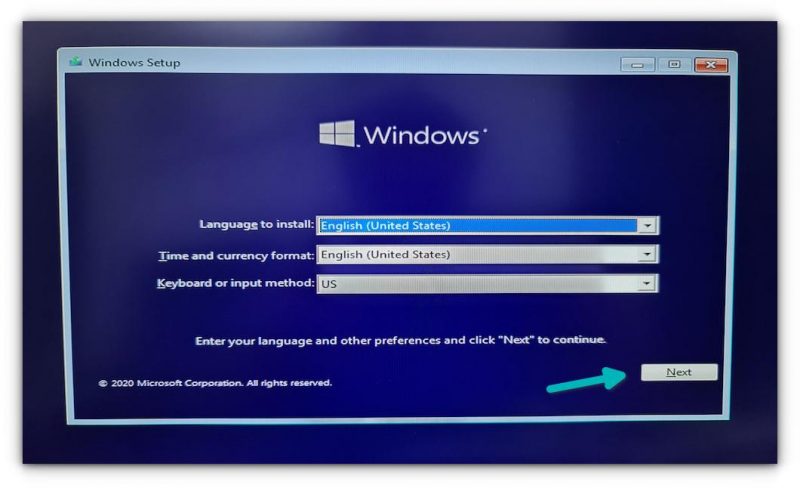
You should see the Windows logo. After a few seconds, you’ll see the option to choose the language, time and keyboard.
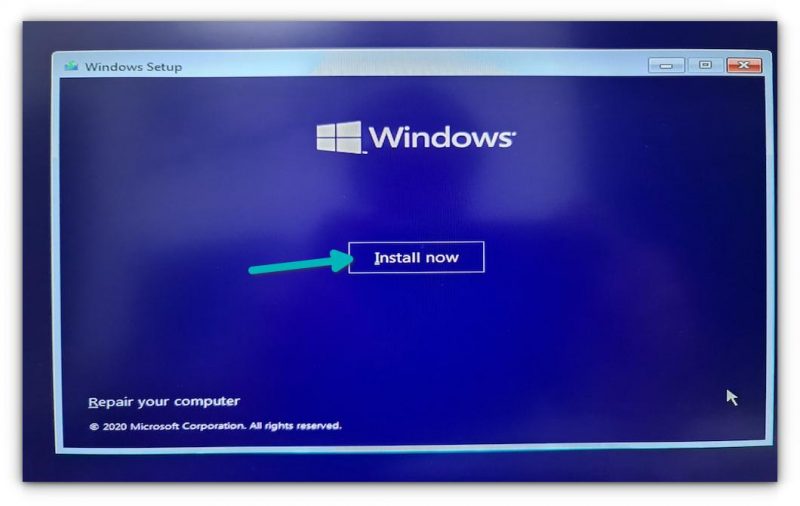
The next screen will give you the option to start the installation. Hit “Install Now”.
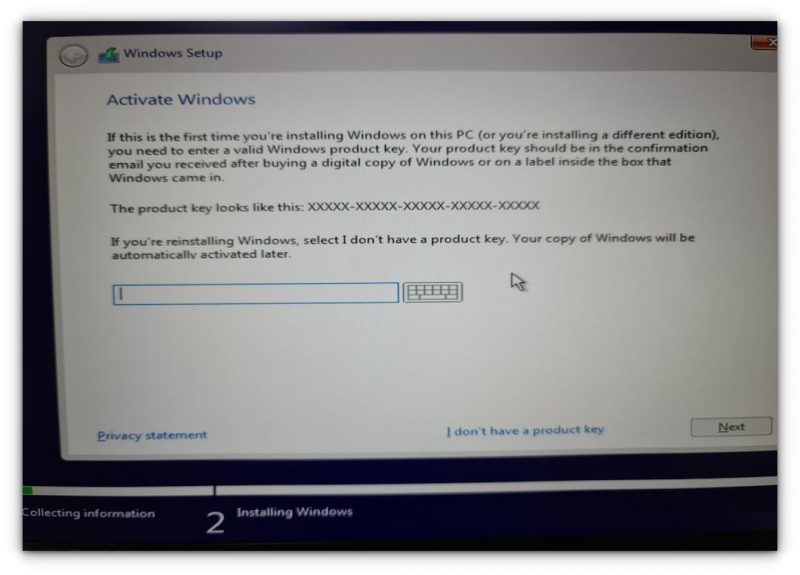
In the next few screens, it will ask for the Windows license key. If you don’t have it, skip it. You can activate Windows later as well. You’ll be asked to choose a Windows version and accept the end user license.
In the next screen, go with the Custom install option.
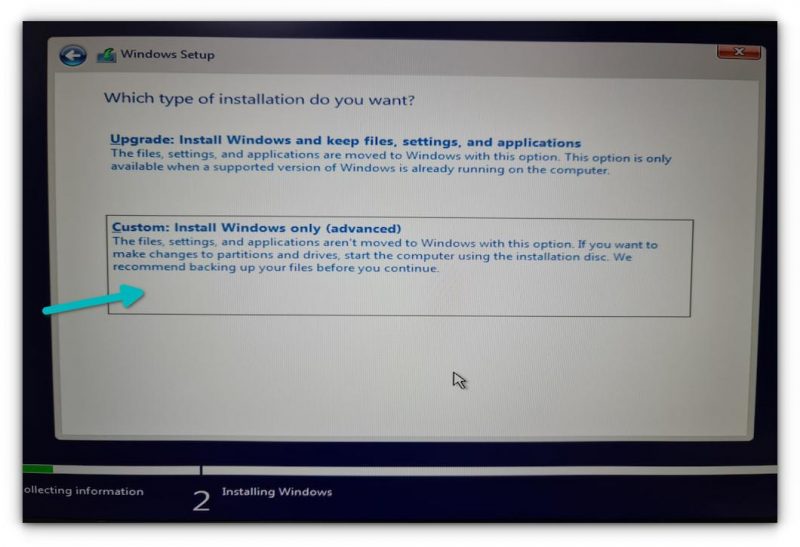
Now you’ll come to the partition screen. Select the free space (unallocated space) you had created in the step 3 and hit the Next button.
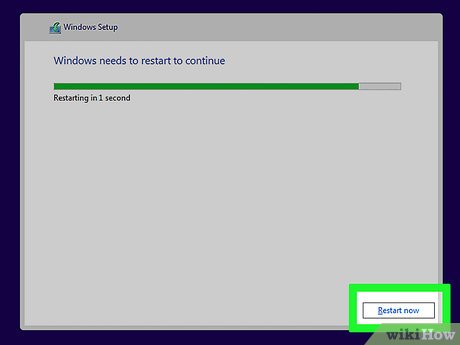
It will take a couple of minutes in copying the files and install Windows.
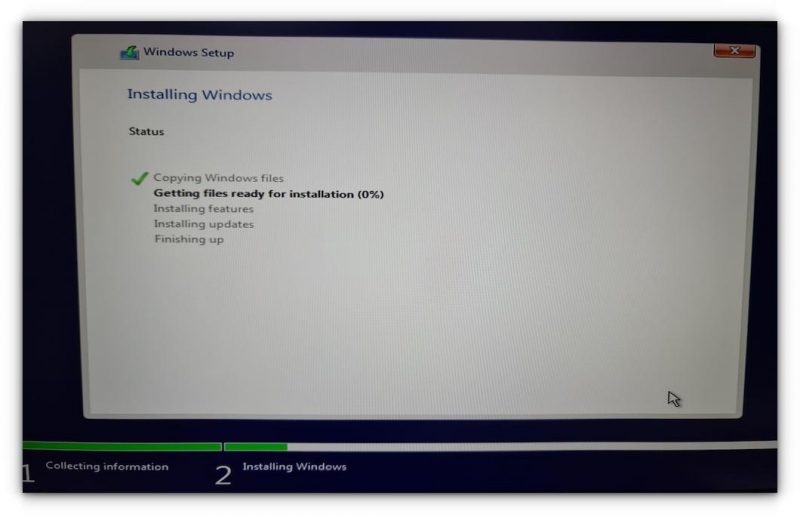
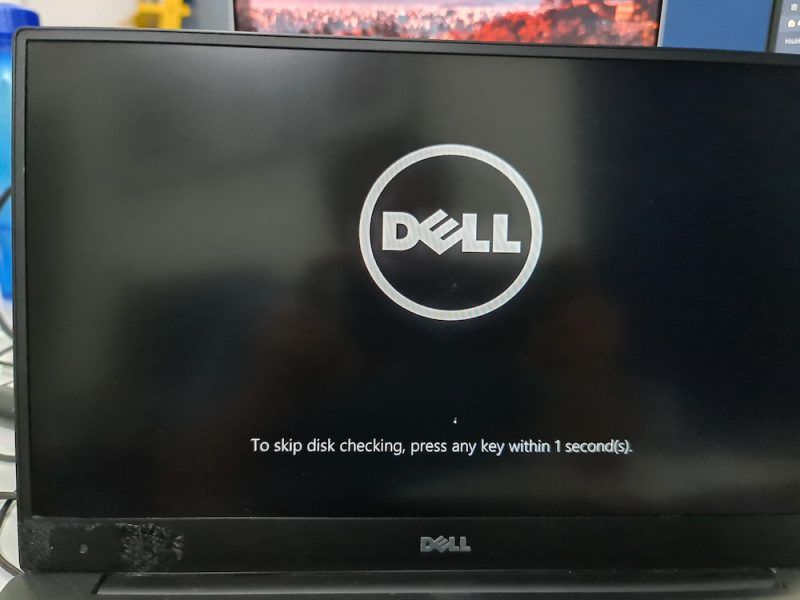
After that, your system will restart automatically and this time it will boot into Windows directly.
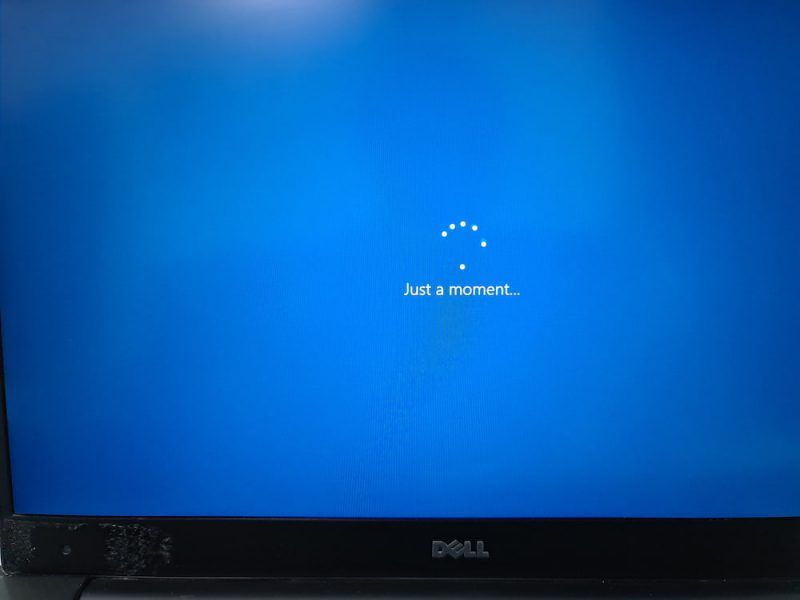
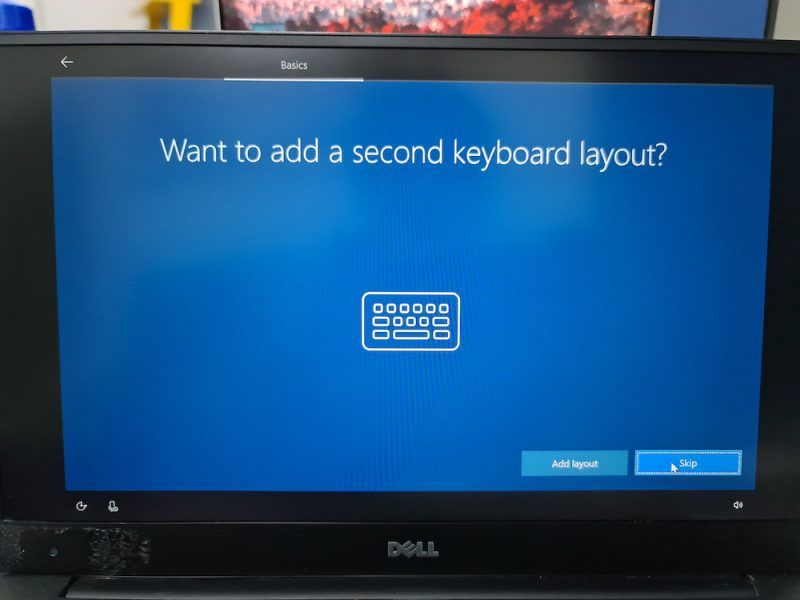
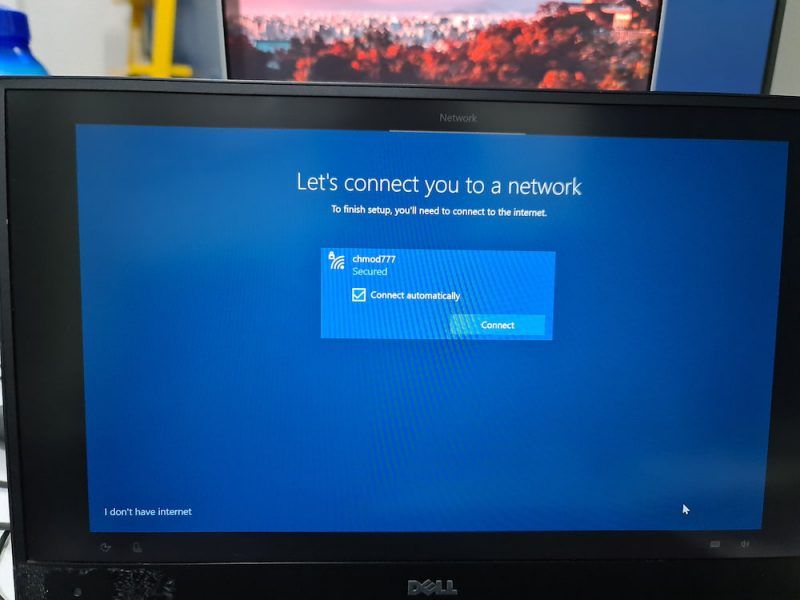
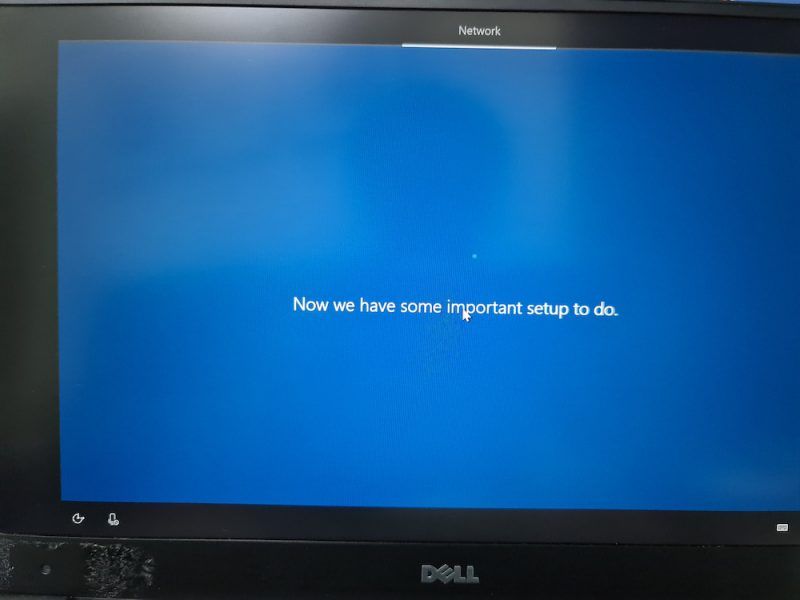
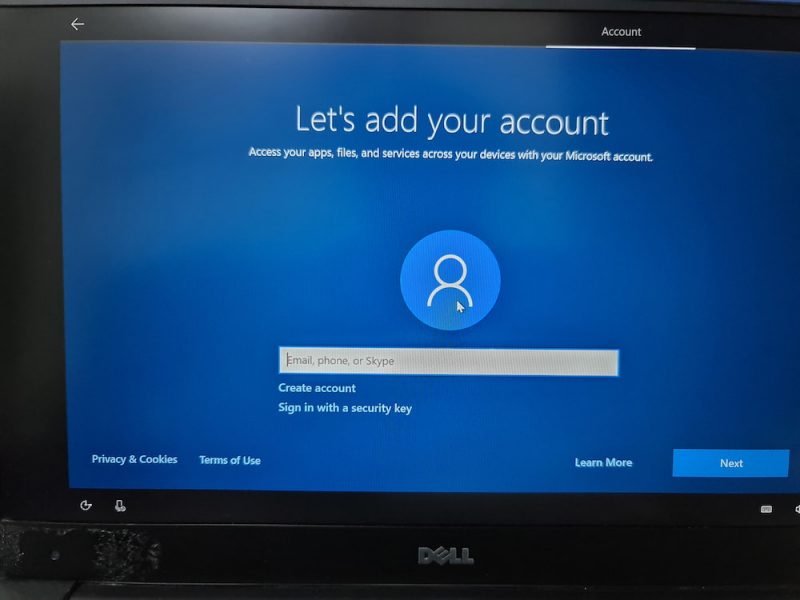
Windows installation is not over entirely. On the next boot, you’ll be asked to configure Windows for your usage and this is super annoying but super easy to follow.
I am not going in detail for this part because I know you can handle the configuration part, which is waiting and hitting next button most of the time. I am sharing a few screenshots just for the reference, though.


Once you have installed Windows successfully, chances are that you’ll be booting into Windows by default. You need to get the Grub dual boot screen back.
Step 5: Get the Grub bootloader back
Once again, restart your system and when it is powering on, go to BIOS settings. From the boot sequence or boot order, move Ubuntu up the order. You may have to use arrow keys or F5 or F6 and the screen may look different for different system.
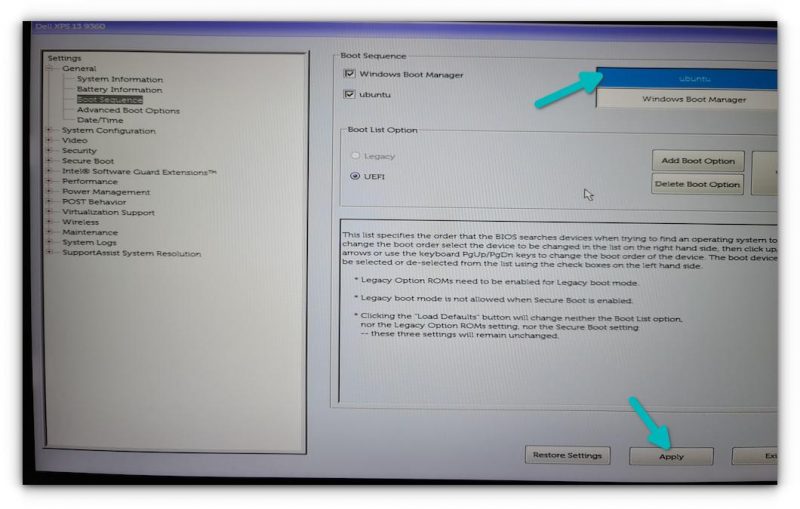
Save and exit and this time you should be booting into Ubuntu. The battle is not over yet. The grub bootloader might not be aware of the presence of Windows. This is why it is a good idea to update grub in Ubuntu.
All you have to do is to open a terminal and use the following command:
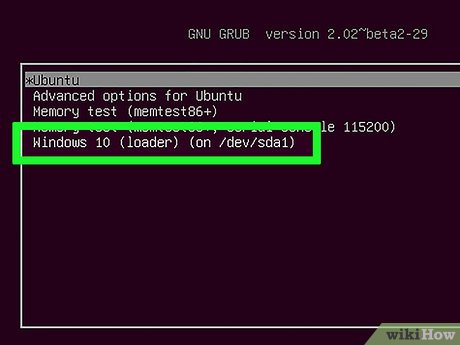
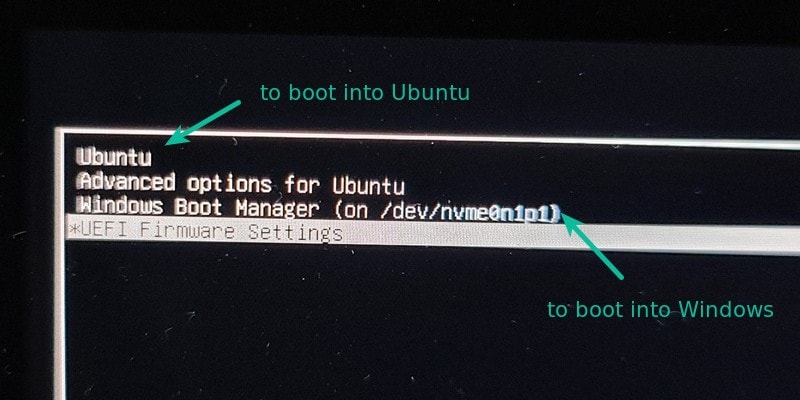
sudo update-grubRestart your system once again. You should be greeted with the familiar grub boot screen that gives you the option to choose between booting into Ubuntu and Windows.
Don’t see Windows Boot Manager in Grub?
Install os-prober (usually installed already) and then edit the /etc/default/grub file to add GRUB_DISABLE_OS_PROBER=false to this file. Save this file, update grub and Grub should see Windows option in the grub screen now.
Did you succeed?
And that brings us to the end of this long journey. It takes some time and effort, but if you want to install Windows after installing Ubuntu, this can surely be done.
If you still have questions, please let me know in the comment section and I’ll try to answer you.

In this comprehensive guide, we will walk you through the process of installing Windows 7 from Ubuntu using a USB drive. This process can be quite useful if you’re looking to dual-boot your system or switch from Ubuntu to Windows 7.
- Prerequisites
- Formatting the USB Drive
- Creating a Bootable USB Drive
- Using Unetbootin
- Using WinUSB
- Using the winusb package
- Using Disk Image Writer
- Booting from the USB Drive
- Conclusion
Prerequisites
Before we begin, ensure that you have the following:
- A USB drive with at least 4GB of storage.
- A Windows 7 ISO file.
- An Ubuntu system.
Formatting the USB Drive
First, we need to format the USB drive to NTFS. We will use a tool called gParted for this purpose. If it’s not already installed on your system, you can install it using the following command:
sudo apt-get install gparted ntfs-3gThe sudo command allows you to execute the command as a superuser. apt-get install is the command used to install software, and gparted ntfs-3g are the packages we are installing.
Once installed, open gParted and select your USB drive. Be careful to select the correct drive. Right-click on it and choose ‘Format to’ > ‘ntfs’. Apply the changes.
Creating a Bootable USB Drive
Next, we will create a bootable USB drive using the Windows 7 ISO file. There are several ways to do this, and we will discuss a few of them.
Using Unetbootin
Unetbootin is a tool that allows you to create bootable USB drives. Download Unetbootin version 494 from here.
Open Unetbootin and select ‘DiskImage’. Browse for your Windows 7 ISO-image. Check ‘Show all drives’ and select your USB drive. Click ‘OK’ to start the process.
Using WinUSB
WinUSB is another tool that you can use. Packages are available from the WinUSB website. However, be aware that it may remove your grub, so proceed with caution.
Using the winusb package
You can also use the winusb package. Add the PPA repository, update, and install winusb using the following commands:
sudo add-apt-repository ppa:colingille/freshlight
sudo apt-get update
sudo apt-get install winusb
Using Disk Image Writer
If you don’t want to download any additional software, you can make a bootable USB on a Linux PC by right-clicking on the ISO file and selecting ‘Open with’ > ‘Disk Image Writer’. Choose your USB drive and click ‘Start Restoring’.
Booting from the USB Drive
Finally, plug the USB drive into the computer where you want to install Windows 7 and boot from it. The Windows 7 installer should start. Follow the instructions to install Windows 7.
Conclusion
Installing Windows 7 from Ubuntu on a USB drive can seem complicated, but with the right tools and steps, it can be done relatively easily. Whether you’re looking to dual-boot your system or switch from Ubuntu to Windows 7, this guide should help you achieve your goal. Remember to always back up your data before making any significant changes to your system.
No, a USB drive with at least 4GB of storage is required to install Windows 7.
Yes, as long as you have a valid Windows 7 ISO file, you can use it to create a bootable USB drive.
Yes, there are other tools available for formatting USB drives, but gParted is recommended for its ease of use and compatibility with Ubuntu.
No, Unetbootin is a standalone tool and does not require any additional software to create a bootable USB drive.
There is a possibility that using WinUSB may remove your grub, so it is recommended to proceed with caution and backup your data before using it.
Yes, you can install Windows 7 on a computer without an operating system by booting from the USB drive and following the installation instructions.
No, this guide is specifically for installing Windows 7 from Ubuntu on a USB drive. The process may differ for Mac systems.
Yes, this method allows you to dual-boot your system with Ubuntu and Windows 7. You can choose which operating system to boot into during startup.
Yes, this method allows you to switch from Ubuntu to Windows 7 permanently by installing Windows 7 and replacing Ubuntu as the primary operating system.
Yes, it is always recommended to backup your data before making any significant changes to your system, including installing a new operating system.
I’m not looking for an emulator. I would like to install Windows from within Ubuntu so that I can boot into Windows when I restart my computer. I would install Windows normally but my USB ports are shot and I don’t have any optical drives. I’d appreciate any help.
![]()
RolandiXor
51.1k31 gold badges162 silver badges256 bronze badges
asked Jan 27, 2011 at 5:34
![]()
If you install Windows, after installing Linux, the windows installation will wipe out your MBR (Master boot record). I think which ever way of install windows (after installing linux) by using a CD, USB, or PXE boot, you wont be able to restore your MBR… Which mean you will not get a ubuntu boot menu (grub or grub2 depends on your version of ubuntu), to select the OS you wish to boot into.
Now you will have to use ubuntu live cd, or some other live linux cd to boot into linux and restore grub.
But since you donot have USB or CD support. I think the only way is, if you motherboard supports PXE boot. So back to your question, to install windows without USB or CD room, follow link A, link B, link C. Then boot into linux using PXE boot again, restore grub. All the best, it looks too much of tricky work to me.
answered Jan 27, 2011 at 7:50
![]()
Vivek SharmaVivek Sharma
1,1602 gold badges12 silver badges25 bronze badges
1
The crazy vmware idea should be doable using raw hard disk access. I did the opposite thing (installing Ubuntu on HDD partition while running Windows using Virtualbox). It was crazy, highly dangerous, yet worked. Even to the point of installing grub on the linux
I will try this out, and let you know of the results. But for starters, this is how it should work :
- Run VBox, mount a RAW Partition using vmdk files
- Install Windows inside the VBox.
- Run
grub-update, andgrub-installto undo anything that Windows might have done to your MBR
I will be using Windows xp for my tests, so it might vary.
Also another option would be find a way to insert an ISO boot menu into GRUB. I’ve been looking around for this but it seems that BURG has that option. So, you can boot into the Windows ISO file, and install Windows from there. (Again this is untested, but it is a possibility)
![]()
answered Jun 8, 2011 at 12:16
![]()
NemoNemo
9,3328 gold badges47 silver badges67 bronze badges
Hm. To begin with, you aren’t getting anywhere without a windows iso. Hope you backed up that windows cd.
Here’s a long shot possibility. Use a virtualization method that claims to be able to go from vm to physical. I think vmware offers a paid version of their software that will do this. The rest is obvious. Install windows, copy to real partition using vmware.
What will not work is using any ole vm software (like VirtualBox) and just copying the files over. For starters, I think ntldr will be broken. Secondly, a lot of the drivers will be specific to the vm, and will break once exposed to your hardware.
answered Jan 27, 2011 at 7:50
![]()
djeikybdjeikyb
29.7k9 gold badges55 silver badges85 bronze badges
I’m afraid you can’t do that. While there is Wubi for the opposite situation, there’s no way to boot the Windows installer other than from an optical drive or a USB disk.
(edited out, see comment)
You could connect an external (optical) drive via USB (try to use an extension card to provide you with an additional USB port).
answered Jan 27, 2011 at 6:56
![]()
chrischris
1,92914 silver badges16 bronze badges
2
You must log in to answer this question.
Not the answer you’re looking for? Browse other questions tagged
.
Not the answer you’re looking for? Browse other questions tagged
.