Vim is a powerful code editor. So powerful that both Linux and Mac have it installed by default.
But if you are using Windows as your operating system, you will need to install Vim separately.
Fortunately, Microsoft makes it very easy to install Vim and get it running on your PC.
How to Download Vim
You can download the latest version of the Vim Text Editor straight from Vim themselves.
They have built a special self-executing installer that walks you through the process of installing Vim in the right location on your hard drive.
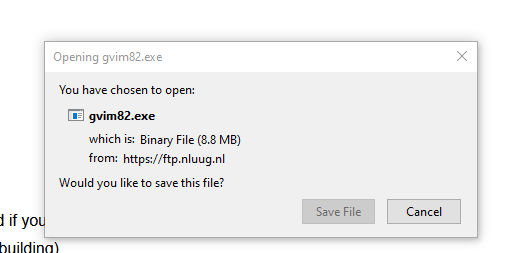
Note that for Windows you will technically download something called gVim, which is a version of Vim that includes a basic graphic user interface (GUI). You can install it by downloading this executable installer.
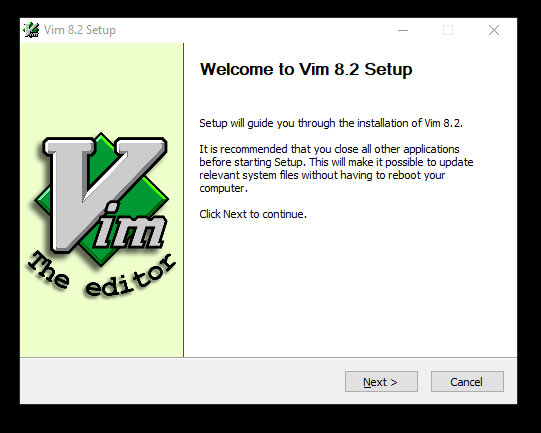
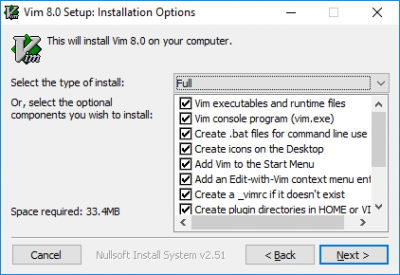
Once you’ve downloaded the file, you just need to run it, and you’ll see a nice installation wizard that looks like this:
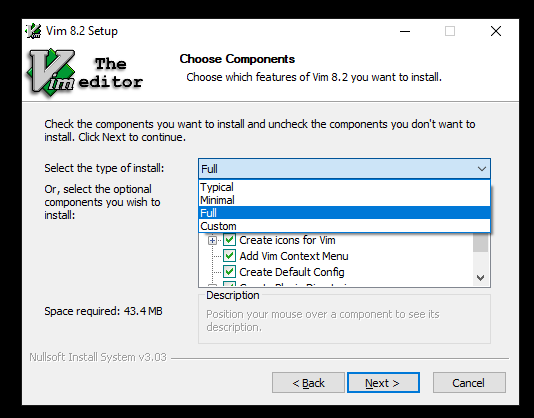
They have a recommended «typical» installation. but if you have a reasonably large hard drive, there’s no harm in going ahead with installing everything by choosing the «full» option:
How to Run Vim in PowerShell
Then, once you’ve installed Vim, you should be able to launch it from your Windows command prompt.
Note that as of 2020, PowerShell has all of the same functionality as CMD, plus a whole lot more. I recommend using PowerShell for everything.
You can open PowerShell from the Windows menu bar by typing «powershell» in the search field on the start bar.
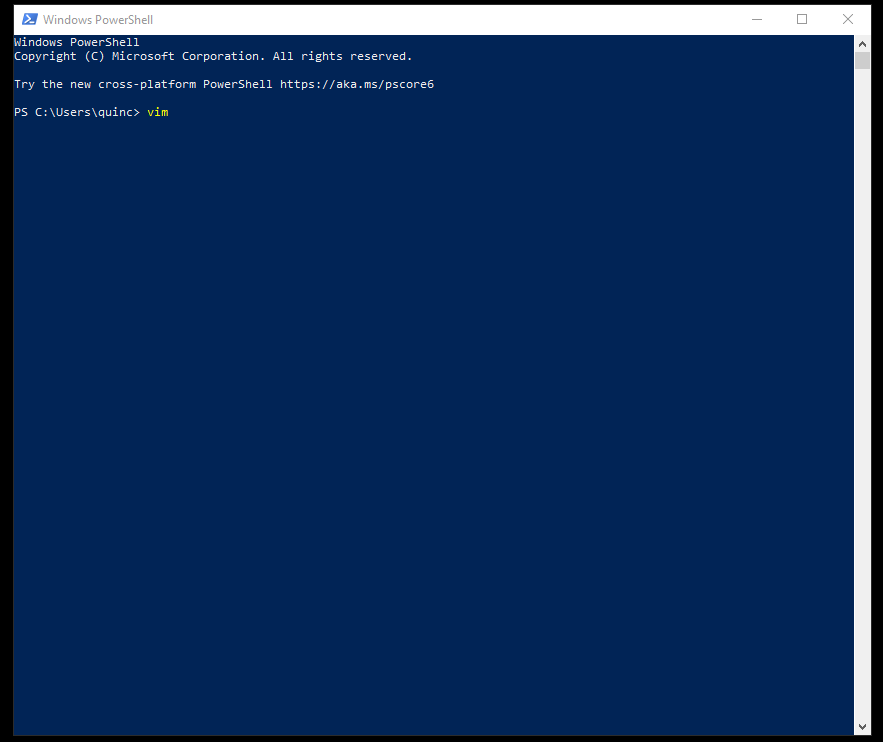
Windows will open PowerShell, and you’ll get a command prompt that looks something like this:
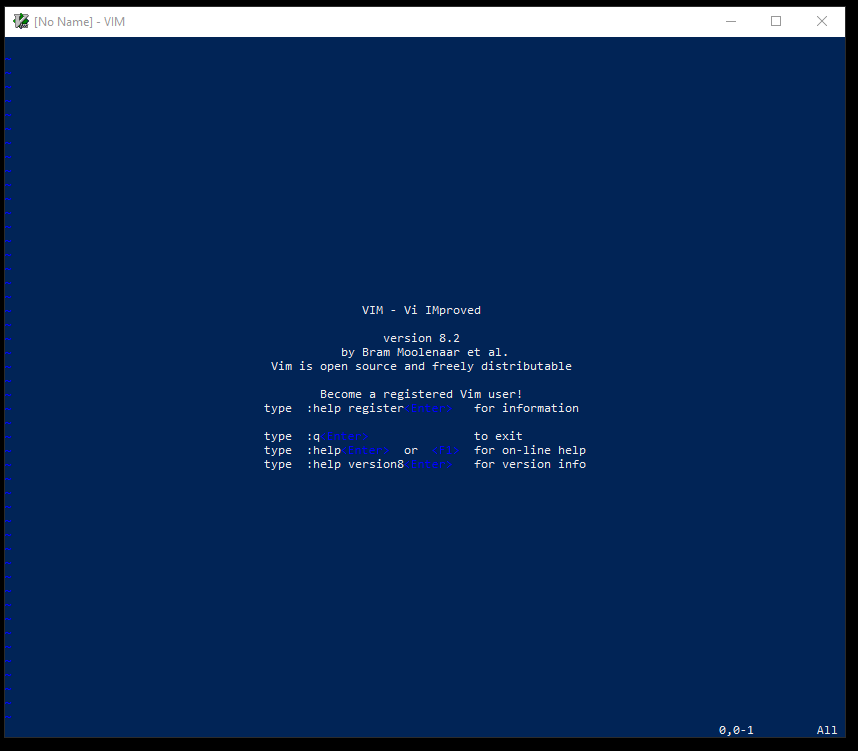
Once you’re in PowerShell, here’s how to run Vim itself. All you have to do is type «vim» and press enter. This will open up Vim. Once Vim is open, this is what you should see:
Congratulations – you now have Vim installed.
How to run Vim inside VS Code
If you are already using VS Code, and want a lot of the speed of Vim without losing the functionality of VS Code, I have good news. It is possible to run a Vim-like experience right within VS Code.
Here is a Vim plugin for VS Code that will help you do this. At the time of me writing this, this plugin has been installed nearly 2 million times.
How to Learn How to Use Vim Properly
Vim is a powerful code editor, and it will take you a lot of practice to get comfortable with it.
Here are a few Vim tutorials that will really help you quickly grasp the basics and get your fingers flying in no time.
For starters, one way Vim is different from other code editors is that Vim has «modes». Here are all of Vim’s modes explained, with examples.
Vim can be intimidating. There is so much to learn. But this guide will show you how not to be afraid of Vim anymore.
If you’re already using VS Code and want to switch completely to Vim, this article will explain how you can do so.
And here are 7 Vim Tips That Changed #100DaysOfCode founder Alex Kallaway’s life. In this article, he not only explain these, but shows demos of these tips in action.
Vim: Learn it, live it, love it.
In the 30 years since Bram Moolenaar first created Vim, its influence has spread far and wide. And even today, the Vim project is actively maintained and constantly improving.
I’ve met so many developers over the years who swear by Vim.
I hope this guide has helped you get running Vim on your Windows PC. And I hope these other tutorials I’ve shared with you here will help you go from zero-to-sixty within the coming months.
The key is to keep practicing and not get discouraged by how many Vim shortcuts there are to remember. Eventually, all of these will become muscle memory, and you’ll be flying from one file to another, banging out code like a terminator.
There is no feeling quite as cool as being able to drop into a codebase and immediately start making changes without ever even reaching for a mouse or trackpad. That is the power that Vim promises, and delivers in spades.
Learn to code for free. freeCodeCamp’s open source curriculum has helped more than 40,000 people get jobs as developers. Get started
Step by step guide to Install and setup vim editor on Window.
This tutorial explains how to install Vim Editor on Windows, Linux, and macOS
How to Install and setup VIM editor on Windows
Following are the steps required to install on Windows.
- Go to vim.org
- Click on the Download link on the left side for navigation
- Download the stable version or old version for the link
PC: MS-DOS and MS-Windows - It downloads the
gvim82.exefile to the local system - Double click on this file and follows the installation instructions
- Select language
- privacy policy
- Choose components
Click on Next to finish the installation
How to run and open vim editor from PowerShell
there are several ways to open vi editors in windows.
- Powershell
- Open windows run by Windows +R command
- type PowerShell
- It opens the PowerShell window
- Windows Terminal
- Open the command prompt and type vim editor
- or you can open the file with
vim filename.
Fixing vim is not recognized as an internal or external command
Once you installed vim on windows, It will not run vim from the command line by default and gives the following error.
vim is not recognized as an internal or external command, operable program, or batch file:
The reason vim is not a recognized command to execute and it does not found in the environment path
So, you have to set environment variables to vim location.
- Go to Control Panel > System — It opens the System properties window
- Edit System environment variables
- VIM is installed on
c:\Program Files (x86)\vimin my windows - Edit PATH environment variable, check vim path is added, if not add this to a PATH environment variable and save it.
Now, the vim command works in terminal and PowerShell windows.
Vim is a versatile editor that is highly customizable. For this reason, it has won the hearts of those who prefer high levels of customization and control in their text editors. With Vim, you can use key mappings to execute sophisticated commands. Vim also offers a Recording feature that makes it possible to automate keystroke sequences to run functions. Like many text editors, Vim gives you the advantage of adding plugins that extend the functionality by adding additional features.
Vim was originally created for Unix-based systems, but as time passed, this text editor found its way to the windows and Mac platforms. So, in this article, you will learn how to install the vim editor on the Windows Operating System.
Let us get started.
Downloading the Vim Editor.
To install the Vim editor, you need the executable file found on the official Vim website. https://www.vim.org/ .
Head over to the site and click on the Download button on the left side of the screen as shown below.
This should take you to the download section where you will find the different Operating systems.
We are interested on the Windows version.
Click on the standard self-installing executable to download the .exe file.
Installing the Vim Editor.
Once the file is saved on your computer, open it to start the installation wizard.
-
Choose the language you wish for the installer and click Okay.
-
On the next page, you will notice that the executable will install Vim version 9. The version should vary depending on the time of download. Click Next to proceed.
- The next step is to accept the terms of License Agreement. Mark the check box and click next to proceed.
-
The next screen prompts you for the features you wish to install. This is step depends on your needs.
- Typical is the default type of install. You can add extra features by clicking on the features you need and this changes the type of install to custom.
- Minimal type of install removes all the extra features while the Full type will install all the additional features.
-
The next screen prompts for the enhancement settings and keyboard/mouse remapping.
-
Leave the Compatibility and enhancement section to default which enables all the vim enhancements.
This screen also enables you to add
key mappingsfor the keyboard and the mouse as you wish. -
To remap the keys, Change the mapping section from
Do not remap keys (Default)toRemap a few keys
-
- Choose the destination folder to install the vim editor and click on the install button.
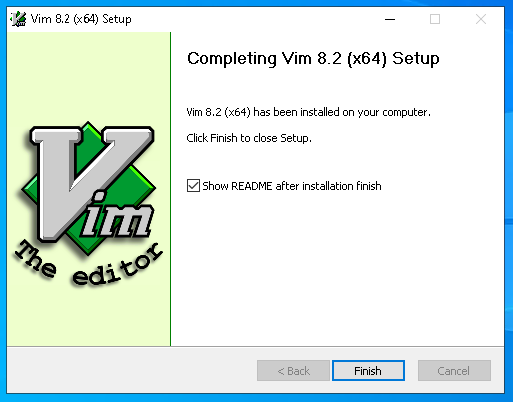
Once the installation is done, Click finish to exit the installation wizard.
Adding Vim Installation path to the system Variables.
Open the vim installation folder and copy the path. In my case, it is installed on this path.
C:\Program Files (x86)\Vim\vim90
Open the start menu and type System Variables
Click on Environment Variables. This should take you to the next window where you can edit the environment variables
Under system variables, choose Path and click on edit to add the vim installation path you copied.
On the next window, click on new and paste the path then click Okay.
Once you are done with this step, you should be able to use Vim like you do with Vi on Unix systems.
How to Use the Vim editor in Windows.
Now that you have Vim installed on your computer, the next step is to use it.
Open Vim by opening the command prompt or powershell and using the vim command.
Vim
If the installation was successful, you should see a similar window as the one below.
Creating files with Vim
Open the cmd and navigate to where you want to create the text file using the cd command.
The syntax to creating a file using Vim is as follows:
vim filname.txt
Example:
vim geekbits.txt
This is how it should look on the commandline.
The command above should open the vim editor where you can write you text and save it.
Saving files with Vim
To save the file, you should press the ESC key to switch to the command mode.
Type :wq then press Enter to save the file and quit Vim.
Learn more about how to use the Vim Editor in this Article: How to use the Vim Editor.
Conclusion
Due to the versatility of the Vim editor, editing text files has become very easy and efficient. The vim editor is very powerful because it has an extensive plugin system and intergrates with many tools and not forgetting the built-in commands.
This article has shown you how to install the Vim editor on the Windows operating system. If you found the article helpful, Share it and subscribe to geekbits to get notified via email everytime we publish interesting articles.
Thanks for reading 
If you enjoy our content, please consider buying us a coffee to support our work:

Edit text file in CMD with Vim
Edit text file in Command Prompt with notepad
cd command in Linux
How to Track Your Screen Time on Linux With ActivityWatch
How to Enable Passwordless SSH Login on Linux
Published by
Just a guy behind the Screen who lacks knowledge about what the future holds. Join me on my Journey.
Download Windows Speedup Tool to fix errors and make PC run faster
IDEs have surrounded developers since long, but the older generation of developers used to write their code right from the terminal window. Although IDEs increase productivity and made it easier to code with features such as auto-complete and IntelliSense. Using a bare-bones text editor like Vi/Vim has its own benefits. You get to write the code from scratch as there are no templates. It deepens your knowledge about a programming language and makes sure you understand each bit of the code. If you are into software development, you must have heard and feared about the good old Vim. This post covers how to set up and install Vim Text Editor on Windows 11/10.
Most of the budding developers are afraid of using Vim, even I am. But once you get used to it, you realize that you have a better command over the keyboard and the programming language. Although Vim was introduced in UNIX systems as Vi text editor, there is a workaround to install it on Windows too.
For all those who are new to Vi/Vim, I must tell you that this is one of the oldest and one of the most stable text editor. It runs within the terminal window and comes with powerful features such as multi-level undo tree, extensive plugin system and integration with many other tools. If you were/are a Linux user and looking to install Vi/Vim on Windows, you are at a right place.
Step 1: You need to download the Vim Text Editor Windows installer to get started. Head over to this link and download the installer for Windows.
Step 2: Now open the setup file and follow the on-screen instructions. In the step where the setup asks you for the installation type, select Full and hit next.
Step 3: Once the installation is complete, open a CMD window and type in vim and hit enter. Voila, now you are inside Vim Text Editor. Typing something won’t work because using Vim is not as simple as is.
Learning Vim
One of the best ways to learn Vim is to go through the official documentation. This link will take you to the documentation which can further navigate you to the best sources to learn vim. If you are looking for something quicker, just type :help inside the vim window, and you can go through the inbuilt guide.
This may seem useless, but the correct way to quit vim is by typing :q and not by hitting the close button on the Window.
If you’ve been already using Vim Text Editor on UNIX systems, then this should feel similar. All the commands should work as it is and there are not many things that are different. If you want to configure Vi/Vim on Windows, you need to edit the configuration file.
On UNIX, the config file is called .vimrc whereas on Windows it is called _vimrc.
The configuration file can be located inside your $VIM folder which is nothing but C:\Program Files (x86)\Vim\_vimrc.
You can edit this file if you want to add some custom configuration.
So, this was all about installing and running Vim on Windows. You can also start Vim directly from the Start menu. The editor also associates itself with the text files, so you can choose it as a default program to open text files. This Vim installation also comes with gVim which is nothing but a Vim with some GUI. You can use gVim if you are not comfortable with Vim. gVim can be configured separately, and it runs differently from Vim.
Can I use vim editor in Windows?
Yes, you can use the Vim editor in Windows. Whether you use Windows 11, Windows 10, or any other version, you can use Vim on your computer. You can download the set-up file from the official website, vim.org. A detailed guide to installing this software is mentioned in the article and it is recommended to follow it minutely.
How do I open Vim in Windows 11/10?
To open and use Vim in Windows 11 or Windows 10, you need to install it first. For that, you can go through the above-mentioned steps to install the app. Next, you can use the Command Prompt to open a file in Vim. For that, enter the following command: vim [file-name]. Once done, you can find the file on your screen.
If you face any issues in installation, do share them in the comments. Also, share your experience about using Vim Text Editor on Windows in the comments down below.
Lavish loves to follow up on the latest happenings in technology. He loves to try out new Windows-based software and gadgets and is currently learning JAVA. He loves to develop new software for Windows. Creating a System Restore Point first before installing a new software is always recommended, he feels.
Vim is one of the more popular text editors of today, which is derived from Vi, rather than an improved version of it. Vim is a command-line text editor which works across platforms and can be used with or without a GUI. Vim can be ported to platforms like Windows, as it is a cross-platform text editor, but it was mainly created for Unix, BSD, and Linux systems.
VIM vs GVIM
If you want to use native Vim, then you should work on the command line as it is a command-line text editor. The Vim that can be used with the graphic environments is the Gvim or the Graphical Vim.
When you are using it on Windows, the installation of Vim will automatically install Gvim to use the Vim from the desktop.
Download Vim Installer For Windows
You will find that the installers for Vim on Windows are provided in different formats like 64-bit installer, 32-bit installer, Portable version 32-bit, or 64-bit executables. These installers are provided on the release page through the Vim Github repository.
For instance, you can use this link to install a 64-bit Vim installer for version 8.2.1970.
https://github.com/vim/vim-win32-installer/releases/download/v8.2.1970/gvim_8.2.1970_x64.exe
You can use this link to install a 32-bit Vim installer for version 8.2.1970.
https://github.com/vim/vim-win32-installer/releases/download/v8.2.1970/gvim_8.2.1970_x86.exe
Install Vim On Windows
First, you have to run the downloaded Windows installer file by double-clicking on it. English is the default language on this screen named Installer Language, but you can download it in different languages like German, French, etc.
- First, you will see a welcome screen that provides some generic information.
- Then, the license agreement and license information about the Vim will be provided.
- Then the components which will be installed are selected. The type of install, which can be minimal, full, etc., is now selected. You could also select the components one by one with the checkboxes.
Then, you can select some Vim configuration and behaviour which will be set in the _vimrc configuration file.
- Compatibility and enhancements
- Mappings
- Mouse
Here, you can provide the installation path of Vim for Windows. The default provided path is C:\Program Files\Vim.
The dll, configuration, executables, resource files will be copied and configured in this step.
Open Vim
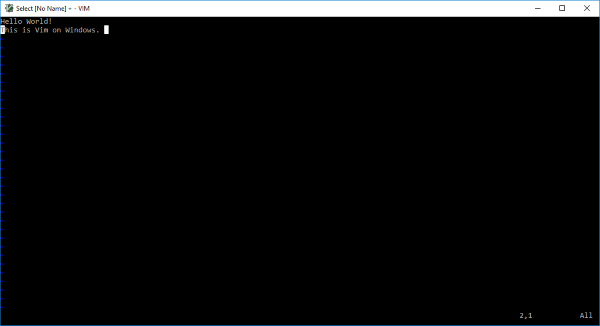
You can open the Vim from the start menu by typing it on the Start menu and running the Vim application launcher. A screen very similar to Linux would be opened when Vim is opened. Then you can start adding text by pressing i.
Open Gvim
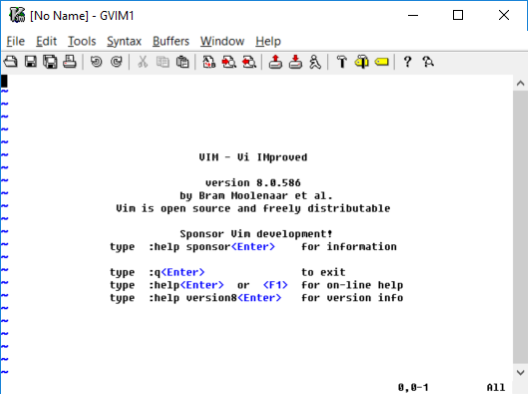
A desktop shortcut of GVIM has been added to the desktop automatically, you can open GVIM from there itself. You will be provided with GUI related menu and functions by GVIM. You will see information regarding the Vim version, a social message saying «Help poor children in Uganda!», and how to get the help from the Vim command line on the welcome screen.
Run Vim via MS-DOS
You can run Vim via the MS-DOS command-line interface too, you just have to run the GVIM command via the MS-DOS.
Run Vim via PowerShell
You can use PowerShell to run Vim, just like the MS-DOS command-line interface. You can use the GVIM command to run Vim.

