In this article, we are going to shows how to Install Kali Linux on Windows 10 WSL. If you are interested to Install Kali Linux on Windows 10 WSL then this post is ideal for you.
Kali Linux is very popular operating system. It is a Debian derived Linux distribution that is maintained and funded by Offensive Security. It is developed for information security tasks such as Penetration Testing, Security research, Reverse Engineering and digital forensics. The official website of kali Linux is Kali.org.
If you know that how to use Linux and it’s terminal commands, architecture system and file management then you can go with Kali Linux. And if you are not good in Linux, then you will go first start with ubuntu distribution and after sufficient practice, you could try for Kali Linux.
The Windows Subsystem for Linux (WSL) allows you to run a GNU/Linux environment including most command-line tools, utilities, and applications directly on Windows system.
WSL2 is an improvement version of WSL. It comes with features such as file system performance boost, full system call compatibility, Managed VM, built with a new architecture, full Linux Kernel and many more.
Requirements to install WSL 2 on Windows 10:
- Windows 10 May 2020 (2004), Windows 10 May 2019 (1903), or Windows 10 November 2019 (1909) or later
- A computer with Hyper-V Virtualization support
With the help of WSL, you can easily install full Linux operating system in your Windows 10. You just need to enable WSL (Windows Subsystem for Linux) in your Windows 10 system.
How to Install Kali Linux on Windows 10 WSL
Simply follow below steps to install Kali Linux on Windows 10 WSL:
Step 1 : Enable WSL in Windows 10
First of all, you will need to enable WSL in your Windows system. To enable it, simply open PowerShell terminal as administrator.
Click on Start icon -> search for PowerShell -> right-click Windows PowerShell app -> choose to run as administrator.

Next, run the command below in the Windows PowerShell console as show below:
dism.exe /online /enable-feature /featurename:Microsoft-Windows-Subsystem-Linux /all /norestartThe command above will display a successful message similar as below:
Deployment Image Servicing and Management tool
Version: 10.0.19041.844Image Version: 10.0.19042.985
Enabling feature(s)
[==========================100.0%==========================]
The operation completed successfully.
Step 2 : Enable Virtual Machine Platform
Run the commands below from the same PowerShell console to enable the Virtual Machine platform in your Windows system:
dism.exe /online /enable-feature /featurename:VirtualMachinePlatform /all /norestartIf you have Windows 10 version lower than 2004 in your system, use the commands below:
Enable-WindowsOptionalFeature -Online -FeatureName VirtualMachinePlatform -NoRestartNext, restart your computer for changes to apply. If you forget to start then the below command doesn’t work.
After restart of your computer, launch the PowerShell as administrator again and run the commands below to set WSL 2 as the default version of WSL:
wsl --set-default-version 2If you get an error, download and install it manually from the link below:
https://wslstorestorage.blob.core.windows.net/wslblob/wsl_update_x64.msi
Now, run the command above again to set WSL 2 as the default version of WSL:
wsl --set-default-version 2Step 3 : Install Kali Linux in Windows 10
At this stage, WSL 2 is installed and ready to be used. So now you can easily install Linux operating system in your Windows 10 system.
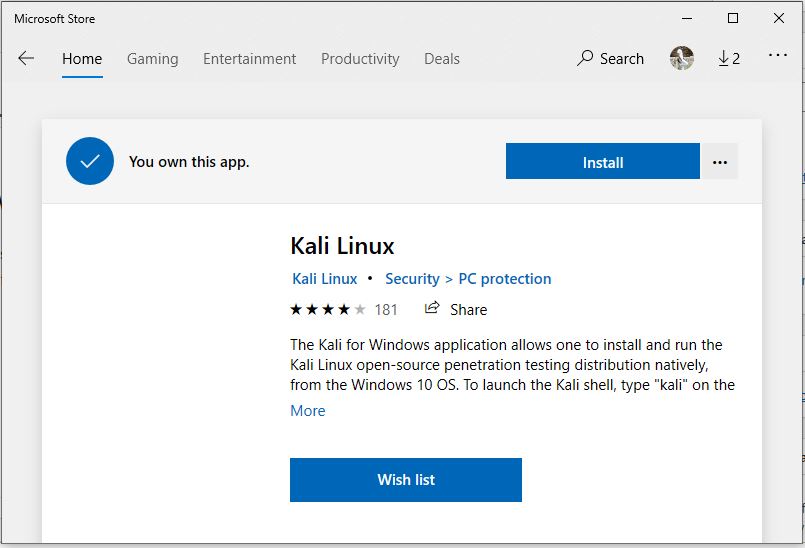
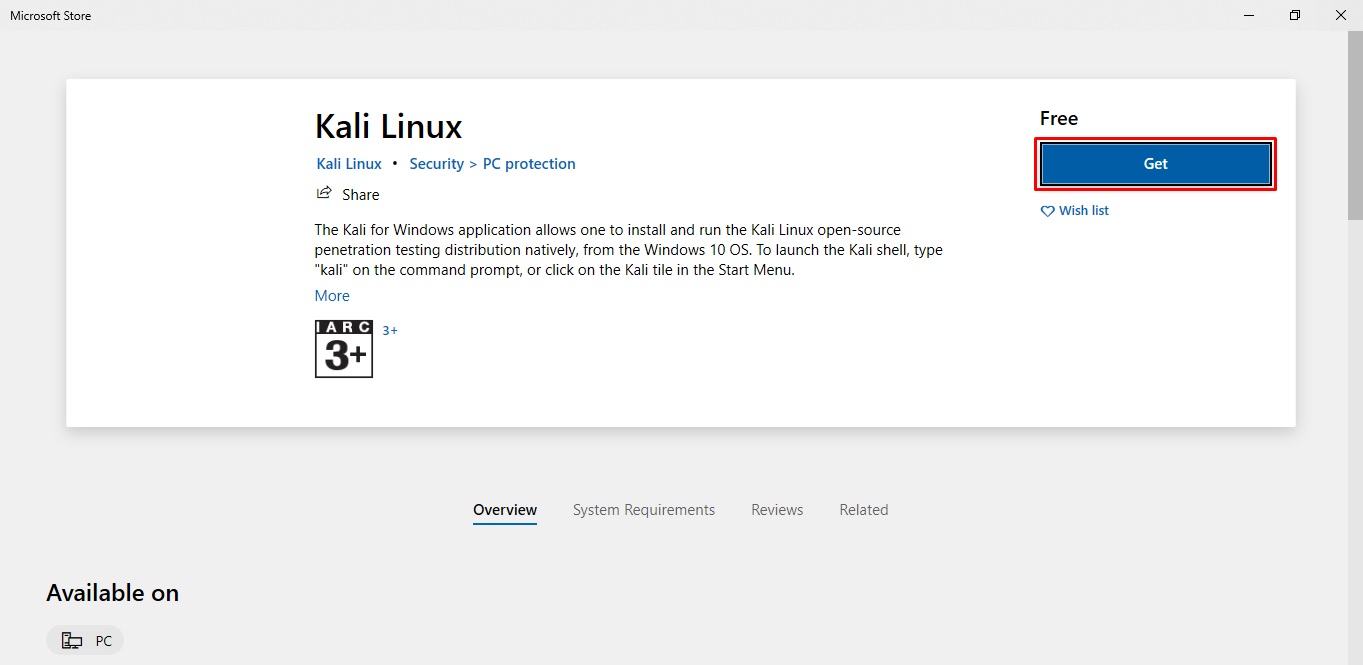
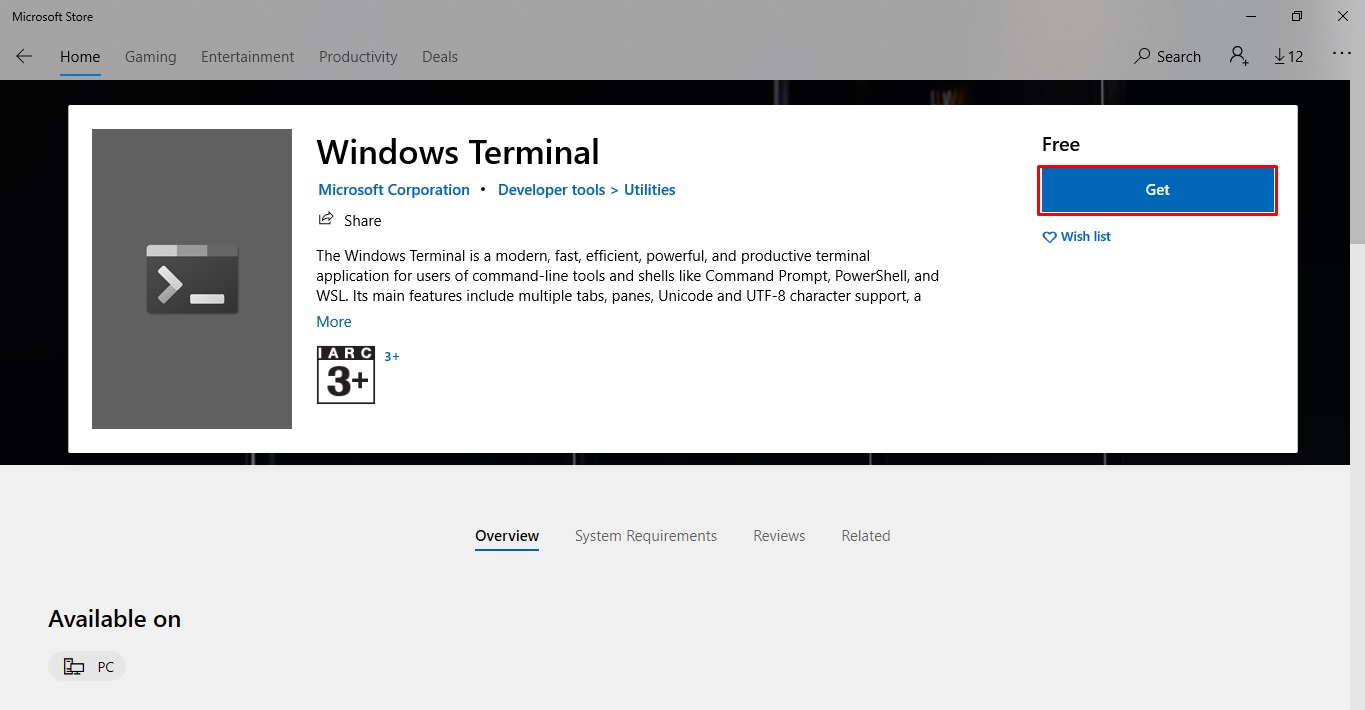
Click on the below button to download and install Kali Linux from Microsoft Windows store.
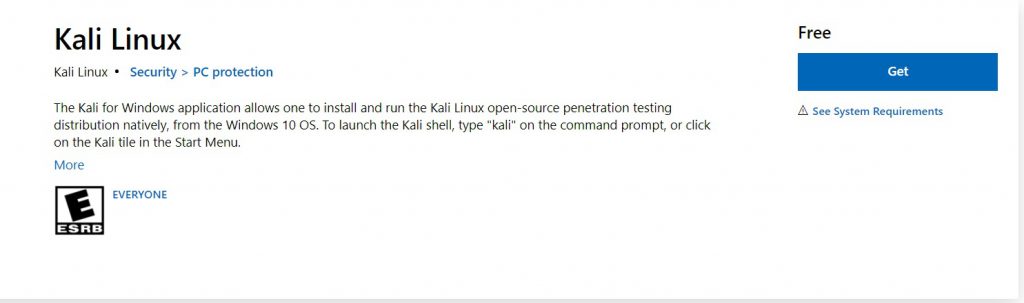
Next, click on the Get button to Download and Install kali Linux. After downloading and installing, you will get a Launch button.
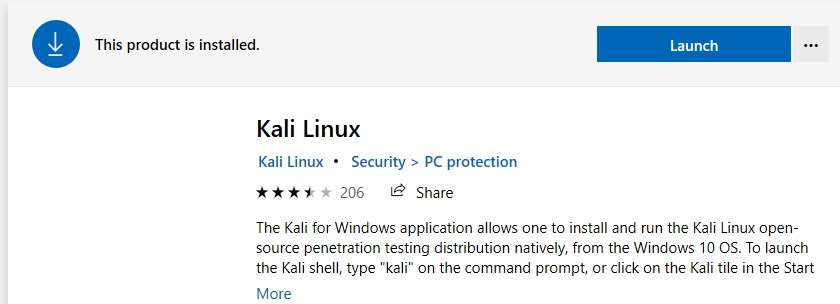
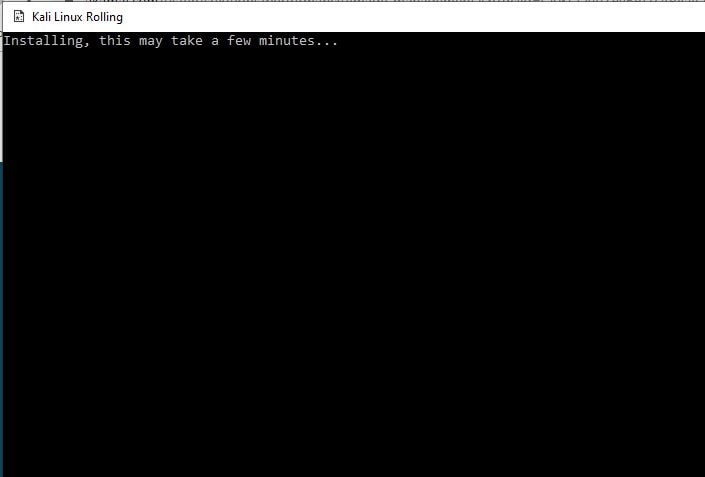
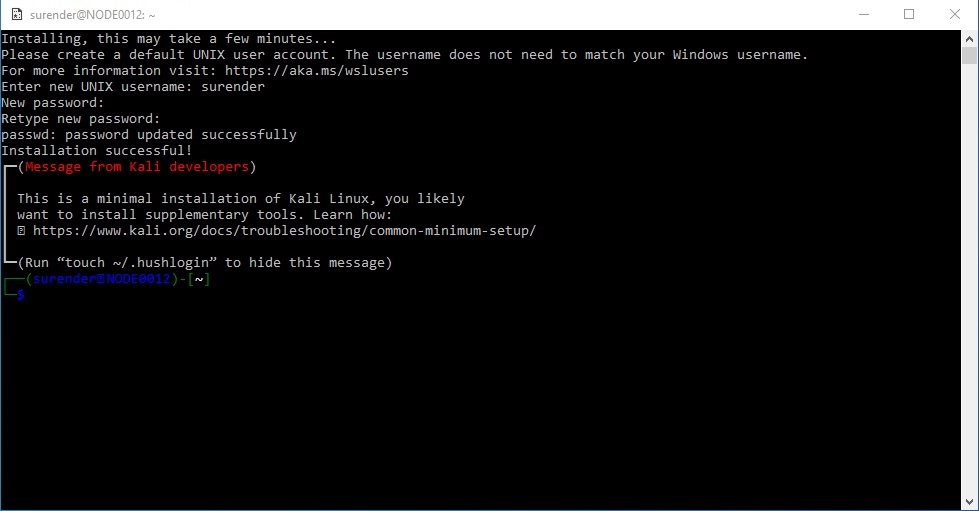
Simply click on Launch Button and when prompt, create your account as show below :
Installing, this may take a few minutes…
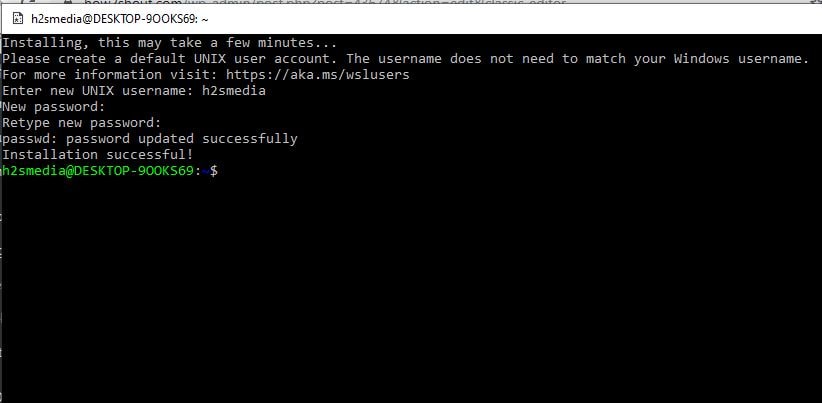
Please create a default UNIX user account. The username does not need to match your Windows username.
For more information visit: https://aka.ms/wslusers
Enter new UNIX username: studiesonline
New password:
Retype new password:
passwd: password updated successfully
Installation successful!Use some troubleshooting commands when you get issues above. Run the below troubleshooting commands and launch kali Linux again:
wsl --set-default-version 1
bcdedit /set hypervisorlaunchtype auto start
Step 4 : Launch Kali Linux in Windows 10
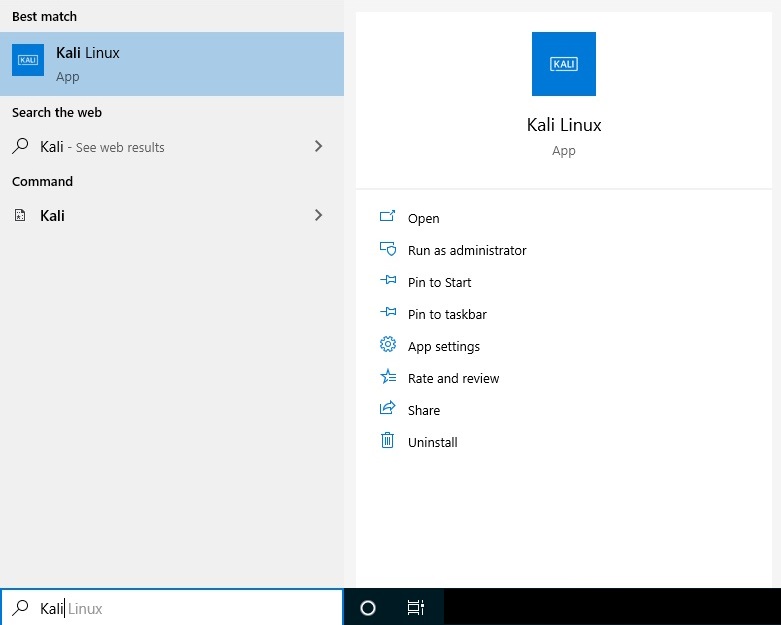
To launch Kali Linux in Windows system, simply search it in windows search bar and launch it.
That’s all
If you face any error and issue in above steps , please use comment box below to report.
If our tutorials helped you, please consider buying us a coffee. We appreciate your support!
Thank you for your support.
Windows 10 WSL (Windows Subsystem for Linux) is one of the amazing features from Microsoft implemented on Windows OS till now. With the help of it, we can install various mainstream Linux operating systems on our Windows 10 and Windows Server 2019. However, it would not be exactly like full-fledged, at least till now, because it runs using a compatibility layer to executes the Linux binary natively; thus, somewhat limited in terms of commands as compared to full-fledged Linux distros. However, WSL2 has been available for developers under Windows insider program to mitigate the limitations of WSL1, yet, not for common users.
Whatever, still WSL is enough to start learning Linux commands and other processes. Even the implementation of different Linux programs using a command line of WSL is possible. Moreover, if you want, the installation and access of the Linux GUI (Graphical user interface) on WSL can be done. Also see, how to use Linux GUI apps on WSL.
Today, here we will talk about the famous penetration testing and ethical hacking Linux distro that is Kali Linux. It is available on Windows store to install and run on Windows subsystem Linux. Hence, if you are new to WSL here are the steps to download and start using Kali Linux on Windows 10 subsystem for Linux.
Step 1: Install Windows subsystem for Linux
The installation of WSL on Windows 10 is quite simple:
- Go to Windows 10 search box.
- Type Turn Windows features off or on.
- Scroll down and find Windows Subsystem for Linux.
- Check the box given in front of it.
- Hit the OK button and wait for its installation.
- After that restart your PC.
For more information, you can see our previous guide on WSL installation along with screenshots.
Step 2: Download Kali Linux from Microsoft Store
Again type ‘Microsoft store’ in your Windows 10 search box, as it appears, click on it to run. On the left side of the store, a search icon is available, click on that and search for Kali Linux.
Now, click on the Get and then Install button to download and initiate Kali Linux on Windows 10.
Step 3: Run Kali Linux and Setup root password
Open the Kali Linux WSL app from the programs of Windows 10 and wait for some times, as it initializing some other files required by it for proper working. Once that is completed, it will ask you to set a username and password to secure your WSL Kali. Just do that and now you can use the Kali to execute penetration testing commands and scripts.
You can switch to root use user by using sudo -i and your standard user password.
To Check Kali Linux version you can use this command:
grep VERSION /etc/os-release
Kali Linux one of the Best penetration testing Distro is now available in Windows Store. Kali Linux is a Debian-based Linux distribution aimed at advanced Penetration Testing and Security Auditing. Kali contains several hundred tools that are geared towards various information security tasks, such as Penetration Testing, Security research, Computer Forensics, and Reverse Engineering. The Kali Linux team has been working with the Microsoft WSL team to Bring the distro to the Platform that still Dominates the PC landscape. So that Windows 10 users can use the pentest tools. This is very exciting news for pen-testers and security professionals who Don’t have access to work and practice on Toolset due to the enterprise compliance standards. Yes because of this enterprise compliance standard users of Linux are not able to work or practice their Linux skills during Office hours. But now no more Worry Microsoft took WSL out of beta, making it available for every Windows 10 user for the latest Fall Creators Update. Users can simply go to Windows Store and install their preferred Linux distro just like any other app. Initially, only Ubuntu, openSUSE Leap, and SUSE Linux Enterprise were available, but the WSL team is working with different distros to bring them to the store.
Here is How to Enable WSL and install Kali Linux Distro On your windows 10 machine.
The Windows Subsystem for Linux, or WSL, is an optional feature of Windows 10 that allows Linux programs to run natively on Windows. WSL was designed by Microsoft in partnership with Canonical, the creator of Ubuntu. Together, they created a kernel compatibility layer based on Ubuntu. This compatibility layer allows Linux programs to run in a Windows 10 version of the Bash shell. Click here to learn more about WSL and How to Enable WSL mode in Windows 10.
Steps:

Open Microsoft Store From Windows10. Or Directly click the Link Here. Get the app from the Store. Depends on your Internet speed it may take a few minutes to download and install the Distro. Finally, create your UNIX username and password as prompted on the console windows and you’re done. To launch Kali Linux again, just type kali on the command prompt or click Kali tile in Start Menu.
Note: While opening the Linux Distro if you faced any Error code Like this 0x8007007e. This means You need to Enable The WSL on your Windows 10 Machine. Here is How to Enable the WSL.
Read Also:
How to remove WSL Linux distro using PowerShell in Windows 11?
Fix No Internet connection in WSL on Windows 11/10
- Publication date
-
2018-05-14
- Topics
- Youtube, video, Science & Technology, hacking, wonderhowto, wonder how to, hack, hacker, hackers, windows, windows 10, microsoft store, microsoft, windows store, windows 10 store, kali, kali linux, linux, subsystem, virtual machine, install, installation, WSL, windows subsystem, subsystem for linux, monitor mode, promiscuous mode, wifi, offensive security, virtual system, af_packet, raw sockets, sockets, nmap, ubuntu,
How to Run Kali as a Windows Subsystem for Linux
Full Tutorial: http://bit.ly/KaliAsWSL
Subscribe to Null Byte: https://goo.gl/J6wEnH
Microsoft’s Windows Subsystem for Linux (WSL) is a great way to utilize Kali on your Windows computer without the need for a virtual machine. However, it is slightly limited right to what you can do, since security restrictions prevent the use of raw sockets, so tools like Nmap won’t work and you won’t be able to set your Wi-Fi adapter into promiscuous mode (or monitor mode).
To help get raw sockets into Microsoft’s priority list, make sure to let them know how many people want this on this GitHub issue:
https://github.com/Microsoft/WSL/issues/1349
Follow Null Byte on:
Twitter: https://twitter.com/nullbytewht
Flipboard: http://flip.it/3.Gf_0
Source: https://www.youtube.com/watch?v=T8Xsi0Dne8o
Uploader: Null Byte
comment
Reviews
Reviewer:
olivia32
—
favoritefavoritefavoritefavorite —
April 15, 2023
Subject:
Information
Hello there,
Thanks for sharing this tutorial on how to run Kali as a Windows Subsystem for Linux. It’s good to know that WSL can be used to run Kali without the need for a virtual machine.
However, as you mentioned, there are some limitations when it comes to using certain tools like Nmap that require raw sockets. It’s great that you provided a link to the GitHub issue where users can let Microsoft know about their desire for raw sockets to be added to the priority list.
Keep up the good work, and thanks for sharing valuable information with the community!
Setup Kali Linux in Windows 10 WSL2
Table of Contents
This article will explain how you can install Kali Linux directly inside your Windows 10 without having to run the Kali setup. This will save you a lot of time that is required to setup a Kali VM in Windows and you won’t have to go through fixing the errors which can encounter during Kali installation.
Install WSL2 in Windows 10
This article assumes you have already installed WSL2 in your Windows 10. The more information about WSL2 and its installation steps are covered in following article:
If you have not installed WSL2, please check this article first and then come back here to start setting up your Kali Linux environment.
Install Kali Linux
- To install Kali Linux (or any other GNU/Linux distribution), open Run dialog (Windows key + R), then type “
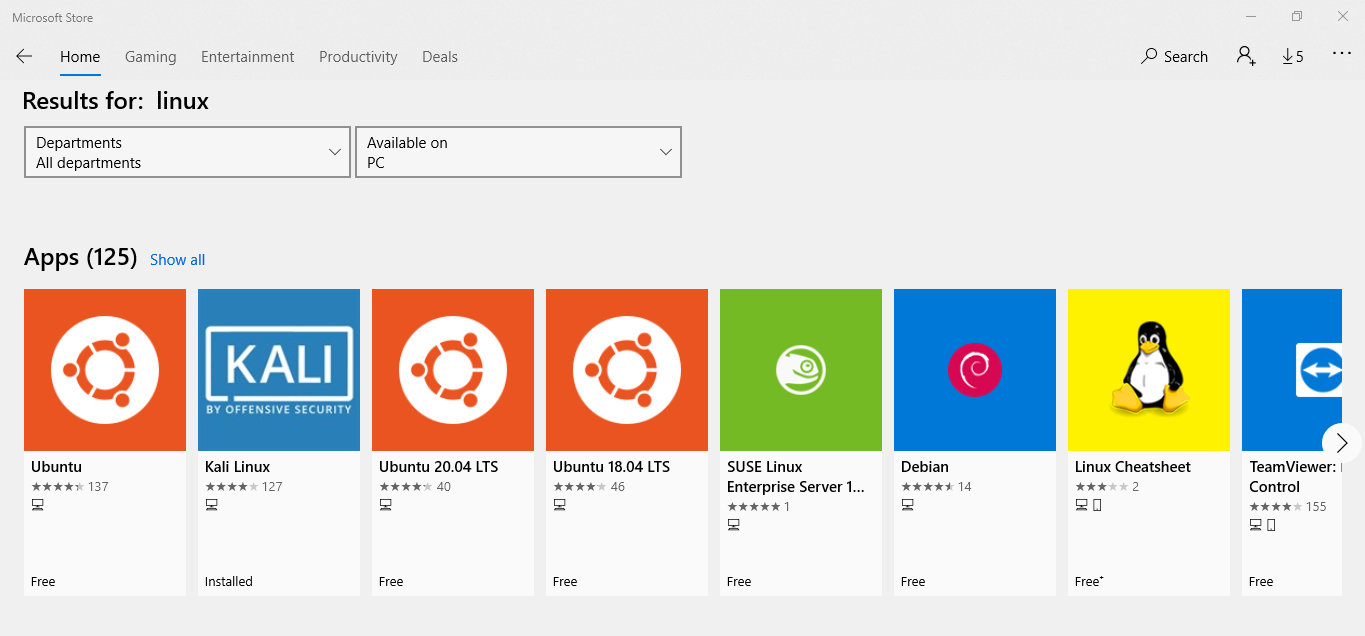
ms-windows-store:” without quotes and hit enter. This will launch Microsoft Store app. - Click on the search, type “Linux” and hit enter. You will see all the popular Linux apps.
-
- Select Kali Linux and click on Install (or Get) button. If it asks you to login with Microsoft account, just click on No, thanks. This will start downloading and installing the Kali Linux which could take a while.
- To launch the Kali linux, click on start and type “Kali” to search.
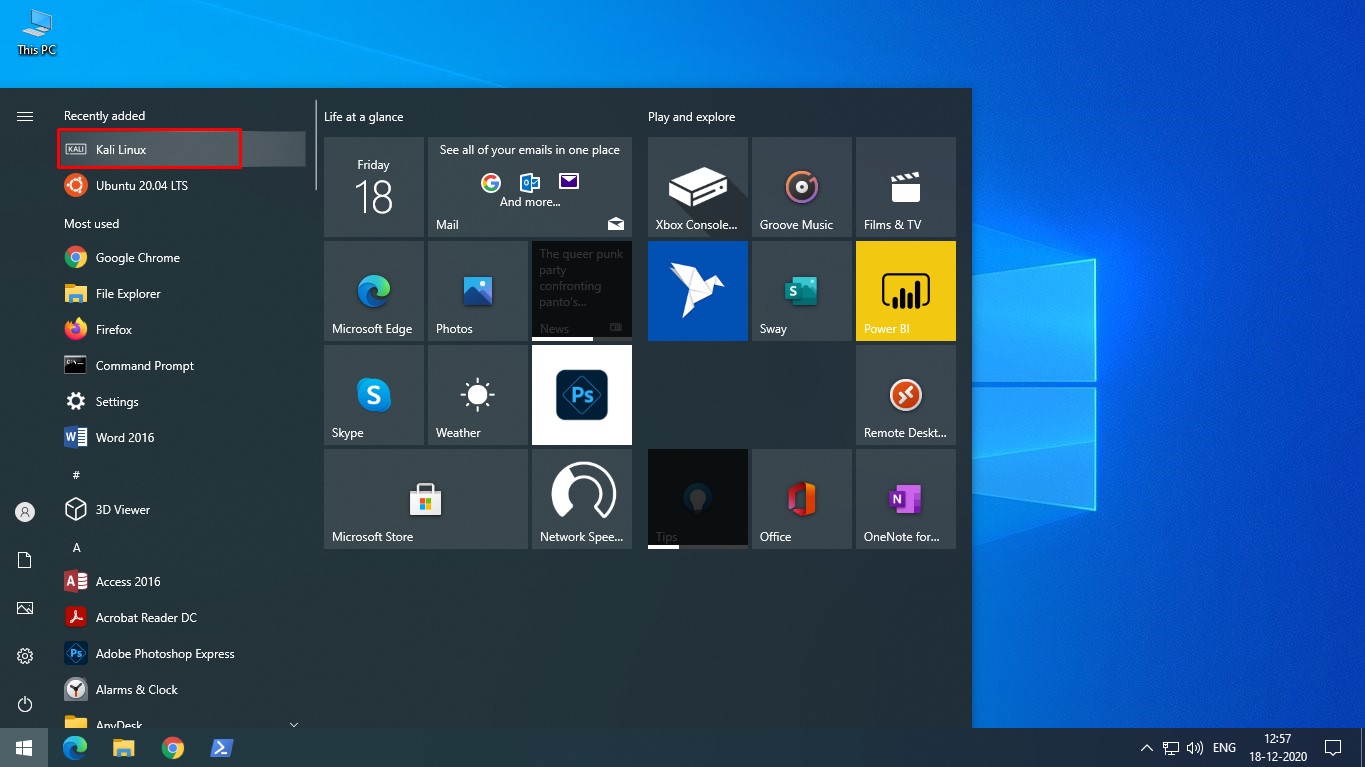
Tip: The most recently installed app “Kali Linux” will probably be displayed on top of start menu.
- Click on “Kali Linux” and it will display a terminal window with a text “
Installing, this may take a few minutes”. This will happen only for the first time.
-
- Once done, you will be asked to type a user name and then set a password. After typing password twice, you will be logged in to your Kali Linux environment. This is just a minimal installation of Kali linux. In the next step, we will convert the minimal installation to full including GUI and tools.
-
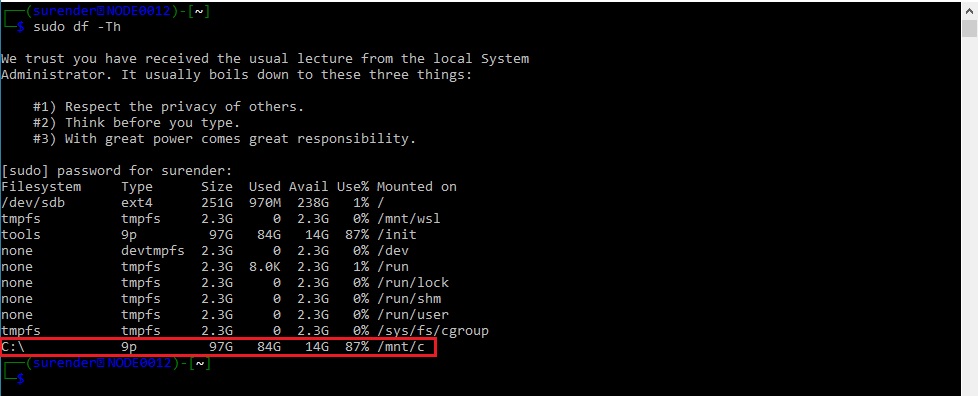
- The good thing is that your Windows C: drive is automatically mounted to /mnt/c directory in Kali linux. So you can browse and seamlessly transfer the files across Windows and Kali. Take a look at the following image:
- Now that we have a mimimal Kali install running in a terminal. We can run commands in terminal to convert it into full GUI. The
sudo apt update && sudo apt install kali-desktop-xfce -ycommand will do that. But instead of installing XFCE desktop environment, we will install Kali Desktop Experience for Windows (aka Win-KeX).
- Now why would we install Win-KeX instead of XFCE which is default desktop environment for Kali Linux? Because “Win-KeX” offers a Kali Desktop Experience for WSL2 which is tightly integrated with Windows. It provides following features:
- Window Mode: Starts a Kali Linux desktop in a dedicated window
- Seamless Mode: Share the Windows desktop between Windows and Kali apps
- Shared clipboard: Allows copy/paste between Windows and Kali Linux apps
- Multi-session support: Supports Root and regular user sessions
- Sound support
Leave the terminal window open and proceed to the next step in order to install Win-KeX.

Install Win-KeX in Kali Linux
- Type the following commands in terminal and hit enter. When prompted, enter the password you set in Step 5.
sudo apt update -y && sudo apt install kali-win-kex -y
It could take a while depending upon the speed of your computer and internet connection. Wait for installation to finish.
Run Win-KeX in Kali Linux
WSL2 allows you to run Win-KeX in three modes.
- Window Mode: Window mode helps keeping the Windows and Kali environments visually apart. Kali linux will run in a dedicated window. To start Win-KeX in Window mode with sound support, type the following command in terminal and hit enter:
win-kex --win -s
- Enhanced Session Mode (ARM only): Enhanced Session Mode runs the Kali Linux desktop session in a separate window using protocols and clients native to Windows. This is supported on ARM devices only. To start Win-KeX in Enhanced Session Mode with sound support, type the following command and hit enter:
win-kex --esm --ip -s
- Seamless mode: Seamless Mode runs a Kali Linux panel on the screen top of the Windows desktop. It removes the visual segregation between linux and window apps which provides a great platform to run a penetration tests in Kali Linux and copy the results straight into a Windows app. To start Win-KeX in Seamless mode with sound support, type the following command and hit enter:
win-kex --sl -s
Now you know How to run Kali Linux in WSL2 without having to install and maintain a VM in VirtualBox or Hyerp-V. But wait a minute; When you want to start Kali Linux, you will have to repeat following two steps every time:
- Open cmd.exe (or PowerShell console) in Windows and then type
wsl -d kali-linuxcommand - And then type
win-kex --sl -scommand to run WinKex in seamless mode
If you don’t want to repeat these steps every time, proceed to the next step of this article.
Install Windows Terminal
- Open Run dialog (Windows key + R), then type “
ms-windows-store:” without quotes and hit enter. This will launch Microsoft Store app. - Click on the search, type “Windows Terminal” and hit enter.
-
- Click on Windows Terminal app from search results and click on Install (or Get) button. If it asks you to login with Microsoft account, just click on No, thanks. This will start downloading and installing the Windows Terminal app.
- We will now create a shortcut in Windows Terminal which will help us start the Kali Linux automatically in just a single click.
Now launch Windows Terminal app and press “Ctrl + ,” keys simultaneously to open terminal settings. It will open “settings.json” file in “Code Writer” app so don’t freak out.
-
- In settings.json file, look for the lines marked with Red box in image, copy the marked section and then paste it right below (as marked by the Green box)
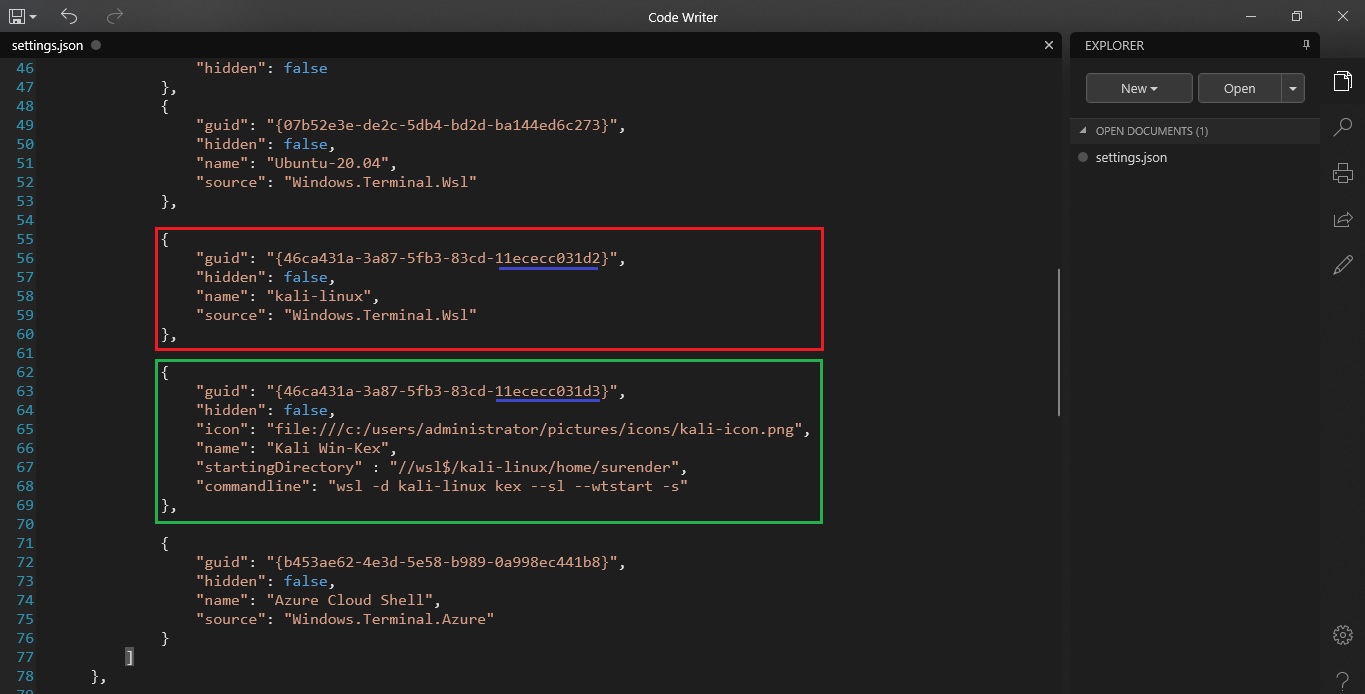
Look at the “commandline” argument’s value. This is the actual command which will run Kali Linux in seamless mode when you click on Windows Terminal shortcut. You can download the kali icon from here.
If you want to run Kali in Window mode, set the “commandline” value to wsl -d kali-linux kex --wtstart -s . You must slightly change the “guid” value marked with Blue underline otherwise you won’t see the new shortcut in Windows Terminal. You can also change other values if you like and then save the file.
-
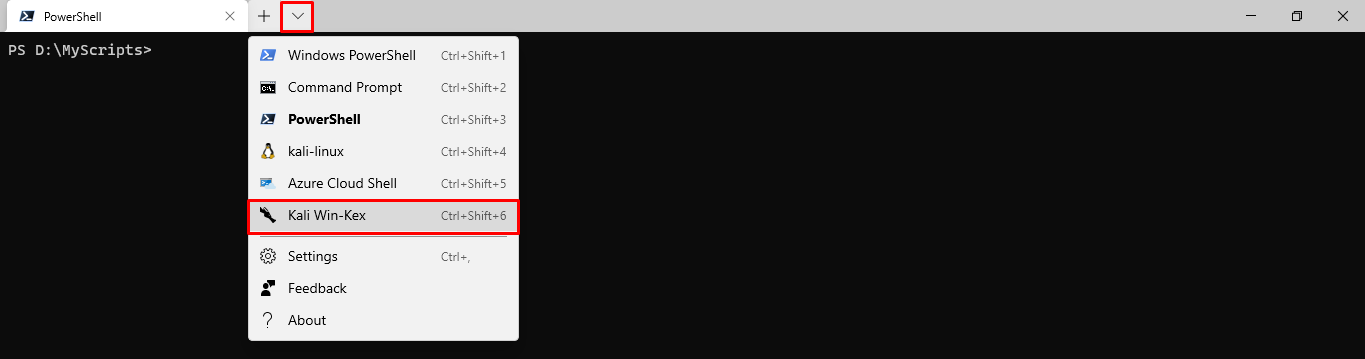
- Now close the Windows Terminal and launch it again. Then click on the dropdown icon and choose the Kali Win-KeX option to launch it.
-
- This will launch Kali Win-KeX in seamless mode and you will see a new window running Kali desktop.
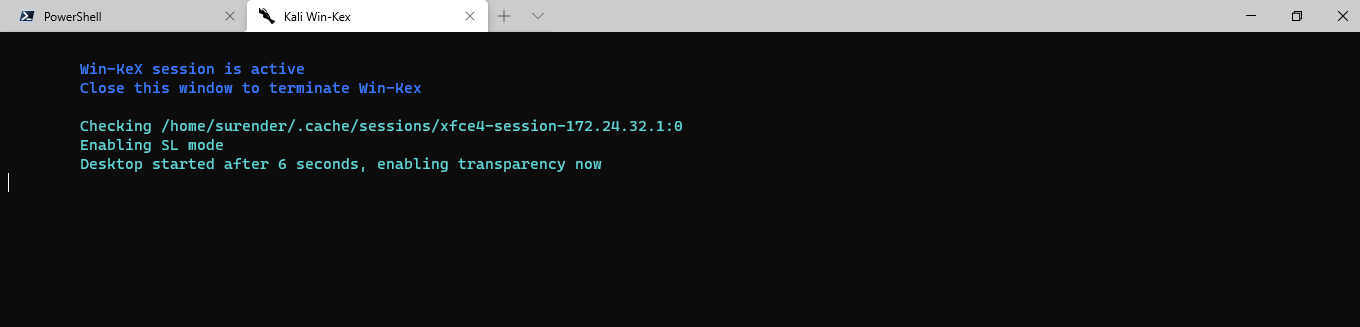
That’s it. Now you’re running Kali Linux in Windows 10 in seamless mode where you can change through apps opened in Windows as well as Kali Linux by pressing “Alt + Tab ” or “ Windows logo + Tab ” keys.
If you want to close the Kali window, just close the Kali Win-KeX tab in Windows Terminal.
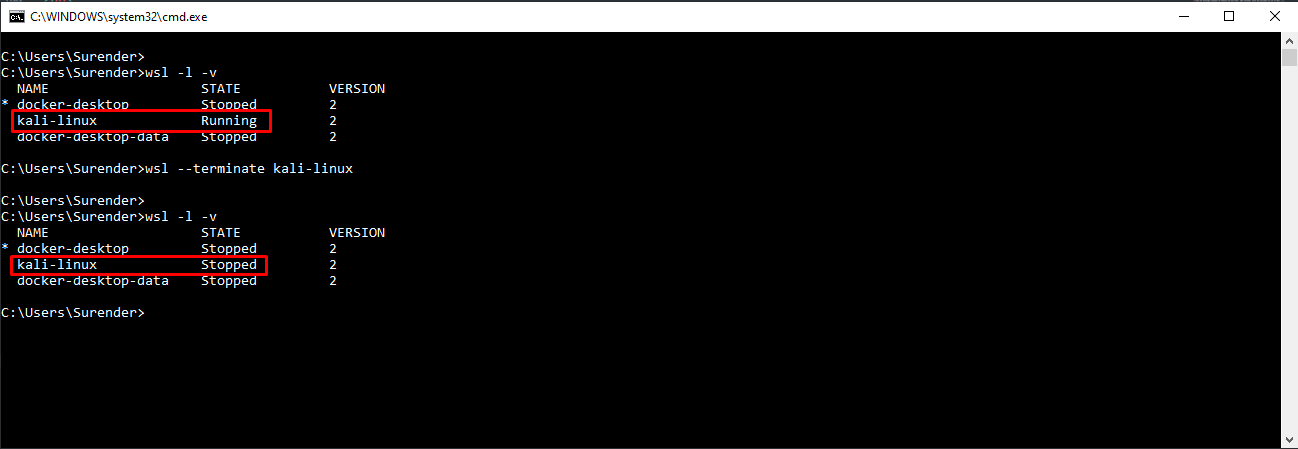
Tip: Closing the Kali Win-KeX tab in Windows Terminal doesn’t actually terminate the “kali-linux” WSL distribution. You can run wsl -l -v command in cmd.exe or PowerShell console and you will still see it Running.
To terminate the WSL instance, you need to run wsl -t kali-linux command manually as shown in image below.
Fixing Errors in Kali Linux
- If you see a message saying Started Win-KeX SL on Windows Terminal but don’t see any Window for Kali Linux, it is most likely that your Windows Firewall or Antivirus Firewall is blocking the application. You need to add the following application to trusted apps list in your Firewall.
\\wsl$\kali-linux\usr\lib\win-kex\VcXsrv\vcxsrv.exe
- If you see an error like Failed to execute child process “dbus-launch” (No such file or directory). You need to connect to Kali linux by running “
wsl -d kali-linux” command in cmd.exe (or PowerShell console) and then execute the following commands:sudo service xrdp stop sudo apt-get install dbus-x11 sudo service xrdp start