To change your current theme:
Click Start > Settings > Personalization > Themes. Under «Change theme», click the tile to switch to the theme you’d like to use.
Note: You can also add a wide variety of new, great looking themes from the Microsoft Store by clicking Get more themes in Microsoft Store, or by downloading featured themes from our website.
To delete a theme:
Click Start > Settings > Personalization > Themes. Right-click (or press and hold) the theme’s tile, and select Delete.
Note: You cannot delete the currently active theme. If you want to delete the currently active theme, first select another theme to use. The Settings app will also not allow you to delete default themes.
Need more help?
Want more options?
Explore subscription benefits, browse training courses, learn how to secure your device, and more.
Communities help you ask and answer questions, give feedback, and hear from experts with rich knowledge.
Windows 10 supports themes which may include custom desktop backgrounds, sounds, mouse cursors, desktop icons, and an accent color. There are a number of methods you can use to change a theme in Windows 10. Let’s review them all.
In Windows 10, you can get extra themes using Windows Store or install them from a themepack file. Themes may include:
- Desktop background: An image, a set of images, or a solid color which can be used as a wallpaper.
- Colors. Windows 10 allows changing the color of the window frame, window borders, active elements and selected items.
- Sounds. A set of sounds that are assigned to various events like notifications, message dialogs, window operations, emptying the Recycle Bin, and so on.
- Screen Saver. Screen savers were created to save very old CRT displays from being damaged by issues like screen burn-in. These days, they are mostly used to personalize the PC with entertaining visuals or improve its security with additional password protection.
- Pointers. By default, Windows 10 comes with no custom cursors bundled and uses the same cursors as Windows 8. Users who love customizing their OS may want to change them.
- Desktop Icons. Themes can change icons like This PC, Recycle Bin, and so on.
Where Windows 10 stores themes
Windows 10 stores themes under different folders.
- Themes that you’ve installed manually, saved, or synced from your Microsoft account are stored in the folder
%LocalAppData%\Microsoft\Windows\Themes. - Default themes are the ones that come pre-installed with Windows 10. They can be found in the folder
C:\Windows\Resources\Themes. - High Contrast Themes. — Themes that make items on your screen easier to see. They are part of the Ease of Access feature of Windows 10. They can be found in the folder
C:\Windows\Resources\Ease of Access Themes.
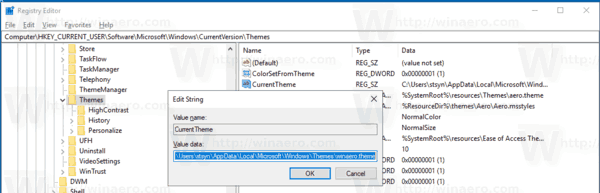
The current theme can be found in the Registry. See the CurrentTheme string (REG_SZ) value under the following key:
HKEY_CURRENT_USER\SOFTWARE\Microsoft\Windows\CurrentVersion\Themes
See the following screenshot:
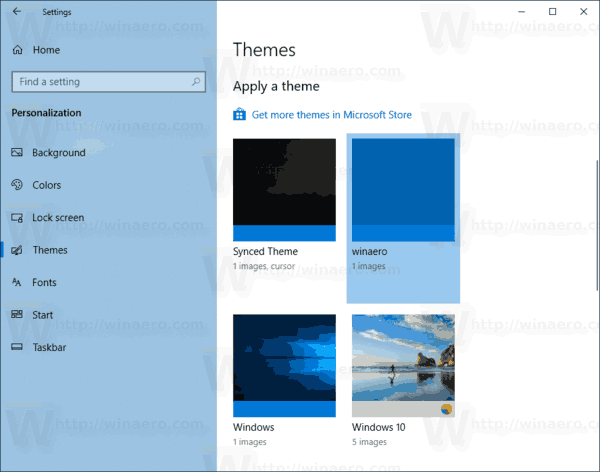
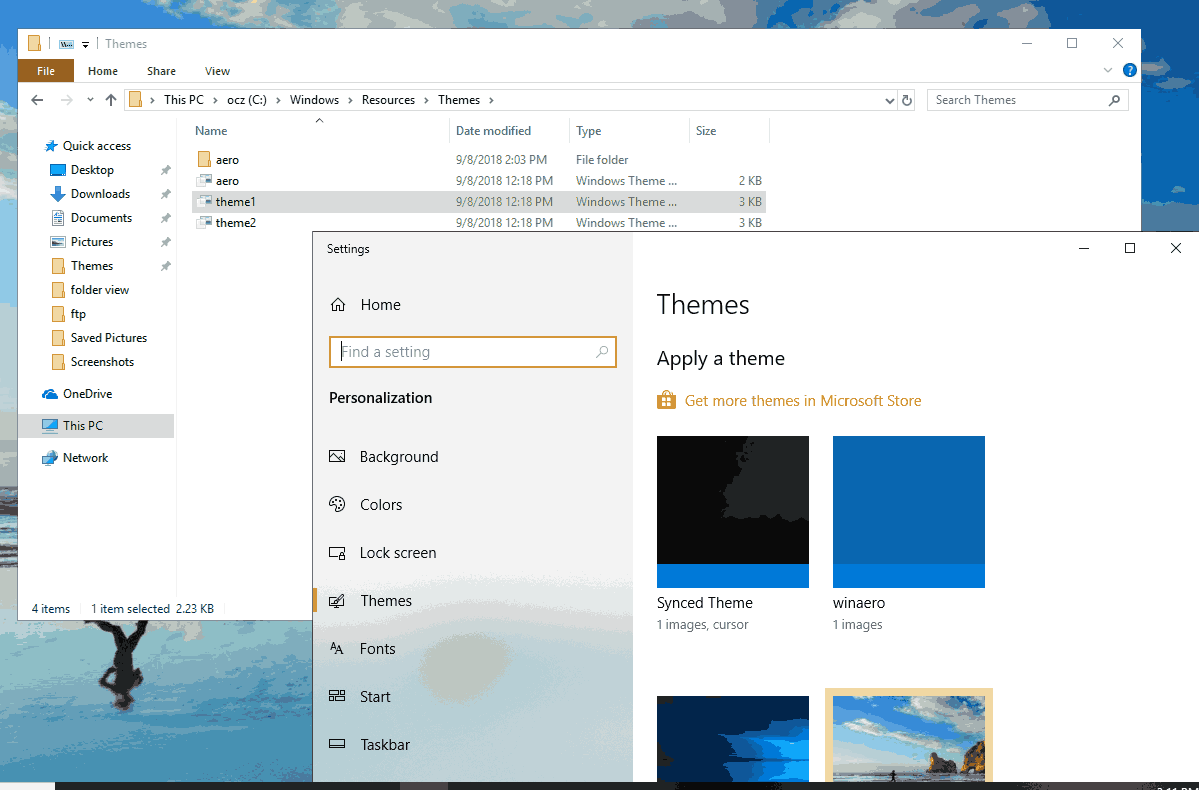
To change the theme in Windows 10, do the following.
- Open the Settings app.

- Go to Personalization -> Themes.
- On the right, click on a theme you like under Apply a theme.

- The theme is now applied.

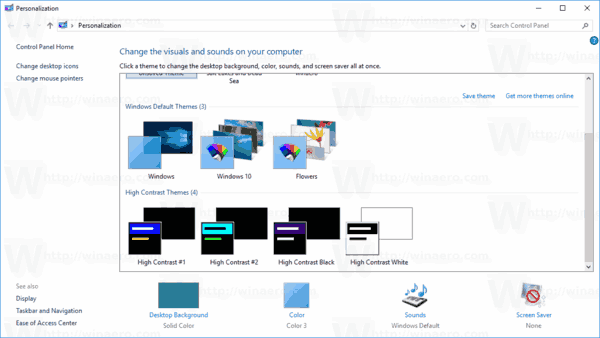
Alternatively, you can use the classic Control Panel applet to quickly apply a custom theme, or any of the default themes, or the High Contrast theme.
Change the theme in Windows 10 using the Control Panel
- Press the Win + R keys on the keyboard.
- Type or copy-paste the following command in the Run box:
explorer.exe shell:::{ED834ED6-4B5A-4bfe-8F11-A626DCB6A921}. - This will open the classic Personalization applet. Click on the desired theme in the list to install it.

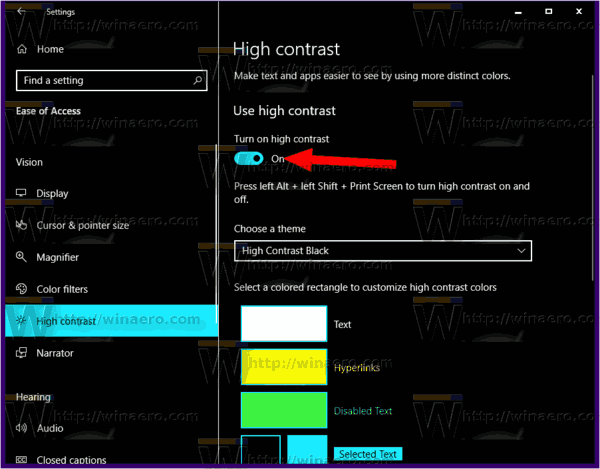
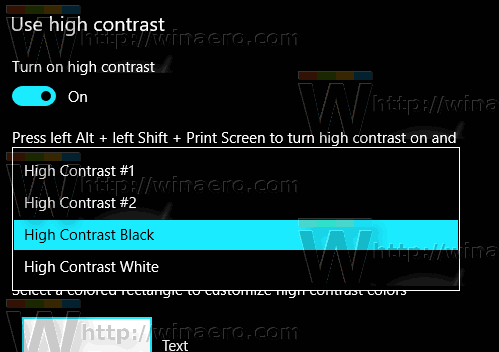
Apply a High Contrast theme using Settings
- Open the Settings app.
- Go to Ease of Access -> High Contrast.
- On the right, set the option Turn on high contrast.

- From the Choose a theme drop down list, choose one of the four pre-installed High Contrast themes.

Finally, you can apply a theme from a file manager app like File Explorer.
Change the Windows theme from File Explorer
- Open File Explorer app.
- Navigate to the folder which contains the *.theme file of the theme you want to apply. The default folders are mentioned in the beginning of this article. e.g., visit the folder
C:\Windows\Resources\Themes. - Double-click on the *.theme file to apply the theme. The theme will be applied. Also, Windows 10 will open the Themes page of the Settings app.

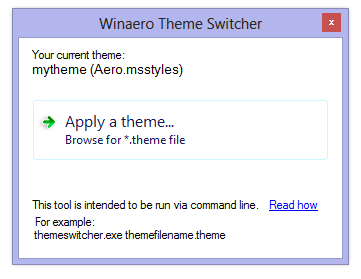
Change your theme with Winaero Theme Switcher
Winaero Theme Switcher is an application which allows you to change a Windows theme from the command line. It is primarily intended to be used with the command prompt or in a batch file where you want to automate the applying of a custom theme.
The syntax is as follows:
ThemeSwitcher.exe path_to_file.theme
To apply one of the default themes, you can run the following command:
themeswitcher.exe c:\Windows\Resources\Themes\theme1.theme
Running the app without parameters will open the following GUI.
Please refer to the following article to learn useful tips and tricks about this app:
https://winaero.com/blog/change-windows-10-theme-from-the-command-prompt/
That’s it.
Support us
Winaero greatly relies on your support. You can help the site keep bringing you interesting and useful content and software by using these options:
If you like this article, please share it using the buttons below. It won’t take a lot from you, but it will help us grow. Thanks for your support!
Download Windows Speedup Tool to fix errors and make PC run faster
In Windows 11 or Windows 10, a Theme may specify the accent color for apps and window frames and may include one or several desktop backgrounds, a set of sounds, mouse cursors, and desktop icons. In this post, in addition to changing the theme via the Settings app, we will show you 5 other ways to change the Theme in Windows 11/10. You can change Windows Themes via Command Prompt, PowerShell, Control Panel, Explorer, etc.

A theme file is a classic text file containing parameters, values and resources such as wallpapers are usually located in a subdirectory. Microsoft uses the Themepack and Deskthemepack archive (ZIP or CAB) package files that contain all the theme resources to simplify theme sharing and for their redistribution via the Microsoft Store. There are three types of themes stored in different locations in Windows 11/10 viz;
- My Themes — manually created or saved, or downloaded and installed from a themepack file or Microsoft Store. These themes are saved in the
%localappdata%\Microsoft\Windows\Themesfolder. - Windows Default Themes — pre-installed themes on your Windows OS. These themes are stored in the
C:\Windows\Resources\Themesfolder. - High Contrast Themes — specially made for people with vision problems and are part of the Ease of Access feature. These themes can be found in the
C:\Windows\Resources\Ease of Access Themesfolder.
There are several ways to change the theme in Windows 11/10. We will discuss these methods as follows:
1] Change Theme via Desktop

The easiest method to change the theme in Windows 11/10 is via the desktop. To change the Theme via Desktop, do the following:
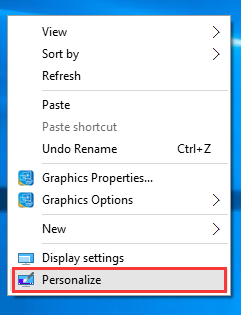
- Right-click on an empty area on the Desktop.
- Select Personalise from the context menu.
- In the Personalisation window, under the Select a theme to apply section, simply click the theme you want.
2] Change Theme via File Explorer

To change Theme via File Explorer in Windows 11/10, do the following:
- Press Windows key + E to open File Explorer.
- Navigate to the folder below or any other folder containing the theme you want to apply
C:\Windows\Resources\Themes
- At the location, double-click the theme file for the theme you want.
- Close the Settings app that automatically opens once you double-click the theme file.
- Close File Explorer.
3] Change Theme via Command Prompt
To change Theme via Command Prompt in Windows 11/10, do the following:
- Press Windows key + R to invoke the Run dialog.
- In the Run dialog box, type cmd and hit Enter to open Command Prompt.
- In the command prompt window, type or copy and paste the path below OR the full path to the theme file you want and hit Enter:
start "" "C:\Windows\Resources\Themes\aero.theme"
The theme will be applied and the Personalisation page in Settings app will automatically open. you can close the Settings app. If you want the theme to be applied without you having to interact with extra windows, run the modified command as follows:
start "" "C:\Windows\Resources\Themes\aero.theme" & timeout /t 3 & taskkill /im "systemsettings.exe" /f
When the command executes, it will apply the theme, wait for 3 seconds with the timeout command, and forcibly close the Settings app with the taskkill app.
4] Change Theme via PowerShell
To change Theme via PowerShell in Windows 11/10, do the following:
- Press Windows key + X to open Power User Menu.
- Tap I on the keyboard to launch PowerShell (Windows Terminal).
- In the PowerShell console, type or copy and paste the path below OR the full path to the theme file you want and hit Enter:
start-process -filepath "C:\Windows\Resources\Themes\aero.theme"
The theme will be applied and the Personalisation page in Settings app will automatically open. you can close the Settings app. If you want the theme to be applied without you having to interact with extra windows, run the modified command as follows:
start-process -filepath "C:\Windows\Resources\Themes\aero.theme"; timeout /t 3; taskkill /im "systemsettings.exe" /f
5] Change Theme via Control Panel

To change Theme via Control Panel in Windows 11/10, do the following:
- Press Windows key + R to invoke the Run dialog.
- In the Run dialog box, copy and paste the shell command below and hit Enter:
shell:::{ED834ED6-4B5A-4bfe-8F11-A626DCB6A921}
- In the Personalisation window, click the desired theme under the My Themes, Windows Default Themes, or High Contrast Themes sections.
- Exit Control Panel when done.
That’s it on the 5 ways to change Theme in Windows 11/10! Let us know in the comments section below if you know any other method to perform this task.
Tip: PC users can personalize your computing experience, and can make your system faster, and private using our Ultimate Windows Tweaker 5.
Related post: How to prevent users from changing the Theme
Does Windows 10 themes work on Windows 11?
Most of the themes are old ones from Windows 10 and they have been adapted for Windows 11 but that’s still a huge selection to consider. You can right-click anywhere on your desktop and click on Personalize > select Themes to apply any of the installed themes on your PC, or click on Browse themes to find some more themes on the Microsoft Store.
Are Windows 10 themes safe?
Themes from Microsoft are generally fine; but be cautious of any other source. Some ‘themes’ include screensavers that contain malware. Make sure your Windows 11/10 PC is running an active and updated antivirus software.
Read next: Best Free Windows 11 Themes and Skins to Download from Microsoft Store.
Obinna has completed B.Tech in Information & Communication Technology. He has worked as a System Support Engineer, primarily on User Endpoint Administration, as well as a Technical Analyst, primarily on Server/System Administration. He also has experience as a Network and Communications Officer. He has been a Windows Insider MVP (2020) and currently owns and runs a Computer Clinic.
Are you looking to change the look of your Windows 11 desktop, but you don’t have a Windows Activation?
Well, there are easy hacks to do that, but most users struggle to apply that. Maybe they are unsure how to do it or afraid of breaking the system. Whatever the reason, this comprehensive guide will show you how to change themes in Windows 10/11 and switch to dark mode without activating Windows. We’ll walk you through each step so that you can customize Windows desktop the way you want it.
To fix various Windows 10/11 problems, we recommend Outbyte PC Repair:
This software will repair common computer errors, protect you from file loss, malware damage, hardware failure, and optimise your computer for peak performance. In three simple steps, you can resolve PC issues and remove virus damage:
- Download Outbyte PC Repair Software
- Click Start Scan to detect Windows 10/11 issues that may be causing PC issues.
- Click Repair All to fix issues with your computer’s security and performance.
This month, Outbyte has been downloaded by 23,167 readers.
Before moving further to apply the hacks for enabling the personalization on an unactivated Windows OS, let us discuss what’s the issue and the process to apply the fix.
When you install Windows 10 or 11 on your PC or laptop, it asks for the license key during installation. However, if you don’t have a genuine Windows license key, Windows allows you to skip this step and continue with the installation.
Although Windows will be installed without activation, you will be restricted from accessing some features, including personalization. When you try to customize any personalization settings on Windows, such as changing the background, you will get the You need to activate Windows before you can personalize your PC error message.

All the personalization options will be grayed out, and you won’t be able to configure them.
On an activated Windows 10/11 OS, you can simply change the theme either by accessing Windows settings or by downloading “.deskthemepack” from third-party sources or Microsoft repository. After downloading, just double-click on the .deskthemepack, and the theme will be installed.
However, this method won’t work on unactivated Windows OS. You need to make changes in Group Policy Editor or the Registry Editor.
Change Windows 10/11 Theme Without Activating Windows using Group Policy Editor
If you are using the Pro version of Windows 10 or 11, you can easily configure the theme settings to let you change the theme without activating Windows. Here are the steps for that:
-
On the Windows search bar, type gpedit and click on Edit group policy to launch the Local Group Policy Editor.

-
Local Group Policy Editor will be launched.

-
Navigate to the following path: User Configuration > Administrative Templates > Control Panel > Personalization.

-
On the right side, under Personalization, double-click on Prevent changing theme.

-
Next, click on the Disabled option and choose Apply & OK to disable Prevent changing the theme.


After applying the above steps, close the Group Policy Editor and restart your system. You will now be able to change the theme on your Windows 10/11 system without activating it.
Change Windows 10/11 Theme Without Activating Windows using Registry Editor
If you are working on Windows 10/11 Home edition, you won’t have access to Group Policy Editor.
Don’t worry; you can still change the theme on your system without activating Windows by applying a simple Registry hack.
Here are the instructions for that:
- On the Windows search bar, type Registry Editor and click on its icon to launch it.

- Copy & paste or navigate to the following path on the Registry editor window: HKEY_CURRENT_USER\SOFTWARE\Microsoft\Windows\CurrentVersion\Policies\Explorer

- Right-click on the Explorer and select New -> DWORD (32-bit) Value.

- Name the value as NoThemesTab.

- Double click on the NoThemesTab and ensure that the Value data is set to 0.


That’s it. Restart your system to make the changes effective.
Apply the Theme on Unactivated Windows System
After modifying the Group Policy Editor or Registry Editor to configure the Windows theme settings to allow you to change the theme, it is time to download and apply the theme you like.
- Navigate to the Microsoft Desktop Theme catalog.
- Switch to the Windows version you want a theme for and expand the category of choice to download the theme.

- Click on the theme of your choice to download it.

- After the download is completed, click on it to install.


How to Switch Dark Mode without Activation in Windows 10/11?
One of the popular options in the Windows 10/11 personalization is to switch to Light or Dark Mode. By default, Windows is configured as the Light mode, and you can switch to the Dark mode pretty easily from Personalization settings. However, if your Windows is not activated, you won’t be able to switch between light and dark modes from the Settings.
If you want to switch to dark mode without activation in Windows 10/11, you can do that using a registry hack. Follow these steps:
- On the Windows search bar, type Registry Editor and click on its icon to launch it.
- Copy & paste or navigate to the following path on the Registry editor window: HKEY_CURRENT_USER\Software\Microsoft\Windows\CurrentVersion\Themes\Personalize

- To switch the App mode to dark, look for the AppsUseLightTheme DWORD and double-click to open it.

- Set the Value data to 0 to enable the dark mode on apps.

- Now, to switch the system theme to dark mode, look for the SystemUsesLightTheme DWORD and double-click to open it.

- Set the Value data to 0 to enable the dark mode on Windows.


That’s it. If you want to switch back to the light mode, modify the Value data of both the DWORDs to 1.
Final Words
Windows personalization is a great way to make your system look attractive and different. But if you are using the unlicensed Windows version, it becomes difficult to provide a different look to your system. In this post, we have explained how to change the theme and apply other personalization without activating the Windows using Group Policy Editor or Registry Editor. Hopefully, by following the detailed instructions in the post, you are able to customize your PC with ease.
I am using the unlicensed Windows version. Can I still use themes?
You can change the theme on your system without activating Windows by applying a simple Registry hack, as mentioned in this post.
How do I switch between light and dark modes without activation in Windows?
You can switch to dark mode without activation in Windows by following the steps mentioned in this post. Just make sure that you set the Value data of both DWORDs to 0 when making changes.
Can I use personalization without activating Windows?
Yes, you can change the theme and other personalization settings without activating Windows. However, some features might be restricted, i.e., you might not be able to change the wallpaper or lock screen.
How do I activate Windows?
You can purchase a valid product key from Microsoft and enter it into your system to activate Windows. Once activated, you will have access to all features of the Operating System.

Peter is an Electrical Engineer whose primary interest is tinkering with his computer. He is passionate about Windows 10 Platform and enjoys writing tips and tutorials about it.
Contents:
- Windows 10 Theme Overview
- How to Change Themes for Windows 10?
- How to Download and Install Themes On Windows 10?
- How to Save a Theme In My Themes on Windows 10?
- How to fix Save a Theme Error on Windows 10?
Windows 10 Theme Overview:
A theme is the combination of Windows background, color, and sound. So undoubtedly, it is of great importance for you to create a new theme as you like or set it up depending on your personal usage.
But in some cases, after you changed a theme and wanted to save the time, save a theme popup appeared warning you that Windows can’t find one of the files in this theme. That means you are meeting with Windows 10 save a theme error. The Desktop theme can’t be changed and it remains the same one all the time.
Here this article will chiefly tell you how to set up Windows 10 themes and meanwhile, it will also teach you on how to download and install new themes for Windows 10, such as custom theme, flat dark theme and anime theme.
How to Change Themes for Windows 10?
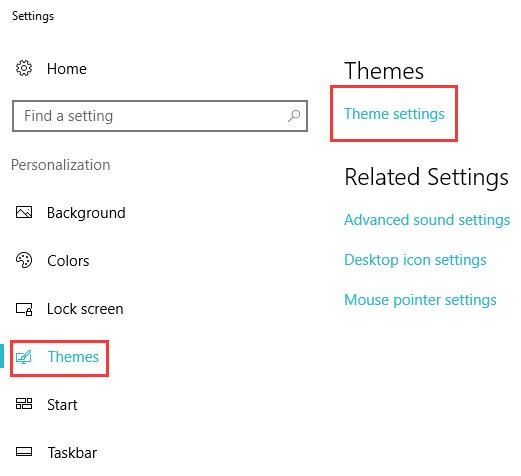
1: Right-click the desktop and choose Personalize.
Here if you can’t open Personalize, you can go to Start > Settings > Personalization.
2: Click Theme settings under the Themes.
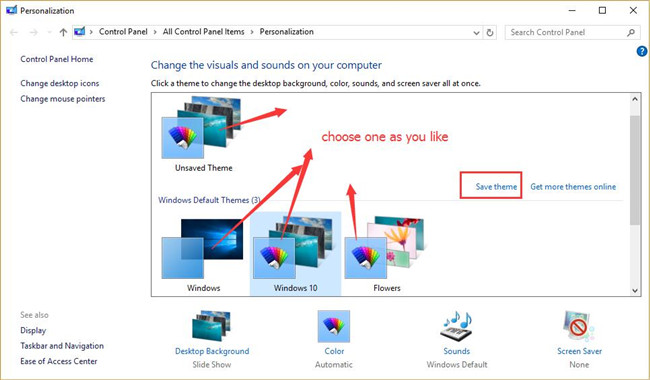
3: Click the theme you like.
Here you can see there are three types of themes, they are My Themes, Windows Default Themes and High Contrast Themes. And you can see how the new theme look like from the Desktop Background and Color or contract the window to see it from the desktop.
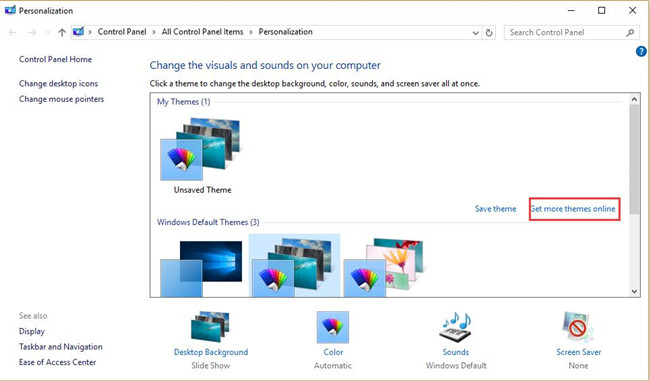
So if you have followed the steps above, you must have known how to change or set up themes on Windows 10. But if you cannot find one fits you, you can choose to get themes online, which will show you in the next way.
How to Download and Install Themes on Windows 10?
There are also some people who find it difficult to find the right theme which they are obsessed with. Here you can be familiar with the ways to download and install the various themes online, such as dark themes, anime themes, and Deviant Art themes.
1: In themes settings, choose to Get more themes online.
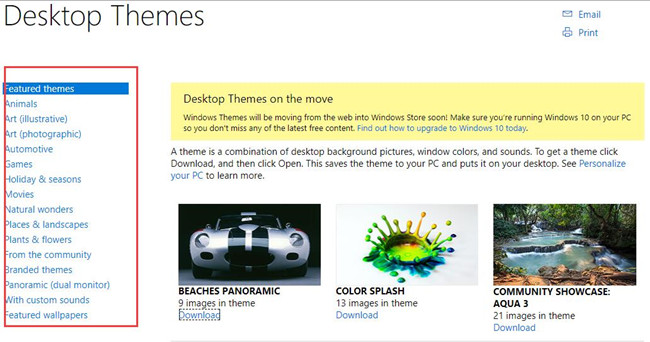
2: Select one online theme as you hope, and choose to download it.
Here you can view that there are various Featured themes, such as Animals, Art, Automotive, etc.
Here choose Beaches Panoramic for your reference.
3: In the Theme setting, you can see the downloaded theme.
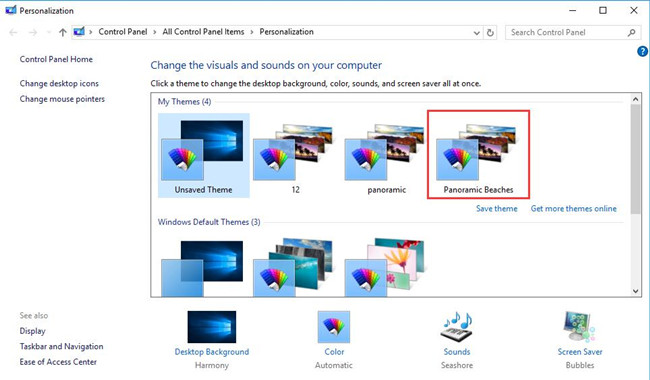
4: Click it to set it up as the new Windows 10 theme.
After that, you can enjoy the new online background, color, and sound on your desktop. Meanwhile, if you tend to save it in my themes, you can go ahead.
How to Save a Theme in My Themes?
If you want to save the theme you have downloaded online in local for the purpose of using it over and over again or sending it to others, you can save it as following steps.
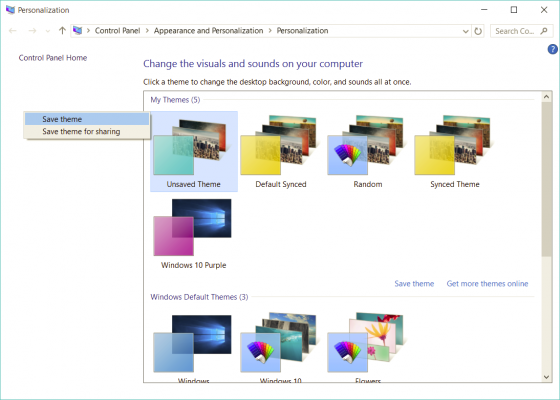
1: In Theme settings, right-click the downloaded themes and choose Save Theme, then you can find it in My Themes.
2: Enter the name of the theme.
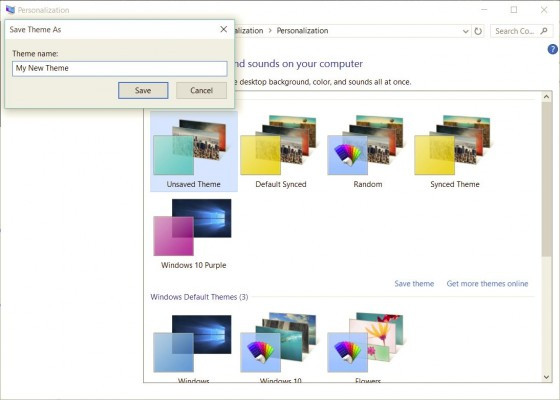
So next time, you can go straight to find the theme saved according to the name.
How to Fix Save a Theme Error on Windows 10?
But some clients are unable to save Windows 10 Desktop theme successfully as they are prompted an error that Windows can’t find one of the files in this theme. Consequently, you failed to save the changes theme and apply it to Windows 10.
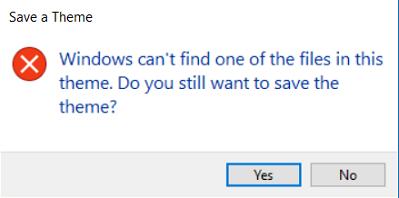
Just like want to save a theme error popup shows, perhaps it is the theme file missing that causes Windows 10 not finding one of the files in this theme. You need to fix this theme error as soon as possible.
The most straightforward way is to change to another theme and save it again. Or you can decide to delete the problematic theme missing a file and then reinstall it. Both of these two methods can be consulted from the contents above.
Otherwise, there is also much need to change some theme settings for Windows 10, such as theme sync and theme background settings.
Change Theme background:
As you all know, in a Desktop theme, you can set a Picture, Slideshow, and Slide color. It is understandable that Windows 10 theme can’t be saved or theme file is missing when you choose slideshow or slide color. So manage to change the theme background to picture to fix Windows can’t find one of the files in this theme error on Windows 10.
Bound for Start > Settings > Personalization > Background > Picture.
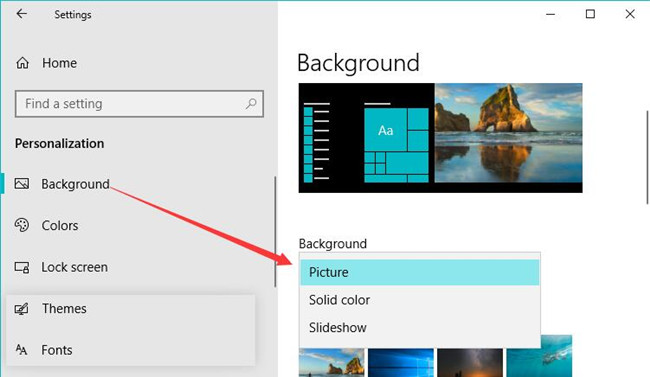
Then you can try to save a theme to see if Windows can’t find one of the files will pop up again.
Change Theme Sync Settings:
There is a sync setting for Windows theme. Upon “save a theme” error window popping up, you can try to disable this syncing setting.
Search Sync in the search box and then determine to turn off Theme sync settings.
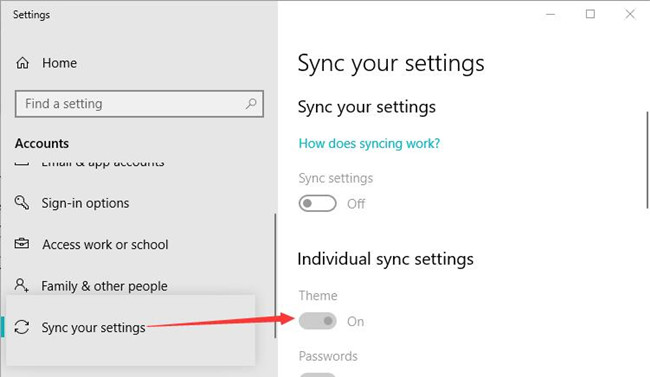
At this moment, attempt to save the theme in My theme. It will work this time.
Create a new User account:
It is said useful to create a new account and then log into Windows 10 with the new account. This new account won’t bring you to save a theme error on Windows 10.
In a word, this tutorial tells you how to set up or change themes for Windows 10, how to get the themes online if you cannot find the theme in local, how to save the downloaded themes in My theme, and how to fix Windows can’t find one of the files in the theme error on Windows 10, you can consult any aspect of it as you wish.
More Articles:
How to Change Text Color on Windows 10/11?
How to Change Taskbar Color in Windows 10/11?
Fixed: What is conhost.exe and Why it running on Computer?