Windows 10 will, for the most part, be added to grub boot menu by the os-prober automajically.
For my specific setup I wanted to completely hide grub menu and automatically boot windows unless a hotkey was pressed to boot Ubuntu. So in my specific case os-prober isn’t an option because the most important step in hiding the grub menu, which most answers I found neglect to mention, is to set the disable os-prober flag or the menu WILL be shown until os-prober completes.
It took considerably longer than I had anticipated to get right because there are so many partial answers out there but most are version dependant and can lead you astray. I spent a lot of time trying write my own grub menu entry trying use grub commands that didn’t exist like ntdlr. Another caveat is that the chainloader functions on my grub try to boot bios not efi and will not work.(Im sure I was doing something wrong?)
In the end the solution was actually simple as the scripts that make your /boot/grub/grub.cfg do most of the work for you in finding UUIDS for your boot partitions. So you can skip the fdisk and blkid steps most people mention.
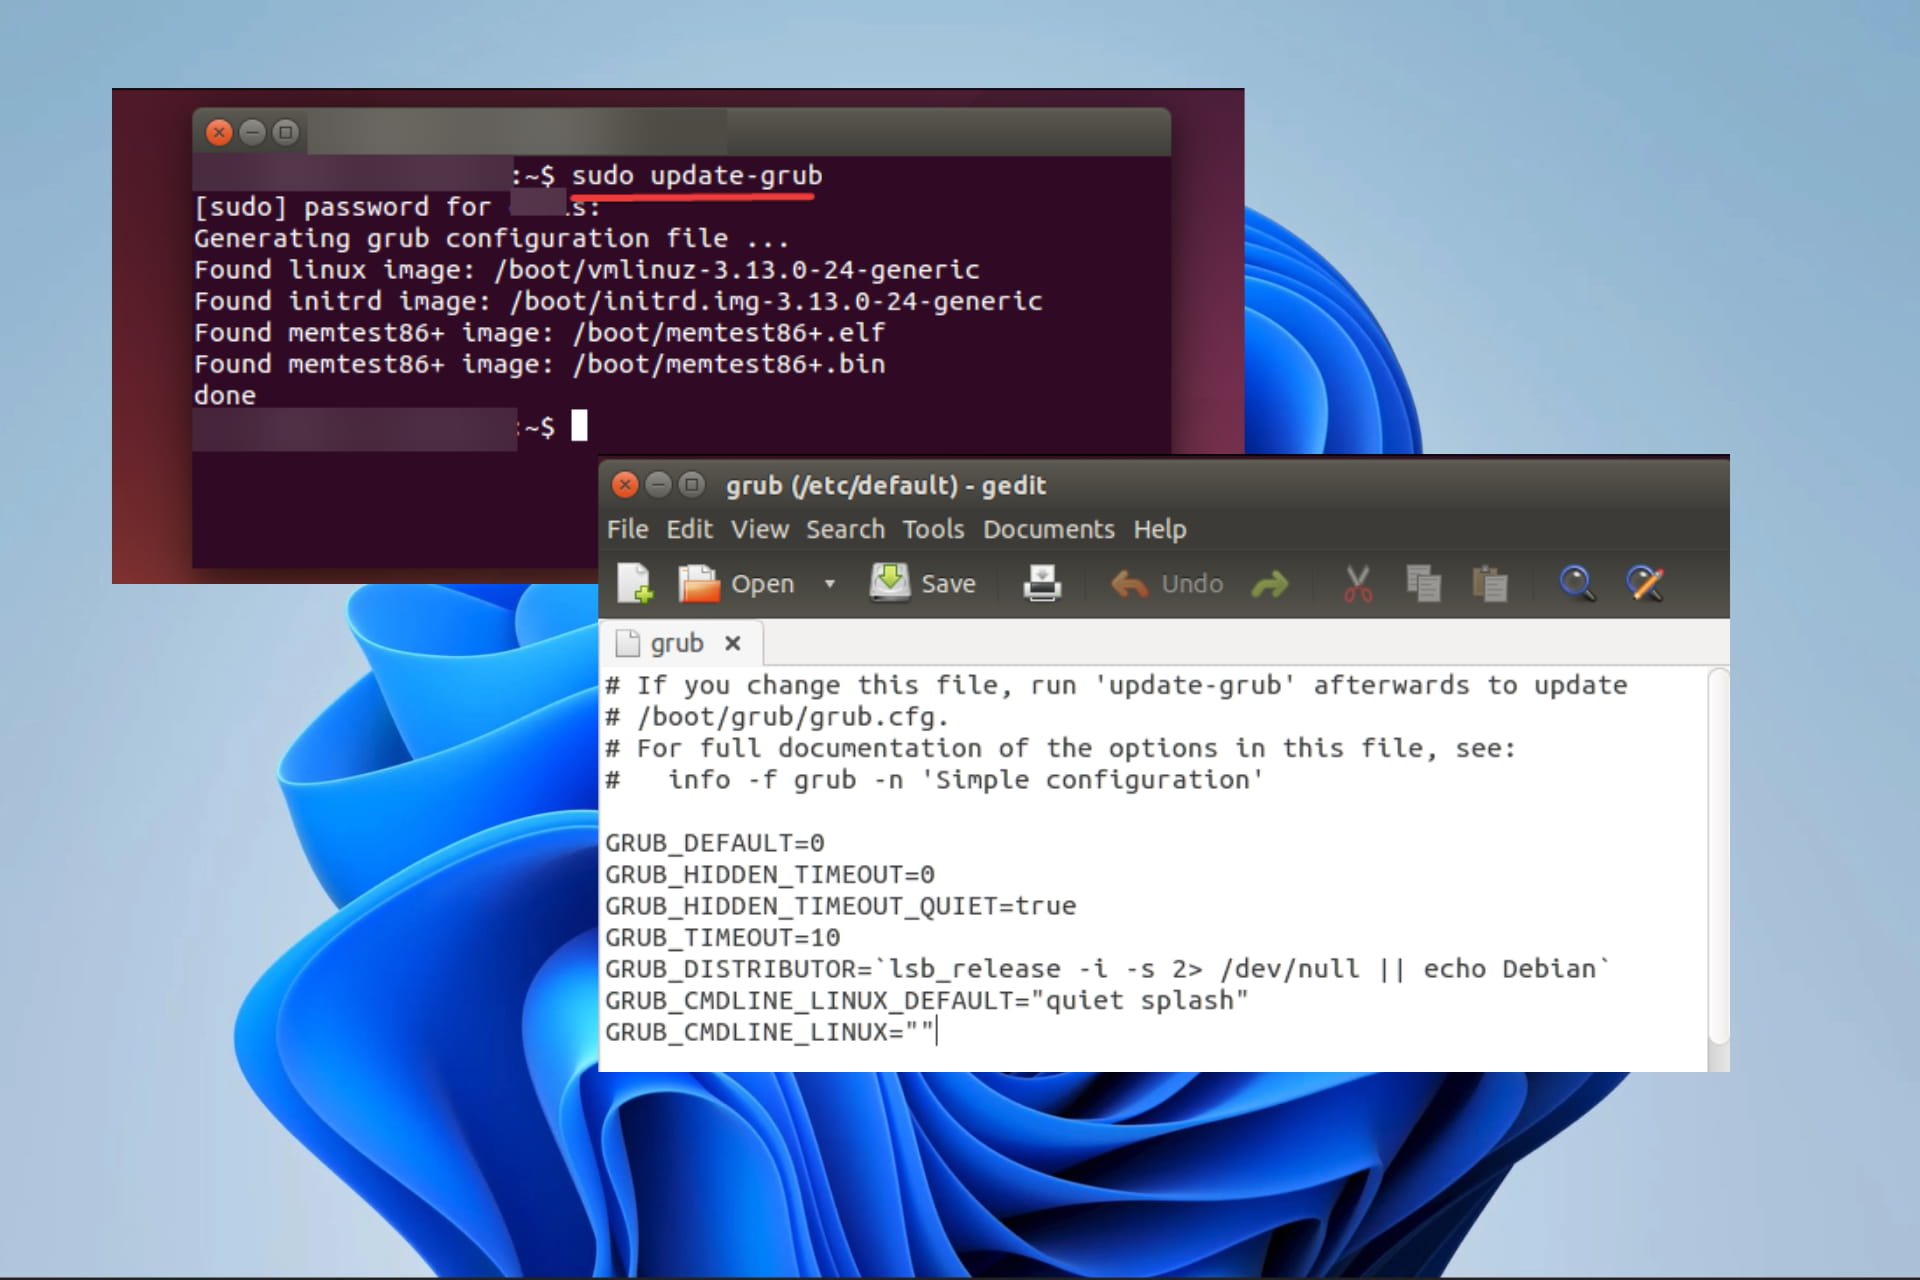
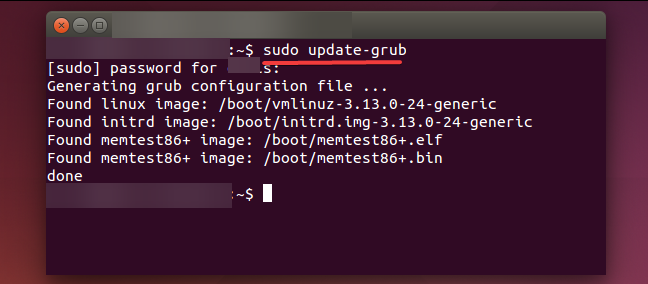
So step 1 is to make sure /boot/grub/grub.cfg is current using update-grub to make .cfg file. In terminal
sudo update-grub
Step 2 is to add custom menu entries in /etc/grub.d/40_custom. Don’t waste time trying to write your own simply open /boot/grub/grub.cfg search «menuentry» and copy the automatically generated entries.
The first in the list will be ubuntu mine looks like
menuentry 'Ubuntu' --class ubuntu --class gnu-linux --class gnu --class os $menuentry_id_option 'gnulinux-simple-9e66eed6-e672-49ff-a07c-afdc00809148' {
recordfail
load_video
gfxmode $linux_gfx_mode
insmod gzio
if [ x$grub_platform = xxen ]; then insmod xzio; insmod lzopio; fi
insmod part_gpt
insmod ext2
if [ x$feature_platform_search_hint = xy ]; then
  search --no-floppy --fs-uuid --set=root  9e66eed6-e672-49ff-a07c-afdc00809148
else
  search --no-floppy --fs-uuid --set=root 9e66eed6-e672-49ff-a07c-afdc00809148
fi
linux   /boot/vmlinuz-5.4.0-39-generic root=UUID=9e66eed6-e672-49ff-a07c-afdc00809148 ro  quiet splash $vt_handoff
initrd  /boot/initrd.img-5.4.0-39-generic
}
Windows will be similar. Copy both to /etc/grub.d/40_custom. The only change I made for Ubuntu is to add the —hotkey=key flag which will make grub boot the os associated with that hotkey.
menuentry 'Ubuntu2' --class ubuntu --class gnu-linux --class gnu --class os --hotkey=u $menuentry_id_option 'gnulinux-simple-9e66eed6-e672-49ff-a07c-afdc00809148' {
recordfail
load_video
gfxmode $linux_gfx_mode
insmod gzio
if [ x$grub_platform = xxen ]; then insmod xzio; insmod lzopio; fi
insmod part_gpt
insmod ext2
if [ x$feature_platform_search_hint = xy ]; then
  search --no-floppy --fs-uuid --set=root  9e66eed6-e672-49ff-a07c-afdc00809148
else
  search --no-floppy --fs-uuid --set=root 9e66eed6-e672-49ff-a07c-afdc00809148
fi
linux   /boot/vmlinuz-5.4.0-39-generic root=UUID=9e66eed6-e672-49ff-a07c-afdc00809148 ro  quiet splash $vt_handoff
initrd  /boot/initrd.img-5.4.0-39-generic
}
I use —hotkey=u here to set Ubuntu boot hotkey to u.
Then I tweaked the Windows entry, replacing $menuentry_id_option withe the grub —id flag.
menuentry "Windows 10" --class windows --class os --id windows-custom {
insmod part_gpt
insmod fat
if [ x$feature_platform_search_hint = xy ]; then
  search --no-floppy --fs-uuid --set=root  0EAE-C882
else
  search --no-floppy --fs-uuid --set=root 0EAE-C882
fi
chainloader /EFI/Microsoft/Boot/bootmgfw.efi
}
I used —id windows-custom. Save chages to /etc/grub.d/40_custom.
Finally open /etc/default/grub and add
GRUB_DISABLE_OS_PROBER=true
change GRUB_DEFAULT=0 to GRUB_DEFAULT=windows-custom
and change GRUB_TIMEOUT=10 to your choice of timings I use 0.5 just to give myself a little extra time to hit u to boot Ubuntu after POST.
Hopefully this saves someone a bit of headache, cheers!
- I have installed Windows 10
- I have installed Linux Mint Silvia and I have chosen a device for boot loader installation — sda.
- There is not Windows 10 in grub menu when the system starts
- I have booted via Linux Mint live USB.
- I Do step by step https://howtoubuntu.org/how-to-repair-restore-reinstall-grub-2-with-a-ubuntu-live-cd
- But it still no Windows 10 in grub menu
- I have booted via live windows 10 USB.
- With restoration tools, I have chosen the command line
- I have fixed Mbr by console command bootrec /FixMbr
- Ok, windows 10 is loading by there is no Grub.
- I have repeated steps 4 and 5
- There is no result
Also, I have tried to change grub config with this answer
https://askubuntu.com/questions/661947/add-windows-10-to-grub-os-list#answer-977251 — But in this case, There is Windows 10 — but when I chose — I will recursively going to grub
And with this answer
https://askubuntu.com/questions/661947/add-windows-10-to-grub-os-list#answer-890562
I have an error message when chose Windows 10 — There is no bootmgr directory
Thanks @Kinnectus for help
Also, I have tried
sudo os-prober
And getting
/dev/sda1:FreeDOS:FreeDOS:chain
/dev/sda2:FreeDOS:FreeDOS1:chain
And then I have tried
sudo update-grub
And getting
Generating grub configuration file ...
Found linux image: /boot/vmlinuz-4.10.0-38-generic
Found initrd image: /boot/initrd.img-4.10.0-38-generic
Found memtest86+ image: /boot/memtest86+.elf
Found memtest86+ image: /boot/memtest86+.bin
Found FreeDOS on /dev/sda1
Found FreeDOS on /dev/sda2
done
Unfortunately — there is not Windows 10 in grub menu
Also, I have fdisk output.
Device     Boot     Start       End   Sectors   Size Id Type
/dev/sda1            2048  16779263  16777216     8G  c W95 FAT32 (LBA)
/dev/sda2  *     16779264  33556479  16777216     8G  c W95 FAT32 (LBA)
/dev/sda3        33556480 770219115 736662636 351,3G  7 HPFS/NTFS/exFAT
/dev/sda4       770220030 976771071 206551042  98,5G  5 Extended
/dev/sda5       770220032 976771071 206551040  98,5G 83 Linux

Partition 4 does not start on physical sector boundary.
There is an issue.
Maybe the problem is with this issue?
Please, help me, I am stucking with this a whole day.
I completely have no idea, what am I doing wrong.
Grub2 — это загрузчик операционных систем, который позволяет выбирать, какую ОС запустить при старте компьютера. Он является стандартным загрузчиком для большинства дистрибутивов Linux и предоставляет возможность выбора ОС и редактирования конфигурации загрузчика. Однако по умолчанию grub2 не содержит информацию о Windows, и поэтому необходимо добавить эту ОС в меню grub2 вручную.
Чтобы добавить Windows в grub2, нужно выполнить несколько простых шагов. Первым делом нужно открыть файл конфигурации grub2. Он обычно расположен в директории /etc/grub.d/ и называется 40_custom. Для редактирования файла конфигурации понадобится права суперпользователя, поэтому его открывают и редактируют командой sudo gedit /etc/grub.d/40_custom.
После открытия файла конфигурации необходимо добавить блок следующего вида:
menuentry «Windows» {
set root=(hd1,1)
chainloader +1
}
Вам может потребоваться изменить параметр set root=(hd1,1) в зависимости от того, на каком разделе находится ваша ОС Windows. По умолчанию, hd1 означает второй физический диск, а 1 — первый раздел на этом диске. Если ваша ОС находится на другом диске или разделе, нужно изменить соответствующие значения.
После того, как вы добавили блок для Windows в файл конфигурации, нужно сохранить и закрыть его. Далее выполните команду sudo update-grub. Она обновит меню grub2 и добавит Windows в список доступных ОС при загрузке компьютера. Теперь вы можете выбрать Windows при старте и запустить его без проблем.
Содержание
- Шаг 1: Подготовка к добавлению Windows в grub2
- Шаг 2: Установка os-prober для обнаружения Windows
- Шаг 3: Редактирование файла конфигурации grub2
- Шаг 4: Перезапуск grub2 для применения изменений
- Шаг 5: Проверка добавления Windows в grub2
Шаг 1: Подготовка к добавлению Windows в grub2
Прежде чем мы сможем добавить Windows в меню grub2, нам нужно выполнить несколько подготовительных шагов. Обратите внимание, что для успешного добавления Windows в grub2 вам потребуется установочный диск или USB-накопитель с загрузочной версией дистрибутива Linux.
1. Вставьте установочный диск или USB-накопитель в компьютер и перезагрузите систему.
2. Загрузитесь с установочного носителя и выберите опцию «Установить Linux» или подобную.
3. Далее, следуйте инструкциям установщика Linux и укажите параметры разделов для установки. Убедитесь, что вы выбрали то же самое хранилище, где уже установлена ваша текущая версия Linux. Если на вашем компьютере уже установлен только Windows, вы можете создать новый раздел для Linux.
4. Укажите раздел для загрузчика. В большинстве случаев, выбор будет автоматическим и установщик выберет раздел с Linux, однако, убедитесь, что загрузчик будет установлен на тот же раздел, где уже находится ваша текущая версия Linux.
5. После завершения установки выберите опцию перезагрузки системы. Теперь ваш компьютер должен загрузиться с установленной версией Linux.
Шаг 2: Установка os-prober для обнаружения Windows
- Открой терминал. Это можно сделать нажатием `Ctrl + Alt + T`.
- Введи команду `sudo apt-get install os-prober` в терминале.
- Нажми Enter и введи пароль администратора системы.
- Дождись завершения установки os-prober.
После завершения установки os-prober, теперь grub2 будет автоматически обнаруживать Windows при создании меню загрузки. Переходи к следующему шагу, чтобы настроить grub2 для добавления Windows в меню загрузки.
Шаг 3: Редактирование файла конфигурации grub2
1. Откройте терминал и выполните следующую команду, чтобы отредактировать файл конфигурации grub2:
sudo nano /etc/default/grub
2. Найдите строку GRUB_DEFAULT=0 и измените значение на GRUB_DEFAULT=saved. Это позволит сохранить последний выбраный вариант загрузки.
3. Добавьте следующие строки после строки с опцией GRUB_DEFAULT=saved:
GRUB_SAVEDEFAULT=true
GRUB_TIMEOUT_STYLE=menu
4. Найдите строку GRUB_TIMEOUT=5 и измените значение на то, которое вам нужно. Это определяет количество секунд задержки перед автоматической загрузкой дефолтной операционной системы.
5. Добавьте следующую строку, чтобы настроить цвет фона главного меню grub2:
GRUB_BACKGROUND="/путь/к/изображению/background.jpg"
Замените /путь/к/изображению/background.jpg на путь к изображению, которое вы хотите использовать в качестве фона. Изображение должно быть в формате jpg.
6. Нажмите Ctrl + O, чтобы сохранить изменения, а затем нажмите Ctrl + X, чтобы выйти из редактора nano.
7. Обновите файл конфигурации grub2, выполнив следующую команду:
sudo update-grub
Теперь вы успешно отредактировали файл конфигурации grub2 для добавления Windows в меню загрузки. После перезагрузки вашей системы вы увидите новую опцию для загрузки Windows.
Шаг 4: Перезапуск grub2 для применения изменений
После всех предыдущих шагов необходимо перезапустить grub2, чтобы изменения в конфигурации вступили в силу. Для этого выполните следующие действия:
1. Откройте терминал или консоль суперпользователя.
2. Введите команду:
sudo update-grub
3. Нажмите Enter и дождитесь завершения обновления grub2.
4. Перезагрузите компьютер, чтобы убедиться, что изменения вступили в силу и Windows появилась в меню grub2.
Шаг 5: Проверка добавления Windows в grub2
После выполнения предыдущих шагов, добавление Windows в grub2 должно быть завершено. Теперь давайте проверим, правильно ли Windows была добавлена в меню grub2.
- Перезагрузите компьютер. При появлении экрана загрузки выберите операционную систему Linux.
- Дождитесь, пока Linux загрузится полностью.
- Откройте терминал и выполните команду
sudo update-grub. Это обновит конфигурацию grub2. - Перезагрузите компьютер и при появлении экрана загрузки выберите «Advanced options for Ubuntu».
- В списке доступных ядер Linux найдите «Windows Boot Manager».
- Выберите «Windows Boot Manager» и нажмите Enter, чтобы запустить Windows.
Если Windows успешно запускается после выбора «Windows Boot Manager» в меню grub2, это означает, что Windows была успешно добавлена в grub2. Вы можете перезапустить компьютер еще раз для дополнительной проверки.
Updating GRUB via the Terminal may be the fastest solution
by Afam Onyimadu
Afam is a geek and the go-to among his peers for computer solutions. He has a wealth of experience with Windows operating systems, dating back to his introduction… read more
Updated on
- GRUB allows users to choose between operating systems installed on their computers at startup.
- You may update GRUB to force it to notice newly added OS like Windows 11.
XINSTALL BY CLICKING THE DOWNLOAD
FILE
GRUB (GRand Unified Bootloader) is the bootloader that allows you to choose between different operating systems installed on your computer when you start it up. It provides a menu that lists all the available operating systems, and you can select the one you want to boot into.
However, when you install a new operating system, it may not appear in the GRUB menu. This can happen if the new operating system wasn’t set up to work with GRUB during installation or the bootloader was overwritten.
This article will explain why GRUB may not show Windows 11 and how you can add it to the GRUB menu in just a few steps.
Why is GRUB not showing Windows 11?
There are a few different reasons why Windows 11 may not be showing up in the GRUB menu.
- Incomplete installation – One possibility is that the installation or boot process did not correctly set up Windows 11 to work with GRUB. This can happen if the installer does not detect the other operating systems on the computer.
- Overwriting during installation – This can happen if the user chooses to install Windows 11 in the same partition as an existing operating system or if the user chooses to install Windows 11 to the same drive as the bootloader.
Note that there are different related issues users have faced, including GRUB rescue, deleted GRUB,
If Windows 11 is not showing up in the GRUB menu, you can add it by editing the GRUB configuration file and adding an entry for Windows 11. Below we outline the steps you must take.
1. Update GRUB
- Boot into an operating system that is already listed in the GRUB menu.
- Press Ctrl + Alt + T to launch the Terminal.
- Lastly, enter the script below:
sudo update-grub
This will update the GRUB configuration file and scan all partitions on your hard drive to detect operating systems that aren’t listed in the GRUB menu.
2. Manually add a GRUB entry
- Press Ctrl + Alt + T to launch the Terminal.
- Enter the script below to open the GRUB configuration file:
sudo nano /etc/grub.d/40_custom
- Now, paste the below lines of code at the end of the file (ensure to replace hdx,y with the partition where Windows 11 is installed):
menuentry "Windows 11" {
set root=(hdx,y)
chainloader +1
ntldr /bootmgr
} - Press Ctrl + X, then Y to save the changes made.
- Again, the script below to apply your changes:
sudo update-grub - Finally, restart the computer.

- How to Type Accents on Windows 11
- How to Disable the Insert Your Security Key Into the USB Port popup
- DTS Sound Unbound for Windows 11: Download & Install
- How to Remove Windows Copilot on Windows 11
It is important to note that some details may vary depending on your specific system configuration. However, back up your current GRUB configuration before making any changes. Also, select the proper partition and drive to avoid boot problems.
Let us know in the comments below what worked for you.
![]()
Save a backup of your all your grub configuration files.
There are two methods I have used in the past:
1) Install ntfs-3g (which should allow your installation to see the windows partition automatically) using your package manager. It was available in the EPEL repo for me, but you’ll have to find a different repo for it on Arch.
Then sudo grub2-mkconfig. This worked for me while trying to get my centos7 dual boot to work with windows.
2) Alternately, you’d be best off adding a custom entry by adding a file to /etc/grub.d/
For example, on my current system which is a Centos7 + Windows 10 dual boot:
$ sudo cat /etc/grub.d/40_custom
#!/bin/sh
exec tail -n +3 $0
# This file provides an easy way to add custom menu entries.  Simply type the
# menu entries you want to add after this comment.  Be careful not to change
# the 'exec tail' line above.
menuentry "Windows 10" {
   set root='(hd0,1)'
   chainloader +1
}
Where the menuentry parameter is the name that will appear in the grub menu. The (hd0,1) will change depending on what hard disk and what partition you have windows on.