You can create a local user account (an offline account) for anyone who will frequently use your PC. The best option in most cases, though, is for everyone who uses your PC to have a Microsoft account. With a Microsoft account, you can access your apps, files, and Microsoft services across your devices.
If needed, the local user account can have administrator permissions; however, it’s better to just create a local user account whenever possible.
Caution: A user with an administrator account can access anything on the system, and any malware they encounter can use the administrator permissions to potentially infect or damage any files on the system. Only grant that level of access when absolutely necessary and to people you trust.
As you create an account, remember that choosing a password and keeping it safe are essential steps. Because we don’t know your password, if you forget it or lose it, we can’t recover it for you.
Create a local user account
-
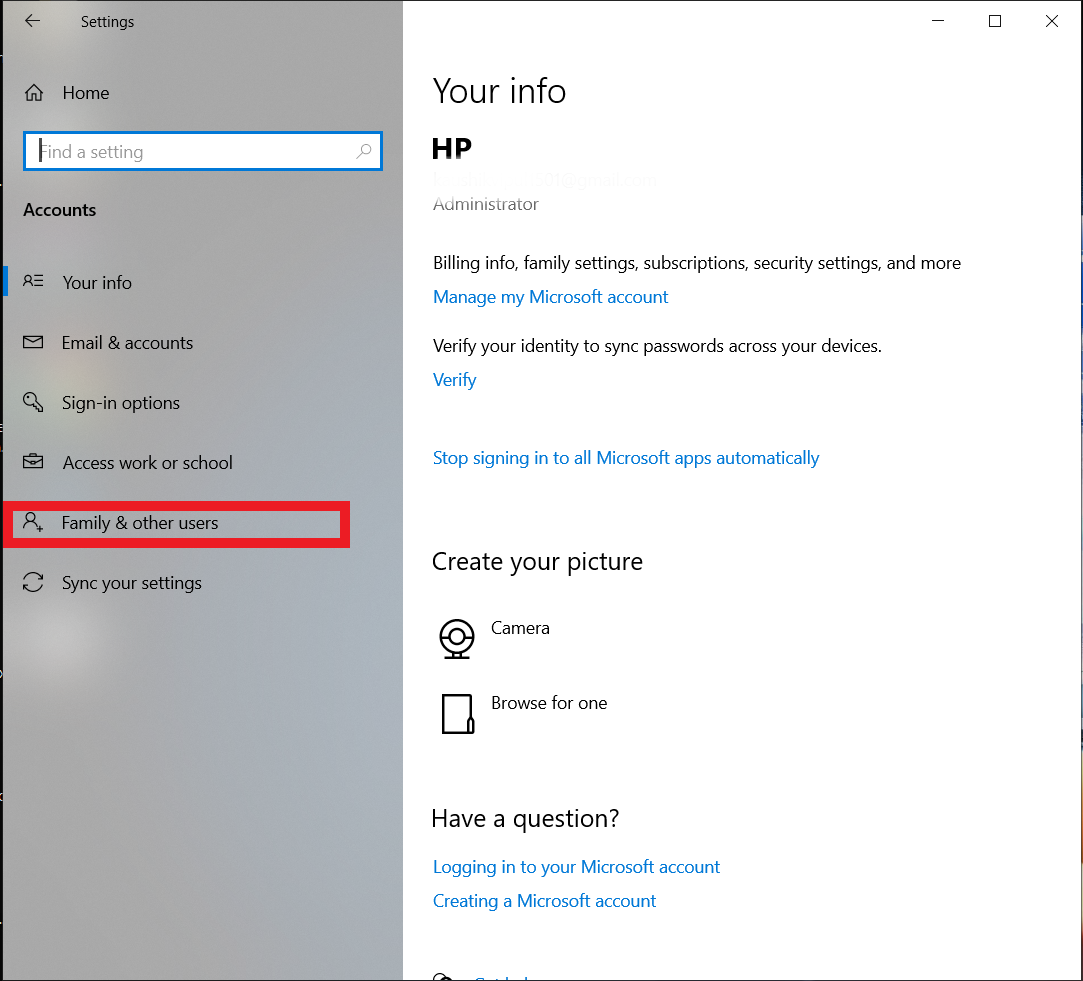
Select Start > Settings > Accounts and then select Family & other users. (In some versions of Windows you’ll see Other users.)
-
Next to Add other user, select Add account.
-
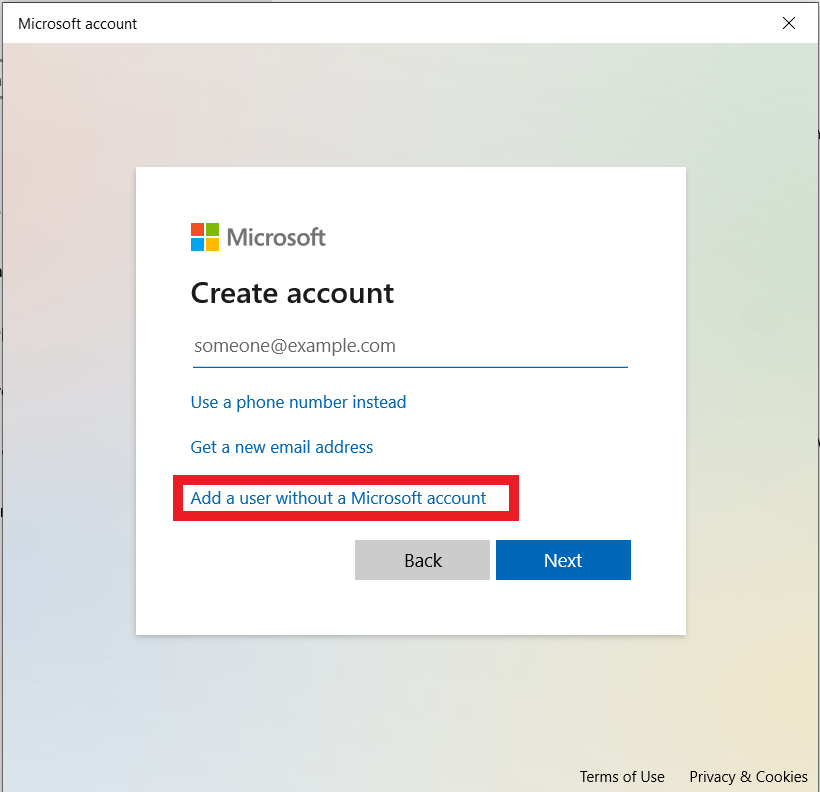
Select I don’t have this person’s sign-in information, and on the next page, select Add a user without a Microsoft account.
-
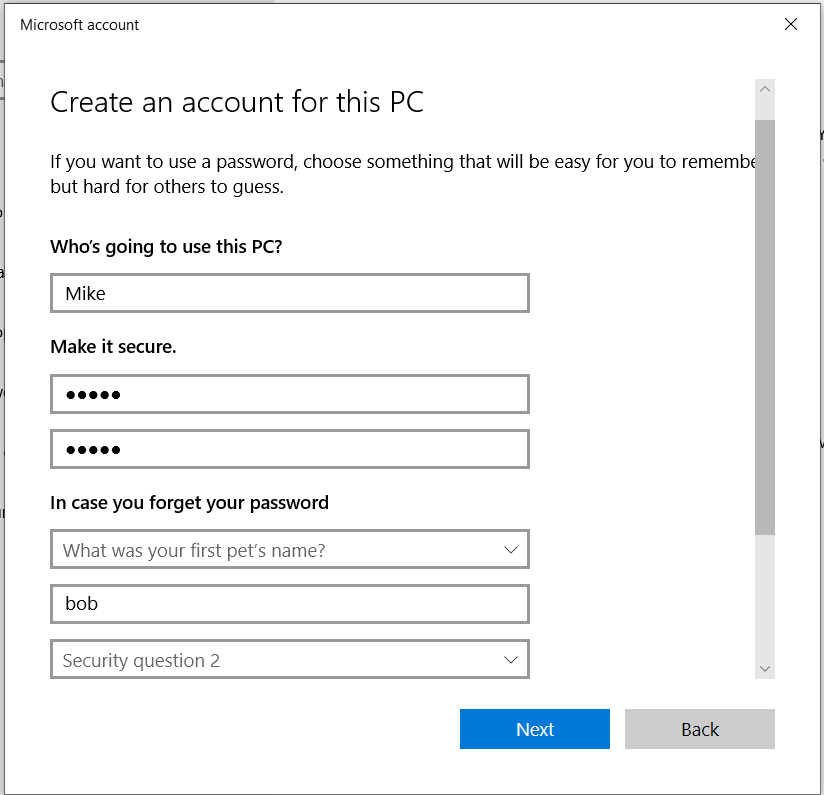
Enter a user name, password, or password hint—or choose security questions—and then select Next.
Open Settings and create another account
Change a local user account to an administrator account
-
Select Start > Settings > Accounts .
-
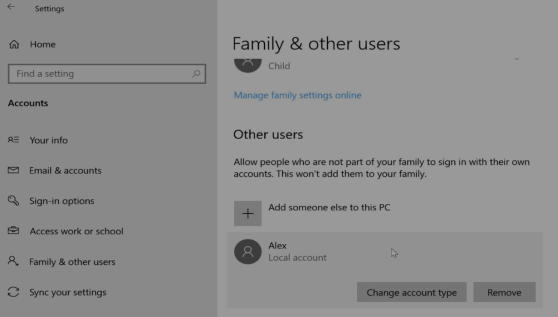
Under Family & other users, select the account owner name (you should see «Local account» below the name), then select Change account type.
Note: If you choose an account that shows an email address or doesn’t say «Local account», then you’re giving administrator permissions to a Microsoft account, not a local account.
-
Under Account type, select Administrator, and then select OK.
-
Sign in with the new administrator account.
If you’re using Windows 10, version 1803 and later, you can add security questions as you’ll see in step 4 under Create a local user account. With answers to your security questions, you can reset your Windows 10 local account password. Not sure which version you have? You can check your version.
Create a local user account
-
Select Start > Settings > Accounts and then select Family & other users. (In some versions of Windows you’ll see Other users.)
-
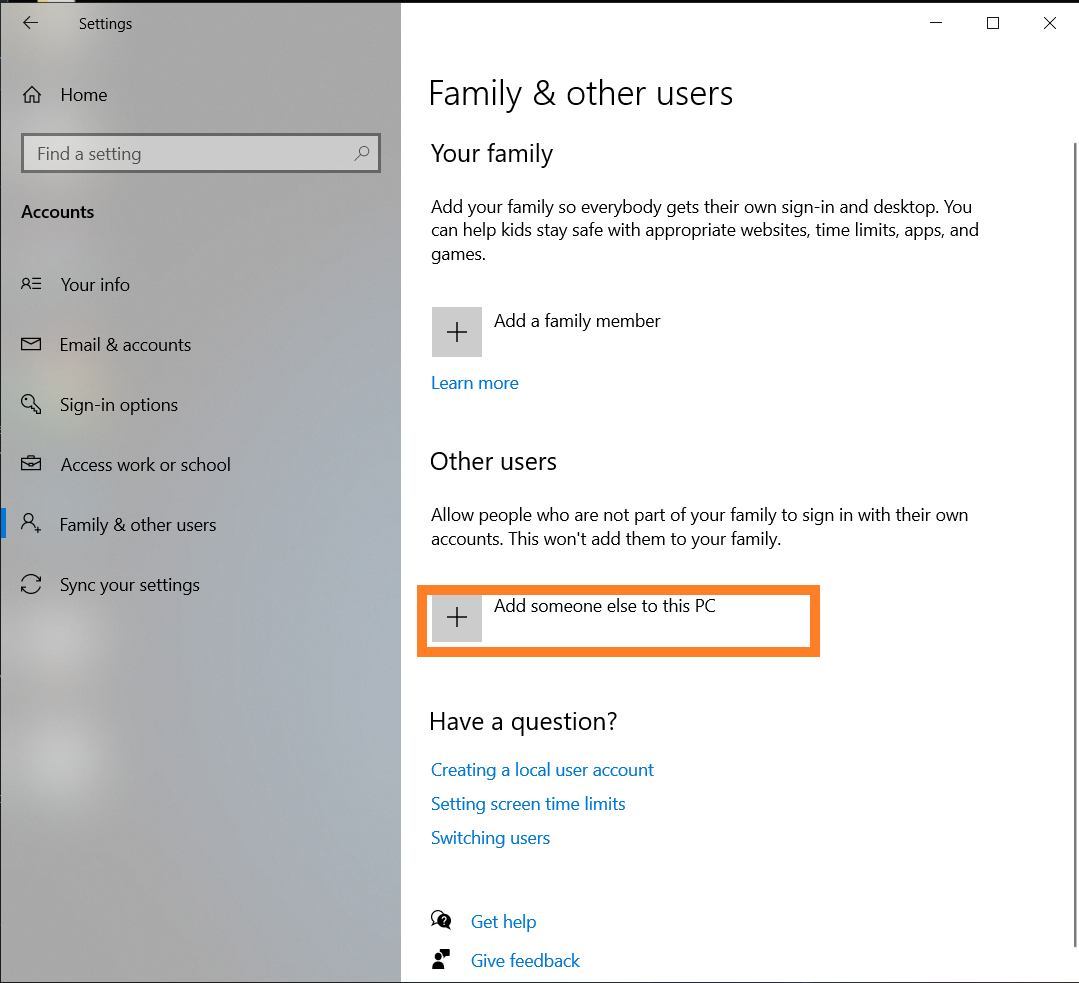
Select Add someone else to this PC.
-
Select I don’t have this person’s sign-in information, and on the next page, select Add a user without a Microsoft account.
-
Enter a user name, password, or password hint—or choose security questions—and then select Next.
Open Settings and create another account
Change a local user account to an administrator account
-
Select Start > Settings > Accounts .
-
Under Family & other users, select the account owner name (you should see «Local Account» below the name), then select Change account type.
Note: If you choose an account that shows an email address or doesn’t say «Local account», then you’re giving administrator permissions to a Microsoft account, not a local account.
-
Under Account type, select Administrator, and then select OK.
-
Sign in with the new administrator account.
Related topics
Microsoft account help
How to reset your Microsoft account password
Get help with Windows activation errors
Need more help?
Want more options?
Explore subscription benefits, browse training courses, learn how to secure your device, and more.
Communities help you ask and answer questions, give feedback, and hear from experts with rich knowledge.
This wikiHow teaches you how to add a new user to a Windows PC. Maintaining separate user accounts allows different users to keep their files and settings separate.
-

1
Click the Start
button. It’s usually at the bottom-left corner of the screen.
-
2
Click
Settings.
-
3
Click Accounts.
-
4
Click Family & other people. It’s in the left column.
-
5
Click Add someone else to this PC. It’s under the “Other People” header.
-
6
Type the new user’s Microsoft account email address. This is the address they use to log into Microsoft services such as Outlook.com, Xbox, and Office Online.
-
7
Click Next.
-
8
Click Finish. Now that you’ve added this user, they’ll be able to sign in to the computer using their Microsoft email address and password.


-
1
Click the
menu. It’s usually at the bottom-left corner of the screen.
- Use this method to create a user for someone who doesn’t have a Microsoft account, such as a child.[1]
- Use this method to create a user for someone who doesn’t have a Microsoft account, such as a child.[1]
-
2
Click
Settings.
-
3
Click Accounts.
-
4
Click Family & other people. It’s in the left column.
-
5
Click Add someone else to this PC. It’s under the “Other People” header.
-
6
Click I don’t have this person’s sign-in information. If you see a place to enter a username, password, and hint, skip this step.
-
7
Click Add a user without a Microsoft account. If you skipped the last step, skip to the next step.
-
8
Enter a username. The new user will use this name to sign in to Windows.
-
9
Enter and confirm a password. The password must be typed exactly the same in both blanks. Once the account is created, the user will be able to reset their own password if they desire.
-
10
Type a password hint. This is something that may jog the new user’s memory in case they forget this password.
-
11
Click Next. The local account is now created and ready to use.


-
1
Open the Control Panel. Click the Start
button and then click Control Panel in the right column.
-
2
Click on «Add or remove user accounts». It’s under the «User Accounts and Family Safety» header.
-
3
Click the «Create a new account» link.
-
4
Name the account. Type the username for the account.
-
5
Choose an account type. Click the radio button next to either «Standard user» or «Administrator».
- Standard: Standard account users can use most software and change system settings that do not affect other users or the security of the computer.
- Administrator: Administrators have complete access to the computer and can make any desired changes. To help make the computer more secure, administrators are asked to provide a password or confirmation before making changes that affect other users.
-
6
Save your changes. Click the Create Account button.
-
7
Finished.
- To modify an account (such as by adding a password, changing the user profile picture, or placing parental controls), just click on the name of the account. Next, click on the appropriate link.


Ask a Question
200 characters left
Include your email address to get a message when this question is answered.
Submit
References
About this article
Thanks to all authors for creating a page that has been read 1,799 times.
Is this article up to date?
As part of a Windows 11 installation, you will automatically create a user account that you can use to log into the Microsoft system. The account has administrator privileges which is perfect for anyone using their device alone. However, if yours is a family device or a work computer shared with several users, an individual user account is required. We will show you how to add a new user in Windows 11.
Contents
- Create a new user in Windows 11– quick tutorial
- Add a new user in Windows 11: local user or Microsoft account?
- Add a user in Windows 11: three options for a new user account
- Option 1: create a new user in Windows 11
- Step 1: launch settings
- Step 2: Menu “Family & other users”
- Step 3: Select account type
- Step 4: Perform or skip Microsoft account linking
- Step 5: Add a Windows 11 account
- Option 2: Add Windows 11 user via password management
- Step 1: Access Windows 11 password management
- Step 2: Perform or skip linking to Microsoft account
- Step 3: Add new Windows 11 user
- Option 3: Add Windows 11 user account via command prompt
- Step 1: Run command prompt as administrator
- Step 2: Create new Windows 11 user
- Option 1: create a new user in Windows 11
$1 Domain Names
Register great TLDs for less than $1 for the first year.
Why wait? Grab your favorite domain name today!
Matching email
SSL certificate
24/7/365 support
Create a new user in Windows 11– quick tutorial
You can add a new user to Windows 11 at any time. The easiest way to do so is via the Settings:
- Launch Settings from the Start menu or using the key combination [Windows] key + [i].
- Select the “Accounts” item from the left side menu.
- Click on the “Family & other users” section.
- Click “Add account” for the desired account type (“family member” or “additional user”).
- Link the account to a Microsoft account (always required for the family account) or create the user as a local user by pressing “I don’t have this person’s sign-in information” and “Add user without Microsoft account” in sequence.
- Assign a username and a secure password and answer three of the selectable security questions.
- Add the new Windows 11 user account via “Next”.
Add a new user in Windows 11: local user or Microsoft account?
When you create a new user in Windows 11, you have two options: You can either link the new account to a Microsoft account for logging into the system or you can generate a local user account.
If you select the former, you will log in with an online account every time you log in to Windows. This offers some advantages when using Microsoft services like OneDrive or Skype. In addition, linking to a Microsoft account enables cross-device synchronization of your data and settings. Merging a user and a Microsoft account is mandatory if you want to download apps from the in-house Microsoft Store.
A local user does not have access to the above features; however, a link can be created at any time.
Add a user in Windows 11: three options for a new user account
As with many other features and functions, Windows 11 allows for different approaches to adding new users. Read on to find out more about the three most commonly used options to add a user in Windows 11.
Option 1: create a new user in Windows 11
The standard option to add a new user account in Windows 11 is via the Settings – the central configuration menu of the Microsoft system. Among other things, you can adjust the language settings to switch the keyboard in Windows 11 or the basic configuration for screen recording in Windows 11 with the Xbox Game Bar.
Step 1: launch settings
Launch the Settings by opening your Start menu and clicking on the entry of the same name. If the configuration menu icon is not pinned, you can use the search function or the key combination [Windows] key + [i].
Step 2: Menu “Family & other users”
In Settings, first switch to the “Accounts” menu on the left. Click “Family & other users” to open the crucial user account management window:

Step 3: Select account type
You can now select a family account or a normal user account.
The former allows you to extend your user account with one or more sub-accounts for your family members. However, you will need to specify or create an email address for each additional account, because this account type is not possible without linking to a Microsoft account.
If you create an ordinary user account, you will be prompted to enter an email address, but in this case you can skip linking it and create the account either temporarily or permanently without online features.
Click “Add account” on the account type of your choice to start creating Windows 11 users.

Step 4: Perform or skip Microsoft account linking
You have the option to link the new user account to a Microsoft account. If you wish to do so, enter the corresponding email address or phone number and click “Next”. In case of a family account, this step is mandatory.
To create a local Windows 11 user without a shortcut, click “I don’t have this person’s sign-in information”.

Step 5: Add a Windows 11 account
From the next dialog select “Add user without Microsoft account” and start setting up the new user account. Enter the desired username and a secure password (twice) and select three security questions. Windows 11 will ask you for them in case you forget your password. Click “Next” to create the new Windows 11 user:

Option 2: Add Windows 11 user via password management
Windows 11, much like its predecessors, offers password management for existing user accounts. Here, you can create a new user to share Windows 11 with multiple people.
Step 1: Access Windows 11 password management
Password management is hidden well in Windows 11 but can be accessed quickly and easily using the “Run” function. You can use the function either with the key combination [Windows] key + [R] or by right-clicking on the Start menu and selecting “Run”.
Type the following command into the “Run” window and confirm it by pressing “OK”:
Step 2: Perform or skip linking to Microsoft account
In the next step click “Add”. Choose whether you want to link the user to a Microsoft account (enter the email address and click “Next” or “Set up new email address”) or create a new local account. For the latter, click “Sign in without a Microsoft account (not recommended)” and then select “Local account”.

Step 3: Add new Windows 11 user
As with account creation in the Settings section, enter the desired username and a suitable password at this point. Confirm your password. You do not have to answer any security questions; only enter a password hint. Finally, press “Next”.

Option 3: Add Windows 11 user account via command prompt
The command prompt, a Windows command line tool, provides the option to create new user accounts. However, you need administrator rights for this step, else the required commands cannot be executed.
Step 1: Run command prompt as administrator
Access the Windows search function (magnifying glass icon in the taskbar) and enter the term “cmd”. The command prompt will be displayed as the top match. Select the menu item “Run as administrator” to launch the command tool:

Step 2: Create new Windows 11 user
Now, enter the command to create a new user account into the command prompt. The syntax is as follows:
net user "Username" "Password" /addInside the quotation marks, enter the desired credentials. Finally, confirm the command by hitting Enter.
If command execution was successful, you should see a corresponding message:

Related articles

How to speed up Windows 11
Operating systems like Windows 11 are the most important software running on a computer. But when using your device over a long period of time its performance could steadily deteriorate. Read on to find out how to speed up Windows 11 and minimize the impact of the operating system on overall performance.
How to speed up Windows 11
 DrHitchShutterstock
How to change startup programs in Windows 11
Launching programs automatically during a system startup is a useful feature that can save you lots of time having to reopen applications or documents you tend to use regularly. But how do you add or remove applications for startup in Windows 11? In this article, we summarize the basics of Windows 11 startup and how you can set up a folder.
How to change startup programs in Windows 11
 G-Stock StudioShutterstock
How to switch to Dark Mode in Windows 11
“Dark modes” have been popular in applications and operating systems for several years now. The dark themes are supposed to be easier on the PC user’s eyes, and they’re aesthetically pleasing. Windows 11 has a dark mode, which can be switched on and off in the settings, via the registry or third-party software. We’ll show you how this works.
How to switch to Dark Mode in Windows 11
 В этой инструкции для начинающих о том, как создать нового пользователя Windows 10 несколькими способами, как сделать его администратором или наоборот, создать ограниченную учетную запись пользователя компьютера или ноутбука. Также может пригодиться: Как удалить пользователя Windows 10.
В Windows 10 присутствуют два типа учетных записей — учетные записи Майкрософт (требующие адреса электронной почты и синхронизирующие параметры онлайн) и локальные учетные записи пользователей, не отличающиеся от тех, которые могут быть вам привычны по ранним версиям Windows. При этом одну учетную запись всегда можно «превратить» в другую (например, Как удалить учетную запись Майкрософт). В статье будут рассмотрено создание пользователей с обоими типами учетных записей. Также может быть полезным: Как сделать пользователя администратором в Windows 10.
- Создание нового пользователя в Параметрах Windows 10
- Как создать пользователя в командной строке
- Локальные пользователи и группы Windows 10
- Добавление пользователя в control userpasswords2
- Видео инструкция
Создание пользователя в параметрах Windows 10
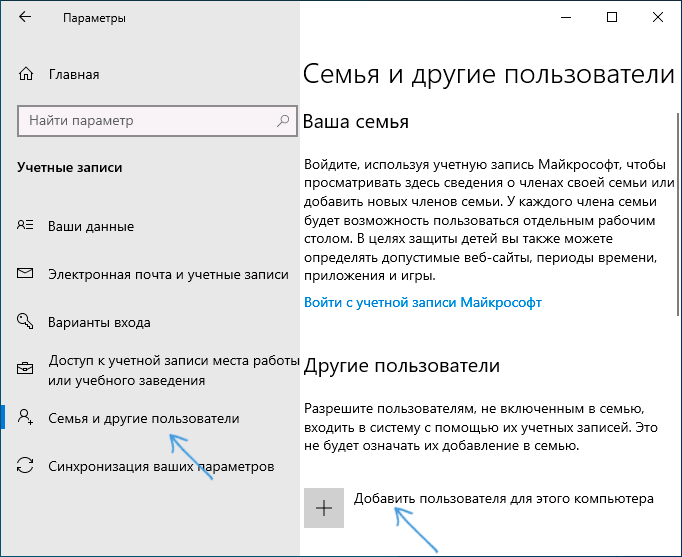
Основной способ создания нового пользователя в Windows 10 — использование пункта «Учетные записи» нового интерфейса настроек, доступного в «Пуск» — «Параметры». В указанном пункте настроек откройте раздел «Семья и другие пользователи».
- В разделе «Ваша семья» вы сможете (при условии, что используете учетную запись Майкрософт) создать учетные записи для членов семьи (также синхронизируемые с Майкрософт), подробнее о таких пользователях я писал в инструкции Родительский контроль Windows 10.
- Ниже, в разделе «Другие пользователи» можно добавить «простого» нового пользователя или администратора, учетная запись которого не будет контролироваться и являться «членом семьи», можно использовать как учетные записи Майкрософт, так и локальные учетные записи. Этот вариант будет рассматриваться далее.
Для создания нового пользователя, не входящего в семью и без возможностей родительского контроля, выполните следующие шаги:
- В разделе «Другие пользователи» нажмите «Добавить пользователя для этого компьютера».

- В следующем окне вам будет предложено указать адрес электронной почты или номер телефона — введите их, при условии, что вы хотите добавить пользователя с уже существующей учетной записью Майкрософт.
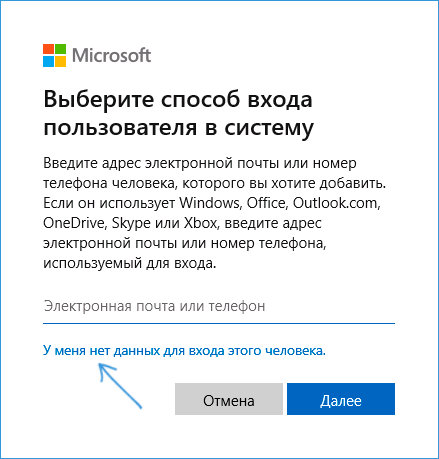
- Если вы собираетесь создавать локальную учетную запись (или даже учетную запись Майкрософт, но пока не зарегистрировали e-mail для нее), нажмите «У меня нет данных для входа этого человека» внизу окна.

- В следующем окне будет предложено создать учетную запись Майкрософт. Вы можете заполнить все поля для создания пользователя с такой учетной записью или нажать «Добавить пользователя без учетной записи Майкрософт» внизу.

- В следующем окне останется ввести имя пользователя, пароль (если требуется пользователь без пароля, просто не вводите ничего в соответствующие поля), подсказку для пароля и указать вопросы для восстановления пароля, на случай, если он будет забыт. Этого достаточно, чтобы новый пользователь Windows 10 появился в системе и под его учетной записью был возможен вход.


По умолчанию, новый пользователь имеет права «обычного пользователя». Если нужно сделать его администратором компьютера, выполните следующие шаги (при этом, вы для этого также должны быть администратором):
- Зайдите в Параметры — Учетные записи — Семья и другие пользователи.
- В разделе «Другие пользователи» нажмите по пользователю, которого нужно сделать администратором и кнопку «Изменить тип учетной записи».
- В списке выберите «Администратор» и нажмите Ок.


Войти под новым пользователем можно, нажав по имени текущего пользователя вверху меню пуск или с экрана блокировки, предварительно выйдя из текущей учетной записи.

Как создать нового пользователя в командной строке
Для того, чтобы создать пользователя с помощью командной строки Windows 10, запустите ее от имени администратора (например, через меню правого клика по кнопке «Пуск»), после чего введите команду (если имя пользователя содержит пробелы, используйте кавычки, пароль брать в кавычки не нужно):
net user имя_пользователя пароль /add
И нажмите Enter.
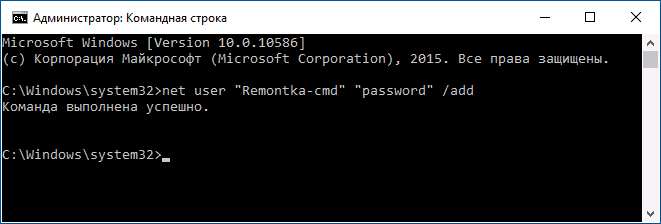
После успешного выполнения команды, в системе появится новый пользователь. Также вы можете сделать его администратором, используя следующую команду (если команда не сработала, а у вас не лицензия Windows 10, попробуйте вместо Администраторы писать administrators):
net localgroup Администраторы имя_пользователя /add
Вновь созданный таким образом пользователь будет иметь локальную учетную запись на компьютере.
Создание пользователя в «Локальные пользователи и группы» Windows 10
И еще один способ создания локальной учетной записи с помощью элемента управления «Локальные пользователи и группы»:
- Нажмите клавиши Win+R, введите lusrmgr.msc в окно «Выполнить» и нажмите Enter.
- Выберите «Пользователи», а затем в списке пользователей кликните правой кнопкой мыши и нажмите «Новый пользователь».

- Задайте параметры для нового пользователя.


Чтобы сделать созданного пользователя администратором, кликните по его имени правой кнопкой мыши, выберите пункт «Свойства». Затем, на вкладке «Членство в группах» нажмите кнопку «Добавить», наберите «Администраторы» и нажмите «Ок».
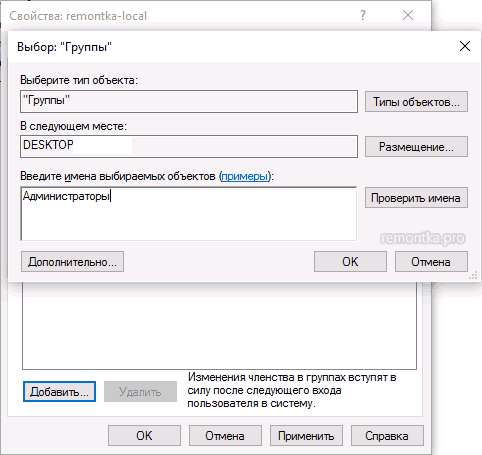
Готово, теперь выбранный пользователь Windows 10 будет иметь права администратора.
Добавление учетной записи в control userpasswords2
И еще один очень простой способ добавления новой учетной записи пользователя Windows 10:
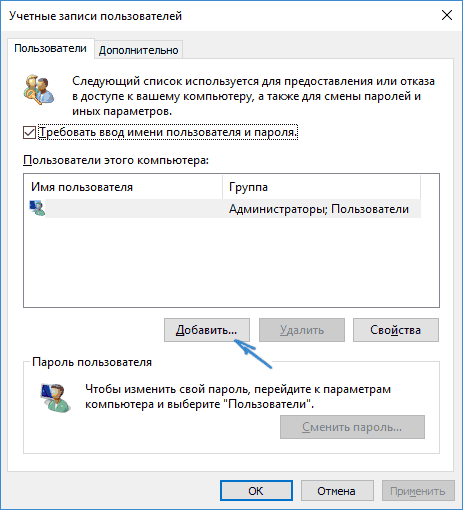
- Нажмаем клавиши Win+R, вводим control userpasswords2

- В списке пользователей нажимаем кнопку добавления нового пользователя

- Дальнейшее добавление нового пользователя (доступны как учетная запись Майкрософт, так и локальная учетная запись) будет выглядеть тем же самым образом, что и в первом из описанных способов.


Видео инструкция
Если остались какие-либо вопросы или что-то не получается так просто, как это описано в инструкции — пишите, постараюсь помочь.
In windows 10, creating multiple user accounts is a good practice for security. Creating a new user in windows 10 is a very easy task. You can follow the steps below to create a new user.
Step 1: Go to the Start menu and click the Settings icon in lower left corner.
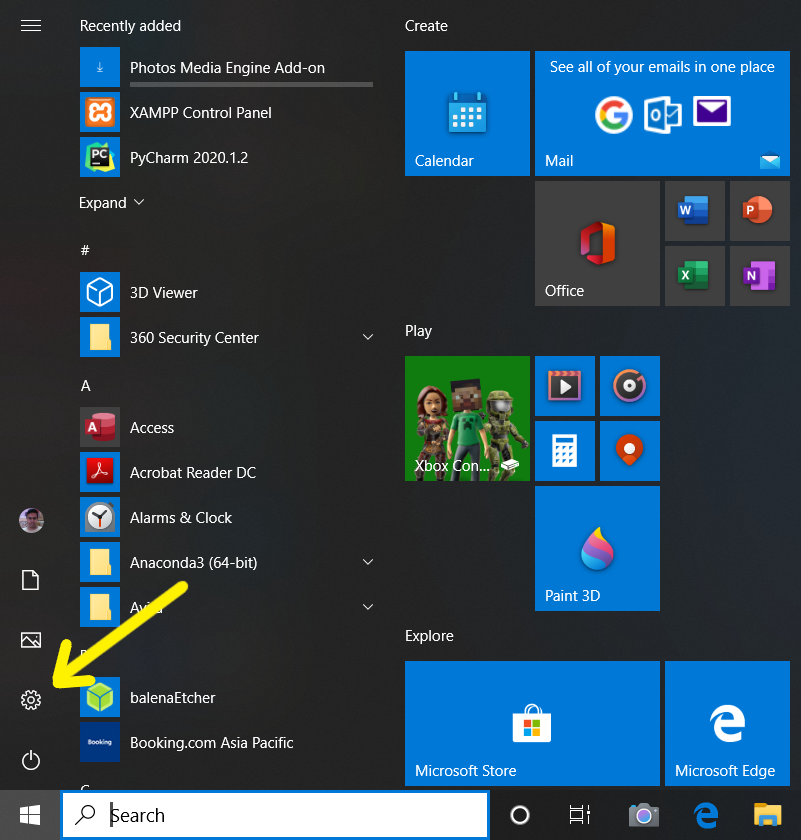
Step 2: Now in the settings window, click on the Accounts icon (most preferably below network and internet).
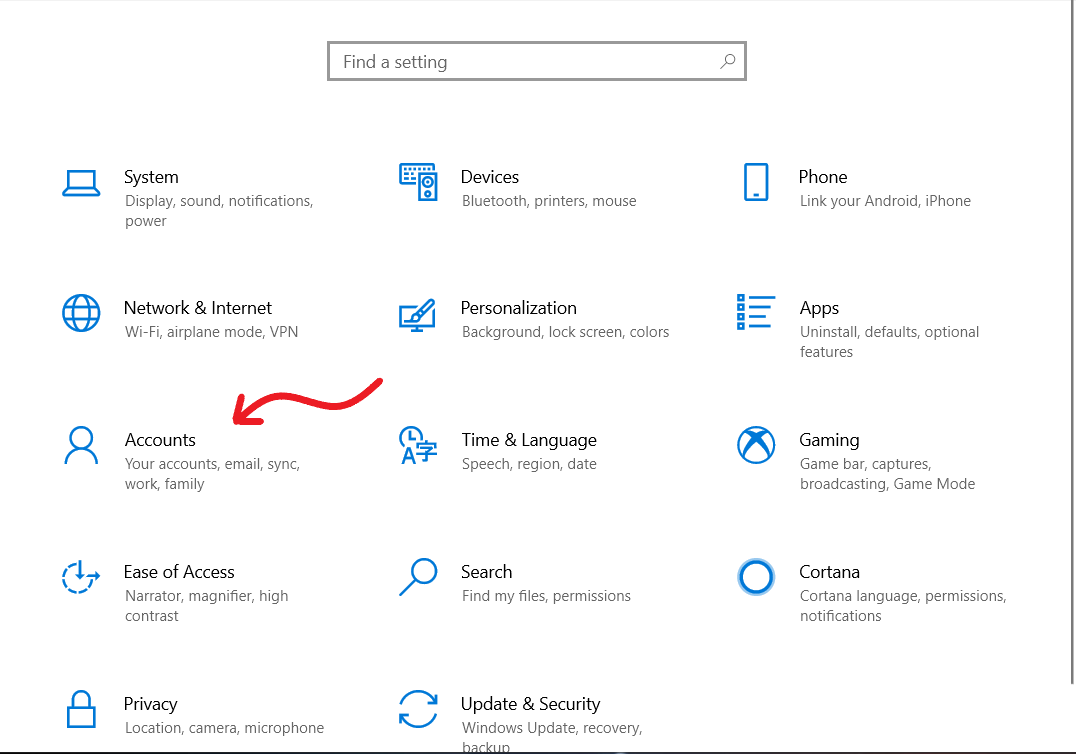
Step 3: In the right menu of the window click Family & other users.
Step 4: Now click on Add someone else to this PC.
Step 5: If you don’t have the sign info of new user then proceed on clicking I don’t have this person’s sign-in information. And then click on Add a user without Microsoft account.
Step 6: Enter all the info of the new user and click on Next.
Step 7: Now your new user account is listed below Add someone else to this PC and you are done.

Alternate way using CMD:
- GOTO CMD(Command Prompt)
- Run as Administrator
- Type command “ net user username /add ” or “ net user username password /add ”
- New user with the specified username will be added
Last Updated :
27 Jun, 2022
Like Article
Save Article