Notes:
-
HomeGroup has been removed from Windows 10 (Version 1803). For more info, see HomeGroup removed from Windows 10 (Version 1803).
-
After you install the update, you won’t be able to share files and printers using HomeGroup. However, you can still do these things by using features that are built into Windows 10.
-
To learn how to share printers in Windows 10, Share your network printer.
-
To learn how to share files, see Share files in File Explorer.
What’s a homegroup?
A homegroup is a group of PCs on a home network that can share files and printers. Using a homegroup makes sharing easier. You can share pictures, music, videos, documents, and printers with other people in your homegroup.
You can help protect your homegroup with a password, which you can change at any time. Other people can’t change the files that you share unless you give them permission to do so.
After you create or join a homegroup, you select the libraries (for example, My Pictures or My Documents) that you want to share. You can prevent specific files or folders from being shared, and you can share additional libraries later.
HomeGroup is available in Windows 7, Windows 8.1, Windows RT 8.1, and Windows 7. You can join a homegroup on a PC running Windows RT 8.1, but you can’t create a homegroup or share content with the homegroup. In Windows 7 Starter and Windows 7 Home Basic, you can join a homegroup, but you can’t create one.
Create a homegroup
-
Open HomeGroup by typing homegroup in the search box on the taskbar, and then selecting HomeGroup.
-
Select Create a homegroup > Next.
-
Select the libraries and devices you want to share with the homegroup, and then select Next.
-
A password will appear—print it or write it down. You’ll need this password to add other PCs to your homegroup.
-
Select Finish.
Notes:
-
If a homegroup already exists on your network, you’ll be asked to join it instead of creating a new one.
-
If your PC belongs to a domain, you can join a homegroup but you can’t create one. You can get to libraries and devices on other homegroup PCs, but you can’t share your own libraries and devices with the homegroup.
-
You can join a homegroup on a PC running Windows RT 8.1, but you can’t create a homegroup or share content with the homegroup.
After you create a homegroup, other PCs running Windows 7, Windows 8.1, Windows RT 8.1, or Windows 7 on your network can join it.
Add your other PCs to the homegroup
After someone on your network creates a homegroup, the next step is to join it. You’ll need the homegroup password, which you can get from any homegroup member. All user accounts except the Guest account will belong to the homegroup. Each person controls access to his or her own libraries.
To join a homegroup, follow these steps on the PC that you want to add to the homegroup:
Note: If you don’t see a space to enter a password, there might not be a homegroup available. Make sure that someone has created a homegroup, or you can create a homegroup yourself.
-
Open HomeGroup by typing homegroup in the search box on the taskbar, and then selecting HomeGroup.
-
Select Join now > Next.
-
Select the libraries and devices you want to share with the homegroup, and then select Next.
-
Type the homegroup password in the box, and then select Next.
-
Select Finish.
Find homegroup files
PCs that belong to your homegroup will appear in File Explorer.
To get to shared libraries on other homegroup PCs
-
Open File Explorer, by typing file explorer in the search box in the taskbar, and then selecting File Explorer.
-
Under Homegroup, select the user account name of the person whose libraries you want to get to.
-
In the file list, double-tap or double-click the library you want to get to, and then double-tap or double-click the file or folder you want.
Notes:
-
PCs that are turned off, hibernating, or asleep won’t be available as part of the homegroup.
-
If you’ve made homegroup files or folders available offline, and then you disconnect from the network, the files or folders will no longer be visible in the Libraries window. To find them, open the Network folder.
Share libraries and devices, or stop sharing them
When you create or join a homegroup, you select the libraries and devices you want to share with other people in the homegroup. Libraries are initially shared with Read access, which means that other people can look at or listen to what’s in the library, but they can’t change the files in it. You can adjust the level of access at any time, and you can exclude specific files and folders from sharing.
Only those people who belong to the homegroup can see shared libraries and devices. You can choose to share libraries, devices, or individual files and folders with specific people in your homegroup or with everyone.
Note: Keep in mind that children who use homegroup PCs will have access to all shared libraries and devices.
To share devices and entire libraries
-
Open HomeGroup by typing homegroup in the search box on the taskbar, and then select HomeGroup.
-
Select Change what you’re sharing with the homegroup.
-
Select the libraries and devices you want to share with homegroup, and then select Next > Finish.
To share individual files or folders
-
Open File Explorer by typing file explorer in the search box in the taskbar, and then selecting File Explorer.
-
Select the item, and then select the Share tab.
-
Choose an option in the Share with group. There are different Share with options depending on whether your PC is connected to a network and what kind of network it is.
-
To share items with a particular person, choose that person’s account.
-
To share with all the members of your homegroup, choose one of the Homegroup options. (Select libraries to share with all the members of your homegroup by opening HomeGroup.)
-
To prevent a file or folder from being shared with anyone, select the Share tab, and then select Stop sharing.
-
To change the level of access to a file or folder, select the Share tab, and then select either Homegroup (view) or Homegroup (view and edit).
-
If you need to share a location such as a drive or system folder, select the Advanced sharing option.
-
Share a printer
Printers that are connected with a USB cable can be shared with a homegroup. After the printer is shared, you can get to it through the Print dialog box in any program, just like a printer that’s directly connected to your PC.
To share or stop sharing your printer with the homegroup
-
Open HomeGroup by typing homegroup in the search box on the taskbar, and then select HomeGroup.
-
Select Change what you’re sharing with the homegroup.
-
Next to Printers & Devices, select Shared or Not shared (this will be set to Shared by default).
-
Select Next > Finish.
To print to a homegroup printer
Open the Print menu of the app you want to print from (like Microsoft Word), select the homegroup printer, and then select Print.
Note: The PC that the printer is connected to must be turned on to use the printer.
Change homegroup settings if needed
At any time after you set up your homegroup, you can change settings by following these steps:
-
Open HomeGroup by typing homegroup in the search box on the taskbar, and then select HomeGroup.
-
Select the settings you want.
These are the settings you can change:
|
Setting |
Description |
|---|---|
|
Change what you’re sharing with the homegroup |
Select the libraries, printers, and devices you want to share with your homegroup. |
|
Allow all devices on this network such as TVs and game consoles to play my shared content |
Use this setting to share content with all devices on your network. For example, you can share pictures with a digital picture frame, or share music with a network media player. Note: Shared content isn’t secure. Anyone connected to your network can receive your shared content. |
|
View or print the homegroup password |
View the password for your homegroup. If someone else wants to join the homegroup, give them this password. |
|
Change the password |
Change your homegroup password. All other PCs in your homegroup will need to type in the new password you generate. |
|
Leave the homegroup |
Leave your homegroup. You can’t delete a homegroup, but if everyone leaves the homegroup it will be gone. You can then set up a new homegroup if you’d like. |
|
Change advanced sharing settings |
Change network discovery, file and printer sharing, HomeGroup connection, and advanced security options. |
|
Start the HomeGroup troubleshooter |
Troubleshoot homegroup problems. |
What’s a homegroup?
A homegroup is a group of PCs on a home network that can share files and printers. Using a homegroup makes sharing easier. You can share pictures, music, videos, documents, and printers with other people in your homegroup.
You can help protect your homegroup with a password, which you can change at any time. Other people can’t change the files that you share unless you give them permission to do so.
After you create or join a homegroup, you select the libraries (for example, My Pictures or My Documents) that you want to share. You can prevent specific files or folders from being shared, and you can share additional libraries later.
HomeGroup is available in Windows 10, Windows 8.1, Windows RT 8.1, and Windows 7. You can join a homegroup on a PC running Windows RT 8.1, but you can’t create a homegroup or share content with the homegroup. In Windows 7 Starter and Windows 7 Home Basic, you can join a homegroup, but you can’t create one.
Create a homegroup
When you set up a PC with Windows 8.1 or Windows RT 8.1, a homegroup is created automatically. If a homegroup already exists on your home network, you can join it.
To create a homegroup
-
Open HomeGroup by swiping in from the right edge of the screen, tapping Settings (or if you’re using a mouse, pointing to the lower-right corner of the screen, moving the mouse pointer up, and then clicking Settings), tapping or clicking Change PC settings, tapping or click Network, and then tapping or clicking HomeGroup.
-
Tap or click Create.
-
Select the libraries and devices you want to share with the homegroup.
Notes:
-
If a homegroup already exists on your network, you’ll be asked to join it instead of creating a new one.
-
If your PC belongs to a domain, you can join a homegroup but you can’t create one. You can get to libraries and devices on other homegroup PCs, but you can’t share your own libraries and devices with the homegroup.
-
You can join a homegroup on a PC running Windows RT 8.1, but you can’t create a homegroup or share content with the homegroup.
-
«Find devices and content» must be turned on for HomeGroup to work.
After you create a homegroup, the other PCs running Windows 10, Windows 8.1, Windows RT 8.1, or Windows 7 on your network can join it.
Add your other PCs to the homegroup
After someone on your network creates a homegroup, the next step is to join it. You’ll need the homegroup password, which you can get from any homegroup member. All user accounts except the Guest account will belong to the homegroup. Each person controls access to his or her own libraries.
To join a homegroup, follow these steps on the PC that you want to add to the homegroup:
-
Open HomeGroup by swiping in from the right edge of the screen, tapping Settings (or if you’re using a mouse, pointing to the lower-right corner of the screen, moving the mouse pointer up, and then clicking Settings), tapping or clicking Change PC settings, tapping or click Network, and then tapping or clicking HomeGroup.
-
Enter the homegroup password, and then tap or click Join.
Note: If you don’t see a space to enter a password, there might not be a homegroup available. Make sure that someone has created a homegroup, or you can create a homegroup yourself.
-
Select the libraries and devices you want to share with the homegroup.
-
Tap or click the control under Media devices if you want to allow devices on the network, such as TVs and game consoles, to play your shared content.
Find homegroup files
PCs that belong to your homegroup will appear in File Explorer.
To get to shared libraries on other homegroup PCs
-
Open File Explorer by swiping in from the right edge of the screen, tapping Search (or if you’re using a mouse, pointing to the upper-right corner of the screen, moving the mouse pointer down, and then clicking Search), entering File Explorer in the search box, and then tapping or clicking File Explorer.
-
Under Homegroup, tap or click the user account name of the person whose libraries you want to get to.
-
In the file list, double-tap or double-click the library you want to get to, and then double-tap or double-click the file or folder you want.
Notes:
-
PCs that are turned off, hibernating, or asleep won’t appear as part of the homegroup.
-
If you’ve made homegroup files or folders available offline, and then you disconnect from the network, the files or folders will no longer be visible in the Libraries window. To find them, open the Network folder.
Share libraries and devices, or stop sharing them
When you create or join a homegroup, you select the libraries and devices you want to share with other people in the homegroup. Libraries are initially shared with Read access, which means that other people can look at or listen to what’s in the library, but they can’t change the files in it. You can adjust the level of access at any time, and you can exclude specific files and folders from sharing.
Only those people who belong to the homegroup can see shared libraries and devices. You can choose to share libraries, devices, or individual files and folders with specific people in your homegroup or with everyone.
Note: Keep in mind that children who use homegroup PCs will have access to all shared libraries and devices.
To share devices and entire libraries
-
Open HomeGroup by swiping in from the right edge of the screen, tapping Settings (or if you’re using a mouse, pointing to the lower-right corner of the screen, moving the mouse pointer up, and then clicking Settings), tapping or clicking Change PC settings, tapping or click Network, and then tapping or clicking HomeGroup.
-
Select the libraries and devices you want to share with the homegroup.
To share individual files or folders
-
Open File Explorer by swiping in from the right edge of the screen, tapping Search (or if you’re using a mouse, pointing to the upper-right corner of the screen, moving the mouse pointer down, and then clicking Search), entering File Explorer in the search box, and then tapping or clicking File Explorer.
-
Select the item, and then tap or click the Share tab.
-
Choose an option in the Share with group. There are different Share with options depending on whether your PC is connected to a network and what kind of network it is.
-
To share items with a particular person, choose that person’s account.
-
To share with all the members of your homegroup, choose one of the Homegroup options. To select libraries to share with all the members of your homegroup, swipe in from the right edge of the screen, tap Settings, and then tap Change PC settings. (If you’re using a mouse, point to the upper-right corner of the screen, move the mouse pointer down, click Settings, and then click Change PC settings.) Then tap or click HomeGroup.
-
To prevent a file or folder from being shared with anyone, tap or click the Share tab, and then tap or click Stop sharing.
-
To change the level of access to a file or folder, tap or click the Share tab, and then select either Homegroup (view) or Homegroup (view and edit).
-
If you need to share a location such as a drive or system folder, use the Advanced sharing option.
-
Share a printer
Printers that are connected with a USB cable can be shared with a homegroup. After the printer is shared, you can get to it through the Print dialog box in any program, just like a printer that’s directly connected to your PC.
To share your printer with the homegroup
-
Open HomeGroup by swiping in from the right edge of the screen, tapping Settings (or if you’re using a mouse, pointing to the lower-right corner of the screen, moving the mouse pointer up, and then clicking Settings), tapping or clicking Change PC settings, tapping or click Network, and then tapping or clicking HomeGroup.
-
Tap or click the control to share Printers and devices.
To print to a homegroup printer
Open the Print menu of the app you want to print from, select the homegroup printer, and then tap or click Print.
Note: The PC that the printer is connected to must be turned on to use the printer.
Change homegroup settings if needed
At any time after you set up your homegroup, you can change settings by following these steps:
-
Open HomeGroup by swiping in from the right edge of the screen, tapping Settings (or if you’re using a mouse, pointing to the lower-right corner of the screen, moving the mouse pointer up, and then clicking Settings), tapping or clicking Change PC settings, tapping or click Network, and then tapping or clicking HomeGroup.
-
Select the settings you want.
These are the settings you can change:
|
Setting |
Description |
|---|---|
|
Share libraries and devices |
Select the libraries, printers, and devices you want to share with your homegroup. |
|
Share media |
Use this setting to share media with all devices on your network. For example, you can share pictures with a digital picture frame, or share music with a network media player. Note: Shared media isn’t secure. Anyone connected to your network can receive your shared media. |
|
View the homegroup password |
View the password for your homegroup. If someone else wants to join the homegroup, give them this password. |
|
Leave the homegroup |
Leave your homegroup. You can’t delete a homegroup, but if everyone leaves the homegroup it will be gone. You can then set up a new homegroup if you’d like. |
Change the homegroup password
To change your homegroup password, follow these steps:
-
Swipe in from the right edge of the screen, and then tap Search.
(If you’re using a mouse, point to the lower-right corner of the screen, move the mouse pointer up, and then click Search.) -
In the search box, enter homegroup, and then click Settings.
-
In the list of results, tap or click Change homegroup password.
-
Tap or click Change the password, and then follow the instructions. You might be asked for an admin password or to confirm your choice.
What’s a homegroup?
A homegroup is a group of PCs on a home network that can share files and printers. Using a homegroup makes sharing easier. You can share pictures, music, videos, documents, and printers with other people in your homegroup.
You can help protect your homegroup with a password, which you can change at any time. Other people can’t change the files that you share unless you give them permission to do so.
After you create or join a homegroup, you select the libraries (for example, My Pictures or My Documents) that you want to share. You can prevent specific files or folders from being shared, and you can share additional libraries later.
HomeGroup is available in Windows 10, Windows 8.1, Windows RT 8.1, and Windows 7. You can join a homegroup on a PC running Windows RT 8.1, but you can’t create a homegroup or share content with the homegroup. In Windows 7 Starter and Windows 7 Home Basic, you can join a homegroup, but you can’t create one.
Create a homegroup
When you set up a PC with Windows 7, a homegroup is created automatically. If a homegroup already exists on your home network, you can join it.
-
Open HomeGroup by clicking the Start button, clicking Control Panel, typing homegroup in the search box, and then clicking HomeGroup.
-
On the Share with other home computers running Windows 7 page, click Create a homegroup, and then follow the instructions.
Notes:
-
If a homegroup already exists on your network, you’ll be asked to join it instead of creating a new one.
-
If your PC belongs to a domain, you can join a homegroup but you can’t create one. You can access files and resources on other homegroup PCs, but you can’t share your own files and resources with the homegroup.
After you create a homegroup, the other PCs running Windows 7 on your network can join it.
Add your other PCs to the homegroup
After someone on your network creates a homegroup, the next step is to join it. You’ll need the homegroup password, which you can get from the person who created the homegroup.
To join a homegroup, follow these steps on the PC that you want to add to the homegroup:
-
Open HomeGroup by clicking the Start button, clicking Control Panel, typing homegroup in the search box, and then clicking HomeGroup.
-
Click Join now, and then follow the steps on your screen.
Note: If you don’t see the Join now button, there might not be a homegroup available. Make sure that someone has created a homegroup, or you can create a homegroup yourself.
Access homegroup files
PCs that belong to your homegroup will appear in Windows Explorer.
To access files or folders on other homegroup PCs
-
Click the Start button, and then click your user name.
-
In the navigation pane (the left pane), under Homegroup, click the user account name of the person whose files you want to access.
-
In the file list, double-click the library you want to access, and then double-click the file or folder you want.
Notes:
-
PCs that are turned off, hibernating, or asleep won’t appear in the navigation pane.
-
If you’ve made homegroup files or folders available offline, and then you disconnect from the network, the files or folders will no longer be visible in the Libraries window. To find them, open the Network folder.
Control which files or folders are shared with your homegroup
When you created or joined your homegroup, you selected the libraries you wanted to share with other people in the homegroup. Libraries are initially shared with Read access, which means that you can look at or listen to what’s in the library, but you can’t make changes to the files in it. You can adjust the level of access later, and you can exclude specific files and folders from sharing.
To prevent a library from being shared
-
Open HomeGroup by clicking the Start button, clicking Control Panel, typing homegroup in the search box, and then clicking HomeGroup.
-
Clear the check box for each library you don’t want shared, and then click Save changes.
To prevent specific files or folders from being shared
-
Click the Start button, and then click your user name.
-
Browse to the file or folder you want to exclude from sharing, and then select it.
-
Do one of the following:
-
To prevent the file or folder from being shared with anyone, in the toolbar, click Share with, and then click Nobody.
-
To share the file or folder with some people but not others, in the toolbar, click Share with, click Specific people, select each person you want to share with, and then click Add. Click Share when you’re finished.
-
To change the level of access to a file or folder, in the toolbar, click Share with, and then select either Homegroup (Read) or Homegroup (Read/Write).
-
Share printers
Printers that are connected with a USB cable can be shared with a homegroup. After the printer is shared, you can access it through the Print dialog box in any program, just like a printer that’s directly connected to your PC.
To share your printer with the homegroup
-
Open HomeGroup by clicking the Start button, clicking Control Panel, typing homegroup in the search box, and then clicking HomeGroup.
-
Click Install printer.
-
Select the Printers check box, and then click Save changes.
To automatically connect to a homegroup printer
Click the Windows found a homegroup printer message that appears.
To manually connect to a homegroup printer
-
On the PC the printer is physically connected to, click the Start button, click Control Panel, type homegroup in the search box, and then click HomeGroup.
-
Make sure the Printers check box is selected.
-
Go to the PC you want to print from.
-
Open HomeGroup by clicking the Start button, clicking Control Panel, typing homegroup in the search box, and then clicking HomeGroup.
-
Click Install printer.
-
If you don’t already have a driver installed for the printer, click Install driver in the dialog box that appears.
Note: The PC that the printer is connected to must be turned on to use the printer.
Change homegroup settings if needed
At any time after you set up your homegroup, you can change settings by following these steps:
-
Open HomeGroup by clicking the Start button, clicking Control Panel, typing homegroup in the search box, and then clicking HomeGroup.
-
Select the settings you want, and then click Save changes.
These are the settings on the HomeGroup settings page:
|
Setting |
Description |
|---|---|
|
Share libraries and printers |
Select the libraries and printers you want to share in their entirety with your homegroup. |
|
Share media with devices |
Use this setting to share media with all devices on your network. For example, you can share pictures with a digital picture frame, or share music with a network media player. Note: Shared media isn’t secure. Anyone connected to your network can receive your shared media. |
|
View or print the homegroup password |
View or print the password for your homegroup. |
|
Change the password |
Change the password for your homegroup. |
|
Leave the homegroup |
Leave your homegroup. |
|
Change advanced sharing settings |
Change settings for network discovery, file sharing, Public folder sharing, password-protected sharing, homegroup connections, and file sharing connections. |
|
Start the HomeGroup troubleshooter |
Troubleshoot homegroup problems. |
Ни для кого не секрет, что вместе с анонсом эпохальной операционной системы Windows 7 корпорация Microsoft предложила пользователям новое средство сетевого доступа к файлам и директориям внутри домашней сети — функцию HomeGroup. Одними владельцами компьютеров она используется на все сто, другими в силу ненадобности оставляется без внимания. А если инструментарий — пусть и полезный — простаивает зазря, то какой смысл тратить на него вычислительные ресурсы? Правильно — никакого, поэтому, руководствуясь приведенной на сайте system-administrators.info инструкцией, функционирующий вхолостую механизм HomeGroup можно деактивировать, освободив тем самым толику мощностей ПК для выполнения иных более важных задач.
Методика отключения HomeGroup в Windows 7 незамысловатая. Первым делом необходимо, засучив рукава, открыть окно «Компьютер», в левой панели файлового менеджера выбрать меню Homegroup, щелкнуть правой клавишей мыши и перейти по ссылке Change HomeGroup Settings.

Следующий этап мероприятия — переход по ссылке Leave the homegroup. Да-да, той самой, что с тремя точками в конце…

После появления запроса подтверждения следует нажать клавишу Leave the homegroup.

Далее останется технично выполнить следующее: открыть диспетчер задач Windows и через вкладку Services проследовать в одноименную оснастку управления запущенными в операционной системе службами. В открывшемся окне потребуется отыскать службы
HomeGroup Listener

HomeGroup Provider
зайти в их настройки, остановить выполнение системных процессов и изменить тип запуска на Disabled.

После этого останется только убедиться в том, что функция полностью отключена, и значок HomeGroup исчез из Windows Explorer:

Voila!
- Пользователи сообщают, что не могут войти в систему на своих ноутбуках с Windows 10 из-за запроса пароля HomeGroupUser $, который появляется на их экранах.
- В этой статье мы рассмотрим некоторые способы устранения ошибки входа в систему с паролем HomeGroupUser $.
- Обязательно загляните в наш раздел Домашняя группа, так как там вы можете найти другую полезную информацию.
- Добавьте в закладки нашу специально созданную учетную запись и центр входа и будьте в курсе последних изменений.

Обычно учетная запись HomeGroupUser $ появляется из-за поврежденной учетной записи пользователя домашней группы Windows.
Если вы пытались войти в систему на своем ноутбуке, только чтобы увидеть на своем экране учетную запись HomeGroupUser $, запрашивающую пароль, вы не единственный.
Некоторые пользователи сталкиваются с такой ситуацией, когда, прежде чем они даже смогут ввести пароль, появляется сообщение «Пароль неверен».
Поскольку HomeGroupUser $ — это встроенная учетная запись, вы не можете удалить ее из системы. Но вы можете легко преодолеть это, попробовав подтвержденное решение, которое мы представляем в этой статье.
1. Используйте командную строку / PowerShell.
- Нажмите клавишу Win + S и введите cmd
- В результатах поиска нажмите Командная строка.
- Введите следующую команду: net user
- Найдите HomeGroupUser $ и введите:
HomeGroupUser$ /active:no
Не удается запустить командную строку от имени администратора? Ознакомьтесь с этим полезным руководством и быстро устраните проблему.
2. Используйте локальных пользователей и группу
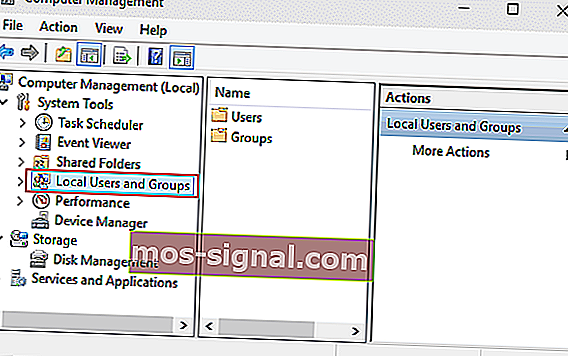
- Нажмите Winkey + R, чтобы открыть Выполнить.
- Введите lusrmgr.msc и нажмите Enter.
- Когда появится окно « Локальные пользователи и группы» , щелкните папку « Пользователи ».
- На средней панели вы увидите все учетные записи в вашей системе.
- Щелкните правой кнопкой мыши HomeGroupUser $ и выберите Свойства.
- В окне «Свойства» установите флажок « Учетная запись отключена» .
- Нажмите « Применить» и нажмите « ОК» .
3. Используйте Netplwiz
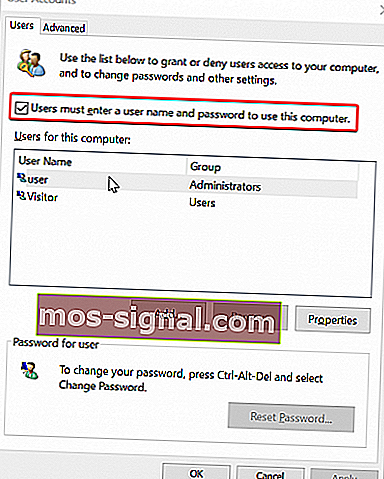
- Перейдите в меню «Пуск», введите netplwiz и откройте его.
- Убедитесь, что флажок « Пользователи должны вводить имя пользователя» снят, обязательно щелкните его, чтобы установить флажок.
- Это остановит попытку автоматического входа в учетную запись.
4. Остановите службы домашней группы.
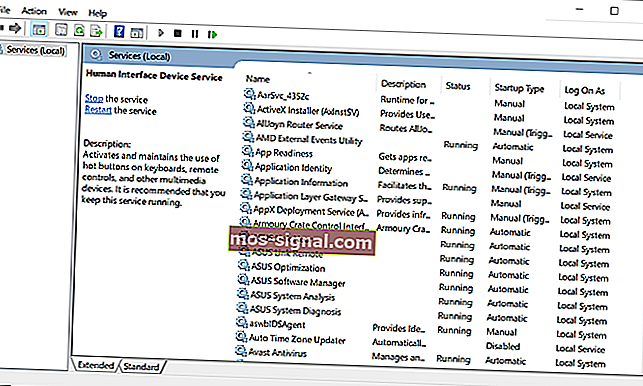
- Откройте меню «Пуск», введите службы и откройте его.
- В списке служб найдите прослушиватель домашней группы и поставщик домашней группы.
- Дважды щелкните службы и щелкните Остановить.
- Нажмите « Применить», а затем нажмите « ОК» .
Вот и все. Надеемся, что вам удалось решить проблему с помощью одного из наших решений.
Если у вас есть еще вопросы или предложения, не стесняйтесь оставлять их в разделе комментариев ниже.
FAQ: Подробнее о пароле учетной записи HomeGroupUser $
- Что такое учетная запись HomeGroupUser $?
Учетная запись HomeGroupUser $ — это встроенная учетная запись для доступа домашней группы к компьютеру. Если Windows больше не обнаруживает домашнюю группу, обязательно ознакомьтесь с нашим пошаговым руководством.
- Какой пароль для домашней группы пользователя $?
Пароль homegroupuser $ довольно просто увидеть. На вкладке Домашняя группа щелкните Просмотреть пароль . При необходимости вы можете легко удалить домашнюю группу из Windows 10.
- Есть ли пароль администратора по умолчанию для Windows 10?
Нет, для Windows 10 нет пароля администратора по умолчанию.
- Как обойти пароль восстановления системы?
Нажмите и удерживайте клавишу F8 при запуске компьютера и выберите « Восстановить компьютер». Вы также можете ознакомиться с нашими предложениями, если вы захотите сбросить пароль Windows 10.
Впервые реализованная в системе Windows 7 функция HomeGroup позволяет новичкам и опытным системным администраторам с легкостью формировать из подключенных по локальной сети персональных компьютеров Windows 7 сети, функционирующие без участия контроллеров домена (DC) и обеспечивающие возможность совместного использования ресурсов, таких как принтеры и файлы. Это средство ориентировано главным образом на массового потребителя, но его могут применять и сотрудники малых предприятий, не имеющие поддержки со стороны ИТ-специалистов
.
Протокол HomeGroup
Протокол Microsoft HomeGroup представляет собой открытый стандарт для одноранговых (P2P) сетей, сформированный на основе протокола Web Services on Devices (WSD). Он используется для публикации и обнаружения ресурсов в локальных подсетях без применения инфраструктуры клиент-сервер. Благодаря использованию технологии IPv6 P2P graphing в сочетании с протоколом Peer Name Resolution Protocol (PNRP) компьютеры получают возможность обнаруживать друг друга, не прибегая к помощи сервера DHCP version 6 (DHCPv6). Кроме того, PNRP заменяет имена NetBIOS, а также главный браузер компьютеров, который в течение многих лет служил основой для построения сетей Windows for Workgroups (WFW).
Когда система Windows 7 формирует домашнюю группу (HomeGroup), она создает защищенную одноранговую группу (PeerGroup), позволяющую узлам Windows 7 в локальной подсети разыскивать друг друга и осуществлять обмен данными в защищенном режиме. Сообщения XML WSD различных типов распространяют информацию о существовании домашней группы, а также другие сведения, например коды узлов, однозначно идентифицирующие каждый компьютер в одноранговой группе, учетные данные для учетной записи HomeGroupUser$, сведения о совместно используемых принтерах, а также MAC-адреса, зарегистрированные для того или иного устройства. Сообщения подписываются, а сведения шифруются в соответствии с требованиями к защите от злоумышленников, которые могут предлагать свои услуги в локальной подсети. С помощью 256-разрядного алгоритма хэширования Secure Hash Algorithm (SHA) на основе имени одноранговой группы формируется 256-разрядный ключ Advanced Encryption Standard (AES); этот ключ AES раскрывается с помощью пароля HomeGroup; таким образом гарантируется уникальность сгенерированного хэша. Ключ AES используется для шифрования сообщений, содержащих учетные данные HomeGroup, а также пару 2048-разрядных закрытого и открытого ключей, которые инициатор формирования домашней группы создает и использует для подписи сообщений WSD, обеспечивая таким образом целостность последних. Когда компьютер получает сообщение WSD от HomeGroup, оно сохраняется. Такой порядок избавляет от необходимости выполнять повторный поиск сведений, кроме тех случаев, когда объявляется о том или ином изменении.
Стандартный протокол для файловых серверов Windows Server Message Block (SMB) 2.1 используется с целью передачи файлов с компьютера на компьютер. Когда пользователи обращаются к ресурсам, размещенным на других входящих в домашнюю группу системах, им нет необходимости вводить учетные данные, поскольку учетная запись HomeGroupUser$, а также группа с именем HomeUsers облегчают доступ к совместно используемым ресурсам от имени зарегистрировавшегося в системе пользователя.
Формирование домашней группы и присоединение к ней
Присоединяться к домашней группе HomeGroup могут компьютеры, функционирующие под управлением любой версии Windows 7, но создавать такие группы могут лишь системы версий Windows 7 Home Premium, Professional, Enterprise и Ultimate. Когда пользователь подключается к новой домашней сети, активируется простая программа-мастер; если существующая HomeGroup не выявляется, пользователю предлагается создать новую домашнюю группу и предоставить для совместного использования выделяемые для этого по умолчанию библиотеки, такие как Documents и Videos. В случае включения компьютера в состав домена пользователь может присоединиться к существующей HomeGroup, если таковая обнаруживается в локальной сети.
HomeGroup остается недоступной, если при настройке брандмауэра Windows используется параметр Public; поэтому данной функцией не смогут воспользоваться те, кто намеревается эпизодически предоставлять свои файлы в распоряжение других пользователей общественных точек доступа WiFi. Пока что функция AirDrop, реализованная специалистами Apple, имеет преимущество перед средствами Windows; она позволяет предоставлять файлы для совместного использования с неизвестными устройствами в общедоступных сетях — аналогично тому, как это делается в системах совместного использования файлов Bluetooth. В процессе настройки брандмауэра Windows Firewall вы можете отказаться от присоединения к домашней группе; для этого на экране Join a Homegroup нужно нажать кнопку Cancel, как показано на экране 1, после чего профиль брандмауэра будет настроен соответствующим образом.
 |
| Экран 1. Присоединение к домашней группе |
HomeGroup и списки управления доступом
Когда пользователь открывает для общего доступа ту или иную библиотеку, система Windows модифицирует списки управления доступом к папкам, которые являются частью этой библиотеки. На экране 2 показано, что пользователь, присоединяющийся к домашней группе, получает новый список управления доступом членов группы HomeUsers для своей папки. Этот список предоставляет право просмотра только для первого уровня содержимого папки.
|
|
| Экран 2. Список управления доступом HomeUsers |
Если вы посмотрите на принадлежащую этому пользователю папку Documents, то увидите, что члены группы HomeUsers получили право просматривать содержащиеся в ней материалы. В момент создания объекта HomeGroup все пользовательские учетные записи добавляются к группе HomeUsers. Во время создания локальной пользовательской учетной записи последняя автоматически включается в группу HomeUsers. До тех пор пока не будет изменена конфигурация по умолчанию, за всеми локальными пользователями сохраняется право доступа к папкам остальных локальных пользователей, которые открыли папки для совместной работы с членами домашней группы.
Мастер настройки HomeGroup дает пользователям возможность предоставлять другим пользователям свои применяемые по умолчанию библиотеки. Конфигурацию с более высокой степенью детализации можно получить, обратившись в окне программы Windows Explorer к меню Share with. Вы можете выделить одну или несколько папок, а затем отключить функцию совместного использования (выбрав в меню Share with пункт Nobody) или предоставить доступ только для чтения (Read) либо для чтения и записи (Read/Write). По умолчанию к материалам библиотек, совместно используемых членами домашних групп, применяются права доступа «только для чтения». Если вы решите с помощью меню Share with предоставлять пользователям право на чтение и запись, не забывайте о том, что фактически пользователи получат в этом случае полный набор полномочий Full Control (то есть смогут, помимо прочего, удалять файлы).
Когда вы будете создавать домашнюю группу или присоединяться к таковой, не пытайтесь манипулировать списками управления доступом с помощью вкладки Security диалогового окна Properties соответствующего файла или папки; выполняйте эти действия в окне программы Windows Explorer. В меню Share with имеется пункт, предусматривающий возможность совместной работы с определенными лицами (Specific people). Используемая по умолчанию конфигурация Windows предполагает возможность выбора только локальных учетных записей и групп. Если вы хотите наладить взаимодействие с тем или иным удаленным пользователем, имейте в виду, что этот пользователь должен иметь учетную запись на локальном компьютере, в которую включены имя пользователя и пароль, установленные на удаленном компьютере. Как показано на экране 3, с помощью экрана Advanced sharing settings центра управления сетями и общим доступом Network and Sharing Center вы можете настроить домашнюю группу таким образом, чтобы вместо учетной записи HomeGroupUser$ она использовала ту или иную запись локального пользователя.
|
|
| Экран 3. Дополнительные настройки общего доступа |
Задача поддержания настроек домашних групп, включая списки управления доступом к разделяемым папкам, возлагается на системную службу HomeGroup. При исключении компьютера из состава домашней группы все ранее добавленные списки управления доступом удаляются.
Домены и домашние группы
Компьютеры, входящие в состав доменов, не могут создавать домашние группы, зато они могут быть включены в домашнюю группу, сформированную на другом компьютере с Windows 7. Чтобы присоединиться к существующей домашней группе, пользователь должен прежде всего удостовериться в том, что в сетевом профиле Windows FireWall использована настройка Home. В системе Windows 7 пользователи домена могут изменять расположение сети без предварительного повышения уровня привилегий. Вы можете отказаться от этого режима, открыв редактор групповых политик и указав в разделе Computer Configuration, Administrative Templates, Network, Network Connections настройку групповой политики Require domain users to elevate when setting a network’s location.
По соображениям безопасности пользователи домена не могут работать с ресурсами совместно с локальными пользователями. Если не входящий в состав домена компьютер создает домашнюю группу или входит в ее состав, то в дальнейшем при вхождении этого компьютера в состав домена все размещенные на нем разделяемые ресурсы будут отключены.
Какие вопросы надо ставить в процессе диагностики домашних групп
Только одна домашняя группа может функционировать в подсети, и система Windows 7 может быть членом лишь одной домашней группы. Если вы хотите войти в состав домашней группы в другой локальной сети, вам прежде всего необходимо удалить устройство из существующей домашней группы. Использоваться в качестве разделяемых ресурсов могут лишь диски, отформатированные в соответствии со стандартом NTFS; иначе говоря, в этом качестве не могут выступать ни компакт-диски, ни накопители DVD-ROM, ни файловые системы на базе стандарта FAT. Если вы столкнулись с трудностями при формировании домашней группы, выполните следующие действия.
- Убедитесь в том, что брандмауэр Windows Firewall настроен правильно. Для настройки брандмауэра в автоматическом режиме обычно бывает достаточно указать в его профиле параметр Home. Подробное описание требований к брандмауэру HomeGroup можно найти в документе Microsoft «HomeGroup and Firewall Interaction», опубликованном по адресу www.microsoft.com/download/en/details.aspx?id=10561.
- Проверьте настройки локального сетевого адаптера. Средства IPv6 должны быть активированы.
- Удостоверьтесь в том, что локальная подсеть допускает осуществление многоадресного трафика и что такой трафик поддерживается сетевыми адаптерами и другими сетевыми устройствами, включая маршрутизаторы, а также коммутаторы.
- Проверьте, не блокируются ли проходящие через домашнюю группу данные программными средствами безопасности сторонних производителей.
Данные, показанные на экране 4, имеют отношение к двум одноранговым группам. Группа Global_ cloud не представляет для нас интереса; отношение к домашней группе имеют только сведения, поступившие от группы LocalLink. В числе этих сведений — адреса IPv6, а также P2P-данные для локального сетевого адаптера; мы можем заключить, что одноранговая группа находится в рабочем состоянии.
|
|
| Экран 4. Диагностика с помощью утилиты Netsh |
Контекст netsh p2p pnrp diag также содержит полезные при проведении диагностики команды ping и traceroute. Но если ваша локальная сеть соответствует базовым требованиям со стороны Windows HomeGroup, у вас вряд ли возникнет необходимость применять новаторские диагностические функции, реализованные в утилите Netsh.
Действуем с осторожностью
Всякий, кому доводилось иметь дело с системой NetBIOS или со службой WINS, знает, какие сложности порой возникают при выполнении даже самых элементарных задач по настройке сетей с использованием средств Windows for Workgroups. Широко известно и то, что поиск неисправностей при решении таких задач требует от исполнителя солидной технической подготовки. Поэтому функцию Windows HomeGroup можно считать удачным дополнением к операционной системе. Несомненно, с ее появлением формирование простых одноранговых сетей станет легко решаемой задачей как для администраторов, так и для не имеющих технической подготовки пользователей.
Реализация HomeGroup с помощью таких компонентов, как IPv6, WSD и SMB, обеспечивает надежную защиту данных. Если конфигурация вашего беспроводного маршрутизатора предусматривает достаточный уровень безопасности, можете смело применять HomeGroup в беспроводной сети, не беспокоясь о том, что тем самым вы повышаете риск компрометации данных, передаваемых с помощью радиоволн.
Однако необходимо внимательно следить за состоянием локальных списков управления доступом, посредством которых одни пользователи локальных компьютеров могут получить доступ к файлам других локальных пользователей. Функция HomeGroup изначально не позиционировалась как решение для задач бизнес-класса, поэтому следует продумать, какие последствия в отношении безопасности могут возникнуть в случае использования этой функции в ситуациях, когда применяются учетные записи локальных пользователей.
Рассел Смит (rms@russell-smith.net) — независимый ИТ-консультант, специализируется на управлении системами
Homegroupuser – это функция операционной системы Windows, которая позволяет пользователям создавать группы домашних компьютеров и обмениваться файлами и принтерами. С помощью Homegroupuser можно легко настроить сеть домашних компьютеров без необходимости пользоваться сложными настройками сети и общего доступа к ресурсам.
Основное преимущество Homegroupuser заключается в том, что данный режим позволяет безопасно обмениваться файлами, создавать резервные копии данных, а также печатать с любого компьютера в сети на одном принтере. Для использования данной функции не требуется особого технического знания или опыта.
Для начала использования Homegroupuser необходимо создать группу, указав уникальное имя и выбрав, какие ресурсы сети вы хотите общими для всех членов группы. После этого можно пригласить других пользователей присоединиться к группе, предоставив им пароль. Каждый пользователь в сети сможет видеть и использовать общие ресурсы, такие как папки, файлы, принтеры и мультимедийные устройства.
Если вы хотите создать безопасную и простую в использовании сеть для обмена файлами и принтерами в домашней среде, то Homegroupuser – это идеальное решение для вас. Благодаря этой функции вы сможете управлять доступом к своим ресурсам и обмениваться данными с другими пользователями в сети, не беспокоясь о безопасности и сложности технических настроек.
Содержание
- Что такое Homegroupuser и как им пользоваться?
- Разберемся, что значит Homegroupuser
- В чем заключается функционал Homegroupuser
Что такое Homegroupuser и как им пользоваться?
Домашняя группа — это функция, которая позволяет пользователям на одной сети обмениваться данными, печатать на общем принтере и совместно использовать другие ресурсы без необходимости настроек сложных сетевых настроек.
Для доступа к домашней группе и использования учетной записи Homegroupuser необходимо выполнить следующие шаги:
- Установите и настройте домашнюю группу на всех компьютерах, которые вы хотите подключить к ней. Это можно сделать через панель управления или с помощью Мастера создания домашней группы.
- После настройки домашней группы на каждом компьютере создается учетная запись Homegroupuser. При этом вы должны указать пароль для входа в домашнюю группу.
- Подключитесь к домашней группе, используя учетную запись Homegroupuser и пароль.
После успешного подключения к домашней группе вы сможете:
- Обмениваться файлами и папками между компьютерами в домашней группе.
- Печатать на общем принтере, подключенном к одному из компьютеров в домашней группе.
- Воспроизводить мультимедийные файлы, расположенные на других компьютерах в домашней группе.
Для безопасности рекомендуется использовать сложные пароли для учетной записи Homegroupuser и регулярно их менять.
Обратите внимание, что функция домашней группы доступна только в некоторых версиях операционной системы Windows, таких как Windows 7 и Windows 8. В более поздних версиях Windows, таких как Windows 10, функция домашней группы заменена на другие методы совместного использования ресурсов.
Разберемся, что значит Homegroupuser
Когда вы создаете домашнюю группу на своем компьютере, вы можете добавить другие компьютеры в эту группу и предоставить им доступ к вашим файлам и принтерам. Для доступа к этим ресурсам на других компьютерах необходимо войти в систему под учетной записью Homegroupuser.
Учетная запись Homegroupuser создается автоматически в системе при настройке домашней группы. Она является специальной учетной записью, предназначенной исключительно для доступа к домашней группе. Учетная запись Homegroupuser имеет ограниченные права доступа к файлам и принтерам и не может выполнять другие действия в системе. Это гарантирует безопасность и защиту данных пользователей в домашней сети.
Чтобы использовать учетную запись Homegroupuser, откройте окно проводника Windows и перейдите в раздел «Домашняя группа». На этой странице вы увидите возможность войти в систему под учетной записью Homegroupuser. После входа в систему вы сможете просматривать и редактировать общие файлы и печатать на общих принтерах в домашней группе.
Если вы больше не пользуетесь домашней группой или хотите удалить учетную запись Homegroupuser, вы можете отключить домашнюю группу или удалить компьютер из группы. После этого учетная запись Homegroupuser больше не будет доступна для входа в систему.
В чем заключается функционал Homegroupuser
Функционал Homegroupuser включает следующие возможности:
- Создание домашней группы: пользователь может создать новую домашнюю группу и пригласить других пользователей для присоединения к ней.
- Подключение к домашней группе: пользователь может присоединиться к уже существующей домашней группе, используя пароль, предоставленный владельцем группы.
- Общий доступ к файлам и папкам: пользователи могут устанавливать общий доступ к определенным папкам и файлам в домашней группе, что позволяет другим пользователям просматривать и копировать их.
- Обмен файлами: пользователи могут отправлять файлы друг другу внутри домашней группы без необходимости использования внешних носителей или электронной почты.
- Общий доступ к принтерам: пользователи могут делиться принтерами в домашней группе, что позволяет печатать документы на общих принтерах из любой точки в сети.
Функционал Homegroupuser является удобным и простым способом организовать совместную работу и обмен данными в локальной сети Windows.