Home Assistant TP Link Router
Home Assistant component for complete router administration of the TP Link Archer C50 and the TP Link N600 based on the TP-Link Router API
v1.0.1
Installation
HACS (recommended)
- Go to the Community Store.
- Search for
Home Assistant TP Link Router. - Navigate to
Home Assistant TP Link Routerintegration - Press
Install.
Manual
Clone this repository in your existing (or create it) custom_components/ folder.
cd custom_components/
git clone https://github.com/menahishayan/Home-Assistant-TP-Link-Router.git
Or using submodules:
cd custom_components/
git submodule add https://github.com/menahishayan/Home-Assistant-TP-Link-Router.git
Setup
Add the following to your configuration.yaml:
- For Switches:
switch:
  - platform: tplink_router
    host: 'hostname or IP'
    username: 'username'
    password: 'password'
- For Sensors:
sensor:
  - platform: tplink_router
    host: 'hostname or IP'
    username: 'username'
    password: 'password'
- Device Tracker:
device_tracker:
  - platform: tplink_router
    host: 'hostname or IP'
    username: 'username'
    password: 'password'
Components
Switches
- Router Power (Restart)
- WAN Connection Enable/Disable
- 2.4Ghz Band Enable/Disable
- 5Ghz Band Enable/Disable
Sensors
- IP Addresses of clients across 2.4Ghz, 5Ghz and LAN
Device Tracker
- Track clients by MAC address across 2.4Ghz, 5Ghz and LAN
Adding Support For More Models
Head over to CONTRIBUTING.md
Troubleshooting/Error Reporting/Contributing
- If you face an error, you may debug using a HTTP Requests tool/monitor on your router’s configuration webpage. Additionally, you may open a new issue on this repo prefixed by [Bug]
- If you would like to help improve the package, request features or add features, open an issue prefixed by [Feature Request] or [Improvement]
PRs and Commit Template
PRs and commits that you make to this repo must include the following:
- Type: bug-fix or enhancement
- Description: Brief description about what the commit achieves
- Notes: (heads ups/pointers to other developers if necessary)
Contributing
This integration is merely a Home Assistant interface for the TP-Link Router API. To help improve the core API itself, such as adding more controls, or supporting more routers, head over to the API’s repo and create a pull request there.
For improvements in how this integration actually interfaces the API with Home Assisant’s developer modules, you may make a pull request here.
Changelog
v1.0.1
- Fix Github incorrect release
v1.0.0
- First Production Release
v1.0.1
- json file version number added
- C7 logs out to prevent lock
The tplink platform allows you to detect presence by looking at connected devices to a TP-Link device. This includes the ArcherC9 line.
TP-Link devices typically only allow one login at a time to the admin console. This component will count towards your one allowed login. Depending on how aggressively you configure device_tracker you may not be able to access the admin console of your TP-Link device without first stopping Home Assistant. Home Assistant takes a few seconds to login, collect data, and log out. If you log into the admin console manually, remember to log out so that Home Assistant can log in again.
# Example configuration.yaml entry
device_tracker:
  - platform: tplink
    host: YOUR_ROUTER_IP
    username: YOUR_ADMIN_USERNAME
    password: YOUR_ADMIN_PASSWORD
Configuration variables:
- host (Required): The IP address of your router, e.g. 192.168.1.1.
- username (Required: The username of an user with administrative privileges, usually admin.
- password (Required): The password for your given admin account.
For Archer C9 models running firmware version 150811 or later please use the encrypted password you can retrieve like this:
- Go to the login page of your router. (default: 192.168.0.1)
- Type in the password you use to login into the password field.
- Click somewhere else on the page so that the password field is not selected anymore.
- Open the JavaScript console of your browser (usually by pressing F12 and then clicking on “Console”).
- Type
document.getElementById("login-password").value;. - Copy the returned value to your Home Assistant configuration as password.
See the device tracker component page for instructions how to configure the people to be tracked.
When Home Assistant enthusiast and tech aficionado, menahishayan, found himself in a pickle with no component to manage his TP-Link router, he did what any self-respecting geek would do – he programmed his own. The TP-Link component for Home Assistant is still wet behind the ears and currently compatible with the TP-Link Archer C50 and the TP-Link N600, but don’t let its new-kid-on-the-block status fool you – it’s already packing some serious features.
- Control your TP-Link router using Home Assistant
- How to install the Home Assistant TP-Link router integration
- Setting up the TP-Link integration
Control your TP-Link router using Home Assistant
The endgame was simple: to take the reins of a TP-Link router. But TP-Link hadn’t rolled out the red carpet by offering an open-source API. This meant our intrepid developer had to don his deerstalker and turn detective, reverse engineering the router’s web management interface. But boy, was it worth it! If you’re lucky enough to own one of the supported TP-Link routers, this integration is like a Swiss army knife of features:
- A switch that lets you play power god with your router, enabling you to reboot it via Home Assistant.
- The power to enable or disable your WAN connection at will.
- Mastery over the 2.4 GHz and 5 GHz bands, giving you the choice to disable either band.
- A device tracker integration using the router’s client connection – like having your own tech bloodhound.
- An IP address sensor, a digital sleuth that helps you pin down the IP address of a client.
- Control over the guest network – because who wants uninvited guests?
How to install the Home Assistant TP-Link router integration
Like many custom integrations, the TP-Link integration is up for grabs in HACS. I’d highly recommend going this route. With HACS as your digital butler, you’ll be the first to know when updates are served. Feeling more adventurous? You can also install it manually.
Setting up the TP-Link integration
This integration is a YAML-only affair. There are three components to get your head around: One for the switches, one for the sensors, and one for the device tracker. It might sound as hard as herding cats, but don’t worry – all three are broken down on the GitHub page.

About Liam Alexander Colman
is an experienced Home Assistant user who has been utilizing the platform for a variety of projects over an extended period. His journey began with a Raspberry Pi, which quickly grew to three Raspberry Pis and eventually a full-fledged server. Liam’s current operating system of choice is Unraid, with Home Assistant comfortably running in a Docker container. With a deep understanding of the intricacies of Home Assistant, Liam has an impressive setup, consisting of various Zigbee devices, and seamless integrations with existing products such as his Android TV box. For those interested in learning more about Liam’s experience with Home Assistant, he shares his insights on how he first started using the platform and his subsequent journey.The tplink integration allows you to control your TP-Link Smart Home Devices such as plugs, power strips, wall switches and bulbs.
You need to provision your newly purchased device to connect to your network before it can be added via the integration. This can be done either by using kasa command-line tool or by adding it to the official Kasa app before trying to add them to Home Assistant. If you use the app, do not upgrade the firmware if it presents the option to avoid blocking the local access by potential firmware updates.
There is currently support for the following device types within Home Assistant:
- Light
- Switch
- Sensor
Configuration
To add the TP-Link Kasa Smart integration to your Home Assistant instance, use this My button:

TP-Link Kasa Smart can be auto-discovered by Home Assistant. If an instance was found,
it will be shown as Discovered. You can then set it up right away.
Supported Devices
See Supported Devices in python-kasa for an up to date list.
Supported devices
Plugs
- HS100
- HS103
- HS105
- HS107
- HS110
- KP100
- KP105
- KP115
- KP125
- KP401
- EP10
- EP25
Power Strips
- EP40
- HS300
- KP303
- KP400
Wall switches
- ES20M
- HS200
- HS210
- HS220
- KS200M
- KS220M
- KS230
Bulbs
- EP40
- LB100
- LB110
- LB120
- LB130
- LB230
- KL50
- KL60
- KL110
- KL120
- KL125
- KL130
- KL135
Light strips
- KL400
- KL420
- KL430
Other bulbs may also work, but with limited color temperature range (2700-5000). If you find a bulb isn’t reaching the full-color temperature boundaries, submit a bug report to python-kasa.
Unsupported devices
Plugs
- KP125M (supported via Matter, but without energy monitoring features)
Random Effect — Service tplink.random_effect
The light strips allow setting a random effect.
| Service data attribute | Description |
|---|---|
entity_id |
The entity_id of the light strip to set the effect on |
init_states |
Initial HSV sequence |
backgrounds |
List of HSV sequences (Max 16) |
segments |
List of segments (0 for all) |
brightness |
Initial brightness |
duration |
Duration |
transition |
Transition |
fadeoff |
Fade off |
hue_range |
Range of hue |
saturation_range |
Range of saturation |
brightness_range |
Range of brightness |
transition_range |
Range of transition |
random_seed |
Random seed |
#Example Service Call
service: tplink.random_effect
target:
  entity_id:
    - light.strip
data:
  init_states: 199,99,96
  backgrounds:
    - - 199
      - 89
      - 50
    - - 160
      - 50
      - 50
    - - 180
      - 100
      - 50
  segments: 0, 2, 4, 6, 8
  brightness: 90
  transition: 2000
  fadeoff: 2000
  hue_range: 340, 360
  saturation_range: 40, 95
  brightness_range: 90, 100
  transition_range: 2000, 6000
  random_seed: 80
Seqeuence Effect — Service tplink.sequence_effect
The light strips allow setting a sequence effect.
| Service data attribute | Description |
|---|---|
entity_id |
The entity_id of the light strip to set the effect on |
sequence |
List of HSV sequences (Max 16) |
segments |
List of segments (0 for all) |
brightness |
Initial brightness |
duration |
Duration |
repeat_times |
Repetitions (0 for continuous) |
transition |
Transition |
spread |
Speed of spread |
direction |
Direction |
#Example Service Call
service: tplink.sequence_effect
target:
  entity_id:
    - light.strip
data:
  sequence:
    - - 340
      - 20
      - 50
    - - 20
      - 50
      - 50
    - - 0
      - 100
      - 50
  segments: 0, 2, 4, 6, 8
  brightness: 80
  transition: 2000
  spread: 1
  direction: 1
Help us to improve our documentation
Suggest an edit to this page, or provide/view feedback for this page.
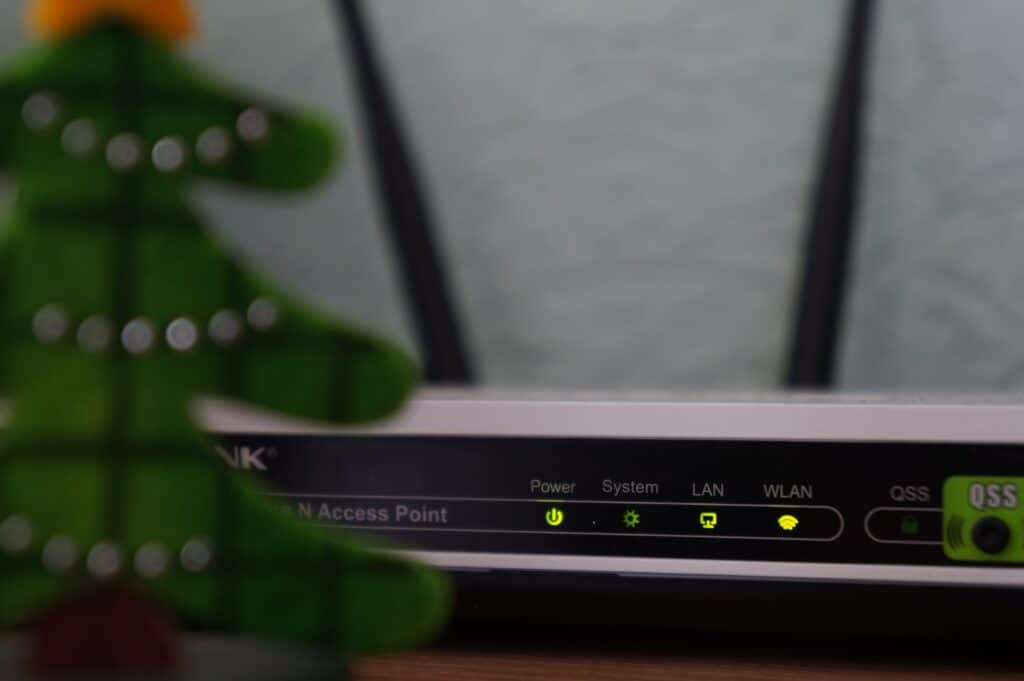
TPLink Router device tracker for Home Assistant
![]()
The tplink_router platform for device_tracker integration allows you to detect presence by looking at connection devices to a TP-Link wireless router.
It was part of the official tplink integration in the past but was removed from Home Assistant.
Installation
Recommended: use HACS.
Manual: copy custom_components/tplink_router folder into your custom_components.
TP-Link devices typically only allow one login at a time to the admin console. This integration will count towards your one allowed login. Depending on how aggressively you configure device_tracker you may not be able to access the admin console of your TP-Link device without first stopping Home Assistant. Home Assistant takes a few seconds to login, collect data, and log out. If you log into the admin console manually, remember to log out so that Home Assistant can log in again.
Configuration
To enable this device tracker, add the following lines to your configuration.yaml:
# Example configuration.yaml entry
device_tracker:
  - platform: tplink_router
    host: YOUR_ROUTER_IP
    username: YOUR_ADMIN_USERNAME
    password: !secret tplink_router_password
Configuration variables:
- host (Required): The IP address of your router, e.g., 192.168.1.1.
- username (Required): The username of an user with administrative privileges, usually admin. The Archer D9 last firmware does not require a username.
- password (Required): The password for your given admin account.
For Archer C9 models running firmware version 150811 or later please use the encrypted password you can retrieve like this:
- Go to the login page of your router. (default: 192.168.0.1)
- Type in the password you use to login into the password field.
- Click somewhere else on the page so that the password field is not selected anymore.
- Open the JavaScript console of your browser (usually by pressing F12 and then clicking on «Console»).
- Type
document.getElementById("login-password").value;ordocument.getElementById("pcPassword").value;, depending on your firmware version. - Copy the returned value to your Home Assistant configuration as password.
See the device tracker integration page for instructions how to configure the people to be tracked.
For Archer D9 model the default IP is 192.168.1.1, the username is not necessary and you can leave that field blank.
Supported devices
Devices originally supported include the following:
- Archer C7 firmware version 150427
- Archer C9 firmware version 150811
- EAP-225 AP with latest firmware version
- Archer D9 firmware version 0.9.1 0.1 v0041.0 Build 160224 Rel.59129n
Additional devices added since the removal from Home Assistant:
- TPLink N600 with latest firmware
- TPLink VR600 with latest firmware
- TL-WR840N
- TL-WDR4900
If your device is not in the list, you can still give it a try and let me know if it works or not, I’ll update the documentation.
Disclaimer: I cannot add support for devices I don’t own, unless you provide me with a list of HTTP requests leading to the page listing MAC address of connected devices, including authentication, and an example of the page.
Open Source Agenda is not affiliated with «Home Assistant Tplink Router» Project. README Source: ericpignet/home-assistant-tplink_router