Edit this page
Toggle table of contents sidebar
Usually, pip is automatically installed if you are:
-
working in a
virtual environment -
using Python downloaded from python.org
-
using Python that has not been modified by a redistributor to remove
ensurepip
Supported Methods#
If your Python environment does not have pip installed, there are 2 mechanisms
to install pip supported directly by pip’s maintainers:
-
ensurepip -
get-pip.py
ensurepip#
Python comes with an ensurepip module[1], which can install pip in
a Python environment.
Linux
$ python -m ensurepip --upgrade
MacOS
$ python -m ensurepip --upgrade
Windows
C:> py -m ensurepip --upgrade
More details about how ensurepip works and how it can be used, is
available in the standard library documentation.
get-pip.py#
This is a Python script that uses some bootstrapping logic to install
pip.
-
Download the script, from https://bootstrap.pypa.io/get-pip.py.
-
Open a terminal/command prompt,
cdto the folder containing the
get-pip.pyfile and run:
More details about this script can be found in pypa/get-pip’s README.
Standalone zip application#
Note
The zip application is currently experimental. We test that pip runs correctly
in this form, but it is possible that there could be issues in some situations.
We will accept bug reports in such cases, but for now the zip application should
not be used in production environments.
In addition to installing pip in your environment, pip is available as a
standalone zip application.
This can be downloaded from https://bootstrap.pypa.io/pip/pip.pyz. There are
also zip applications for specific pip versions, named pip-X.Y.Z.pyz.
The zip application can be run using any supported version of Python:
If run directly:
Linux
$ python -m pip.pyz --help
MacOS
$ python -m pip.pyz --help
Windows
then the currently active Python interpreter will be used.
Alternative Methods#
Depending on how you installed Python, there might be other mechanisms
available to you for installing pip such as
using Linux package managers.
These mechanisms are provided by redistributors of pip, who may have modified
pip to change its behaviour. This has been a frequent source of user confusion,
since it causes a mismatch between documented behaviour in this documentation
and how pip works after those modifications.
If you face issues when using Python and pip installed using these mechanisms,
it is recommended to request for support from the relevant provider (eg: Linux
distro community, cloud provider support channels, etc).
Upgrading pip#
Upgrade your pip by running:
Linux
$ python -m pip install --upgrade pip
MacOS
$ python -m pip install --upgrade pip
Windows
C:> py -m pip install --upgrade pip
Compatibility#
The current version of pip works on:
-
Windows, Linux and MacOS.
-
CPython 3.7, 3.8, 3.9, 3.10 and latest PyPy3.
pip is tested to work on the latest patch version of the Python interpreter,
for each of the minor versions listed above. Previous patch versions are
supported on a best effort approach.
Other operating systems and Python versions are not supported by pip’s
maintainers.
Users who are on unsupported platforms should be aware that if they hit issues, they may have to resolve them for themselves. If they received pip from a source which provides support for their platform, they should request pip support from that source.
This section covers the basics of how to install Python packages.
It’s important to note that the term “package” in this context is being used to
describe a bundle of software to be installed (i.e. as a synonym for a
distribution). It does not to refer to the kind
of package that you import in your Python source code
(i.e. a container of modules). It is common in the Python community to refer to
a distribution using the term “package”. Using
the term “distribution” is often not preferred, because it can easily be
confused with a Linux distribution, or another larger software distribution
like Python itself.
Contents
-
Requirements for Installing Packages
-
Ensure you can run Python from the command line
-
Ensure you can run pip from the command line
-
Ensure pip, setuptools, and wheel are up to date
-
Optionally, create a virtual environment
-
-
Creating Virtual Environments
-
Use pip for Installing
-
Installing from PyPI
-
Source Distributions vs Wheels
-
Upgrading packages
-
Installing to the User Site
-
Requirements files
-
Installing from VCS
-
Installing from other Indexes
-
Installing from a local src tree
-
Installing from local archives
-
Installing from other sources
-
Installing Prereleases
-
Installing “Extras”
Requirements for Installing Packages
This section describes the steps to follow before installing other Python
packages.
Ensure you can run Python from the command line
Before you go any further, make sure you have Python and that the expected
version is available from your command line. You can check this by running:
You should get some output like Python 3.6.3. If you do not have Python,
please install the latest 3.x version from python.org or refer to the
Installing Python section of the Hitchhiker’s Guide to Python.
Note
If you’re a newcomer and you get an error like this:
>>> python3 --version
Traceback (most recent call last):
  File "<stdin>", line 1, in <module>
NameError: name 'python3' is not defined
It’s because this command and other suggested commands in this tutorial
are intended to be run in a shell (also called a terminal or
console). See the Python for Beginners getting started tutorial for
an introduction to using your operating system’s shell and interacting with
Python.
Note
If you’re using an enhanced shell like IPython or the Jupyter
notebook, you can run system commands like those in this tutorial by
prefacing them with a ! character:
In [1]: import sys
        !{sys.executable} --version
Python 3.6.3
It’s recommended to write {sys.executable} rather than plain python in
order to ensure that commands are run in the Python installation matching
the currently running notebook (which may not be the same Python
installation that the python command refers to).
Note
Due to the way most Linux distributions are handling the Python 3
migration, Linux users using the system Python without creating a virtual
environment first should replace the python command in this tutorial
with python3 and the python -m pip command with python3 -m pip --user. Do not
run any of the commands in this tutorial with sudo: if you get a
permissions error, come back to the section on creating virtual environments,
set one up, and then continue with the tutorial as written.
Ensure you can run pip from the command line
Additionally, you’ll need to make sure you have pip available. You can
check this by running:
If you installed Python from source, with an installer from python.org, or
via Homebrew you should already have pip. If you’re on Linux and installed
using your OS package manager, you may have to install pip separately, see
Installing pip/setuptools/wheel with Linux Package Managers.
If pip isn’t already installed, then first try to bootstrap it from the
standard library:
Unix/macOS
python3 -m ensurepip --default-pip
Windows
py -m ensurepip --default-pip
If that still doesn’t allow you to run python -m pip:
Securely Download get-pip.py 1
Run
python get-pip.py. 2 This will install or upgrade pip.
Additionally, it will install setuptools and wheel if they’re
not installed already.Warning
Be cautious if you’re using a Python install that’s managed by your
operating system or another package manager. get-pip.py does not
coordinate with those tools, and may leave your system in an
inconsistent state. You can usepython get-pip.py --prefix=/usr/local/
to install in/usr/localwhich is designed for locally-installed
software.
Ensure pip, setuptools, and wheel are up to date
While pip alone is sufficient to install from pre-built binary archives,
up to date copies of the setuptools and wheel projects are useful
to ensure you can also install from source archives:
Unix/macOS
python3 -m pip install --upgrade pip setuptools wheel
Windows
py -m pip install --upgrade pip setuptools wheel
Optionally, create a virtual environment
See section below for details,
but here’s the basic venv 3 command to use on a typical Linux system:
Unix/macOS
python3 -m venv tutorial_env
source tutorial_env/bin/activate
Windows
py -m venv tutorial_env
tutorial_env\Scripts\activate
This will create a new virtual environment in the tutorial_env subdirectory,
and configure the current shell to use it as the default python environment.
Creating Virtual Environments
Python “Virtual Environments” allow Python packages to be installed in an isolated location for a particular application,
rather than being installed globally. If you are looking to safely install
global command line tools,
see Installing stand alone command line tools.
Imagine you have an application that needs version 1 of LibFoo, but another
application requires version 2. How can you use both these applications? If you
install everything into /usr/lib/python3.6/site-packages (or whatever your
platform’s standard location is), it’s easy to end up in a situation where you
unintentionally upgrade an application that shouldn’t be upgraded.
Or more generally, what if you want to install an application and leave it be?
If an application works, any change in its libraries or the versions of those
libraries can break the application.
Also, what if you can’t install packages into the
global site-packages directory? For instance, on a shared host.
In all these cases, virtual environments can help you. They have their own
installation directories and they don’t share libraries with other virtual
environments.
Currently, there are two common tools for creating Python virtual environments:
-
venv is available by default in Python 3.3 and later, and installs
pip and setuptools into created virtual environments in
Python 3.4 and later. -
virtualenv needs to be installed separately, but supports Python 2.7+
and Python 3.3+, and pip, setuptools and wheel are
always installed into created virtual environments by default (regardless of
Python version).
The basic usage is like so:
Using venv:
Unix/macOS
python3 -m venv <DIR>
source <DIR>/bin/activate
Windows
py -m venv <DIR>
<DIR>\Scripts\activate
Using virtualenv:
Unix/macOS
python3 -m virtualenv <DIR>
source <DIR>/bin/activate
Windows
virtualenv <DIR>
<DIR>\Scripts\activate
For more information, see the venv docs or
the virtualenv docs.
The use of source under Unix shells ensures
that the virtual environment’s variables are set within the current
shell, and not in a subprocess (which then disappears, having no
useful effect).
In both of the above cases, Windows users should _not_ use the
source command, but should rather run the activate
script directly from the command shell like so:
Managing multiple virtual environments directly can become tedious, so the
dependency management tutorial introduces a
higher level tool, Pipenv, that automatically manages a separate
virtual environment for each project and application that you work on.
Use pip for Installing
pip is the recommended installer. Below, we’ll cover the most common
usage scenarios. For more detail, see the pip docs,
which includes a complete Reference Guide.
Installing from PyPI
The most common usage of pip is to install from the Python Package
Index using a requirement specifier. Generally speaking, a requirement specifier is
composed of a project name followed by an optional version specifier. PEP 440 contains a full
specification
of the currently supported specifiers. Below are some examples.
To install the latest version of “SomeProject”:
Unix/macOS
python3 -m pip install "SomeProject"
Windows
py -m pip install "SomeProject"
To install a specific version:
Unix/macOS
python3 -m pip install "SomeProject==1.4"
Windows
py -m pip install "SomeProject==1.4"
To install greater than or equal to one version and less than another:
Unix/macOS
python3 -m pip install "SomeProject>=1,<2"
Windows
py -m pip install "SomeProject>=1,<2"
To install a version that’s “compatible”
with a certain version: 4
Unix/macOS
python3 -m pip install "SomeProject~=1.4.2"
Windows
py -m pip install "SomeProject~=1.4.2"
In this case, this means to install any version “==1.4.*” version that’s also
“>=1.4.2”.
Source Distributions vs Wheels
pip can install from either Source Distributions (sdist) or Wheels, but if both are present
on PyPI, pip will prefer a compatible wheel. You can override
pip`s default behavior by e.g. using its –no-binary option.
Wheels are a pre-built distribution format that provides faster installation compared to Source
Distributions (sdist), especially when a
project contains compiled extensions.
If pip does not find a wheel to install, it will locally build a wheel
and cache it for future installs, instead of rebuilding the source distribution
in the future.
Upgrading packages
Upgrade an already installed SomeProject to the latest from PyPI.
Unix/macOS
python3 -m pip install --upgrade SomeProject
Windows
py -m pip install --upgrade SomeProject
Installing to the User Site
To install packages that are isolated to the
current user, use the --user flag:
Unix/macOS
python3 -m pip install --user SomeProject
Windows
py -m pip install --user SomeProject
For more information see the User Installs section
from the pip docs.
Note that the --user flag has no effect when inside a virtual environment
— all installation commands will affect the virtual environment.
If SomeProject defines any command-line scripts or console entry points,
--user will cause them to be installed inside the user base’s binary
directory, which may or may not already be present in your shell’s
PATH. (Starting in version 10, pip displays a warning when
installing any scripts to a directory outside PATH.) If the scripts
are not available in your shell after installation, you’ll need to add the
directory to your PATH:
-
On Linux and macOS you can find the user base binary directory by running
python -m site --user-baseand addingbinto the end. For example,
this will typically print~/.local(with~expanded to the absolute
path to your home directory) so you’ll need to add~/.local/binto your
PATH. You can set yourPATHpermanently by modifying ~/.profile. -
On Windows you can find the user base binary directory by running
py -mand replacing
site --user-sitesite-packageswithScripts. For
example, this could return
C:\Users\Username\AppData\Roaming\Python36\site-packagesso you would
need to set yourPATHto include
C:\Users\Username\AppData\Roaming\Python36\Scripts. You can set your user
PATHpermanently in the Control Panel. You may need to log out for the
PATHchanges to take effect.
Requirements files
Install a list of requirements specified in a Requirements File.
Unix/macOS
python3 -m pip install -r requirements.txt
Windows
py -m pip install -r requirements.txt
Installing from VCS
Install a project from VCS in “editable” mode. For a full breakdown of the
syntax, see pip’s section on VCS Support.
Unix/macOS
python3 -m pip install -e SomeProject @ git+https://git.repo/some_pkg.git          # from git
python3 -m pip install -e SomeProject @ hg+https://hg.repo/some_pkg                # from mercurial
python3 -m pip install -e SomeProject @ svn+svn://svn.repo/some_pkg/trunk/         # from svn
python3 -m pip install -e SomeProject @ git+https://git.repo/some_pkg.git@feature  # from a branch
Windows
py -m pip install -e SomeProject @ git+https://git.repo/some_pkg.git          # from git
py -m pip install -e SomeProject @ hg+https://hg.repo/some_pkg                # from mercurial
py -m pip install -e SomeProject @ svn+svn://svn.repo/some_pkg/trunk/         # from svn
py -m pip install -e SomeProject @ git+https://git.repo/some_pkg.git@feature  # from a branch
Installing from other Indexes
Install from an alternate index
Unix/macOS
python3 -m pip install --index-url http://my.package.repo/simple/ SomeProject
Windows
py -m pip install --index-url http://my.package.repo/simple/ SomeProject
Search an additional index during install, in addition to PyPI
Unix/macOS
python3 -m pip install --extra-index-url http://my.package.repo/simple SomeProject
Windows
py -m pip install --extra-index-url http://my.package.repo/simple SomeProject
Installing from a local src tree
Installing from local src in
Development Mode,
i.e. in such a way that the project appears to be installed, but yet is
still editable from the src tree.
Unix/macOS
python3 -m pip install -e <path>
Windows
py -m pip install -e <path>
You can also install normally from src
Unix/macOS
python3 -m pip install <path>
Windows
Installing from local archives
Install a particular source archive file.
Unix/macOS
python3 -m pip install ./downloads/SomeProject-1.0.4.tar.gz
Windows
py -m pip install ./downloads/SomeProject-1.0.4.tar.gz
Install from a local directory containing archives (and don’t check PyPI)
Unix/macOS
python3 -m pip install --no-index --find-links=file:///local/dir/ SomeProject
python3 -m pip install --no-index --find-links=/local/dir/ SomeProject
python3 -m pip install --no-index --find-links=relative/dir/ SomeProject
Windows
py -m pip install --no-index --find-links=file:///local/dir/ SomeProject
py -m pip install --no-index --find-links=/local/dir/ SomeProject
py -m pip install --no-index --find-links=relative/dir/ SomeProject
Installing from other sources
To install from other data sources (for example Amazon S3 storage)
you can create a helper application that presents the data
in a format compliant with the simple repository API:,
and use the --extra-index-url flag to direct pip to use that index.
./s3helper --port=7777
python -m pip install --extra-index-url http://localhost:7777 SomeProject
Installing Prereleases
Find pre-release and development versions, in addition to stable versions. By
default, pip only finds stable versions.
Unix/macOS
python3 -m pip install --pre SomeProject
Windows
py -m pip install --pre SomeProject
get-pip.py
get-pip.py is a bootstrapping script that enables users to install pip,
setuptools, and wheel in Python environments that don’t already have them. You
should not directly reference the files located in this repository and instead
use the versions located at https://bootstrap.pypa.io/.
Usage
$ curl -sSL https://bootstrap.pypa.io/get-pip.py -o get-pip.py
$ python get-pip.py
Upon execution, get-pip.py will install pip, setuptools and wheel in
the current Python environment.
It is possible to provide additional arguments to the underlying script. These
are passed through to the underlying pip install command, and can thus be
used to constraint the versions of the packages, or to pass other pip options
such as --no-index.
$ python get-pip.py "pip < 21.0" "setuptools < 50.0" "wheel < 1.0"
$ python get-pip.py --no-index --find-links=/local/copies
get-pip.py options
This script also has it’s own options, which control which packages it will
install.
--no-setuptools: do not attempt to installsetuptools.--no-wheel: do not attempt to installwheel.
Development
You need to have a nox available on the CLI.
How it works
get-pip.py bundles a copy of pip with a tiny amount of glue code. This glue
code comes from the templates/ directory.
Updating after a pip release
If you just made a pip release, run nox -s update-for-release -- <version>.
This session will handle all the script updates (by running generate), commit
the changes and tag the commit.
IMPORTANT: Check that the correct files got modified before pushing. The session
will pause to let you do this.
Generating the scripts
Run nox -s generate.
Discussion
If you run into bugs, you can file them in our issue tracker.
You can also join #pypa or #pypa-dev on Freenode to ask questions or
get involved.
Code of Conduct
Everyone interacting in the get-pip project’s codebases, issue trackers, chat
rooms, and mailing lists is expected to follow the PSF Code of Conduct.
Introduction
PIP is a package management system used to install and manage software packages written in Python. It stands for “preferred installer program” or “Pip Installs Packages.”
PIP for Python is a utility to manage PyPI package installations from the command line.
If you are using an older version of Python on Windows, you may need to install PIP. You can easily install PIP on Windows by downloading the installation package, opening the command line, and launching the installer.
This tutorial will show how to install PIP on Windows, check its version, upgrade, and configure.
Note: The latest versions of Python come with PIP pre-installed, but older versions require manual installation. The following guide is for version 3.4 and above. If you are using an older version of Python, you can upgrade Python via the Python website.
Prerequisites
- Computer running Windows or Windows server
- Access to the Command Prompt window
Before you start: Check if PIP is Already Installed
PIP is automatically installed with Python 2.7.9+ and Python 3.4+ and it comes with the virtualenv and pyvenv virtual environments.
Before you install PIP on Windows, check if PIP is already installed.
1. Launch the command prompt window:
- Press Windows Key + X.
- Click Run.
- Type in cmd.exe and hit enter.
Alternatively, type cmd in the Windows search bar and click the “Command Prompt” icon.
2. Type in the following command at the command prompt:
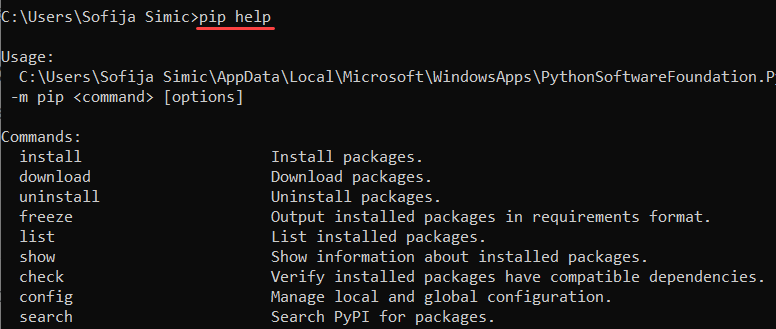
pip helpIf PIP responds, then PIP is installed. Otherwise, there will be an error saying the program could not be found.

Installing PIP On Windows
Follow the steps outlined below to install PIP on Windows.
Step 1: Download PIP get-pip.py
Before installing PIP, download the get-pip.py file.
1. Launch a command prompt if it isn’t already open. To do so, open the Windows search bar, type cmd and click on the icon.
2. Then, run the following command to download the get-pip.py file:
curl https://bootstrap.pypa.io/get-pip.py -o get-pip.py
Step 2: Installing PIP on Windows
To install PIP type in the following:
python get-pip.py
If the file isn’t found, double-check the path to the folder where you saved the file. You can view the contents of your current directory using the following command:
dirThe dir command returns a full listing of the contents of a directory.
Step 3: Verify Installation
Once you’ve installed PIP, you can test whether the installation has been successful by typing the following:
pip helpIf PIP has been installed, the program runs, and you should see the location of the software package and a list of commands you can use with pip.
If you receive an error, repeat the installation process.
Step 4: Add Pip to Windows Environment Variables
To run PIP from any location, you need to add it to Windows environment variables to avoid getting the «not on PATH» error. To do so, follow the steps outlined below:
- Open the System and Security window by searching for it in the Control Plane.
- Navigate to System settings.
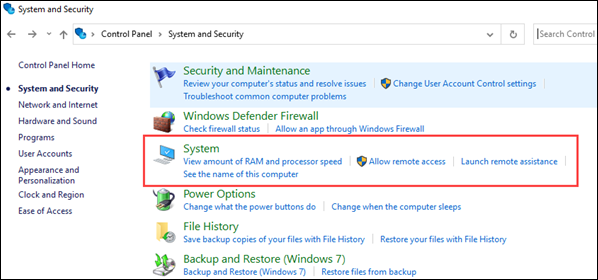
- Then, select Advanced system settings.
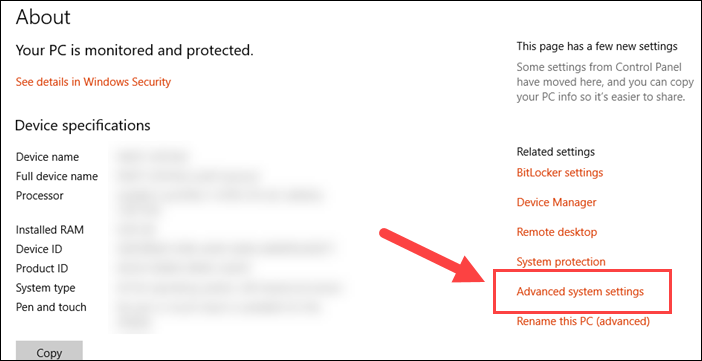
- Open the Environment Variables and double-click on the Path variable in the System Variables.

- Next, select New and add the directory where you installed PIP.
- Click OK to save the changes.
Step 5: Configuration
In Windows, the PIP configuration file is %HOME%\pip\pip.ini.
There is also a legacy per-user configuration file. The file is located at %APPDATA%\pip\pip.ini.
You can set a custom path location for this config file using the environment variable PIP_CONFIG_FILE.
Upgrading PIP for Python on Windows
New versions of PIP are released occasionally. These versions may improve the functionality or be obligatory for security purposes.
To check the current version of PIP, run:
pip --version
To upgrade PIP on Windows, enter the following in the command prompt:
python -m pip install --upgrade pipThis command uninstalls the old version of PIP and then installs the most current version of PIP.
Downgrade PIP Version
Downgrading may be necessary if a new version of PIP starts performing undesirably. To downgrade PIP to a prior version, specifying the version you want.
To downgrade PIP, use the syntax:
python -m pip install pip==version_numberFor example, to downgrade to version 18.1, you would run:
python -m pip install pip==18.1You should now see the version of PIP that you specified.
Conclusion
Congratulations, you have installed PIP for Python on Windows. Check out our other guides to learn how to install PIP on other operating systems:
- Install PIP on CentOS
- Install PIP on Ubuntu
- Install PIP on Debian
- Install PIP on Mac
Now that you have PIP up and running, you are ready to manage your Python packages.
NumPy is a library for the Python programming language, adding support for large, multi-dimensional arrays and matrices. Check out our guide and learn how to install NumPy using PIP.
Prerequisite: Python Language Introduction
Before we start with how to install pip for Python on Windows, let’s first go through the basic introduction to Python. Python is a widely-used general-purpose, high-level programming language. Python is a programming language that lets you work quickly and integrate systems more efficiently.
PIP is a package management system used to install and manage software packages/libraries written in Python. These files are stored in a large “online repository” termed as Python Package Index (PyPI). pip uses PyPI as the default source for packages and their dependencies. So whenever you type:
pip install package_name
pip will look for that package on PyPI and if found, it will download and install the package on your local system.
Check if Python is installed
Run the following command to test if python is installed or not. If not click here.
python --version
If it is installed, You will see something like this:
Python 3.10.0
Download and Install pip
The PIP can be downloaded and installed using the command line by going through the following steps:
Method 1: Using cURL in Python
Curl is a UNIX command that is used to send the PUT, GET, and POST requests to a URL. This tool is utilized for downloading files, testing REST APIs, etc.
Step 1: Open the cmd terminal
Step 2: In python, a curl is a tool for transferring data requests to and from a server. Use the following command to request:
curl https://bootstrap.pypa.io/get-pip.py -o get-pip.py
python get-pip.py

Method 2: Manually install PIP on Windows
Pip must be manually installed on Windows. You might need to use the correct version of the file from pypa.io if you’re using an earlier version of Python or pip. Get the file and save it to a folder on your PC.
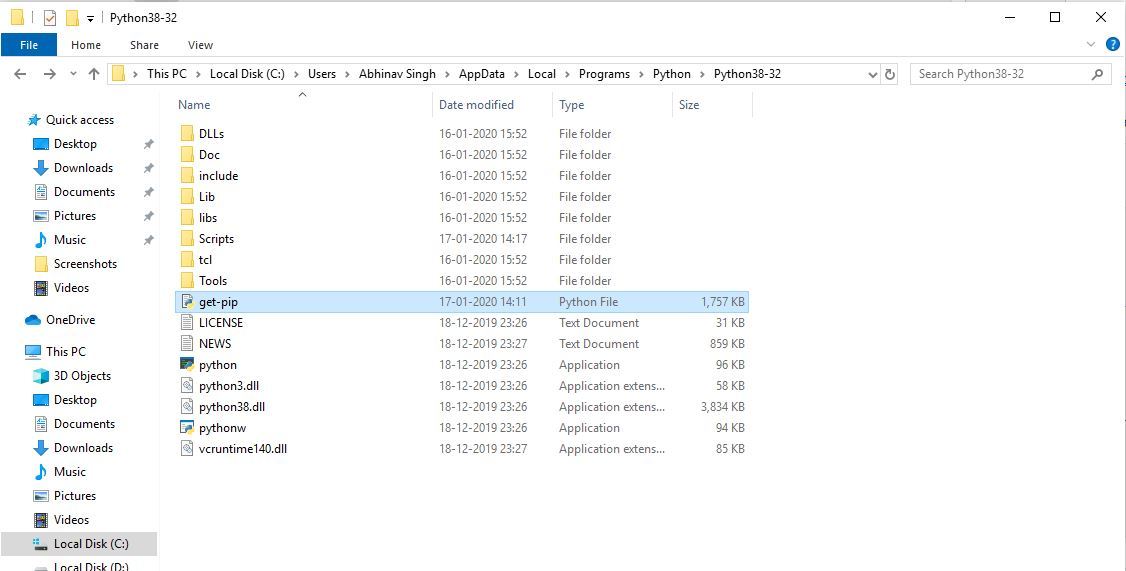
Step 1: Download the get-pip.py (https://bootstrap.pypa.io/get-pip.py) file and store it in the same directory as python is installed.
Step 2: Change the current path of the directory in the command line to the path of the directory where the above file exists.

Step 3: get-pip.py is a bootstrapping script that enables users to install pip in Python environments. Run the command given below:
python get-pip.py
Step 4: Now wait through the installation process. Voila! pip is now installed on your system.

Verification of the installation process
One can easily verify if the pip has been installed correctly by performing a version check on the same. Just go to the command line and execute the following command:
pip -V
or
pip --version

Adding PIP To Windows Environment Variables
If you are facing any path error then you can follow the following steps to add the pip to your PATH. You can follow the following steps to set the Path:
- Go to System and Security > System in the Control Panel once it has been opened.
- On the left side, click the Advanced system settings link.
- Then select Environment Variables.
- Double-click the PATH variable under System Variables.
- Click New, and add the directory where pip is installed, e.g. C:Python33Scripts, and select OK.
Upgrading Pip On Windows
pip can be upgraded using the following command.
python -m pip install -U pip
Downgrading Pip On Windows
It may happen sometimes that your pip current pip version is not supporting your current version of python or machine for that you can downgrade your pip version with the following command.
Note: You can mention the version you want to install
python -m pip install pip==17.0
Last Updated :
17 Apr, 2023
Like Article
Save Article