Содержание
- Способ 1: Проверка активности функции
- Способ 2: Предоставление разрешения в брандмауэре
- Способ 3: Изменение состояния связанной службы
- Способ 4: Включение сетевого обнаружения
- Способ 5: Редактирование реестра
- Способ 6: Изменение локальной групповой политики
- Способ 7: Внесение изменений в файл «hosts»
- Способ 8: Использование сторонних программ
- Вопросы и ответы
Способ 1: Проверка активности функции
Одна из самых частых причин проблем с работой RDP, то есть удаленным рабочим столом, в Windows 11 связана с отключением самой функции через раздел с системными настройками. Удаленный рабочий стол обязательно должен быть активирован, чтобы иметь возможность не только подключаться, но и принимать входящие соединения.
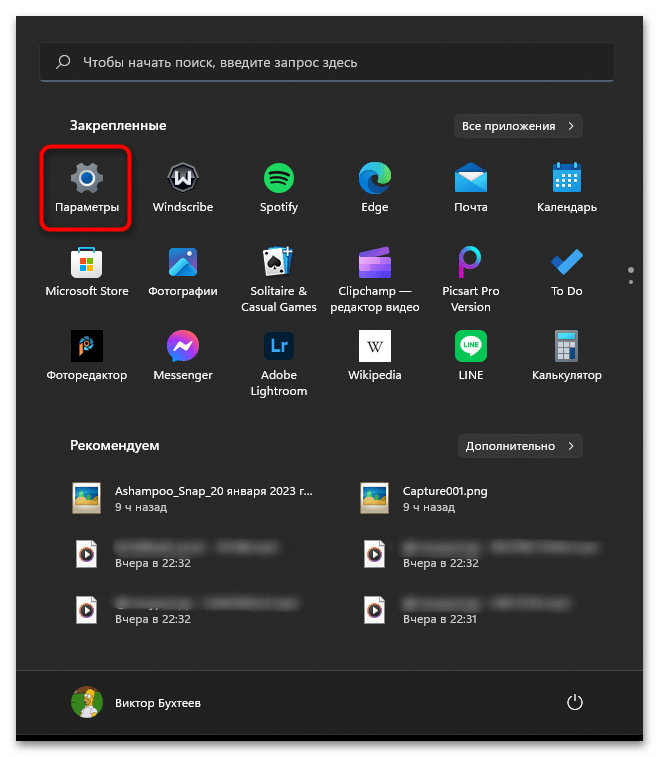
- Проверка активности займет не так много времени, а начать стоит с перехода в «Параметры», щелкнув по значку с шестеренкой в меню «Пуск».
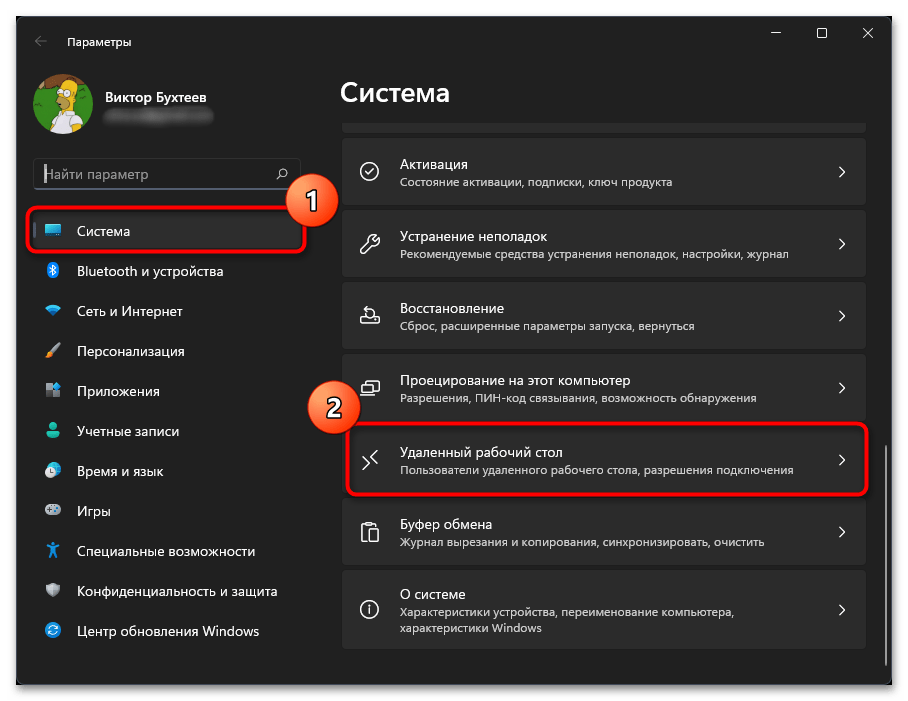
- Далее на панели слева выберите «Система» и в списке отыщите «Удаленный рабочий стол».
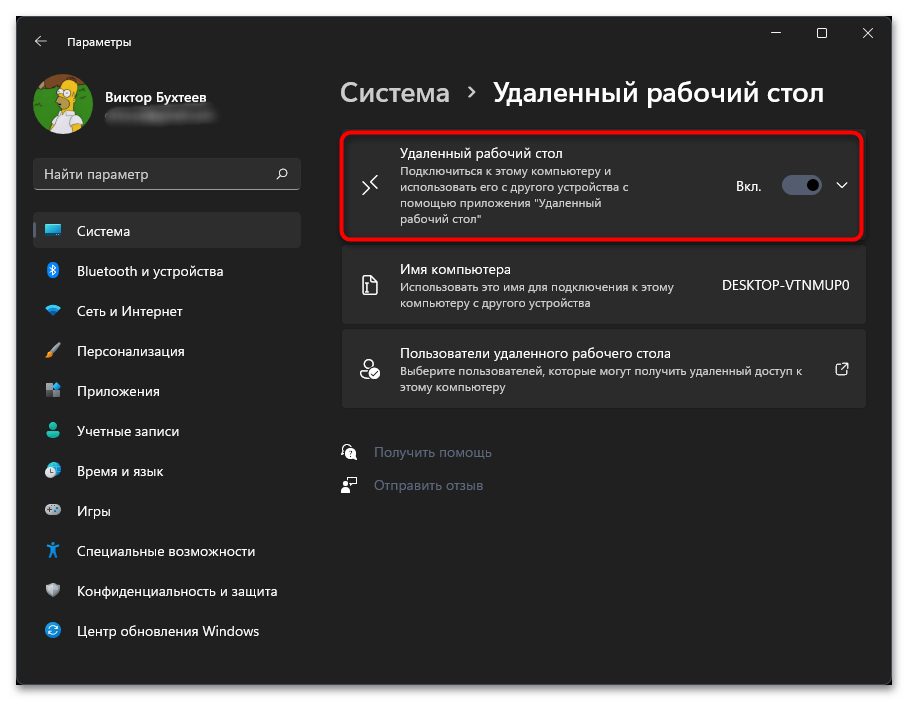
- Перетащите переключатель «Удаленный рабочий стол» в состояние «Вкл.», если сейчас он отключен. Не перезагружайте компьютер, а сразу переходите к проверке подключения, чтобы параметры не сбросились до исходных вместе с отключением нужной службы.
Способ 2: Предоставление разрешения в брандмауэре
Иногда рассматриваемая проблема с RDP в Windows 11 относится к неправильным настройкам брандмауэра, когда для удаленного рабочего стола установлены ограничения при подключении к частной сети. Вам понадобится вручную найти список разрешений, ознакомиться с текущими параметрами и поправить их для предоставления доступа.
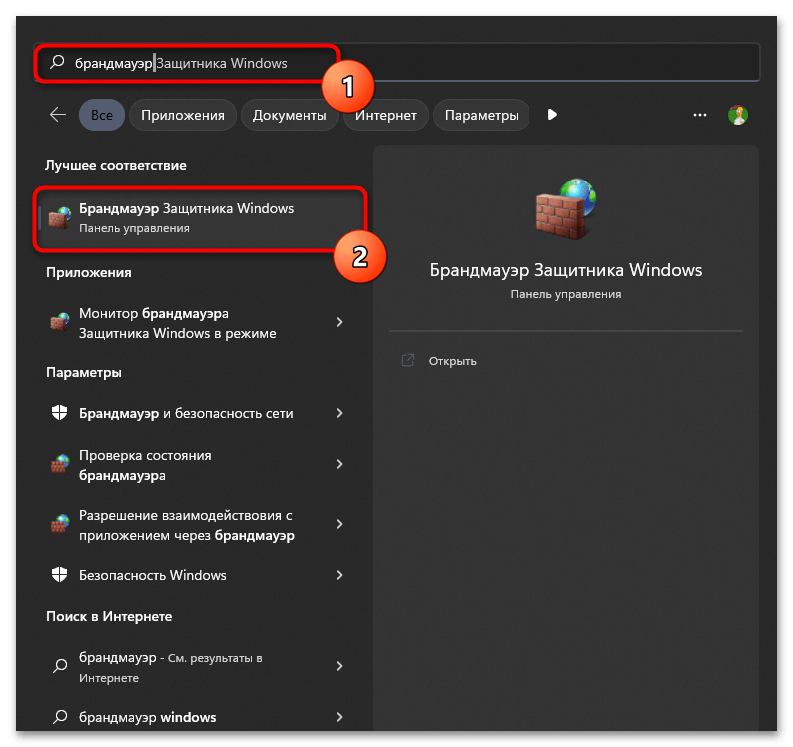
- Проще всего открыть «Брандмауэр Защитника Windows» через поиск в меню «Пуск». Среди результатов вас интересует элемент «Панели управления».
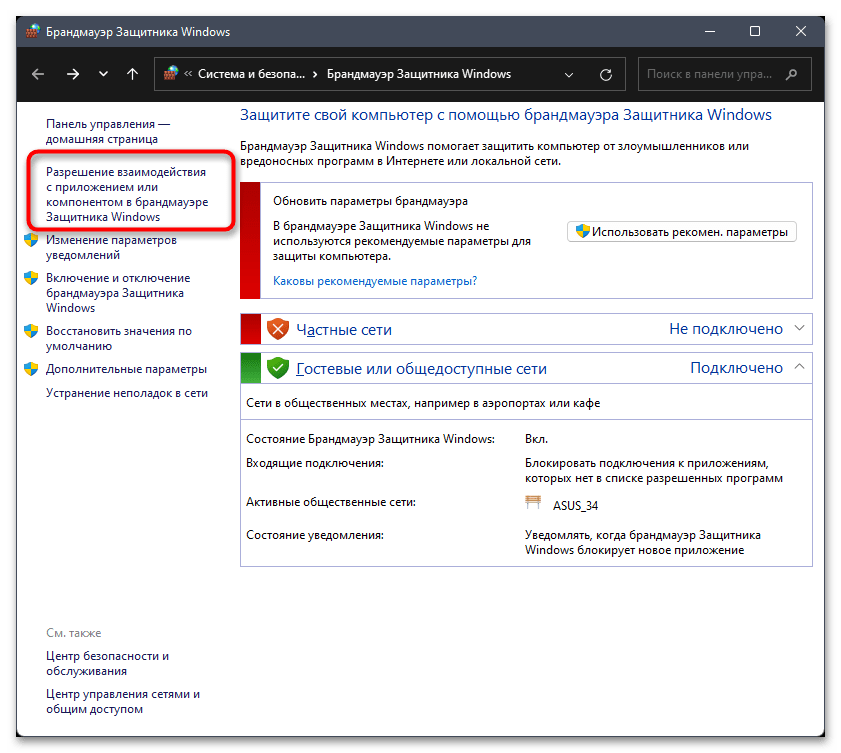
- В новом окне на панели слева нажмите по ссылке «Разрешение взаимодействия с приложением или компонентом в брандмауэре Защитника Windows».
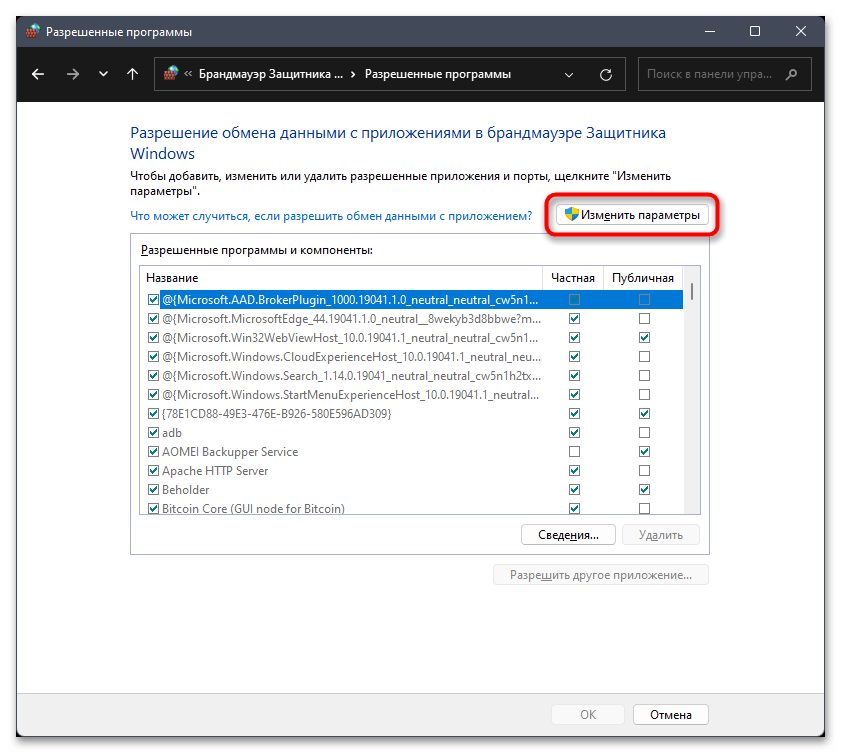
- Нажмите кнопку «Изменить параметры», чтобы включить настройку следующего списка.
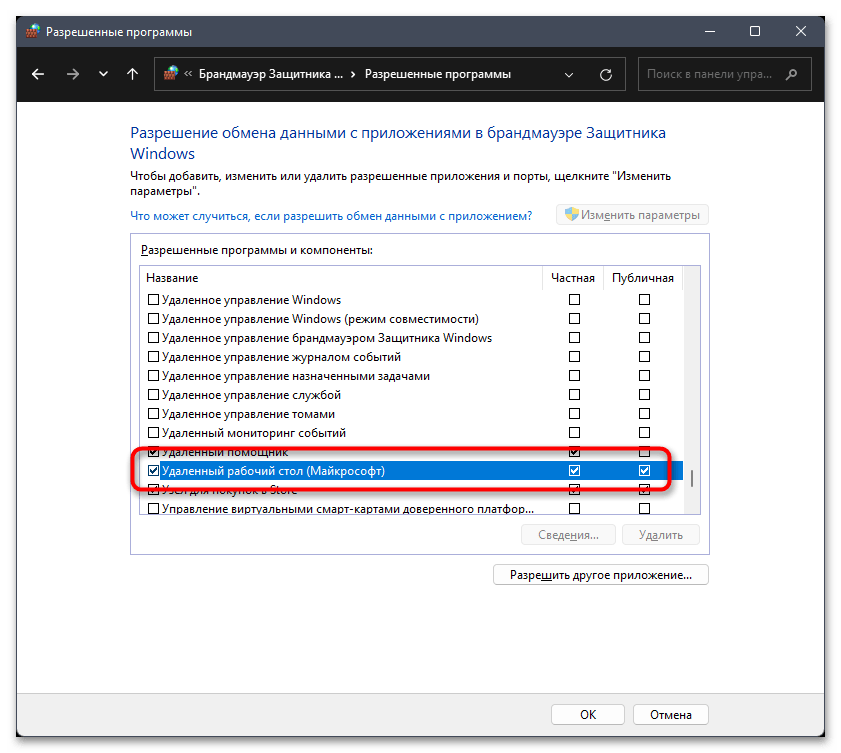
- В нем прокрутите окно вниз и для «Удаленный рабочий стол (Майкрософт)» обязательно поставьте галочки как возле «Частная», так и «Публичная». Перед выходом нажмите «ОК», чтобы настройки были сохранены.
Способ 3: Изменение состояния связанной службы
Для работы RDP в Виндовс 11 используется специальная связанная служба. Доступ к удаленному рабочему столу будет предоставлен только в том случае, если эта служба находится в активном состоянии. По умолчанию ее тип запуска установлен как «Вручную», но не всегда она запускается при попытке установить соединение, поэтому настройку нужно изменить на «Автоматически».
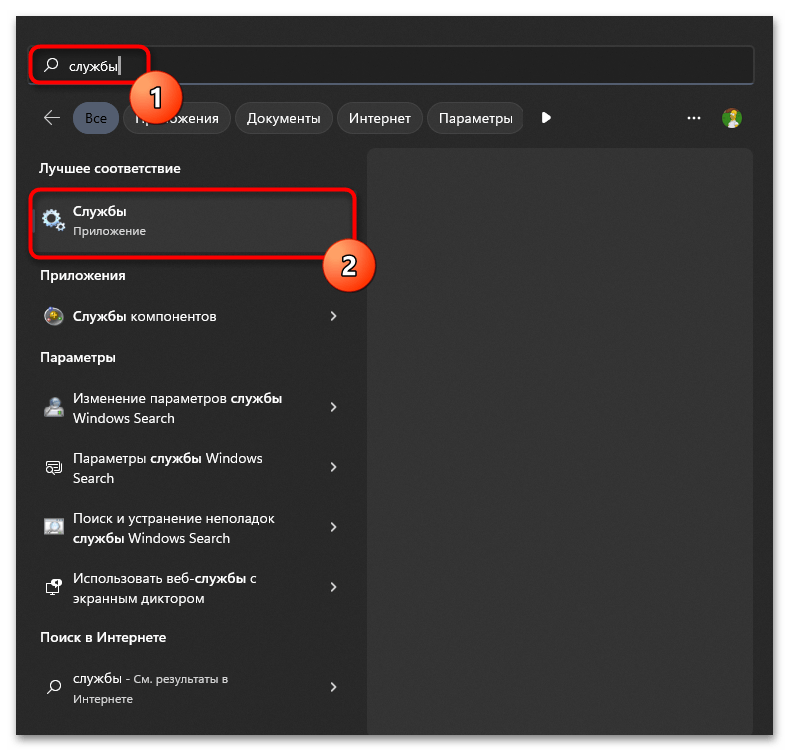
- Для этого в поиске «Пуска» введите «Службы» и запустите данное классическое приложение.
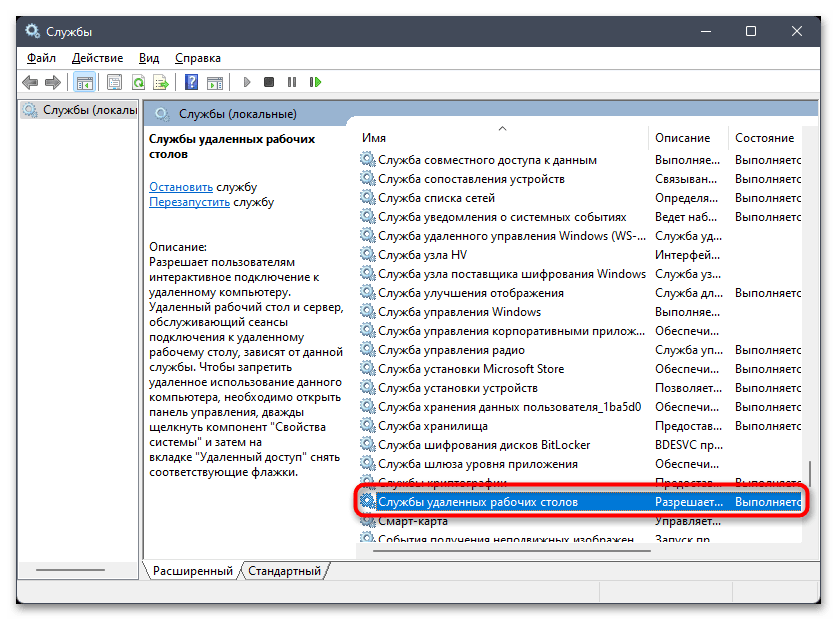
- В списке служб найдите «Службы удаленных рабочих столов» и дважды кликните по этой строке левой кнопкой мыши.
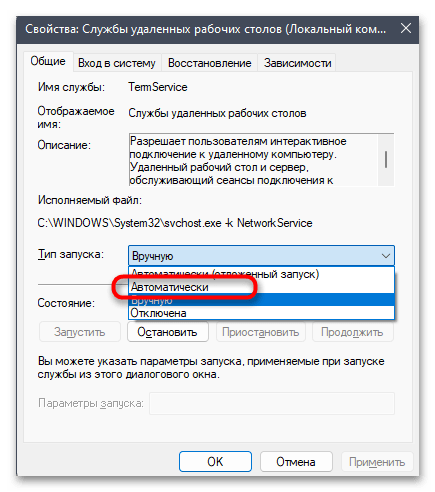
- Разверните список «Тип запуска» и установите значение «Автоматически».
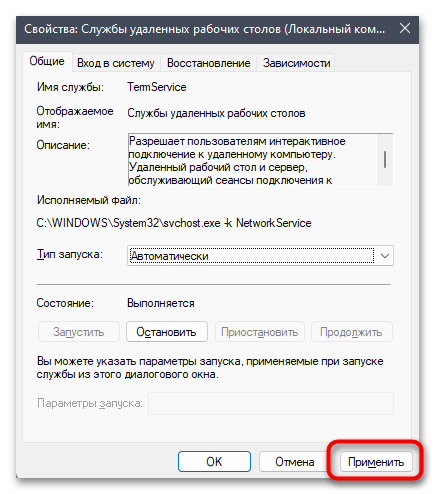
- Перед выходом обязательно щелкните по «Применить» для сохранения настройки. Перезагрузите компьютер и повторите попытку взаимодействия с удаленным рабочим столом.
Способ 4: Включение сетевого обнаружения
Следующий метод подразумевает настройку общего доступа, а именно позволит включить сетевое обнаружение. Этот параметр обязательно нужен при использовании удаленного рабочего стола, поэтому его отключенное состояние и может вызывать различные ошибки, связанные с RDP. Выполните следующие действия, чтобы в пару кликов справиться с поставленной задачей.
- Откройте «Пуск» и запустите «Панель управления», отыскав ее через поиск.
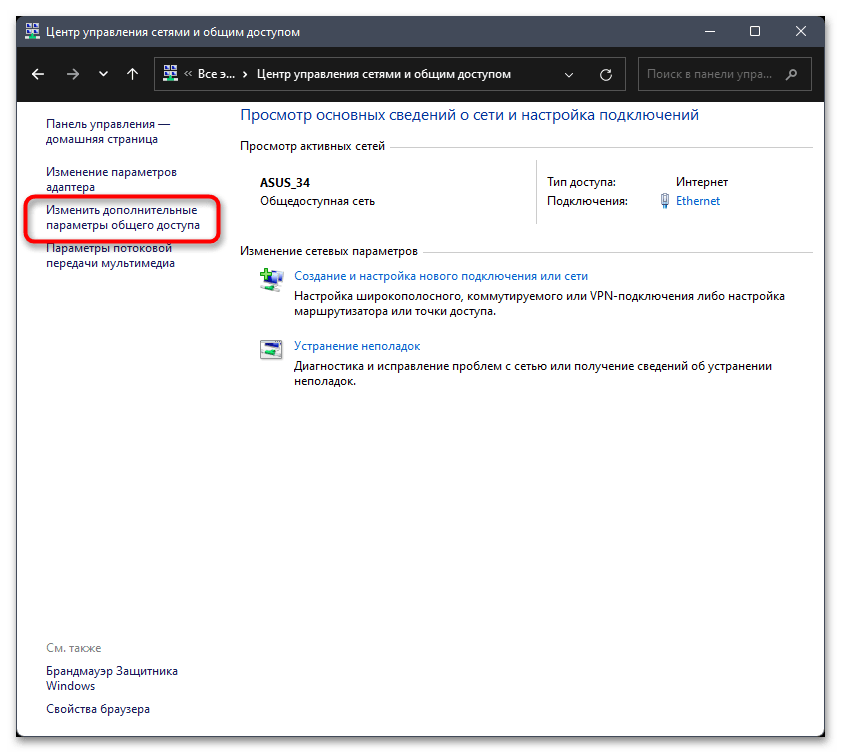
- В списке значков найдите «Центр управления сетями и общим доступом», затем перейдите к данному элементу.
- На панели слева вас интересует ссылка «Изменить дополнительные параметры общего доступа».
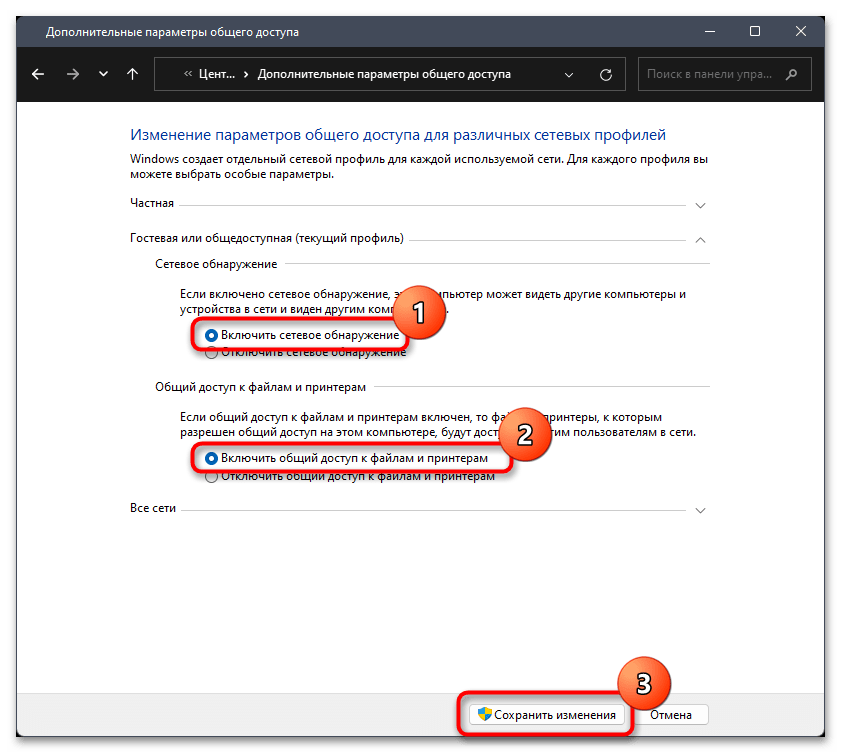
- Установите маркер «Включить сетевое обнаружение», а также на всякий случай организуйте общий доступ к файлам и папкам. После этого кликните по кнопке «Сохранить изменения».


Способ 5: Редактирование реестра
При помощи редактирования реестра пользователь самостоятельно создает параметр, связанный с UDP. Этот протокол через данную настройку понадобится запретить, что позволит избежать большинства проблем, относящихся к RDP. Если изменение не принесет должного результата, параметр можно будет в любой момент удалить без последствий для работы ОС.
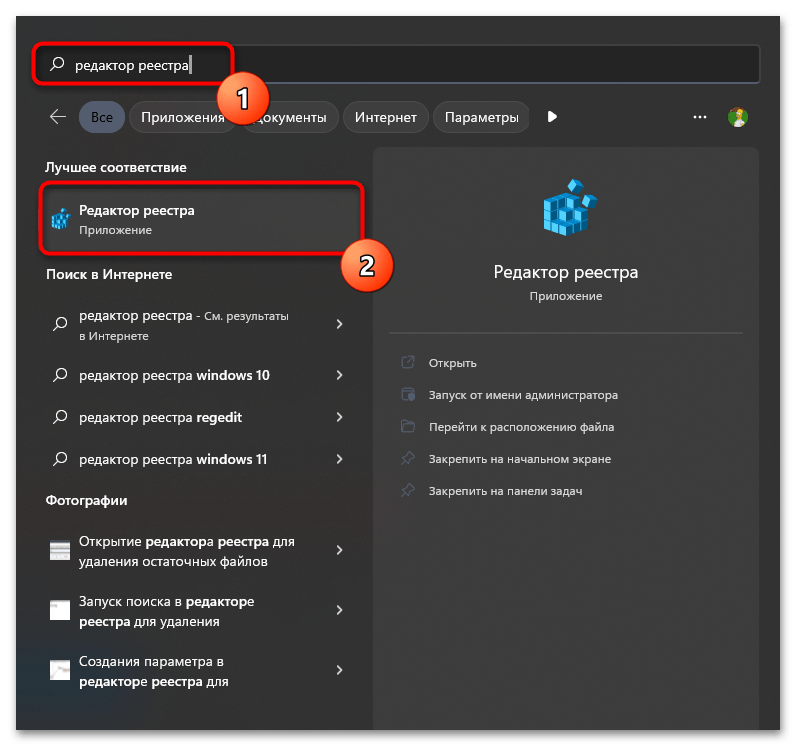
- Точно так же, как вы делали это раньше, через поиск в «Пуске» запустите «Редактор реестра».
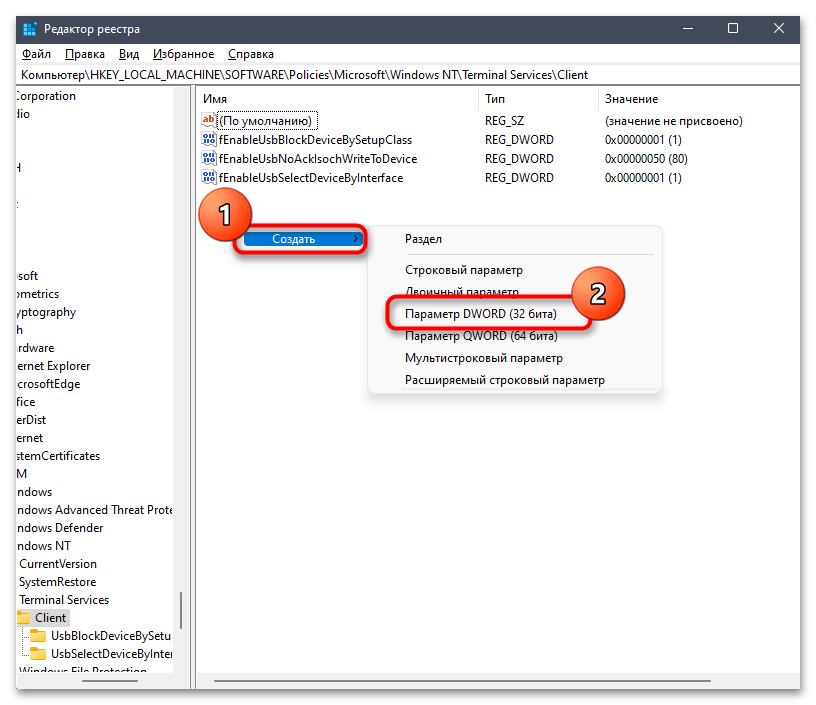
- В адресную строку вставьте путь
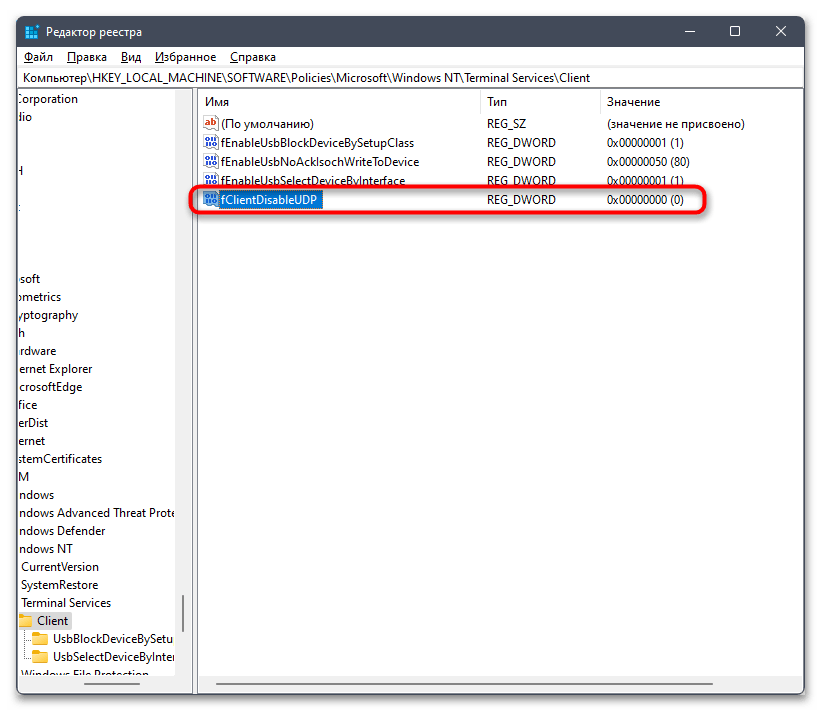
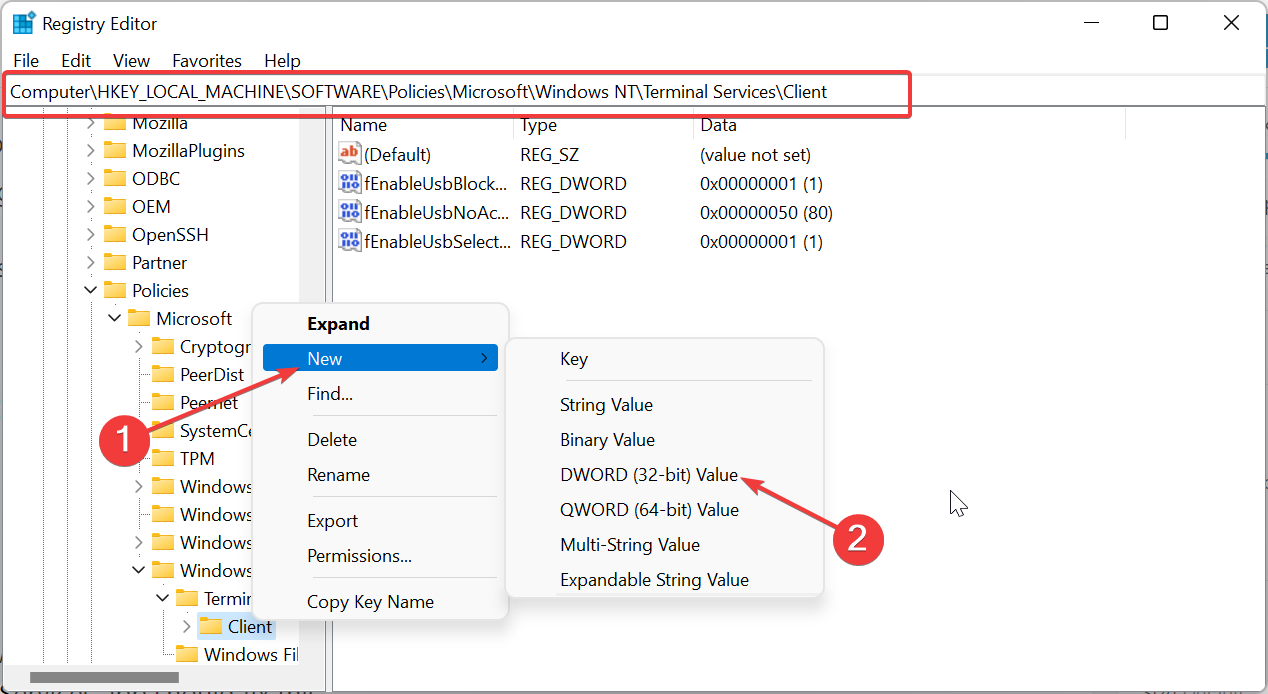
Компьютер\HKEY_LOCAL_MACHINE\SOFTWARE\Policies\Microsoft\Windows NT\Terminal Services\Clientи перейдите по нему. - В корне каталога в правой области нажмите по любому свободному месту правой кнопкой мыши, наведите курсор на пункт «Создать» и выберите «Параметр DWORD (32 бита)».
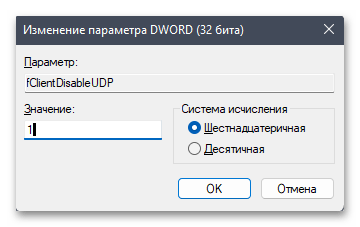
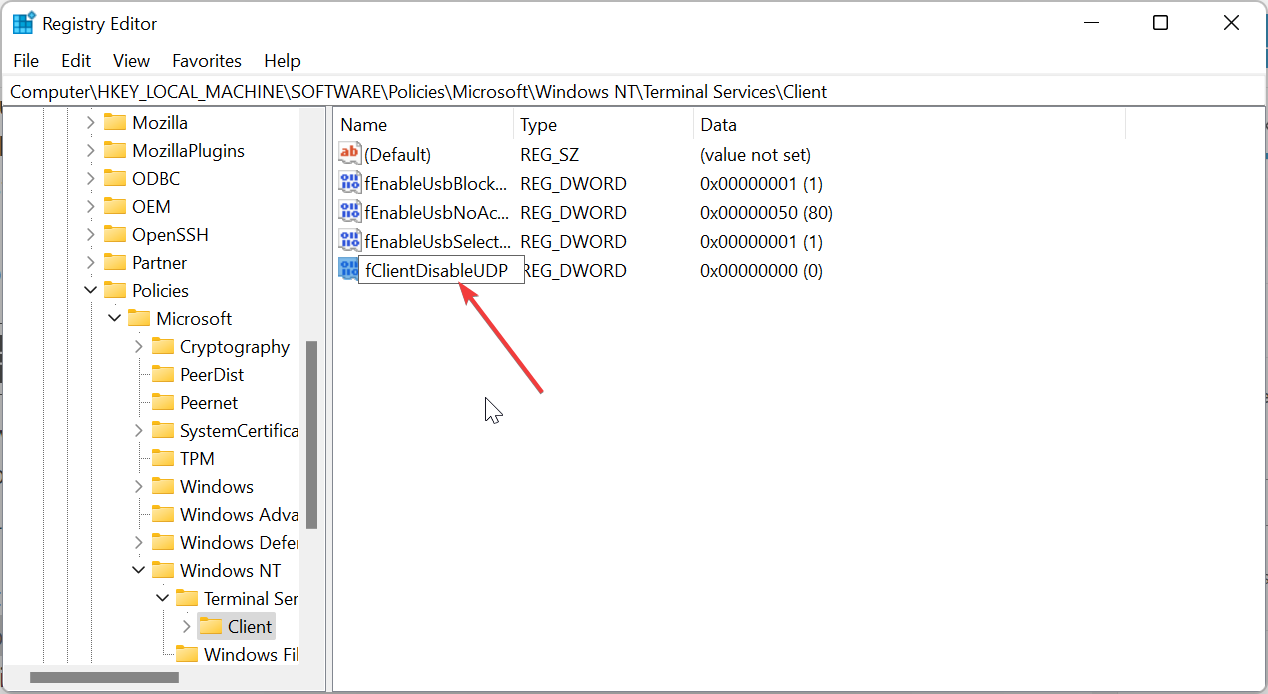
- Задайте для него название «fClientDisableUDP» и дважды кликните для открытия окна редактирования значения.
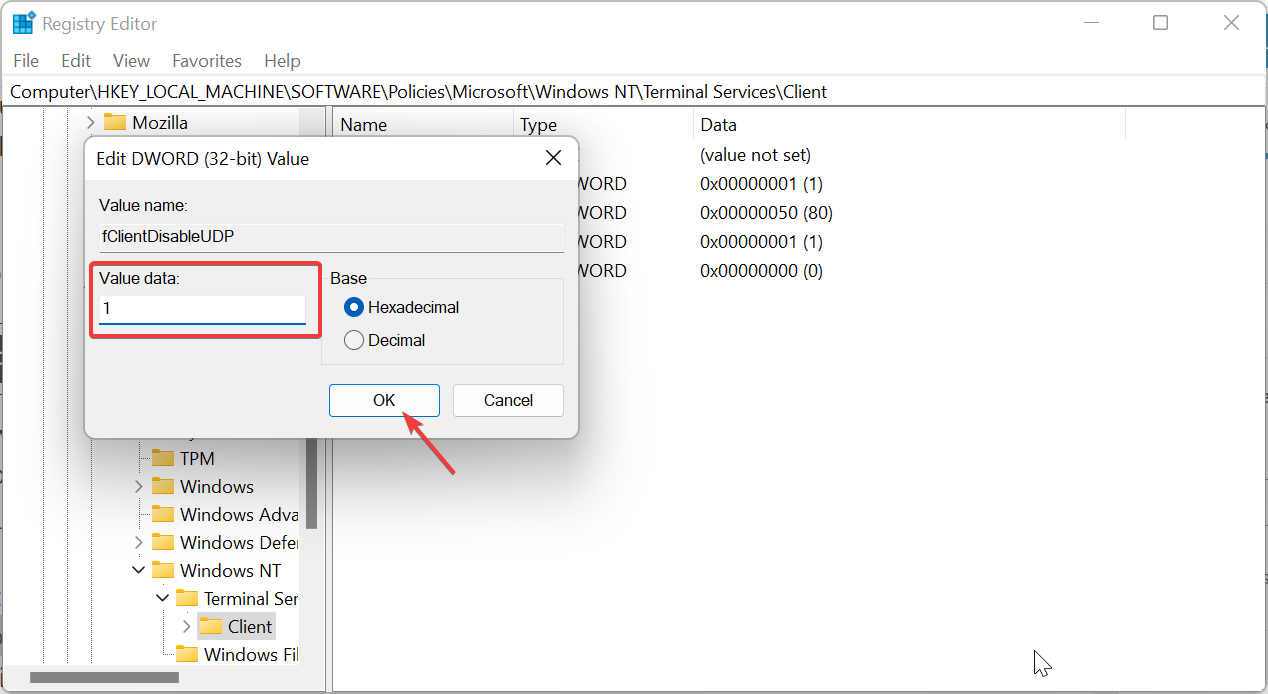
- Установите значение «1» и нажмите «ОК». Обязательно отправьте компьютер на перезагрузку, чтобы настройка вступила в силу.

Способ 6: Изменение локальной групповой политики
Рассмотрим еще один метод, связанный с протоколом UDP и его отключением. Вы можете использовать его вместе с предыдущим или вместо, однако учитывайте, что для реализации понадобится доступ к «Редактору локальной групповой политики», а этот компонент активен исключительно в Windows 11 Pro и Enterprise.
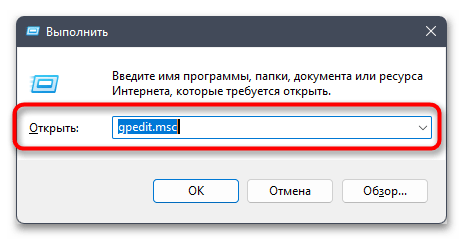
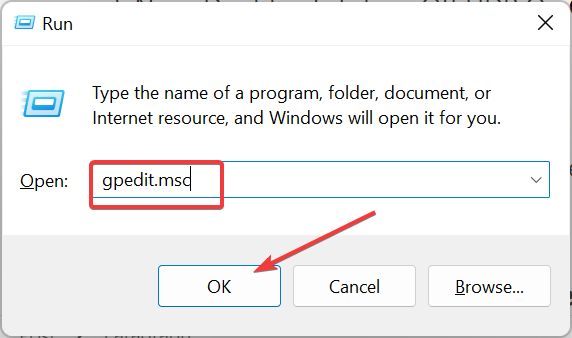
- Запустите утилиту «Выполнить», используя для этого стандартное сочетание клавиш Win + R. В поле ввода укажите
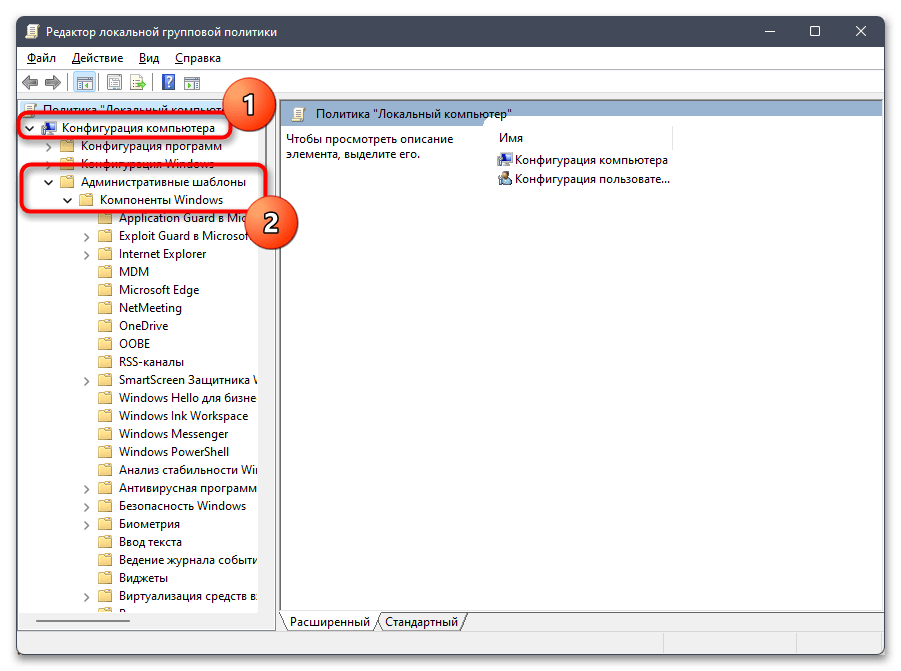
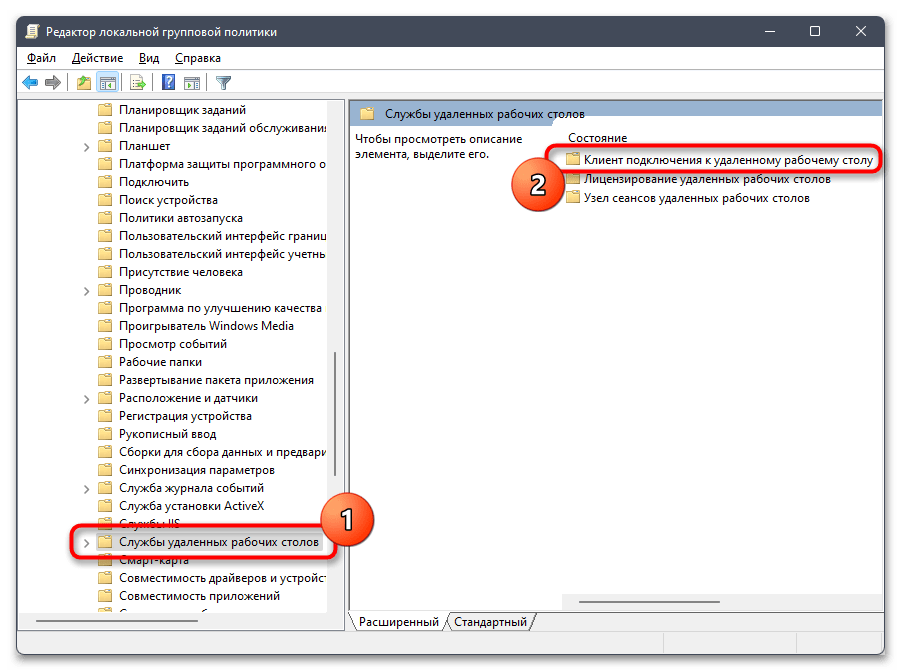
gpedit.mscи нажмите Enter для запуска оснастки. - Разверните раздел «Конфигурация компьютера», в нем выберите каталог «Административные шаблоны» и «Компоненты Windows».
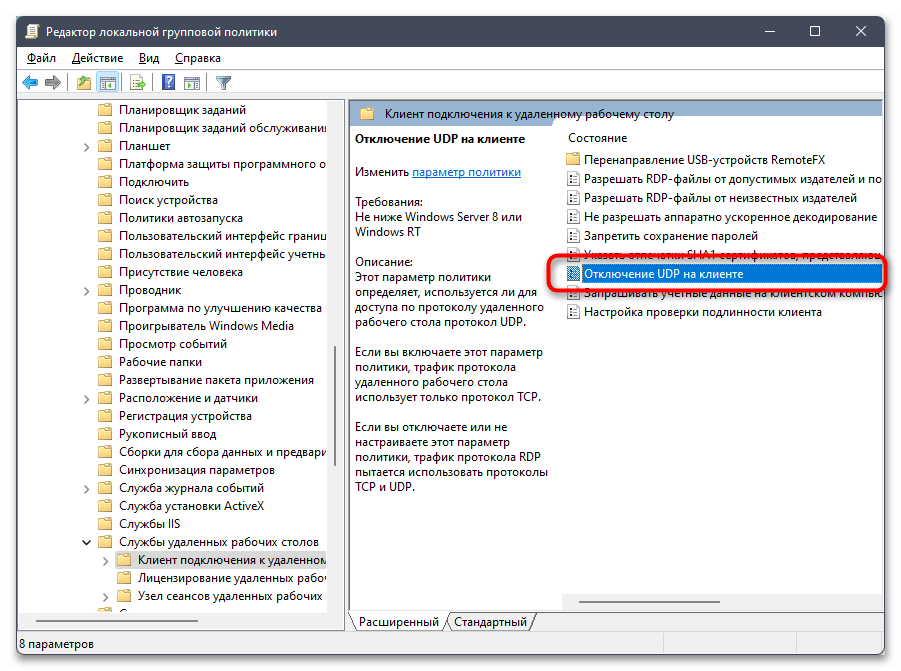
- Далее выберите директорию «Службы удаленных рабочих столов» и перейдите в «Клиент подключения к удаленному рабочему столу».
- В данной папке найдите параметр «Отключение UDP на клиенте» и дважды щелкните по нему левой кнопкой мыши, чтобы перейти к изменению значения.
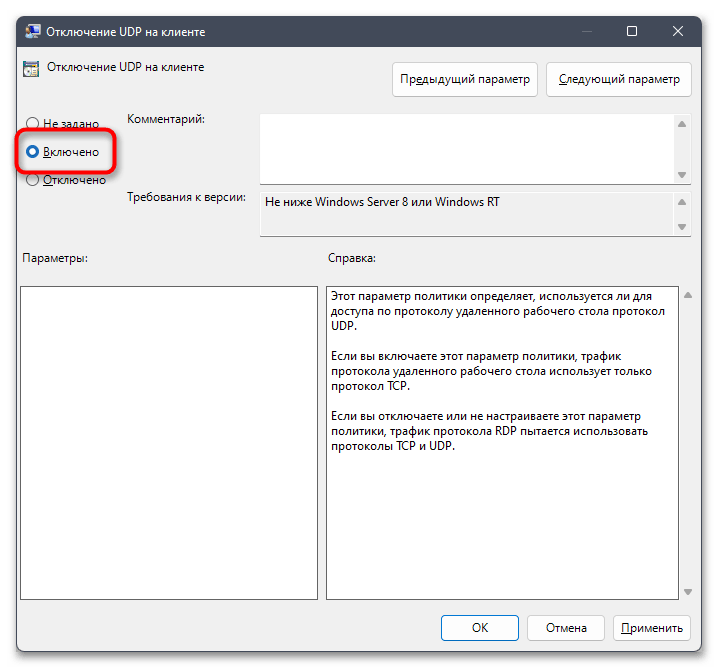
- Установите маркер возле пункта «Включено», примените изменения и перезагрузите компьютер.
Способ 7: Внесение изменений в файл «hosts»
Эффективность данного метода спорная, однако вы можете проверить его, если ничего из перечисленного выше не помогло. Суть заключается в редактировании файла «hosts» с указанием IP-адреса хоста, к которому вы хотите подключиться. В качестве доменного имени указывается название компьютера или поле оставляется пустым (нужно изменять файл и проверять оба варианта).
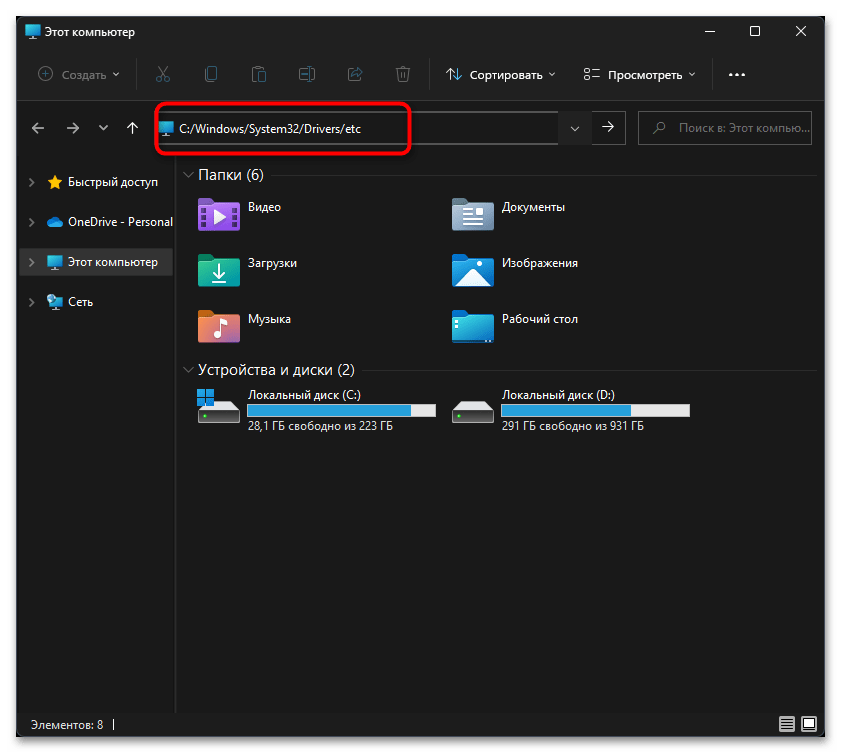
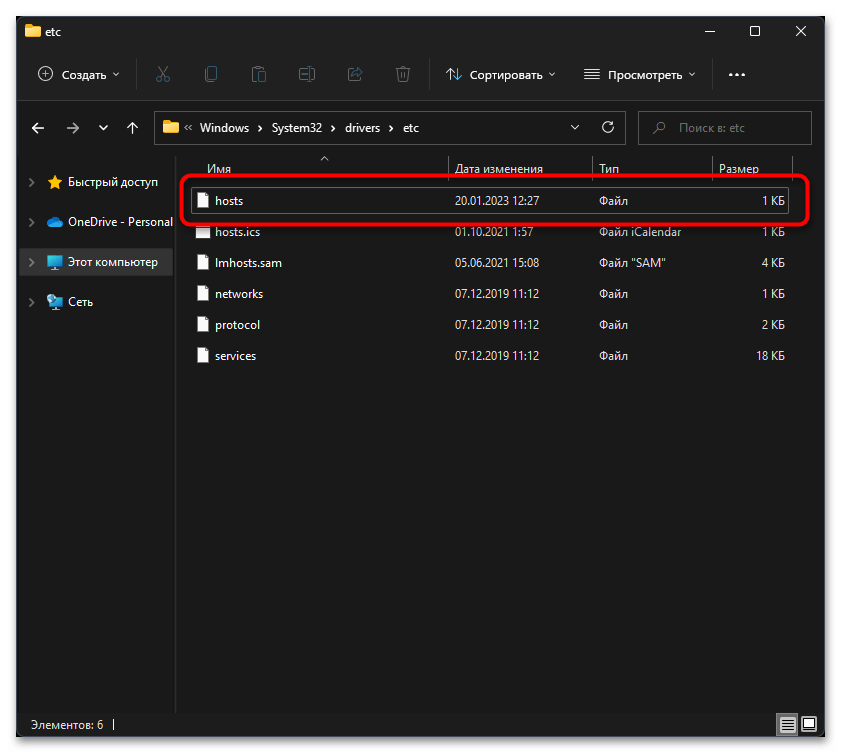
- Для начала откройте «Проводник» и перейдите по пути
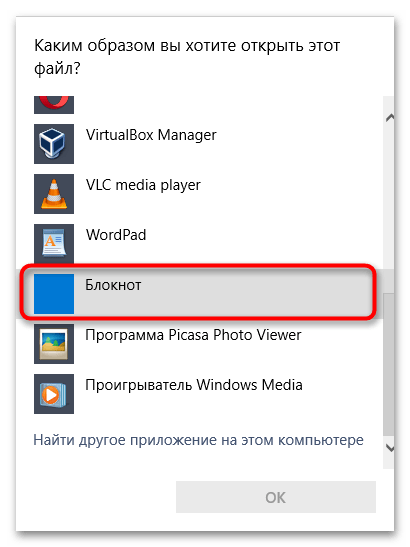
C:/Windows/System32/Drivers/etc. - Дважды щелкните по файлу «hosts», чтобы открыть список с выбором программ для запуска.
- Выберите «Блокнот» или любой удобный для себя текстовый редактор.
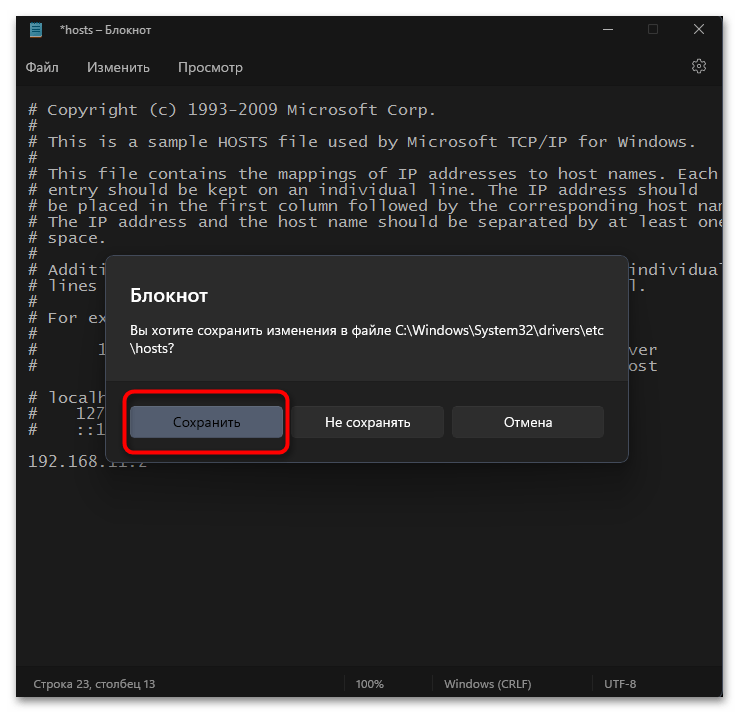
- В конце файла добавьте IP-адрес компьютера, а через пробел название компьютера для подключения (или сначала только адрес).
- Перед выходом обязательно сохраните изменения.
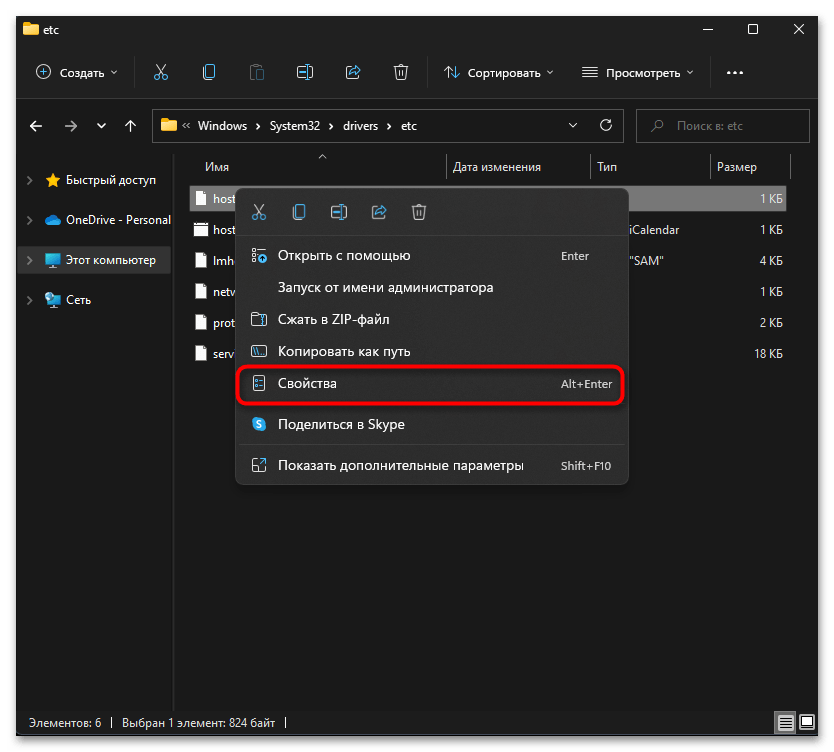
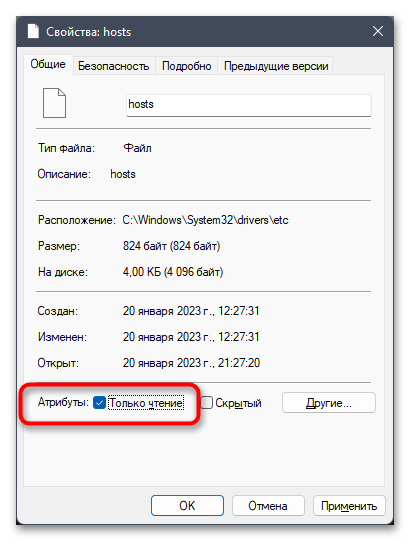
- Если вы получили уведомление о том, что редактирование файла недоступно, сначала понадобится щелкнуть по нему ПКМ и выбрать пункт «Свойства».
- Снимите галочку с пункта «Только чтение» среди атрибутов и сохраните изменения.

Способ 8: Использование сторонних программ
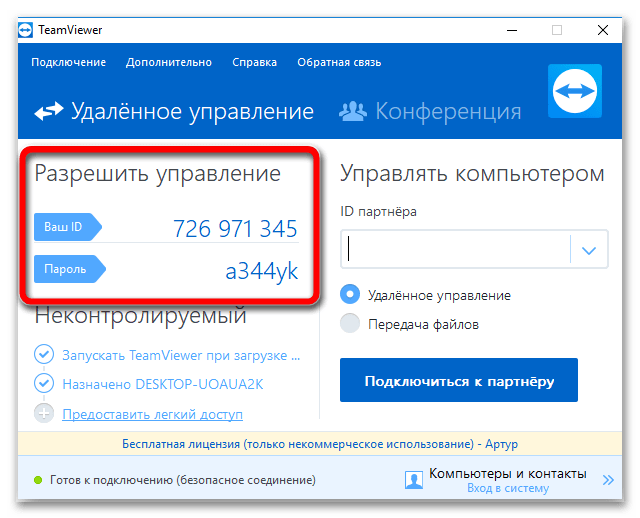
Если ни один из методов так и не позволил решить ситуацию с RDP и подключиться к удаленному рабочему столу так и не получается, рекомендуем заменить стандартное средство на любую стороннюю программу. Она должна быть установленной на двух компьютерах, а подключение осуществляется по идентификатору и установленному паролю. К тому же у такого софта функциональность обычно значительно шире, нежели у стандартного средства ОС. Детальную инструкцию по работе в самом популярном ПО вы найдете по ссылке ниже, а также сможете перейти к чтению материала, где представлены бесплатные его аналоги, ничем не уступающие по функциональности.
Подробнее:
Как пользоваться TeamViewer
Бесплатные аналоги TeamViewer
Еще статьи по данной теме:
Помогла ли Вам статья?
Everything you need to regain your remote connection
by Matthew Adams
Matthew is a freelancer who has produced a variety of articles on various topics related to technology. His main focus is the Windows OS and all the things… read more
Updated on
- Windows 11’s Remote Desktop is not working due to firewall blocks and disabled network features and services.
- Checking firewall permissions for the Remote Desktop app might help when you can’t connect to a remote PC.
- Enabling certain RDP services might also solve Remote Desktop problems in no time.
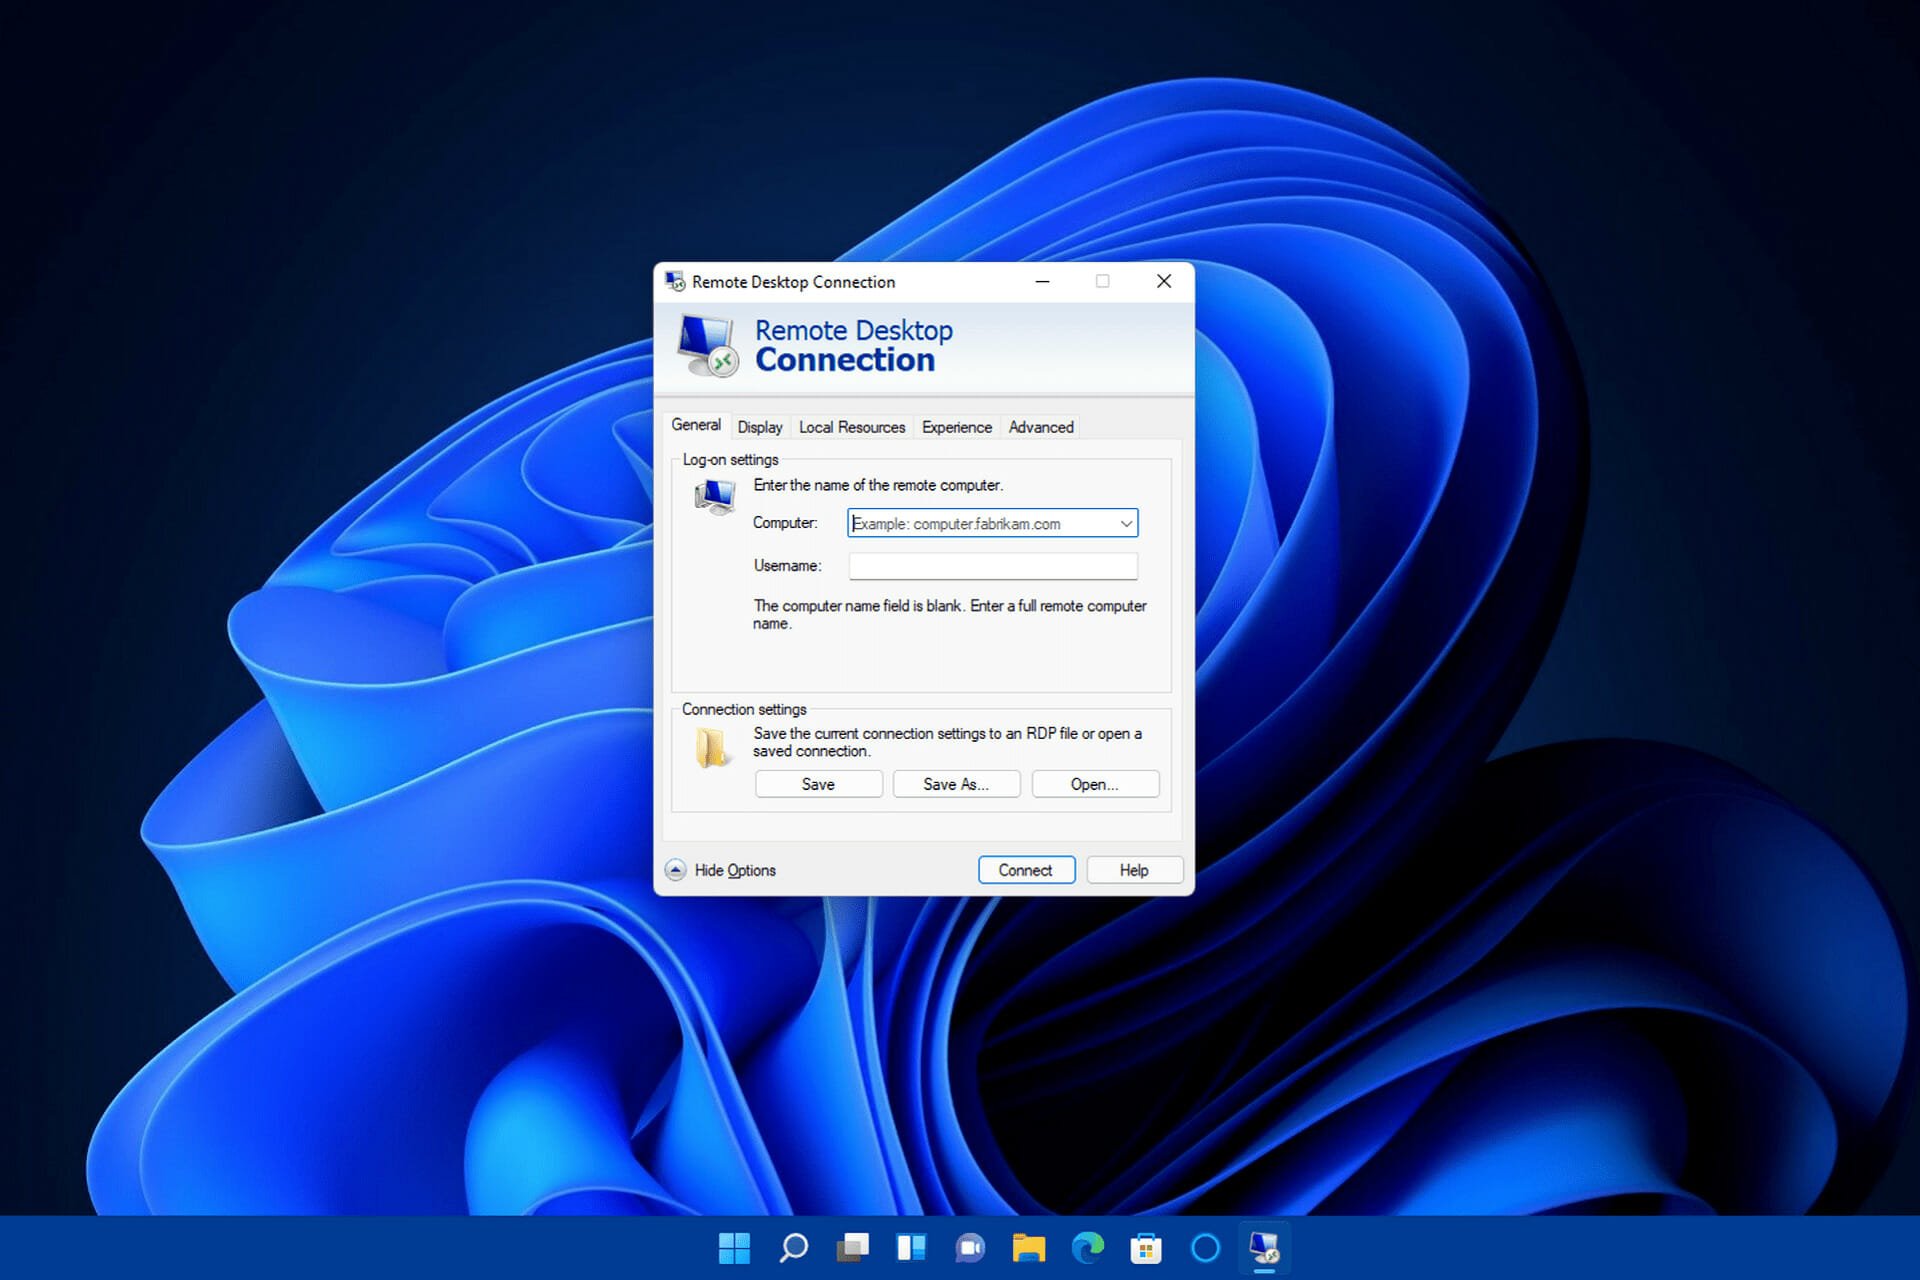
Windows 11 includes a Remote Desktop Connection app, which you can use to remotely connect and work on another PC. By doing so, you may utilize the remote PC you’re connected to on the desktop or laptop directly in front of you.
However, users have been reporting issues with connection. Most of the complaints are that the Remote Desktop is not working on Windows 11.
Knowing this feature’s importance, we have prepared this guide to help you fix this issue and regain your remote connectivity.
Why does Remote Desktop not work in Windows 11?
Remote Desktop connection errors often arise because of various configuration or network issues. These are some of the more probable causes for Remote Desktop connection errors in Windows 11:
How we test, review and rate?
We have worked for the past 6 months on building a new review system on how we produce content. Using it, we have subsequently redone most of our articles to provide actual hands-on expertise on the guides we made.
For more details you can read how we test, review, and rate at WindowsReport.
- Remote Desktop isn’t enabled: The first thing to check if Windows 11 RDP is not working is if the feature is turned on for the host and client PCs. Enabling it on Settings and the Services app should fix this.
- Firewalls: Windows Defender Firewall, or others incorporated in third-party antivirus software, can block RDP connections. You need to check if Windows Defender Firewall is not blocking the feature to make it work.
- Faulty Windows update: If the Windows 11 Remote Desktop is not working after an update, the problem is most likely caused by the update. The solution here is to remove the problematic update or edit your registry.
How to fix Remote Desktop not working in Windows 11?
1. Edit your registry
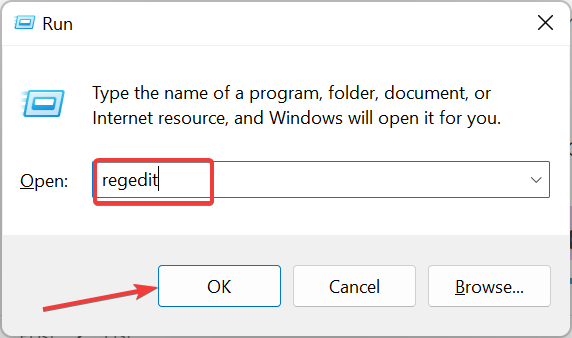
- Press the Windows key + R, type regedit, and click OK.

- Follow the path below in the left pane:
Computer\HKEY_LOCAL_MACHINE\SOFTWARE\Policies\Microsoft\Windows NT\Terminal Services\Client - Now, right-click the Client folder and choose New > DWORD (32-bit) Value.

- Type fClientDisableUDP as the name of the new item.
- Finally, double-click it, set its Value data to 1 and click the OK button.
If you noticed that the Windows 11 Remote Desktop is not working after installing the 22H2 update, it is because the feature is trying to connect with UDP.
The solution here is to disable UDP by creating a new registry value.
2. Turn off UDP in Group Policy
- Press the Windows key + R, type gpedit.msc, and click OK.
- Navigate to the path below in the left pane:
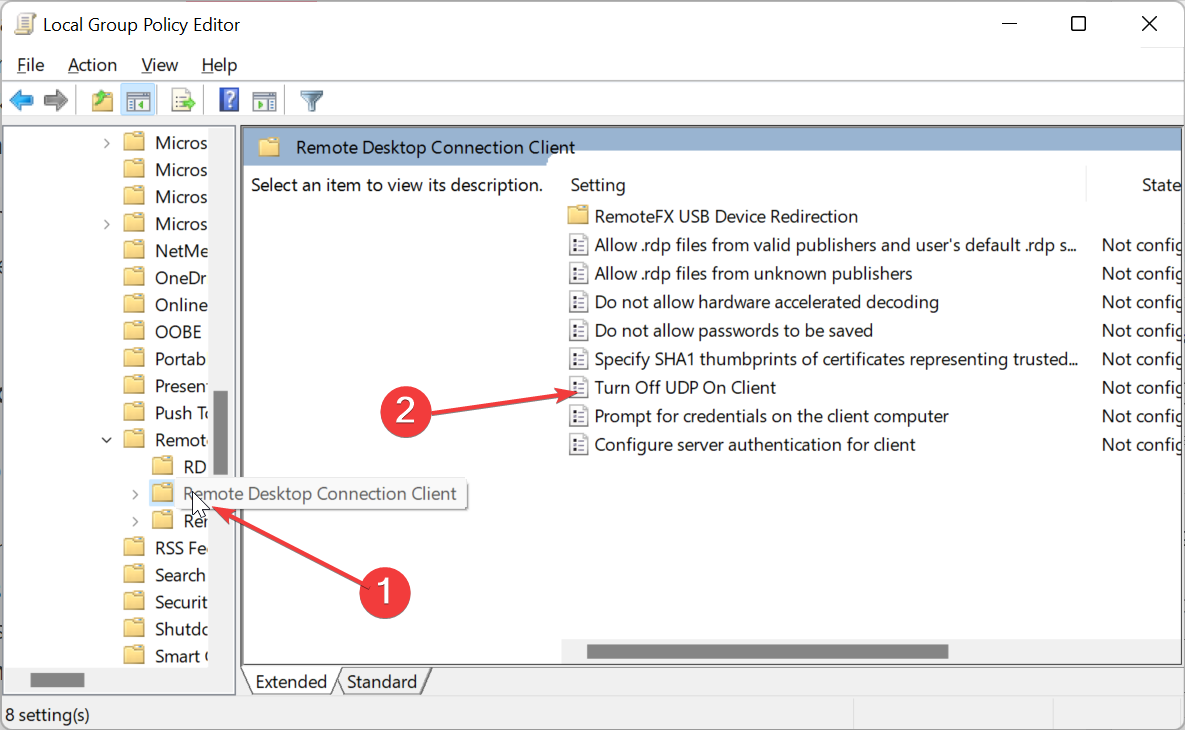
Computer Configuration > Administration Templates > Windows Components > Remote Desktop Services > Remote Desktop Connection Client - Now, double-click Turn Off UDP On Client in the right pane.

- Finally, tick the Enabled radio button and click OK.


This is another excellent solution if the Windows 11 Remote Desktop feature stops working after the 2022 update. With the above steps, the UDP client should be completely disabled and allow your PC to connect.
- Fix: Remote Desktop connection not working /can’t connect
- Fix: Set Time Zone Automatically Defaults to Wrong Time Zone
- 0X8007013 Install Error: How to Quickly Fix it
- Fix: Internet Keeps Disconnecting When Playing Games on Windows 11
3. Make sure Remote Desktop is enabled
3.1. Enable Remote Desktop in Settings
- First, click Start on the Taskbar and select the Settings option.
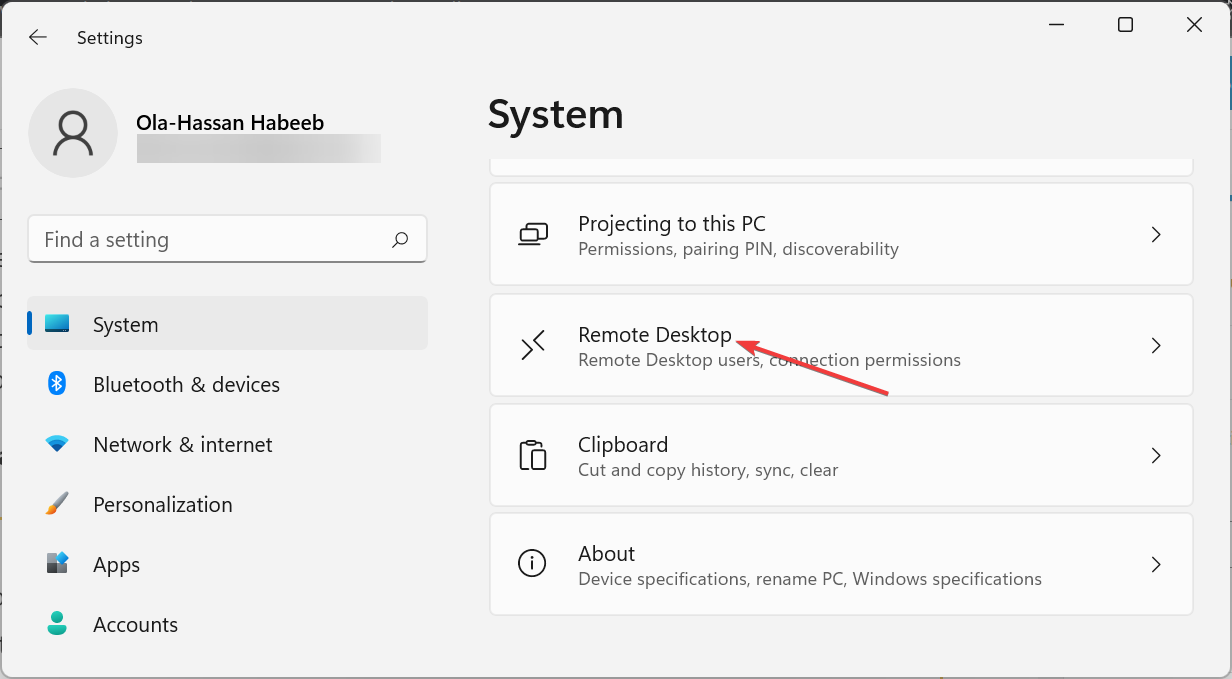
- Click Remote Desktop on the System tab.

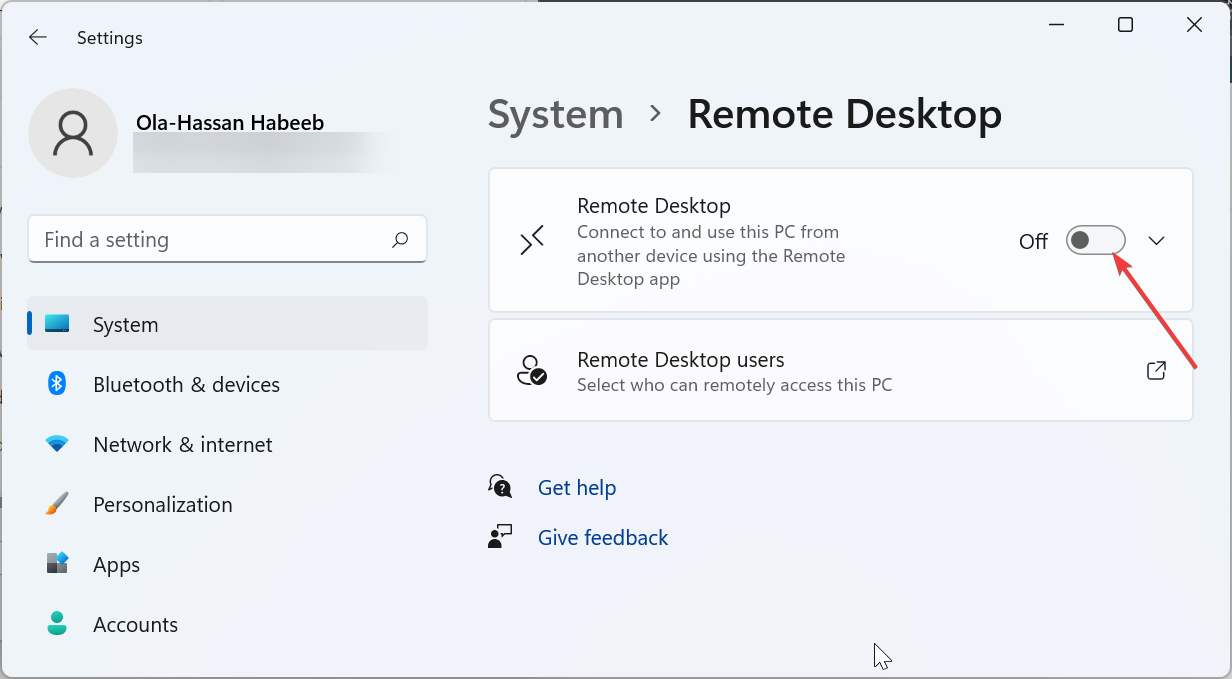
- Then, toggle the switch for Remote Desktop forward to enable it.
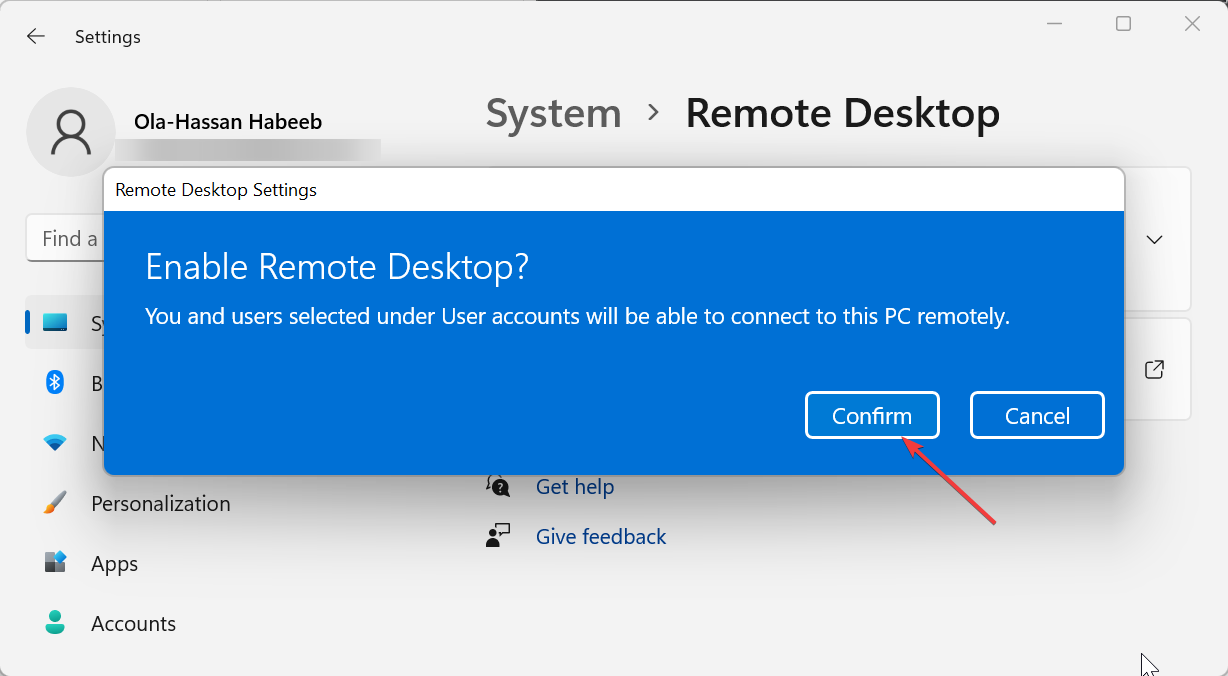
- Select the Confirm option on the dialog box that opens.

After enabling this, you will be able to use the Remote Desktop feature, and other PCs will also be able to access your PC remotely.
3.2. Check Remote Assistance is enabled in System Properties

NOTE
Make sure Remote Desktop is enabled on both the remote PC you’re trying to connect to and on the client. Note that you can’t enable that feature via Settings in Windows 11 Home. The remote host PC you’re trying to connect with must have Windows 11 Pro.
- Open the search utility by clicking the magnifying glass button on Windows 11’s taskbar.

- Type Control Panel within the search tool’s box.
- Next, click the View drop-down menu’ and select the Category option.
- Select System and Security in the Control Panel.
- Then click Allow remote access.

- Select the Allow Remote Assistance connections to this computer checkbox if it’s unchecked.

- Also, click the Allow remote connections to this computer setting radio button to select it.
- Click Apply to save the new settings.
- Then press the OK button to exit System Properties.


If the Windows 11 Remote Desktop is still not working after the first two solutions, you need to check if the feature is enabled. You might have mistakenly disabled it in the process of troubleshooting.
4. Check that Remote Desktop Services is enabled and running
- Right-click the Start menu’s taskbar button and select Run to launch that accessory.

- Type this Run command within the Open text box:
services.msc - Select the OK option.
- Then double-click Remote Desktop Services to bring up its properties window.

- Select the Automatic option on the Startup type drop-down menu if the service is disabled.

- Press the Apply button.
- Now, click the Start button and select OK to exit the window.
- Repeat steps five to seven for the Remote Desktop Services UserMode Port Redirector service afterward.


Another factor that can stop the Windows 11 Remote Desktop from working is if it is disabled in Services. You need the service to run and startup automatically to enjoy a smooth connection.
5. Allow Remote Desktop through Windows Defender Firewall
- Press the Windows key + S, type firewall, and select Windows Defender Firewall.
- Then click Allow an app or feature through Windows Defender Firewall on the left side of the Control Panel.

- Press the Change settings button.

- Select the Private checkbox for Remote Desktop if it’s unchecked.
- Thereafter, click OK to exit.


For the RDP feature to work, you must let it pass through your Firewall. Hence, if the Windows 11 Remote Desktop is working or responding on your PC, check if your Windows Defender Firewall is not blocking it.
We have come to the end of this detailed guide. We believe you now have everything to connect to your computer remotely from your comfort zone.
Similarly, check our excellent guide to get it working quickly if the Remote Desktop is greyed out on Windows 11.
Feel free to share the solution that helped you fix this issue in the comments below.
![]()
- Remove From My Forums
-
Question
-
Ошибка «Не удалось подключиться к удалённому компьютеру, поскольку сертификат сервера шлюза удалённых рабочих столов отозван или просрочен».

При этом Windows 10 (8, 7) этот сертификат (выданный доменным Центром сертификации) не просрочен и подключение в этих ОC происходит без проблем. В хранилище Доверенные корневые центры сертификации (локальный компьютер) сертификат
доменного ЦС есть.Списки отзыва актуальные, серийного номера сертификата шлюза в них нет.
Пока нагуглил, что какие-то проблемы с Службой времени Windows в этой ОС. В Просмотре событий очень много 158 кодов про ошибку VMICTimeProvider. Вместе с тем, время в трее показывается актуальное, синхронизация
с сервером времени time.windows.com происходит успешно.Кто-нибудь сталкивался с подобной проблемой? Нашлось решение?
Буду признателен за любую помощь по существу проблемы.
MCSA
Answers
-
Ещё пробовали почистить кэш SSL с помощью команды certutil -urlcache * delete. К сожалению, тоже не помогло.
MCSA
Настроил шлюз на 2012R2 — все прекрасно заработало.
На 2008R2 сертификаты
TLSv1, на 2012R2 TLSv1.2
Скорее всего на WIN11 старый TLS запрещен или его можно включить.
-
Edited by
Friday, October 8, 2021 6:52 PM
-
Marked as answer by
ЙоЖыГ
Friday, October 8, 2021 10:25 PM
-
Edited by
-
Скорее всего на WIN11 старый TLS запрещен или его можно включить.
Спасибо за наводку! Включил TLS v.1 согласно
этой статьи (выполнил пункты 3.1 и 3.2) и тоже всё заработало. ОГРОМНОЕ Спасибо!
Конечно, со временем будем переходить новые серверные ОC.
MCSA
-
Edited by
ЙоЖыГ
Friday, October 8, 2021 8:53 PM -
Marked as answer by
ЙоЖыГ
Friday, October 8, 2021 8:53 PM
-
Edited by
-
Скорее всего на WIN11 старый TLS запрещен или его можно включить.
Спасибо за наводку! Включил TLS v.1 согласно этой статьи (выполнил пункты 3.1 и 3.2) и тоже всё заработало. ОГРОМНОЕ Спасибо!
Конечно, со временем будем переходить новые серверные ОC.
MCSA
Спасибо добрый человек, но чтоб долго не искать напишу тут, нужно создать reg файл с содержимым, добавить в реестр и перезагрузиться:
Windows Registry Editor Version 5.00
[HKEY_LOCAL_MACHINE\SOFTWARE\Microsoft\Windows\CurrentVersion\Internet Settings\WinHttp]
"DefaultSecureProtocols"=dword:00000A80
[HKEY_LOCAL_MACHINE\SOFTWARE\Wow6432Node\Microsoft\Windows\CurrentVersion\Internet Settings\WinHttp]
"DefaultSecureProtocols"=dword:00000A80

Windows Registry Editor Version 5.00
[HKEY_LOCAL_MACHINE\SYSTEM\CurrentControlSet\Control\SecurityProviders\SCHANNEL\Protocols\TLS 1.0]
[HKEY_LOCAL_MACHINE\SYSTEM\CurrentControlSet\Control\SecurityProviders\SCHANNEL\Protocols\TLS 1.0\Client]
"DisabledByDefault"=dword:00000000
"Enabled"=dword:00000001
[HKEY_LOCAL_MACHINE\SYSTEM\CurrentControlSet\Control\SecurityProviders\SCHANNEL\Protocols\TLS 1.0\Server]
"DisabledByDefault"=dword:00000000
"Enabled"=dword:00000001
-
Marked as answer by
ЙоЖыГ
Saturday, October 30, 2021 2:16 PM
-
Marked as answer by
If you could not connect to a remote computer through Remote Desktop after installing Windows 11 22H2 Update, follow the instructions below to fix the problem.
Several Windows 11 users have reported that they are having problems connecting to Remote Desktop (RDP) after the installation of 22H2 update. More specifically, they report that they are either unable to connect to the remote computer with error code 0x10b, or the remote connection drops after a while.
The aforementioned remote desktop connection issues do not occur when connecting from computers running Windows 10/8/7, or Windows 11 version 21H2, and this means that they are due to a bug in Windows 11 version 22H2.
This guide contains several methods to fix the following issues with remote desktop on Windows 11 22H2:
- RemoteApp and Desktop Connections hang on «Loading the virtual machine».
- Windows 11 22H2 breaks the Remote Desktop Connection.
- Windows 11 22H2 cannot connect to remote desktop computer with error 0x10b.
How to Fix Windows 11 22H2 Remote Desktop Connection problems.
Method 1. Prevent Remote Desktop Client to connect through UDP.
Remote desktop connection problems in Windows 11 22H2 are due to a bug in the Remote Desktop client (mstsc.exe), which tries to connect to the remote computer over a UDP port instead of TCP. So, the way to solve the problem is to prevent the RDP client from using the UDP protocol to connect to the remote computer and use only the TCP port. To do that, use one of the ways below:
Way 1. Disable UDP Port in RDP Client through Registry.
To disable the UDP protocol in Remote Desktop client using Registry, create the fClientDisableUDP DWORD and set it’s value data to 1 at the following registry location:
HKEY_LOCAL_MACHINE\SOFTWARE\Policies\Microsoft\Windows NT\Terminal Services\Client
To do that:
1. Restart the client PC, or terminate the «mstsc.exe» process using Task Manager.
2. Open Command Prompt as Administrator.
3. In command prompt, copy and paste the following command:
REG ADD «HKLM\SOFTWARE\Policies\Microsoft\Windows NT\Terminal Services\Client» /v fClientDisableUDP /t REG_DWORD /d 1 /f

4. Restart you PC and then try to connect to the remote computer using remote desktop. *
* Note: If you want to undo this change an to re-enable the UDP on RDP on the future, navigate to the above mentioned registry location and delete the fClientDisableUDP DWORD value.

Way 2. Turn Off the UDP Port in RDP in Group Policy.
To disable the UDP port in remote desktop client, using Group Policy:
1. Restart the client PC, or terminate the «mstsc.exe» process using Task Manager.
2. Open the Group Policy Editor. To do that:
1. Press simultaneously the Windows
+ R keys to open the run command box.
2. Type gpedit.msc & press Enter to open the Group Policy Editor.

2. At the left pane navigate to:
- Computer Configuration > Administration Templates > Windows Components > Remote Desktop Services > Remote Desktop Connection Client
3. At the right-pane open the Turn Off UDP on Client policy.

4. Set the policy to Enabled and click OK

Method 2. Replace MSTSC.EXE & MSTSCAX.DLL Files from another machine with Windows 11 21H2.
To second method to fix the remote desktop connections issues on Windows 11 22H2, is to copy the files mstsc.exe and mstscax.dll from a Windows 11 21H2 computer and to copy them to your Windows 11 22H2 computer. to do that:
1. From a Windows 11 21H2 PC, copy the mstsc.exe and mstscax.dll files from the C:\Windows\System32 folder on a USB disk.

2. On the Windows 11 22H2 PC, proceed and take the ownership of the mstsc.exe and mstscax.dll files as instructed below, in order to be able to replace them with the files from the Windows 11 21H2 machine. *
* Note: Before proceeding below, I suggest to copy to mstsc.exe and mstscax.dll files to another location on the disk as a backup.
3. Navigate to C:\Windows\System32 folder, right-click on mstsc.exe file and select Properties.

4. In Security tab, click Advanced.

5. Click Change next to TrustedInstaller.

6. Type your username and hit OK.

7. Now select the Users group and click Edit

8. Check the Full Control box and click OK.

9. Click OK.

10. Click Yes at Windows Security message to change the permissions.

11. Click OK and close the file properties.
12. Repeat the same steps and change the owner and the permissions on the mstscax.dll file.
13. Finally copy the files mstsc.exe and mstscax.dll from the USB disk to C:\Windows\System32 folder and then connect to remote desktop computer.
Method 3. Rollback to Windows 11 21H2.
The final method to fix Remote Desktop issues in Windows 11 22H2 is to roll back your system to the previous version 21H2 until Microsoft fixes the issue in the future. To do that:
1. Go to Start > Settings > Update and Security and click Advanced Options on the right pane.
2. Then click Recovery and click Go back under the Recovery Options.

That’s all folks! Which method worked for you?
Please leave a comment in the comment section below or even better: like and share this blog post in the social networks to help spread the word about this solution.
If this article was useful for you, please consider supporting us by making a donation. Even $1 can a make a huge difference for us.

Время на прочтение
2 мин
Количество просмотров 6.8K
Microsoft изучает сообщения пользователей о проблемах с удалённым рабочим столом в системах Windows 11 после установки обновления Windows 11 2022. Она приводит к тому, что клиенты удалённого рабочего стола не подключаются, случайно отключаются или неожиданно зависают.
Администратор на сайте сообщества Microsoft сообщил, что в клиенте удалённого рабочего стола есть ошибка, из-за которой он пытается использовать только UDP-подключение, а не TCP-подключение.
«Windows 11 22H2 разрывает подключения к удалённому рабочему столу через шлюз» — отметил другой пользователь.
«У меня есть несколько клиентов на Windows 11, и после обновления 22H2 они не смогли войти на наши RDS-сервера. Я пробовал без брандмауэра, но ничего не изменилось. Проблема исчезла после отката обновления, они снова смогли войти в систему», — сообщил третий.
Хотя Microsoft ещё официально не признала эту проблему, её сотрудник подтвердил, что сбой изучают более недели. Он отметил, что проблема связана с клиентом, и её пытаются воспроизвести.
В настоящее время проблему можно решить, откатив обновление Windows 2022 или отключив UDP-подключения на уязвимых клиентах. Чтобы сделать это, нужно перейти в HKLM\SOFTWARE\Policies\Microsoft\Windows NT\Terminal Services\Client с помощью редактора реестра, создать новую запись DWORD с именем fClientDisableUDP со значением 1 и перезапустить устройство.
Также можно включить политику «Отключить UDP на клиенте» в разделе «Конфигурация компьютера» > «Шаблоны администрирования» > «Компоненты Windows» > «Службы удалённых рабочих столов» > «Клиент подключения к удалённому рабочему столу» с помощью редактора групповой политики. В этом случае перезапуск устройства не требуется.
Ранее выяснилось, что загрузка и копирование локальных файлов в Windows 11 2022 могут происходить на 40% медленнее после обновления. Снижение производительности наблюдается при копировании файлов с удалённого компьютера с использованием протокола SMB.