FileZilla Server – это сервер который поддерживает FTP и FTP через SSL/TLS и обеспечивает безопасное шифрованное подключение к серверу.
FileZilla поддерживает SSL. Такой же уровень шифрования поддерживает ваш браузер, чтобы защитить вашу информацию. Когда вы используете SSL ваша информация шифруется так, что никто не сможет подсмотреть её, поэтому ваша конфиденциальность гарантирована. Также поддерживается функция сжатия «на лету», что ускоряет передачу данных.
К сожалению, опция сжатия данных может иногда работать некорректно, поэтому рекомендуется пользоваться ею с осторожностью. Есть вероятность, что уже сжатые файлы будут переданы, имея больший размер, чем исходные.
Поддержка SFTP (SSH File Transfer Protocol) не предусмотрена в Filezilla Server.
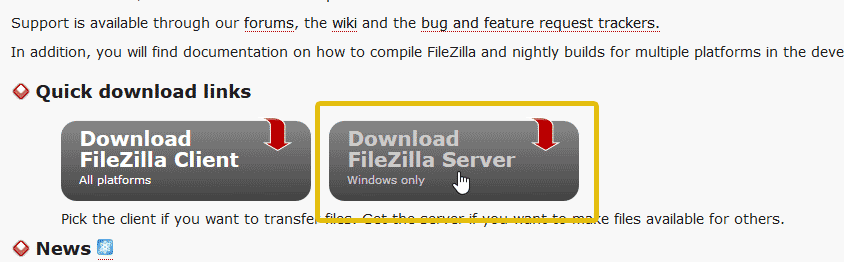
Загрузить FileZilla Server
Смотрите также
Настройка сети, Параметры командной строки (сервер)
Установка и настройка в Windows
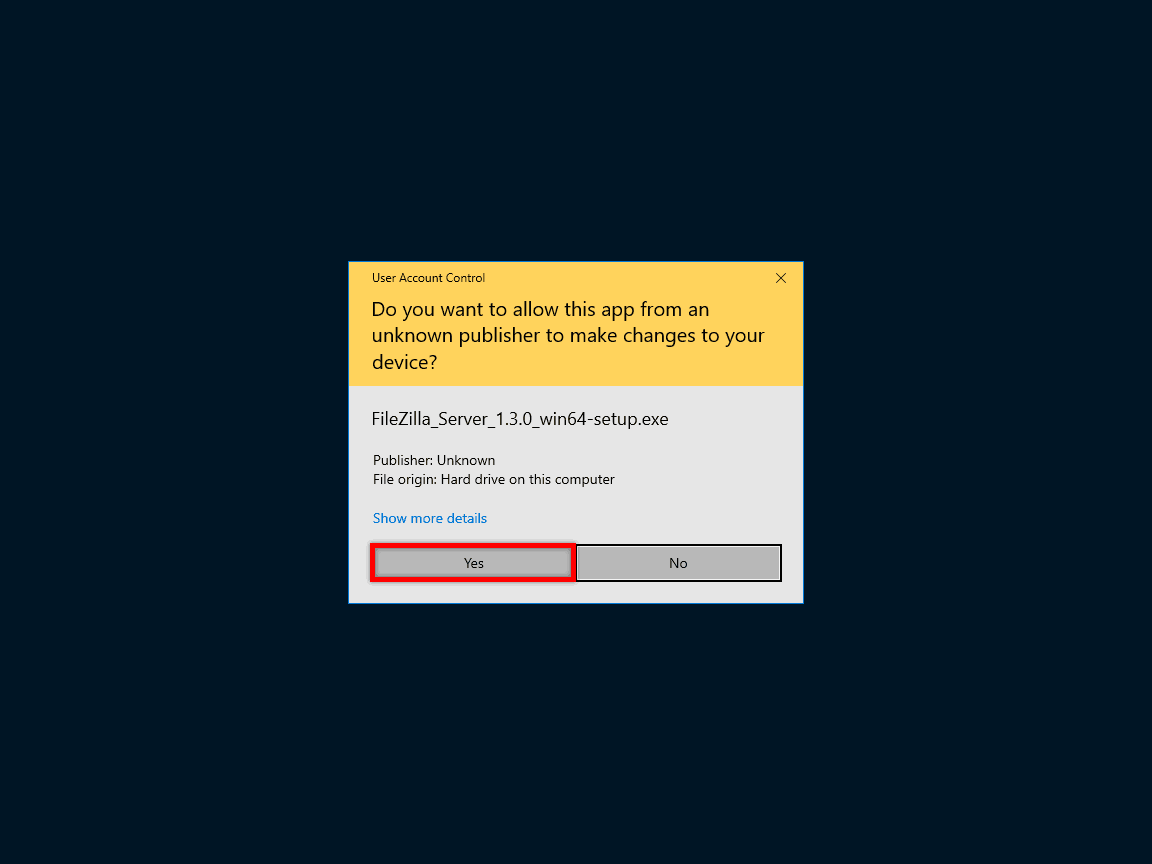
- Запустите exe установщик
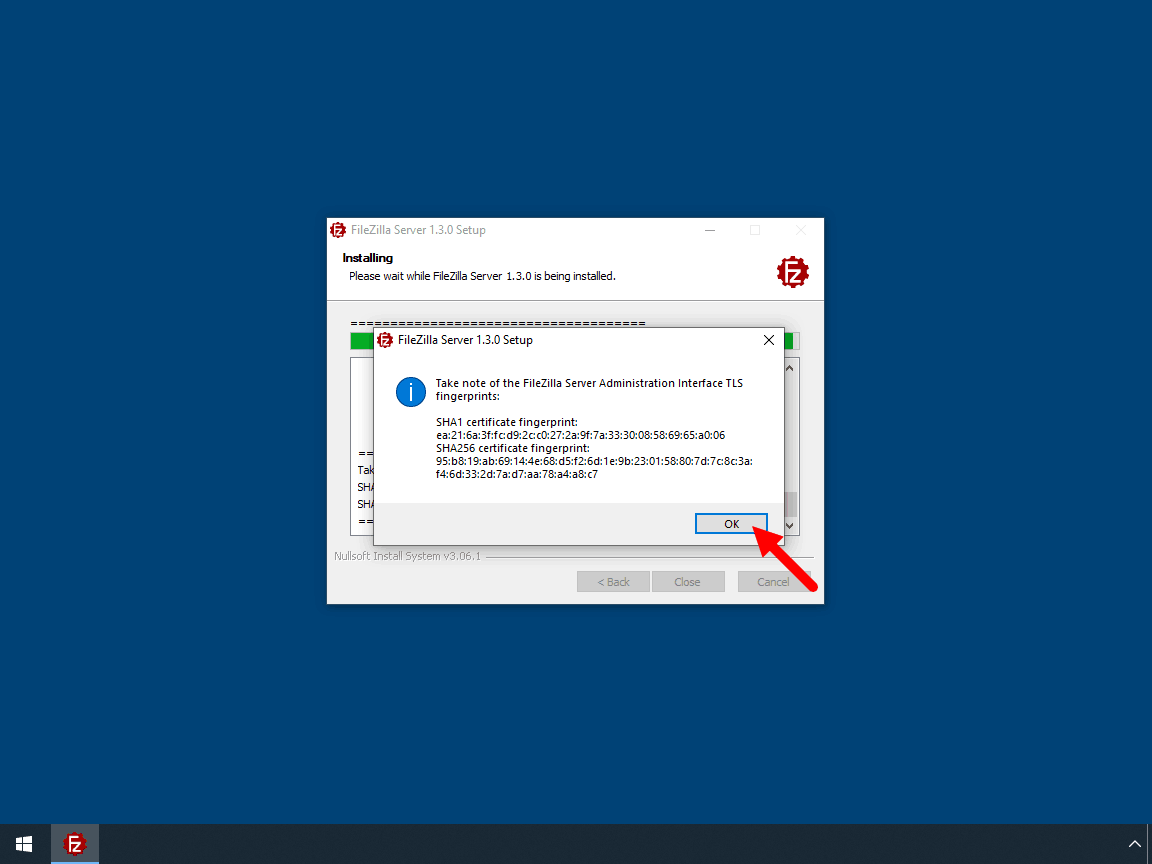
- Нужно выбрать admin port и запомнить его
- Запустите FileZilla Server Interface
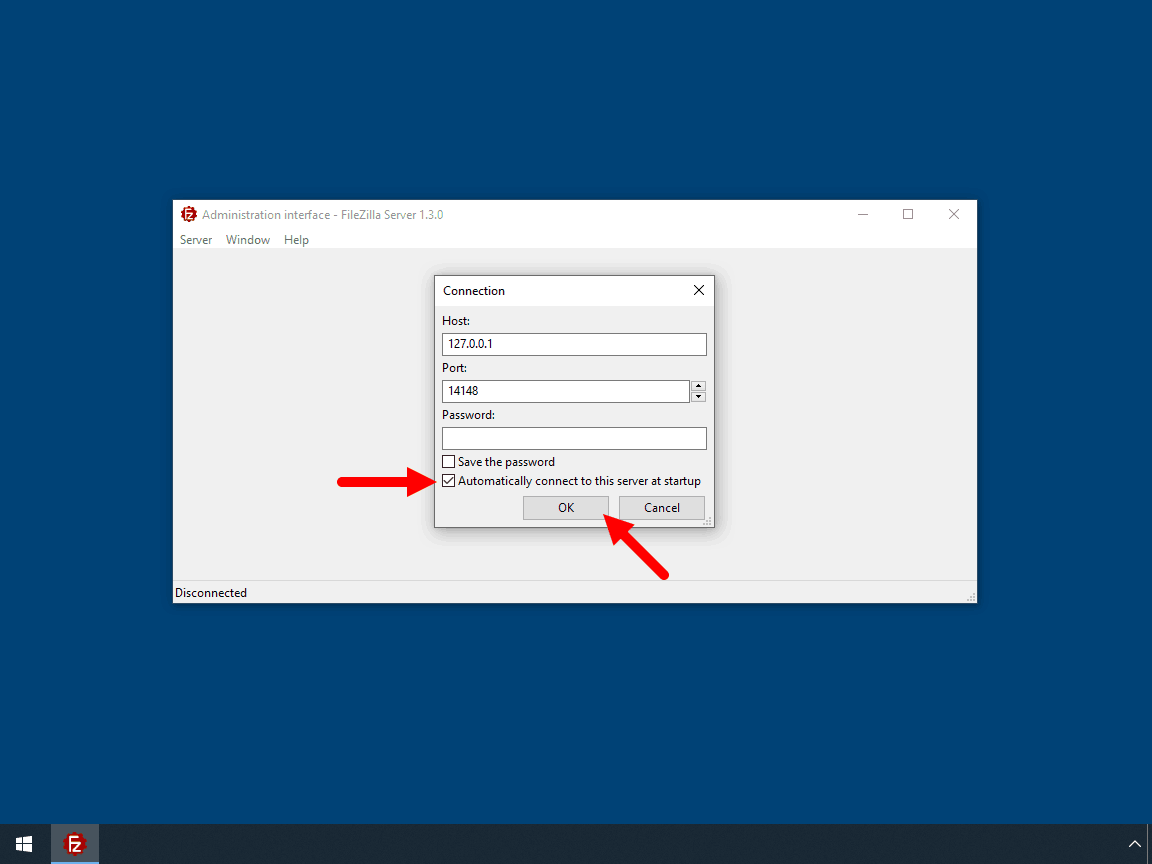
- Введите admin port и пароль для администратора, нажмите ok/connect
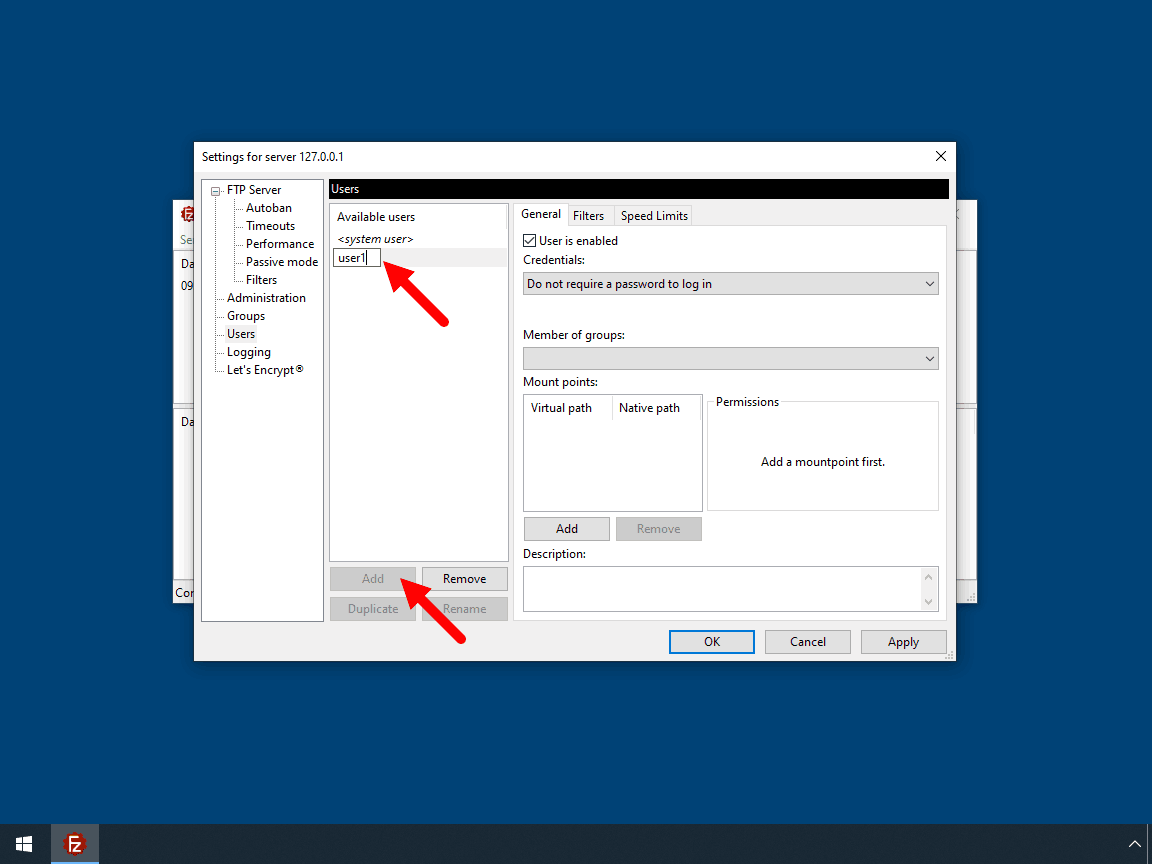
- Создайте профиль пользователя и/или группу с разрешениями для home directory.
- Создайте еще один каталог и включите отображение alias name в home directory (/AliasName)
- Завершите установку
Установка на Windows 7 с встроенным брандмауэром
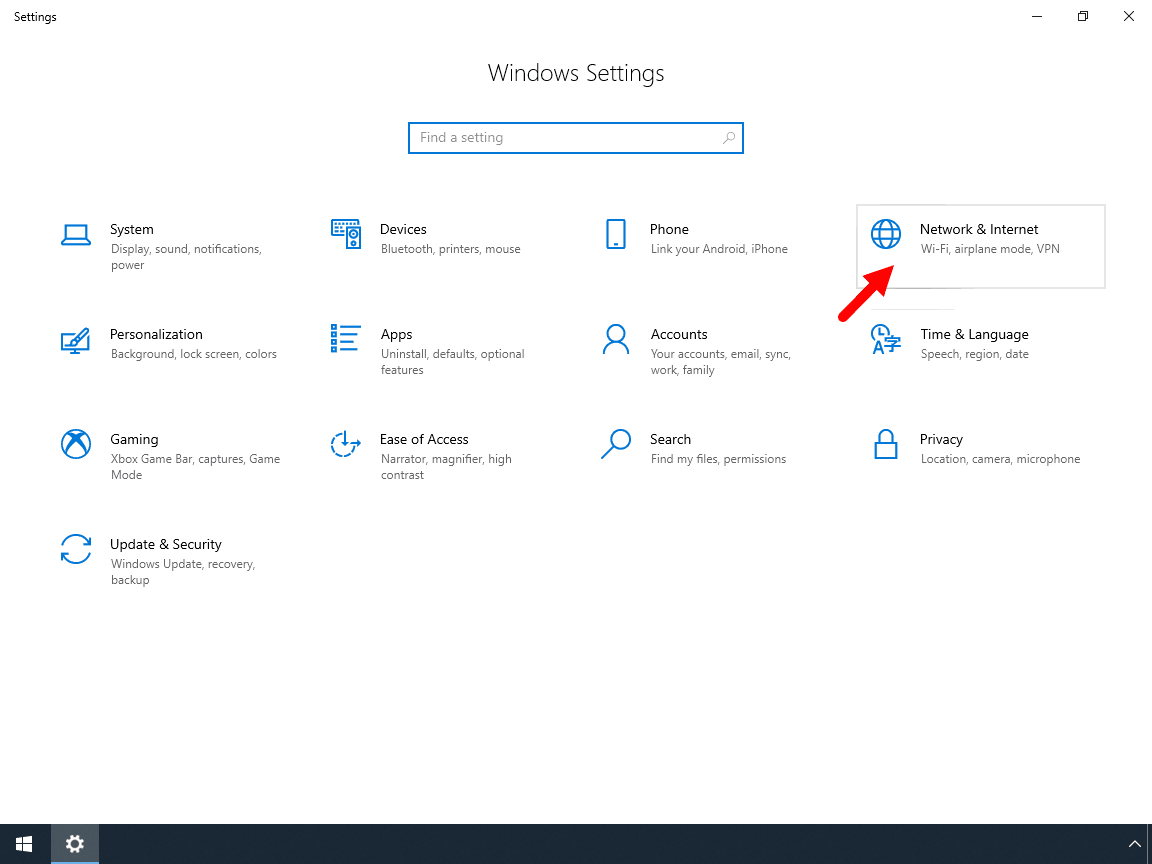
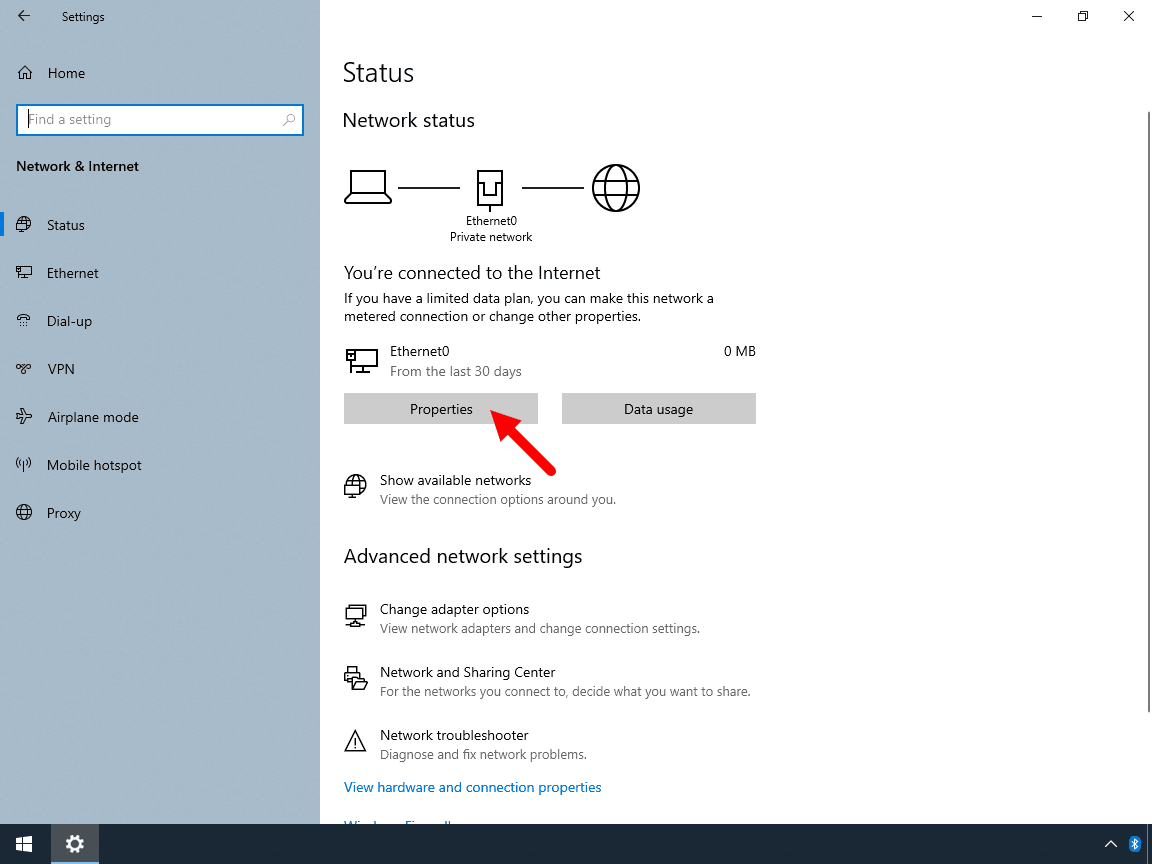
После установки убедитесь, что FileZilla Server внесен в список разрешенных программ встроенного брандмауэра. В Control Panel, откройте System and Security. В разделе Windows Firewall, нужно выбрать ‘Allowed Programs’ для того чтобы открылось окно настроек. Нужно выбрать обе Частную и Общественную сеть для «FileZilla Server» (Не «FileZilla Server Interface». Если «FileZilla Server» нету в списке, нужно добавить»C:\Program Files\FileZilla Server\FileZilla server.exe» в соответсвии с тем куда был установлен клиент). Если не выбрать Частную Сеть, входящее FTP соединение будет заблокировано.
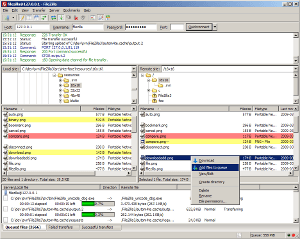
FileZilla — один из лучших бесплатных FTP-менеджеров, который поможет вам скачать и загрузить
файлы с FTP-серверов.
Программа обладает удобным и приятным интерфейсом, присутствует множество поддерживаемых языков, а также
разнообразие настроек и возможностей.
Доступна для разных операционных систем, существует portable версия, которую вы можете установить на
флэш-диск, кроме того, удобна для обновления файлов на вашем хостинге.
Связаться с нами
The latest stable version of FileZilla Server is 1.7.3
Please select the file appropriate for your platform below.
Windows (64bit x86)
![]()
![]()
Size: 5646568 bytes
SHA-512 hash: d4161b69a2411e32e68d064cf5755b39def1d55d51a04c400be12deb6b1c666e66054264167bb98b9d4b916bfb690ccfe777c3313db9c84cd2cd62ee7fdcfb56
The 64bit versions of Windows 8.1, 10 and 11 are supported.
More download options
Other platforms: ![]()
![]()
Please select your edition of FileZilla Server
| FileZilla Server | FileZilla Server with manual |
FileZilla Pro Enterprise Server |
|
|---|---|---|---|
| Standard FTP | Yes | Yes | Yes |
| FTP over TLS | Yes | Yes | Yes |
| Let’s Encrypt® integration | Yes | Yes | Yes |
| Comprehensive PDF manual | — | Yes | Yes |
|
SFTP |
— | — | Yes |
|
Two-factor authentication |
— | — | Yes |
|
Download |
Buy |
Buy |
FileZilla Server is really easy to install and configure. It provides a fully functional and easy-to-use FTP server for Windows operating system.
The first thing we need to do is download FileZilla server for Windows 10.
In your browser, go to https://filezilla-project.org. Click Download FileZilla Server and it will bring us to the download page.
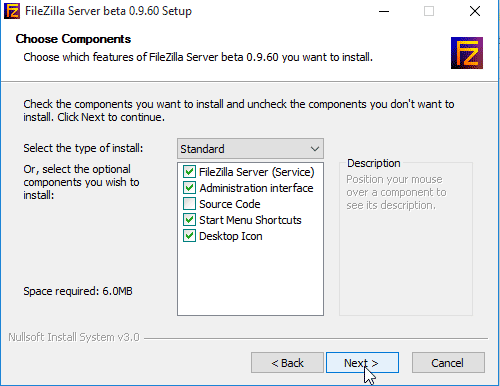
After the download has finished, run the setup and start the installation process and Continue with default Standard install type.
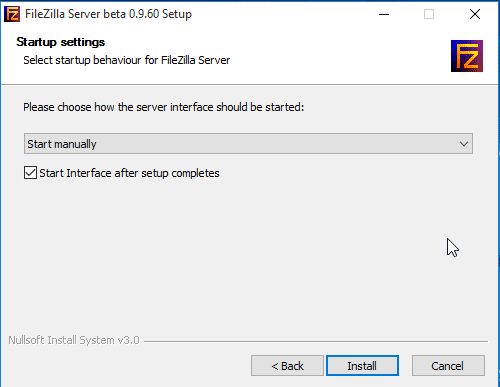
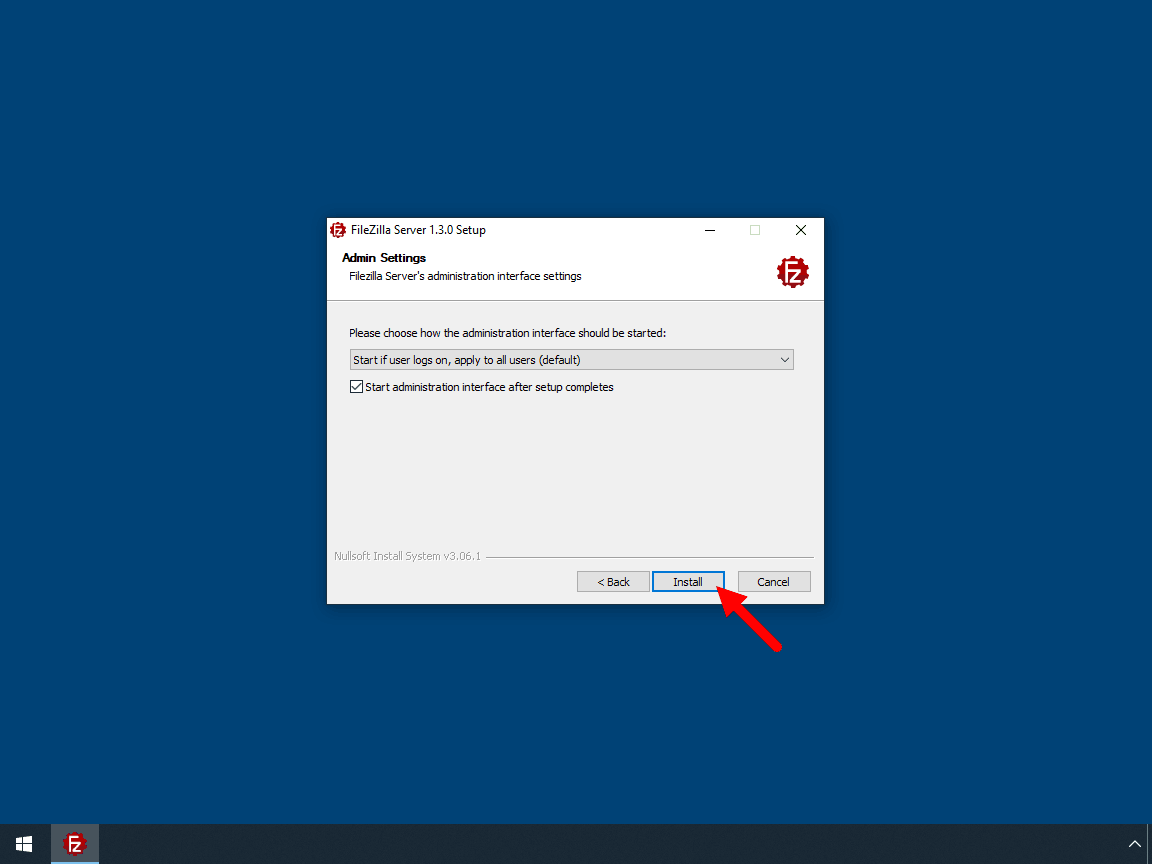
Leave the Administrative port default. When choosing how FileZilla server should start, Select «Install as service, started with Windows», if you want to start the FTP server automatically at Windows startup.
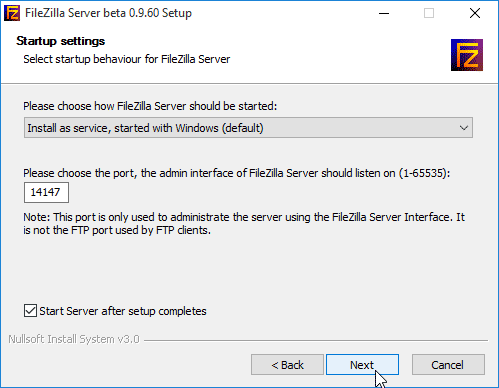
Select, «Start manually» option for the Server GUI(Interface).
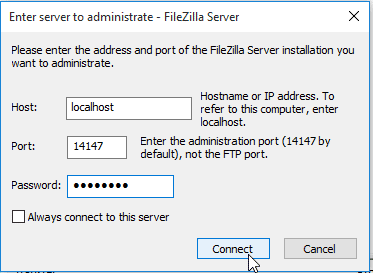
When launched for the first time, it will ask you to configure the FTP server. Leave the Host (127.0.0.1) and admin port (14147) as default. Type a new password (You will use this password for administering the FileZilla FTP server) and Press Connect.
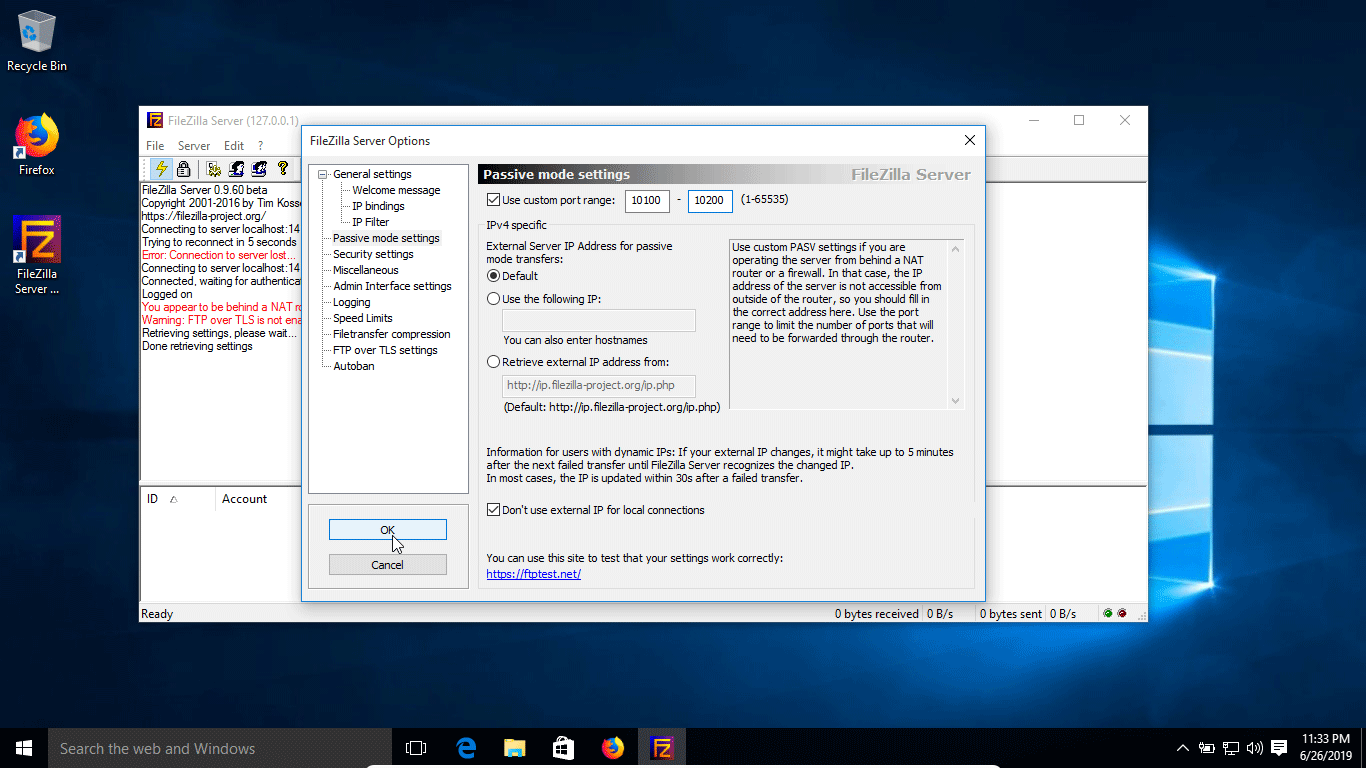
Next, we need to configure the passive mode settings. Go to Edit > Settings > Passive mode settings, set the custom port range from 10100 to 10200.
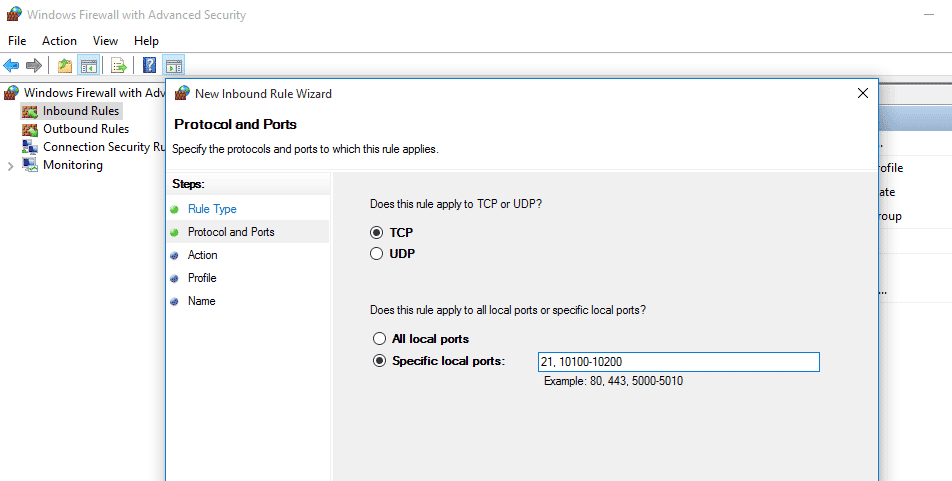
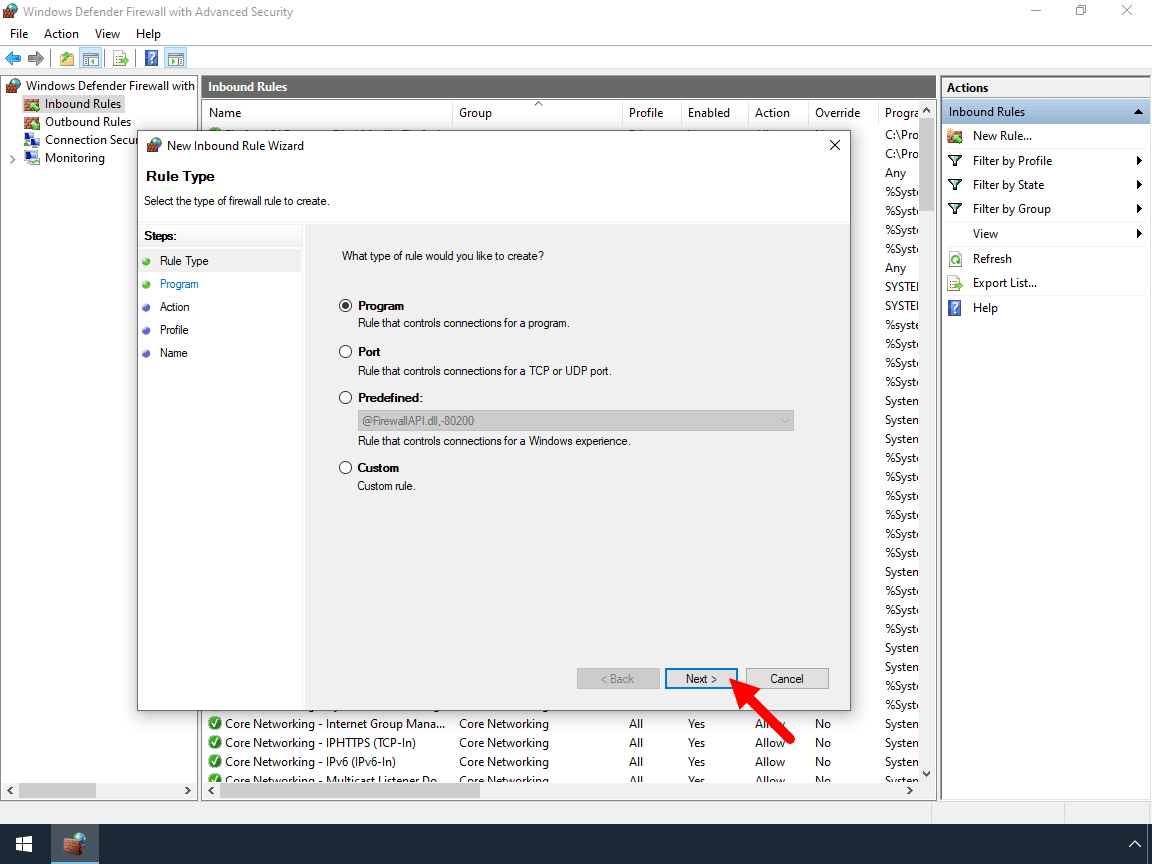
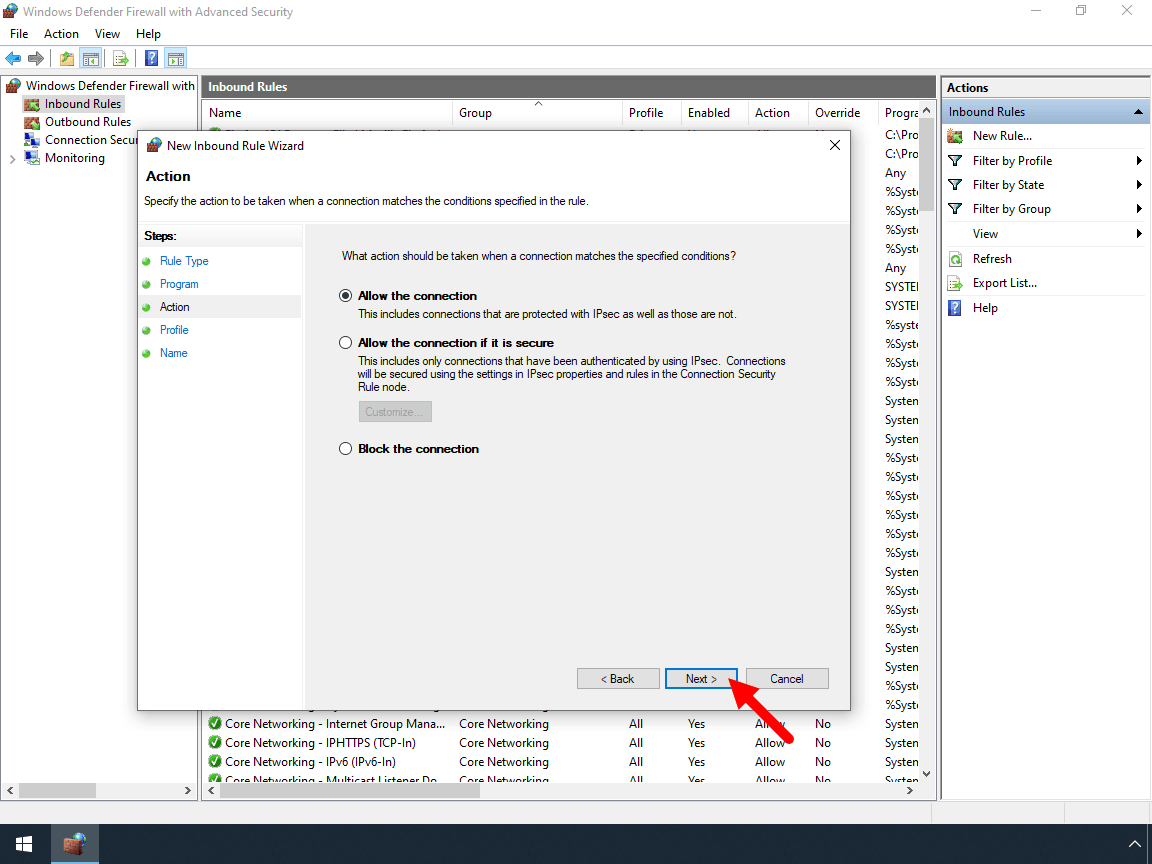
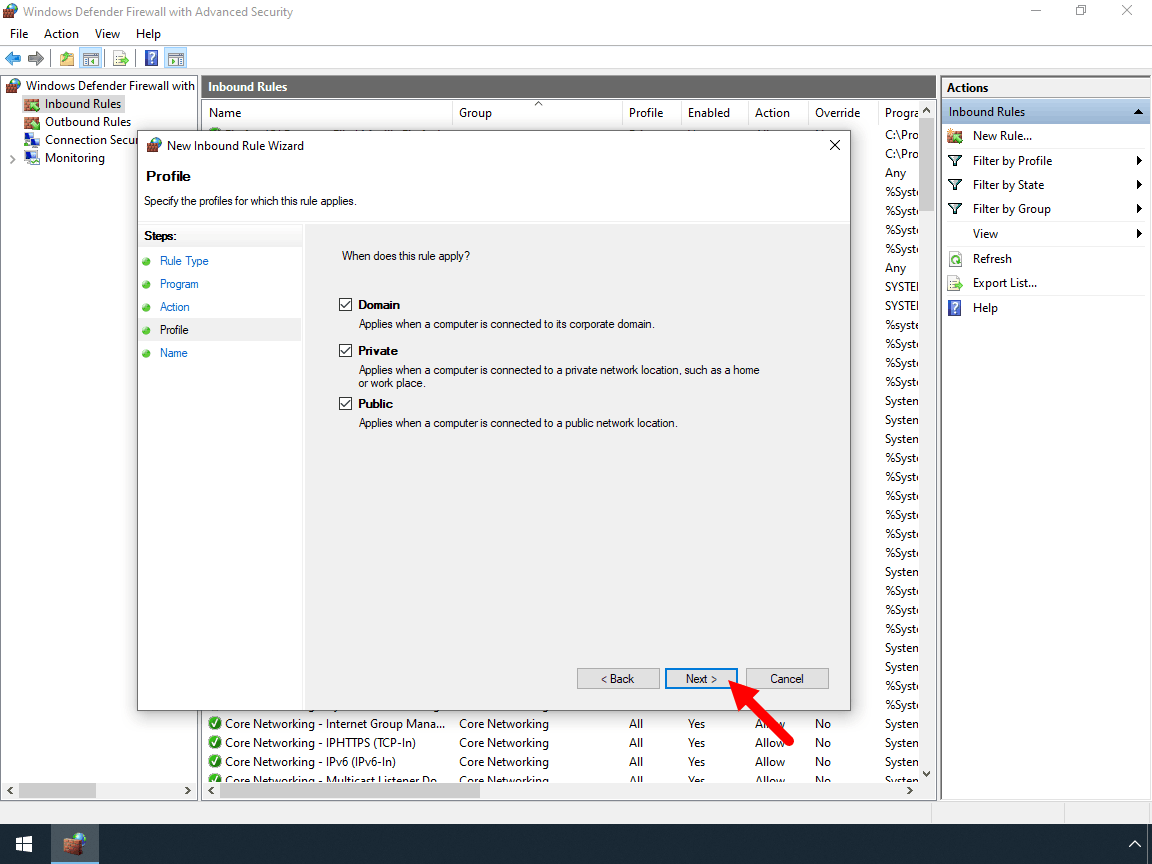
After that, open the Windows Firewall and create a new Inbound rule to allow FTP port 21 and passive port range (10100-10200).
Create a user account
Now the FileZilla FTP Server has been installed on Windows 10, we need to create an FTP user that can log in to the server. To set up an FTP user in the FileZilla server, complete the following steps:
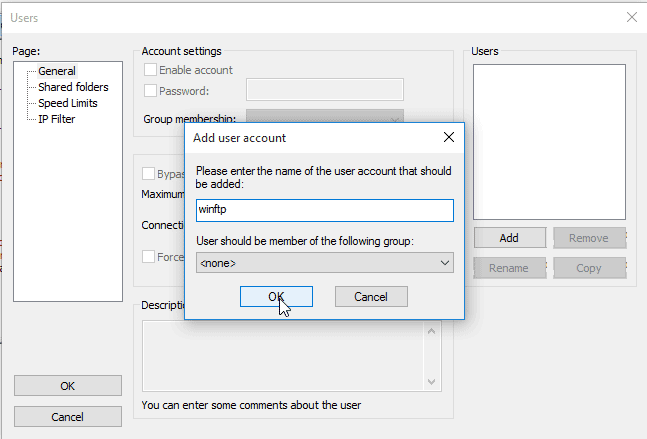
Click on the user icon (Fourth icon from the left). Then, click on the add button and enter the name of the user account to be created and press OK.
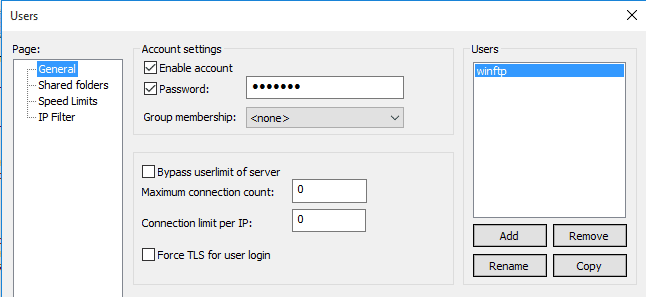
After you have created the user, check on the Password option and Specify a password for the user.
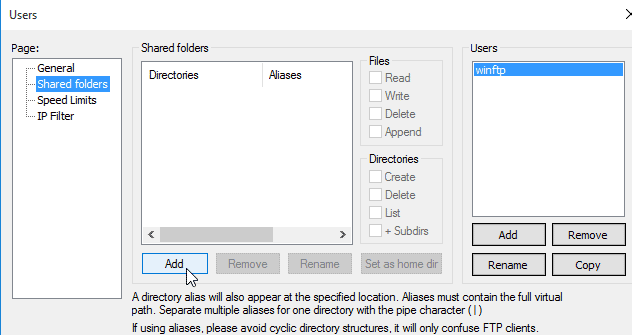
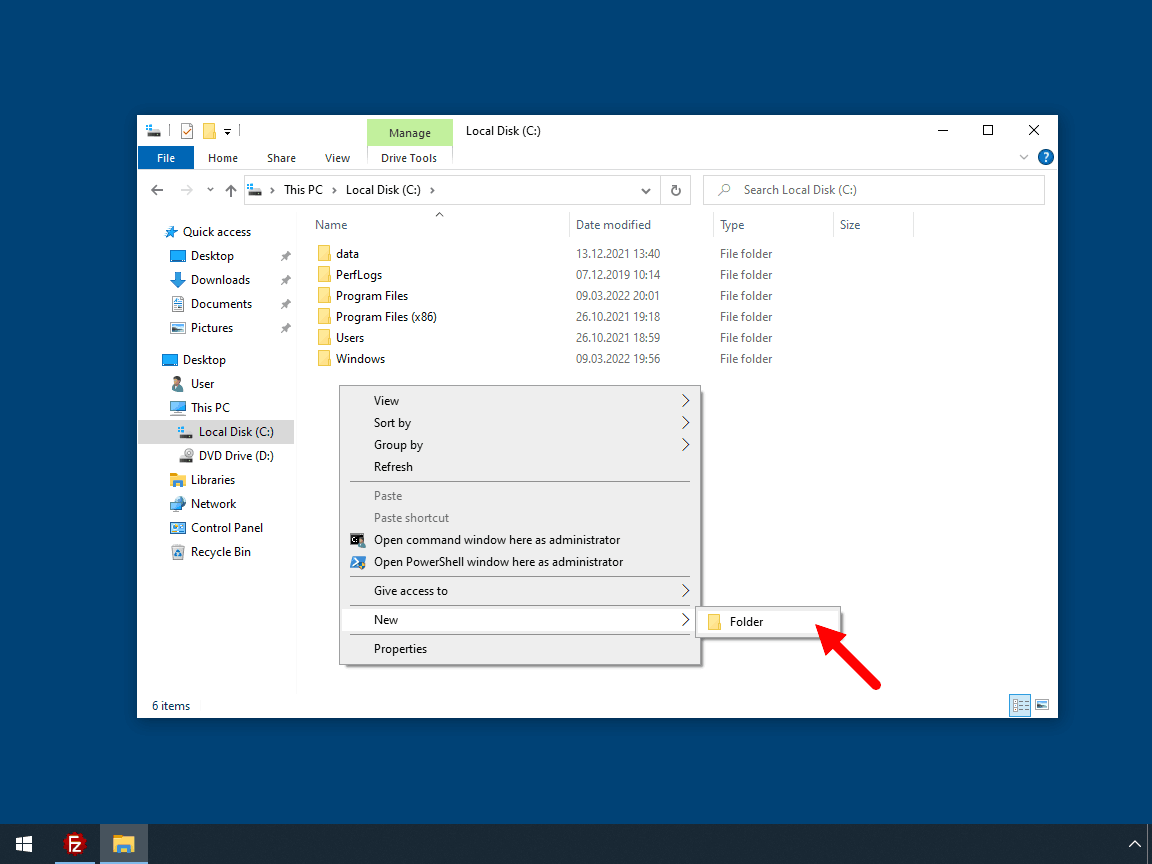
We also must specify a home directory for this user, Go to the Shared folders section, click on the add button and browse the folder(s) you want access over the FTP.
That is all you need to setup FTP Server on Windows 10/Server.
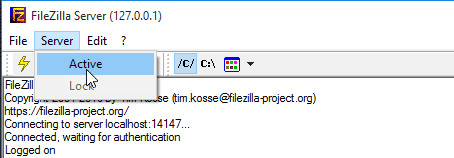
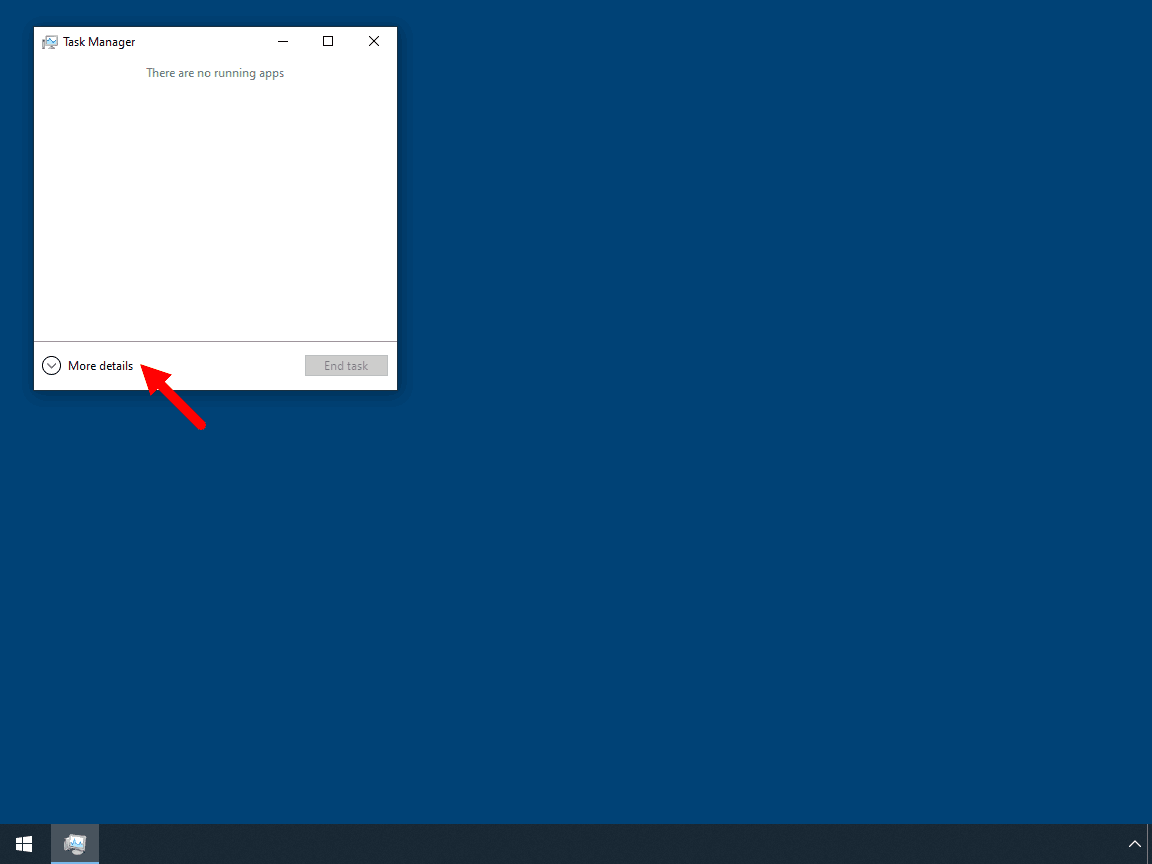
Note that, during the installation, if FileZilla FTP service configured to start manually, you need to start the server from the interface.
Open the FileZilla server interface. Then, select Server > Active, as shown in following screenshot, to start the FTP server.
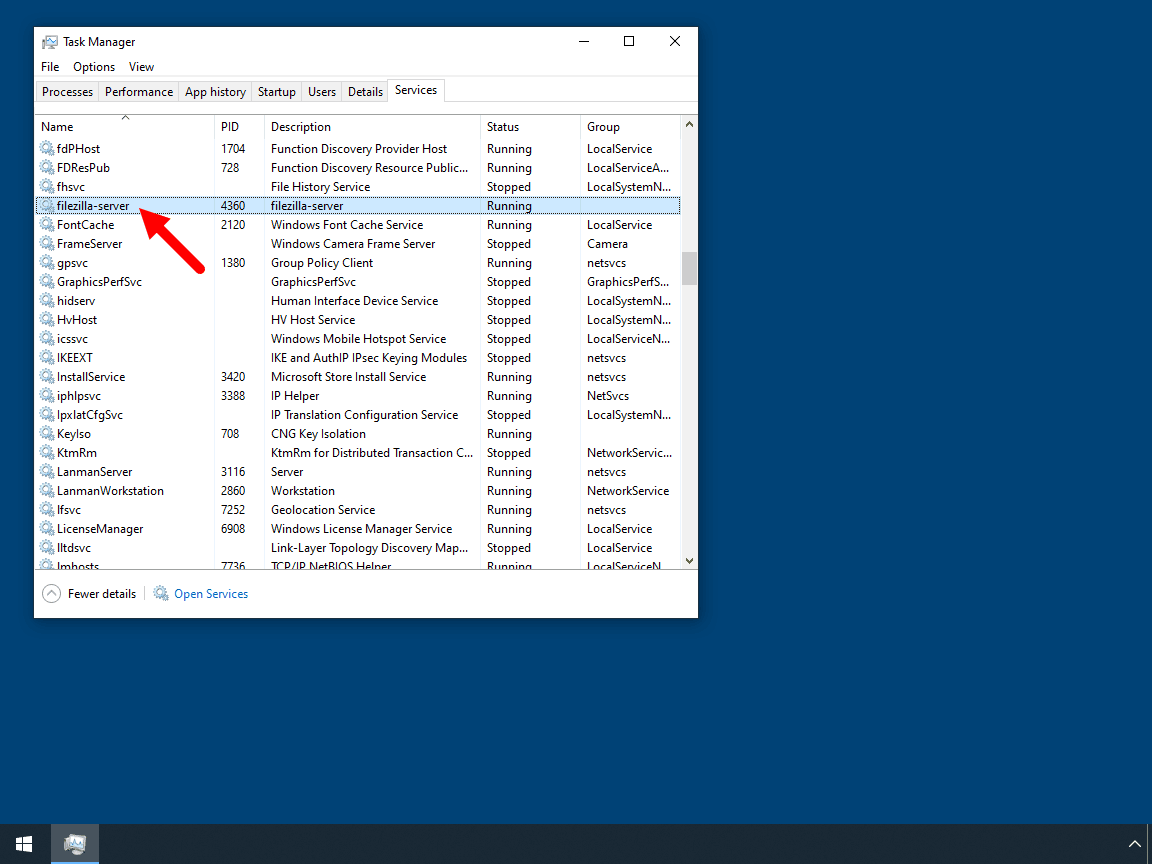
Alternatively, we can use Windows CMD to start/stop FileZilla FTP service:
sc start "FileZilla Server"
sc stop "FileZilla Server"
And that’s it! We’ve learned how to setup FTP server on Windows 10.

You can set up a local installation of an FTP server in order to transfer media to and from a folder on your computer. This is great for devices that support FTP, for instance, digital cameras or mobile phones.
Note that this guide does not show how to open the server publically to the internet. This guide will only show you how to open an FTP server for your home/local network. In other words, all devices that have access to your local network will also have access to the FTP server as long as they have the credentials.


# FTP# Windows 10
One comment
Leave a Reply
Your email address will not be published. Required fields are marked *
Name *
Email *
Add Comment *
Save my name, email, and website in this browser for the next time I comment.
-
After an awful lot of searching this is the guide that finally solved my issue. Thank you very much.
— Advertisement —
Hello, how are you? File transfer has been around for a long time. In addition, this activity requires security, compatibility, and performance for the resources. Consequently, it is ideal to have a practical and functional solution for it. FileZilla is a tool that is at the forefront. Indeed, FileZilla Client, which is one of the best FTP, FTPS, FTPES and SFTP clients for Windows systems. FileZilla has been developed as free open-source software under the terms of the GNU General Public License. Today, we will see how to configure FileZilla Server in Windows 10/11.
FileZilla Server Features
- IPv6 support
- Can be run on Windows, Linux, BSD, Mac OS X systems and more
- Supports FTP, FTP over SSL / TLS (FTPS) and SSH File Transfer Protocol (SFTP)
- Allows resuming and transferring large files larger than 4 GB
- Available in different languages
- Support for HTTP/1.1.1, SOCKS5 and FTP-Proxy
- Features a site manager and transfer queue
- Synchronized directory browsing function and much more.

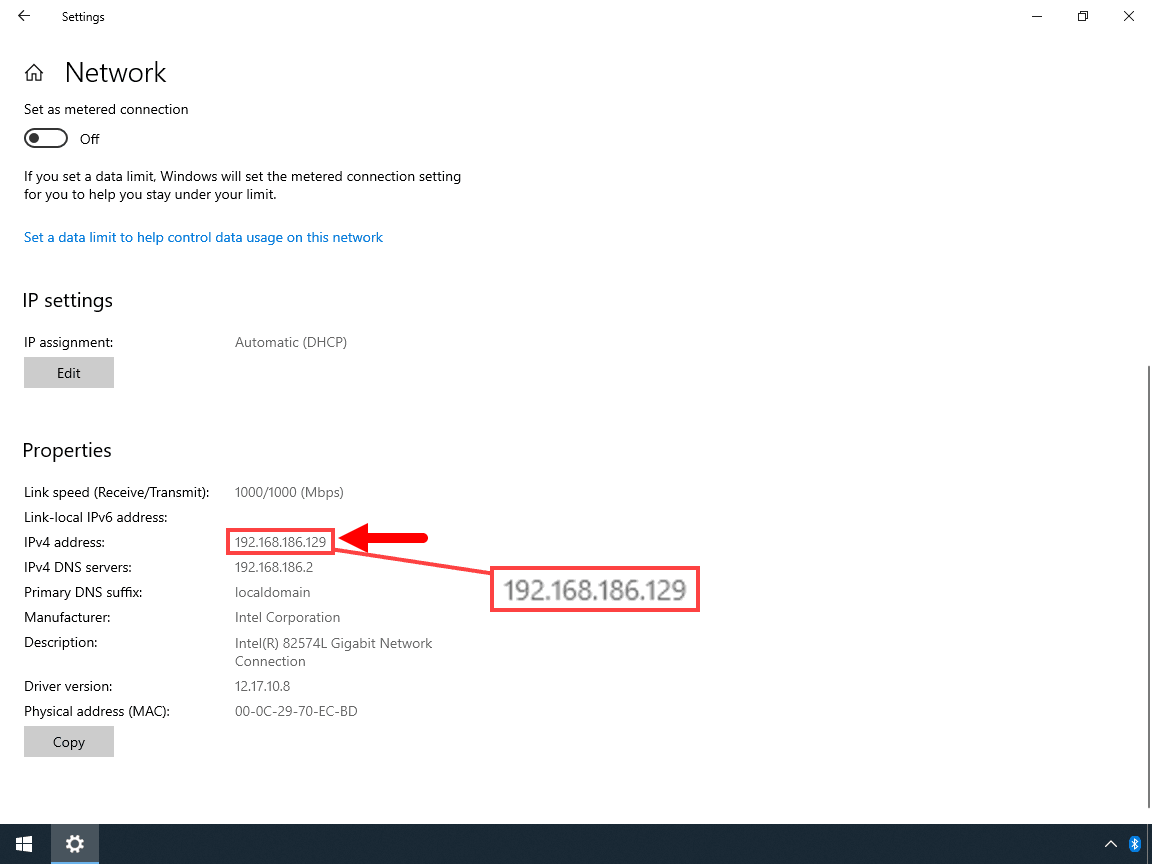
Thanks to this software, we can easily create our FTP or FTP over TLS server. As a result, we will be able to exchange files between the connecting clients and our server. This connection can be through the local LAN or through the Internet. As for the connection through the local network, you only have to enter the private IP address and the control port of the FTP server. The default port is 21 TCP. To connect via the Internet, you will have to enter the public IP address or dynamic DNS domain of the connection. You also have to indicate the corresponding port. You also have to open a port in the NAT on the router. In this way, it will be accessible from the outside and will be able to pass through the NA.
Installing FileZilla Server on Windows
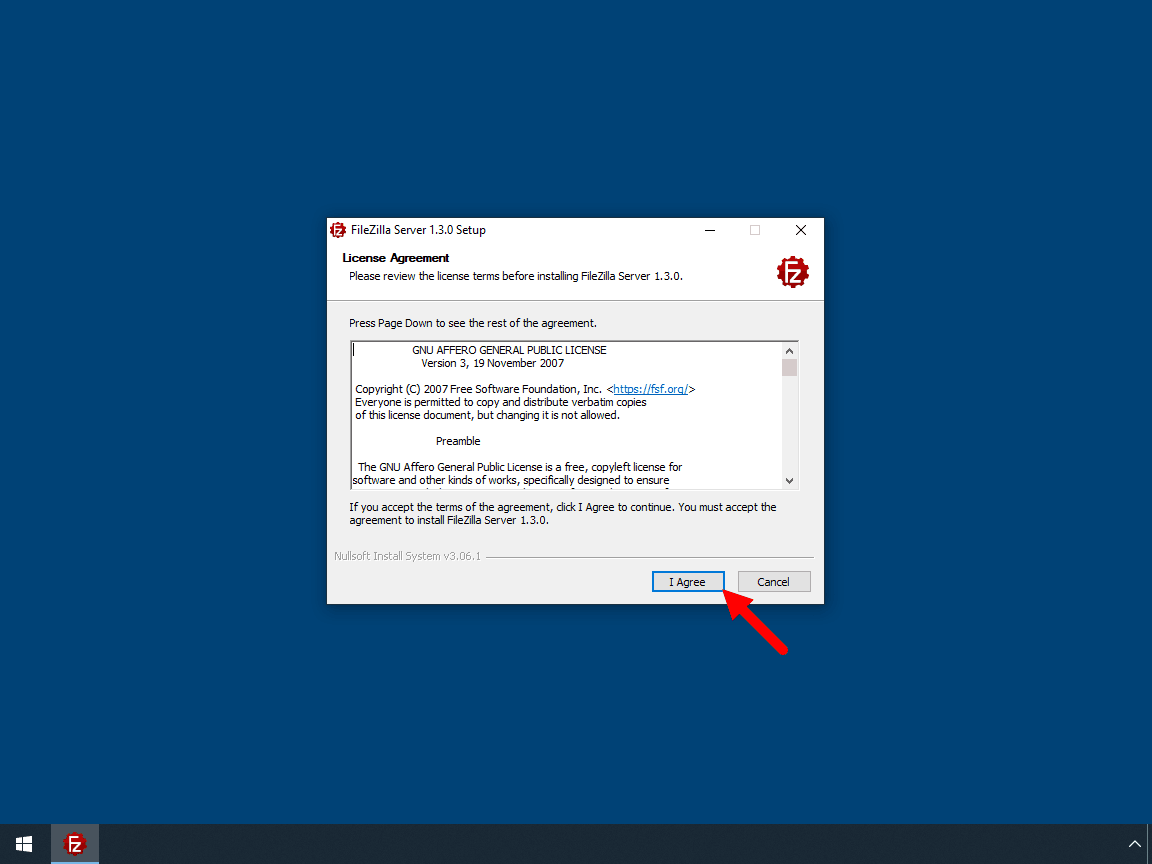
To install the Filezilla server, you have to go to the download section. After downloading it, just run it to start the installation of the program. The first thing you have to do is to accept the license. Next, please choose the type of installation. We recommend using the Full installation, which is the default installation.
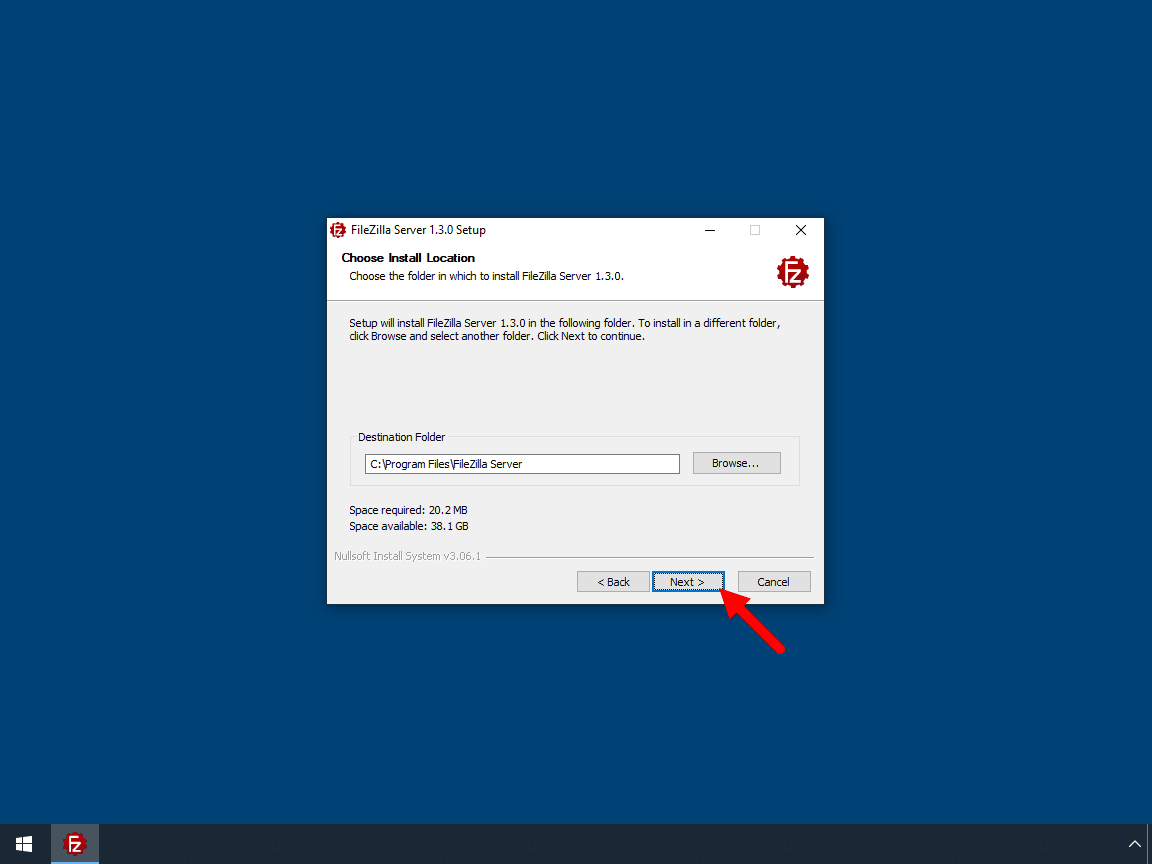
To install the Filezilla server, you have to go to the download section. After downloading it, just run it to start the installation of the program. The first thing you have to do is to accept the license. Next, please choose the type of installation. We recommend using the Full installation, which is the default installation. Then you must choose the installation folder and the Menu folder. Next, configure whether you want to install FileZilla Server as a service. I recommend leaving it this way by default. Likewise, you can set the port. However, you can also leave it as default. Finally, configure the startup type of the tool interface. That is, it can start at login, or start manually.


Startup and configuration of FileZilla Server
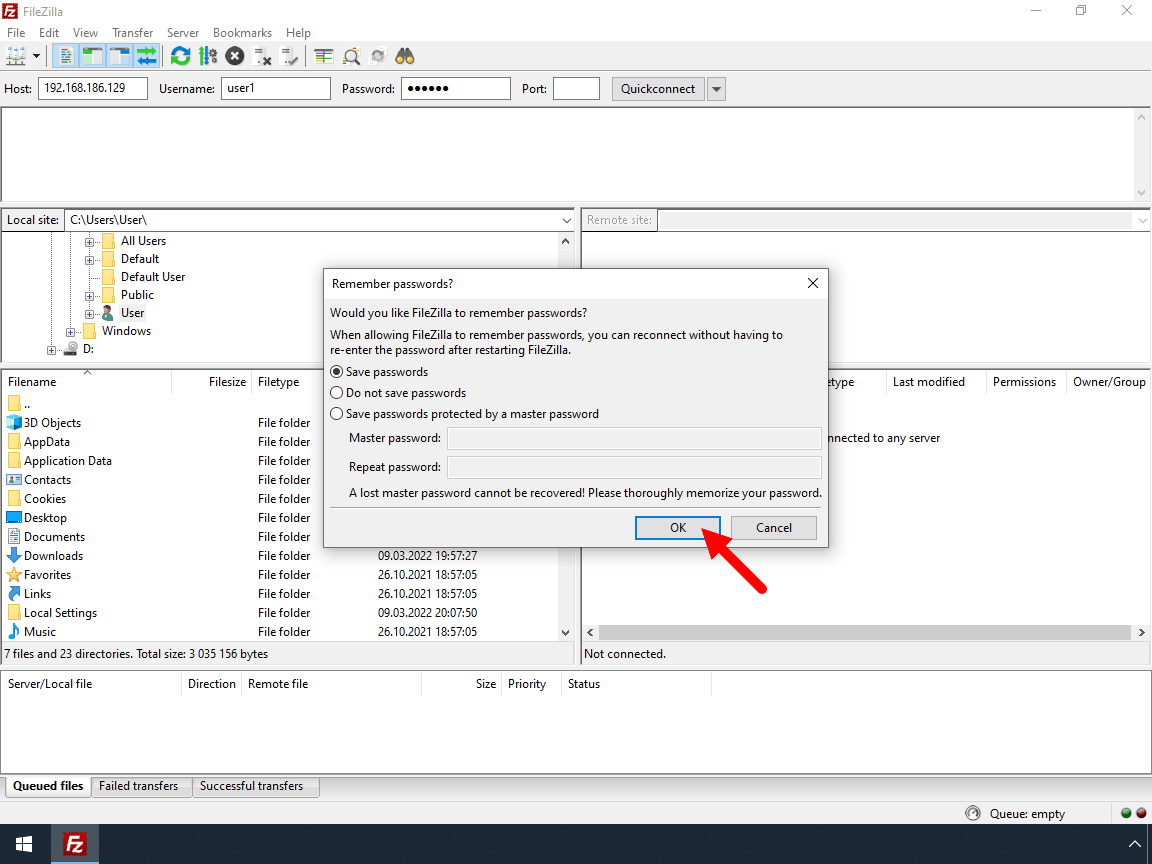
After installing the program, you will see the following window. Please click on Connect to Filezilla FTP Server.

In the following window, we will enter the options to configure the server. In the host field, please enter localhost. The port information should be left as default. Finally, assign a password to protect the connection.

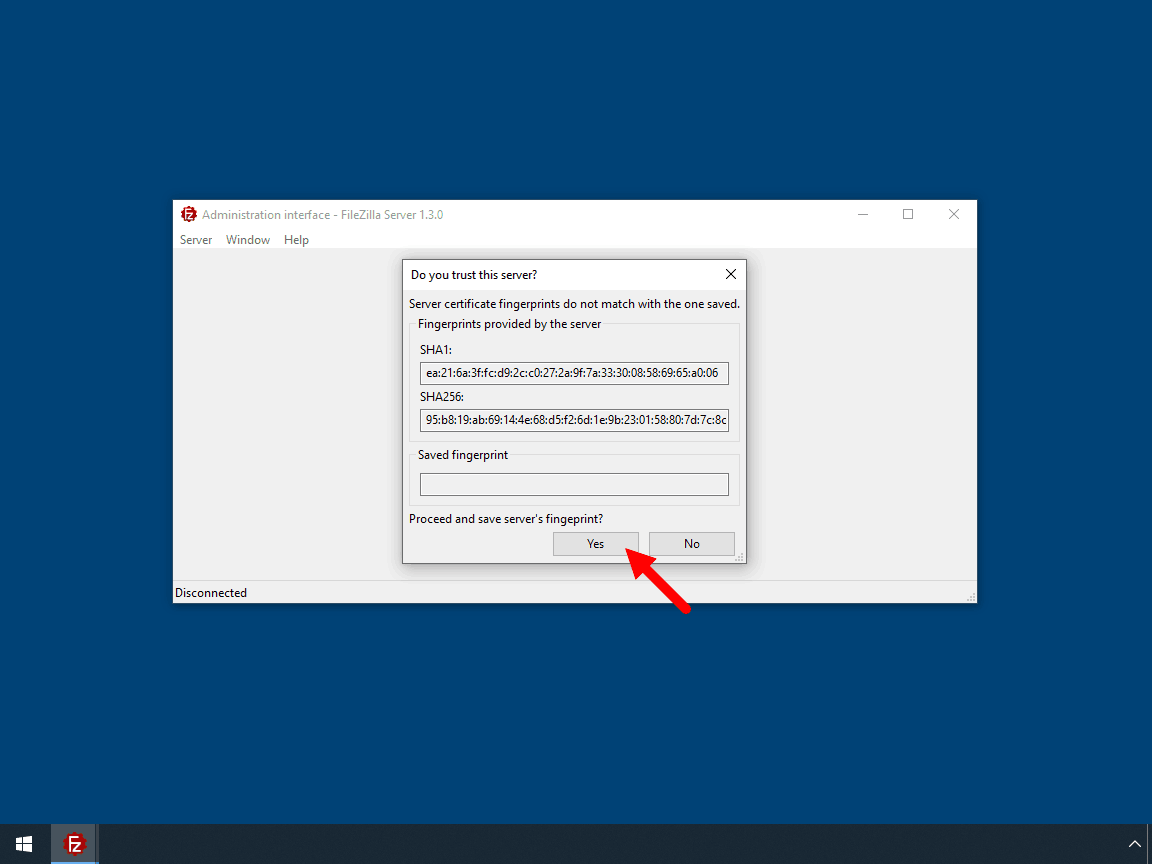
When you press OK, the server will be correctly connected. From now on, I would like to make some considerations. First, we are working with the latest stable version of FileZilla Server. Previously, there were beta versions that were a bit more complicated to configure. However, this edition has a graphical interface that is very user-friendly and easy to configure. Very well, next we will see the graphical interface of the server administrator.

Configuring the connection settings
Now we are going to enter the values for the connection through the local network. With this in mind, click on Server and then on Configure.

Now we are going to enter the values for the connection through the local network. With this in mind, click on Server and then on Configure.

The server configuration window will be displayed immediately. It is well known that by default an insecure FTP connection is offered. Therefore, we will configure a new secure server. Accordingly, click on FTP Server and then on Add.

Then, you just have to specify the new values. Within the IP address, please set 127.0.0.1, select port 21 and use the Protocol that requires explicit FTP over TLS.

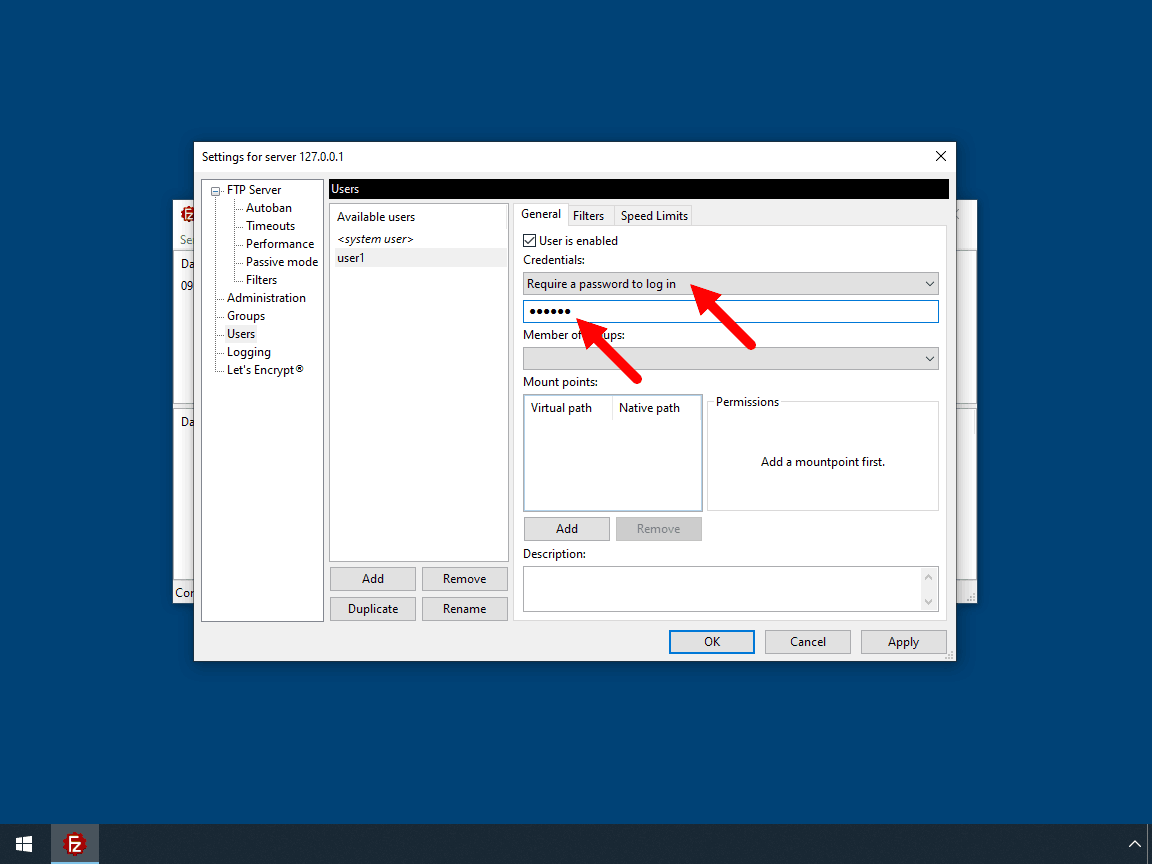
Configuring the user
Now it is time to add a new user for the server. To do so, scroll down to Users. Next, click on Add and enter the user’s name.

Next, enable the user by checking the corresponding box. It is also possible to require a password for the user. For the purposes of this tutorial, we will not use a password. However, if you are going to grant access to third parties, we urge you to assign a password.

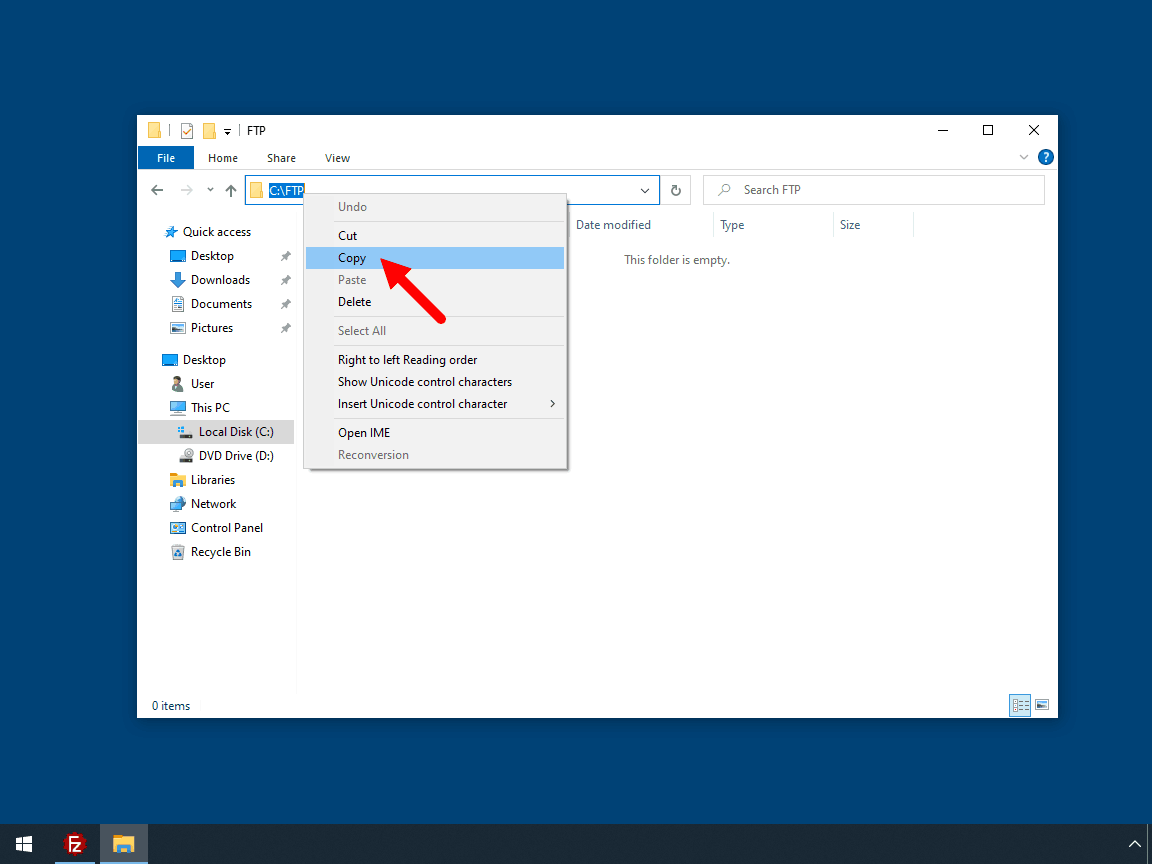
Now it is time to determine which folders the user will have access to on the server. With this in mind, scroll down to Mount Point. Once there, there are a couple of variables that need to be set correctly. First, Virtual Path. In that field, just add a /. The next field corresponds to the Native Path. There, you just have to go to the file explorer and copy the path of the folder you want to share. Then paste it into the field. Finally, check the Writable box.

That’s it! In this way, we have learned how to configure FileZilla Server in Windows 10/11. From now on, just use your favorite FTP client to connect to the server. But we will see that in future tutorials. Undoubtedly, it is a straightforward way to access our files. Either locally or through the network. See you soon!