Время на прочтение
3 мин
Количество просмотров 48K
В свое время я открыл для себя Asterisk и VoIP вообще после прочтения серии статей на opennet.ru о его настройке. Попробую повторить пиар подобного типа для FreeSWITCH.
Установка, старт
Установка FreeSWITCH ничем особенным не выделяется, msi пакет для Windows, исходники под все остальные платформы. Сборка по стандартной последовательности. Для поклонников пакетных вариантов установки есть возможность собрать deb пакеты через не менее стандартный debian/rules binary.
Итак, первое что я вам должен сообщить, это то что FS после установки уже настроен, работает и готов если не к использованию, то к тестам.
В качестве домена выбран IP адрес хоста, есть пользователи с номерами от 1000 до 1019, функционирует голосовая почта (для прослушивания наберите свой номер, когда зарегистрированы), конференции трех типов (8кГц — 30xx,16кГц — 31xx,32кГц — 32xx), и еще множество примеров для демонстрации возможностей.
И это всё вполне можно сразу начинать использовать на полную катушку, но в любом случае схему надо будет переделывать под себя. Главное же что я вам скажу — демонстрационный номерной план надо изучить, проштудировать и понять каждый пункт — в нём можно найти примеры использования самых новых возможностей, да и вообще большинство возможностей в нём есть.
А теперь разберемся с конфигурацией. Главный каталог — conf, в нем содержится freeswitch.xml — корневой файл, из которого после препроцессинга получится конфигурация, vars.xml — файл в котором содержится множество настроек. С этого момента поподробнее.
Переменные
Вот, например, строка <X-PRE-PROCESS cmd=«set» data=«domain=$${local_ip_v4}»/>. Именно в этой стандартной строке из vars.xml задается имя нашего домена используемое в стандартном номерном плане.
А вот в этой строке она используется в номерном плане <action application=«set» data=«domain_name=$${domain}»/>,
и domain_name — <action application=«bridge» data=«user/${dialed_extension}@${domain_name}»/>
На этом примере разберемся с константами и переменными. Константа задаётся как $${имя_константы} и будет заменена при препроцессинге конфигурации на значение. То есть в результирующей конфигурации ни слова о имя_константы(или о domain и local_ip_v4) мы не увидим.
Переменные задаются как ${domain_name}. Их значение может быть различным, в зависимости от обстоятельств. Например при звонке всегда есть переменная destination_number, содержащая входящий номер, или caller_id_number содержащая номер вызывающей стороны.
Константы устанавливаются при помощи конструкции <X-PRE-PROCESS cmd=«set» data=«domain=мой.маленький.но.очень.гордый.домен.рф»/>, переменные устанавливаются системой или можно задать их через приложение номерного плана «set», пример: <action application=«set» data=«domain_name=$${domain}»/>. После препроцессинга она примет вид <action application=«set» data=«domain_name=мой.маленький.но.очень.гордый.домен.рф»/>.
SIP, профили
За поддержку SIP отвечает mod_sofia, основанный на библиотеке Sofia-SIP от компании Nokia. Список поддерживаемых возможностей из RFC, относящихся к делу, очень близок к 100%. Это и TCP транспорт, и TLS, SIMPLE и еще многое.
Первое, что необходимо для работы mod_sofia, это объявление профиля (conf/sip_profiles/{internal,external}.xml). Профиль можно рассматривать как виртуальный сервер из мира HTTP серверов (у SIP вообще много аналогий с HTTP). Каждый профиль определяет пару адрес/порт, контекст, в котором будут обрабатываться входящие звонки, правила регистрации, домен, ограничения, нужна ли авторизация.
Например стандартный профиль internal служит для обслуживания внутренних абонентов. Через этот профиль регистрируются клиенты нашей инсталляции, пользуются голосовой почтой, звонят друг другу, устраивают конференции, в общем ведут активную деловую жизнь с бюрократическими вкраплениями.
Профиль external служит для связи с внешним миром. В его настройках задан стандартный контекст из номерного плана public, в котором нет всех этих возможностей. Главным образом он служит для роутинга входящих звонков во внутренний контекст на определенные номера. К примеру входящие звонки на 78-14-90 перевести на внутренний номер 1009.
Также есть понятие шлюзов (gateway). Посмотрите содержимое файла conf/sip_profiles/external/example.xml. Здесь есть пример конфигурации шлюза (закомментированый). Шлюзы задуманы для использования с провайдерами VoIP, которые требуют регистрации на своих серверах. Если SIP хост не требует регистрации, то звонки через него можно организовать через номерной план без использования конфигурационной сущности «шлюз». Но для красоты можно задать таки шлюз с параметром <param name=«register» value=«false»/>
В следующей серии разбор номерного плана.
From FreeSWITCH Wiki
The
purpose of the following page is to instruct new users on how to
configure FreeSWITCH™ in a basic way. It is also intended to provide
people with a basic understanding of the configuration files and how
they are processed. If FreeSWITCH™ is not already installed on your
system you should read the Installation Guide. This guide is not intended to allow for more than a default configuration.
Contents
[hide]
- 1 FreeSWITCH layout
- 2 Configuration
- 2.1 Firewall
- 2.2 Configuration Files
- 3 Configuring FreeSWITCH
- 3.1 vars.xml
- 3.2 autoload_configs
- 3.2.1 modules.conf.xml
- 3.2.2 sofia.conf.xml
- 3.2.3 What SIP Profiles Do
- 3.2.3.1 SIP_Profiles
- 3.2.3.2 Internal
- 3.2.3.3 External
- 3.2.3.4 NAT
- 3.2.3.5 Other Profile Concepts
- 3.3 dialplan
- 3.3.1 Some common extensions for testing
- 3.4 directory
- 3.4.1 User Configuration
- 3.4.2 Sample Gateway Configuration
- 3.4.3 Dialing out via Gateway
- 3.4.4 Receiving an inbound call from a Gateway
- 4 Running FreeSWITCH
- 4.1 Starting in Unix-based Systems
- 4.2 Starting in Windows-based Systems
- 4.3 Command Line Parameters
- 4.4 Shutting Down FreeSWITCH™
- 5 Some stuff to try out!
- 6 Advanced
- 6.1 Preprocessor Commands
- 6.2 freeswitch.xml
- 6.3 How the configuration files are parsed
- 6.3.1 Example freeswitch.xml
- 6.4 Preprocessor Variables
- 6.5 Multi-Tenant Info / Multiple Company HOWTO
- 7 What FreeSWITCH cannot do
- 8 Asterisk Rosetta Stone
- 9 See Also
FreeSWITCH layout
FreeSWITCH™
has a modular design. This design allows it to be extended without
breaking functionality or requiring massive recoding efforts. Each
module provides specific functionality, often commands that are related
are grouped into one module. You will need to enable the modules that
you desire, based on their function. By default FreeSWITCH™ comes with a
good set of modules loaded, to enable most basic functionality.
Read up on the default config for more information.
Configuration
The following sections will show you each step that you will have to take to get a functional system.
Firewall
If
you are going to route traffic across your network, you need to ensure
that you do not have a firewall blocking traffic on the specified
network paths. Commonly firewalls are installed at egress points, where
your local network connects to the internet. This is not always the case
in some corporate environments. If you are not responsible for your
network, you may wish to contact the group or individuals who are
responsible for it.
Information they may need to enable traffic
would include the port numbers. Various protocols use different ports
for different things. Some you need bi-directional connectivity, some
you only need outbound. Depending on your call scenario you may only
need to allow connections that are initiated by your system. If you
have any problems with protocols not working, it is recommended that you
disable your firewall to the FreeSWITCH™ system, place a test call, and
see if the problem persists. A misconfigured firewall is responsible for many common problems.
For more information, including the ports which need to be configured, see the Firewall page.
Configuration Files
FreeSWITCH™
configuration data is stored in XML format. These files are located in
the conf directory under the FreeSWITCH™ install directory. By default
on a Unix-like system this will be /usr/local/freeswitch/conf. There are
preprocessor markup tags that tell the configuration parser to perform
tasks, such as including other files, which are carried out before the
XML is parsed.
| Folder | Description |
|---|---|
| autoload_configs |
These configuration files are loaded automatically into FreeSWITCH. They contain configuration information for almost all core modules. |
| dialplan | This is the place where you setup your dialplan. There are some examples of how to configure your dialplan included. |
| directory | The directory contains all users that may register and use freeswitch as their PBX. |
| jingle_profiles | Jingle is the mod that FS uses to handle XMPP. Profiles tells FS how to use the protocol. Each profile has its own ip port. |
| lang | Tells FS how to say currency etc in different languages |
| mrcp_profiles | MRCP is used to allow FreeSWITCH to use speech recognition and TTS |
| sip_profiles | Tells FS how to talk sip. Each profile has it’s own port. |
Configuring FreeSWITCH
This guide aims to explain the default configuration layout and how you configure it to your liking. Read up on the default config for more information.
This layout
is in no way required, you can minimize the configuration to just one
file if needed. The main config file is called freeswitch.xml, you don’t
need to change it in any way, it just loads all other config files.
vars.xml
vars.xml
is used to define a couple of variables that are used system wide.
NOTICE you can not comment these X-PRE-PROCESS lines out. They will
still be active in an XML comment.
See Config_vars.xml for example.
In
the default configuration the vars.xml file is used to define some
preprocessor variables. In a first time setup you will most likely want
to set:
<X-PRE-PROCESS cmd=»set» data=»outbound_caller_name=FreeSWITCH»/>
<X-PRE-PROCESS cmd=»set» data=»outbound_caller_id=8777423583″/>
<X-PRE-PROCESS cmd=»set» data=»call_debug=false»/>directives for use in other portions of the configuration.
The default port of Freeswitch is also defined in
<param name=»sip-port» value=»5060″ />
autoload_configs
autoload_configs
is a directory where a lot of the freeswitch configuration resides.
This directory is located in $PREFIX/conf/autoload_configs. The default
freeswitch.xml preprocesses xml files matched by the glob
conf/autoload_configs/*.xml
modules.conf.xml
See modules.conf.xml for an example of modules.conf.xml.
modules.conf.xml tells freeswitch which modules to load. There are
certain modules required for operation so you should not edit this file
unless you know that you wish to add or remove a specific module
sofia.conf.xml
mod_sofia
is used to create SIP endpoints in FreeSWITCH. If you are familiar with
Asterisk, each SIP Profile in mod_sofia is similar to chan_sip in
Asterisk, though much more powerful.
The sofia.conf.xml file
contains a «X-PRE-PROCESS» directive that includes other XML files
(within, by default, conf/sip_profiles/) that define one or more «SIP
Profiles». A SIP Profile is a SIP UA (User Agent or an endpoint), which
communicates with other SIP endpoints.
A «User Agent» («UA») is
an application used for running a certain network protocol. A Sofia User
Agent is the same thing but the protocol in that case is SIP. In
FreeSWITCH terms, User Agent = UA = Sofia Profile = SIP Profile.
See Sofia_Configuration_Files for an example sofia.conf.xml.
See also SIP Network Elements on wikipedia.
What SIP Profiles Do
The
SIP Profiles in FreeSWITCH can often lead to confusion. Unlike other
softswitches (like Asterisk), FreeSWITCH allows you to handle media
(calls, video, etc.) differently based on where the equipment is
attached to your network. This assists with security as well as
providing added functionality.
SIP Profiles allow you to define
paths to devices or carriers that may live inside or outside your
network. These paths can be of many different types, but must consist of
a unique combination of port and IP pairs. You could have SIP profiles
for your internal network, or multiple profiles for each subnet of your
internal network, or even completely different protocols like IPv6 as
profile definitions. This helps FreeSWITCH identify how to route
different types of calls when necessary, and also gives you the
flexibility to tailor your dialplans based on what path a call
originates to/from.
In the sample configuration there are three
default categories for where a SIP Profile can reside. Each profile is
detailed below.
SIP_Profiles
The
default profiles are «internal» and «external», each serves a special
purpose so it would be wise to understand what they do.
Internal
File Location: $PREFIX/conf/sip_profiles/internal.xml
This
profile generally refers to devices that reside on your internal
network. Those devices will inherit all configuration options in the
internal profile you setup. This is typically your internal phones with
extensions. By default, these devices must use SIP authentication.
The
Internal (formerly called «default») SIP profile is configured to
listen on the primary IP address of the machine (unless you set
$${domain} to something else in vars.xml) on port 5060 (the default SIP
port). The internal SIP profile does authenticate calls and is not
suitable for configuring trunks to providers or outside phones, in most
cases (i.e., use the External profile for configuring trunks to
providers or outside phones).
The Internal profile should be
used if you intend on handling registration for sip clients (ie a SIP
registrar). You may wish to skip to the section Getting_Started_Guide#directory to configure additional sip clients.
Authenticated users of this profile are normally set (via the variable user_context) to use the dialplan defined in the default context.
See Config_default.xml
External
File Location: $PREFIX/conf/sip_profiles/external.xml
This
profile generally refers to devices or gateways that reside outside of
your network. Generally this is where you define your external
trunks/VoIP carriers/etc. Again, those devices will inherit all
configuration options in the external profile you setup.
The
External (formerly «outbound») profile handles outbound registrations to
a SIP provider. The SIP provider sends calls to you, and you send calls
to your provider, through the external profile. The external profile
allows anonymous calling, which is required as your provider will never
authenticate with you to send you a call.
In order to secure
your FreeSWITCH it is wise to link your outbound profile to a dialplan
context other than ‘default’, which in the default configuration is the
where authenticated users are placed.
NOTE: The default
port for external connections is 5080. This also means if you are
trying to connect a phone remotely to your FreeSWITCH box, you must set
it to connect on port 5080, or change your ports around. This confuses a
lot of people. As an example, in X-Lite, if you are connecting to FS
from the outside, set your server as «my.server.com:5080».
The dialplan for this profile (per-default) is defined in the public context
See Config_external.xml
NAT
The nat.xml file (and profile) have been deprecated. Use the External Profile and port 5080.
Other Profile Concepts
Ideas for other SIP profiles you might end up building:
- Routing IPv6
- Having multiple profiles for different networks or subnets
- Having multiple profiles for different remote hosts/endpoints (remote offices, etc.)
dialplan
The
FreeSWITCH dialplan is a full-featured, XML-based call-routing
mechanism. (There also exists support for Asterisk-like dialplans as
well as really fancy real-time and/or back-end database-driven
dialplans.) The best place to get started in learning about the
FreeSWITCH dialplan is the Dialplan
page here on the wiki. It discusses the basics of the FreeSWITCH
dialplan. If you need an XML primer check out the information on the Basic_XML
page which will get you pointed in the right direction. There are two
other important resources for you to learn more about the diaplan: the
small-but-growing Dialplan_Recipes page as well as the default dialplan that comes with a standard FreeSWITCH installation.
It
is recommended that you compile FreeSWITCH with the default
configuration and make sure it works before you start making
customizations. Note that the default config files, including the
default.xml dialplan, are still being updated. It makes sense to put
your custom diaplan entries into the extensions subdirectory
under conf/dialplan. You may create one or more XML files in this
subdirectory, all of which will be included in the dialplan thanks to an
«include» directive in the default.xml file. By keeping your customized
extensions separate from default.xml you will be able to update
default.xml without having to re-enter your custom extensions.
Some common extensions for testing
- 1000, 1001, …, 1019 — Generic SIP extensions
- 5000 — demo IVR (requires sounds and music files to be installed)
- 9995 — five second delay echo test
- 9996 — standard echo test
- 9999 — music on hold (requires music files to be installed)
directory
See Config_directory.xml for a sample configuration.
The directory holds authentication credentials for other sip endpoints
that will register to freeswitch (most commonly users). The directory
configuration default is configured to process the glob
$PREFIX/conf/directory/default/*.xml by the configuration included in
freeswitch.xml $PREFIX/conf/directory/*.xml.
This may seem confusing but the default will work in most cases. Feel free to look at the examples in: $PREFIX/conf/directory/
User Configuration
see Config_1000.xml for a simple (1000.xml) configuration of a user (endpoint) which will register to freeswitch.
Sample Gateway Configuration
See SIP Provider Examples for sample gateway configurations for different providers.
outbound registrations to providers can also be made in the outbound profile. see Clarification:gateways this page for a clarification
Dialing out via Gateway
Add the following to default.xml (in prefix/conf/dialplan)
for 11 digit dialing (US) via your newly created gateway configuration
above. Remember, the default configuration provided by FreeSWITCH does
not include a diaplan rule for outbound calls via the gateway you’ve
defined. You will need to add something similar to the following.
<!— Dial any 10 digit number (2223334444) or 1+10 number (12223334444) here —>
<extension name=»Long Distance — voicepulse»>
<condition field=»destination_number» expression=»^(1{0,1}\d{10})$»>
<action application=»set» data=»effective_caller_id_number=12223334444″/>
<!— If your provider does not provide ringback (180 or 183) you may simulate
ringback by uncommenting the following line. —>
<!— action application=»ringback» /—>
<action application=»bridge» data=»sofia/gateway/voicepulse/$1″/>
</condition>
</extension>
Receiving an inbound call from a Gateway
Add the following to public.xml (in prefix/conf/dialplan) to receive inbound calls via your newly created gateway configuration above. Make sure to set destination_number
to a DID defined for this gateway. This will route all inbound calls to
extension 1001. Remember, you can have multiple endpoints register to
one account ( See Multiple Registrations
). You will need to add something similar to the following. Please
note, this will only redirect to an extension, you will also need to
have the extension bridge with an endpoint/user if that is your desire
(See Dialplan_XML#Example_9 ).
<extension name=»Voicepulse»> <!— your provider or any name you’d like to call it —>
<condition field=»destination_number» expression=»15555551212″> <!— your DID for this gateway—>
<action application=»transfer» data=»1001 XML default»/>
</condition>
</extension>If you want users to register with something other than the number that will reach them, then contact mapping is for you.
**Note: Not
all providers work this way, if you have difficulty with routing
incoming calls from your provider look in the Wiki section for SIP Provider Examples.
Running FreeSWITCH
Starting FreeSWITCH™ is done from the command-line. The location of the executable varies depending on your system.
Starting in Unix-based Systems
Now
that you have compiled and configured FreeSWITCH™ its time to place a
test call to ensure that everything is working so far. To start
FreeSWITCH™ change to the bin subdirectory under the FreeSWITCH™
installation directory, and run FreeSWITCH™. In a unix-like system that
might be:

cd /usr/local/freeswitch/bin
./freeswitch
REDHAT CENTOS Startup Scripts:
cp build/freeswitch.init.redhat /etc/init.d/freeswitch
chmod 755 /etc/init.d/freeswitch
Starting in Windows-based Systems
The Visual Studio project runs via an executable located under the debug or release
folder of your project’s directory tree (depending on how your project
was built). On a debug build of the Windows system start FreeSWITCH™ as
follows:
cd <PROJECT FOLDER>\debug
FreeSwitch.exe
The FreeSWITCH™ command line will be available after successful loading of the application.
Command Line Parameters

These are the optional arguments you can pass to freeswitch:
-conf [confdir] — specify an alternate config dir
-db [dbdir] — specify an alternate db dir
-help — this message
-hp — enable high priority settings
-log [logdir] — specify an alternate log dir
-nc — do not output to a console and background
-nf — no forking
-nonat — do not load NAT (network address translation, for firewalls)
-stop — stop freeswitch
-waste — don’t consume tons of unix resources (file handles)
Shutting Down FreeSWITCH™
To
exit the FreeSwitch CLI, simply type ‘shutdown’ or ‘…’. Note, this
will shutdown FreeSwitch. If you do not wish to shutdown FreeSwitch, it
is suggested to start the process inside of a «screen» session; In
Windows, FreeSWITCH™ may be started as a service. It is not recommended
that you start FreeSWITCH™ as a service until you are certain your
configuration is valid. Also if started from a remote login session (IE
SSH) it is not advised to terminate the connection with FS left in the
foreground.
Some stuff to try out!
The
optimal way of testing is to get a pair of SIP phones and try out
features via the default dialplan. If you’re already familiar with
asterisk, you could also start out by Connecting Freeswitch And Asterisk
- Register two phones to FreeSWITCH with two different extension numbers.
- Let’s assume for the example that you have your SIP phones registered as extensions 1000 and 1001.
-
You can use extension numbers 1000 through 1019 with a password of 1234
(the default voice-mail password is the same number as the extension
{Ex: Extension 1000 has its voice-mail password set to 1000}.
A sample configuration with X-Lite is shown below:

Once you’ve done that, you can try out a bunch of features already setup in the test dialplan.
Basic Calling
- Call between 1000 and 1001 by dialing the respective extension.
- Call 4000 to login to your voicemail box.
- 870 — Redial last called # from this extension.
- *69 — Call back the last person to call this extension.
-
8+[ext] — Place an intercom call to extension [ext]. If no answer, it
does not go to voicemail but just keeps ringing. Some phones have
additional functionality for intercom calls.
Advanced Calling Features
-
88+[ext] — Eavesdrop on extension [ext] (ex: 881001). That extension
must be on an active call. Once connected, you can listen to the call
without being heard, or you can… - Press 1 to barge in with the distant party.
- Press 2 to barge in with the local party.
- Press 3 to barge in on both parties.
- 5900 — Park a call in a hold queue (First-in-first-out style).
- 5901 — Pickup a call parked in queue (that was put there via 5900).
Group Assignments
The below functions involve the idea of keeping a database/table of
which extensions belong to one of 100 groups (numbered 00-99).
-
80+[group] — Delete this extension from calling group #[group] (can be
two digits 00-99). A beep tone confirms the function worked. - 81+[group] — Add this extension to calling group #[group] (can be two digits 00-99). A beep tone confirms the function worked.
-
82+[group] — Simultaneously ring all extensions in group #[group]. The
first person to answer will be connected to you automatically.
Conferencing
- 30+[conf] — Join conference #[conf] — 8kHz quality.
- 31+[conf] — Join conference #[conf] — 16kHz quality.
- 32+[conf] — Join conference #[conf] — 32kHz quality.
- 9888 — Join the FreeSWITCH conference via a SIP Internet connection (8kHz).
- 91616 — Join the FreeSWITCH conference via a SIP Internet connection (16kHz).
Note:
Conference rooms are unique for the bit-level you choose (i.e. 3000 for
conference room 00 will not join with participants in 3100 which is
also conference room 00. They are different conferences).
Interactive Voice Response
- 5000 — IVR demo.
Other Tests
- 9992 — Info test (prints information to the command line interface).
- 9995 — Echo test (5-second delay before returning echo).
- 9996 — Echo test (real-time).
- 9997 — Play milliwatt tone.
- 9998 — Tetris, via tone streaming.
- 9999 — Test Music On Hold out (if you installed sound files).
Advanced
Preprocessor Commands
The
FreeSWITCH™ configuration supports preprocessor commands reminiscent of
(but not matching) apache server-side includes: #comment, #include and
#set.
In addition to the pre-processor PIs, which may appear
anywhere, the freeswitch.xml file has a root element of «document», and
all its children are «section» elements, with «name» attribute values
being one of:
- ???
- ???
- ???
Note
that preprocessor variables set with a #set PI are unrelated to
«channel variables», defined with the <variable> element. Those
variables are only expanded within channels.
Preprocessor
commands are included in XML style comment brackets. Even though they
appear commented to an XML parser, they are still processed. The comment
characters are required or they will not be processed. An example would
be:
<!—#include «switch.conf.xml»—>
freeswitch.xml
This
is the main configuration file, and the only one that has a fixed name.
When you start FreeSWITCH™ it will locate this file and process it. The
default freeswitch.xml file includes other files to allow for easier
maintenance of configuration data. The default configuration of most of
these files is suitable for first time users, until you become more
familiar with FreeSWITCH™ it is advised that you leave them to their
default settings.
freeswitch.xml is divided into multiple
sections, and each section is used by a different component in
FreeSWITCH™. The sections are as follows:
- The «configuration» section has children for switch.conf and modules.conf which are used by the core, as well as a child for each module in use.
- The dialplan section defines which action to invoke when a call arrvies to the switch.
- The directory defines the users that can connect to the switch (user agents).
- The phrases section defines where freeswitch can find the sound files, and if it can use any TTS engines.
The
structure below «document» and «section» varies according to the
parent. There is currently no dtd/relaxng/xmlschema available to
validate the file, though since it does not use xml mechanisms for
inclusion that would be an obstacle to true validation (and the limited
xml parser used by FreeSwitch doesn’t implement any of the XML standard
mechanisms such as external entities or XInclude). XML namespaces are
not currently used. There is no application-level versioning within the
file.
How the configuration files are parsed
FS begins with its single, master configuration file (conf/freeswitch.xml). This master config file then loads (via «globs»
e.g. «*.xml») additional config files. FS 1.0.4 installs with dozens of
config files. You may stray daringly far from the stock install and
arrange the files (and the loading thereof) however you wish: it’s up to
you if you want a single, huge config file or a series of config files.
Each config file can include none or many other config files. Whatever
method you choose, at runtime FreeSwitch parses all the (one or many)
files into a single, huge, resultant «running config» file (located at
log/freeswitch.xml.fsxml) which mustn’t be edited while FS is running as portions are memory-mapped into FS.
IMPORTANT
When the FS console reports a configuration error, the line number it
gives is the line number in the «running config» file, not the line
number in any included file.
Example freeswitch.xml
Below is a snippet freeswitch.xml file. Of course, the bulk of the configuration is found in the included files.
<?xml version=»1.0″?>
<document type=»freeswitch/xml»>
<X-PRE-PROCESS cmd=»include» data=»vars.xml»/>
<section name=»configuration» description=»Various Configuration»>
<X-PRE-PROCESS cmd=»include» data=»autoload_configs/*.xml»/>
</section>
<section name=»dialplan» description=»Regex/XML Dialplan»>
<X-PRE-PROCESS cmd=»include» data=»dialplan/*.xml»/>
</section>
<!— mod_dingaling is reliant on the vcard data in the «directory» section. —>
<!— mod_sofia is reliant on the user data for authorization —>
<section name=»directory» description=»User Directory»>
<X-PRE-PROCESS cmd=»include» data=»directory/*.xml»/>
</section>
<!— phrases section (under development still) —>
<section name=»phrases» description=»Speech Phrase Management»>
<macros>
<X-PRE-PROCESS cmd=»include» data=»lang/*/*.xml»/>
</macros>
</section>
</document>
Preprocessor Variables
For
now, do not worry about all of the configuration properties, this guide
will show you the minimum required to get a running FreeSWITCH™ system.
After you have verified your installation you may then configure the
system in more detail.
The first thing you should do is review
conf/vars.xml and conf/freeswitch.xml. For now just make note of the
preprocessor variables.

<X-PRE-PROCESS cmd=»set» data=»bind_server_ip=auto»/>
<X-PRE-PROCESS cmd=»set» data=»global_codec_prefs=G722,PCMU@20i,PCMA@20i»/>
- «bind_server_ip» Can be an ip address, a dns name, or «auto».
- «global_codec_prefs» has a default of G.711 u-law. You can probably leave this alone, unless you need to change it to another codec, but most VoIP equipment will support this codec.
hint: If you need to troubleshoot your configuration, the log/freeswitch.xml.fsxml
file contains the entire pre-processed freeswitch.xml file. (For
testing and troubleshooting you could replace the freeswitch.xml file
with this copy.)
hint2: If you have a [multihomed NIC] (Single Link, Multiple IP address) then remember that you may have to set a pre-process variable in the vars.xml file.
<X-PRE-PROCESS cmd=»set» data=»local_ip_v4=<your ip address>»/>
Multi-Tenant Info / Multiple Company HOWTO
The Multi-tenant page gives details regarding running FS to support multiple separate companies. Multiple Companies is a HOWTO that describes setting up two independent companies on FS, where the files go, what they must contain, etc.
Что такое FreesWitch?
Freeswitch-это платформа для телефонного обмена с открытым исходным кодом, которая имеет сильную масштабируемость от простого мягкого телефонного клиента с мягким обменом на уровне оператора почти всемогущим. Он может работать на собственных платформах 32/64, таких как Windows, Max OS X, Linux, BSD и Solaris. Его можно использовать в качестве простого двигателя обмена, УАТС, медиа -шлюза или медиа, который поддерживает IVR. Он поддерживает SIP, H323, Skype, Google Talk и другие протоколы, и может легко общаться с различными системами УАС с открытым исходным кодом, такими как Sipxecs, Call Weaver, Bayonne, Yate и Asterisk. Freeswitch Следуйте RFC и поддерживает множество расширенных функций SIP, таких как присутствие, BLF, SLA, TCP, TLS и SRTP. Его также можно использовать в качестве SBC для прозрачного прокси -сервера SIP (прокси) для поддержки других средств массовой информации, таких как T.38. Freeswitch поддерживает широкополосное и узкое голосовое кодирование. Мост конференции конференции может поддерживать голос 8, 12, 16, 24, 32 и 48 кГц одновременно. В традиционной телефонной сети вам нужно получить трехпартийный звонок или многогранный вызов. Обработка, другие услуги, такие как предоплаченная, цветные колокольчики и другие предприятия, должны полагаться на интеллектуальные сети (в) в сети PSTN, а конфигурация довольно гибкая.
Быстрый опыт
Функция FreesWitch действительно очень богатая и мощная. До дальнейшего обучения мы сделаем полный опыт. Конфигурация по умолчанию Freeswitch-это Soho PBX (маленький коммутатор домашнего телефона). Затем цель этой главы состоит в том, чтобы установить из 0, чтобы реализовать расширение телефона, проверить различные функции и вызовать телефон PSTN, добавив шейн SIP-PSTN. Таким образом, даже если у вас нет опыта, вы сможете гладко завершить эту главу, чтобы создать прямое понимание. Во время опыта вы столкнетесь с небольшой сложной конфигурацией. Если вы не можете полностью понять, не волнуйтесь, мы подробно расскажем ее позже. Конечно, если вы очень опытный пользователь Freeswitch , вы можете пропустить эту главу.
Установите базовую систему FreesWitch
При написании этой статьи последняя версия — 1.0.5pre10, но, возможно, когда вы ее читаете, была выпущена официальная версия 1.0.5. Freeswitch поддерживает 32 -бит и 64 -бит Linux, Macosx, BSD, Solaris, Windows и многие другие платформы. На некоторых платформах есть скомпилированные пакеты установки, но я настоятельно рекомендую установить из исходного кода, потому что Freeswitch обновляется очень быстро, а составленная версия обычно старше. Вы можете скачать пакет исходного кода или получить последний код непосредственно из репозитория SVN. В отличие от других проектов, его код туловища SVN обычно более стабилен, чем стабильная версия выпуска. Более того, когда вам нужна техническая поддержка, разработчики обычно рекомендуют сначала перейти к последнему коду в SVN, а затем посмотрите, есть ли еще проблемы.
Пользователи Windows могут загружать и устанавливать файлы напрямую http://files.freeswitch.org/windows/installer/x86/freeswitch.msi (Напоминание, версия относительно старая. Если вы установите ее из исходного кода, вам необходимо Visual Studio 2008. Кроме того, 64 -битные пользователи загрузили:http://files.freeswitch.org/windows/installer/x64/freeswitch.msiК. Установка завершает выполнение c: \ freeswitch \ freeswitch.exe (или c: \ «Program Files» \ freeswitch \ freeswitch.exe). Его файлы конфигурации все в C: \ freeswitch \ conf \.
Следующее предполагает, что вы используете платформу Linux и предполагаете, что у вас есть базовые знания Linux. Как установить Linux с самого начала выходит за рамки этой книги, и вы можете легко найти эти материалы из Интернета. Вообще говоря, любой набор для распределения в порядке, но основная, файловая система и среда компиляции некоторых наборов для распределения, версия LIBC будет иметь некоторые проблемы. Поэтому, если вы хотите получить поддержку сообщества после того, как столкнетесь с проблемой, лучше всего выбрать распределительный комплект, с которым все знакомы. Платформа, используемая разработчиками FreeSwitch, составляет CentOS 5.2/5.3 (в CentOS 5.4 будут некоторые проблемы, не всегда более высокая версия, тем лучше). Многие люди в сообществе также используют Ubuntu и и И Debian, если вы хотите использовать производственную среду, рекомендуется использовать версию LTS (долгосрочная поддержка), то есть Ubuntu8.04/10.04 или Debian Stable. Перед установкой нам нужно подготовить некоторые среды (FreesWitch может работать с обычными разрешениями пользователя, но для простоты все следующие операции выполняются с помощью ROOT):
CentOS:
yum install -y subversion autoconf automake libtool gcc-c++ ncurses-devel make
yum install -y libjpeg-devel libtiff-devel zlib-devel
Ubuntu:
apt-get -y install build-essential subversion automake autoconf wget libtool libncurses5-dev
Выбираются следующие три метода установки, а место установки по умолчанию -/usr/local/freeswitch. Во время процесса установки будет загружен каталог исходного кода, поэтому, пожалуйста, сохраните его, чтобы обновить и установить другие компоненты в будущем.
Объявление установки пакета исходного кода:
wget http://latest.freeswitch.org/freeswitch-1.0.5-latest.tar.gz
tar xvzf freeswitch-1.0.5-latest.tar.gz
cd freeswitch-1.0.5
./configure
make install
Это стандартный процесс из программного обеспечения для установки исходного кода на Linux. Прежде всего, первая строка загружает последний исходный код, вторая строка разложена и сжата, 4 -я строка настроена на состав среды, а пятую строку компиляция и установка.
Установка со склада SVN:
Freeswitch использует Subversion для управления исходным кодом. Установка из библиотеки кода позволяет вам навсегда использовать последнюю версию.
svn co http://svn.freeswitch.org/svn/freeswitch/trunk freeswitch
cd freeswitch
./bootstrap.sh
./configure
make install
В отличие от предыдущего метода, необходимо выполнить Bootstrap.sh для инициализации некоторых средств непосредственно из установки библиотеки кода.
Самая быстрая установка (рекомендуется)
wget http://www.freeswitch.org/eg/Makefile && make install
Приведенные выше команды будут загружать MakeFile, а затем использовать Make для выполнения процесса установки. Во время процесса установки он получает код из репозитория SVN, и операция на самом деле совпадает с методом установки.
Установите звуковой файл
В следующем примере нам нужны некоторые звуковые файлы, и установить эти звуковые файлы очень проста. Вам нужно только выполнить в каталоге исходного кода:
make sounds-install
make moh-install
Следующие высококачественные звуковые файлы могут быть выбраны для установки. Freeswitch поддерживает голос 8, 16, 32 и 48 кГц, и редко другие телефонные системы поддерживают так много частоты выборки (общий телефон — 8 тыс., Более высокая частота означает лучшее качество вызова).
make cd-sounds-install
make cd-moh-install
После завершения установки будет отображаться полезная помощь, будет отображаться,
+---------- FreeSWITCH install Complete ----------+
+ FreeSWITCH has been successfully installed.     +
+                                                 +
+       Install sounds:                           +
+       (uhd-sounds includes hd-sounds, sounds)   +
+       (hd-sounds includes sounds)               +
+       ------------------------------------      +
+                make cd-sounds-install           +
+                make cd-moh-install              +
+                                                 +
+                make uhd-sounds-install          +
+                make uhd-moh-install             +
+                                                 +
+                make hd-sounds-install           +
+                make hd-moh-install              +
+                                                 +
+                make sounds-install              +
+                make moh-install                 +
+                                                 +
+       Install non english sounds:               +
+       replace XX with language                  +
+       (ru : Russian)                            +
+       ------------------------------------      +
+                make cd-sounds-XX-install        +
+                make uhd-sounds-XX-install       +
+                make hd-sounds-XX-install        +
+                make sounds-XX-install           +
+                                                 +
+       Upgrade to latest:                        +
+       ----------------------------------        +
+                make current                     +
+                                                 +
+       Rebuild all:                              +
+       ----------------------------------        +
+                make sure                        +
+                                                 +
+       Install/Re-install default config:        +
+       ----------------------------------        +
+                make samples                     +
+                                                 +
+       Additional resources:                     +
+       ----------------------------------        +
+       http://www.freeswitch.org                 +
+       http://wiki.freeswitch.org                +
+       http://jira.freeswitch.org                +
+       http://lists.freeswitch.org               +
+                                                 +
+       irc.freenode.net / #freeswitch            +
+-------------------------------------------------+
Пока что он был установлен. В операционной системе Unix -Class ее позиция установки по умолчанию составляет/usr/local/freeswtich. Путь, описанный ниже, все относительно пути. Две обычно используемые команды — это Bin/Freeswitch и Bin/FS_CLI. Чтобы облегчить использование, рекомендуется, чтобы эти две команды в качестве символических ссылок в вашем пути поиска, такие как ::
ln -sf /usr/local/freeswitch/bin/freeswitch /usr/local/bin/
ln -sf /usr/local/freeswitch/bin/fs_cli /usr/local/bin/
Конечно, если/usr/local/bin не находится в вашем пути поиска, вы можете заменить вышеуказанный/usr/local/bin/usr/bin/. Кроме того, вы также можете изменить переменную среды пути, чтобы включить этот путь.
Это должно быть запущено дальше, выполнив команду FreeSwitch в терминале (если вы сделали символическую ссылку, в противном случае вы должны выполнить/usr/loc Первый старт, который можно игнорировать. После того, как запуск будет завершен, он войдет в системную консоль (далее именуемый FS-CON). И отобразить аналогичную подсказку «freeswitch@Internal>» (далее упрощено «fs>»). Вы можете отключить FreesWitch, введя команду выключения в FS-CON.
Если вы хотите начать FreesWitch, чтобы начать фон (Daemon, Service Mode), вы можете использовать FreesWitch -nc (без консоли). В фоновом режиме нет консоли. Если вы хотите управлять FreesWitch в настоящее время, вы можете использовать клиентское программное обеспечение FS_CLI для подключения. Обратите внимание, что в FS_CLI вам нужно использовать команду FSCTL Shutdown, чтобы отключить FreesWitch. Конечно, он также может быть закрыт непосредственно через команду FreeSwitch -Stop под приглашением Linux. Если вы не хотите выходить из службы FreeSwitch, выйдите только с клиентом FS_CLI, вам необходимо ввести /выйти, или Ctrl + d или непосредственно отключить окно терминала.
Подключите SIP Soft Thone Number
Наиболее типичным применением FreesWitch является сервер (на самом деле это обратный пользовательский агент, B2Bua), и подключает его с программным обеспечением для телефонного клиента (обычно называемого Soft Phone). Хотя FreesWitch поддерживает многие протоколы связи, такие как IAX, H323, Skype, Gtalk, его основной протокол — SIP. Есть много мягких телефонов, которые поддерживают SIP. Наиболее часто используются X-Lite и Zoiper. Оба мягких телефона поддерживают платформы Linux, Macosx и Windows, которые не имеют свободного использования, но не открыты. Вы также можете использовать мягкие вызовы Ekiga на Linux.
Настоятельно рекомендуется устанавливать мягкие вызовы на других машинах на той же локальной области и гарантировать, что микрофоны и наушники могут работать нормально. Конечно, если у вас нет дополнительных машин для проведения этого эксперимента, вы также можете установить на той же машине. Просто обратите внимание, что мягкий телефон не должен занимать порт UDP 5060, потому что Freeswitch использует этот порт по умолчанию, что является проблемой, с которой часто сталкиваются новички. Вы можете начать проблему, запустив FreesWitch перед запуском мягкого телефона, чтобы избежать этой проблемы. Кроме того, какой -то мягкий вызов позволяет изменить локальный порт мониторинга.
Вы можете знать, какой IP -адрес прослушивается следующие команды, введя следующие команды. Помните этот IP -адрес (до части 5060). Используется следующее:
netstat -an | grep 5060
FreeSwitch по умолчанию конфигурация1000 ~ 1019 В общей сложности 20 пользователей, вы можете выбрать пользователя случайно для конфигурации:
Щелкните правой кнопкой мыши x-lite, выберите «Настройки учетной записи SIP …», нажмите «Добавить», чтобы добавить учетную запись, заполните следующие параметры (Zoiper может обратиться к конфигурации):
Display Name: 1000
User name: 1000
Password: 1234
Authorization user name: 1000
 Домен: Ваш IP -адрес - тот, который вы помните только сейчас
Другие используют настройки по умолчанию, нажмите ОК. Затем нажмите «Закрыть», чтобы закрыть окно настроек учетной записи SIP. В настоящее время X-Lite автоматически зарегистрируется в FreesWitch. После успеха регистрации «Готов. Ваше имя пользователя будет отображено 1000». Кроме того, кнопка «Dial» слева станет зеленым. Как показано ниже.

Захватывающий момент наступает. Введите «9664» и нажмите Enter (или нажмите кнопку зеленого вызова), вы сможете услышать музыку (MOH, музыка в удержании). Если вы не слышите это, не будете обескуражены, посмотрите, есть ли какие-либо ошибки в FS-Con. Если есть подсказки, такие как «файл не найден», большинство звуковых файлов не установлены, и проверьте, неправильно ли Moh-Install. Далее вы можете попытаться набрать следующий номер по очереди:
------------------
 Номер | Описание
----------------------
 9664 | Сохраняйте музыку
 9196 | Echo, Echo Test
 9195 | echo, Echo Test, Doply 5 Seconds
 9197 | Milliwatte расширение, звук звонка
 9198 | Пример генерации рингтона TGML
 5000 | Пример IVR
 4000 | Слушайте голосовые динамики
 33xx | Call Conference, 48K (из которых XX может быть 00-99, то же самое ниже)
 32xx | Call Conference, 32K
 31xx | Call Conference, 16K
 30xx | Call Conference, 8K
 2000-2002 | Группа звонка
 1000-1019 | Раздельный номер по умолчанию

 Таблица 1: Номер по умолчанию и инструкции
Смотрите деталиhttp://wiki.freeswitch.org/wiki/Default_Dialplan_QRF。
Кроме того, возможно, вы хотите попытаться зарегистрировать другого пользователя SIP и поговорить между ними. Лучше всего запустить еще один X-Lite на другой машине в той же локальной сети района и использовать 1001 для регистрации. После регистрации вы можете позвонить 1001 на 1000 или 1000 на 1001. Конечно, вы все еще можете сделать это на одной и той же машине (например, зарегистрироваться как 1001 с Zoiper). Следует отметить, что, поскольку у вас есть только одна звуковая карта на вашей машине, они могут конкурировать за звуковое оборудование. Особенно на Linux некоторые программные обеспечения будут монополизировать звуковые устройства. Если у вас также есть гарнитура USB -Interface одновременно, вы можете установить различное программное обеспечение для использования разных звуковых устройств.
Профиль
Файл конфигурации FreeSwitch размещен в Conf/, который состоит из серии файлов конфигурации XML. Файл верхнего уровня -freeswitch.xml. Когда система запускается, он установлен для установки других файлов XML и в конечном итоге образует большой XML -файл.
Файл | Описание
---------------------------------------------------
 vars.xml | Некоторые часто используемые переменные
 Dialplan/default.xml | Defifiting Dial -Up План
 Directory/default/*. XML | Пользователь SIP, один файл на пользователя
 SIP_PROFILES/International.xml | A SIP-профиль или SIP-UA, мониторинг локального IP и порта 5060, как правило, для пользователей внутренней сети для его использования
 SIP_PROFILES/EXTERA.XML | Еще один SIP-UA, используемый в качестве внешнего соединения, порт 5080
 AutoLoad_Configs/Modules.conf.xml | Какие модули автоматически загружаются, когда начинается Freeswitch
Добавить нового пользователя SIP
Freeswitch по умолчанию настроил 20 пользователей (1000-1019). Если вам нужно больше пользователей, или вы хотите изучить конфигурацию FreeSwitch, добавив пользователя, вам нужно только просто выполнить следующие три шага:
- Добавьте файл конфигурации пользователя в Conf/Directory/Default/
- Измените план набора (Dialplan), чтобы другие пользователи могли его назвать
- Повторная конфигурация, чтобы она вступила в силу
Если вы хотите добавить Джез пользователя, расширение составляет 1234. Просто перейдите в каталог Conf/Directory/по умолчанию и скопируйте 1000.xml до 1234.xml. Откройте 1234.xml и измените все от 1000 до 1234. И измените значение Effective_caller_id_name на jack, а затем выйдите из диска. как:
<variable name="effective_caller_id_name" value="Jack"/>
Далее, откройте conf/dialplan/default.xml и найдите <condy field = «destination_number»
Express = «^(10 [01] [0-9]) $»> строка, измененная на <condition field = «destination_number» Expression = «^(10 [01] [ 0 -9] | 1234) $ «>. Люди, знакомые с регулярным выражением, должны знать, что «^(10 [01] [0-9]) $» соответствующий номер 1000-1019. Поэтому выражение после того, как мы модифицируемся, составляет более 1234. Freeswitch использует Perl совместимое регулярное выражение (PCRE).
Теперь вернитесь к FS-CON или запустите FS_CLI, выполните команду RELAUDXML или нажмите клавишу сочетания F6, чтобы вступить в силу новую конфигурацию.
Найдите мягкий телефон, который только что зарегистрировался как 1001 (или запустите новый, если у вас достаточно машин), измените 1001 на 1234 и зарегистрируйтесь снова, вы можете набрать и проверить с 1000. Если нет нескольких машин, запуск нескольких мягких телефонов на одной и той же машине может противоречить. В настоящее время вы также можете напрямую ввести консоль FreeSwitch для использования команд для тестирования:
FS> Sofia Status Profile International (сколько пользователей зарегистрировано)
 Fs> Oning Sofia/Internet/1000 & Echo (Dial 1000 и Execute Echo Program)
 Fs> Изовать пользователь/1000 & echo (так же, как и выше)
 FS> Изовать Sofia/Internet/1000 9999 (эквивалентно набору 9999 на мягком телефоне 1000)
 Fs> Oning Sofia/Internet/1000 9999 XML по умолчанию (так же, как и выше)
Среди них программа Echo () — это простая программа. Она просто говорит вам контент, который вы говорите, как это полезно. Во время тестирования это полезно. В этой книге мы часто будем использовать его для его проверки.
FreesWitch используется в качестве мягкого телефона
FreesWitch также может быть просто использован в качестве мягкого телефона, такого как X-Lite. Хотя по сравнению с конфигурацией X-Lite немного более хлопотно, вы получите больше преимуществ от него: FreesWitch-это открытый исходный код, более мощный и гибкий. Дело в том, что это единственный мягкий телефон, который я знаю, в настоящее время поддерживает вызовы Celt HD.
Freeswitch используйте mod_portaudio для поддержки вашего локального звукового оборудования. Модуль не составлен по умолчанию. Под вашим исходным деревом кода выполните:
make mod_portaudio
make mod_portaudio-install
Другие модули также могут быть повторно связаны и установлены в приведенном выше методе. Затем перейдите в FS-Con, чтобы выполнить:
FS> load mod_portaudio
Ошибки, такие как «Невозможно найти устройство ввода», могут быть вашим драйвером голосовой карты. Если это быстро «+OK», это успешно, а затем выполнить:
FS> pa devlist

API CALL [pa(devlist)] output:
0;Built-in Microphone;2;0;
1;Built-in Speaker;0;2;r
2;Built-in Headphone;0;2;
3;Logitech USB Headset;0;2;o
4;Logitech USB Headset;1;0;i
Вышеуказанный вывод на моей ноутбуке, который перечисляет все звуковое оборудование. Среди них окончательный «O» и I »3 и 4 представляют устройства звука (Out) и входные (в) устройства соответственно. Это может отличаться на вашем компьютере. Если вы хотите выбрать другие устройства, вы можете использовать команду:
FS> pa indev #0
FS> pa outdev #2
Приведенные выше команды выберут встроенные микрофон и наушники на моем компьютере.
Затем у вас может быть мягкий телефон, которым можно управлять командными линиями, круто?
Fs> pa looptest
FS> pa call 9999
FS> pa call 1000
FS> pa hangup
Как показано выше, вы можете вызвать все номера, которые вы только что попробовали. Теперь предположим, что если вы хотите позвонить вам из расширения SIP 1000, вам необходимо изменить диалеру. Поместите следующие файлы с вашим любимым редактором в Conf/Dialplan/Default/Portaudio.xml
<include>
  <extension name="call me">
    <condition field="destination_number" expression="^(me|12345678)$">
      <action application="bridge" data="portaudio"/>
    </condition>
  </extension>
</include>
Затем нажмите «F6» или введите следующую команду в FS-Con, заставьте его вступить в силу:
FS> reloadxml
Позвоните «Я» или «12345678» в расширении 1000 (вы должны выбрать более прохладный номер для себя), а затем вы должны увидеть »[DEBUG] MOD_PORTOUDIO.C: 268 BRRRRRRING! BRRRRRRING!» Позвоните 1 »(Если вы можете Не видите этого, вы можете получить подробный журнал в соответствии с «F8»), который показывает, что ваш мягкий телефон — Bell. Возьмите еще несколько возвратов, а затем введите «Ответ PA», чтобы ответить на звонок. «PA Hangup» может повесить трубку.
Конечно, вы определенно хотите услышать настоящий тон колокольчика, а не то, что Brrrrrrrying во время колокола. Хорошая рука, выберите хороший звуковой файл (.
<param name="ring-file" value="/home/your_name/your_ring_file.wav"/>
Затем перезагрузите модуль:
FS> reloadxml
FS> reload mod_portaudio
Попробуйте еще раз, посмотрите, услышите ли вы звук звонка?
Если вы используете непоколебимый интерфейс символов, вы можете посмотреть на FreesWitch-Air (http://www.freeswitch.org.cn/download), он предоставляет простой интерфейс с мягкой телефонной графикой для Freeswitch. Кроме того, если вам нужны вызовы с высоким уровнем определения, в дополнение к настройке связанного голосового кодека (кодек), вам также нужна хорошая гарнитура для достижения наилучших результатов. Я использую USB -гарнитуру.
Настройка шлюза SIP для вызова внешних вызовов
Если у вас есть учетная запись SIP в определенном операторе, вы можете настроить внешний вызов. Учетная запись SIP (или устройство, которое предоставляет учетную запись) называется SIP Gateway в FreesWitch. Добавьте только шлюз, необходимый только для создания XML -файла на CONF/SIP_PROFILES/EXTERNE/CREATION. Имя может быть случайным, таким как gw1.xml.
<gateway name="gw1">
    <Param name = "realm" value = "адрес SIP -сервера, который может быть ip или ip: конечный номер"/>
         <Param name = "username" value = "SIP -имя пользователя"/>
         <Param name = "password" value = "password"/>
    <param name="register" value="true" />
</gateway>
Если ваш SIP -шлюз нуждаются в других параметрах, вы можете обратиться к example.xml в одном и том же каталоге, но, как правило, достаточно параметров. Вы можете перезапустить FreesWitch или выполнить следующие команды, чтобы вступить в силу.
FS> sofia profile external rescan reloadxml
Затем отобразите статус:
FS> sofia status
Если отображается статус шлюза GW1, это указывает на то, что он правильно зарегистрирован в шлюз. Вы можете попробовать, сначала ли ворота работает нормально с командами:
FS> originate sofia/gateway/gw1/xxxxxx &echo()
Приведенная выше команда передаст номер вызова GW1 xxxxxx (вероятно, номер вашего мобильного телефона). После ответа на номер вызова на Freeswitch будет выполнено программа Echo (), и вы должны услышать свой эхо.
Вызовать определенное расширение
Если тест шлюза нормальный, вы можете настроить его с SIP Soft Phone или Portaudio. Поскольку мы используем FreesWitch в качестве УАТС, нам нужно выбрать чемпионат. Обычные УАС, как правило, представляют собой внутренний циферблат, а 0 или 9 требуются для вызова внешних вызовов. Конечно, это ваш собственный переключатель, вы можете использовать любой номер (или даже букву), который вам нравится. Продолжайте изменять план -Dial -UP и создать новый файл XML: conf/dialplan/default/call_out.xml:
<include>
  <extension name="call out">
    <condition field="destination_number" expression="^0(\d+)$">
      <action application="bridge" data="sofia/gateway/gw1/$1"/>
    </condition>
  </extension>
</include>
Среди них (\ d+) является регулярным выражением, которое соответствует всем числам за 0 с переменной $ 1. Затем используйте программу Bridge, чтобы воспроизвести номер через Gateway GW1. Конечно, после создания XML вам необходимо выполнить эффективность ReloadXML в FS-CON.
Позвоните по телефону.
Если ваш SIP -шлюз поддерживается, то вам нужно знать, что сделано вызов. Полное имя DID — это прямой входящий циферблат, который называется напрямую. Вообще говоря, выполнение звонка — ваш номер SIP. Если вы не знаете, это не имеет значения, вы узнаете, как его получить позже. Редактировать следующие XML -файлы размещены в Conf/Dialplan/public/my_did.xml
<include>
  <extension name="public_did">
         <Условие подано = "destination_number" expression = "^(your did) $">
      <action application="transfer" data="1000 XML default"/>
    </condition>
  </extension>
</include>
Reloadxml усиливает это. Вышеуказанная конфигурация будет непосредственно перенесена в расширение 1000 в будущем. В следующих главах вы узнаете, как обращаться с вызовом более гибко, например, переносить в голосовое меню или голосовой почтовый ящик.
резюме
Фактически, эта глава охватывает довольно много контента от установки, конфигурации до отладки и использования. Если вы можете пройти плавно, вы, должно быть, смогли ее вынести. Если вы где -то застряли, или некоторые функции не реализованы, это не ваша вина, главным образом из -за глубокой, глубокой, глубокой и глубокой, я не могу объяснить все аспекты в короткой главе. В следующих главах вы изучите более основные концепции, более глубоко поймете философию Freeswitch, изучите больше методов и навыков отладки, а решить любые проблемы будут кусочком торта.
Эта статья относится к этомуhttp://www.freeswitch.org/node/202, Но без перевозки работы, и первоначальный автор был уведомлен.
Search code, repositories, users, issues, pull requests…
Provide feedback
Saved searches
Use saved searches to filter your results more quickly
Sign up
-
Download and install
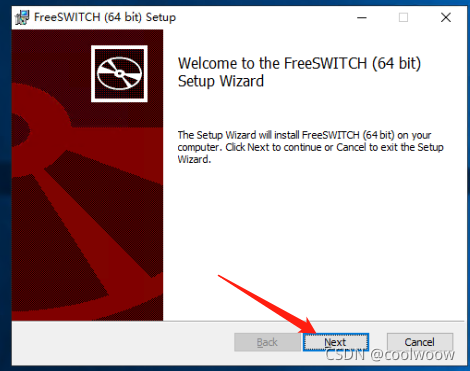
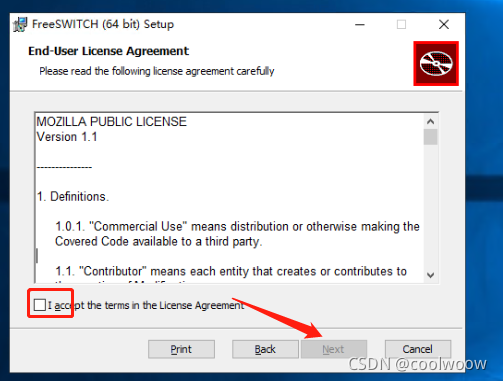
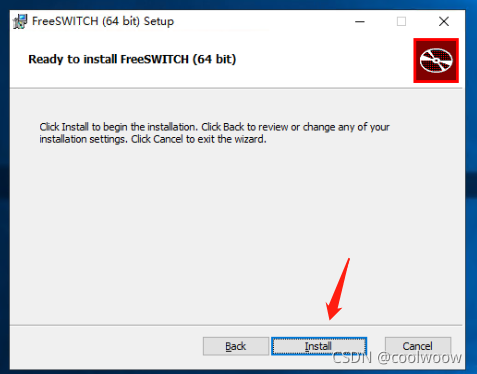
Step 1: Official website download Download link

Part 2: Double-click to open to install.
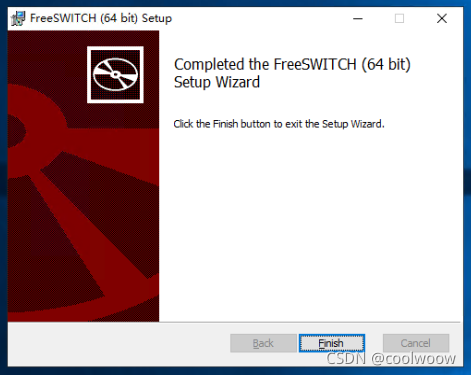
The installation is complete here.
The default directory is C:\Program Files\FreeSWITCH -
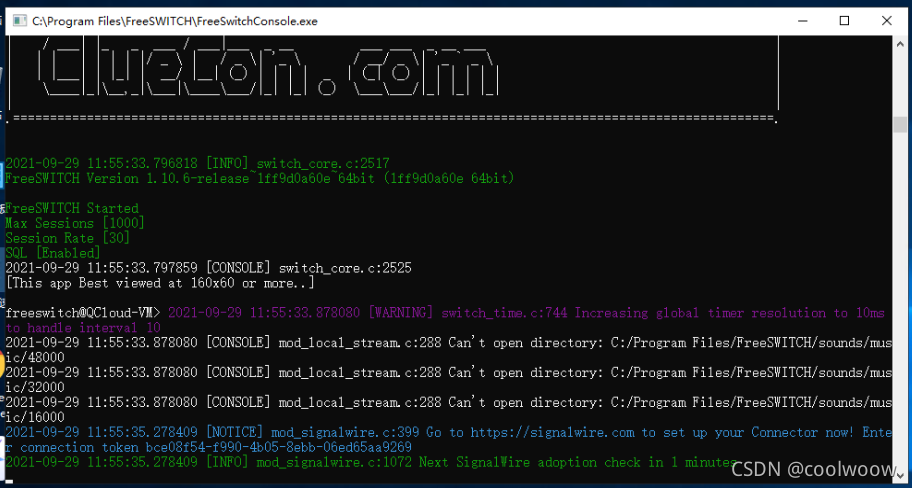
Start FreeSwitch
and go directly to the C:\Program Files\FreeSWITCH directory, find the FreeSwitchConsole.exe file and double-click it.
Here it means that the startup is successful