If you’re trying to use your printer and run into problems, here are some steps for common printer problems to try to get things working again.
Before you begin
Start by running the automated printer troubleshooter in the Get Help app. Get Help automatically runs diagnostics and takes the correct steps to fix most printer issues.
Open Get Help
If the Get Help app is unable to resolve your printer issue, try the possible solutions listed:
Sometimes power cycling your printer can resolve the issue. Turn off your printer and unplug it, wait 30 seconds, plug your printer back in, and then turn the printer back on.
If your printer still doesn’t work, continue to step 2.
Check the cables (for wired printers). Make sure that the printer’s USB cable is properly connected from the printer to your PC. If your USB isn’t recognized, see Automatically diagnose and fix Windows USB problems.
Check the wireless connection (for wireless printers). Do one of the following:
-
Make sure the printer’s wireless option is turned on and available. Many printers have a button that displays a blue wireless icon when a wireless connection option for the printer is available. To learn where this button is located on your printer and to find instructions about how to turn it on, see the instructions that came with the printer or check the manufacturer’s website for instructions.
-
Run the printer’s wireless connectivity test. Many printers have a menu option to test the printer’s wireless connectivity. Read the instructions that came with the printer or check the printer manufacturer’s website for instructions about how to do this.
-
If those check out and you’re still having problems, your PC may not be connecting to your wireless network. To learn more, see Why can’t I get online? For more advanced help, see Fix network connection issues in Windows.
-
If you’re having trouble connecting to a Bluetooth printer, see Fix Bluetooth problems in Windows.
Notes:
-
If you use wireless access points, extenders, or multiple wireless routers with separate SSIDs, make sure you’re connected to the same network as the printer for your PC.
-
If your printer’s status displays «Printer in error state,» there may be a problem with the printer itself. If these first two steps did not resolve the error, check the printer for low paper or ink, and be sure the cover isn’t open and the paper isn’t jammed.
If your printer still doesn’t work, continue to step 3.
Try removing and reinstalling the printer.
Remove your printer
-
Select the Start button, then select Settings > Bluetooth & Devices > Printers & scanners .
Open Printers & scanners settings -
Select the printer you want to uninstall.
-
Select the Remove button. Then confirm you’re sure you want to remove this device by selecting Yes.
Reinstall your printer
If your printer is turned on and connected to the network, Windows should find it easily. Available printers can include all printers on a network, such as Bluetooth and wireless printers, or printers that are plugged into another computer and shared on the network. You might need permission to install some printers. To reinstall your printer, follow these steps:
-
Select the Start button, then select Settings > Bluetooth & Devices > Printers & scanners .
Open Printers & scanners settings -
Make sure your printer is turned on and connected. Then select the Add device (or Refresh) button.
-
Please wait a moment while Windows searches for the printers that are connected to the device (locally or wirelessly). Windows will then display a list of printers connected to your device. If you see your printer listed, select the Add device button for your printer. If you don’t see your device listed, select Add manually.
Notes:
-
If you use wireless access points, extenders, or multiple wireless routers with separate SSIDs, make sure you’re connected to the same network as the printer for your PC to find and install it.
-
If you have a new wireless printer that hasn’t been added to your home network, read the instructions that came with the printer and check the printer manufacturer’s website to learn more and to get up-to-date software for your printer.
Tip: You can print a test page to make sure the printer is working correctly. If you’ve installed the printer but it doesn’t work, check the manufacturer’s website for troubleshooting information or driver updates.
Reinstall your printer manually
If the system cannot install the printer automatically, you can reinstall it manually. When you select Add manually, you will then see five options to Find a printer by other options. Select the option that applies best for your situation and then follow the steps provided. All of the options can apply for a printer that is connected wirelessly or through your network. However, if your printer is connected directly to your computer locally, select Add a local printer or network printer with manual settings and then select Next.
Reinstall a local printer manually
After selecting Add a local printer or network printer with manual settings, follow these steps:
-
Select Use an existing port and then select the port the printer is connected to. Then select Next. If the printer is connected via USB, select it from the list. There are also options for parallel (LPT) and serial (COM) ports.
-
You will now see options to install the printer driver. If the printer came with a disc that includes the driver, select Have Disk. Otherwise, select Windows Update.
-
Please wait while Windows updates the list of printers. Then select the printer manufacturer from the left column, and the printer model from the right column. Then select Next.
Note: If there are multiple versions of a driver for your device, you might be asked which version of the driver to use. In most cases, you should select Replace the current driver. However, if you’re confident the installed driver is correct, select Use the driver that is currently installed.
-
Type a name for your printer, and then select Next. This name is only for your personal reference, so you can choose any name you prefer.
-
Select Do not share this printer. (If you want to share your printer with other devices on your network, select Share this printer and enter the name and location.) Select Next.
-
Select Print a test page to confirm that the printer is working and then select Finish.
If your printer still doesn’t work, continue to step 4.
If the previous troubleshooting step is not successful, you may need to clear spooler files and restart the spooler service. The print spooler is a file that manages the printing process. To clear and reset the print spooler:
-
In the search box on the taskbar, type services, and then select Services in the list of results.
-
Select the Standards tab, and then double-click Print Spooler in the list of services.
-
Select Stop, and then select OK.
-
In the search box on the taskbar, enter %WINDIR%\system32\spool\printers, select %WINDIR%\system32\spool\PRINTERS in the list of results, and then delete all files in the folder.
-
In the search box on the taskbar, search for services, and then select Services in the list of results.
-
Select the Standards tab, and the double-click Print Spooler in the list of services.
-
Select Start, select Automatic in the Startup Type box, and then select OK.
If your printer still doesn’t work, continue on to step 6.
Notes:
-
If you need help installing your printer in Windows 10, see Install a printer in Windows 10.
-
If your PC is running Windows 10 S, some printers might not work with it, or they might have limited functionality. For more info, see Device support on Windows 10 S.
-
If a USB printer port is missing, see USB printer port missing after disconnecting printer while Windows 10 (version 1903 or later) is shut down.
-
If you’re looking for help with a scanner, see Install and use a scanner in Windows 10.
Sometimes power cycling your printer can resolve the issue. Turn off your printer and unplug it, wait 30 seconds, plug your printer back in, and then turn the printer back on.
If your printer still doesn’t work, continue to step 2.
Check the cables (for wired printers). Make sure that the printer’s USB cable is properly connected from the printer to your PC. If your USB isn’t recognized, see Automatically diagnose and fix Windows USB problems.
Check the wireless connection (for wireless printers). Do one of the following:
-
Make sure the printer’s wireless option is turned on and available. Many printers have a button that displays a blue wireless icon when a wireless connection option for the printer is available. To learn where this button is located on your printer and to find instructions about how to turn it on, see the instructions that came with the printer or check the manufacturer’s website for instructions.
-
Run the printer’s wireless connectivity test. Many printers have a menu option to test the printer’s wireless connectivity. Read the instructions that came with the printer or check the printer manufacturer’s website for instructions about how to do this.
-
If those check out and you’re still having problems, your PC may not be connecting to your wireless network. To learn more, see Why can’t I get online? For more advanced help, see Fix network connection issues in Windows.
-
If you’re having trouble connecting to a Bluetooth printer, see Fix Bluetooth problems in Windows 10: FAQ.
Notes:
-
If you use wireless access points, extenders, or multiple wireless routers with separate SSIDs, make sure you’re connected to the same network as the printer for your PC.
-
If your printer’s status displays «Printer in error state,» there may be a problem with the printer itself. If these first two steps did not resolve the error, check the printer for low paper or ink, and be sure the cover isn’t open and the paper isn’t jammed.
If your printer still doesn’t work, continue to step 3.
Try removing and reinstalling the printer.
Remove your printer
-
Select the Start button, then select Settings > Devices > Printers & scanners .
Open Printers & scanners settings -
Under Printers & scanners, find the printer, select it, and then select Remove device.
Reinstall your printer
You’ll need to follow different steps to reinstall or add a wireless or local printer. Here’s how.
Reinstall a wireless printer
-
Select the Start button, then select Settings > Devices > Printers & scanners .
Open Printers & scanners settings -
Select Add a printer or scanner. Wait for your device to find nearby printers, choose the one you want, and then select Add device.
If your printer is turned on and connected to the network, Windows should find it easily. Available printers can include all printers on a network, such as Bluetooth and wireless printers, or printers that are plugged into another computer and shared on the network. You might need permission to install some printers.
Notes:
-
If you use wireless access points, extenders, or multiple wireless routers with separate SSIDs, make sure you’re connected to the same network as the printer for your PC to find and install it.
-
If you have a new wireless printer that hasn’t been added to your home network, read the instructions that came with the printer and check the printer manufacturer’s website to learn more and to get up-to-date software for your printer.
Tip: You can print a test page to make sure the printer is working correctly. If you’ve installed the printer but it doesn’t work, check the manufacturer’s website for troubleshooting information or driver updates.
Reinstall a local printer
If you want to reinstall or add a local printer, plug the USB cable from your printer into an available USB port on your PC, and then turn on the printer.
-
Select the Start button, then select Settings > Devices > Printers & scanners .
Open Printers & scanners settings -
Under Printers & scanners, look for your printer.
-
If you see your printer listed, you’ll know it’s installed.
-
If you don’t see your printer listed, select Add a printer or scanner. Wait for your device to find available printers, choose the one you want, and then select Add device.
-
Tip: You can confirm the printer is working by printing a test page. If you’ve installed the printer but it doesn’t work, check the manufacturer’s website for troubleshooting information or driver updates.
If your printer still doesn’t work, continue to step 4.
If the previous troubleshooting step is not successful, you may need to clear spooler files and restart the spooler service. The print spooler is a file that manages the printing process. To clear and reset the print spooler:
-
In the search box on the taskbar, type services, and then select Services in the list of results.
-
Select the Standards tab, and then double-click Print Spooler in the list of services.
-
Select Stop, and then select OK.
-
In the search box on the taskbar, enter %WINDIR%\system32\spool\printers, select %WINDIR%\system32\spool\PRINTERS in the list of results, and then delete all files in the folder.
-
In the search box on the taskbar, search for services, and then select Services in the list of results.
-
Select the Standards tab, and the double-click Print Spooler in the list of services.
-
Select Start, select Automatic in the Startup Type box, and then select OK.
If your printer still doesn’t work, continue on to step 6.
Connecting your printer
When you connect a printer to your PC or add a new printer to your home network, you can usually start printing right away. Windows supports most printers, and you probably won’t have to go out of your way to install special printer software. If you’re using Windows 8.1 or Windows RT 8.1, additional printer support and drivers are available through Windows Update.
To install a printer
In most cases, all you have to do to set up a printer is to connect it to your PC. Simply plug the USB cable from your printer into an available USB port on your PC, and turn the printer on.
For wireless printers with Windows 8.1:
Note: If you have a new wireless printer that hasn’t been added to your home network, read the instructions that came with the printer to learn how to add it. Check the printer manufacturer’s website to learn more and to get up-to-date software for your printer.
-
Swipe in from the right edge of the screen, tap Settings, and then tap Change PC settings. (If you’re using a mouse, point to the lower-right corner of the screen, move the mouse pointer up, select Settings, and then select Change PC settings.)
-
Tap or click PC and devices, and then tap or click Devices. If your printer is installed, it should appear under Printers.
-
If your printer isn’t listed, tap or click Add a device, and then select your printer to install it.
To install (add) a local printer
-
Click the Start button, and then, on the Start menu, click Devices and Printers.
-
Click Add a printer.
-
In the Add Printer wizard, click Add a local printer.
-
On the Choose a printer port page, make sure that the Use an existing port button and the recommended printer port are selected, and then click Next.
-
On the Install the printer driver page, select the printer manufacturer and model, and then click Next.
-
If your printer isn’t listed, click Windows Update, and then wait while Windows checks for additional drivers.
-
If none are available and you have the installation CD, click Have Disk, and then browse to the folder where the printer driver is located. (For additional help, consult the printer manual.)
-
-
Complete the additional steps in the wizard, and then click Finish.
Tip: You can print a test page to make sure the printer is working correctly. If you’ve installed the printer but it doesn’t work, check the manufacturer’s website for troubleshooting information or driver updates.
To install a network, wireless, or Bluetooth printer
If you’re trying to add a network printer at the office, you’ll usually need the name of the printer. If you can’t find it, contact your network administrator.
-
Click the Start button, and then, on the Start menu, click Devices and Printers.
-
Click Add a printer.
-
In the Add Printer wizard, click Add a network, wireless or Bluetooth printer.
-
In the list of available printers, select the one you want to use, and then click Next. (If your computer is connected to a network, only printers listed in Active Directory for your domain are displayed in the list.)
-
If prompted, install the printer driver on your computer by clicking Install driver.
 If you’re prompted for an administrator password or confirmation, type the password or provide confirmation.
 -
Complete the additional steps in the wizard, and then click Finish.
 If you’re prompted for an administrator password or confirmation, type the password or provide confirmation.
Tip: Available printers can include all printers on a network, such as Bluetooth and wireless printers or printers that are plugged into another computer and shared on the network. You might need permission to install some printers. You can confirm the printer is working by printing a test page.
Note: After your printer is installed, you can keep it up to date with automatic Windows 7 driver updates.
Troubleshoot printer problems
Start by checking your hardware
Make sure that the printer’s electrical cord is plugged into an electrical outlet and that the power switch is turned on. If you’re printing to a shared printer or a printer on a network, make sure that all necessary computers and routers are turned on too. If your printer or other equipment is plugged in to a surge protector or a backup power supply, make sure that hardware is plugged in and turned on as well.
If you’re using a wired printer, make sure that the printer cable is properly connected from the printer to your PC.
For wireless printers, check the wireless connection. Make sure the printer’s wireless option is turned on and available. Many printers have a button that displays a blue wireless icon when wireless is available.
Next, run the printer’s wireless connectivity test. Read the instructions that came with the printer or check the printer manufacturer’s website for instructions about how to do this.
If your printer’s status displays «Printer in error state,» there may be a problem with the printer itself. If the previous steps did not resolve the error, check the printer for low paper or ink, and be sure the cover isn’t open and the paper isn’t jammed.
Use a troubleshooter
A troubleshooter is an automated tool that can find and automatically fix some problems with your PC. The printing troubleshooter can fix problems with installing and connecting to a printer.
Update drivers
Most printers require driver software to work properly. If you recently upgraded from one version of Windows to another, it’s possible that the current printer driver is for the previous version of Windows. If you’ve had recent power outages, viruses, or other computer problems, it’s possible that the drivers have become damaged. Downloading and installing the latest driver for your printer can resolve these types of problems.
Three ways to find and install a driver:
-
Use Windows Update. Windows Update might have an updated version of your printer driver.
-
Install software from the printer manufacturer. If your printer came with a disc, that disc might contain software that installs a driver for the printer.
-
Download and install the driver yourself . You can search for a driver on the manufacturer’s website. Try this if Windows Update can’t find a driver for your printer, and the printer didn’t come with software that installs a driver.
Support for Windows 7 ended on January 14, 2020. Technical assistance and software updates from Windows Update that help protect your PC are no longer available for Windows 7. Microsoft strongly recommends that you move to Windows 11.
Click here to get more info and learn what it means for you.
Related topics
Find out how to install a printer in Windows.
Find out how to How to download and install the latest printer drivers.
Find out how to set up a default printer in Windows.
Find out how to view a printer queue in Windows.
If you are having a problem changing your printer «offline» status, go to Troubleshooting offline printer problems.
windows 10 printer not working? Having Different problems with the network Printer, cannot print documents after windows 10 update? Printer not showing in devices and printers or print job stuck in a queue, Print spooler not running or unable to connect to the printer. There is a various reason that may cause the problem such as incomputable printer driver, incorrect configuration, print spooler service stopped or print spooler file corrupted. And most probably reinstall the latest printer driver and Clearing the Print Spooler probably fixes the problem for you.
Contents
- 1 Windows 10 printer not working
- 1.1 Run printer troubleshooter
- 1.2 Clearing the Print Spooler
- 1.3 Update printer driver
- 1.4 Reinstall printer driver
- 1.5 Set Default Printer
- 1.6 Add Printer Again
- 1.7 Fix Network printer problems
Windows 10 printer not working
If you’re unable to print or connect to your printer in Windows 10
- Make sure that your printer is plugged into the power supply and turned on.
- Check the USB connection (for wired printers) or the wireless connection (for wireless printers).
Run printer troubleshooter
Run the build-in printer troubleshooter that automatically detects and fixes the problems that prevent the printer to function properly.
- Press Windows + I to open the settings app,
- Click Update & security, then troubleshoot,
- Here on the right-hand side select printer and click run the troubleshooter,
- This will scan and detect problems and try to fix them
- During the troubleshooting process, this will restart the print spooler service
- Automatically clear the corrupted print spooler files
- Also, detect if an outdated printer driver causing the problem
- Restart windows after complete the process and check the printer working properly.

Clearing the Print Spooler
If running the printer troubleshooter didn’t fix the problem, let’s manually Clear the Print Spooler which most probably fixes the problem for you. Follow the steps below to clear the print spooler on Windows 10, 8.1 and 7.
- Press Windows + R, type services.msc and ok
- This will open the windows service console, scroll down and look for print spooler
- Right-click on print spooler service select stop, and minimize the Windows service console
- Now press Windows + R, type %WINDIR%\system32\spool\printers and ok
- And delete Delete all the files of inside this folder

- Again go to the ‘Services’ console.
- Find the ‘Print Spooler’ service,
- right-click on it and choose ‘Start’.
This would fix if the printer stuck printing documents, printer is pending but not printing documents, or clear the print queue if a document is stuck
Update printer driver
If you’re still having problems, your printer may need a new driver.
- Press Windows + X and select Device Manager.
- Expand Printers, and find your printer in the list,
- right-click it, then select Update Driver.
- Click on the ‘Search automatically for updated driver software option.
- It will start looking for the latest drivers on the internet and ask you to install them.

Reinstall printer driver
If updating the driver software didn’t work, then try removing the driver completely and reinstalling them again.
- Press Windows + I to open settings,
- Then navigate to ‘Devices > Printers & Scanners’.
- Find your printer, click on it to expand options and click on the ‘Remove device’ button.
- Go to the ‘Start menu, type ‘Print Management’ and press ‘Enter’ key.
- Select all the printers, right-click on it and ‘Delete’ all of them.
- Restart your PC, plug back the printer’s cable and start installing the drivers again.

Also, you can visit the printer manufacturer’s website to download and install the latest available driver. Check if this helps to fix printer problems on windows 10. Here are some links to driver download pages for the most common makes of printer:
- Brother
- Canon
- Dell
- Epson
- Kyocera
- OKI
- Samsung
- Xerox
Note: Printer drivers tend to be .exe files. To install the driver, just download and run the file.
Set Default Printer
Sometimes Windows 10 could not manage the default printer when you have multiple printers connected or using network printers. And manually set a specific device as the default printer probably helps.
- Go to ‘Control Panel’ and change the view to large icons.
- Search for the ‘Devices and Printer option.
- Click on any of the connected printers and choose ‘Set as default printer option.

Add Printer Again
Sometimes, adding up the printer again can help in fixing the issue also.
- Press the ‘Windows key + I’ keys to open Windows Settings
- Navigate to the path ‘Devices > Printers & Scanners’.
- Click on the previously added printer and choose ‘Remove Device’.
- Unplug and then plug back the printer in the USB port.
- Click on ‘Add a printer or scanner’ and let it find your device again.
- Click on your device and add it.
- Check if this helps

Fix Network printer problems
If you are having a problem with network sharing printer
Check the firewall and Antivirus/network protection software. These programs might block the incoming connection to the shared printer.
Disable VPN if configured on your system.
Turn on network discovery
- Open Control Panel.
- Then click Network and Sharing Center,
- In the left pane, click Change advanced sharing settings.
- Click Turn on network discovery, and then click Save changes.
Did these solutions help to fix Different printer problems on windows 10? Let us know in the comments below, Also read:
- Step By Step Install and Configure Printer on Windows 10
- Solved: Print Spooler keeps stopping Not Running on Windows 10
- Windows 10 Stuck on Welcome Screen? Here 5 working solutions to get rid this
- Fix Windows Has Detected An IP Address Conflict In Windows 10
- How To fix Devices and Printers not Loading on Windows 10
When your printer is not working is an annoying problem especially if you have an important document to print. But don’t worry! If you’re experiencing printer issues in Windows 10/11 you’re not alone and in this guide you’ll find step by step instructions to fix it.
Why a Printer May Not Working in Windows 10/11?
The primary reason why a printer may not work is because it may not be receiving power or may not be connected to the computer properly. For example: if the printer’s power cord is not properly connected to both the printer and the power outlet, or if the cable connecting the printer to the computer is damaged, this can cause the printer to not work or not communicate with the computer.
The second reason for a printer not working in Windows 10/11 is printer’s driver. Printer drivers are the programs that communicate with the computer, allowing it to recognize and use the printer correctly. When these drivers become out of date or damaged, the system may not be able to communicate properly with the printer, resulting in a wide range of printing issues.
How to FIX: Printing Not Working issue on Windows 10/11.
Before you you continue to the below methods to fix your printing problem, perform first these simple steps:
1. Check first to see if the printer is ON and doesn’t display any error. (e.g. Paper Jam, Out of Paper, etc.).
2. Turn Off the Printer and disconnect the power cord and the cable that connects it to your PC or to the network (e.g. the USB or the LAN cable).
3. Restart your computer.
4. Then, reconnect the printer’s power cable and the cable that connects the printer with your PC (USB or LAN).
5. Turn On the printer and try to print a test page.
6a. If the printer is not printing again right-click on your printer and select See what’s printing.

6b. Select the pending document to print and from the Document menu choose Cancel.

7. Then go, to Start ![]() > Settings > Update & Security.
> Settings > Update & Security.
8. Click Check for updates and then if any updates found proceed to install them, restart your PC and try to print again. If your system is fully updated or you cannot print again, proceed to the methods below.

Method 1. Fix Printer Not Working with Printer Troubleshooter.
To help users with printer problems, Microsoft has integrated the «printer troubleshooter» tool into the Windows system. To try to solve the «Printer is not working» problem using the printer troubleshooter, follow these steps:
1. Press the Windows ![]() + I to launch Settings and then select Update & Security.
+ I to launch Settings and then select Update & Security.

2. Select Troubleshoot from the left pane and at the right select Additional troubleshooters.

3. Click on the Printer and hit the Run the troubleshooter button.

4. Allow the tool to detect the printer problem and if a fix found, click Apply this fix.

5. Once completed, check if the printer now works.
Method 2: Reset Print Spooler (Clear Printer Queue).
If you have a lot of print jobs waiting in the queue, it may be causing the «printing not working» problem. In this case, proceed to remove the print jobs in the queue and restart the «Printer Spooler» service.
1a. Press Windows + R keys to open the Run widget.
1b. Type: services.msc and press Enter.

2. At the right pane, right click on Print Spooler service and click Stop. Then, without closing the ‘Services’ window and continue to next step.

3a. Simultaneously press the Windows ![]() + R keys to open run command box.
+ R keys to open run command box.
3b. In Run command box, type the following command and click OK:
- %systemroot%\System32\Spool\Printers

4. Press CTRL + A to select all the files inside the «Printers» folder and press the Delete button to delete all of them.

5. Now go back to Services window, right-click at Print Spooler service and click Start.

2. Finally close all windows and try to print.
Method 3: FIX Printing Problems by Reinstalling the Printer.
One of the most effective ways to resolve printing issues, is to uninstall the printer driver and other printer’s related software and to reinstall them. This method often solves printing problems, especially if the printer’s driver is damaged.
1a. Press Windows ![]() + R keys to load the Run dialog box.
+ R keys to load the Run dialog box.
1b. Type devmgmt.msc and press Enter to open the device manager.

2a. in the Device Manager window, expand Printers.
2b. Right-click on the Printer and select select Uninstall device. (At warning prompt, select Uninstall to proceed.)

2c. When done, close Device Manager.
3a. Press Windows ![]() + R keys to load the Run dialog box.
+ R keys to load the Run dialog box.
3b. Type appwiz.cpl in the search box and press Enter.
![clip_image011[1]](https://www.wintips.org/wp-content/uploads/2021/11/clip_image0111_thumb-1.png "clip_image011[1]")
4. Check if there is any printer software installed and if so Uninstall it.

3. Once completed, turn off the printer and reboot the PC.
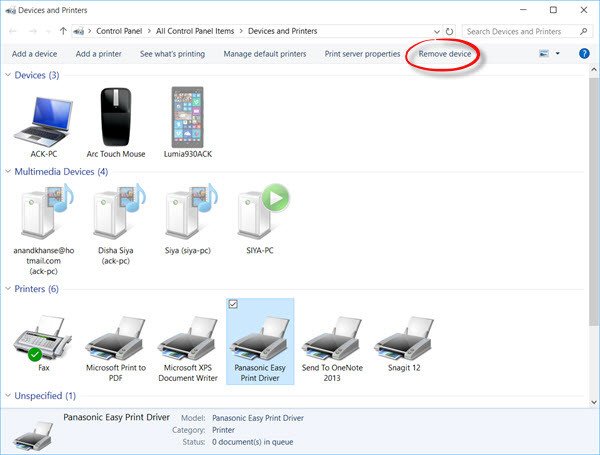
4. After restarting, go to Control Panel > Devices and Printers.
5. Select the Microsoft Print to PDF (or any other installed printer), and open Print server properties.

6. Under Installed printer drivers, ensure that your printer’s driver is not listed. If listed, select it and click the Remove button to remove it. Then reboot your PC again.

7. When finished, turn on the printer and wait 4-5 minutes for Windows to install the printer drivers.
8. Then, go to Control Panel > Devices and Printers and see if the printer is listed as a device. Then according the result, proceed as follows:
-
If the printer is listed, right-click on it, open the Printer Properties and Print a Test Page, to see if the problem is solved.
-
If you don’t see the printer, navigate to printer’s manufacturer support site and download and install the latest driver and software for the printer.
If none of the above methods resolve the printing issue, it could be a hardware problem with the printer. In this case, you may need to contact the printer’s manufacturer for further support, or to replace your printer.
That’s it! Which method worked for you?
Let me know if this guide has helped you by leaving your comment about your experience. Please like and share this guide to help others.
Download Windows Speedup Tool to fix errors and make PC run faster
The variety of problems some users who upgraded to Windows 11/10, is truly astounding. While the upgrade went smoothly for me on all my devices, several users have been facing a plethora of Windows 10 problems. While Microsoft has been quick to release several automated solutions to fix Windows issues, the frustration among some who still face issues is understandable. There is one set of users who are facing Printer problems after upgrading from Windows 8.1 or Windows 7 to Windows 11/10. Some are reporting that the Printer is not being detected or recognized, the Printer is disconnecting, the Printer cannot scan or print, the Printer or Scan is busy or in use and the Printer is offline kind of messages.
Microsoft has updated and released its Printer Troubleshooter to specifically fix issues being faced by users in Windows 11/10.
UPDATE: Microsoft has deprecated the MSDT-based Windows Troubleshooters. You have to use the new Get Help based Printer Troubleshooter.
This Printer troubleshooter will check if:
- You have the latest Printer drivers, and fix and or update them
- If you have connectivity issues
- If the Print Spooler and required Services are running fine
- Any other Printer related issues.
Read: How to reset Printer to default factory settings.
What this Troubleshooter fixes:
- You are unable to install a printer, connect to a printer, or print more than one job at a time
- You receive an error indicating your Print Spooler service is experiencing problems
- You receive an error indicating your <PRINTERNAME> is not the default printer
- You receive an error indicating: <PRINTERNAME> cannot be contacted over the network
- Identify if your printer is turned off
- Identify if your printer toner is low or empty causing your print job to appear faint or it does not print at all
- Identify if your printer paper is low or empty
- Identify if the printer has a paper jam which is preventing it from operating normally
- Identify if a print job that is in the print queue is preventing other print jobs from printing
- Identify if you need to update your print driver
- You receive an error stating that your Plug and Play printer %PRINTERNAME% has encountered a driver problem
To bring up the built-in Printer Troubleshooter, open Run box, type the following and hit Enter:
msdt.exe /id PrinterDiagnostic
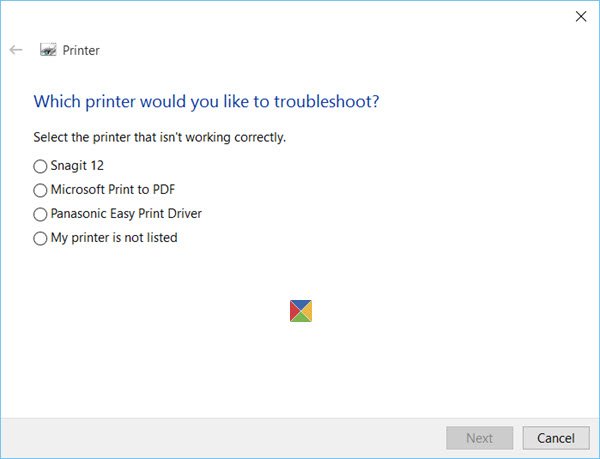
Once you have opened the Troubleshooter from Microsoft, connect your Printer and run it. Next, select the Printer and move forward. Once the run is completed and problems detected, it will offer to fix the problems for you.
Read: Printer not printing in color on Windows.
Cannot print in Windows 11/10
If this does not help and you still face Printer problems and issues, your printer may need a new driver. To do this, open Start, enter Devices and Printers and select it.
Select your Printer. Then select Remove device from the top of the window.
Now if Windows doesn’t automatically find a new driver, search on the device manufacturer’s website and follow their download and installation instructions.
Tip: The Touch Keyboard Troubleshooter from Microsoft will help you fix problems with the Touch keyboard.
Other posts that will help you fix printer-related issues:
- Change Printer status from Offline to Online
- Default Printer keeps changing
- How to Repair Print Spooler
- Printer will not print or User Intervention is required.
- Error 0x803C010B while troubleshooting Printers
- Print command opens Send to OneNote, Save As, Send Fax, etc, dialogue boxes
- Windows does not allow you to print more than 15 files
- Cancel a jammed or stuck Print Job queue.
Anand Khanse is the Admin of TheWindowsClub.com, a 10-year Microsoft MVP (2006-16) & a Windows Insider MVP (2016-2022). Please read the entire post & the comments first, create a System Restore Point before making any changes to your system & be careful about any 3rd-party offers while installing freeware.
If you have issues with your printer or printing service make sure that you get the latest fixes for your Windows 10 version.
Version 1909/1903 or Version 2004. Find out your version here
Or try the HP Print and Scan Doctor to fix your printer issues
Fix printer problems caused by a Windows 10 update or upgrade
Are you unable to print or scan after a Windows 10 update or upgrade?
If so, make sure you have restarted Windows at least once. To Restart, click the lower left Start button, click and select Restart.
If problems persist, then make sure your printer is compatible with Windows 10.
- HP Printer compatibility issues with Windows 10
If your printer is compatible with Windows 10, download and run the Print and Scan Doctor to detect and fix isses.
If problems persist, reinstall the latest HP printing software.
- Download and Install the latest HP printer software and driver.
Depending on the type of HP printer software you are using, refer to one of these two support documents if it stopped working:
- HP Solution Center stopped working (For printers manufactured before 2010)
- HP Printer Assistant stopped working (For printers manufactured after 2009)
If you are still facing issues and none of the solutions are working, try using System Restore. To do a system restore, follow Recovery options in Windows 10. Find the options here>
HP Printer compatibility issues with Windows 10
Some HP printers might not be compatible with Windows 10 and will experience issues if they are used on a Windows 10 system. To see if your printer is supported and find the correct software drivers, read one of the following support documents that matches your version of Windows 10.
Note: To find out your Windows PC version, press Windows logo key + R, type winver, then select OK.
Download and Install the latest HP Printer software and driver
To enable all the features your printer supports and to set up network and computer connections, install the recommended HP print driver and software on your computer.
HP Solution Center stopped working (For printers manufactured before 2010)
Are you experiencing the following issues with HP Solution Center after upgrading to Windows 10?
- HP Solution Center stopped working. It is missing or fails to open correctly
- HP Solution Center cannot run’ or ‘Scan is busy or in use’ error with a network connected printer
Review the troubleshooting steps from this document to help resolve these issues HP Printers — HP Solution Center Software Frequently Asked Questions (FAQs)
HP Printer Assistant stopped working (For printers manufactured after 2009)
After you upgrade to Windows 10, the Printer Setup & Software window opens instead of the settings and tools view when you open HP Printer Assistant, and the printer icon is missing from the Devices and Printers folder. The issue might occur even though your printer was set up and installed before the Windows upgrade.
Review the following document to learn how to troubleshoot when the HP Printer Assistant does not open correctly. HP Printers — HP Printer Assistant Prompts to Connect a New Printer
Wireless Network Printer Set up
USB Printer Set up
Set up your HP printer for a USB cable connection to a Windows computer. To get the most supported features from a USB connected printer, install the full feature HP driver. View the document below to guide you through the steps.
Additional setup, install and uninstall information
Printer Offline
Visit the following link to fix Printer Offline issue using HP Print and Scan Doctor Diagnostic Utility
- Resolving Printer Offline problem using the HP Print and Scan Doctor
Printer Not Found during Network driver setup in Windows
Are you experiencing one of the following errors while installing the printer?
- Printer not found
- Unable to find the printer
- No devices found
- Your printer could not be found on your wireless network
To troubleshoot issues that can cause network printer setup problems use the steps in the following document: HP Printers — Printer Not Found During Network Driver Setup (Windows)
Scanner Connection Errors
When you try to scan, the computer or the scanner is not found or the scan fails. One of the following communication or connection errors displays and the scan fails:
- An error occurred communicating with the scanning device
- An error occurred while communicating with the HP imaging device
- Computer not found
- No Computer Detected
- Scan to computer is currently unavailable
- Scan to computer no longer activated
- Scan Unsuccessful
- Scanner not found
- Scanner Unreachable
- The scanner could not be initialized