The Windows Command Prompt tool, and many of its commands, might seem boring or even relatively useless at first glance, but as anyone who has ever used the Command Prompt very often can tell you, there’s much to love!
These tricks will get you excited about many of the mundane-sounding Command Prompt commands like telnet, tree, or robocopy—okay, robocopy sounds pretty cool.
Some of these Command Prompt tricks are special features or fun uses for the Command Prompt itself, while others are just neat or relatively unknown things you can do with certain CMD commands.
Use Ctrl+C to Abort a Command
Just about any command can be stopped in its tracks with the abort command: Ctrl+C.
If you haven’t actually executed a command, you can just backspace and erase what you’ve typed, but if you’ve already executed it, then you can do a Ctrl+C to stop it.
It isn’t a magic wand, and it can’t undo things that aren’t undoable, like a partially complete format command.
However, for things like the dir command that seem to go on forever or questions you’re asked at the prompt that you don’t know the answer to, the abort command is an excellent Command Prompt trick to know.
View a Command’s Results One Page (or Line) at a Time
Ever run a command, like the dir command, that produces so much information on the screen that it’s almost useless?
One way to manage this info dump is to execute the command in a special way so whatever information is generated is shown to you one page, or one line, at a time.
Just type the command, and then follow it with the pipe character and then the more command.
For example, executing the below command will generate the thousands of lines of results that you expect from the dir command, but the more command will pause each page of results with — More — at the bottom of the page, indicating that the command is not done running.
dir /s | more
Just press the spacebar to advance by page, or press Enter to advance one line at a time.
Run Command Prompt as an Administrator Automatically
Many commands require that you open an elevated Command Prompt in Windows—in other words, execute them from a Command Prompt that’s run as an administrator.
You can always right-click any Command Prompt shortcut and choose Run as administrator, but creating a shortcut to do the same thing can be a huge time saver if you’re a frequent Command Prompt power user.
To complete this trick, just create a Command Prompt shortcut on the desktop, enter the shortcut’s properties and then select the Run as administrator box, located in the Advanced button on the Shortcut tab.
If you use Command Prompt via Terminal (you do by default if you’re on Windows 11), setting up admin access is even easier: Open Terminal’s settings to the Defaults page, and enable Run this profile as Administrator.
Become a Command Prompt Power User With Function Keys
The fact that the function keys actually do something in the Command Prompt is maybe one of the best kept secrets about the tool:
- F1: Pastes the last executed command (character by character)
- F2: Pastes the last executed command (up to the entered character)
- F3: Pastes the last executed command
- F4: Deletes current prompt text up to the entered character
- F5: Pastes recently executed commands (does not cycle)
- F6: Pastes ^Z to the prompt
- F7: Displays a selectable list of previously executed commands
- F8: Pastes recently executed commands (cycles)
- F9: Asks for the number of the command from the F7 list to paste
Change the Prompt Text
Did you know the prompt itself is completely customizable thanks to the prompt command? It is, and when we say customizable, we mean really customizable.
Instead of C:\>, you can set the prompt to any text you want, have it include the time, the current drive, the Windows version number (like in this example image), you name it.
One useful example is prompt $m$p$g, which will show the full path of a mapped drive, alongside the drive letter.
You can always execute prompt alone, without options, to return it to its sometimes boring default.
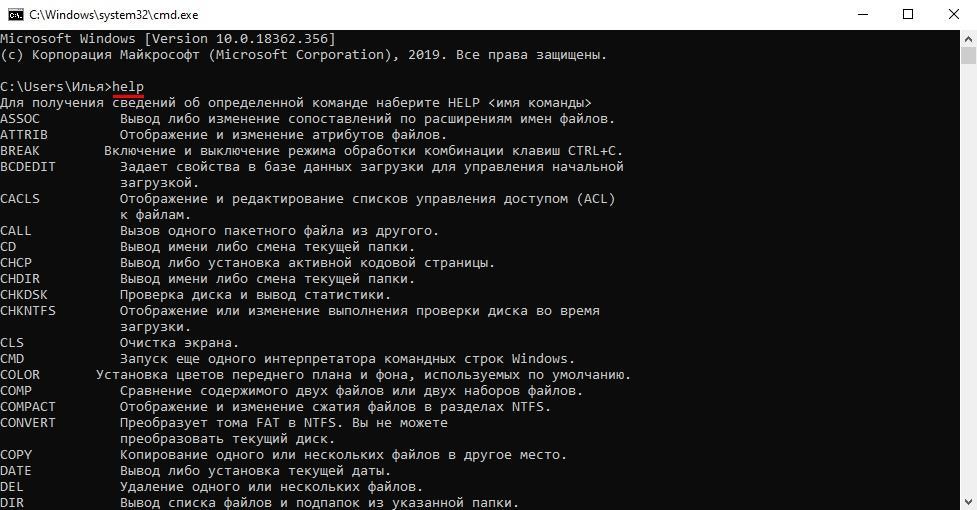
Get Help for Any Command
The help command does not provide help for every Command Prompt command.
However, any command can be suffixed with the /? option, usually called the help switch in Command Prompt, to display detailed information about the command’s syntax and often times even some examples.
The help switch may not be the coolest Command Prompt trick you’ve ever heard of, but it’s hard to disagree that it’s one of the more useful.
Neither the help command nor the help switch offers much in the way of explaining how to interpret the syntax.
How to Read Command Syntax
Save a Command’s Output to a File
An incredibly useful Command Prompt trick is the use of redirection operators, specifically the > and >> operators.
These little characters let you redirect the output of a command to a text file, giving you a saved version of whatever data the command produced in the Command Prompt window.
For example, let’s say you’re about to post a computer problem to an online forum, and you want to provide really accurate information about your computer. An easy way to do that would be to use the systeminfo command with a redirection operator.
For example, you might execute the below command to save the information provided by the systeminfo command to that file. You could then attach the file to your forum post.
systeminfo > c:\mycomputerinfo.txt
Terminal users have it even easier. Just right-click the Command Prompt tab and choose Export Text.
How to Redirect Command Output to a File
View a Drive’s Entire Directory Structure
One of the neatest little commands is the tree command. With tree, you can create a kind of map of the directories on any of your computer’s drives.
Execute tree from any directory to see the folder structure under that directory.
With so much information created with this command, it’s probably a good idea to export the results to a file so you can actually look through it.
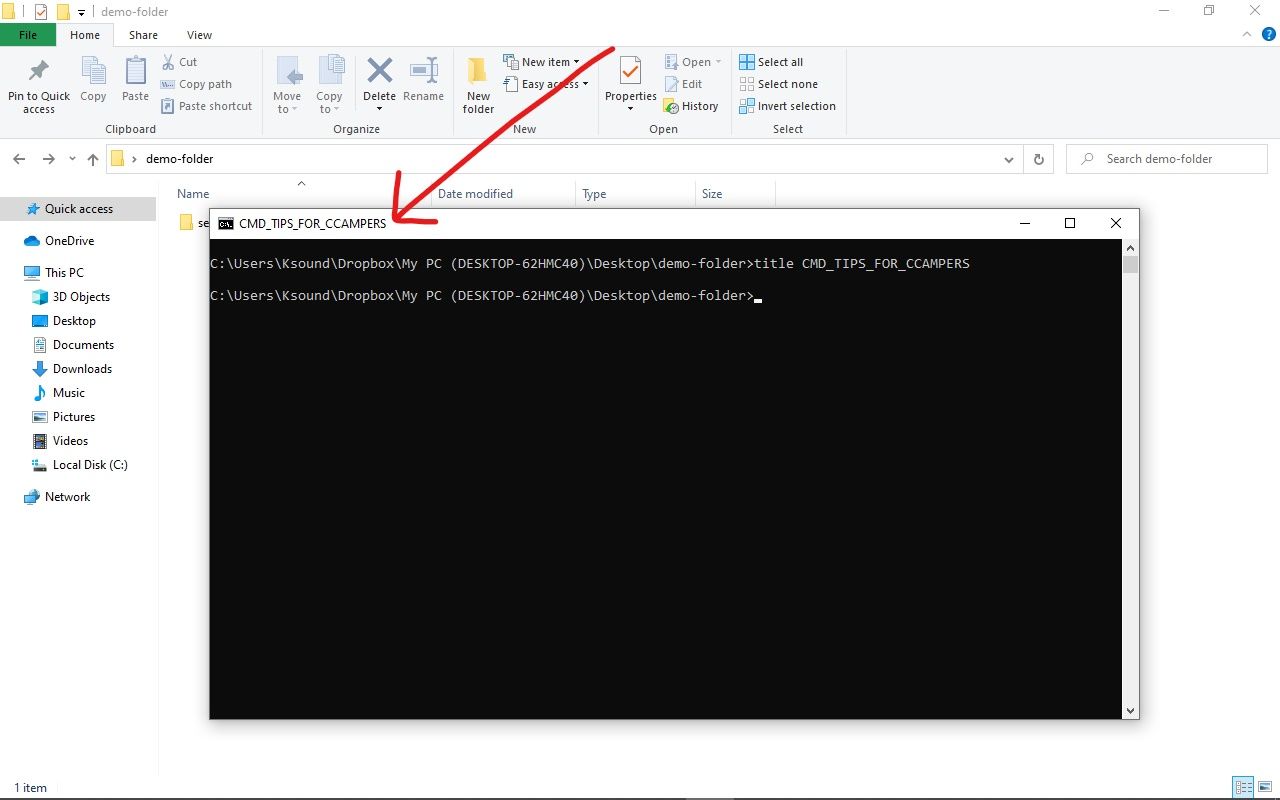
Customize the Command Prompt Title Bar Text
Tired of that «Command Prompt» title bar text? No problem, just use the title command to change it to say whatever you like.
For example, let’s say your name is Maria Smith, and you want to express your ownership of the Command Prompt. Execute this and the title bar will change immediately:
title Property of Maria Smith
The change won’t stick, so the next time you open Command Prompt, the title bar will be back to normal.
The title command is usually used to help give a custom appearance in script files and batch files—not that titling it with your name isn’t a good idea!
Copy Text From the Command Prompt
Copying lots of text from the Command Prompt isn’t as easy as copying from other programs, which is part of the reason why saving a command’s output to a file, which you learned about a few tricks back, is so handy.
However, what if you do just want to copy a short section of text to the clipboard? It’s not too hard, but it’s not very intuitive either:
- Right-click anywhere in the Command Prompt window and choose Mark.
- Highlight with your left mouse button whatever you’d like to copy.
- Press Enter or right-click once.
That’s the menu-based method, but surprisingly, you can also use the regular Ctrl+C shortcut, too.
If you chose Mark but then decided you don’t want to copy anything, right-click again to cancel the Mark action, or press the Esc key.
Now you can paste that information anywhere, just like you paste other text.
If QuickEdit Mode is turned on (or you’re in Terminal), right-clicking won’t show a menu. This is actually another tip in this list! See step 20 for the details.
Open the Command Prompt From Any Location
If you’ve ever worked in the Command Prompt for very long, you know that it can be really frustrating executing the cd/chdir command over and over again to get to the right directory.
In Windows, open the folder you’d like to start working from. When you’re there, hold down Shift while you right-click anywhere in the folder.
After the menu pops up, you’ll notice an entry that’s not usually there: Open in Terminal (Windows 11) or Open command window here. Select that, and you’ll start a new instance of the command line, ready and waiting at the right location.
If you’re a Command Prompt power user, you’ll immediately recognize the value in this little trick.
Drag and Drop For Easy Path Name Entry
Most Command Prompt commands require you to specify full paths to files or folders, but typing out a long path can be frustrating, especially when you miss a character and have to start over.
For example, in Windows 11 and 10, this is the path to the Accessories group in the Start Menu:
C:\ProgramData\Microsoft\Windows\Start Menu\Programs\Accessories
Who wants to type that all in manually? We don’t.
Just open the folder in Explorer. Once there, drag the folder or file to the Command Prompt window and let go. Like magic, the full path is inserted, saving you a considerable amount of typing depending on the length and complexity of the path name.
This technique doesn’t work in an elevated Command Prompt.
Shut Down or Restart Another Computer
System administrators in a business environment do this all the time for lots of reasons, but you can also shut down or restart another computer on your network, all from your computer’s Command Prompt.
The easiest way to shut down a computer remotely is to execute shutdown /i from the Command Prompt to open the Remote Shutdown Dialog, shown above.
Just enter the name of the remote computer (which you can get by running the hostname command on the other PC), choose what you want to do (restart or shutdown), select some other options, and then select OK.
So whether you’re brushing up on your command skills or just scaring a family member, this Command Prompt trick is a fun one.
You can also shut down or restart another computer strictly from the Command Prompt with the shutdown command, without using the Remote Shutdown Dialog.
Use Robocopy as a Backup Solution
Thanks to the robocopy command, you don’t need to use Window’s backup software or install a free backup software tool.
Just execute the following, obviously replacing the source and destination folders with whatever you’d like to back up and where it should go.
robocopy c:\users\ellen\documents f:\mybackup\documents /copyall /e /r:0 /dcopy:t /mir
The robocopy command with these options functions identically to an incremental backup software tool, keeping both locations in sync.
You don’t have this command if you’re using Windows XP or earlier. However, you do have the xcopy command, which can be used to do something very similar:
xcopy c:\users\ellen\documents f:\mybackup\documents /c /d /e /h /i /k /q /r /s /x /y
No matter which command you choose to use, just create a batch file containing the command and schedule it to run in Task Scheduler, and you’ll have your own custom-made backup solution.
View Your Computer’s Important Network Information
Maybe just for your own information, but certainly when you’re troubleshooting a network or internet problem, you’ll probably at some point need to know details about your computer’s network connection.
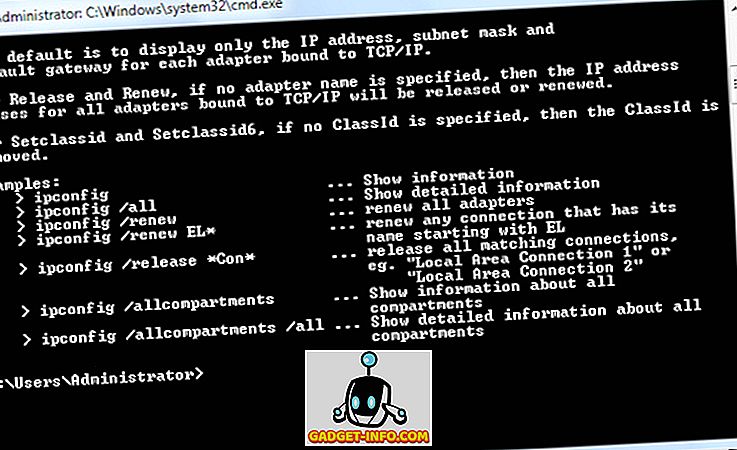
Everything you’d want to know about your network connection is available somewhere in the Control Panel in Windows, but it’s much easier to find, and much better organized, in the results from the ipconfig command.
Execute this command in Command Prompt:
ipconfig /all
What displays on-screen next is everything important about your network connection: your IP address, hostname, DHCP server, DNS information, and much, much more.
How to Find Your IP Address in Windows
Map a Local Folder Just Like a Network Drive
The net use command is used to assign shared drives on a network to your own computer as a drive letter, but did you know there’s another command that can be used to do the same thing to any folder on any of your local hard drives?
There is, and it’s called the subst command. Just execute the command followed by the path of the folder you wish to appear as a drive.
For example, let’s say you want your C:\Windows\Fonts folder to appear as the Q: drive. Just execute this command and you’re set:
subst q: c:\windows\fonts
This Command Prompt trick makes accessing a particular location from the Command Prompt much easier and the folder will appear as a drive next to all your real hard drives.
An easy way to delete the «network drive» example here is with the subst /d q: command. Just replace q: with your own drive letter.
Access Previously Used Commands With the Arrow Keys
Marcus Urbenz / Unsplash
Another great Command Prompt trick uses the keyboard arrow keys to cycle through previously executed commands.
The up and down arrow keys cycle through the commands you’ve entered, and the right arrow automatically enters, character by character, the last command you executed.
This might not sound that interesting, but there are several situations where the arrow keys become huge time savers.
Consider this example: You’ve typed out 75 characters of a command and then try to execute it, only to find that you forgot to add an option at the very end. No problem, just press the up arrow and the entire command is automatically entered in the Command Prompt window, ready for you to edit to make it work.
Automatically Complete Commands With Tab Completion
Tab completion is another Command Prompt trick that can save you lots of time, especially if your command has a file or folder name in it that you’re not completely sure of.
To use tab completion, enter the command and then the portion of the path that you do know, if at all. Then press the Tab key over and over to cycle through all the available possibilities.
For example, let’s say you want to change directories to some folder in the Windows directory, but you’re not sure what it’s named. Type cd c:\windows\ and then press Tab until you see the folder you’re looking for.
The results cycle in order, or you can use Shift+Tab to step through the results in reverse.
You know how your smartphone’s texting app automatically guesses what it is you want to type next? Tab completion in Command Prompt is sort of like that—only better.
Find a Website’s IP Address
Want to find the IP address of any website? Use the nslookup command or the ping command, but the former is probably faster.
First, let’s use the nslookup command to find the IP address of lifewire.com.
Just execute nslookup lifewire.com and view the result. Don’t confuse any private IP addresses that also show up in the nslookup results alongside the public IP address of lifewire.com, which is what IP address we’re after.
Now let’s try using the ping command to find it.
Execute ping lifewire.com and then look at the IP address between the brackets in the first line shown. Don’t worry if the ping command «times out» during execution; all we needed here was the IP address.
You can use the same procedure with any website or any hostname on your local network.
What the NSLOOKUP Tool Can Tell You About Internet Domains
Copy and Paste Easier With QuickEdit Mode
A number of these Command Prompt tricks have dealt with making copying and pasting easier. So, how about an even easier way to copy from the Command Prompt (and a secret way to easily paste)?
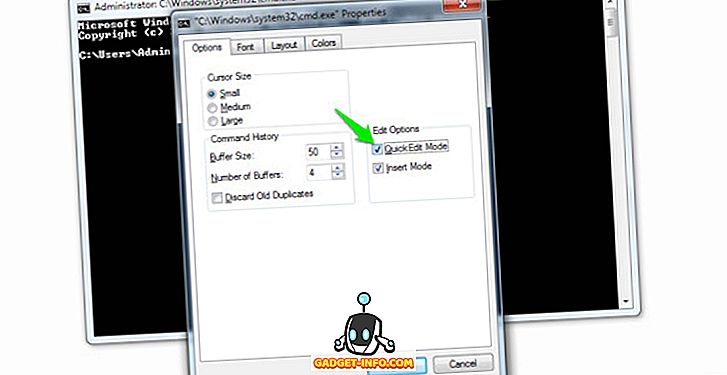
Just right-click on the Command Prompt title bar and select Properties. On the Options tab, in the Edit Options section, check the QuickEdit Mode box and then select OK.
Enabling QuickEdit Mode is like having Mark enabled all the time, so selecting text to copy is really easy.
As a bonus, this also enables a simple way to paste into the Command Prompt: just right click once and whatever you have in the clipboard is pasted in the Command Prompt window. Normally, pasting involves right-clicking and selecting Paste, so this is still a bit different than you’re used to.
Using Command Prompt through Terminal? Just select text like you would anywhere else, and press Enter or right-click to copy it. No need to turn on QuickEdit Mode.
Watch Star Wars Episode IV
Yes, you read that correctly, you can watch an ASCII version of the full Star Wars Episode IV movie right in the Command Prompt window!
Just open Command Prompt and execute this:
telnet towel.blinkenlights.nl
The movie will start immediately. Check out the tip below if this doesn’t work.
True, this isn’t a terribly productive use of the Command Prompt, nor is it really a trick of the Command Prompt or any command, but it sure is fun! We can’t imagine the work that went into this homage to the sci-fi masterpiece.

Windows 10 has an incredible Graphics User Interface (GUI) that will often be enough for you to get things done.
But if your inner Oliver Twist wants more, then you should start learning about the Command Line.
With the command prompt, you get access to features that are not available in the GUI and you get to interact directly with your Windows 10 operating system.
In this article, I’m going to show you 14 command line tips and tricks that’ll help you feel like a superhero while using your computer and that will surely impress your friends as well.
Be aware that you should be very careful while executing commands in the command prompt because any command you execute might have a lasting effect on your computer.
Make sure you read until the end because I’m going to show you how to see the password of every Wi-Fi that has ever been connected to your computer.
Table of Contents
- How to Open the Command Prompt in any Folder
- How to Create a Secure Folder with the Command Prompt
- How to Run the Command Prompt as an Administrator
- How to Encrypt Files with the Command Prompt
- How to Hide a Folder with the Command Prompt
- How to Change the Background Color and Font Color of the Command Prompt
- How to Change the Title of the Command Prompt Window
- How to Change the Prompt Text of the Command Prompt
- How to Change the Font Size of the Command Prompt Texts
- How to Generate Battery Health Report with the Command Prompt
- How to Log on to a Website from the Command Prompt
- How to Check the IP Address of a Website with the Command Prompt
- How to Show All Wi-Fi Passwords with the Command Prompt
- How to Shut Down Your Computer With the Command Prompt
1. How to Open the Command Prompt in any Folder
Not everyone wants the hassle of navigating around folders in the command line.
If you are one of those people like I am, you can open the folder directly in the command prompt by typing “cmd” in the folder address bar and then hitting ENTER
There you go!
2. How to Create a Secure Folder with the Command Prompt
For privacy reasons, you might want to create a folder that cannot be edited, moved, copied, or deleted by any random person that gets access to your computer.
To do this, navigate to the directory where you want to create this folder or open the command prompt directly in it with the first tip in this article. Then execute the command – md aux\.
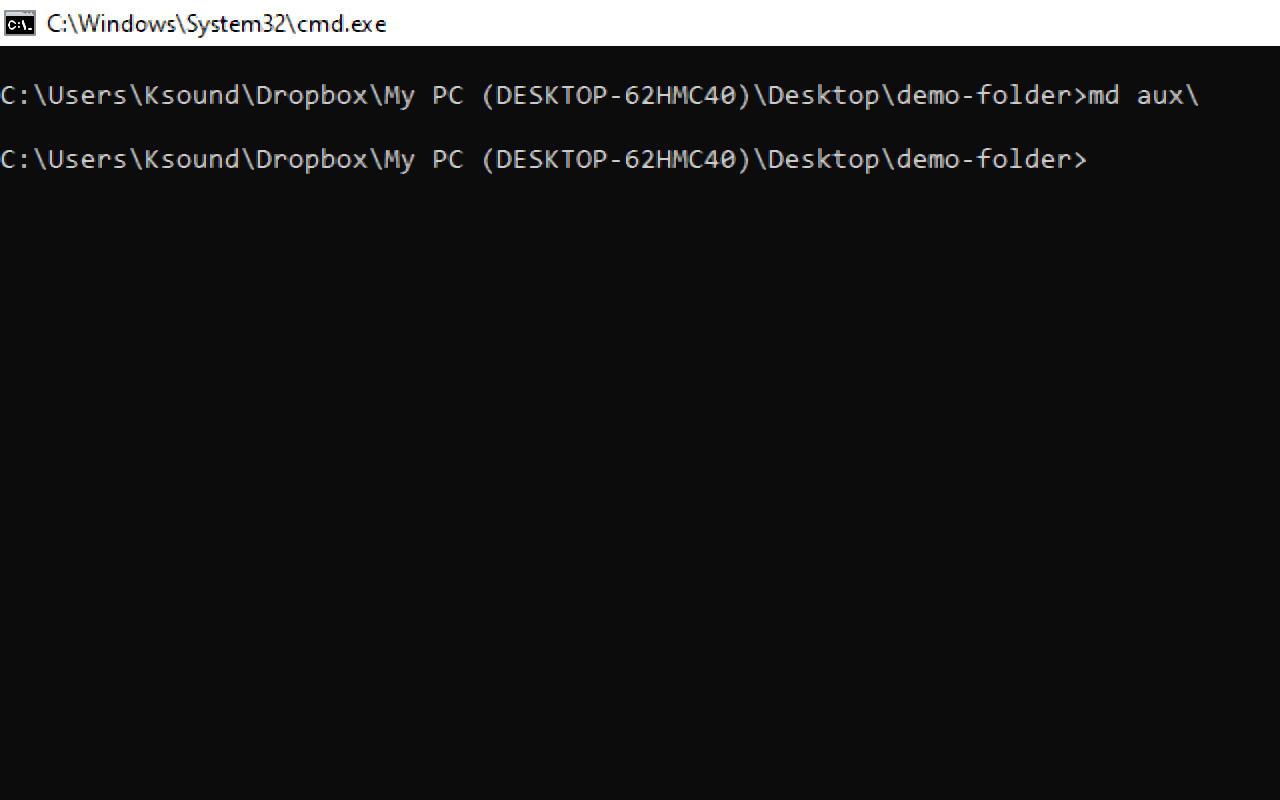
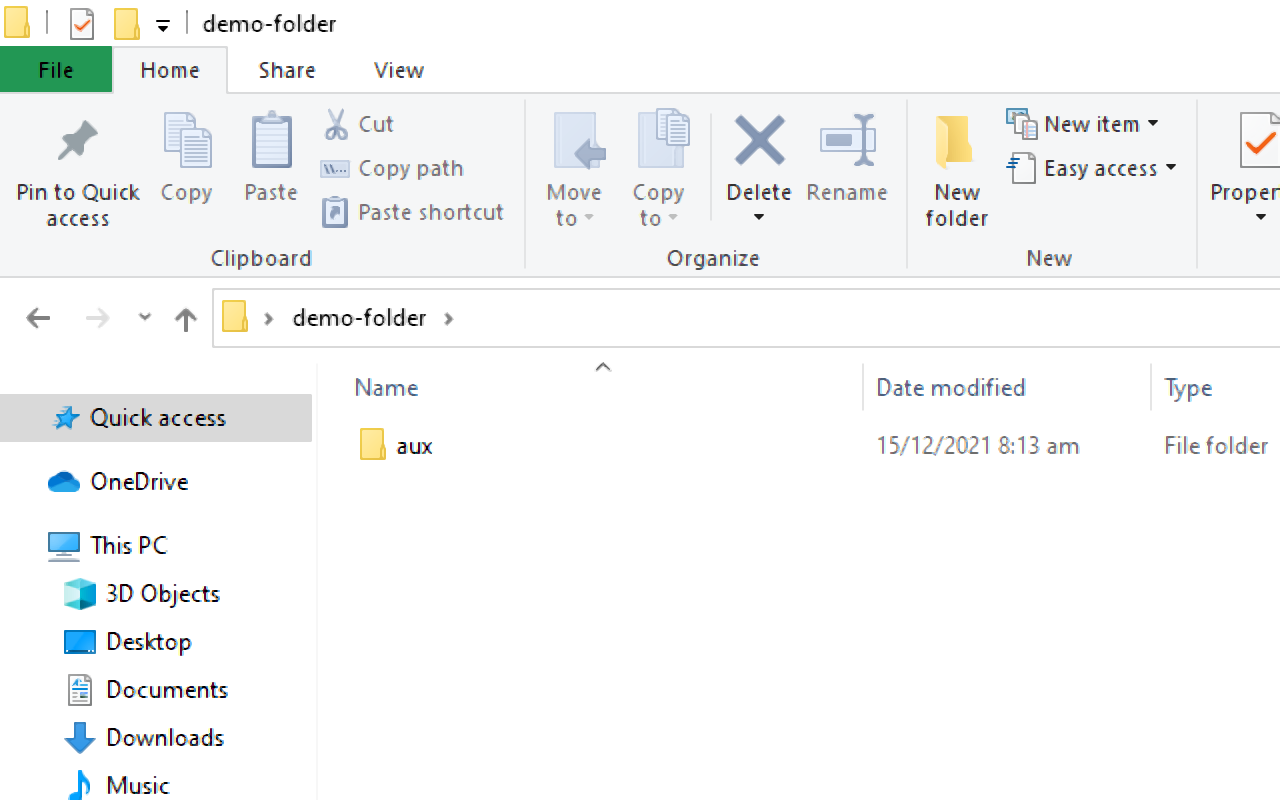
This will create a folder named “aux”. It cannot be deleted, edited, moved, or copied.
If you check and you can’t find the folder, refresh the directory in which you created the folder.
So, what if you want to delete this folder? You can’t do that with the GUI, so you need to do it in the command line. Execute the command –rd aux\ – to delete the folder. Make sure the files in the folder are backed up.
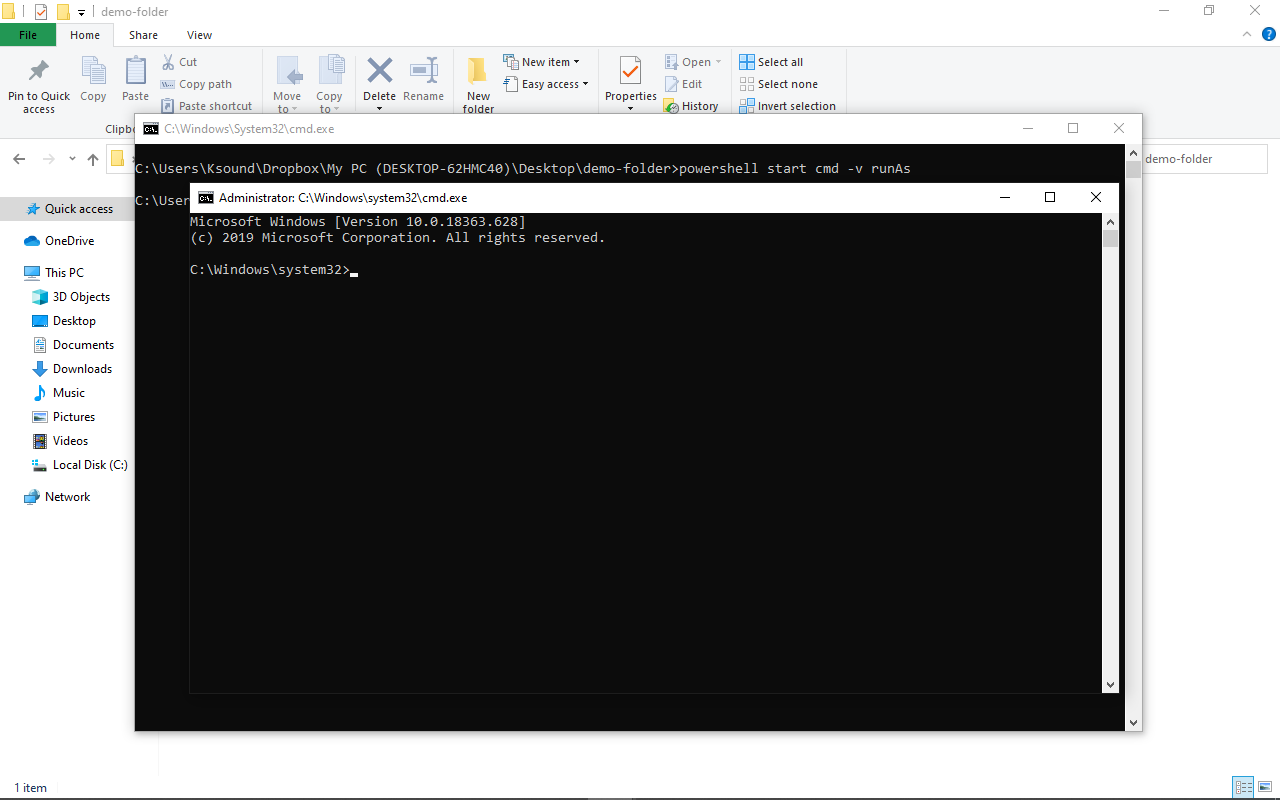
3. How to Run the Command Prompt as an Administrator
Sometimes, you might need administrative privileges when you don’t have access to the GUI.
To get these, type in powershell "start cmd -v runAs and hit ENTER. Select Yes in the next prompt and it’ll open a new window of the command prompt with administrative privileges.
4. How to Encrypt Files with the Command Prompt
If you’re not the only one who uses your Windows 10 computer and you want your files inaccessible to other users, you can encrypt the files by navigating to the folder where the files are located and typing in Cipher /E.
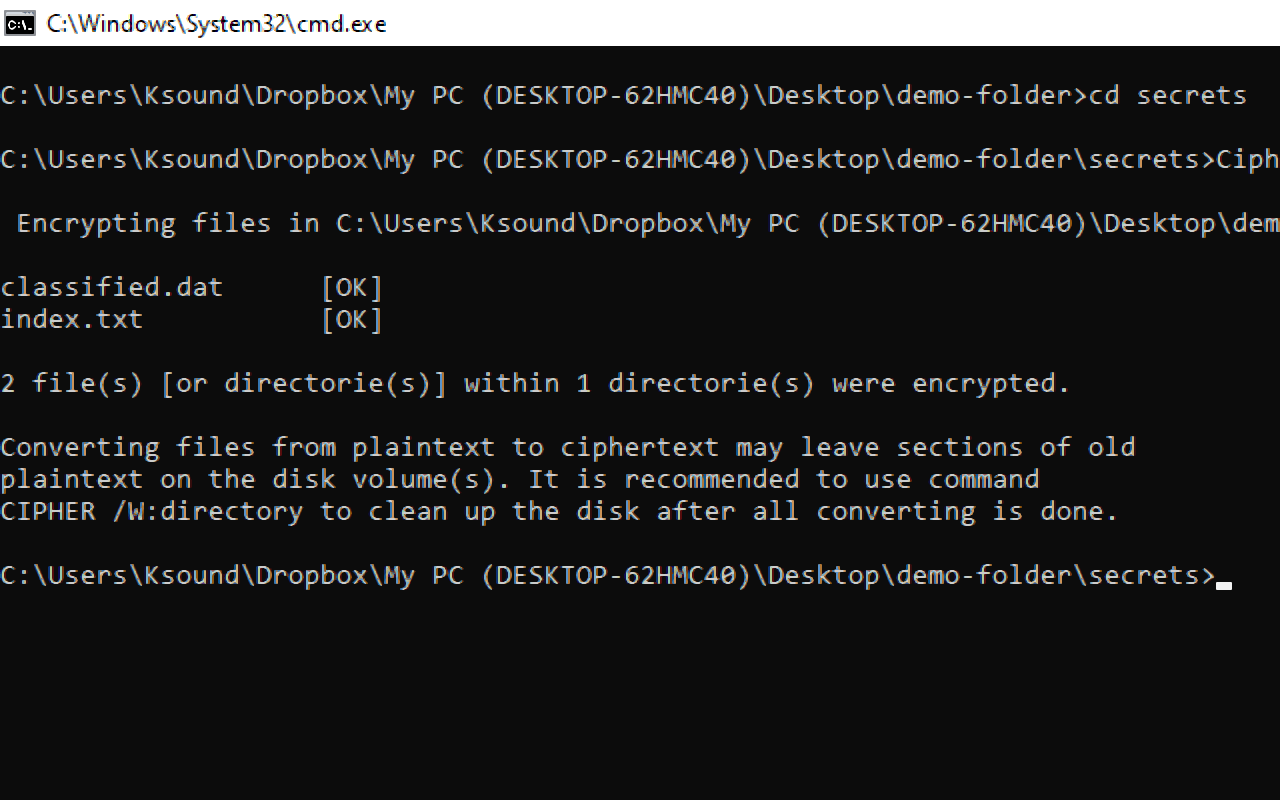
Any other user apart from you will be unable to open the files.
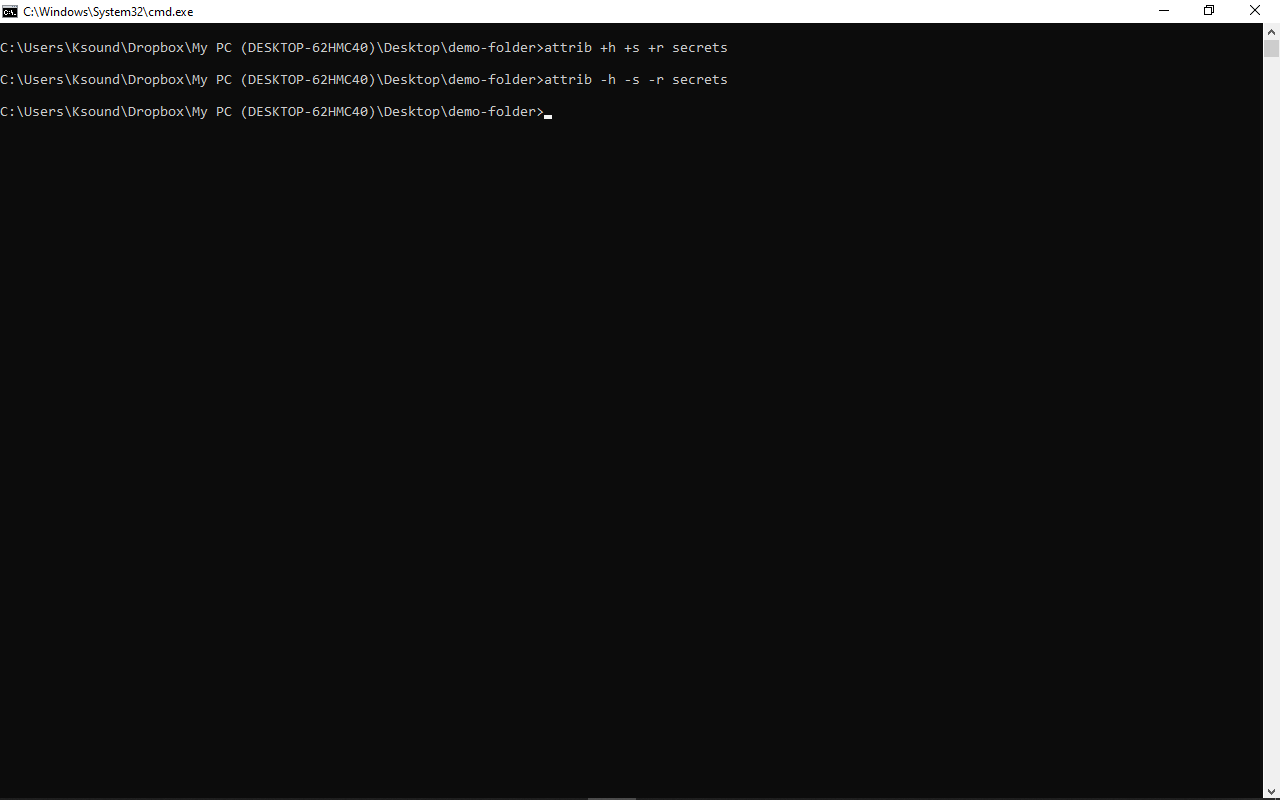
5. How to Hide a Folder with the Command Prompt
So, what if you want to hide a folder? You can do that by typing in attrib +h +s +r folder_name and then hitting ENTER.
To show the folder again, execute the command – attrib -h -s -r folder_name.
6. How to Change the Background Color and Font Color of the Command Prompt
If the old-school black and white colors of the command line look boring to you, you can change them to your desired color scheme.
To do this, launch the command prompt and run color -help. This will show you available colors represented by numbers and alphabets. You can change the background and font colors to.
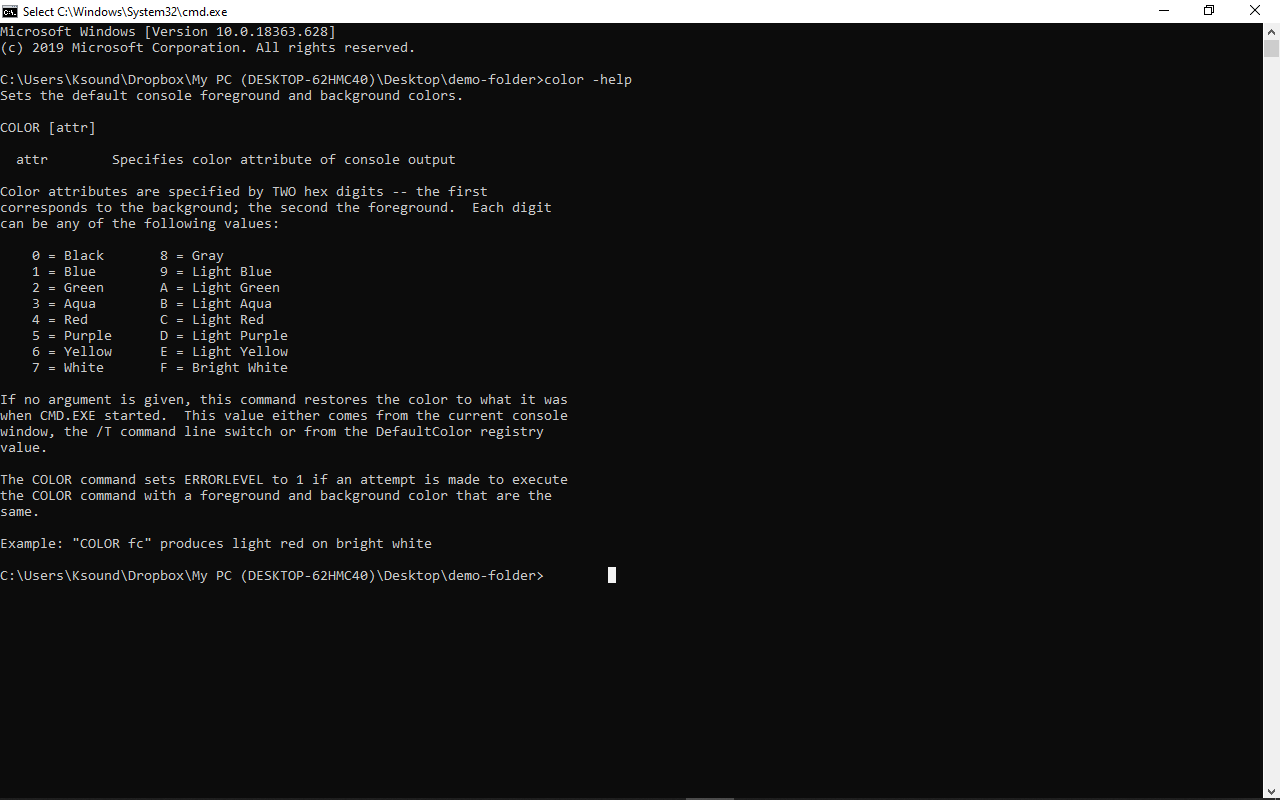
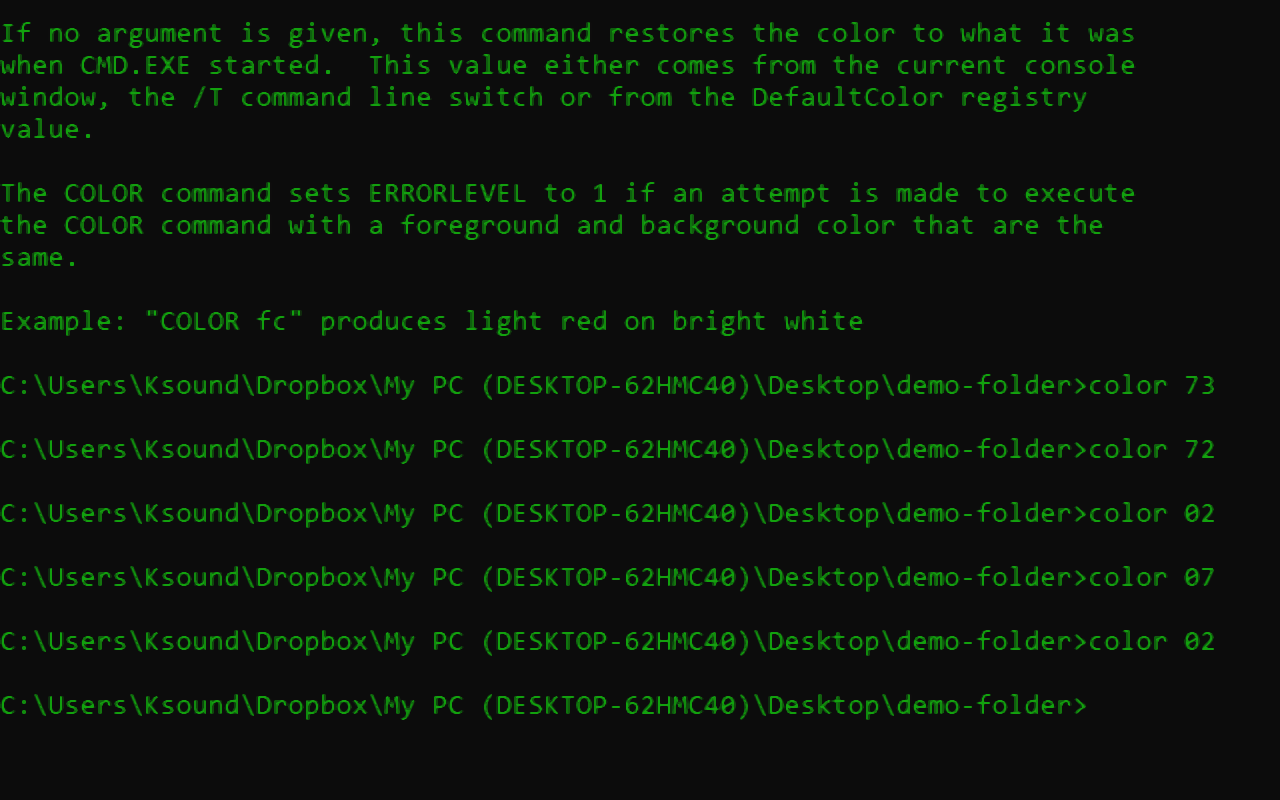
To change the colors properly, run color background_color_number font_color_number. For example, color 02 leaves the background color black and changes the font color to green.
7. How to Change the Title of the Command Prompt Window
The title of an opened command prompt window doesn’t need to stay as the default – you can change it.
To do this, type in title window_title_name.
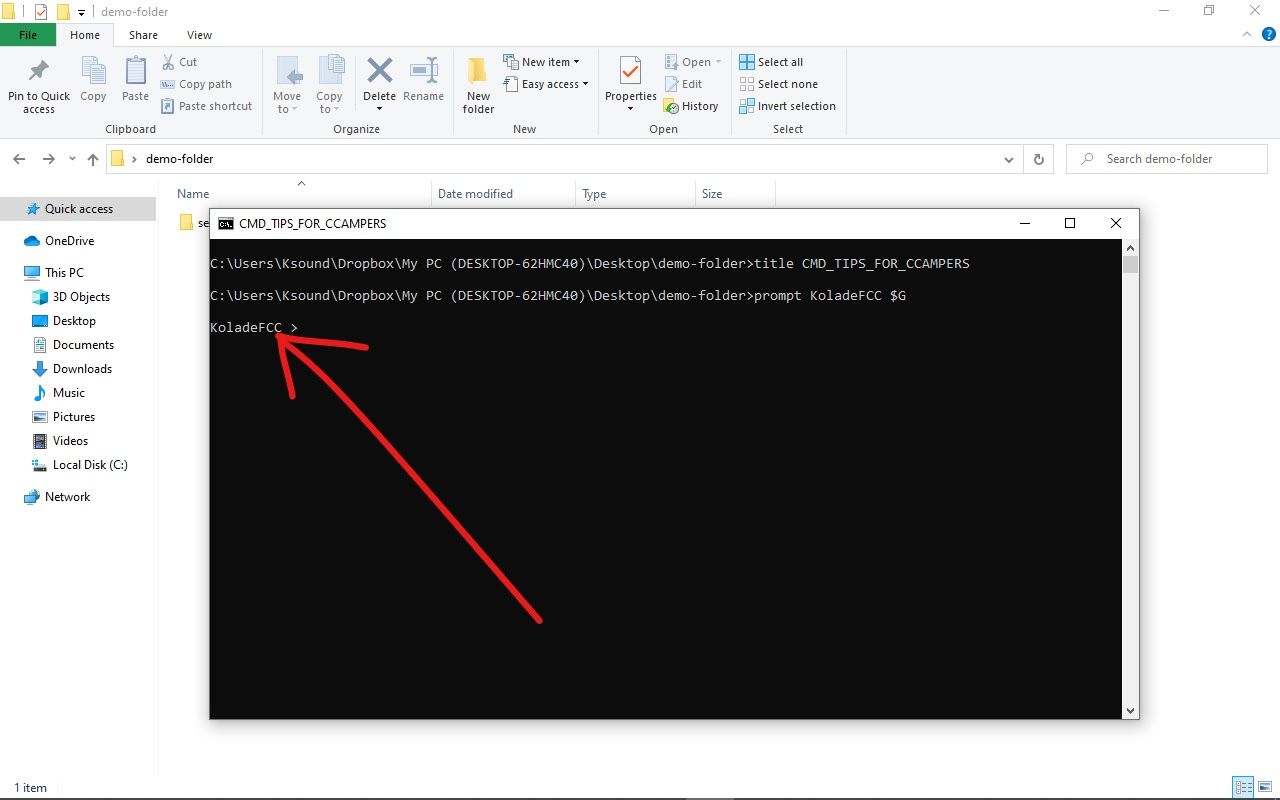
8. How to Change the Prompt Text of the Command Prompt
The text that appears before you type your commands might not be attractive enough for you. For me, it isn’t, so I’ve changed it.
To change the prompt text, type in prompt prompt_name $G and hit ENTER.
The “$G” in front of the specified prompt name will append the greater than (>) symbol for you, so you can know where your command starts – a better UX for you, by you!
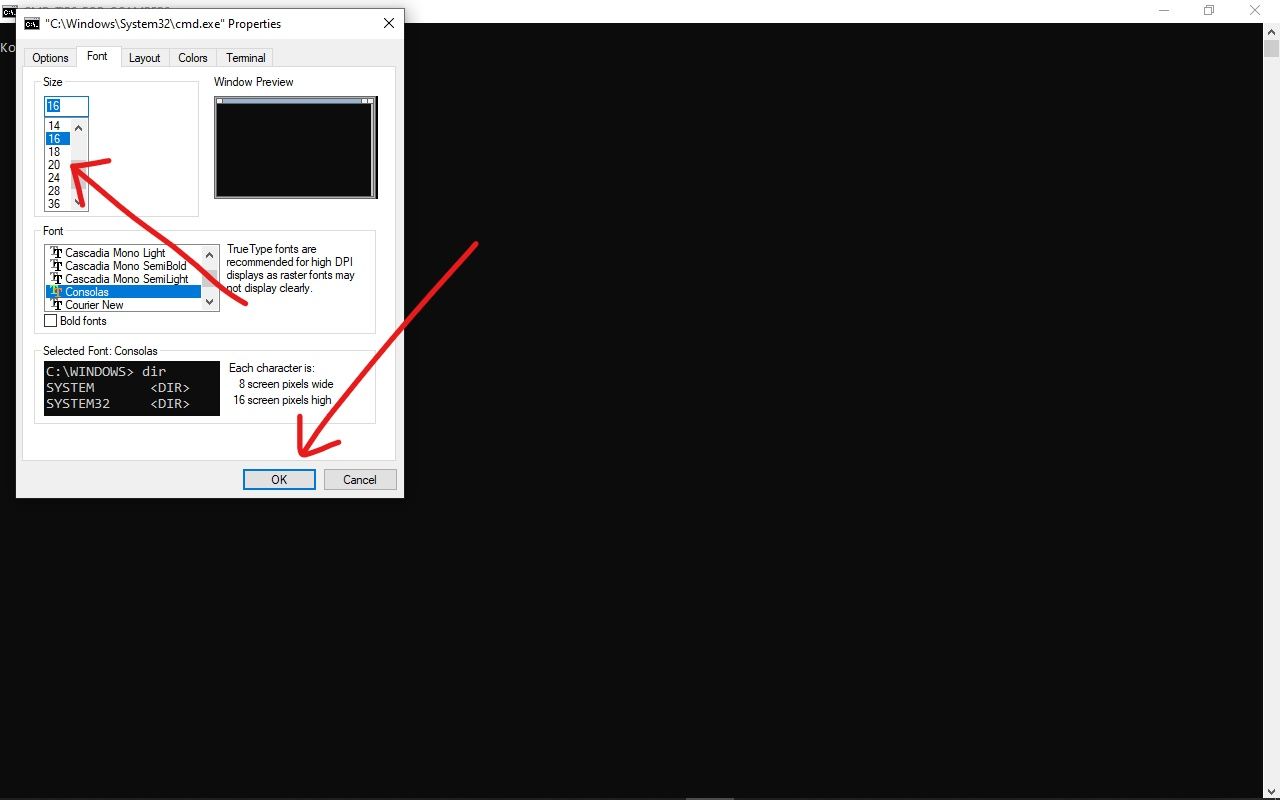
9. How to Change the Font Size of the Command Prompt Texts
If the default font size of the command prompt is too small for your eyes, you can change it. You don’t even need to run a command for this.
Step 1: Right-click on the command prompt window and select “properties”.
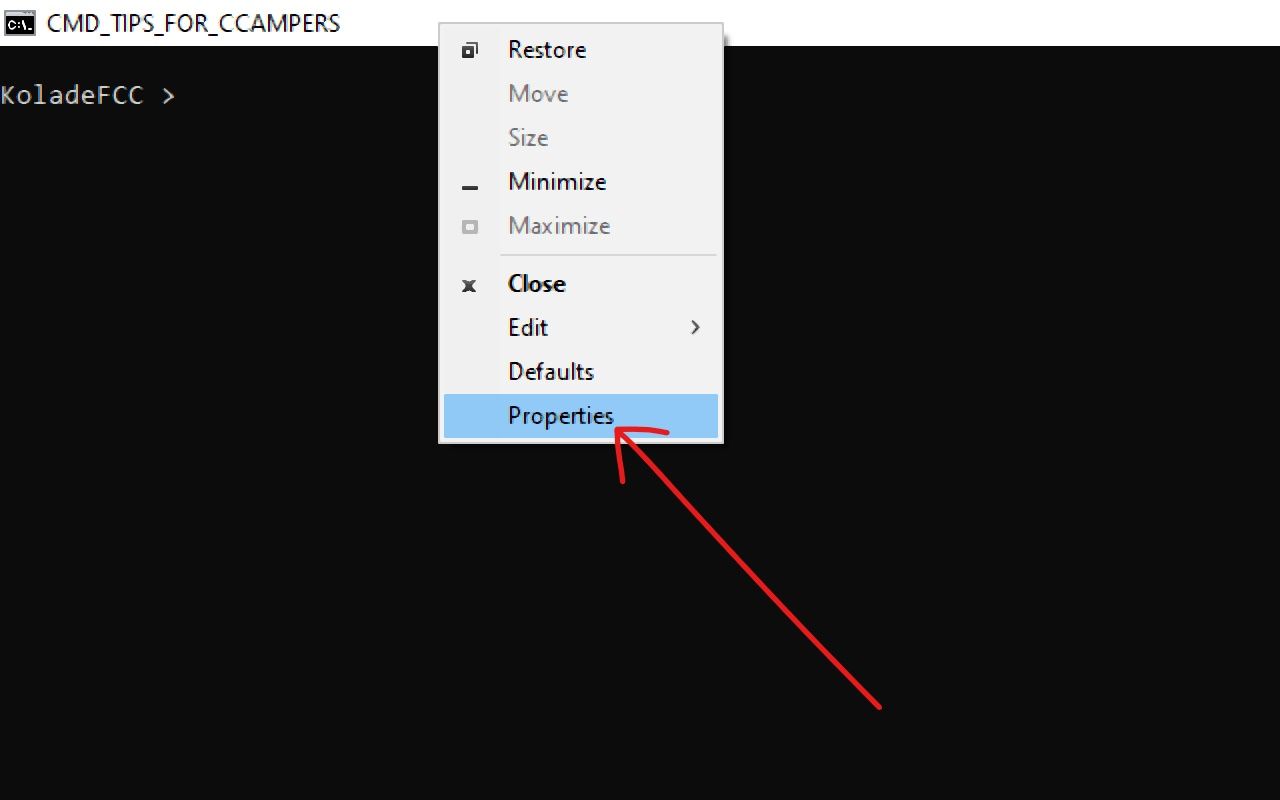
Step 2: Switch to the font tab and select your desired font size, then click “Ok”.
10. How to Generate Battery Health Report with the Command Prompt
With this, you get to know the state of your laptop battery and what to do to improve it. In fact, this is my favorite thing that the command prompt lets me do.
To generate a battery health report, make sure you are running the command prompt as an administrator. Then enter the command powercfg/energy and hit ENTER.
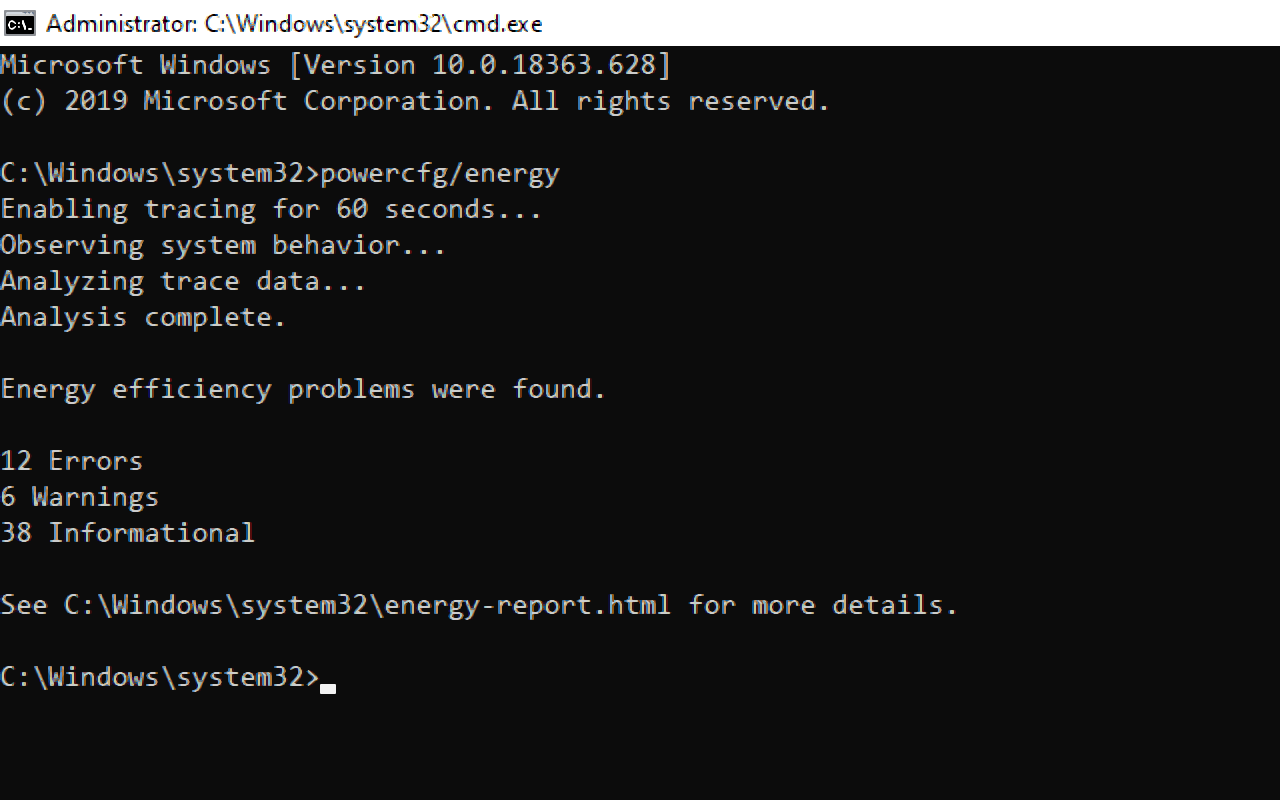
An HTML file you can open with the browser will be generated for you in 60 seconds.
You can locate the HTML file in C:\Windows\system32\energy-report.html.
11. How to Log on to a Website from the Command Prompt
You can open a website from the command prompt by typing in start www.website_name.com and then hitting ENTER. Then the website will open in your default browser.
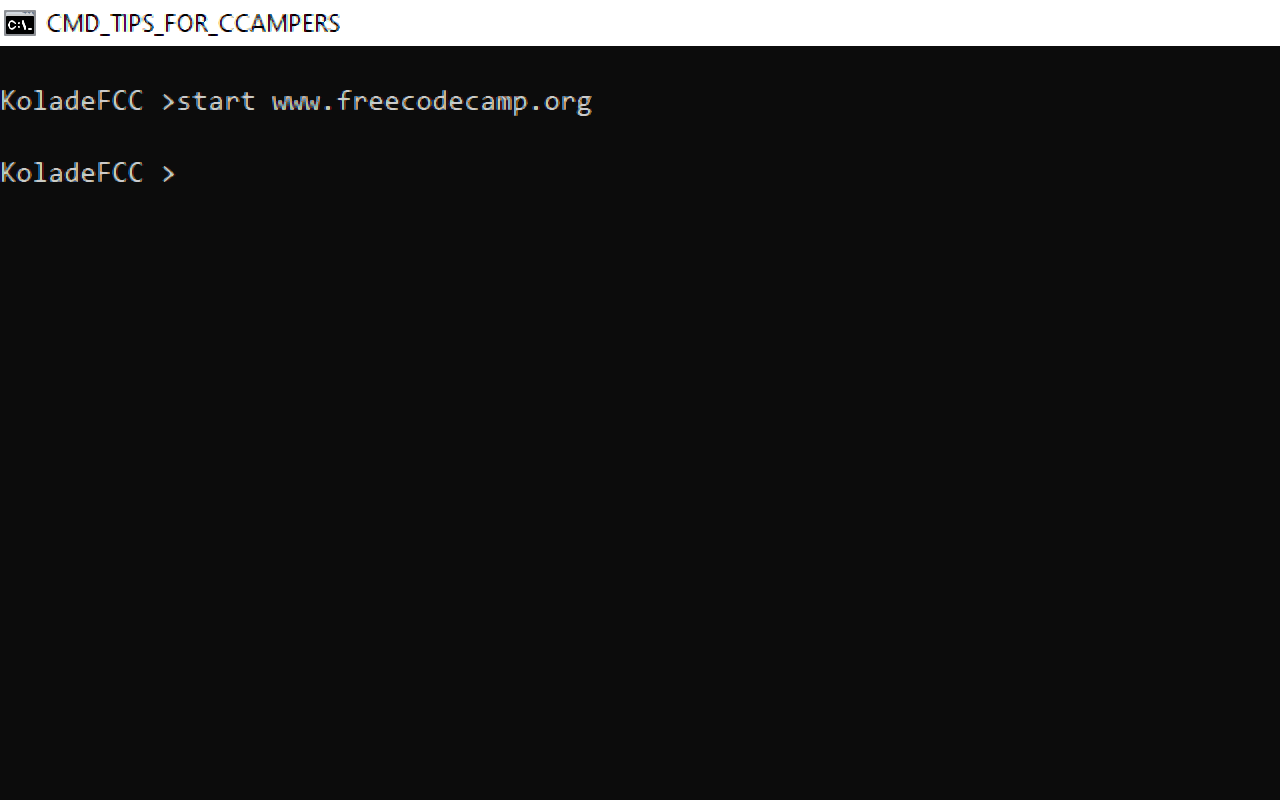

Note that you must append “www” before the domain name, otherwise, it doesn’t work.
12. How to see the IP Address of a Website with the Command Prompt
You can check the IP address of any website by typing ping www.website_name.com and then hitting ENTER.
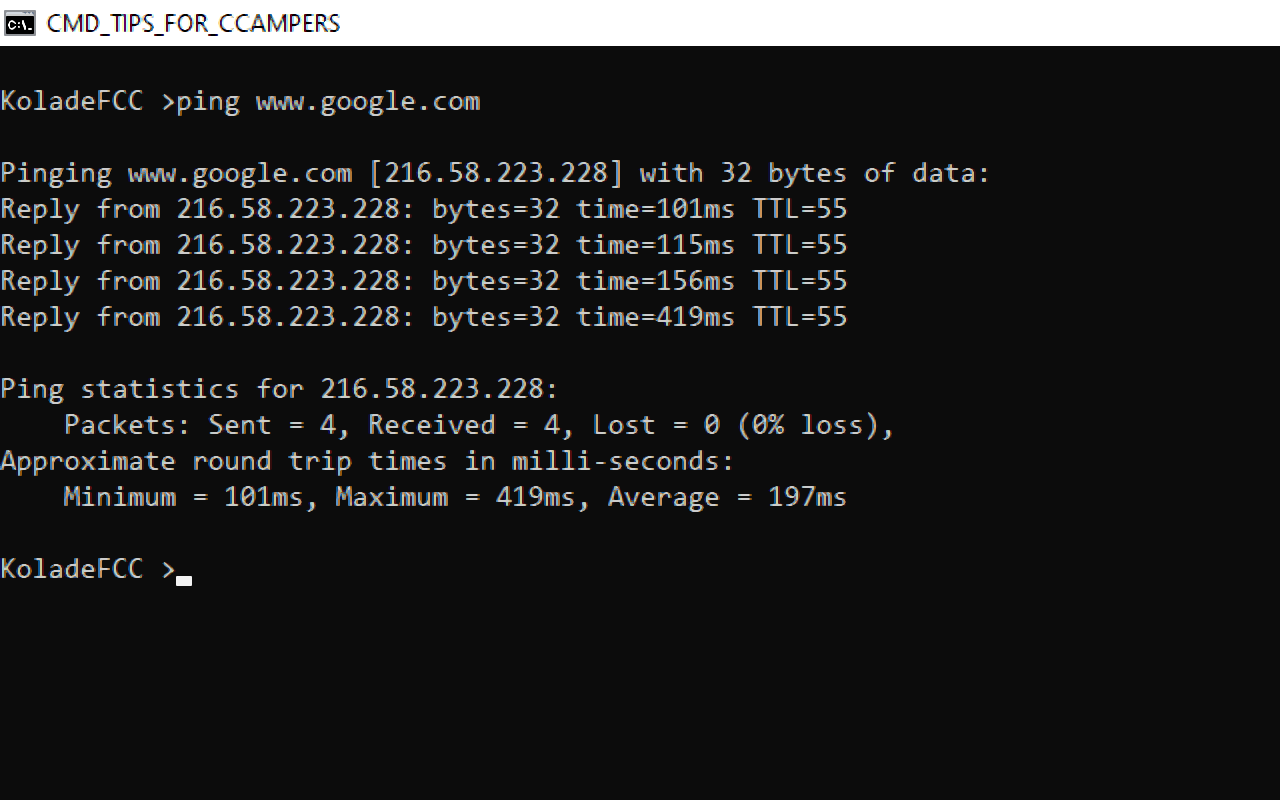
Note that you must append “www” before the domain name, otherwise, it doesn’t work.
13. How to Show All Wi-Fi Passwords with the Command Prompt
You can check the password of your current WiFi connection with the GUI. But the command prompt also shows the passwords of every WiFi that has ever connected with your computer.
To check the passwords, run the command – for /f "skip=9 tokens=1,2 delims=:" %i in ('netsh wlan show profiles') do @echo %j | findstr -i -v echo | netsh wlan show profiles %j key=clear and hit ENTER.
You can find the key right in front of “Key content”.
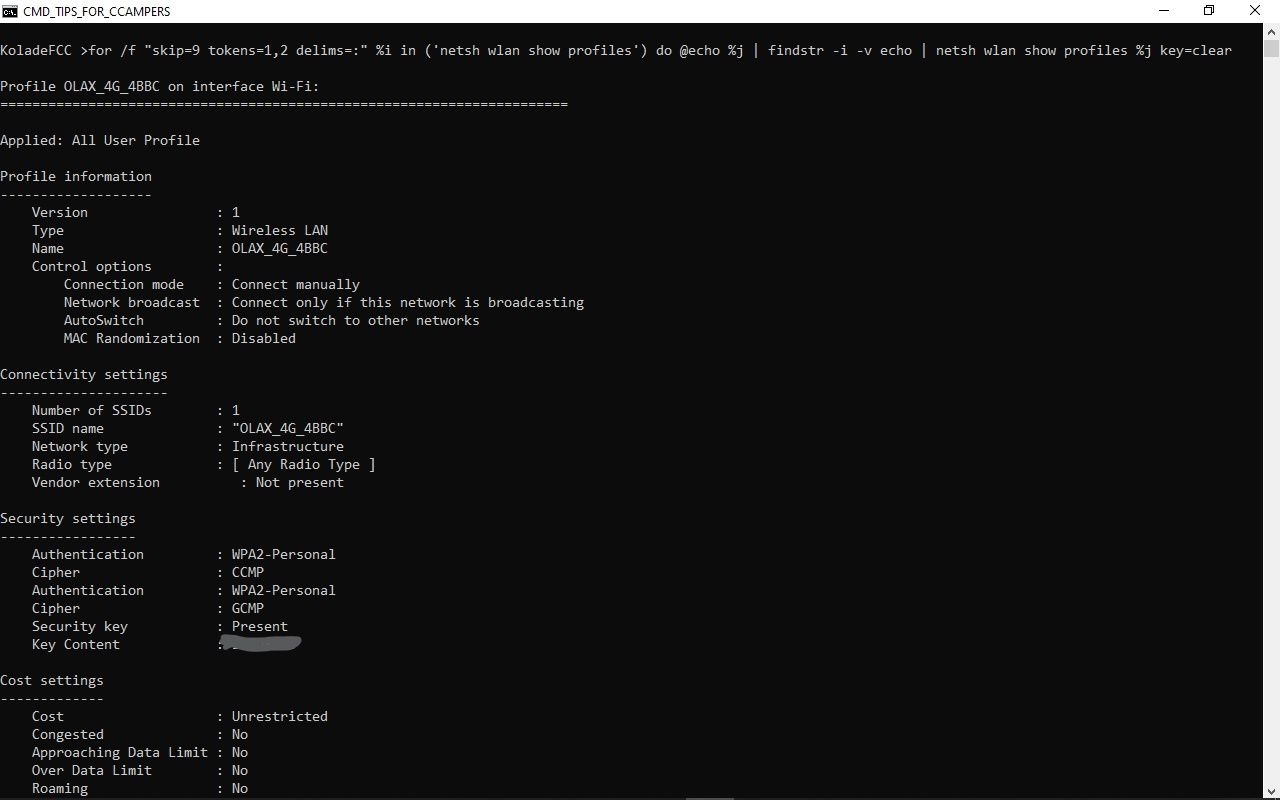
I blurred out the key, as some of my neighbors read my freeCodeCamp articles. 
14. How to Shut Down Your Computer With the Command Prompt
Now that you’ve learned about 11 helpful commands that’ll make you feel like a boss, here’s one more: shut down or restart your computer with the command prompt.
To shut down your computer with the command prompt, run the command shutdown -s.
To restart your computer, enter shutdown -r and hit ENTER.
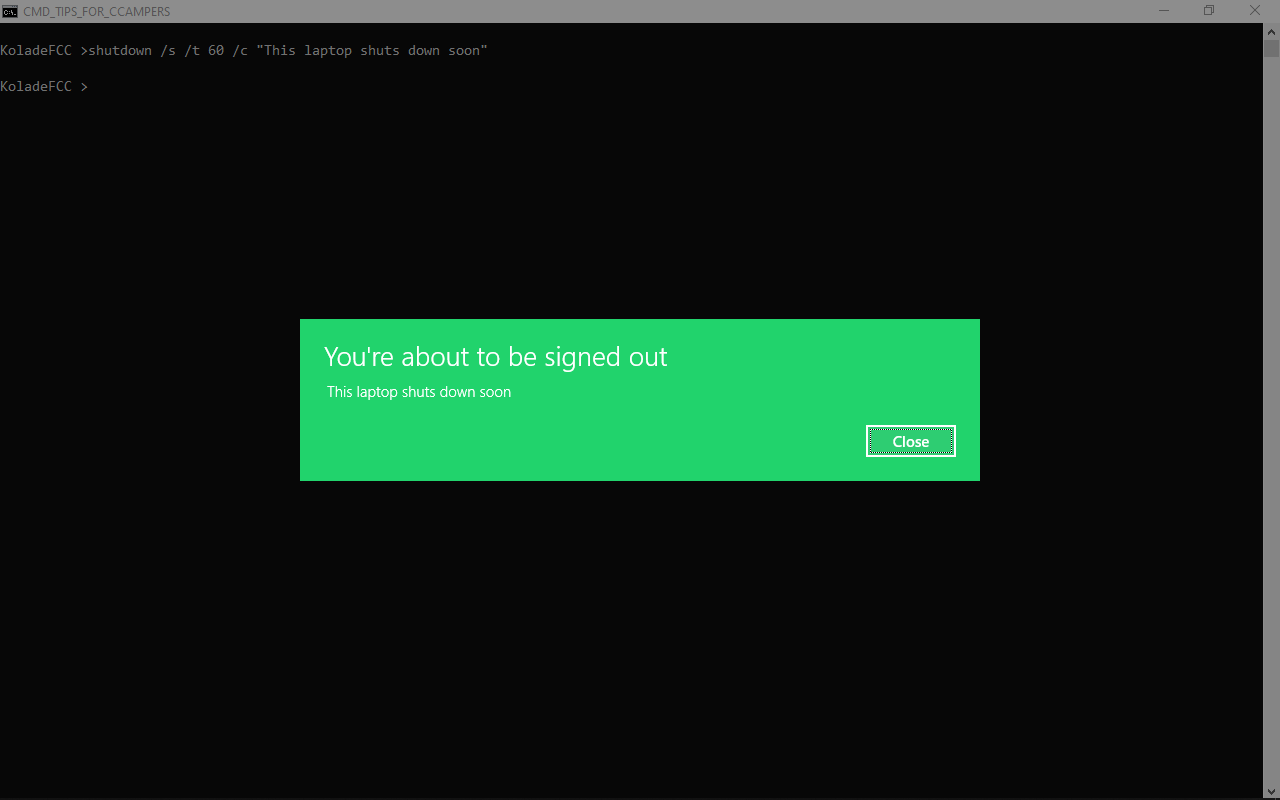
To set a countdown for when your computer will shut down, enter shutdown /s /t time_in_seconds and hit ENTER.

To set a countdown and an alert message for when your computer will shut down, enter shutdown /s /t time_in_seconds /c “alert_message” and hit ENTER.
Thank you for reading this article. If you find it helpful, please share with your friends and family.
Learn to code for free. freeCodeCamp’s open source curriculum has helped more than 40,000 people get jobs as developers. Get started
Here are some Best windows command prompt tricks for Windows 10. which allow doing the things which you can’t do on GUI windows. Like Create A Con folder, Hide and unhide folders using windows command prompt. The trick is to shut down the computer with a command prompt. Also, you can set Shutdown Computer At a specified Time With CMD prompt. You can Create Wi-Fi Hotspot using Command Prompt, and also Check the IP address of any Website and get the system details. And much more you can do with the command prompt. Here we have some hidden Command prompt Tricks you must Try.
Contents
- 1 Top windows command prompt Tricks
-
-
- 1.0.0.1 Create CON Folder
- 1.0.0.2 To Deleting con Folder
- 1.0.0.3 To Unhide the Folder
- 1.0.1 Check IP address of any Website
- 1.0.2 Check Installed Driver list
- 1.0.3 Create Wi-Fi Hotspot using Command Prompt
- 1.0.4 Assoc CMD Command
- 1.0.5 This command provides you with a list of programs and their associated files.
-
-
Creating Con Or Non-Delectable Folder With CMD
In Windows, you cannot create a folder with the name con or can not rename a folder to con. This is because it is a variable name used by Windows programming.
Other variable name includes lp1, lpt2, lpt3 up to lpt9, aux. So Windows cannot allow you to make a folder with this name.
But with the help of the dos command, we can create a folder with such a name.

Create CON Folder
Press the Windows button and run CMD as administrator.
Now Type Command
C:>md .D:con
Here D is your drive location and con is your folder name
To Deleting con Folder
You can not delete such folders manually by using Windows. To delete this folder type the following command in the command prompt.
C:>rd .D:con
Hide/ Unhide A Folder with CMD Command
We can play some interesting tricks with the command prompt. Hiding a folder is one of them. By hiding a folder you can also save your data from other users.
You can do this by typing the following command: attrib +s +h D:Srikant
Where D is my Drive Letter and Srikant is the name of the directory we want to hide.
To Unhide the Folder
If we can also unhide the hidden folder using the command prompt. To unhide the folder type the following command: attrib -s -h D:Srikant
Open Command Prompt from current Folder
When you open the command prompt, it opens up in either the User or System folder depending upon whether you run it as administrator or not.
Now the thing is, if you want to execute a file in any particular folder, you would have to use the change directory(cd) command to navigate to the folder which can be a problem if the directory is nested way too deep. To ease things, you can open the folder in your Windows Explorer, hold the Shift key when you right-click in the folder, and select the Run command window here to directly open the CMD prompt with the path to that folder directly.
Shut Down Computer with Commands
You can also shut down your computer by using the command prompt. Type the following command in the command prompt.
For Shut Down shutdown -s (S parameter tells the computer to shut down)
For Restarting shutdown -r (R parameter tells the computer to Restart windows)
And command for Force Logoff shutdown -l (L parameter tells the computer to log off windows)
Shutdown Computer In specified Time With CMD
You can also shut down your computer at a specified time using the command prompt. If you want to shut down your computer after 10 minutes type the following
command.
shutdown -s -t 600

Save a Command to a File
If you want to save the results of a command to a .txt for future reference. Then it is quite easy you need to execute this after command > (destination/filename with .txt extension)”
for example, ipconfig/all > D/srikant.txt

This will create a text file on D drive named srikant.txt
Check IP address of any Website
You can see the IP address of any website just by entering “nslookup” command along with the name of the website.>
For example, you can type “nslookupwindows101tricks.com” to find its IP address.
Run Command Prompt as Admin
Many commands require you to run command prompt as an administrator. When you search for CMD in Start Menu, other than selecting Run as administrator from the right-click menu, you can simply press Ctrl+Shift+Enter to open it with admin privileges. This trick will work for all the programs installed on your system.
Get Help for Any Valid Command
This is especially helpful for beginners, you know about a command, but you are not sure how it works. Not a problem, you can easily get info on almost every command you provide in the Command Prompt. Information includes complete details of what a command is.
To get the help, just type “/?” at the end of the command and execute it. If the command is valid, the command prompt will give you all the information related to it.
Use Function Keys on command prompt for different results
1. F1: Pastes per character last used command
2. F2: Pastes last used command only to a specified command character
3. F3: Pastes Last used command
4. F4: Delete command only to a specified command character
5. F5: Pastes last used command without cycling
6. F6: Pastes ^Z
7. F7: Provides a list of already used commands (selectable)
8. F:8 Pastes cycleable used commands
9. F9: Will let you paste commands from the list of recently used commands
Check Installed Driver list
Type driverquery command to see installed Driver’s list
 Run Commands Simultaneously
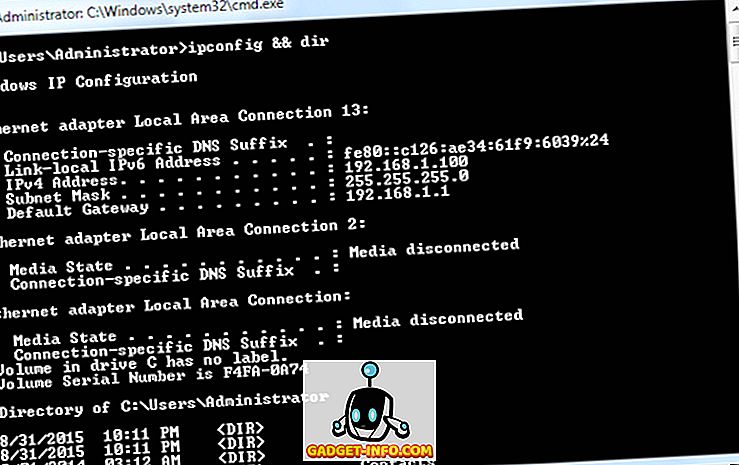
You can put && between two commands and execute them one after another. The command on the left will execute first followed by the command on the right of the double ampersand.

for example, you can type “ipconfig && dir” to execute both commands one after another
Create Wi-Fi Hotspot using Command Prompt
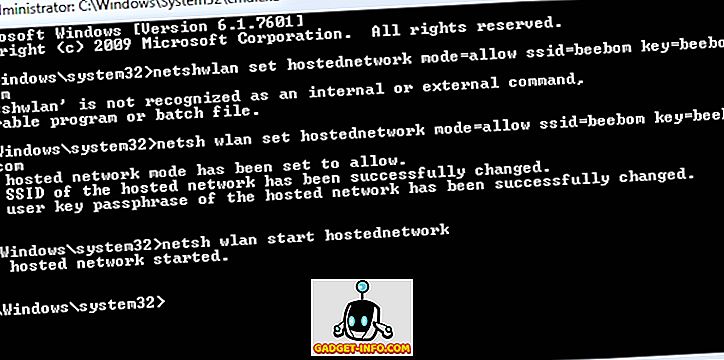
In the Command Prompt, enter the following command to enable Wi-Fi Hotspot.
“netsh wlan set hostednetwork mode=allow ssid=Hotspotname key=password”
Once enabled, you can start the Wi-Fi hotspot by entering the command “netsh wlan start hostednetwork” or stop it by entering the command “netsh wlan stop hostednetwork“. You will also need to share your internet connection to this hotspot for everyone to use. Go to the “Network and Sharing” option from the “Control Panel” and then click on “Change adaptor settings” in the left panel.
Here, right-click on the internet connection you are using and click on “Properties“. In the properties, go to sharing tab and check the option “Allow other network users to connect through this computer’s internet connection” to share your internet connection.
Assoc CMD Command
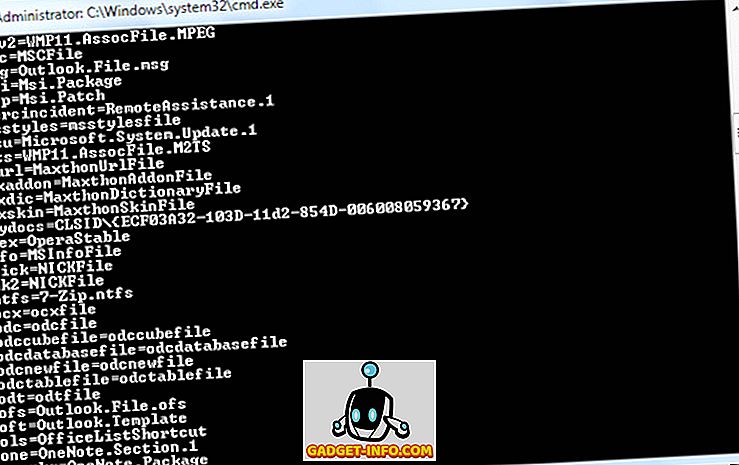
There are many programs installed on our computer. Each program has its own file extension. It is difficult to remember each file extension. If you want to know which file is associated with which program then we can do this by typing the following command: Assoc

This command provides you with a list of programs and their associated files.
See Command History
You can see the last commands used in a session using the navigation buttons, but if you would like to see a list of all the commands, you can get it by pressing the F7 button.
Alternatively, you can use the command doskey /history to list these commands in the command prompt itself.
These are some best windows command prompt commands which make windows easier. windows command prompt tutorial will definitely help you understand Command Prompt in a better way.
- 2019
Когда у вас такой привлекательный интерфейс, использование командной строки может показаться старомодным. Если вы можете легко перейти к месту или получить доступ к различным настройкам на вашем ПК, настраивайте их, зачем выбирать сложные команды и скучный интерфейс? Ну, это может быть не так плохо, как можно подумать. Командная строка может быть немного сложной, но она делает всю ручную настройку всего лишь одной командой. Нынешние пользователи командной строки понимают, насколько она мощна, поэтому они не против освоить несколько трюков или команд, чтобы позаботиться о повседневной работе. Поэтому изучение хотя бы основ командной строки стоит сэкономить несколько секунд дополнительной работы каждый день.
Мы создали этот список команд и трюков командной строки, которые могут помочь вам работать лучше. Независимо от того, начали ли вы использовать командную строку или являетесь обычным пользователем, вы сможете найти способ немного упростить ситуацию.
Обновление: если вам нужны последние трюки с командной строкой, вы также можете проверить наш свежий пост о классных трюках с командной строкой (часть 2).
Некоторые полезные приемы командной строки
1. Получить помощь практически по каждой команде
Это особенно полезно для начинающих, но опытные пользователи тоже могут немного научиться. Вы можете легко получить информацию почти по каждой команде, которую вы предоставляете в командной строке. Информация включает в себя полную информацию о том, что делает команда и какой процесс используется, также может быть показано несколько примеров.
Чтобы получить помощь, просто введите «/?» В конце команды, для которой вам нужна информация. Например, вы можете ввести « ipconfig /? », И вы получите всю информацию.
2. Используйте функциональные клавиши
Вы можете использовать функциональные клавиши (F1, F2, F3 и т. Д.) Прямо в командной строке и получать разные результаты. Ниже приведены примеры использования функциональных клавиш в командной строке:
- F1: вставляет на символ последнюю использованную команду
- F2: вставляет последнюю использованную команду только в указанный символ команды
- F3: вставляет последнюю использованную команду
- F4: Удалить команду только для указанного командного символа
- F5: вставляет последнюю использованную команду без зацикливания
- F6: вставляет ^ Z
- F7: Предоставляет список уже используемых команд (по выбору)
- F: 8 вставляет циклически используемые команды
- F9: позволит вам вставить команду из списка недавно использованных команд
3. Сохранить команду в файл
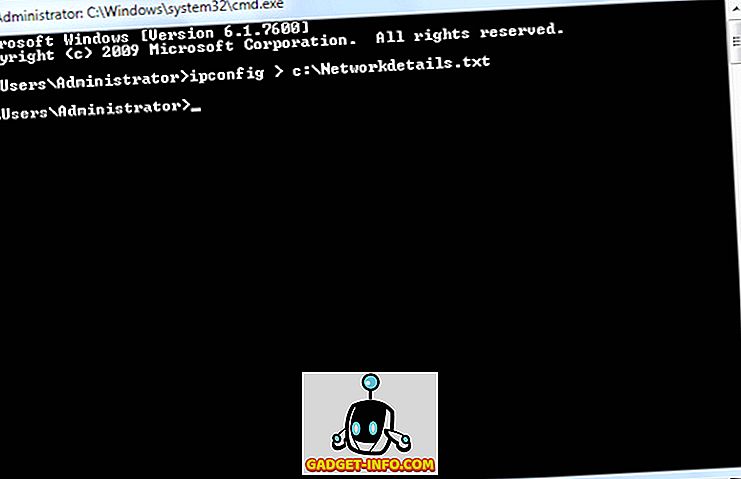
Если вы хотите сохранить результаты команды в .txt для дальнейшего использования, то это тоже довольно просто. Все, что вам нужно сделать, это добавить « > (назначение / имя файла с расширением .txt) » в конце команды, которую вы собираетесь выполнить.
Например, вы можете ввести « ipconfig> c: \ Networkdetails.txt », эта команда создаст файл .txt на диске C с именем « Networkdetails ».
4. Скопируйте данные из командной строки
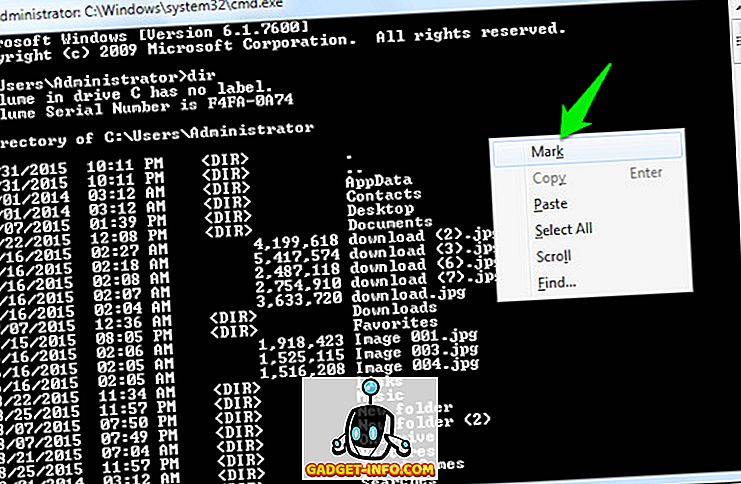
Копирование данных из командной строки — это не просто Ctrl + C, процесс на самом деле другой. Это не так сложно, просто щелкните правой кнопкой мыши в любом месте окна и выберите « Отметить » в меню. После этого просто выберите текст, который вы хотите скопировать, и нажмите Enter, чтобы скопировать его.
Важное примечание: В Windows 10 команды Ctrl + C и Ctrl + V для копирования / вставки включены в командной строке. Таким образом, вам не нужно следовать описанному выше процессу, если вы используете Windows 10. Кроме того, в Windows 10 сочетания клавиш для CMD включены по умолчанию, чего не было в более ранней версии Windows.
5. Цикл по папкам
Указание точных каталогов может быть немного неприятной задачей, если у вас нет скопированного места назначения. Однако, если вы просто знаете, на каком диске или в папке находится нужная папка, вы можете просмотреть все папки, чтобы добраться до нее. Для этого просто введите указанный диск и нажмите клавишу TAB на клавиатуре, чтобы просмотреть все папки внутри него.
6. Используйте режим QuickEdit
Командная строка поставляется с режимом QuickEdit для быстрого копирования и вставки содержимого одним щелчком правой кнопки мыши. В режиме QuickEdit вы можете выделить контент и щелкнуть правой кнопкой мыши, чтобы скопировать его, или щелкнуть правой кнопкой мыши в пустой области, чтобы вставить контент из буфера обмена (если он есть).
Чтобы включить режим QuickEdit, щелкните правой кнопкой мыши в верхней части интерфейса командной строки (там, где расположена кнопка выхода) и выберите « Свойства ». В свойствах установите флажок рядом с « QuickEdit Mode », чтобы включить его (вам придется отключить его позже).
7. Проверьте IP-адрес любого веб-сайта
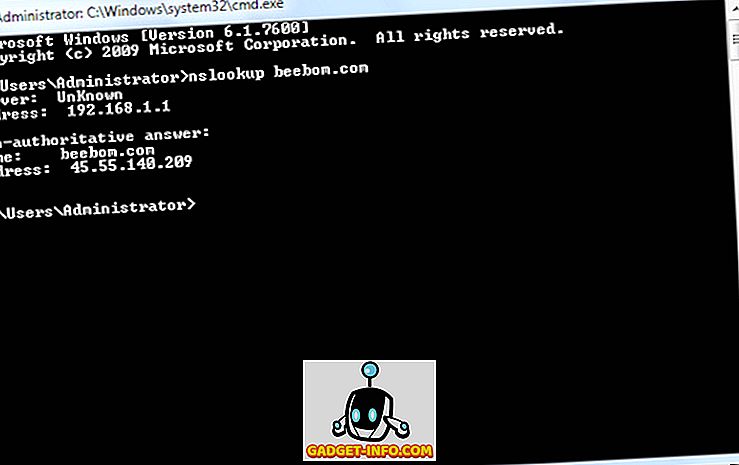
Вы можете увидеть IP-адрес любого веб-сайта, просто введя команду «nslookup» вместе с названием веб-сайта. Например, вы можете набрать « nslookup beebom.com », чтобы найти его IP-адрес.
8. Выполните несколько команд
Вы можете легко выполнять одну команду за другой, предоставляя все команды и помещая «&&» между каждой командой (может сэкономить время). Например, вы можете ввести « ipconfig && dir » для выполнения обеих команд одна за другой.
9. Проверьте программы по умолчанию
Вы можете проверить, какие приложения используются для открытия определенных типов программ. Для этого просто введите « assoc » в командной строке и нажмите Enter. Вы увидите все расширения и связанные с ними программы, которые их открывают, написанные рядом с ними.
10. Получить список драйверов ПК
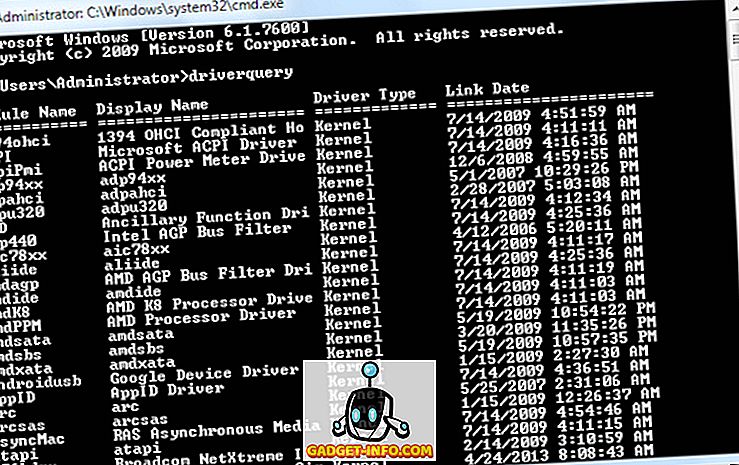
Вы можете открыть список всех драйверов, установленных на вашем компьютере, с помощью одной команды. Просто введите « driverquery » в командной строке и нажмите Enter. После небольшой задержки вы увидите все драйверы, установленные на вашем компьютере, а также имя, тип и дату подключения.
11. Сканирование системных файлов
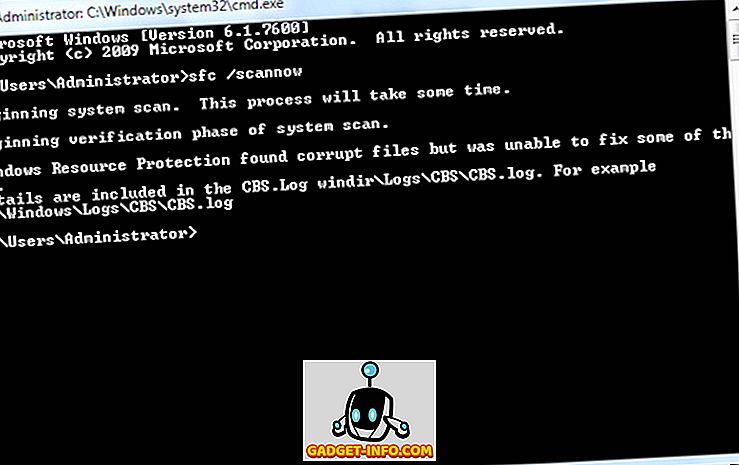
Системные файлы также могут быть отсканированы и восстановлены из командной строки. Введите « SFC / SCANNOW » и нажмите Enter, сканирование начнется и может занять некоторое время в зависимости от скорости вашего компьютера (может быть до часа). Он будет либо автоматически восстанавливать файлы, либо сообщать вам, если есть проблема, и сообщать ее подробности.
12. Изменить цвет командной строки
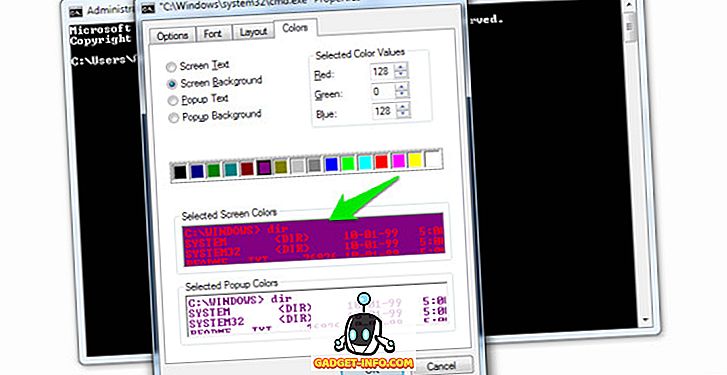
Вы также можете изменить цвет командной строки, чтобы он выглядел менее унылым и немного легким для глаз. Для этого щелкните правой кнопкой мыши в верхних углах командной строки и выберите « Свойства » в меню. В свойствах перейдите на вкладку « Цвета », и вы найдете все опции для изменения цвета текста и фона.
13. Создание папок, которые можно восстановить
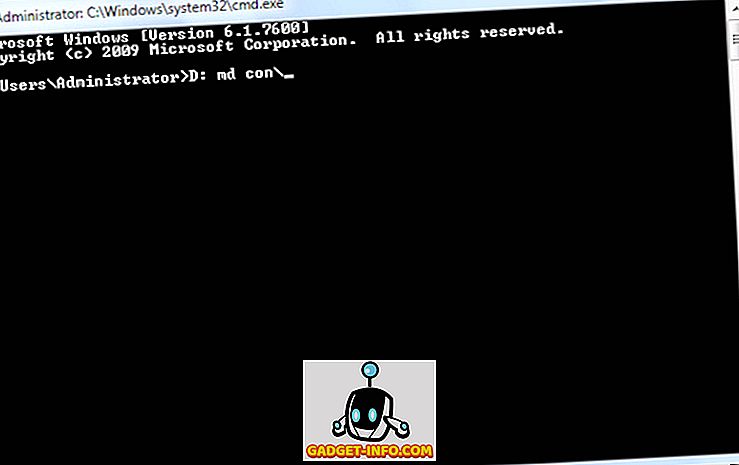
Вы можете создавать папки, которые можно удалить, используя определенный набор ключевых слов. В командной строке введите имя диска, на котором вы хотите создать папку (на нем не должна быть установлена Windows). После этого введите любое из этих ключевых слов « md con \» или «md lpt1 \ » и нажмите Enter. Так что это должно выглядеть примерно так: « D: md con \ ».
Это создаст папку с тем же именем, которую нельзя удалить или переименовать. Чтобы удалить папку, замените « md con \ » на « rd con \ » или « md lpt1 \ » на « rd lpt1 \ ».
14. Получить информацию о сети
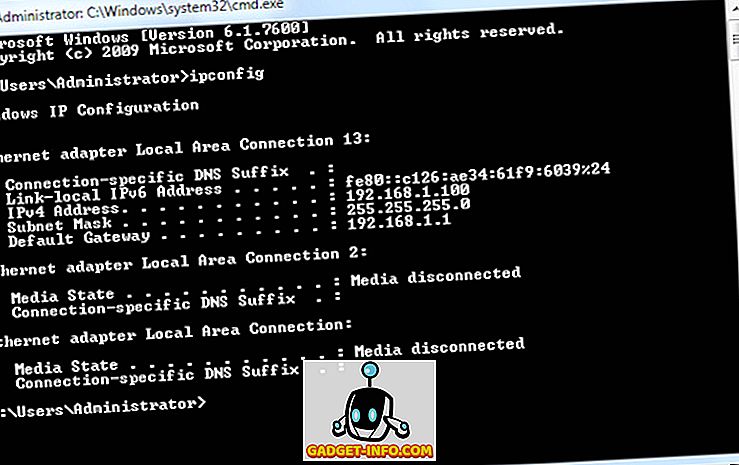
Вы можете быстро получить информацию о сети, например, IP-адрес и маску подсети или шлюз по умолчанию, с помощью одной команды. Введите « ipconfig » и нажмите Enter, вы увидите все детали вашей сети.
15. Скрыть файлы и папки с помощью командной строки
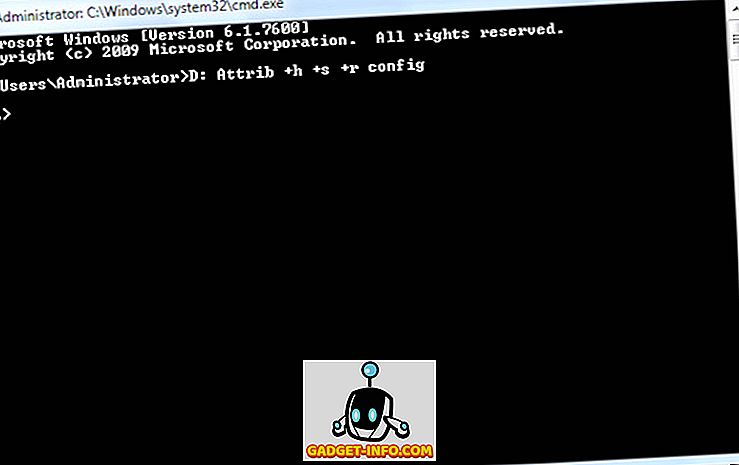
Вы можете скрыть папку с помощью командной строки, к которой нельзя получить доступ, используя традиционную функцию скрытия Windows. Для этого введите имя диска, на котором находится папка, затем введите эту команду « Attrib + h + s + r », а затем введите имя файла / папки, которую вы хотите скрыть. Так что это должно выглядеть примерно так: « D: Attrib + h + s + r haider ».
Если папка находится внутри другой папки, то команда должна находиться перед папкой / файлом, который вы хотите скрыть, а не только после имени диска. Чтобы снова увидеть папку, используйте тот же процесс, что и выше, но измените команду на « Attrib -h -s -r » с « Attrib + h + s + r ».
16. Сравните два файла
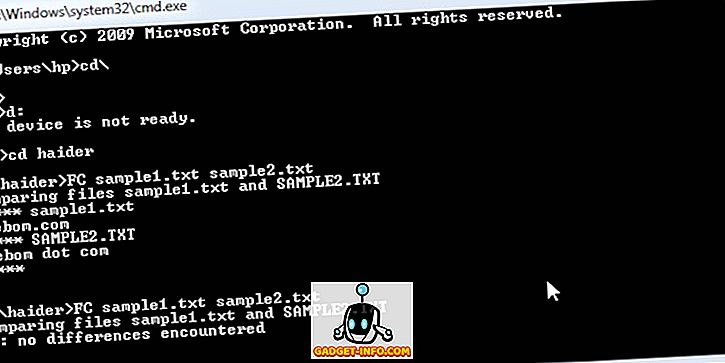
Вы также можете сравнить два текстовых файла в командной строке и увидеть разницу. Результаты не будут такими же хорошими, как у сторонних доступных инструментов сравнения файлов, но это стоит попробовать и весело провести время!
Все, что вам нужно сделать, это набрать команду «FC» и затем ввести каталоги обоих текстовых файлов (файлы должны быть в формате .txt для правильной работы). Например, вы можете ввести « fc C: \ haider \ sample1.txt C: \ haider \ sample2.txt » и нажать клавишу ввода, чтобы получить сравнение обоих файлов с ответом, например, файлы разные или оба файла идентичны.
В приведенном выше примере «C:» — это диск, на котором расположен текстовый файл, «haider» — это имя папки, в которой находится текстовый файл, а «Sample1.txt» — это имя текстового файла. Оба файла могут быть расположены в любом месте на вашем компьютере, вам просто нужно предоставить правильный каталог.
Если оба файла имеют разное содержимое, то выполнение этой команды покажет разное содержимое, а если оба файла имеют одинаковое содержимое, команда вернет это сообщение «различий не обнаружено».
17. Смотреть Звездные войны Эпизод IV
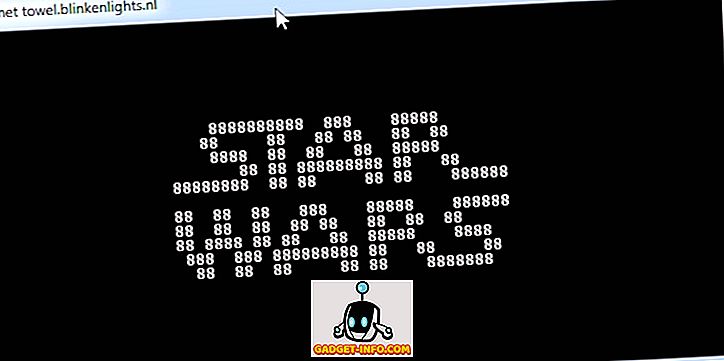
Это действительно крутой трюк, хотя и не продуктивный, но забавный. Вы можете посмотреть знаменитый Эпизод IV Звездных войн прямо в командной строке. Это будет ASCII-версия, поэтому не надейтесь на HD-фильм.
Процесс прост, откройте командную строку и введите эту команду « telnet полотенце.blinkenlights.nl » и нажмите Enter. Фильм начнется автоматически без каких-либо задержек.
Примечание. Убедитесь, что на вашем компьютере включен Telnet, вы можете получить информацию для установки и включения Telnet с веб-сайта Microsoft.
18. Создайте точку доступа Wi-Fi с помощью командной строки
Вам не нужны какие-либо сторонние приложения для создания точки доступа Wi-Fi для общего доступа к Интернету на вашем ПК, вы можете легко сделать это из командной строки.
В командной строке введите следующую команду, чтобы включить точку доступа Wi-Fi.
« Netsh wlan set hostednetwork mode = разрешить ssid = ключ Hotspotname = пароль »
После включения вы можете запустить точку доступа Wi-Fi, введя команду « netsh wlan start hostednetwork » или остановить ее, введя команду « netsh wlan stop hostednetwork ».
Вам также нужно будет поделиться своим интернет-соединением с этой точкой доступа для всех желающих. Перейдите к опции « Сеть и обмен » в « Панели управления », а затем нажмите « Изменить настройки адаптера » на левой панели.
Здесь щелкните правой кнопкой мыши на подключении к Интернету, которое вы используете, и выберите « Свойства ». В свойствах перейдите на вкладку « Общий доступ » и установите флажок « Разрешить другим пользователям сети подключаться через подключение к Интернету на этом компьютере », чтобы поделиться своим подключением к Интернету.
Примечание. Использование привилегий администратора для CMD необходимо для запуска этой команды, иначе она выдаст ошибку.
Эти приемы CMD определенно помогут вам лучше понять командную строку. Если вы знаете какой-то другой трюк, о котором стоит упомянуть в посте, сообщите нам об этом в разделе комментариев.
Windows 10 предусматривает гибкую настройку и управление системой с помощью командной строки. Она позволяет пользователю посредством команд воспользоваться той или иной функцией. Например, существует команда SFC /scannow, позволяющая производить сканирование и мгновенное исправление системных файлов. Подобных функций десятки, но не все о них знают. Однако некоторые из них бывают очень даже полезными при постоянном использовании ПК.
Сегодня мы поговорим подробнее об основных командах для командной строки в Windows 10.
Открываем командную строку
Для пользователей Windows 10 в командной строке предоставлено огромное количество команд, однако не все из них используются даже опытными юзерами. Поэтому мы рассмотрим с вами только основные команды, которые могут пригодиться в разных случаях. Но для начала я покажу вам, каким способом можно запустить командную строку и как ею пользоваться.
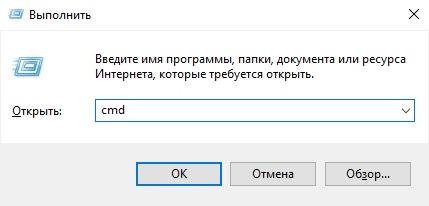
Самый простой способ запуска командной строки – это ввод специальной команды в окне «Выполнить». Для этого воспользуемся следующей инструкцией:
- Используем комбинацию клавиш «Win+R», где Win – это клавиша, расположенная в нижней левой части клавиатуры с логотипом Windows. Далее вводим команду cmd и нажимаем на клавишу «Enter».

Запускаем командную строку
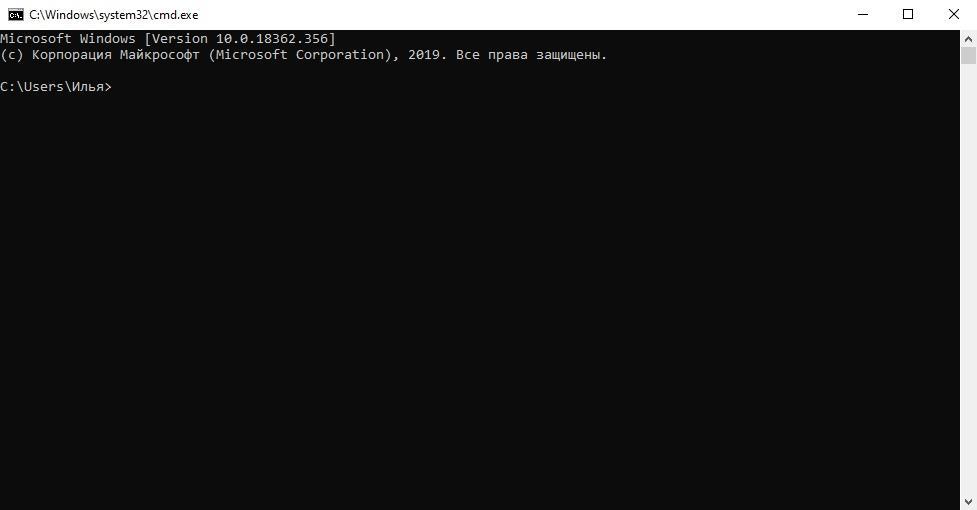
- В отобразившемся окне перед нами открывается командная строка, которая уже готова к получению команд от пользователя.

Командная строка включает в себя простой интерфейс и мощный функционал
Также вы можете запустить командную строку и через меню «Пуск». Для этого достаточно кликнуть правой кнопкой мыши по пуску и выбрать «Командная строка» либо «Windows PowerShell». Тут же можно открыть программу от имени администратора.
Давайте теперь попробуем воспользоваться командной строкой на примере очень простой команды: control. Она позволяет запускать панель управления на компьютере.
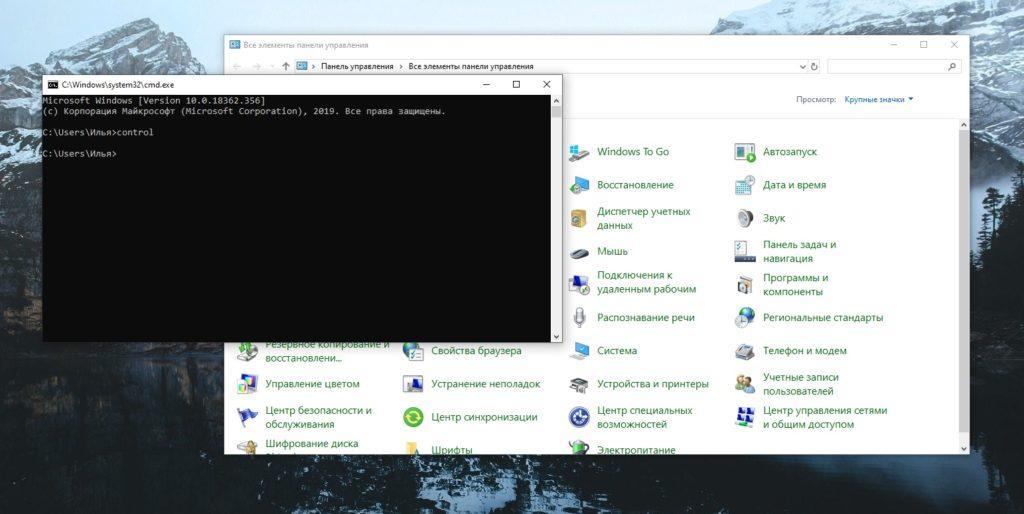
Чтобы использовать команду, необходимо ввести нужное слово или набор слов и символов, а затем нажать на кнопку «Enter»
С вводом команд разобрались, теперь можно приступить к просмотру основных команд. Начнем мы с тех, которые предназначены для быстрого запуска стандартных программ.
Запуск основных программ и утилит системы
Нижеуказанный список не всем будет полезен, но там есть команды, без которых пользователю не обойтись. Например, обратите внимание на такие команды как dxdiag и regedit. С помощью них запускаются важные утилиты, которые просто так вы не сможете найти в операционной системе.
- appwiz.cpl – утилита «Программы и компоненты»
- certmgr.msc – окно для управления сертификатами системы
- control – «Панель управления»
- control printers – окно для управления устройствами и принтерами
- control userpasswords2 – «Учетные записи пользователя»
- compmgmt.msc – «Управление компьютером»
- devmgmt.msc – «Диспетчер устройств»
- dfrgui – «Оптимизация дисков»
- diskmgmt.msc – «Управление дисками»
- dxdiag – запуск средства диагностики DirectX
- hdwwiz.cpl – еще одна команда для вызова окна «Диспетчер устройств»
- firewall.cpl – Брандмауэр Защитника Windows
- gpedit.msc – «Редактор локальной групповой политики»
- lusrmgr.msc – «Локальные пользователи и группы»
- mblctr – «Центр мобильности»
- mmc – консоль управления системными оснастками
- msconfig – «Конфигурация системы»
- odbcad32 – панель администрирования источника данных ODBC
- perfmon.msc – «Системный монитор», предоставляющий возможность просмотра изменений в производительности компьютера и системы
- presentationsettings – «Параметры режима презентации»
- powershell – PowerShell (та же командная строка, но с большим функционалом)
- powershell_ise – «Интегрированная среда сценариев» оболочки PowerShell
- regedit – «Редактор реестра»
- resmon – «Монитор ресурсов»
- rsop.msc – «Результирующая политика»
- shrpubw – «Мастер создания общих ресурсов»
- secpol.msc – «Локальная политика безопасности»
- services.msc – средство управления службами операционной системы
- taskmgr – «Диспетчер задач»
- taskschd.msc – «Планировщик заданий»
Управление и настройка операционной системы
В данном разделе будет рассказано о командах, с помощью которых можно выполнять различные действия в операционной системе.
- сomputerdefaults – определение параметров программ по умолчанию
- control admintools – открытие папки со средствами администрирования
- date – отображение и изменение текущей даты в командной строке
- displayswitch – изменение подключенных экранов
- dpiscaling – параметры дисплея
- eventvwr.msc – просмотр журнала событий
- fsmgmt.msc – средство работы с общими папками
- fsquirt – отправка и прием файлов по Bluetooth
- intl.cpl – региональные настройки
- joy.cpl – настройка внешних игровых устройств
- logoff – выход из системы
- lpksetup – установка и удаление языков интерфейса
- mobsync – запуск окна «Центр синхронизации»
- msdt – официальное средство диагностики службы поддержки Microsoft
- msra – вызов утилиты «Удаленный помощник Windows»
- msinfo32 – просмотр сведений об операционной системе
- mstsc – подключение к удаленному Рабочему столу
- napclcfg.msc – настройка конфигурации операционной системы
- netplwiz – панель управления «Учетными записями пользователей»
- optionalfeatures – включение и отключение стандартных компонентов операционной системы
- shutdown – завершение работы компьютера
- sigverif – средство проверки подлинности файлов
- sndvol – запуск микшера громкости
- slui – средство активации лицензии ОС Windows
- sysdm.cpl – вызов окна «Свойства системы»
- systempropertiesperformance – «Параметры быстродействия»
- systempropertiesdataexecutionprevention – запуск службы DEP, компонента «Параметров быстродействия» ОС
- timedate.cpl – изменение даты и времени
- tpm.msc – «Управление доверенным платформенным модулем TPM на локальном компьютере»
- useraccountcontrolsettings – «Параметры управления учетными записями пользователей»
- utilman – управление «Специальными возможностями» в разделе «Параметров» операционной системы
- ver – показывает сведения о текущей версии ОС Windows.
- wf.msc – активация режима повышенной безопасности в стандартном Брандмауэре ОС Windows
- winver – просмотр общих сведений об операционной системе и ее версии
- WMIwscui.cpl – переход к Центру поддержки операционной системы
- wscript – «Параметры сервера сценария» ОС Windows
- wusa – «Автономный установщик обновлений Windows»
Настройки периферийных устройств
Есть также и немного команд, предназначенных для вызова стандартных программ и элементов управления оборудования, подключенного к компьютеру или ноутбуку.
- main.cpl – настройка мыши
- mmsys.cpl – панель настройки звука
- printui – «Пользовательский интерфейс принтера»
- printbrmui – средство переноса принтера, предоставляющее возможность экспорта и импорта программных компонентов и драйверов оборудования
- printmanagement.msc – «Управление печатью»
- sysedit – редактирование системных файлов с расширениями INI и SYS (Boot.ini, Config.sys, Win.ini и др.)
- tabcal – средство калибровки дигитайзера
- tabletpc.cpl – просмотр и настройка свойств планшета и пера
- verifier – «Диспетчер проверки драйверов»
- wfs – «Факсы и сканирование»
- wmimgmt.msc – вызов «Элемента управления WMI» стандартной консоли
Работа с файлами и подключенными накопителями
Нижеуказанные команды предназначены для работы с файлами, папками, дисковыми устройствами и накопителями. Некоторые из них работают только внутри предварительно вызванных консольных утилит. Для получения более подробных сведений по ним вы всегда можете обратиться к справке, воспользовавшись командой help.
Вводим help и нажимаем на клавишу «Enter»
- assoc — выводит и позволяет изменять связь между расширениями имени и типов того или иного пакетного файла
- attrib – редактирование атрибутов предварительно обозначенного файла или папки
- bcdboot – создание и/или восстановление системного раздела
- cd – просмотр наименования текущей папки или переход в другую
- chdir – просмотр папки или переход к другой
- chkdsk – проверка жестких и твердотельных дисков, а также подключенных к ПК внешних накопителей
- cleanmgr – инструмент «Очистка диска»
- convert – преобразование файловой системы тома
- copy – копирование файлов (с указанием конечного каталога)
- del – удаление выбранных файлов
- dir – просмотр файлов и папок по указанному пути
- diskcopm – позволит сравнить содержимое двух гибких дисков
- dickcopy – полностью скопирует содержимое одного гибкого диска на любой другой (пакетное копирование)
- diskpart – консольная утилита для работы с дисками (открывается в отдельном окне «Командной строки», для просмотра поддерживаемых команд обратитесь к справке – help)
erase – удаление одного или нескольких файлов - fc – сравнение файлов и поиск различий
- format – форматирование локальных дисков Windows
- label – удаление, изменение, а также создание меток тома для дисков
- md – создание новой папки
- mdsched – проверка оперативной памяти
- move – перемещение файлов по заданному пути
- ntmsmgr.msc – средство работы с внешними накопителями
- recdisc – создание диска восстановления операционной системы (работает только с оптическими накопителями)
- recover – восстановление данных
- rekeywiz – инструмент для шифрования данных («Шифрующая файловая система (EFS)»)
- RSoPrstrui – Настройка средства «Восстановление системы»
- sdclt – «Резервное копирование и восстановление»
- sfc /scannow – проверка целостности системных файлов с возможностью их восстановления
- tree – графическое отображение структуры каталогов диска или папки
- verify – анализ правильности записи файлов на диск
- vol – отображает собственную метку и серийный номер тома для диска
Работа внутри командной строки
Если вы захотите изменить цвет, почистить содержимое командной строки или воспользоваться внутренними настройками, то вы также можете использовать команды. Например, если вписать команду color и выбрать специальное кодовое слово, то изменится весь фон и цвет текста командной строки.
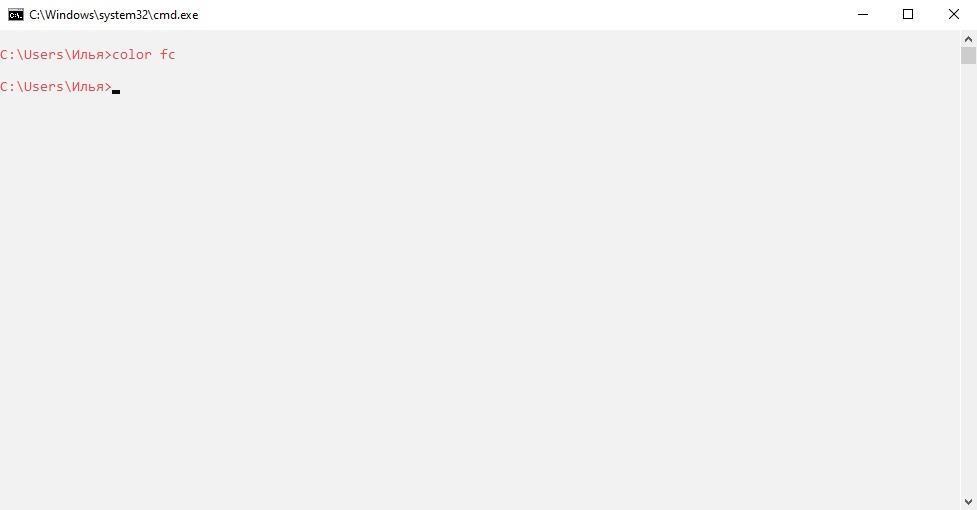
Команда color fc придает утилите бледно-розовый оттенок
- cls – очистка содержимого экрана командной строки
- color – изменение фона и цвета
- exit – выход из командной строки
- help – отображение полного списка команд командной строки
- prompt – изменяет слева от вводимого текста название на любое другое
Теперь вместо <C:\Users\Илья> будет отображаться слово «hello»

Сеть и интернет
Немного команд для настройки сети и интернета:
- control netconnections – просмотр и настройка доступных «Сетевых подключений»
- inetcpl.cpl – переход к свойствам интернета
- NAPncpa.cpl – аналог первой команды, предоставляющий возможность настройки сетевых подключений
- telephon.cpl – настройка модемного подключения к интернету
Заключение
Подытожив, хочется сказать, что не нужно запоминать какую-либо команду дословно. Ознакомления с ними более чем достаточно. Ну а если вам понадобится воспользоваться какой-либо функцией на компьютере с Windows 10, то вспомните про командную строку и посмотрите вышеперечисленные команды – уверен, вы найдете то, что нужно. Если же вы хотите более обширно изучить командную строку, то рекомендую почитать профессиональную литературу, которую легко найти в Интернете.
Post Views: 24 854