Please fill the info fields, it helps to get you faster support 
If you have a Guru Meditation Error, please decode it:
https://github.com/me-no-dev/EspExceptionDecoder
—————————— Remove above ——————————
Hardware:
Board: ESP32 Dev Module
Core Installation/update date: esp has not been updated firmware is about 2 years old
IDE name: Arduino IDE
Flash Frequency: 40Mhz?
Upload Speed: 115200?
Description:
the esp32 wont connect to my network it just says connecting to wifi over and over and never connects
it was working then it stopped could updating the esp32 firmware fix this or is it another issue , also is there a different way to connect to wifi that’s different to the :
WiFi.begin(ssid,password);
while (WiFi.status() != WL_CONNECTED) {
Serial.println(«Connecting to WiFi..»);
delay(300);
}
that might fix this issue
Sketch:
//Change the code below by your sketch
#include <Adafruit_Sensor.h>
//#include "DHT.h"
#include <WiFi.h>
#include <PubSubClient.h>
#include "SparkFunHTU21D.h"
//Create an instance of the object
HTU21D myHumidity;

const char* ssid = "skynet";
const char* password = "Sexyfrog9919";
//const char* mqttServer = "192,168,0,196";
IPAddress mqttServer(192,168,0,196);
const int mqttPort = 1883;
const char* mqttUser = "ojosbourne";
const char* mqttPassword = "Skingsking9919";
//#define mqttPort "1883"
#define temperature_topic "topic/temp"       //Topic temperature
#define humidity_topic "topic/humid"         //Topic humidity
//#define debug_topic "debug"                   //Topic for debugging


//here we use pin IO23 of ESP32 to read data
//#define DHTPIN 14
//our sensor is DHT22 type
//#define DHTTYPE DHT22
//create an instance of DHT sensor
//DHT dht(DHTPIN, DHTTYPE);

WiFiClient espClient;
PubSubClient client(espClient);


void setup() {
//void setup() (

//   connect to wifi


Serial.begin(115200);
WiFi.disconnect(true);
delay(3000);

//DO NOT TOUCH
    //  This is here to force the ESP32 to reset the WiFi and initialise correctly.
 //   Serial.print("WIFI status = ");
  //  Serial.println(WiFi.getMode());
  // WiFi.disconnect(true);
   // delay(3000);
   // WiFi.mode(WIFI_STA);
   // delay(1000);
    //Serial.print("WIFI status = ");
    //Serial.println(WiFi.getMode());
    // End silly stuff !!!

WiFi.begin(ssid,password);

while (WiFi.status() != WL_CONNECTED) {
Serial.println("Connecting to WiFi..");
delay(300);

}

Serial.println("Connected to the WiFi network");
 // connect to mqtt

client.setServer(mqttServer, mqttPort);
//mqttClient.setServer(mqttServer, mqttPort);
while (!client.connected()) {
Serial.println("Connecting to MQTT...");
 delay(300);

if (client.connect( "ESP32Client", mqttUser, mqttPassword )) {

Serial.println("connected");
 delay(300);

} else {

Serial.print("failed with state ");
Serial.print(client.state());
delay(200);

}
//}


  //Serial.begin(115200);
  //Serial.println("DHT22 sensor!");
  //call begin to start sensor
  //dht.begin();

  Serial.println("HTU21D Example!");

  myHumidity.begin();
}

}


void loop() {

  float h = myHumidity.readHumidity();
  float t = myHumidity.readTemperature();


  //use the functions which are supplied by library.
  //float h = dht.readHumidity();
  // Read temperature as Celsius (the default)
  //float t = dht.readTemperature();
  // Check if any reads failed and exit early (to try again).
  if (isnan(h) || isnan(t)) {
    Serial.println("Failed to read from htu21d sensor!");
    return;
  }
  // print the result to Terminal
  //client.publish(humidity_topic, (h));
  Serial.print("Humidity: ");
  Serial.print(h);
  Serial.print(" %\t");
 // client.publish(temperature_topic, (t));
  Serial.print("Temperature: ");
  Serial.print(t);
  Serial.println(" *C ");

   // Publish values to MQTT topics
    client.publish(temperature_topic, String(t).c_str(), true);   // Publish temperature on mosohomes/temp1
    //if ( debug ) {
      Serial.println("Temperature sent to MQTT.");
    //}
    delay(200); //some delay is needed for the mqtt server to accept the message

    client.publish(humidity_topic, String(h).c_str(), true);      // Publish humidity on mosohomes/humid1

    //if ( debug ) {
                  Serial.println("Humidity sent to MQTT.");
                 //}
  //we delay a little bit for next read
  delay(10000);
}


### Debug Messages:

[D][WiFiGeneric.cpp:345] _eventCallback(): Event: 2 - STA_START
[D][WiFiGeneric.cpp:345] _eventCallback(): Event: 0 - WIFI_READY
Connecting to WiFi..
Connecting to WiFi..
Connecting to WiFi..
Connecting to WiFi..
Connecting to WiFi..
[D][WiFiGeneric.cpp:345] _eventCallback(): Event: 5 - STA_DISCONNECTED
[W][WiFiGeneric.cpp:360] _eventCallback(): Reason: 202 - AUTH_FAIL
Connecting to WiFi..
Connecting to WiFi..
Connecting to WiFi..
Connecting to WiFi..
Connecting to WiFi..
Connecting to WiFi..
Connecting to WiFi..
Connecting to WiFi..

Страница 1 из 3
-
Доброго времени суток
Помогите новичку
Может у кого такая ситуация была (диво-дивное, чудо чудное)
ESP32-WROOM-32 DEVKIT V1
прошивки любые, даже из учебных в Arduino IDE
прошивал через flash_download_tool_3.8.5 и через Arduino 1.8.13
очищал, обнулял и заводские бинарники поадресно заливал
Прошивки заливаются БЕЗ ПРОБЛЕМ, на ураПроблема: не подключается к домашней сети по Wi-Fi роутера, НО подключается без проблем к точке доступа на телефоне!!! На любой прошивке!
Роутер замучил настройками до смерти, все пробовал, перезагружал, матерился.
Заменил роутер на абсолютно другой — история та же
Создал на телефоне точку доступа, такую же как на роутере — к телефону подключилась в момент, даже несмотря на то что на роутере Wi-Fi не выключал.
Для уточнения — названия сети только лат. буквы, пароль лат. буквы и цифры. Название и пароль локалки и точки доступа на телефоне одинаковы.
Если возникнут вопросы насчет отдаления от антенн или телефона, все делалось почти в упор, телефон достает метров на 10 через стены
Все это проверял через SerialMonitor или монитором порта в АрдуиноБуду благодарен за идеи и участие в поисках истины
-
Роутер №1 — ?
Роутер №2 — ?Мне бы так жить: не коннектится ESP32 — взял и заменил роутер на абсолютно другой.
А за одно… Настройки сети и wifi на роутере, рассказ о том, что там на ESP32 установлено, как к wifi подключаете.
Не стесняйтесь, рассказывайте подробно о том, как wifi добываете.Хотя, можете и объявить открытый конкурс с призовым фондом: «Посмотри в хрустальный шар, угадай и реши мою проблему».
Последнее редактирование: 11 дек 2020
Feofan и S_E_R_G_I_O нравится это.
-
1-ый -D-link DIR-815 прошивка 2.5.25
2- ой Huawei WS319 прошивка WS319-10V100R001C108B016
Есть еще DIR-300, но он старенький
Роутеры, кроме первого остались от старых квартир, я не олигарх )))Настройки wifi:
2,4 ГГц
Режим безопасности: WPA2-PSK (пробовал все режимы с перезагрузками, с матюками)
Режим шифрования WPA: AES (пробовал все доступные)
Период обновления WPA-ключа: 3600 (не знаю что это)
изоляцию точки доступа: выключено (включал, не помогло)
канал: 5 (пробовал все от 1 до 13)
Все брадмаузеры, мак-фильтра, исключения отключены
Полоса пропускания 11n: 20/40 МГц (пробовал и другие варианты)
Режим передачи: 802.11 b/g/n
Имена сети создавал разные: только латиница без символов
Пароли: цифровые, буквенные латиница без символовРоутер подключен через WAN к интернету, шнурками и Wi-Fi все раздает
Есть несколько подключенных и работающих плат ESP32-WROOM-32 DEVKIT V1 и ESP8266, абсолютно таких проблем не возникало.Телефон Nokia 8 Sirocco (работает как часики в режиме точки доступа), там настроек мало:
название точки доступа: тоже что и локалки
пароль: тот же
Защита: WPA2-Personal (другой там нет, только без защиты вообще)Я уже мучаюсь около недели, всех действий не перечислить, задавайте вопросы, отвечу на все
-
Для простоты сейчас юзаю прошивку из примеров Ардуино (в самой программе) WiFiClientBasic.
-
Ну что говорит мой хрустальный шар, ибо кроме названий роутеров информации не прибавилось.
Наиболее вероятная причина — ваш волшебный скетч назначает модулю постоянный ip адрес, который совпадает в третьей группе цифр с теми адресами, что выдаёт телефон, но не совпадает с теми, что выдают роутеры.
-
Скажите, что еще про роутеры надо рассказать? Думаю цвет корпуса будет неинтересен, а более настроек Wi-Fi на моих роутерах нет.
Придется и мне хрустальный шарик включить: постоянный ip адрес это не причина, а следствие, а вот что является причиной, брак железа или недостатки софта? И самое главное, как с этим можно бороться? Данная болезнь лечится?
Включайте хрустальный шар на полную мощность или задавайте правильные вопросы, максимально подробно отвечу. -
Цвет в этом деле имеет решающее значение, но до него мы еще дойдем. А пока подскажите,
1. Какой диапазон адресов выдает DHCP роутера клиентам и включен ли он вообще, полагаю включен.
2. Каковы настройки подключения wifi вашего невероятного скетча.Если наберетесь смелости показать секретный скетч, сделайте так, чтобы он выглядел по-человечески.
-
DHCP включен, без его никак, 192.168.0.1-192.168.0.250
/*
* This sketch sends a message to a TCP server
*
*/#include <WiFi.h>
#include <WiFiMulti.h>WiFiMulti WiFiMulti;
void setup()
{
Serial.begin(115200);
delay(10);// We start by connecting to a WiFi network
WiFiMulti.addAP(«localca», «12345678»);Serial.println();
Serial.println();
Serial.print(«Waiting for WiFi… «);while(WiFiMulti.run() != WL_CONNECTED) {
Serial.print(«.»);
delay(500);
}Serial.println(«»);
Serial.println(«WiFi connected»);
Serial.println(«IP address: «);
Serial.println(WiFi.localIP());delay(500);
}void loop()
{
// const uint16_t port = 80;
// const char * host = «192.168.1.1»; // ip or dns
const uint16_t port = 1337;
const char * host = «192.168.0.1»; // ip or dnsSerial.print(«Connecting to «);
Serial.println(host);// Use WiFiClient class to create TCP connections
WiFiClient client;if (!client.connect(host, port)) {
Serial.println(«Connection failed.»);
Serial.println(«Waiting 5 seconds before retrying…»);
delay(5000);
return;
}// This will send a request to the server
//uncomment this line to send an arbitrary string to the server
//client.print(«Send this data to the server»);
//uncomment this line to send a basic document request to the server
client.print(«GET /index.html HTTP/1.1\n\n«);int maxloops = 0;
//wait for the server’s reply to become available
while (!client.available() && maxloops < 1000)
{
maxloops++;
delay(1); //delay 1 msec
}
if (client.available() > 0)
{
//read back one line from the server
String line = client.readStringUntil(‘\r‘);
Serial.println(line);
}
else
{
Serial.println(«client.available() timed out «);
}Serial.println(«Closing connection.»);
client.stop();Serial.println(«Waiting 5 seconds before restarting…»);
delay(5000);
} -
Добавлю, заливал WiFiScan, плата видит все сети поблизости, сигнал отличный
-
Вот лог из SerialMonitor
ets Jun 8 2016 00:22:57rst:0x1 (POWERON_RESET),boot:0x13 (SPI_FAST_FLASH_BOOT)
configsip: 0, SPIWP:0xee
clk_drv:0x00,q_drv:0x00,d_drv:0x00,cs0_drv:0x00,hd_drv:0x00,wp_drv:0x00
mode:DIO, clock div:1
load:0x3fff0018,len:4
load:0x3fff001c,len:1216
ho 0 tail 12 room 4
load:0x40078000,len:9720
ho 0 tail 12 room 4
load:0x40080400,len:6352
entry 0x400806b8
[W][esp32—hal—psram.c:30] psramInit(): PSRAM init failed!
[I][WiFiMulti.cpp:84] addAP(): [WIFI][APlistAdd] add SSID: localcaWaiting for WiFi… [D][WiFiGeneric.cpp:337] _eventCallback(): Event: 0 — WIFI_READY
[D][WiFiGeneric.cpp:337] _eventCallback(): Event: 2 — STA_START
[D][WiFiGeneric.cpp:337] _eventCallback(): Event: 1 — SCAN_DONE
[I][WiFiMulti.cpp:114] run(): [WIFI] scan done
[I][WiFiMulti.cpp:119] run(): [WIFI] 6 networks found
[D][WiFiMulti.cpp:149] run(): —> 0: [5][00:34:FE:50:EE:F4] localca (—47) *
[D][WiFiMulti.cpp:149] run(): —> 1: [5][C0:A0:BB:8C:4A:94] balbulator (—63) *
[D][WiFiMulti.cpp:151] run(): 2: [1][88:C3:97:E0:12:DB] Haharina9 (—82) *
[D][WiFiMulti.cpp:151] run(): 3: [13][1C:BD:B9:B8:64:26] Yatsyshyny (—85) *
[D][WiFiMulti.cpp:151] run(): 4: [2][84:16:F9:98:6F:4A] Kyivstar_6F4A (—88) *
[D][WiFiMulti.cpp:151] run(): 5: [11][18:D6:C7:72:EF:AE] Inessa (—89) *
[I][WiFiMulti.cpp:160] run(): [WIFI] Connecting BSSID: 00:34:FE:50:EE:F4 SSID: localca Channal: 5 (—47)
[D][WiFiGeneric.cpp:337] _eventCallback(): Event: 5 — STA_DISCONNECTED
[W][WiFiGeneric.cpp:353] _eventCallback(): Reason: 2 — AUTH_EXPIRE
[D][WiFiGeneric.cpp:337] _eventCallback(): Event: 5 — STA_DISCONNECTED
[W][WiFiGeneric.cpp:353] _eventCallback(): Reason: 2 — AUTH_EXPIRE
[E][WiFiMulti.cpp:187] run(): [WIFI] Connecting Failed (6).
.[D][WiFiMulti.cpp:195] run(): [WIFI] delete old wifi config…
[D][WiFiMulti.cpp:198] run(): [WIFI] start scan
.[D][WiFiGeneric.cpp:337] _eventCallback(): Event: 5 — STA_DISCONNECTED
[W][WiFiGeneric.cpp:353] _eventCallback(): Reason: 202 — AUTH_FAIL
….[D][WiFiGeneric.cpp:337] _eventCallback(): Event: 1 — SCAN_DONE
[D][WiFiGeneric.cpp:337] _eventCallback(): Event: 1 — SCAN_DONE
[I][WiFiMulti.cpp:114] run(): [WIFI] scan done
[I][WiFiMulti.cpp:119] run(): [WIFI] 5 networks found
[D][WiFiMulti.cpp:149] run(): —> 0: [5][00:34:FE:50:EE:F4] localca (—48) *
[D][WiFiMulti.cpp:149] run(): —> 1: [5][C0:A0:BB:8C:4A:94] balbulator (—65) *
[D][WiFiMulti.cpp:151] run(): 2: [1][88:C3:97:E0:12:DB] Haharina9 (—81) *
[D][WiFiMulti.cpp:151] run(): 3: [13][1C:BD:B9:B8:64:26] Yatsyshyny (—85) *
[D][WiFiMulti.cpp:151] run(): 4: [11][18:D6:C7:72:EF:AE] Inessa (—91) *
[I][WiFiMulti.cpp:160] run(): [WIFI] Connecting BSSID: 00:34:FE:50:EE:F4 SSID: localca Channal: 5 (—48)
[E][WiFiMulti.cpp:184] run(): [WIFI] Connecting Failed.
.[D][WiFiMulti.cpp:195] run(): [WIFI] delete old wifi config…
[D][WiFiMulti.cpp:198] run(): [WIFI] start scan
.[D][WiFiGeneric.cpp:337] _eventCallback(): Event: 5 — STA_DISCONNECTED
[W][WiFiGeneric.cpp:353] _eventCallback(): Reason: 202 — AUTH_FAIL
….[D][WiFiGeneric.cpp:337] _eventCallback(): Event: 1 — SCAN_DONE
[D][WiFiGeneric.cpp:337] _eventCallback(): Event: 1 — SCAN_DONE
[I][WiFiMulti.cpp:114] run(): [WIFI] scan done
[I][WiFiMulti.cpp:119] run(): [WIFI] 5 networks found
… -
F ‘nj kju ghb ecgtiyjv gjlrk.xtybb r nt
Лог с самого начала, далее он повторяется
Добавлю лог с успешным подключением к телефонуets Jun 8 2016 00:22:57rst:0x1 (POWERON_RESET),boot:0x13 (SPI_FAST_FLASH_BOOT)
configsip: 0, SPIWP:0xee
clk_drv:0x00,q_drv:0x00,d_drv:0x00,cs0_drv:0x00,hd_drv:0x00,wp_drv:0x00
mode:DIO, clock div:1
load:0x3fff0018,len:4
load:0x3fff001c,len:1216
ho 0 tail 12 room 4
load:0x40078000,len:9720
ho 0 tail 12 room 4
load:0x40080400,len:6352
entry 0x400806b8
[W][esp32—hal—psram.c:30] psramInit(): PSRAM init failed!
[I][WiFiMulti.cpp:84] addAP(): [WIFI][APlistAdd] add SSID: localcaWaiting for WiFi… [D][WiFiGeneric.cpp:337] _eventCallback(): Event: 0 — WIFI_READY
[D][WiFiGeneric.cpp:337] _eventCallback(): Event: 2 — STA_START
[D][WiFiGeneric.cpp:337] _eventCallback(): Event: 1 — SCAN_DONE
[I][WiFiMulti.cpp:114] run(): [WIFI] scan done
[I][WiFiMulti.cpp:119] run(): [WIFI] 5 networks found
[D][WiFiMulti.cpp:151] run(): 0: [5][00:34:FE:50:EE:F4] balbulator (—41) *
[D][WiFiMulti.cpp:149] run(): —> 1: [10][8E:26:F0:6A:20:9B] localca (—48) *
[D][WiFiMulti.cpp:151] run(): 2: [5][C0:A0:BB:8C:4A:94] balbulator (—69) *
[D][WiFiMulti.cpp:151] run(): 3: [6][F8:1A:67:75:D5:66] YaRka (—88) *
[D][WiFiMulti.cpp:151] run(): 4: [13][1C:BD:B9:B8:64:26] Yatsyshyny (—95) *
[I][WiFiMulti.cpp:160] run(): [WIFI] Connecting BSSID: 8E:26:F0:6A:20:9B SSID: localca Channal: 10 (—48)
[D][WiFiGeneric.cpp:337] _eventCallback(): Event: 4 — STA_CONNECTED
[D][WiFiGeneric.cpp:337] _eventCallback(): Event: 7 — STA_GOT_IP
[D][WiFiGeneric.cpp:381] _eventCallback(): STA IP: 192.168.43.14, MASK: 255.255.255.0, GW: 192.168.43.142
[I][WiFiMulti.cpp:174] run(): [WIFI] Connecting done.
[D][WiFiMulti.cpp:175] run(): [WIFI] SSID: localca
[D][WiFiMulti.cpp:176] run(): [WIFI] IP: 192.168.43.14
[D][WiFiMulti.cpp:177] run(): [WIFI] MAC: 8E:26:F0:6A:20:9B
[D][WiFiMulti.cpp:178] run(): [WIFI] Channel: 10
192.168.43.14
Connecting to 192.168.0.1
[E][WiFiClient.cpp:258] connect(): socket error on fd 54, errno: 113, «Software caused connection abort»
Connection failed.
Waiting 5 seconds before retrying…
Connecting to 192.168.0.1Тут только ошибка подключения к 192.168.0.1, я вводил для примера это ДНС
-
Там успех соединения празднуется выдачей целой огромной жииирной точки, не так ли?
Заметить ее очкарик типа меня не в состоянии.Ув. @S_E_R_G_I_O , в сетапе строку Serial.print(«.»); поменяйте на чтото более информативное.
И зачем в лупе вы пытаетесь присоединиться к роутеру по порту 1337? -
А это зачем? Что модуль будет искать в вебморде роутера? Там в сетапе еще вопрос с соединением.
-
Да ввел я IP-роутера от фонаря, дело ведь происходит до этого, — при подключении Wi-Fi, вот тут успех
[I][WiFiMulti.cpp:160] run(): [WIFI] Connecting BSSID: 8E:26:F0:6A:20:9B SSID: localca Channal: 10 (—48)
[D][WiFiGeneric.cpp:337] _eventCallback(): Event: 4 — STA_CONNECTED
[D][WiFiGeneric.cpp:337] _eventCallback(): Event: 7 — STA_GOT_IP
[D][WiFiGeneric.cpp:381] _eventCallback(): STA IP: 192.168.43.14, MASK: 255.255.255.0, GW: 192.168.43.142
[I][WiFiMulti.cpp:174] run(): [WIFI] Connecting done.
[D][WiFiMulti.cpp:175] run(): [WIFI] SSID: localca
[D][WiFiMulti.cpp:176] run(): [WIFI] IP: 192.168.43.14
[D][WiFiMulti.cpp:177] run(): [WIFI] MAC: 8E:26:F0:6A:20:9B
[D][WiFiMulti.cpp:178] run(): [WIFI] Channel: 10
192.168.43.14 -
Что именно туда подставить, я в этом не силен
-
Поставьте «Да здравствует союз рабочих и крестьян» вместо точки.
-
Значит вот что добавлю. Я ни разу не соединял esp32 с wifi на йазыке Ардуино, поэтому суть вашей беды не вижу. Но сделал за вас всю черновую работу — вытащил на свет ваши деяния.
Теперь вежливо подергайте за рукав сведущих товарищей с форума, думаю им хватит информауии.Последнее редактирование: 12 дек 2020
-
Так это успешное соединение к телефону.
-
Этот скетч взят из примеров Ардуино, он легкий, потому его в пример и привел
Мой рабочий скетч, который работает на других платах, слишком тяжело сюда загрузить (архивы не загружаются)
Но смею вас заверить, что там есть подключение в полной мере, с загрузкой указанной ай-пи в веб -
Там в реальном пароле пробела нет или еще какого хитрого символа?
Лог ничего полезного не говорит, время выходит, соединения нет….
Страница 1 из 3
Цель этого урока — объяснить, как подключить ESP32 к сети Wi-Fi с помощью Arduino IDE. К счастью для тех, кто имеет опыт работы с библиотеками ESP8266 Arduino IDE, процедура очень похожа.
Если вы еще не установили поддержку ESP32 в среде Arduino IDE, как это сделать рассказываю здесь. Также в предыдущем уроке рассказывал, как загрузить первый скетч в DOIT ESP32 DEVKIT V1. Распиловку плату можно посмотреть тут.
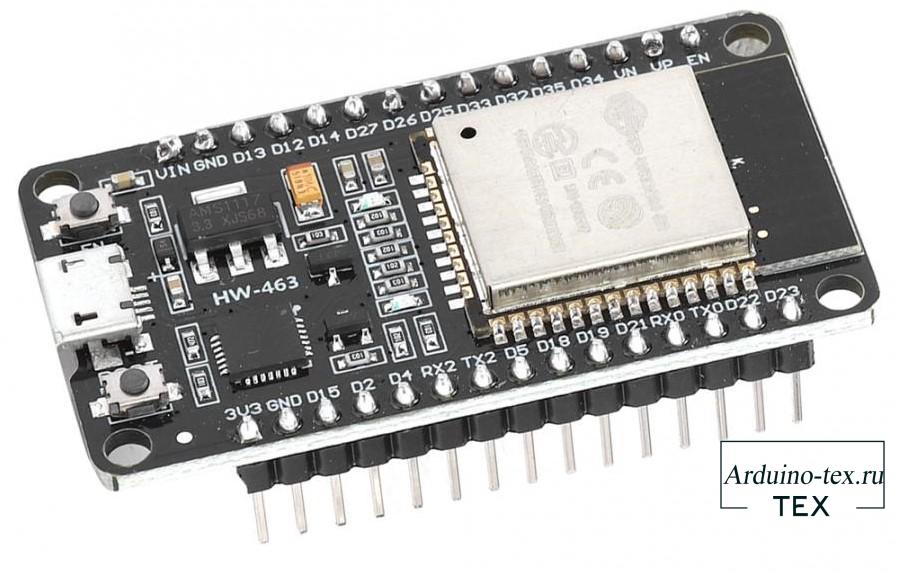
В данном уроке будем использовать также плату DOIT ESP32 DEVKIT V1.
Описание скетча подключение к сети Wi-Fi ESP32.
Прежде всего, нам нужно подключить библиотеку WiFi.h, которая позволит подключиться к сети. Интересно отметить, что разработчики выбрали более общее имя библиотеки, в отличие от ESP8266, где библиотека называлась ESP8266WiFi.h.
#include "WiFi.h"
Функциональность также представлена, как внешняя переменная с именем WiFi, в данном случае это класс WiFiClass.
Чтобы наш код было легко редактировать, мы объявим две глобальные переменные для хранения имени сети Wi-Fi, к которой мы хотим подключиться, так же и ее пароля.
const char* ssid = "NetworkName";
const char* password =  "NetworkPass";
Внимание, используйте учетные данные вашей сети.
Теперь мы укажем функцию настройки, в которой подключимся к сети. Но сначала откроем последовательное соединение, чтобы мы могли вывести результат работы программы.
Затем вызываем метод begin для объекта WiFi, передавая в качестве аргументов SSID (имя сети) и переменную пароля, указанные ранее. Это инициализирует подключение к сети.
Serial.begin(115200);
WiFi.begin(ssid, password);
После этого выполним цикл while, пока соединение не будет установлено. Для этого можем вызвать метод status для объекта WiFi и дождаться, пока результат не совпадет с перечислением WL_CONNECTED. Между каждой итерацией мы вводим небольшую задержку, чтобы избежать постоянного опроса.
while (WiFi.status() != WL_CONNECTED) {
  delay(500);
  Serial.println("Connecting to WiFi..");
}
После цикла ESP32 должен успешно подключиться к сети Wi-Fi. Полный исходный скетч приведён ниже.
#include "WiFi.h"

const char* ssid = "yourNetworkName";
const char* password =  "yourNetworkPass";

void setup() {

  Serial.begin(115200);

  WiFi.begin(ssid, password);

  while (WiFi.status() != WL_CONNECTED) {
    delay(500);
    Serial.println("Connecting to WiFi..");
  }

  Serial.println("Connected to the WiFi network");

}

void loop() {}
Тестирование скетча, подключение к сети Wi-Fi ESP32.
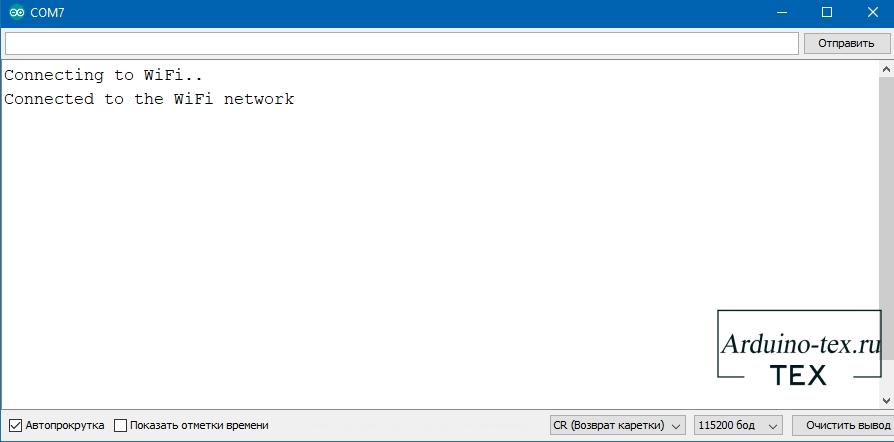
Чтобы проверить код, просто загрузите его в плату ESP32 и откройте последовательный порт. Вы должны получить результат, аналогичный показанному на рисунке ниже. Это означает, что подключение в Wi-Fi выполнено успешно.
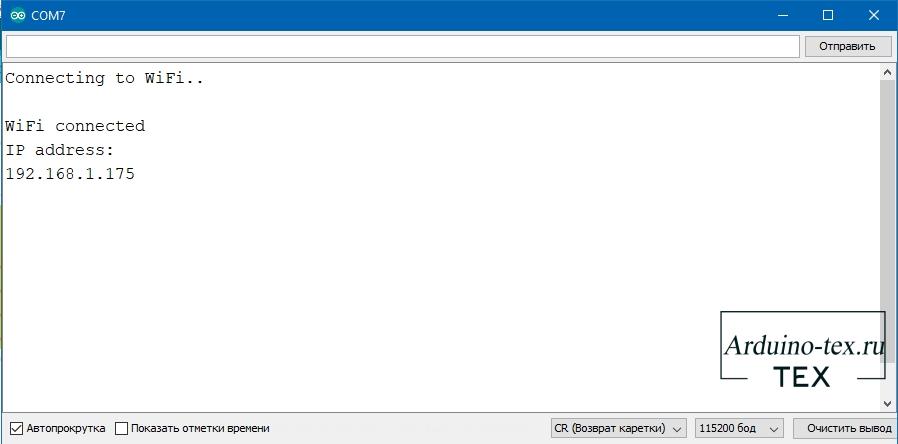
Давайте немного дополним код. При подключении выведем Ip адрес, который получит ESP32. А если подключиться не удалось в течение 10 попыток, выведем сообщение об этом.
#include "WiFi.h"

const char* ssid = "NetworkName";
const char* password =  "NetworkPass";
byte tries = 10;  // Попыткок подключения к точке доступа
void setup() {

  Serial.begin(115200);

  WiFi.begin(ssid, password);

  while (--tries && WiFi.status() != WL_CONNECTED) {
    delay(500);
    Serial.println(".");
  }
  if (WiFi.status() != WL_CONNECTED)
  {
    Serial.println("Non Connecting to WiFi..");
  }
  else
  {
    // Иначе удалось подключиться отправляем сообщение
    // о подключении и выводим адрес IP
    Serial.println("");
    Serial.println("WiFi connected");
    Serial.println("IP address: ");
    Serial.println(WiFi.localIP());
  }

}

void loop() {}
В итоге должны получить вот такой результат.
Смотрите также другие уроки по программированию ESP32:
- Урок 1. Веб-сервер ESP32 (ESP8266) в среде Arduino IDE
- Урок 2. Подключаем DHT11, DHT22 к ESP32, ESP8266. Показание на веб-странице.
- Урок 3. ESP32 и ESP8266 с выводом статуса на веб-страницу и на OLED дисплей.
Понравился Урок ESP32: Подключение к сети Wi-Fi? Не забудь поделиться с друзьями в соц. сетях.
А также подписаться на наш канал на YouTube, вступить в группу Вконтакте, в группу на Facebook.
Спасибо за внимание!
Технологии начинаются с простого!
Фотографии к статье


Файлы для скачивания
| скетча подключение к сети Wi-Fi ESP32.ino | 1 Kb | 520 | Скачать |
Offline
Зарегистрирован: 26.01.2019
bool WifiModule::connect( const char* ssid, const char* password )
{
  WiFi.mode(WIFI_STA);
  WiFi.begin( ssid, password );

  while (WiFi.status() != WL_CONNECTED)
  {
        delay(1000);
        Serial.print(".");
  }
  LOGS( "WiFi connected. IP address: %s", WiFi.localIP() );
}
при этом сканирование сетей работает отлично:
bool WifiModule::scan()
{
    LOGI("scan start");
    int n = WiFi.scanNetworks();
        for (int i = 0; i < n; ++i)
        {
            LOGI("Network name: %s", WiFi.SSID(i));
            delay(10);
        }
    WiFi.scanDelete();
    WiFi.disconnect();
}
менял режим шифрования в сети, полностью делал сеть открытой, пытался приконнектиться к сети с укащанием MAC девайса — ничего не момогает. Коннекта нет.
если подключить вывод в лог сетевых эвентов то выводит:
"WiFi interface ready"
"WiFi client started"
"WiFi client started"
"WiFi client started"
"WiFi interface ready"
"WiFi client started"
"WiFi client started"
"WiFi client started"
и так бесконечно. Но роутере в логе пусто ((
Are you having issues with ESP32 won’t connect to WiFi? We have proven solutions that will help you resolve this problem.
The ESP32 is a low-cost SoC that comes with connectivity options allowing you to create systems on top of your current setup.
Our solutions will help you resolve a common WiFi issue that nearly all users can encounter.
Let’s get to solving your issues.
To connect your ESP32 to WiFi, you want to make sure that your system can detect your network. Your ESP32 may also be set to a different mode so make sure to switch it to Station Mode. You also want to connect your system to 2.4 GHz WiFi since the ESP32 is unable to connect to the 5 GHz frequency.
Before we move on to the full fix guide, we can take a closer look at the possible causes of this problem.
Why ESP32 Won’t Stay Connected to WiFi
When your ESP32 system doesn’t connect to your WiFi network, there are a few sources to focus on.
One, in particular, is that you’re not using the proper WiFi library in your code. Your router is also too far away for your system’s wireless network module to pick up.
Here are the possible issues that you’re going to face with your ESP32:
1. WiFi Library Is Not Loaded
To configure your ESP32, you will need to do some coding. You need to reference certain code libraries so you can use different commands.
You may have forgotten to use the WiFi library, and this can cause connectivity problems.
2. Router Too Far Away
Just like other devices, your ESP32 needs to be within a certain range of your router. It won’t connect properly if it’s too far away and can often disconnect.
3. ESP32 on a Different Connection Mode
You can set your ESP32’s WiFi module as an access point, a client, or both. Setting it to a different mode can cause WiFi issues.
4. 5G WiFi is Incompatible
There are versions of the ESP32 that do not work well with 5G WiFi. Make sure your network is using the usual 2.4 GHz frequency.
These are all the issues you’re likely to face with your ESP32’s WiFi woes.
Now that you have a better understanding, we can now proceed to the complete troubleshooting guide!

The first thing you can do to fix this issue your WiFi issues is to reboot your ESP32.
You can do it by cutting the power, so if it’s connected to your computer via the USB port, simply pull it out to shut it down.
Wait for a few seconds before plugging it back in and checking if it reconnects to the network on its own.
You can also hold down the Boot button and wait for your system to shut down.
In case it doesn’t, and you’re having a hard time getting it to connect to WiFi, here are the other solutions you can try:
Solution #1: Include the WiFi.h Library in Your Code
The very first fix that you should consider is making sure that you include the ESP32’s WiFi library.
This is the only way to use WiFi functionalities in your system. Now, you don’t have to worry if you need to upload an external file onto your device.
As long as you have installed ESP32, you should have it ready for use.
Here’s how to include WiFi.h:
- Install ESP32 by going to Arduino Boards Manager.
- Search for ESP32.
- Press the Install button.
- Add #include <WiFi.h> in your code.
Note: Scan your network and see if your ESP32 can detect your active networks.
Solution #2: Reconnect to the WiFi Network
After including the right libraries into your ESP32 sketches, you will want to attempt to reconnect to your WiFi network.

Reconnecting on the ESP32 is a bit different than most of your devices. There are a few steps that you need to do before you can successfully detect and connect to your network.
You want to make sure that everything is in order and that your system can see the network you want to connect to.
Here are the steps on how to successfully connect your ESP32 to WiFi:
- In your IDE, go to File, then Examples.
- Select WiFi, then WiFiScan.
- Check for available networks that your system can detect.
- Connect to your WiFi network using the initWiFi() function.
Note: You can also know your connection's signal strength by using the RSSI function.
Solution #3: Put Your ESP32 Into Flash or Upload Mode
The next thing that you need to do is to flash your system.
If you’re having connection issues, your current sketch or code is not properly uploaded to your ESP32, and your changes are not properly loaded into your device.
This step is more like a soft reset for your ESP32 board and ensures that future changes are reflected in your system.
Here’s how to put your ESP32 into flash or upload mode:
- Press and hold the Boot button on the ESP32 board.
- Click on the Upload button in the Arduino IDE on your computer.
- Wait for the Connecting message to appear on the terminal window.
- Release the Boot button.
- The Done Uploading message should appear.
Tip: Your new sketch with changes to your connections is now loaded to the board, and it will start to connect to your WiFi.
Solution #4: Set Your ESP32 to Station Mode
Your ESP32’s WiFi module can be configured to different modes.
It can broadcast WiFi signals as an access point, be it a device that connects to a WiFi source or even both.

If your ESP32 doesn’t connect to your WiFi, you can check if it’s set to the Access Point Mode.
If this is the case, you’ll want to set it back to Station Mode so it can receive the signal from your router.
Here’s how to set your ESP32 to Station Mode:
- Use WiFi.mode(WIFI_STA) to set your ESP32 to Station Mode.
- Know the SSID and password of your network.
- Use the initWiFi() function to connect to your network.
- Replace ssid with your network’s SSID.
- Replace password with your network’s WiFi password.
Pro Tip: You can also set your ESP32 as a station and access point, adding versatility.
Solution #5: Set a Static IP on Your ESP32
If none of these solutions work so far, you’ll want to explore setting your ESP32 with a static IP. Connectivity issues can cause your device to stop connecting to your WiFi.
Your system cannot properly connect to your router’s DHCP servers, so it’s not assigned an IP address.
You can set your ESP32 with a static IP address to remedy this. This way, your system has a more permanent IP address, which makes it easier for you whenever you connect it with other devices.
Here’s how to set a static IP address on your ESP32:
- Use the WiFi.config() function to set a static IP address for your system.
- Change the value in local_IP by putting your IP address.
- Change the value under gateway to the IP address of your router.
- Call the WiFi.config() function in setup() to assign your IP addresses.
Tip: You can also change your DNS addresses for better connectivity.
Solution #6: Enable 2.4G WiFi on Your Router:
ESP32 systems are low-cost, barebones types of devices with minimal features and functionalities.
Yes, they’re going to have WiFi and Bluetooth capabilities, but they’re not going to be using top of the line hardware for those.

Your ESP32 will not have 5G WiFi available.
If your system doesn’t readily connect to your wireless network, you want to make sure that the 2.4 GHz frequency on your router is switched on.
Here’s how to enable 2.4G WiFi on your router:
- Access your router’s dashboard by typing its IP address on your browser.
- Log in using your router’s username and password.
- Navigate to WiFi, then Advanced.
- Turn on your router’s dual-band features.
- Alternatively, you can switch on 2.4 GHz.
Note: You can also disable your router’s 5G WiFi to ensure that it’s only broadcasting in 2.4 GHz.
After going through these solutions, you can be sure that you’ll be able to connect your ESP32 to your WiFi in no time.
If you continue to experience issues with your system, you can always contact Espressif System’s customer support team so they can guide you on the next steps.
Read Next: What is the Cheapest Way to Keep a Phone Number?
Bottom Line
Now that you know the fix to your ESP32 won’t connect to WiFi problem, you will be able to resolve the error.
As long as you follow the steps carefully, fixing your ESP32 won’t take too much of your time and effort.

Kevin has over five years of experience working in various Tech startups and providing Technical solutions. He has contributed to many Tech publications and websites.