Во время установки Windows появляется ошибка «the file autorun dll could not be loaded or is corrupt error code 0x7e»
Некоторые пользователи при попытке установить на свой компьютер операционную систему Windows сталкиваются с данной ошибкой. Если ее перевести на русский язык, то звучит она так: файл autorun dll не может быть загружен или поврежден код ошибки 0x7e.
В данной статье мы разберемся почему появляется данная ошибка и как ее устранить чтобы успешно переустановить систему.
Почему она появляется?
С данной ошибкой сталкиваются те, кто скачал установочный образ Windows из интернета или скопировал с другого установочного диска и просто поместил все содержимое на флешку или на диск, предварительно распаковав.
Далее прямо в работающей системе запускается файл setup.exe, после чего появляется известная ошибка “the file autorun dll could not be loaded or is corrupt error code 0x7e”.
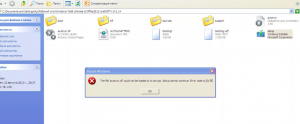
Появление ошибки при запуске файла setup прямо из Windows
Все дело в том, что установочный диск или флешка записывается несколько иным способом. Для успешной установки Windows они должны быть загрузочными, то есть подготовленными для установки с них операционной системы.
Имея установочный образ Windows не достаточно его просто записать на флешку. Для этого существуют специальные программы, которые запишут его правильным образом. Об этом мы уже писали:
- Как записать образ Windows на флешку для последующей установки;
- Как записать установочный диск.
Как исправить ошибку?
Для этого сначала нужно по одной из инструкций выше записать диск или флешку. После того, как установочный носитель будет готов, лучше всего произвести установку системы, запуская ее не из под Windows, а из под BIOS.
Для этого нужно лишь установить в BIOS на первое место загрузки DVD ROM или вашу флешку, в зависимости от того, откуда вы будете ставить систему.
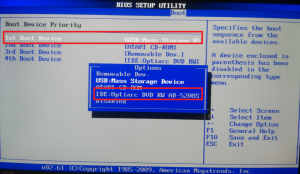
Выбор первичного загрузочного устройства
Выводы
Для успешного устранения ошибки “the file autorun dll could not be loaded or is corrupt error code 0x7e” достаточно выполнить всего два условия:
- С помощью специальной программы записать скачанный образ Windows на диск или флешку.
- Запустить установку не из под Windows, а из под BIOS.
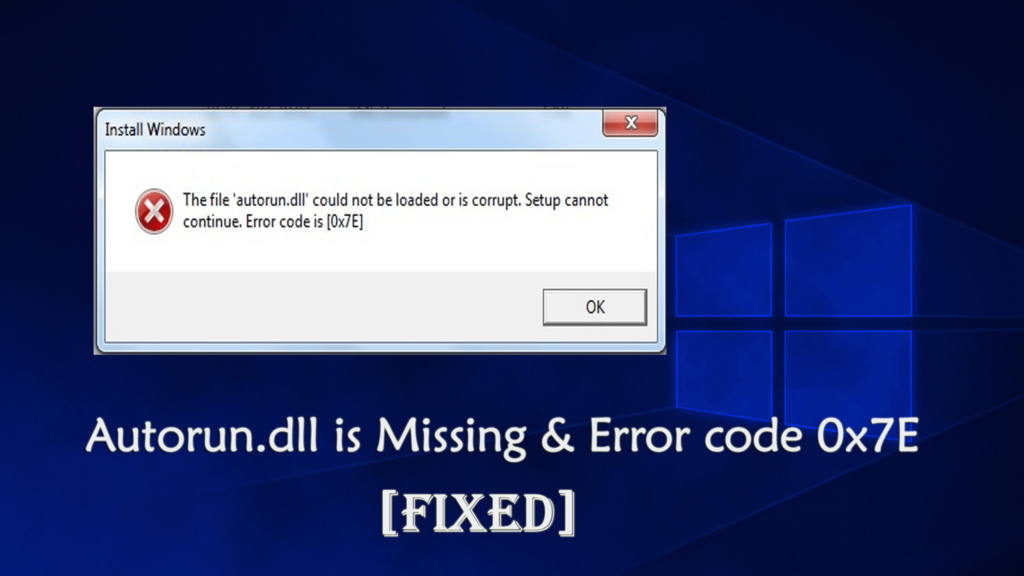
When you attempt to run setup.exe from the Windows 10 or 11 ISO, the following error may occur:
Install Windows

The file 'autorun.dll' could not be loaded or is corrupt. Setup cannot continue. Error code is [0x7E]
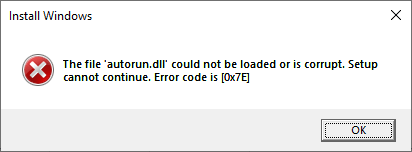
The error code 0x7E implies, “The specified module could not be found.”
Cause
The above error occurs if the user tries to open the ISO using a third-party tool like 7-Zip and run setup.exe from there. If the user is running setup.exe from the USB setup disk and yet this error occurs, it’s possible that the USB disk is corrupt or the file Autorun.dll wasn’t copied successfully during the setup disk creation.
Resolution
To fix the issue, please run setup.exe as mentioned below.
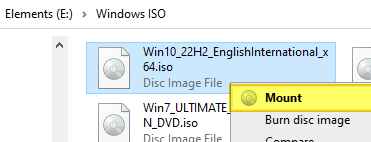
First, mount the ISO by right-clicking on it and clicking “Mount.”
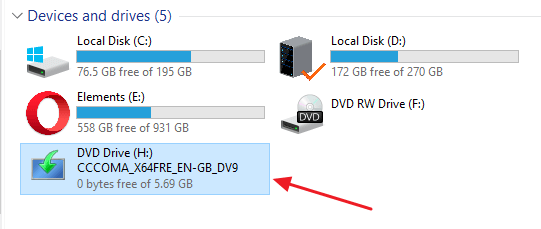
When you mount an ISO, a drive letter like this will be assigned and will show up in This PC. The mounted ISO drive letter will have the caption “DVD Drive”.
Double-click the drive letter (H:\ in this example), and run H:\Setup.exe.
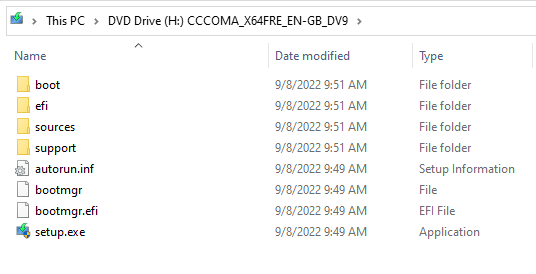
That’s it! This should successfully start the setup process.
Note: If you’re running setup.exe from a USB flash disk and yet the above error occurs, please format the USB flash disk and recreate a new setup disk using Rufus or Media Creation Tool. Check out the article Create Bootable USB Disk from ISO Using Rufus or MCT for more information.
If none of the above steps help, please download a fresh Windows 10 or 11 ISO copy and run setup.exe.
I hope the information in this article helps. Let’s know your comments.
One small request: If you liked this post, please share this?
One «tiny» share from you would seriously help a lot with the growth of this blog.
Some great suggestions:
- Pin it!
- Share it to your favorite blog + Facebook, Reddit
- Tweet it!
So thank you so much for your support. It won’t take more than 10 seconds of your time. The share buttons are right below. 
Ramesh Srinivasan is passionate about Microsoft technologies and he has been a consecutive ten-time recipient of the Microsoft Most Valuable Professional award in the Windows Shell/Desktop Experience category, from 2003 to 2012. He loves to troubleshoot and write about Windows.
Ramesh founded Winhelponline.com in 2005.
Это энциклопедическая статья о проблеме, возникающей при установке операционной системы Windows, связанной с файлом winsetup.dll и ошибкой 0x7e. В данной статье будут представлены эффективные методы и советы по решению этой проблемы.
Описание проблемы
Во время установки Windows операционная система часто требует наличия файла winsetup.dll для успешного завершения установки. Ошибка 0x7e может возникнуть, если этот файл отсутствует, поврежден или несовместим с версией операционной системы. Такая ошибка может привести к невозможности завершить установку Windows.
Методы решения проблемы
Для решения проблемы с файлом winsetup.dll и ошибкой 0x7e при установке Windows можно использовать несколько эффективных методов:
1. Проверить целостность файла winsetup.dll
Первым шагом следует проверить целостность файла winsetup.dll. Для этого можно воспользоваться командой «System File Checker» (SFC), которая проверит и восстановит поврежденные системные файлы:
sfc /scannow
2. Заменить файл winsetup.dll
Если файл winsetup.dll поврежден или отсутствует, его можно заменить с помощью оригинального файла из установочного носителя операционной системы или скачать его с официального веб-сайта Windows. Для замены файла требуется доступ к командной строке:
copy <путь к новому файлу winsetup.dll> C:\Windows\System32
3. Обновить операционную систему
Если проблема с winsetup.dll по-прежнему возникает после замены файла, можно попробовать обновить операционную систему до последней версии. Microsoft регулярно выпускает обновления, которые могут исправлять известные ошибки и проблемы.
4. Проверить совместимость файлов
Возможно, файл winsetup.dll несовместим с версией операционной системы. В этом случае можно проверить информацию о версии файла и убедиться, что он соответствует требованиям операционной системы. Если файл несовместим, следует найти версию winsetup.dll, совместимую с устанавливаемой операционной системой.
5. Обратиться за помощью к специалистам
Если все вышеперечисленные методы не решают проблему, рекомендуется обратиться за помощью к специалистам. Это может быть техническая поддержка операционной системы или специалист по компьютерному обслуживанию.
Заключение
Проблема с файлом winsetup.dll и ошибкой 0x7e при установке Windows может быть достаточно серьезной, так как она мешает завершить процесс установки операционной системы. Однако, применяя эффективные методы, описанные в данной статье, можно успешно решить данную проблему и продолжить установку Windows.
In Windows system all the DLL files are important, in case any one of them gets misplaced or deleted from their specific location then you will receive different types of error messages.
The AutoRun.dll file contains lots of important information on “how the application or a Windows service needs to execute”.
Once this system file gets misplaced or deleted, all of the related or linked app/services get affected. In such condition, a user may face trouble while executing the program or using the computer in a proper manner.
The Autorun.dll errors are commonly faced by Windows 10 users. Many users reported they are getting the “Autorun.dll not found.” and “The file autorun.dll is missing” while trying to install, update or launch the particular program or applications.
So in this article, I am going to list down the AutoRun.dll errors with complete fixes.
Common Autorun.dll Errors Encountered by the Users:
- “Autorun.dll not found.”
- “The file autorun.dll is missing.”
- “Cannot register autorun.dll.”
- “Cannot find C:\Windows\System32\\autorun.dll.”
- “Autorun.dll Access Violation.”
- “Cannot start Windows 8 Pro. A required component is missing: autorun.dll. Please install Windows 8 Pro again.”
- “The file autorun.dll could not be loaded or is corrupted. setup cannot continue error code is 0x7e”
- “This application failed to start because autorun.dll was not found. Re-installing the application may fix this problem.”
Why I am getting Autorun.dll Error Code 0x7e Windows 10 Error
- Because of damaged or invalid registry key of AutoRun.dll file.
- Computer virus or malware has injected malicious code or altered AutoRun.dll file.
- The original AutoRun.dll file was removed by other application.
- The necessary version of AutoRun.dll file is overwritten by other application.
- Due to damaged hardware, such as a bad hard drive.
So, these are the common causes responsible for the corruption of the autorun.dll 0x7e error, now check out the complete fixes to get rid of the Autorun.dll not found or missing error.
How to Fix Autorun.dll Errors in Windows
Note: If you are unable to operate your system in the normal mood then boot Windows in Safe Mode to complete any of the following steps.
Fix 1: Restore it from Recycle Bin
It may happen the autorun.dll file error is deleted unintentionally, and due to this, you are getting the file autorun.dll could not be loaded or other related errors. So, try to restore it from the recycle bin.
Follow the steps to do so
- Open Recycle Bin.

- Now in the search bar > type autorun.dll > Enter.
- If you found the file then right-click on it > choose Restore.
Fix 2: Download the Autorun.dLL files Manually
You can also download the missing or not found Autorun.dll file manually from the Microsoft official websites. So, here it is suggested to download the DLL file and check if the autorun.dll error code 0x7e is fixed or not
Follow the instruction carefully:
- Download that autorun.dll file by searching in Google or search in the Microsoft official website
- After downloading > place the downloaded file in “C:\Windows\System32”
- And lastly, Restart your system
Fix 3: Fix Autorun.dll Invalid Registry Entries
In many cases, the DLL error occurs because of Windows Registry issues. Therefore it is highly recommended to repair corrupt registry entries.
Repairing the Registry entry manually can be very risky, a single mistake can damage the entire system so it is better to make use of professional recommended automatic Registry Repair Tool
This will scan your PC completely and repair the corrupted registry entry as well as the DLL error.
Get Registry Repair Tool, to fix corrupt and damaged registry keys
Hope, repairing the registry keys works for you to fix autorun.dll error code 0x7e errors. But if not then follow try performing the system restore.
Fix 4: Perform a System Restore
Performing the system restore allow the users to go back to previous Windows state where your Windows system is working properly.
Follow the steps to do so:
- In the search box type Recovery,> hit Enter.
- Then click Open System Restore > and follow the on-screen instructions
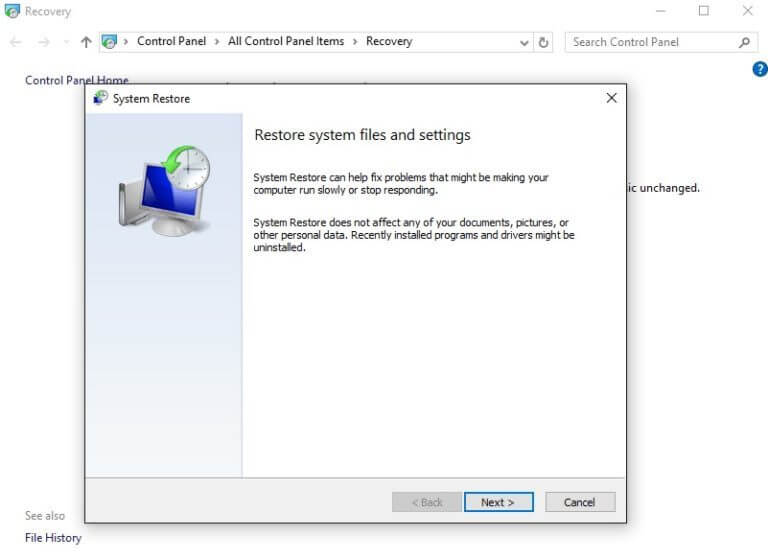
- Now select a restore point (earlier where there is no error)
It is estimated the error Code 0x7E and autorun.dll is Missing is fixed after following the given fixes, but if the error still persists then follow more fixes given in the article – How to fix DLL errors
Automatic Solution: DLL Repair Tool
If you are unable to fix the Autorun.dll and error Code 0x7E after following the given manual fixes then here it is suggested to scan your system with the professional recommended DLL Repair Tool. Many times the manual solutions won’t work for you to fix autorun.dll error code 0x7e Windows 10.
This is an advanced repair tool that not only fixes DLL errors but also capable to fix other Windows related issues like EXE errors, protect you from file loss, hardware failure and also optimize your PC for maximum performance
Get DLL Repair Tool, to fix DLL errors easily.
Conclusion:
So, this is all about the autorun.dll file is missing and error code 0x7e in Windows 10. Follow the given fixes one by one and check which one works for you.
Make sure to follow the given fixes carefully to avoid further issues or else try the automatic DLL repair tool, to fix DLL issues and errors.
Despite this, if you have any comment or queries then write us in the below comment section

Always up to help others with their PC-related issues, Jack loves to write on subjects such as Windows 10, Xbox, and numerous technical things. In his free time, he loves to play with his dog “Bruno” and hang out with his friends.
Некоторые пользователи сообщают, что после успешного обновления Windows при попытке запустить некоторые установленные программы на своем устройстве они сталкиваются с сообщением об ошибке — Не удается загрузить компонент защиты, error 0x7e.
Не удается загрузить компонент защиты, error code is 0x7e
Если вы столкнулись с этой проблемой, вы можете попробовать наши рекомендуемые решения ниже в произвольном порядке и посмотреть, поможет ли это решить проблему.
Давайте посмотрим на описание процесса, связанного с каждым из перечисленных решений:
- Удалите и повторно установите программное обеспечение
- Запустите программу от имени администратора
- Запустите сканирование SFC и DISM
- Временно отключите программное обеспечение безопасности
Удалите и повторно установите программное обеспечение
Это решение просто требует, чтобы вы удалили программу, которая выдает the file autorun dll 0x7e, а затем загрузите и установите самую последнюю версию программы. Если это не поможет решить проблему, попробуйте следующее решение.

Запустите программу от имени администратора
Это решение требует, чтобы вы запустили программу от имени администратора и посмотрели, запустится ли программа без ошибки — error code 0x7e autorun dll.
Запустите сканирование SFC и DISM
Если у вас есть ошибки в системных файлах, вы можете столкнуться с этой ошибкой.
SFC и DISM утилита в Windows, которая позволяет пользователям сканировать поврежденные системные файлы Windows, и восстановить их.
Для простоты и удобства вы можете запустить сканирование, используя описанную ниже процедуру.
- Нажмите клавишу Windows + R, чтобы вызвать диалоговое окно «Выполнить».
- В диалоговом окне «Выполнить» введите «notepad» и нажмите «Enter», чтобы открыть Блокнот.
- Скопируйте и вставьте приведенный ниже синтаксис в текстовый редактор.
@echo off
date /t & time /t
echo Dism /Online /Cleanup-Image /StartComponentCleanup
Dism /Online /Cleanup-Image /StartComponentCleanup
echo …
date /t & time /t
echo Dism /Online /Cleanup-Image /RestoreHealth
Dism /Online /Cleanup-Image /RestoreHealth
echo …
date /t & time /t
echo SFC /scannow
SFC /scannow
date /t & time /t
pause
- Сохраните файл с любым именем и добавьте расширение файла .bat — например: SFC_DISM_scan.bat
- Запустите файл с правами администратора (щелкните сохраненный файл правой кнопкой мыши и выберите «Запуск от имени администратора» в контекстном меню);
- Дождитесь завершения сканирования;
- Перезагрузите компьютер.
Попробуйте снова открыть и посмотрите удалось ли исправить 0x7e. Если нет, переходите к следующему решению.
Временно отключите программное обеспечение безопасности
Как видно из начального изображения, некоторые программы безопасности могут блокировать компоненты системы защиты от копирования и вызывать код ошибки 0x7e, что может помешать запуску программы, которую вы пытаетесь открыть.
Отключение антивируса перед запуском рассматриваемой программы решит проблему. После успешного запуска программы вы можете снова активировать свое программное обеспечение безопасности.
Если Защитник Windows блокирует приложение, вы можете отключить Защитник Windows. Для стороннего программного обеспечения безопасности это во многом зависит от установленного вами ПО.