— by: C. Smith
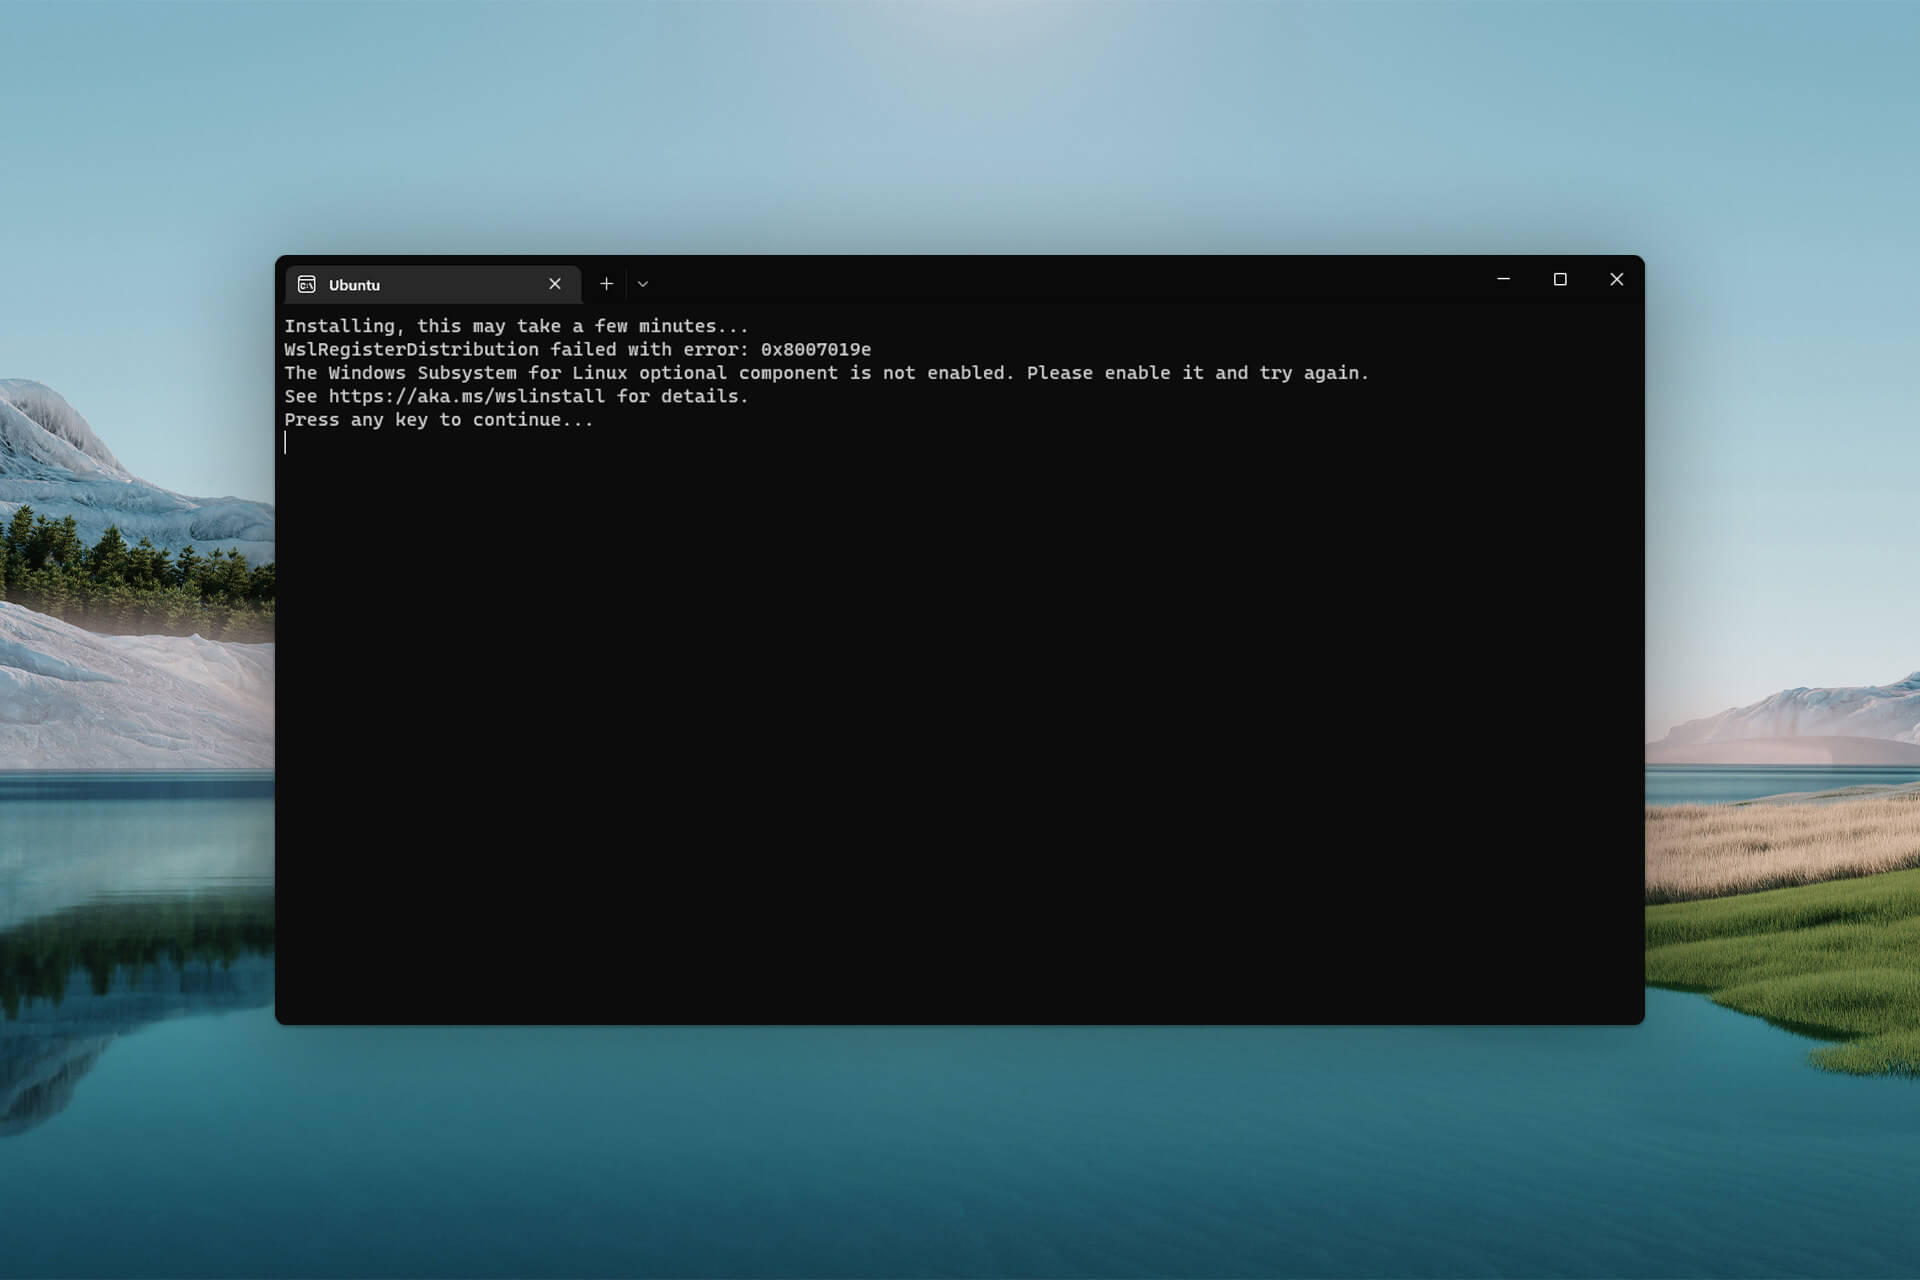
If you are trying the Linux Subsystem for Windows feature for the first time, you will probably receive the following error message when you boot any Linux distribution:
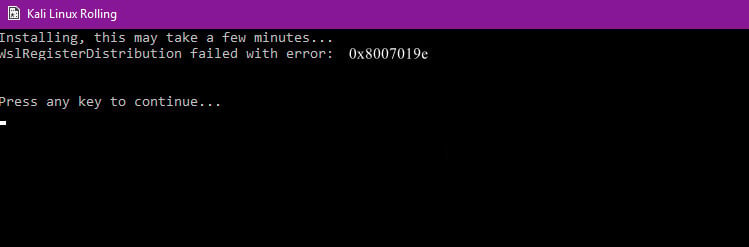
Installing, this may take a few minutes…
WslRegisterDistribution failed with error: 0x8007019e
Error: 0x8007019e The Windows Subsystem for Linux has not been enabled.
Plenty of developers face this problem regardless of the web technology used. So this is not a node.js, angular, express, web
This is true even if you have enabled virtualization in the BIOS. The error occurs because WSL is not enabled by default, so you have to do it yourself.
To do this, open the start menu and start typing Turn Windows feature on or off .

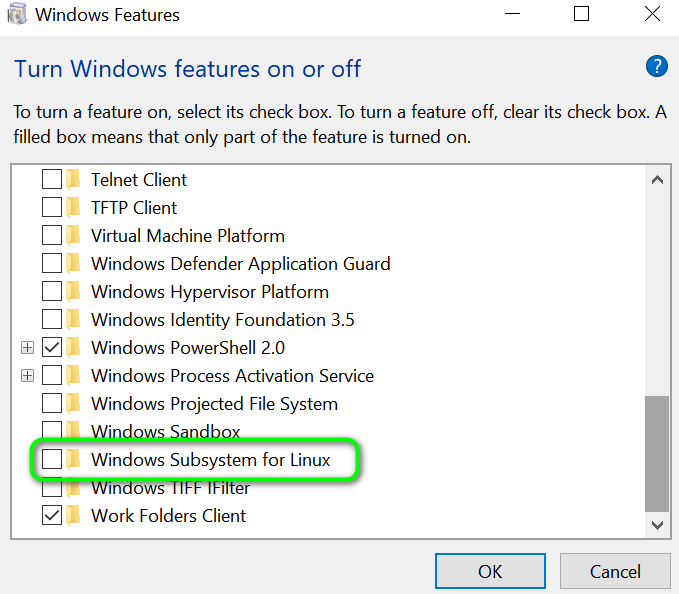
Click on the result to open and scroll to the bottom of the list. You need to enable two features:
Virtual Machine PlatformWindows Subsystem for Linux

The installation is quick, just a few seconds. After that, you have to restart Windows.
You may encounter the WSLRegisterDistribution Failed error due to the disabled subsystem for the Linux. Moreover, a corrupt installation of the Linux distro application may also cause the error.
The affected user gets the error when he tries to launch the Linux terminal with the following message:
Before proceeding with the troubleshooting process, try to launch the Linux console using the Windows Search bar (located on the Taskbar of your system), not by the bash.
Solution 1: Enable/Disable Subsystem for Linux
Windows has a feature “Subsystem for Linux” which is essential for the operation of your Linux distribution. If the said option is not enabled, then you may encounter the error at hand. In this case, enabling the option of the subsystem for Linux may solve the problem.
- On the Taskbar, click on the Windows Search bar and type Control Panel. Then in the results shown, click on Control Panel.

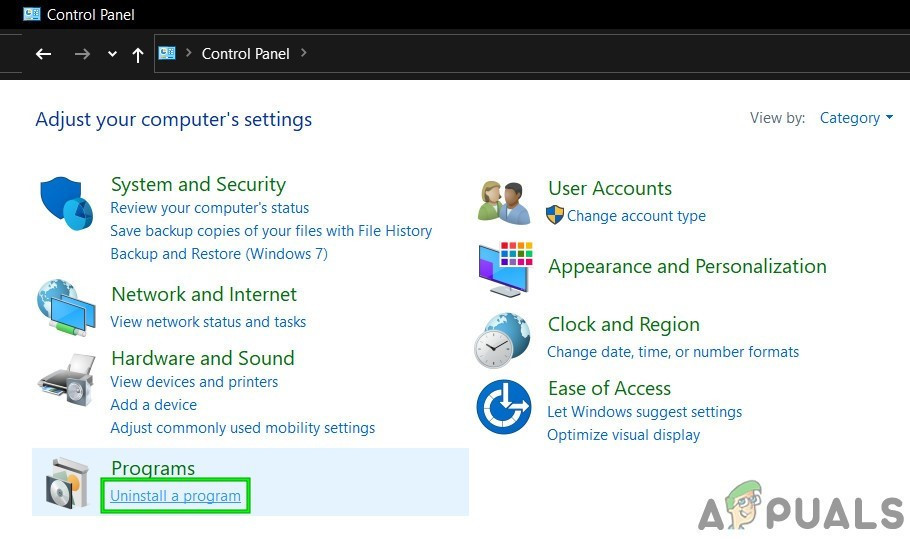
Open Control Panel - Now click on Uninstall a Program.

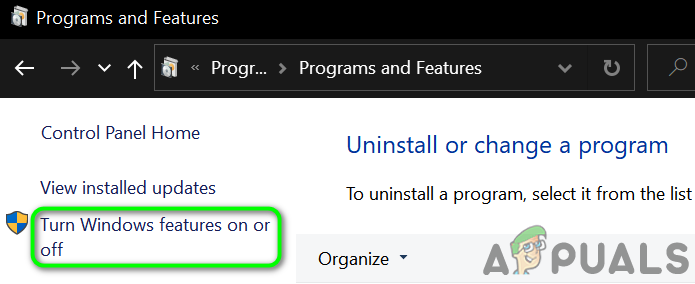
Click Uninstall a Program in Control Panel - Then, in the left pane of the window, click on Turn Windows Feature on or off.

Turn Windows Feature on or off - Now, scroll down till the end and enable Windows Subsystem for Linux Option.

Enable Windows Subsystem For Linux - Then restart your system and then check if the system is clear of the error.
- If the option is already enabled at step 4, then disable it and restart your system.
- Upon restart, enable the Subsystem option and then restart your system.
- Upon restart, check if the Linux distro is working fine.
Solution 2: Restart the LxssManager Service
Linux instance life cycle service i.e. LxssManager operates in the background to keep things under control. You may encounter the error at hand if the said service is stuck in operation or is in an error state. In this scenario, restarting the service may clear the glitch and thus solve the problem.
- Press Windows + R keys to bring out the Run command box.
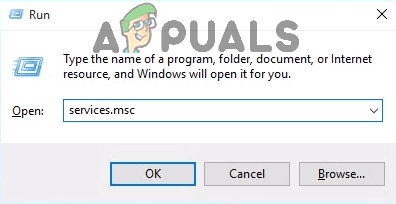
- Now type Services.msc and then click on OK.

Type “services.msc” into the Run dialog and press Enter - Now find and restart the LxssManager service.

Restart Lxss Manager Service - Then relaunch the terminal to check if it is clear of the error.

Solution 3: Launch the Subsystem from Microsoft Store
Linux distribution has a bug, in which, sometimes the terminal starts to show the error at hand when launched from the shortcut/command prompt. This glitch can be cleared by launching the application directly from the Microsoft Store interface.
- On the Taskbar of your system, click on Windows Search box and type Microsoft Store. Then in the list of results shown, click on Microsoft Store.

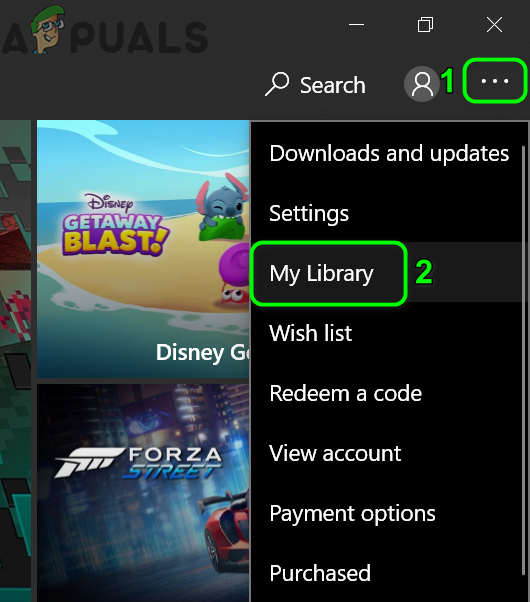
Open Microsoft Store - Then, in the top right corner of the window, click on the horizontal Ellipses and then click on My Library.

Open My Library in Microsoft Store - Now in the left pane of the window, click on Installed.

Open the Installed Tab in My Library - Then in the right pane of the window, click on your Linux distro App.
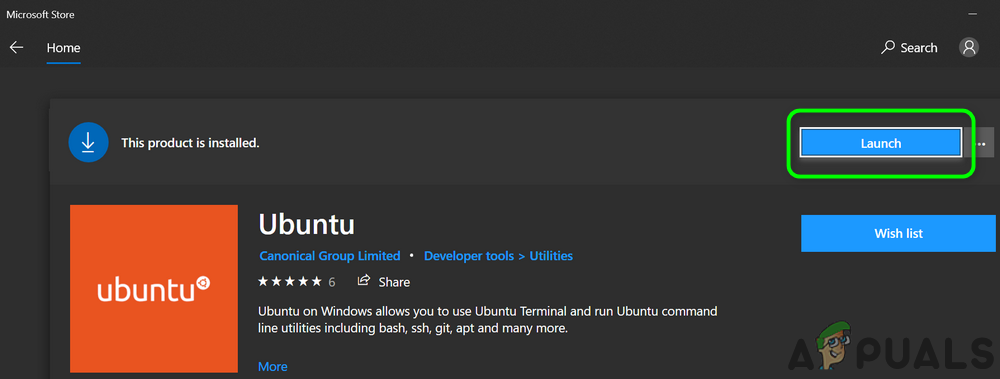
- Now click on the Launch button and then check if the issue has resolved.

Launch the Linux Console Application from the Microsoft Store


Solution 4: Update the Linux Terminal by Using Command Prompt
You may encounter the error under discussion if you are using an older version of the distribution. In this context, updating the application may solve the issue. You can use the Command Prompt to achieve the same without reinstalling the application.
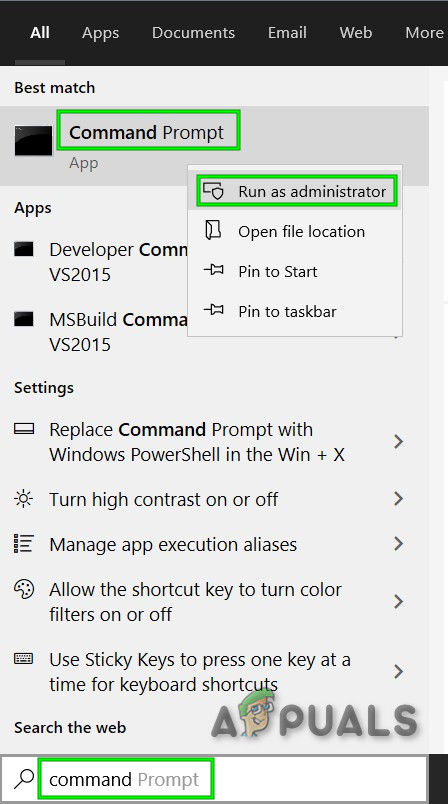
- On the Taskbar of your system, click on the Windows Search box and type Command Prompt. Then in the results shown, right-click on Command Prompt and then in the sub-menu, click on Run as Administrator.

Open Command Prompt from Windows Search - Now type the following commands in the Command Prompt and press the enter key after each command:
C:\> bash

$ sudo apt-get update

$ sudo apt-get dist-upgrade

$ <CTRL-D>

C:\> exit
- Now, launch the terminal to check if it is clear of the error.
Solution 5: Repair the Linux Terminal App
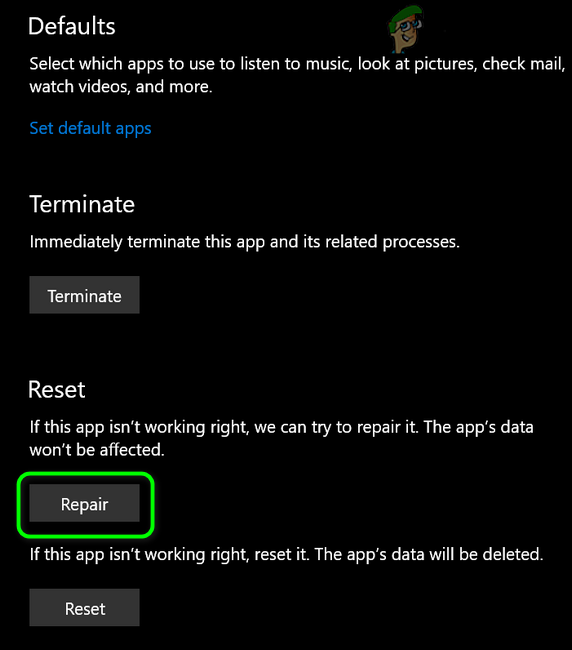
If nothing has helped you so far, then the issue may have been caused by a corrupt installation of the Linux distribution app. To overcome such corruption, the Repair feature of Windows Settings can be used which will then solve the problem.
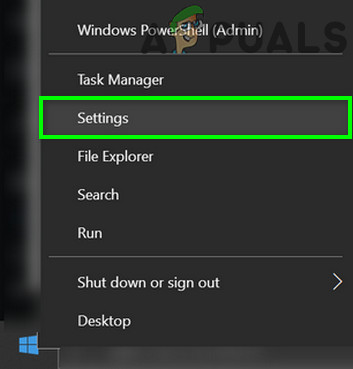
- Right-click on the Windows button and click on Settings.

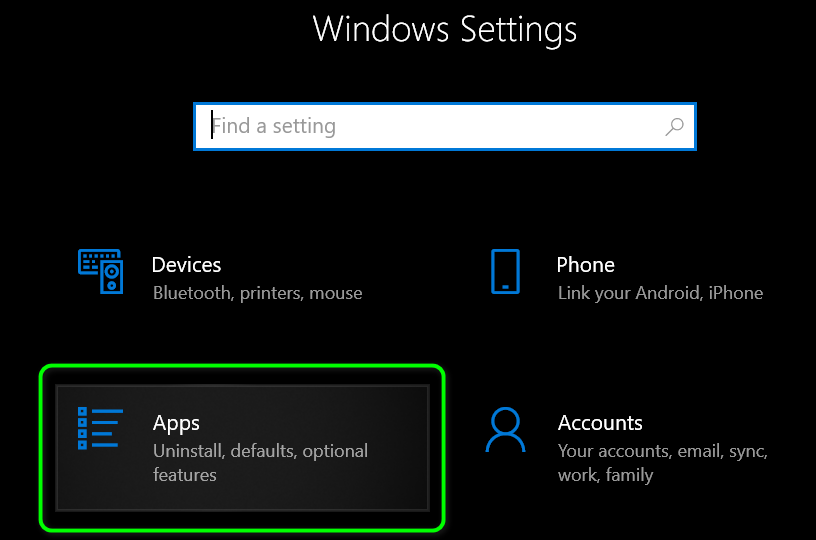
Open Windows Settings - Then tap on Apps.

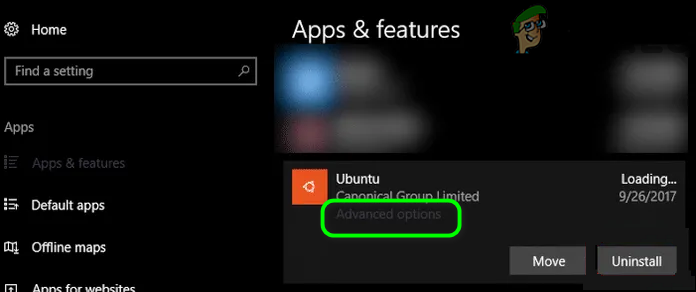
Open Apps in Windows Settings - Now, find and click on your Linux Distribution Application, e.g., if you are using Ubuntu, click on Ubuntu. Then click on Advanced Options.

Open Advanced Settings of the Linux Distribution Application - Now, scroll down till the end and click on the Repair button.

Repair the Linux Distribution Application - After repairing the distro, check if it is clear of the error.
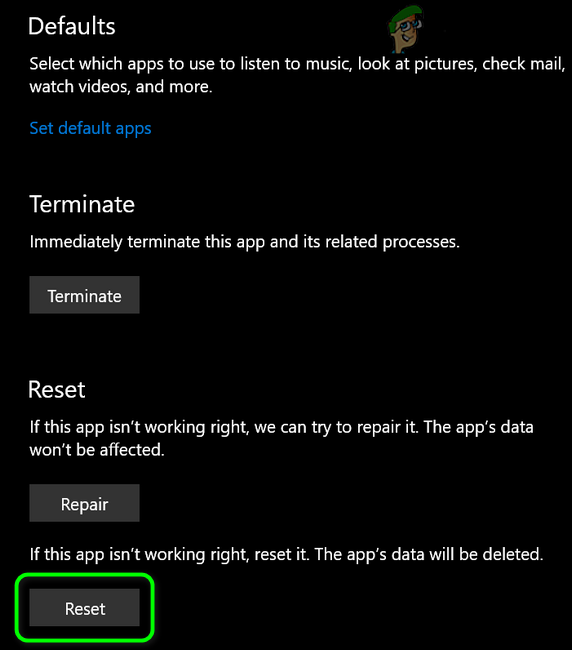
- If not, open Advanced Options (step 1 to 2).
- Then, scroll down till the end and click on the Reset button (your data/settings will be lost).

Reset the Linux Distribution Application - Now, launch the distro to check if it is clear of the error.
Solution 6: Reinstall the Linux Console Application
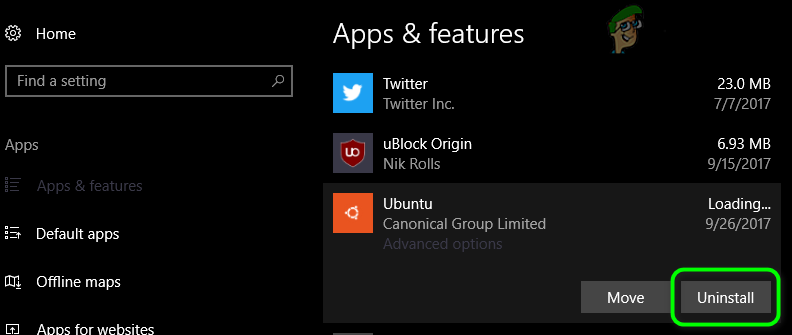
If the repairing of the Linux console has not solved the issue, then the corrupt module of the application is beyond repairing and you have to manually uninstall and then reinstall the application to solve the problem.
- Right-click on the Windows button and click on Settings.
- Now, find and click on your Linux Distribution Application, e.g., if you are using Ubuntu, click on Ubuntu. Then click on Uninstall.

Uninstall the Linux Distribution Application - After uninstalling, disable the Subsystem for Linux Option (as discussed in solution 1) and restart your system.
- Upon restart, enable the Subsystem for Linux (as discussed in solution 1).
- Now install your Linux Console Application and hopefully, your issue has been resolved.
If nothing has worked for you, then you may have to Reset your Windows PC or perform a clean installation of Windows.

Kevin Arrows
Kevin Arrows is a highly experienced and knowledgeable technology specialist with over a decade of industry experience. He holds a Microsoft Certified Technology Specialist (MCTS) certification and has a deep passion for staying up-to-date on the latest tech developments. Kevin has written extensively on a wide range of tech-related topics, showcasing his expertise and knowledge in areas such as software development, cybersecurity, and cloud computing. His contributions to the tech field have been widely recognized and respected by his peers, and he is highly regarded for his ability to explain complex technical concepts in a clear and concise manner.
Easily enable the Windows Subsystem for Linux
by Hasibul Kabir
Hasibul Kabir is a Tech-Enthusiast Blogger, Web Developer & Hobbyist Game Developer. Writing about Technology, mainly Windows, Mac, iOS, etc., is his main focus, besides doing some computer… read more
Updated on
- When you try to launch something that requires Windows Subsystem for Linux, you may get an error indicating that this optional feature is not enabled.
- Enabling this feature can be necessary and will not slow down your PC’s performance.
- To turn on this feature on Windows, you can use PowerShell and another method described in this article.
XINSTALL BY CLICKING THE DOWNLOAD
FILE
Usually, when you try to run any software, service, or app that requires the Linux environment, you may get an error.
In most cases, if you install the Ubuntu app from the Microsoft Store and open it, this problem will appear. When it occurs, you get the following message: The Windows Subsystem for Linux optional component is not enabled. Please enable it and try again.
It also may show an error code 0x8007019e. But don’t worry, you can easily fix this problem if you take the proper steps.
Does the Windows Subsystem for Linux slow down a PC?
To make your development work much more pleasant, you may enable WSL. It does not hurt Windows performance.
How we test, review and rate?
We have worked for the past 6 months on building a new review system on how we produce content. Using it, we have subsequently redone most of our articles to provide actual hands-on expertise on the guides we made.
For more details you can read how we test, review, and rate at WindowsReport.
Any services in the background take a few computing resources. The WSL is not different. However, according to the users, it doesn’t slow down the PC.
We have tested it by ourselves. Our research also has found that modern computers can easily handle Windows Subsystem for Linux without negatively affecting performance.
Moreover, it can be an essential feature for some users. So, you may need to turn it on, particularly when you face the error mentioned in this article.
How do I enable Windows Subsystem for Linux on Windows?
If you want to enable WSL on your PC, you can easily do it. But, before that, we suggest you do the following things:
- Update Windows to the latest version.
- Ensure you are using Windows 11 or 10, as other versions don’t support this feature.
Now, you can follow the methods mentioned below to enable Windows Subsystem for Linux.
1. Install the optional feature
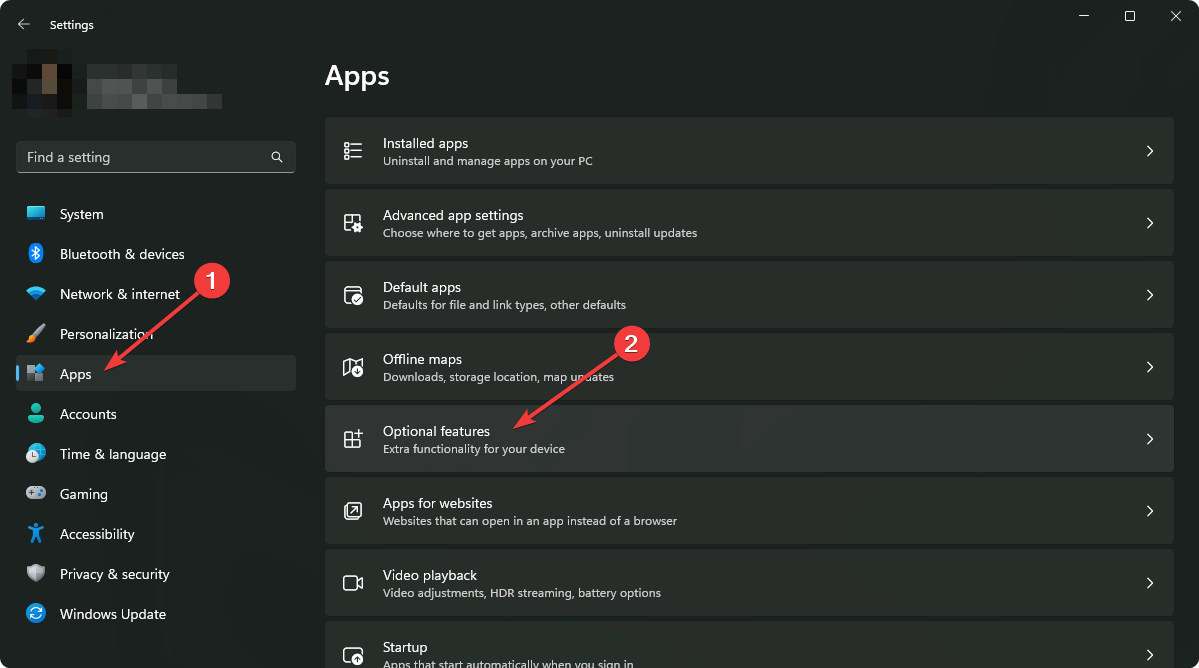
- Press Win + I on the keyboard to open Windows Settings.
- Go to Apps and click on Optional features.

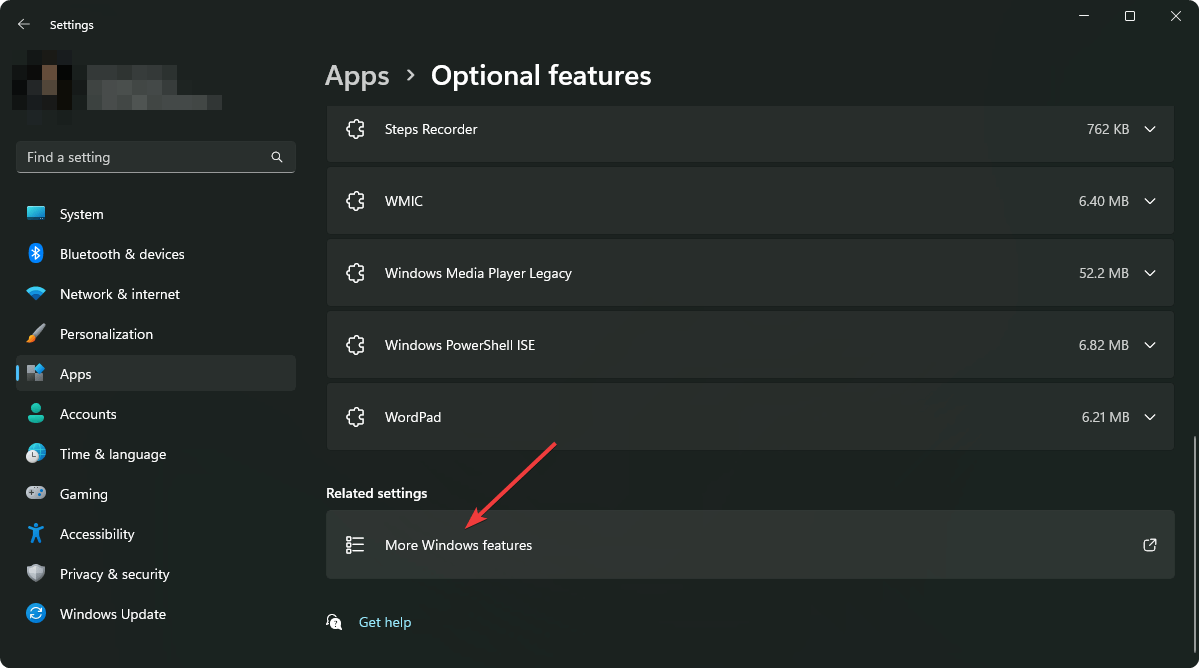
- Click on More Windows features to open the Windows Features window.
- Tick Windows Subsystem for Linux and click on OK.

- It will install the required components.
- Restart your PC after completing the process.

Alternatively, you also can search for the optionalfeatures on the Start Menu to find and open the Windows Features window. It can be necessary if you don’t find the exact options shown in the above steps.
After enabling the WSL, you can try to open the Ubuntu terminal or any other app or service that was showing the error. Hopefully, you will not see the same again.
2. Use the PowerShell command
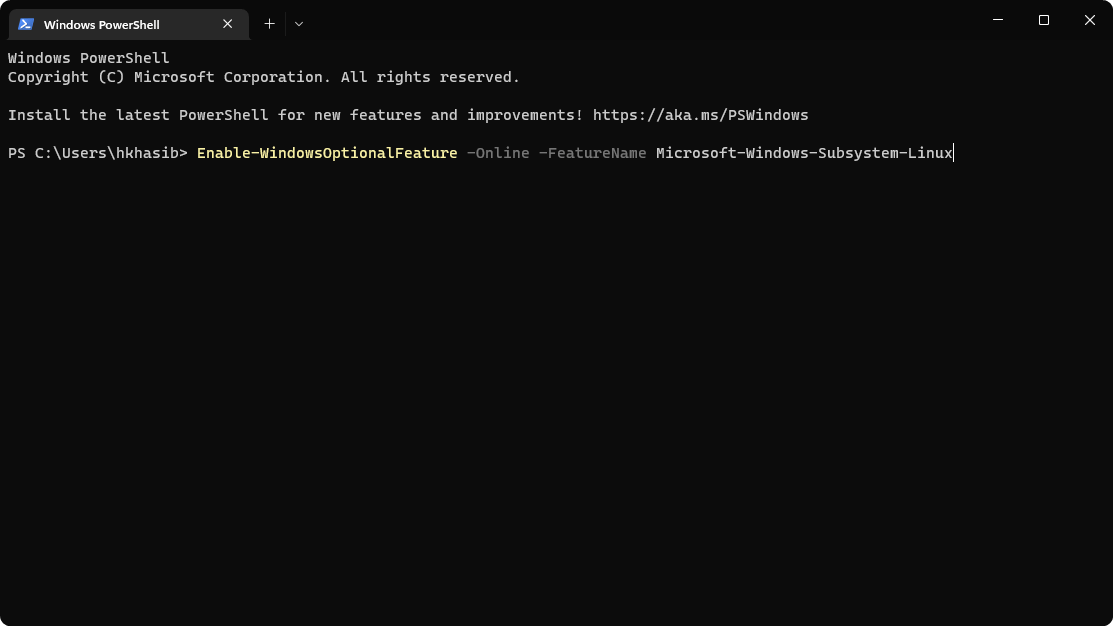
- Open the Start Menu, type PowerShell, and hit Enter.
- Now, type the following command and press Enter to execute it:
Enable-WindowsOptionalFeature -Online -FeatureName Microsoft-Windows-Subsystem-Linux
- Wait for a while.
- Restart your PC after PowerShell installs the required features.
Now, verify if it has solved the problem or not. If PowerShell can successfully enable this optional feature, you can use the Ubuntu terminal or any other app that requires WSL without any error.
- Fix: Set Time Zone Automatically Defaults to Wrong Time Zone
- 0X8007013 Install Error: How to Quickly Fix it
- Fix: Internet Keeps Disconnecting When Playing Games on Windows 11
3. Enable Developer Mode

NOTE
If you are using the latest builds, enabling Developer Mode is no longer necessary. In case you are running an older build, perform the steps below to enable it.
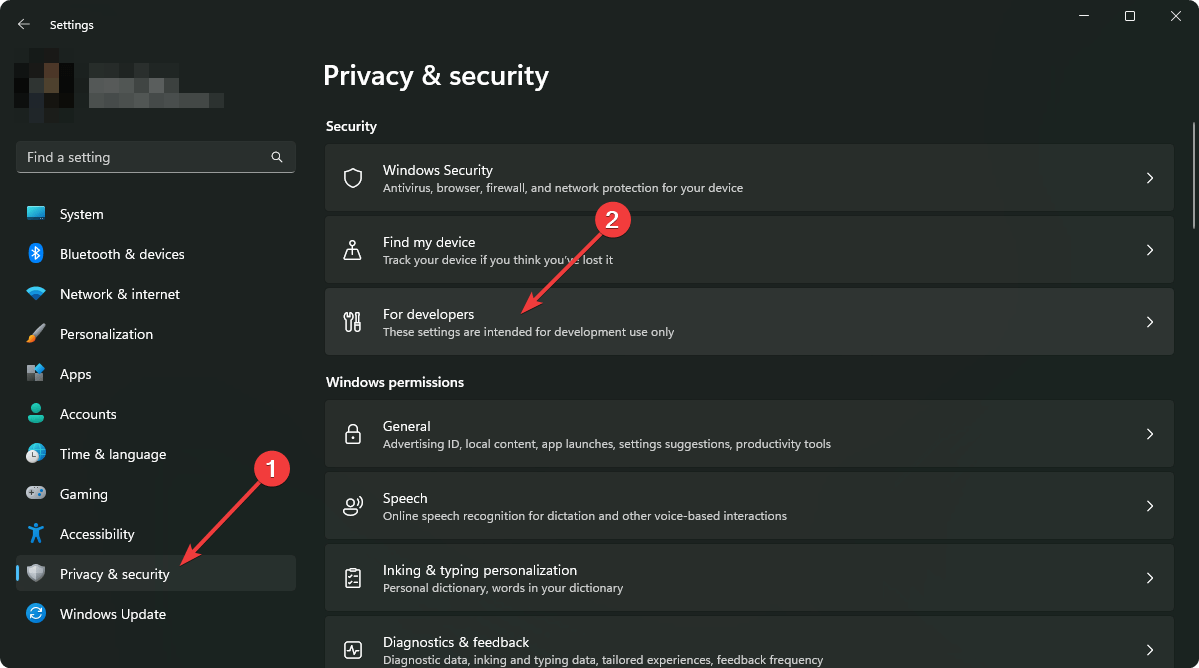
- Open Windows Settings.
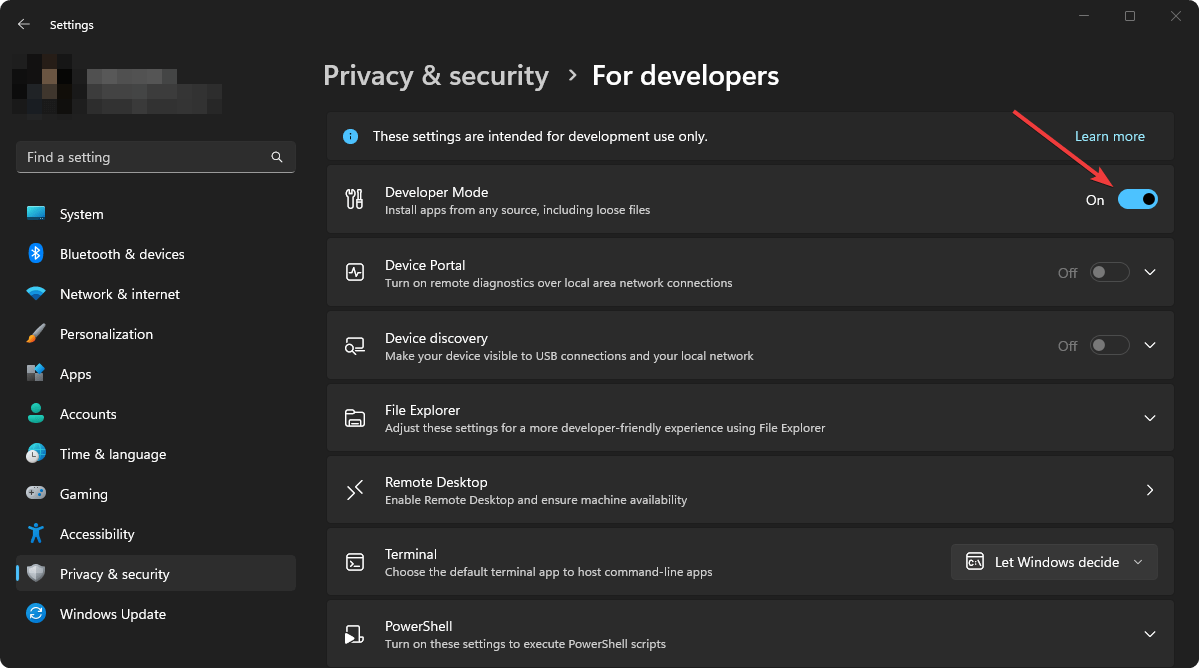
- Go to Privacy & security and click on For developers.
- Turn the Developer Mode by tweaking the appropriate switch.
- Click on Yes on the popup window.
- Restart your PC.
For more detailed steps, learn how to enable Windows 11 Developer Mode. If the Developer Mode is a requirement, try to enable the latest WSL again and see if it works.
This article has explained how to fix Windows Subsystem for Linux is not enabled. If you have any opinions or suggestions, feel free to let us know in the comments box.
![]()
Wslregisterdistribution — это команда, которая используется в ОС Windows для регистрации дистрибутивов в Windows Subsystem for Linux (WSL). Однако иногда при выполнении этой команды может возникнуть ошибка с кодом 0x8007019e. Эта ошибка указывает на проблему в процессе регистрации дистрибутива WSL и может возникать по разным причинам.
Если Wslregisterdistribution завершился с ошибкой 0x8007019e, первым делом следует попробовать перезапускать компьютер. Иногда это может помочь восстановить нормальное функционирование WSL и устранить ошибку. Также рекомендуется убедиться, что у вас установлена последняя версия ОС Windows и все обновления установлены.
Если перезапуск компьютера не помог, можно попробовать выполнить команду Wslregisterdistribution с административными привилегиями. Для этого следует открыть командную строку или PowerShell от имени администратора и выполнить команду wsl.exe —unregister, а затем wsl.exe —register. Это может помочь исправить проблему с регистрацией дистрибутива WSL и устранить ошибку.
Примечание: Важно понимать, что выполнение команды —register может привести к потере данных в WSL, поэтому перед выполнением этой команды рекомендуется создать резервную копию своих файлов и данных в WSL.
Если перезапуск компьютера и выполнение команды Wslregisterdistribution с административными привилегиями не помогают, возможно, проблема вызвана поврежденными файлами WSL. В этом случае можно попробовать выполнить команду sfc /scannow в командной строке или PowerShell от имени администратора. Эта команда проверит системные файлы и попытается восстановить поврежденные файлы. После выполнения команды следует перезагрузить компьютер и проверить, исправилась ли ошибка.
Если все вышеперечисленные способы не помогли и ошибка 0x8007019e все еще возникает, рекомендуется обратиться за помощью к специалистам в службу поддержки Microsoft или на форумы сообщества пользователей WSL. Они смогут предложить более специализированное и квалифицированное решение проблемы.
Содержание
- Проверьте наличие обновлений системы
- Перезагрузите компьютер
- Удалите и установите WSL заново
- Проверьте наличие и состояние служб
- Проведите проверку системных файлов
- Обратитесь в службу поддержки Microsoft
Проверьте наличие обновлений системы
Ошибка 0x8007019e при запуске WslRegisterDistribution может возникнуть из-за проблем с установкой или обновлением Windows Subsystem for Linux (WSL). Один из способов исправления этой ошибки — проверить наличие обновлений системы.
Вот несколько шагов, которые вы можете предпринять:
- Откройте меню «Пуск» и найдите «Настройки».
- Нажмите на «Обновление и безопасность».
- Перейдите на вкладку «Windows Update».
- Нажмите на кнопку «Проверить наличие обновлений».
- Дождитесь, пока система выполнит поиск доступных обновлений.
- Если обновления найдены, установите их и перезагрузите компьютер.
После установки обновлений попробуйте снова выполнить команду WslRegisterDistribution и проверьте, решена ли проблема. Если ошибка по-прежнему возникает, попробуйте другие методы исправления.
Перезагрузите компьютер
Если при выполнении команды wsl --set-version <имя_дистрибутива> <версия> в Windows Subsystem for Linux (WSL) вы получили ошибку wslregisterdistribution завершился с ошибкой 0x8007019e, вам может помочь перезагрузка компьютера.
Перезагрузка компьютера может помочь восстановить функциональность WSL, поскольку она может устранить временные проблемы, которые могут возникнуть после выполнения некоторых команд или изменений в системе.
Чтобы перезагрузить компьютер:
- Сохраните все открытые файлы и закройте все программы, чтобы предотвратить потерю данных.
- Нажмите на кнопку «Пуск» в левом нижнем углу экрана.
- Выберите опцию «Включение» или «Выключение» в основном меню.
- Нажмите на кнопку «Перезагрузка».
- Подождите, пока компьютер полностью выключится и затем снова включится.
После перезагрузки компьютера попробуйте выполнить команду wsl --set-version <имя_дистрибутива> <версия> снова и проверьте, решена ли проблема. Если проблема не решена, вам может потребоваться произвести дополнительные действия, такие как переустановка WSL или обновление системы.
Помимо перезагрузки компьютера, также рекомендуется проверить, что у вас установлена последняя версия Windows и все доступные обновления системы.
Если проблема сохраняется после перезагрузки компьютера, вы можете обратиться к официальной документации Microsoft или сообществу пользователей WSL для получения дополнительной помощи.
Удалите и установите WSL заново
Если у вас возникла ошибка 0x8007019e при выполнении команды wslregisterdistribution, одним из решений может быть полное удаление и повторная установка Windows Subsystem for Linux (WSL). Вот как это сделать:
- Откройте окно PowerShell от имени администратора. Для этого нажмите Win + X, а затем выберите «Windows PowerShell (администратор)».
- Выполните следующую команду, чтобы удалить все существующие дистрибутивы WSL:
wsl --unregister <имя_дистрибутива>Убедитесь, что вы заменяете <имя_дистрибутива> на фактическое имя дистрибутива, который вы хотите удалить. Примеры имен дистрибутивов: Ubuntu, Debian, OpenSUSE и т. д.
- Выполните следующую команду, чтобы удалить и отключить подсистему WSL полностью:
dism.exe /online /disable-feature /featurename:Microsoft-Windows-Subsystem-Linux /quiet- Перезагрузите ваш компьютер, чтобы завершить удаление WSL.
- После перезагрузки откройте окно PowerShell от имени администратора и выполните следующую команду, чтобы включить WSL снова:
dism.exe /online /enable-feature /featurename:Microsoft-Windows-Subsystem-Linux /all /quiet- После завершения выполнения команды перезагрузите компьютер.
- Когда компьютер загрузится снова, откройте окно PowerShell от имени администратора и выполните команду:
wsl --installЭта команда установит последнюю версию WSL.
После завершения установки вы сможете использовать WSL снова. У вас будет возможность установить необходимый дистрибутив Linux и настроить его по вашим потребностям.
Проверьте наличие и состояние служб
Ошибка 0x8007019e может возникать в случае, когда одна из служб, необходимых для работы WSL (Windows Subsystem for Linux), не работает корректно. Чтобы исправить эту ошибку, важно проверить наличие и состояние следующих служб:
-
LxssManager: Данная служба отвечает за управление и запуск Linux-дистрибутивов в WSL. Проверьте, что служба запущена и работает без ошибок. Чтобы проверить состояние службы, выполните следующие шаги:
- Нажмите комбинацию клавиш Win + R, чтобы открыть окно «Выполнить».
- Введите команду services.msc и нажмите клавишу Enter.
- В открывшемся окне «Службы» найдите службу LxssManager.
- Проверьте, что статус службы указан как «Запущено».
- Если служба не запущена, щелкните правой кнопкой мыши на службе LxssManager и выберите пункт меню «Запустить».
- Если служба запущена, но вы видите ошибки, попробуйте перезапустить службу.
-
WslSvc: Эта служба отвечает за взаимодействие между WSL и файловой системой Windows. Убедитесь, что служба запущена и работает без ошибок. Для этого выполните следующие действия:
- Откройте окно «Выполнить» с помощью комбинации клавиш Win + R.
- Введите команду services.msc и нажмите клавишу Enter.
- Найдите службу WslSvc.
- Убедитесь, что статус службы указан как «Запущено».
- Если служба не запущена, щелкните правой кнопкой мыши на службе WslSvc и выберите пункт меню «Запустить».
- Если служба запущена, но вы видите ошибки, попробуйте перезапустить службу.
Проверьте наличие и состояние указанных выше служб. Если службы отображаются как работающие или вы не можете запустить или перезапустить службы, попробуйте выполнить следующие действия:
- Проверьте, что у вас есть права администратора на компьютере. Для этого щелкните правой кнопкой мыши по кнопке «Пуск» и выберите пункт «Windows PowerShell (администратор)».
- Выполните команду
sc config LxssManager start=autoв открывшемся окне командной строки. Эта команда устанавливает стартовый тип службы LxssManager как «автоматический». - Выполните команду
sc config WslSvc start=autoв командной строке для установки стартового типа службы WslSvc как «автоматический». - Перезагрузите компьютер и проверьте, исправилась ли ошибка.
Если после перезагрузки компьютера ошибка все еще возникает, возможно, есть другие проблемы, которые могут потребовать дополнительного решения. Рекомендуется обратиться за помощью к официальной документации Microsoft или форумам сообщества пользователей Windows.
Проведите проверку системных файлов
Ошибка 0x8007019e может возникать из-за повреждения системных файлов операционной системы. Чтобы исправить эту проблему, необходимо провести проверку целостности системных файлов и восстановить поврежденные файлы.
- Откройте командную строку от имени администратора.
- Запустите проверку целостности системных файлов.
- Перезагрузите компьютер.
Нажмите Windows + X на клавиатуре и выберите «Командная строка (администратор)» из контекстного меню.
Введите команду sfc /scannow и нажмите клавишу Enter. Дождитесь завершения процесса проверки и восстановления файлов. Это может занять некоторое время.
После завершения проверки и восстановления файлов, перезагрузите компьютер, чтобы изменения вступили в силу.
После перезагрузки компьютера проверьте, возникла ли ошибка 0x8007019e при запуске Wslregisterdistribution. Если проблема продолжается, возможно, вам потребуется выполнить более подробную диагностику вашей операционной системы или обратиться к технической поддержке Microsoft.
Обратитесь в службу поддержки Microsoft
Если при выполнении команды «wsl —set-version <имя дистрибутива> <версия>» возникла ошибка 0x8007019e, то одним из возможных решений проблемы может быть обращение в службу поддержки Microsoft.
Служба поддержки Microsoft предоставляет профессиональную помощь пользователям продуктов и сервисов компании Microsoft. Если вы столкнулись с проблемой установки или использования Windows Subsystem for Linux (WSL) и не можете ее решить самостоятельно, обратитесь в службу поддержки Microsoft для получения квалифицированной помощи.
Чтобы обратиться в службу поддержки Microsoft, вы можете воспользоваться следующими способами:
- Посетите официальный веб-сайт Microsoft и найдите раздел «Служба поддержки». Там вы найдете контактную информацию и сможете выбрать подходящий способ обратиться в службу поддержки, например, чат, электронную почту или телефон.
- Воспользуйтесь поиском на официальном сайте Microsoft, чтобы найти ответы на свои вопросы или узнать о уже известных проблемах и их решениях.
- Проверьте форумы и сообщества пользователей, где вы можете задать свой вопрос или обратиться за помощью. Многие пользователи и специалисты также могут помочь вам решить проблему с WSL и поделиться своим опытом.
Обратившись в службу поддержки Microsoft, вы получите подробную и конкретную помощь в решении проблемы с WSL и другими продуктами Microsoft. Служба поддержки Microsoft всегда готова помочь вам с любыми вопросами и проблемами, связанными с продуктами и сервисами компании.
Подсистема WSL или Windows для Linux для Windows 10 — отличный инструмент для разработчиков. Но иногда при запуске командной строки выдает код ошибки 0x8007019e или же 0x8000000d. Хотя ошибка кажется, что это проблема с установкой WSL, но это может быть ложное срабатывание. У некоторых пользователей был установлен WSL, но они все еще сталкивались с проблемой. Код ошибки гласит:
Установка может занять несколько минут…
WslRegisterDistribution завершился с ошибкой: 0x8007019e / 0x8000000d
Ошибка: 0x8007019e / 0x8000000d Параметр неверен.
нажмите любую клавишу чтобы продолжить.
Эта ошибка возникает из-за отсутствия поддержки функций Windows 10. Ошибка даже не позволяет использовать командную строку на основе WSL. В этой статье мы рассмотрим, как исправить эту ошибку в Windows 10.

WslRegisterDistribution завершился с ошибкой: 0x8007019e & 0x8000000d
Пользователь должен будет включить Подсистема Windows для Linux функция для устранения этой проблемы. Это можно сделать двумя способами:
- Включение WSL с помощью включения или выключения функций Windows.
- Использование Windows PowerShell.
1] Включите WSL с помощью Включение или отключение функций Windows
Чтобы включить функцию подсистемы Windows для Linux с помощью диалогового окна Включение или отключение компонентов Windows, вам необходимо выполнить поиск Включение и отключение компонентов Windows в поле поиска Windows.

В заполненном списке отметьте опцию для Подсистема Windows для Linux. Выбирать ОК.
Он найдет и установит некоторые необходимые системные файлы и попросит вас перезагрузить компьютер. После перезагрузки компьютера ваш дистрибутив Linux будет работать без проблем.
2] Использование Windows PowerShell
Откройте Windows PowerShell с правами администратора. Выполните следующую команду, чтобы включить функцию подсистемы Windows для Linux:
Включить-WindowsOptionalFeature -Online -FeatureName Microsoft-Windows-Subsystem-Linux
Он начнет поиск и установку некоторых необходимых системных файлов.
При появлении запроса вам нужно ввести Y к перезагружать твой компьютер.
Он установит все необходимые системные файлы, и ваш дистрибутив Linux обычно будет работать сейчас.
Я надеюсь, что это руководство помогло вам.
Аналогичный WslRegisterDistribution завершился ошибкой: 0xc03a001a | 0x80041002 | 0x800700b7 или 0x80080005 | 0x80070422 | 0x80370114 | 0x80370102 | 0x80070003 | 0x80070032 | 0x8007023e | 0x800701bc.