Although Windows users could also wish to run Linux software, Linux users frequently desire to run Windows applications on Linux. You can use Linux applications without leaving Windows, whether you’re searching for an improved development environment or strong command-line tools. There are several alternatives to purchasing a new laptop to run the OS for running Linux applications on Windows. Since anybody can set up a virtual machine with a free Linux distribution without the requirement for software licenses, it is simpler than running Windows software on Linux.
There are two popular methods for running Linux software on Windows, they are
- WSL (Windows Subsystem for Linux)
- Virtual Machine
In this article, we’ll discuss how to implement both of these methods briefly.
Note: If you’re using Windows 11, the below steps can be omitted since Windows 11 can run Linux GUI apps out of the box.
Method 1: Windows Subsystem for Linux (WSL)
The WSL is a feature available in Windows that’ll enable one to run the Linux file system, along with Linux command-line tools and GUI applications, directly on Windows. And they can be completely integrated with Windows tools. But the only drawback of WSL is that they are mainly targeted for command-line tools and cannot be used for graphics-intensive programs.
Step 1: Enable the Windows Subsystem for Linux optional feature
Start PowerShell or Command-Prompt with administrator privileges and enter the following command to enable the WSL services on windows, this may be enabled by default in some systems.
Enable-WindowsOptionalFeature -Online -FeatureName -Microsoft-Windows-Subsystem-Linux

Alternatively, you can enable it using the ‘programs and features’ settings.

Step 2: Enable the Virtual Machine platform and Install WSL2
The virtual machine has to be enabled before installing WSL, this can be done using the following command.
dism.exe /online /enable-feature /featurename:Microsoft-Windows-Subsystem-Linux /all /norestart

Once it has been enabled, install WSL by entering the following command in PowerShell or Command-Prompt.
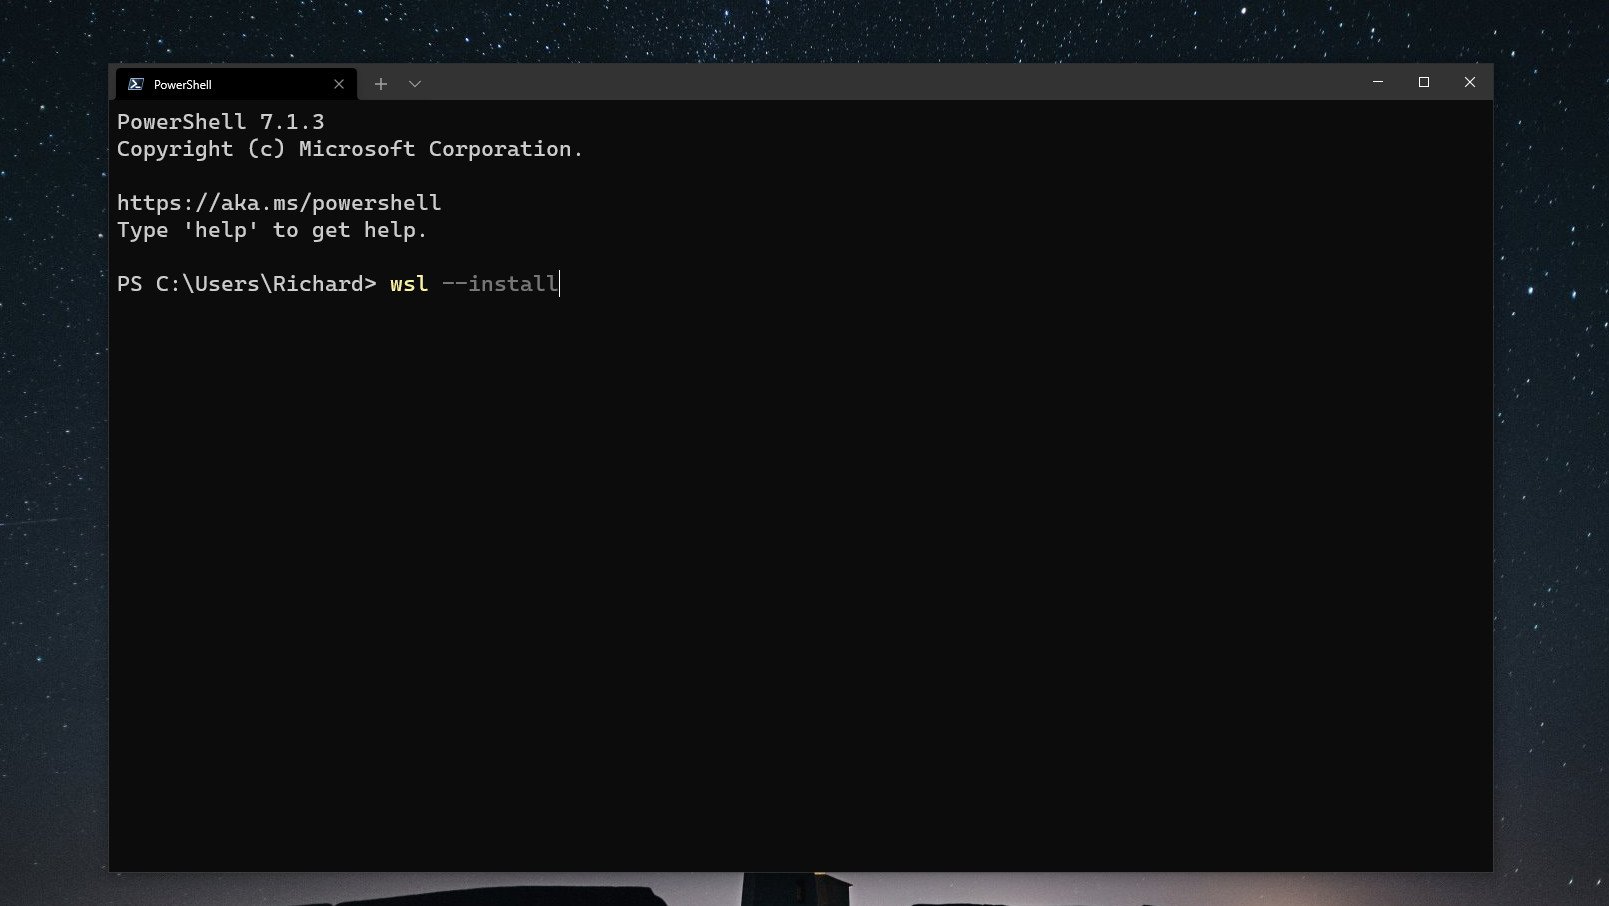
wsl --install
Set the default version of WSL to 2
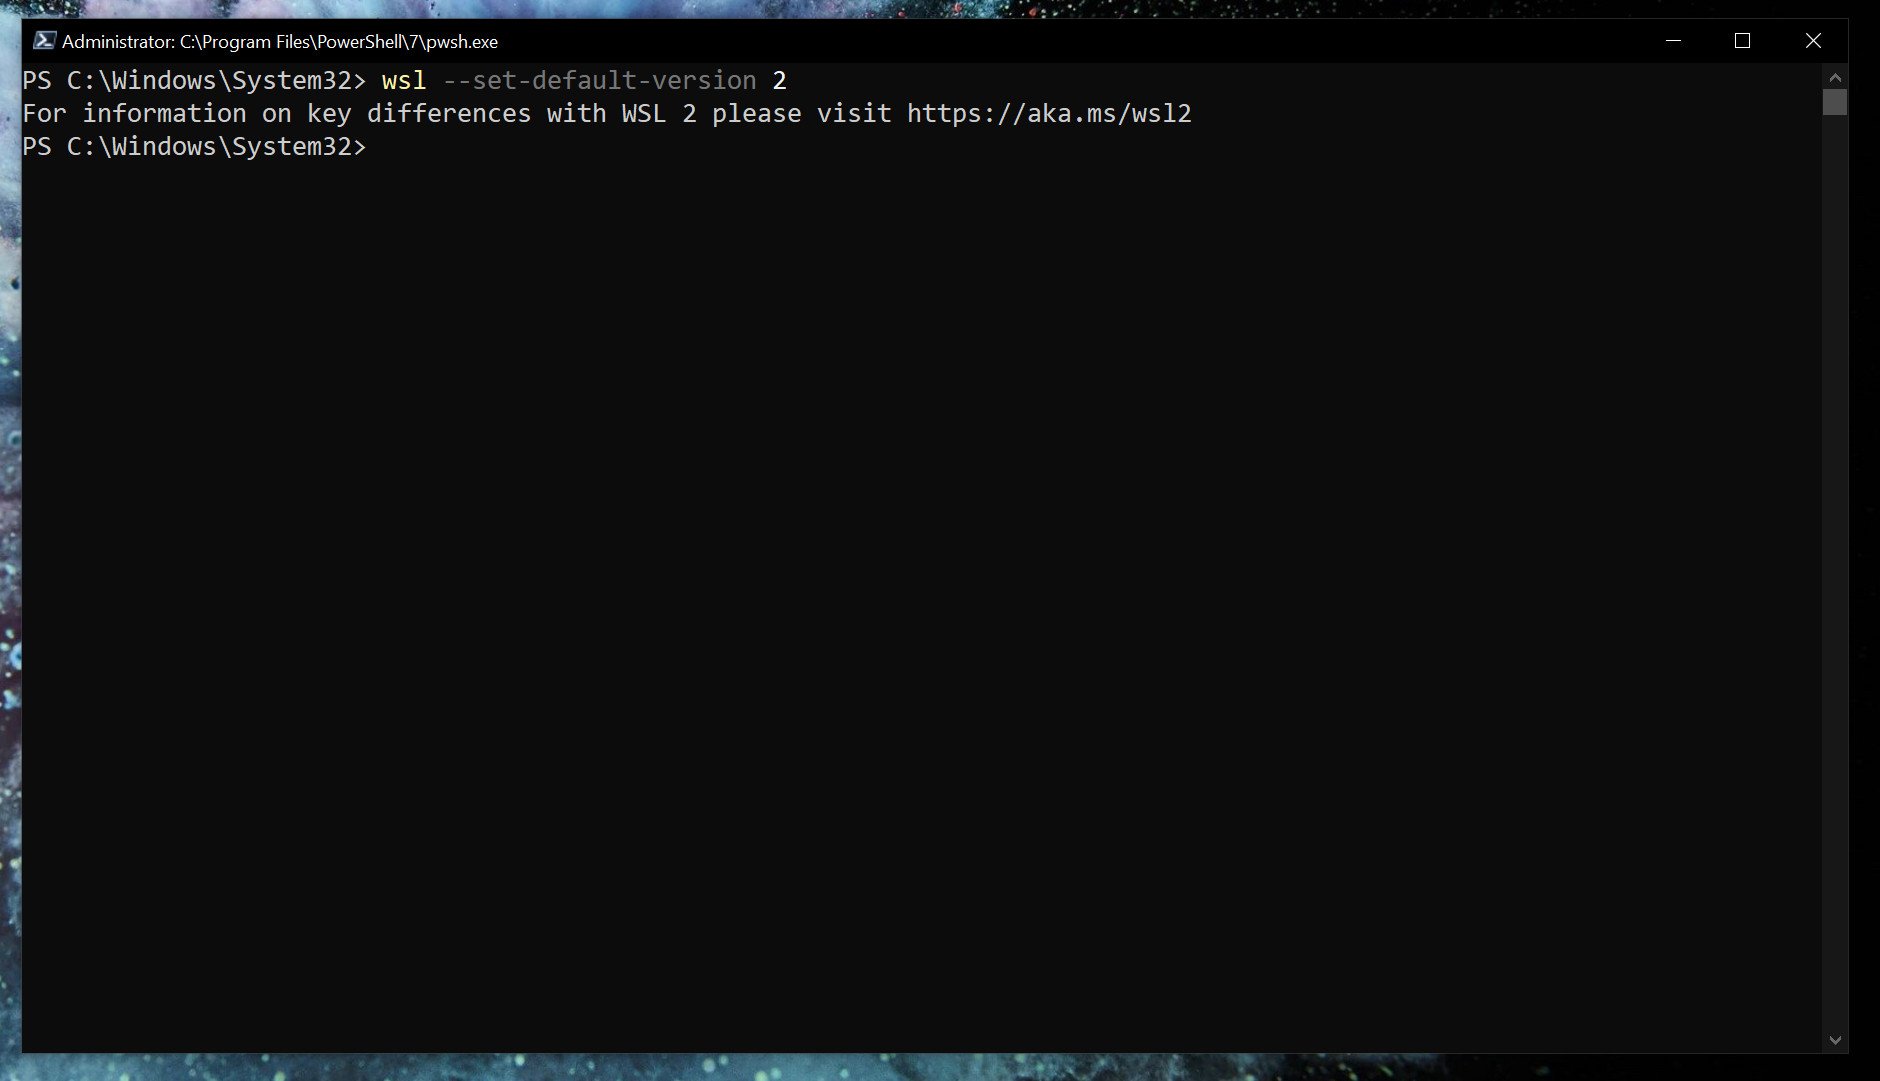
wsl --set-default-version 2

Step 3: Download and Install a Linux distribution
You can download and install any distro of your choice, for the sake of convenience we’ll be installing ubuntu. Navigate to Microsoft Store and search for ‘ubuntu’ then install the application. Once downloaded open the app and follow through with the installation wizard. Once the installation process is complete you’ll be left with the following terminal. Linux Command-line tools can be executed using this terminal.

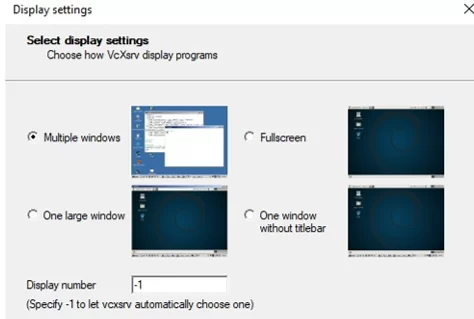
Step 4: Download and Install VcXsrv Windows X Server
The X server is a third-party display manager which is a provider of graphics resources and keyboard/mouse events. Download VcXsrv Windows X Server from the link provided – VcXsrv Windows X Server
Once the setup is complete, make sure to disable the access control option to avoid running into errors while running the GUI applications.

Step 5: Setting up the DISPLAY environment variable
Starting the bash terminal, we have to set the DISPLAY environment variable so it uses the windows host IP address since WSL2 and Windows host doesn’t share the network device. Use any of the following commands to set the DISPLAY variable.
export DISPLAY=$(ip route|awk ‘/^default/{print $3}’):0.0
export DISPLAY=”`grep nameserver /etc/resolv.conf | sed ‘s/nameserver //’`:0″

Run the below command to check whether the variable is properly set or not.
echo $DISPLAY

The variable is reset every time a session is restarted so as to avoid running the command each and every time we open the terminal. We can add the command at the end of the /etc/bash.bashrc file. Open the bashrc file using nano or vim and then add the command at the end.
sudo nano /etc/bash.bashrc

Step 6: Create a .xsession file in the user’s home directory
The following command can be used to create a .xsession file in the user’s home directory /home/<user>/.xsession with the content xfce4-session.
echo xfce4-session > ~/.xsession
Now Windows desktop can run Linux GUI apps.

Method 2: Using a Virtual Machine
Using a Virtual Machine is the most efficient and easy way to run Linux apps on Windows, we’ll briefly discuss the installation and setting up a virtual machine with a Linux OS.
Step 1: Download and Install a Virtual Machine
Download a virtual machine of your choice (Oracle or VMware), here we’ll be using a VMware workstation. Download the software from the below link and follow the installation process. Refer to this How to Install VirtualBox on Windows GeeksforGeeks article for setting up a virtual machine using oracle.
Download VMware Workstation.

Step 2: Download a Linux distribution of your choice
You can download any Linux distribution, below are some of the most popular choices along with their links.
- Ubuntu
- Pop! OS
- Linux Mint
- Fedora
Step 3: Installing the OS
Open VMware Workstation, and click on the ‘Create new Virtual Machine’. And then select the installer disc image option and choose the downloaded Linux operating system’s ISO file.

Specify the disk capacity and click on next.

Name the virtual machine and move on to the next step.

Start the virtual machine to boot up the OS and follow the installation steps. Once the installation is complete you can run any Linux GUI apps using the virtual machine.

Step 4: Starting and Running the applications
You can now run any Linux application while within the virtual machines environment, here are some examples.
$ gedit

$ sudo apt install x11-apps -y
$ xcalc

$ xclock

$ xeyes

Last Updated :
07 Nov, 2022
Like Article
Save Article
Easily enable the Windows Subsystem for Linux
by Hasibul Kabir
Hasibul Kabir is a Tech-Enthusiast Blogger, Web Developer & Hobbyist Game Developer. Writing about Technology, mainly Windows, Mac, iOS, etc., is his main focus, besides doing some computer… read more
Updated on
- When you try to launch something that requires Windows Subsystem for Linux, you may get an error indicating that this optional feature is not enabled.
- Enabling this feature can be necessary and will not slow down your PC’s performance.
- To turn on this feature on Windows, you can use PowerShell and another method described in this article.
XINSTALL BY CLICKING THE DOWNLOAD
FILE
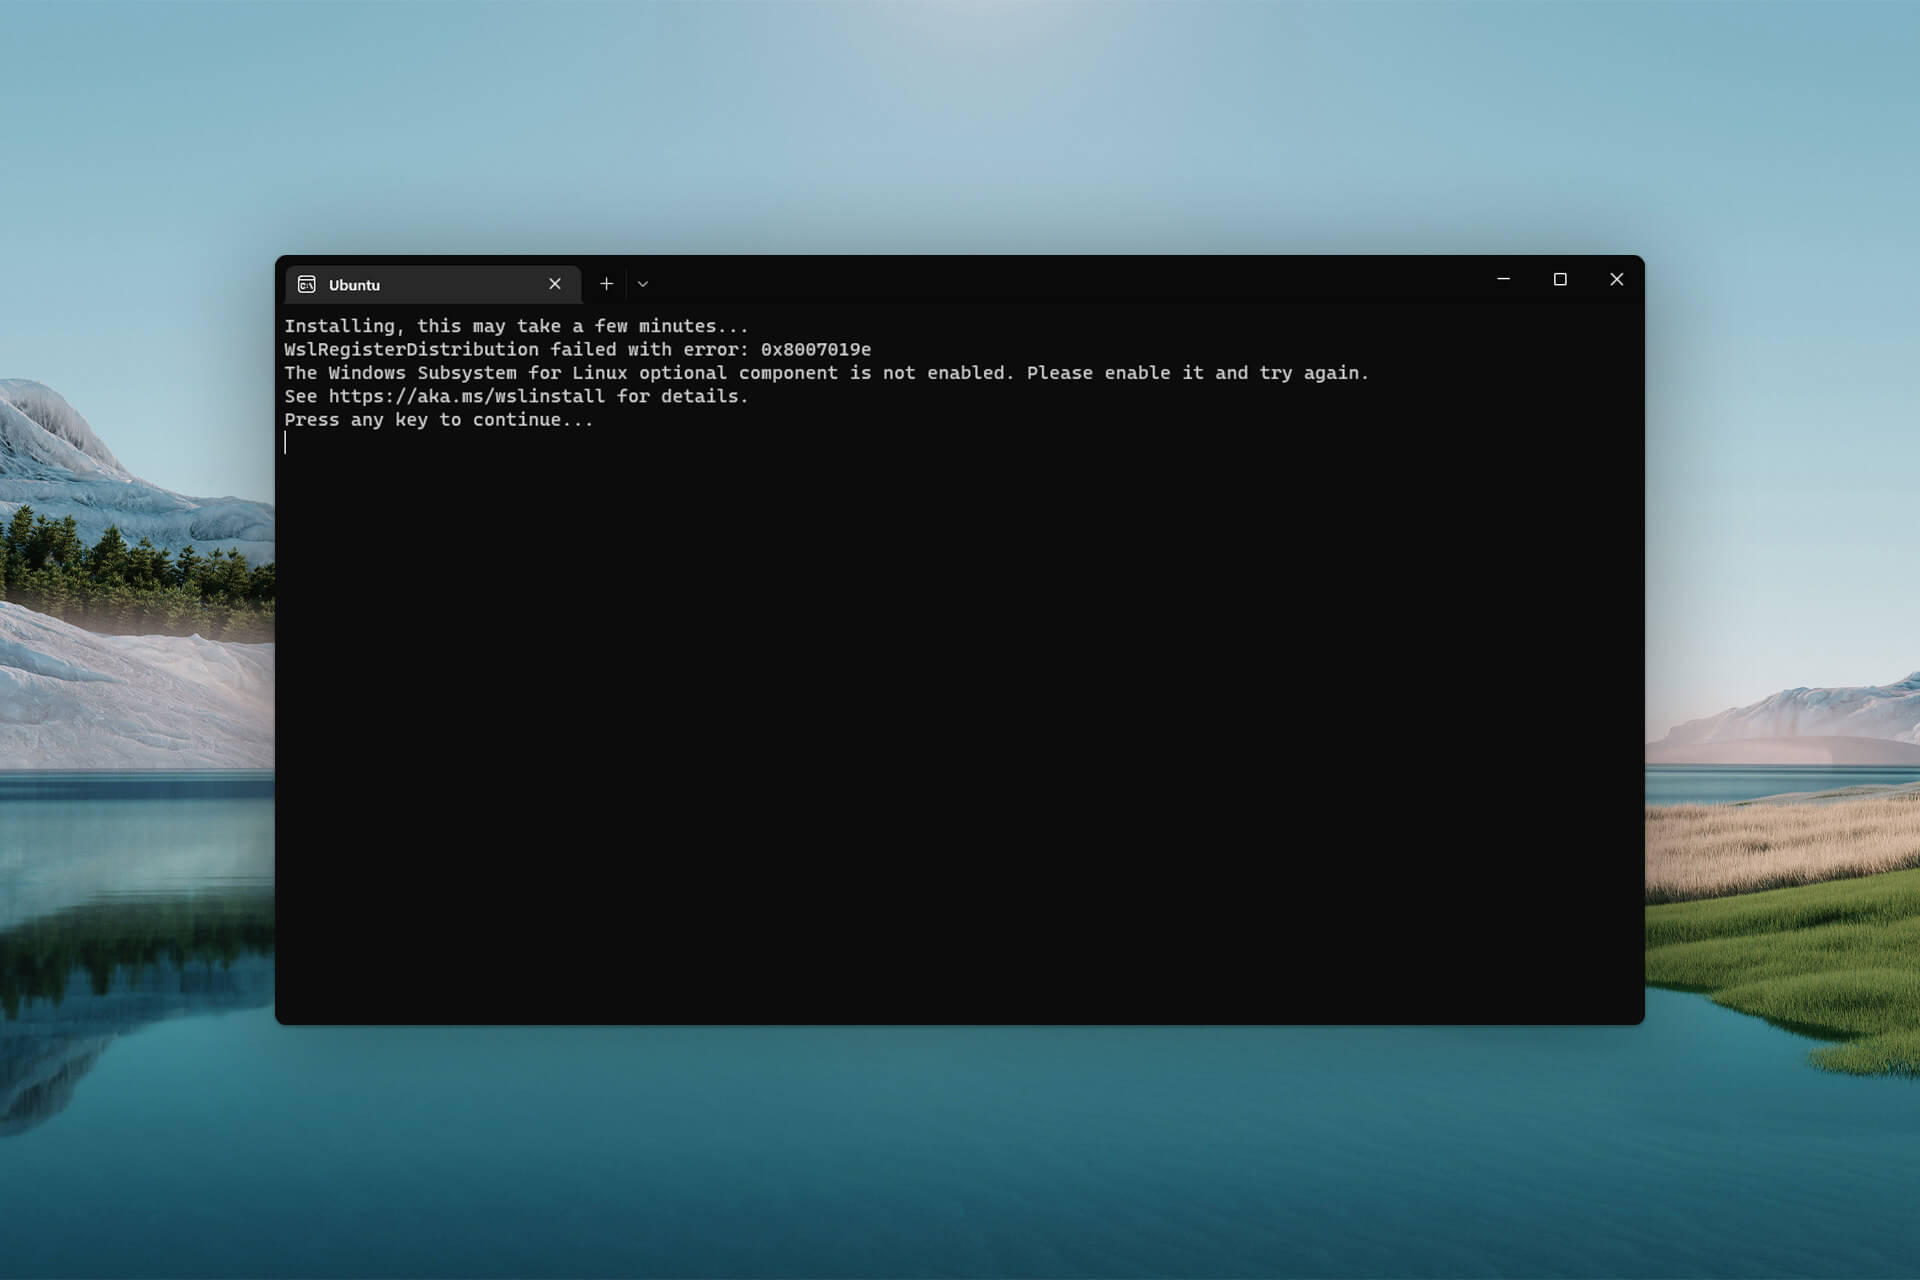
Usually, when you try to run any software, service, or app that requires the Linux environment, you may get an error.
In most cases, if you install the Ubuntu app from the Microsoft Store and open it, this problem will appear. When it occurs, you get the following message: The Windows Subsystem for Linux optional component is not enabled. Please enable it and try again.
It also may show an error code 0x8007019e. But don’t worry, you can easily fix this problem if you take the proper steps.
Does the Windows Subsystem for Linux slow down a PC?
To make your development work much more pleasant, you may enable WSL. It does not hurt Windows performance.
How we test, review and rate?
We have worked for the past 6 months on building a new review system on how we produce content. Using it, we have subsequently redone most of our articles to provide actual hands-on expertise on the guides we made.
For more details you can read how we test, review, and rate at WindowsReport.
Any services in the background take a few computing resources. The WSL is not different. However, according to the users, it doesn’t slow down the PC.
We have tested it by ourselves. Our research also has found that modern computers can easily handle Windows Subsystem for Linux without negatively affecting performance.
Moreover, it can be an essential feature for some users. So, you may need to turn it on, particularly when you face the error mentioned in this article.
How do I enable Windows Subsystem for Linux on Windows?
If you want to enable WSL on your PC, you can easily do it. But, before that, we suggest you do the following things:
- Update Windows to the latest version.
- Ensure you are using Windows 11 or 10, as other versions don’t support this feature.
Now, you can follow the methods mentioned below to enable Windows Subsystem for Linux.
1. Install the optional feature
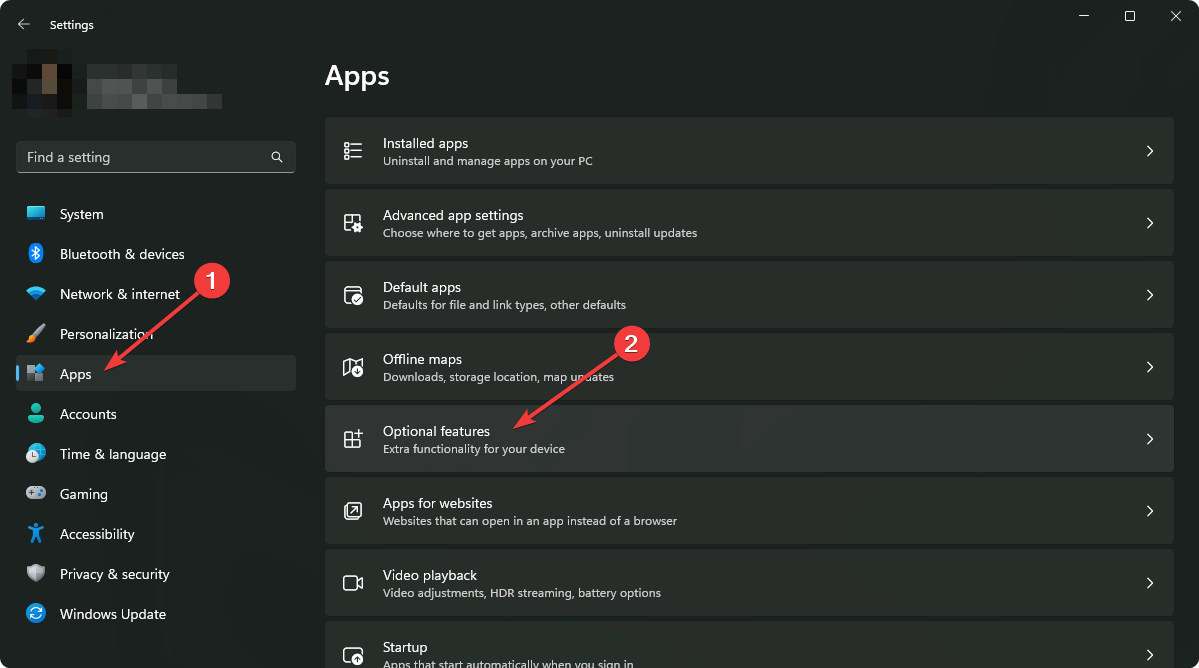
- Press Win + I on the keyboard to open Windows Settings.
- Go to Apps and click on Optional features.

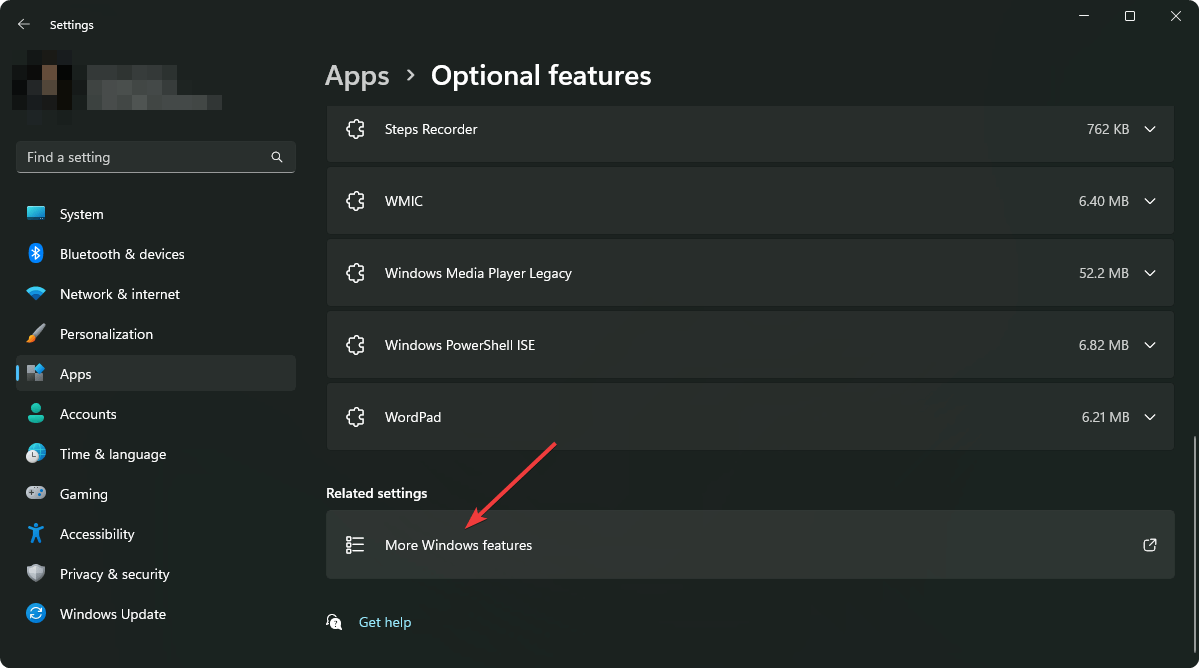
- Click on More Windows features to open the Windows Features window.
- Tick Windows Subsystem for Linux and click on OK.

- It will install the required components.
- Restart your PC after completing the process.

Alternatively, you also can search for the optionalfeatures on the Start Menu to find and open the Windows Features window. It can be necessary if you don’t find the exact options shown in the above steps.
After enabling the WSL, you can try to open the Ubuntu terminal or any other app or service that was showing the error. Hopefully, you will not see the same again.
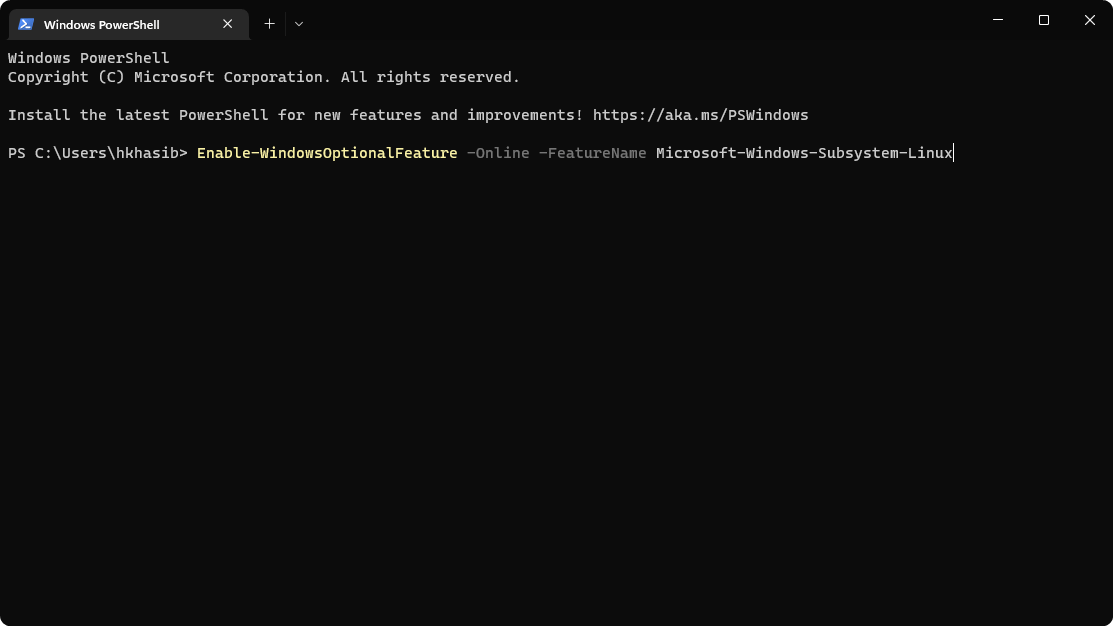
2. Use the PowerShell command
- Open the Start Menu, type PowerShell, and hit Enter.
- Now, type the following command and press Enter to execute it:
Enable-WindowsOptionalFeature -Online -FeatureName Microsoft-Windows-Subsystem-Linux
- Wait for a while.
- Restart your PC after PowerShell installs the required features.
Now, verify if it has solved the problem or not. If PowerShell can successfully enable this optional feature, you can use the Ubuntu terminal or any other app that requires WSL without any error.
- Fix: Set Time Zone Automatically Defaults to Wrong Time Zone
- 0X8007013 Install Error: How to Quickly Fix it
- Fix: Internet Keeps Disconnecting When Playing Games on Windows 11
3. Enable Developer Mode

NOTE
If you are using the latest builds, enabling Developer Mode is no longer necessary. In case you are running an older build, perform the steps below to enable it.
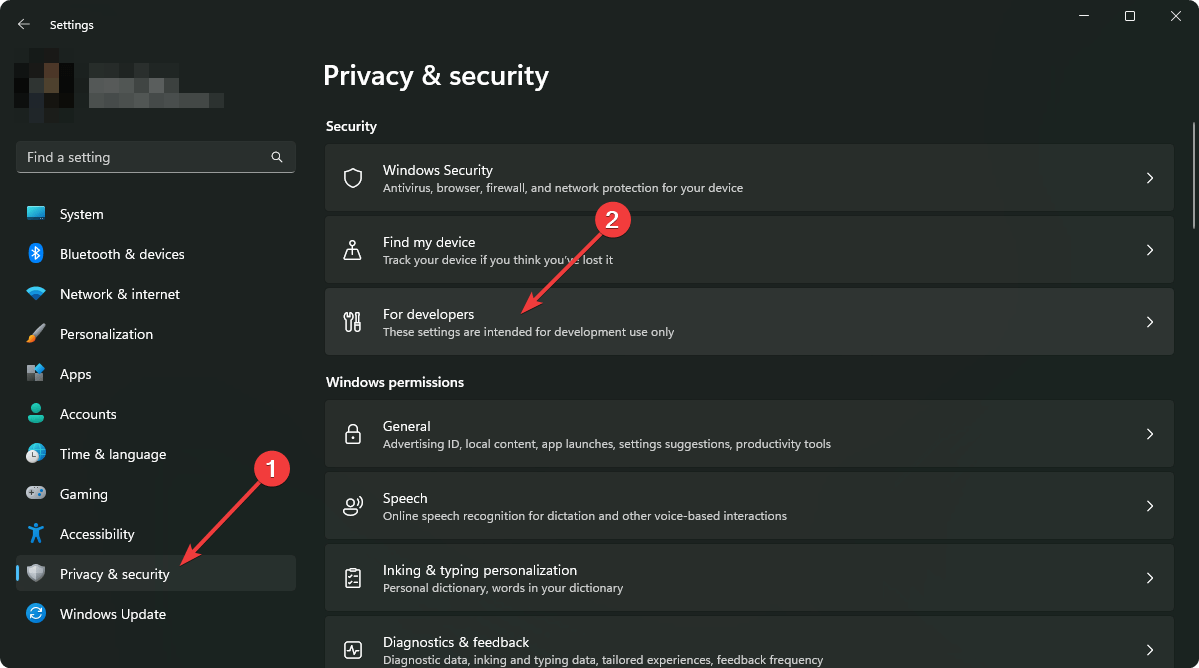
- Open Windows Settings.
- Go to Privacy & security and click on For developers.
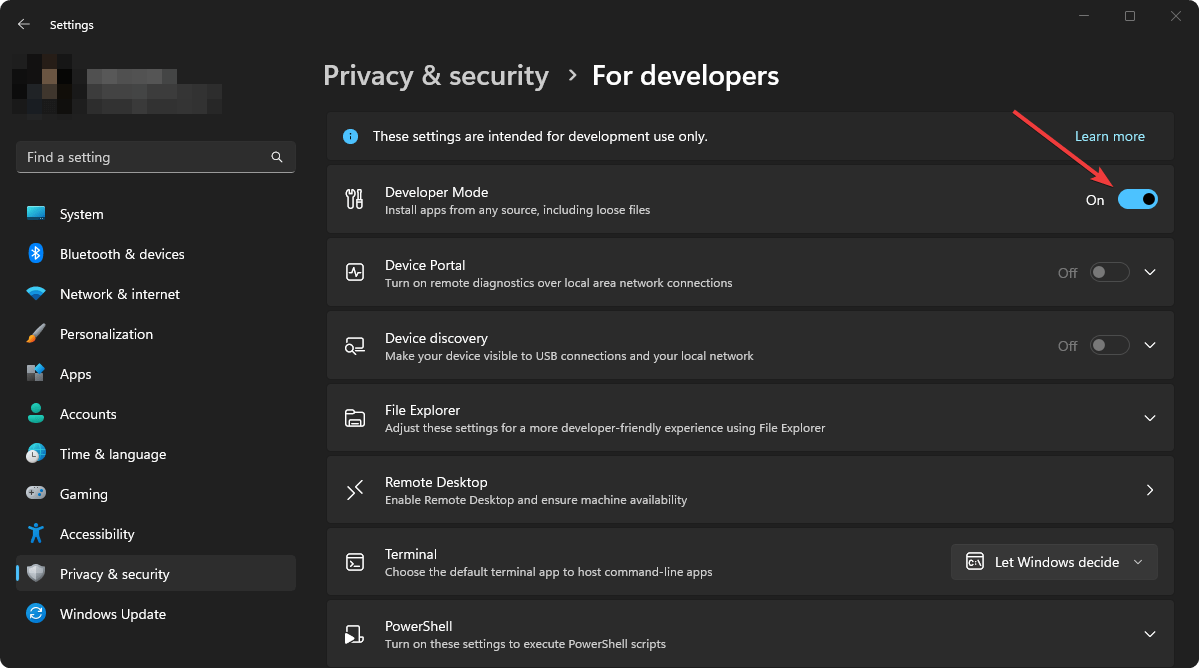
- Turn the Developer Mode by tweaking the appropriate switch.
- Click on Yes on the popup window.
- Restart your PC.
For more detailed steps, learn how to enable Windows 11 Developer Mode. If the Developer Mode is a requirement, try to enable the latest WSL again and see if it works.
This article has explained how to fix Windows Subsystem for Linux is not enabled. If you have any opinions or suggestions, feel free to let us know in the comments box.
![]()
Windows Subsystem for Linux (WSL) — подсистема ОС Windows 10, позволяющая разработчикам, тестировщикам запускать нативные приложения Linux, писать скрипты, выполнять команды непосредственно из Windows. В обновлённой Windows 10 (2004) появилась 2я версия WSL, в которой используется полноценное ядро Linux с возможностью запуска приложений и контейнеров Docker, реализована высокая скорость загрузки, небольшой объем потребляемых ресурсов, управление в фоновом режиме, обновление ядра. Таким образом вы сможете запускать ELF64 программы, которые могут получать доступ к файловой системе Windows без использования сторонних порто (таких как Cygwin).
Образ ядра Linux (версия ядра 4.19) в Windows 10 представляет собой легкую виртуальную машину, для запуска которой не нужно ставить полноценную роль Hyper-V. Системные вызовы Linux транслируются на лету в вызовы Windows без использования эмулятора (в отличии от WSL1).
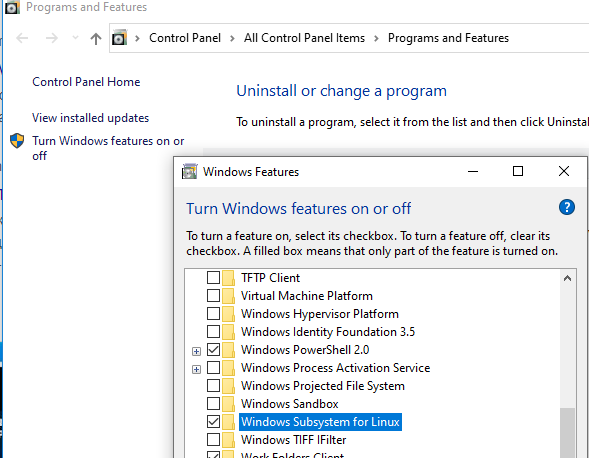
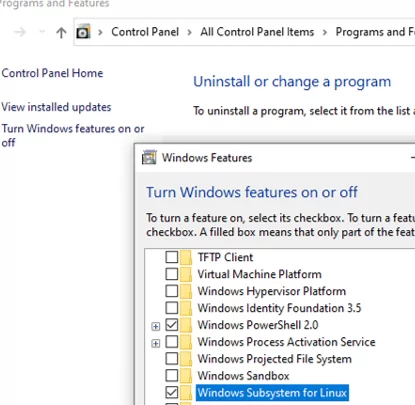
Изначально компонент WSL отключен. Чтобы его включить, вам необходимо зайти в Пуск -> Панель управления -> Программы и компоненты -> Включение и отключение компонентов Windows (Control Panel\All Control Panel Items\Programs and Features\Turn Windows features on or off), активировать галочку Подсистема Windows для Linux (Windows Subsystem for Linux), нажать кнопку ОК, и перезагрузить компьютер.
Вы можете включить компоненты WSL в Windows 10 с помощью dism:
dism.exe /online /enable-feature /featurename:VirtualMachinePlatform /all /norestart
dism.exe /online /enable-feature /featurename:Microsoft-Windows-Subsystem-Linux /all /norestart
или PowerShell
Enable-WindowsOptionalFeature -Online -FeatureName Microsoft-Windows-Subsystem-Linux
Enable-WindowsOptionalFeature -Online -FeatureName VirtualMachinePlatform
В Windows Server 2004 Semi-Annual Channel (SAC) для установки компонента WSL используется командлет Install-WindowsFeature:
Install-WindowsFeature -Name Microsoft-Windows-Subsystem-Linux
После этого также необходимо перезагрузить компьютер.
В настройка BIOS/UEFI компьютера должна быть включена поддержка аппаратной виртуализации: Intel VT (Intel Virtualization Technology) или AMD-V.
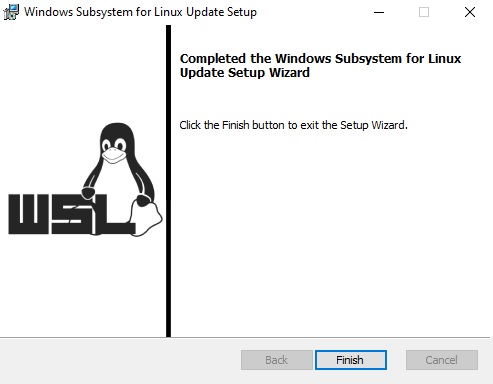
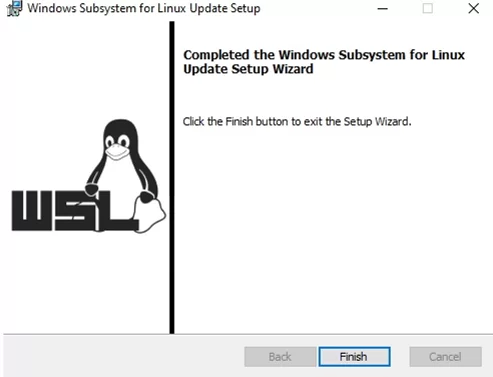
Теперь вам нужно выполнить обновление WSL до версии 2. Для этого требуется зайти на сайт https://docs.microsoft.com/ru-ru/windows/wsl/wsl2-kernel, скачать файл wsl_update_x64.msi, установить его. По завершении увидите картинку
Чтобы сделать WSL2 архитектурой по умолчанию для новых дистрибутивов, в PowerShell выполните команду:
wsl --set-default-version 2
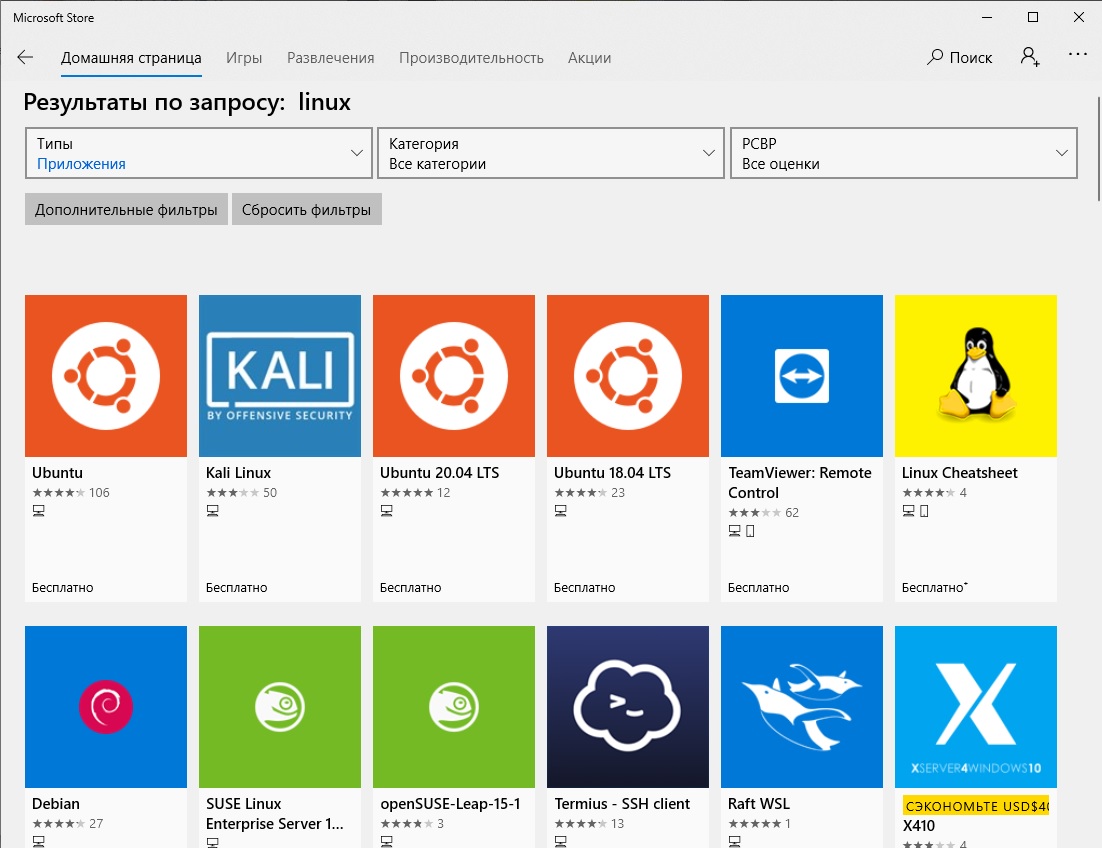
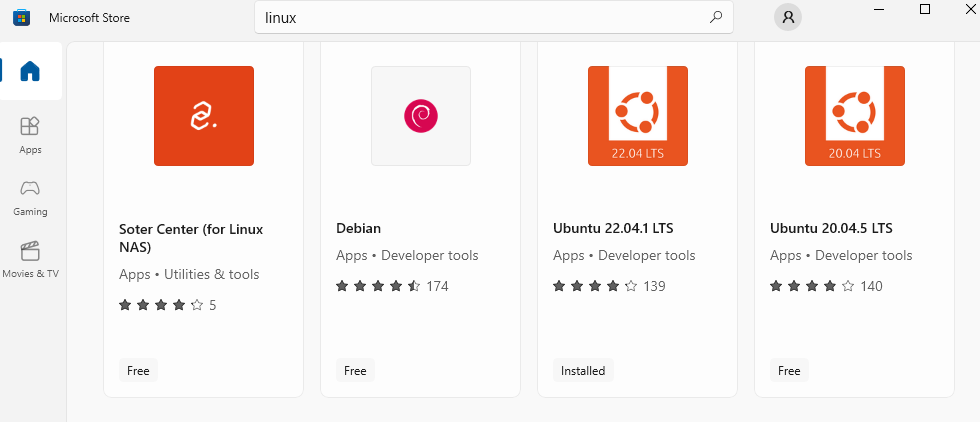
Далее вам необходимо открыть Microsoft Store, в поиске ввести слово “Linux”. В появившемся списке выберите нужный дистрибутив. Доступные Ubuntu, Debian, Kali Linux, Linux Cheatsheet, SUSE Linux Enterprise Server15, openSUSE Leap 15-1, Pengwin Enterprise, Fedora Remix for WSL или другие. В нашем примере мы будем использовать Ubuntu 20.04 LTS, нажмите кнопку Получить.
Если у вас отключен Windows Store или вы хотите установить дистрибутив WSL в Core редакции Windows Server, вы можете скачать дистрибутив Ubuntu с помощью PowerShell командлета Invoke-WebRequest:
Invoke-WebRequest https://aka.ms/wslubuntu2004 -OutFile ubuntu-2004.zip –UseBasicParsing
Распакуйте архив:
Expand-Archive -Path .\ubuntu-2004.zip
Запустите установку образа Linux с помощью файла Ubuntu.exe.
Также вы можете скачать образ в виде appx файла и установить его с помощью командлета Add-AppxPackage.
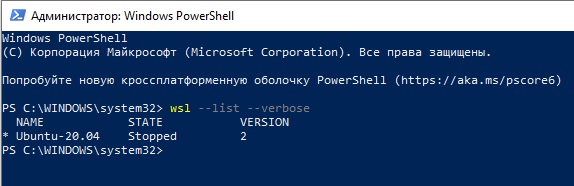
После установки можно проверить используемую версию WSL с помощью команды
wsl --list –-verbose
Если у вашей среды Linux указана версия 1, нужно изменить ее на WSL2 командой:
wsl --set-version Ubuntu-20.04 2
Файл жёсткого диска с образом виртуальной машины ОС Linux Ubuntu 20.04 будет располагаться в профиле пользователя: C:\Users\234\AppData\Local\Packages\CanonicalGroupLimited.Ubuntu20.04onWindows_79rhkp1fndgsc\LocalState.
После установки дистрибутива в стартовом меню появляется ярлык на него. Для запуска Ubuntu зайдите в меню Пуск, нажмите на соответствующем ярлыке и получите в отдельном окне полноценную командную оболочку Bash. Запускать WSL можно и с помощью команды wsl. При первом запуске образа в командной строке Bash вам будет предложено создать пользователя и пароль (которые не должны совпадать с учётной записью Windows). Чтобы выполнять команды с правами root, необходимо использовать дополнительный ключ (префикс) sudo. В WSL есть общие команды для Bash и CMD, и тут нужно не забывать, что система Linux чувствительна к регистру.
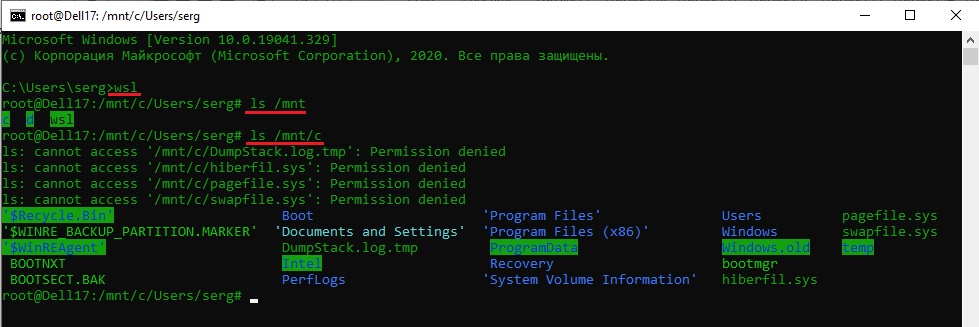
Вы можете выполнить Linux-команды из CMD. Для этого необходимо вначале указать “WSL”. Например, для просмотра списка файлов и папок в каталоге Windows, выполните:
wsl
ls /mnt
ls/mnt/c
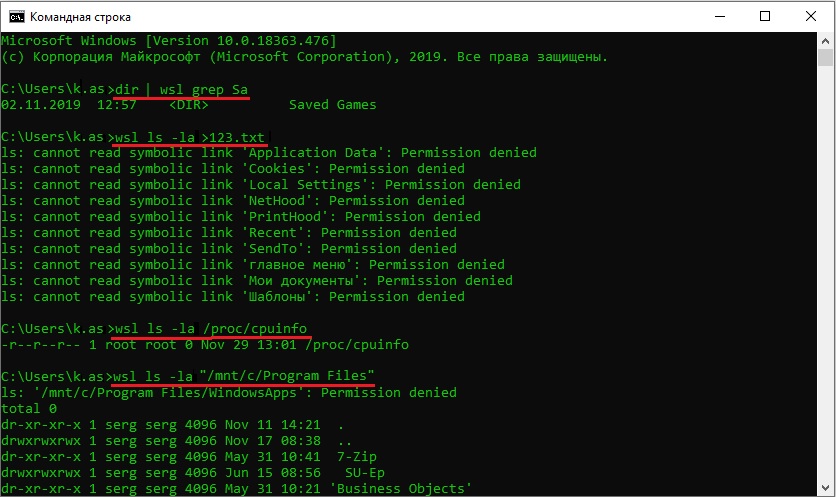
dir | wsl grep Sa
wsl ls ‑la > 123.txt
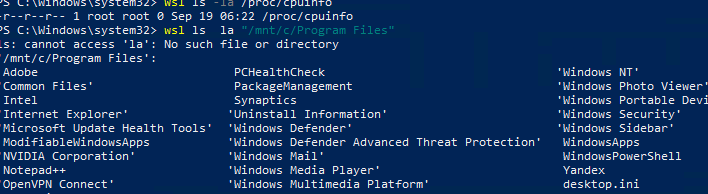
wsl ls ‑la /proc/cpuinfo
wsl ls ‑la “/mnt/c/Program Files”
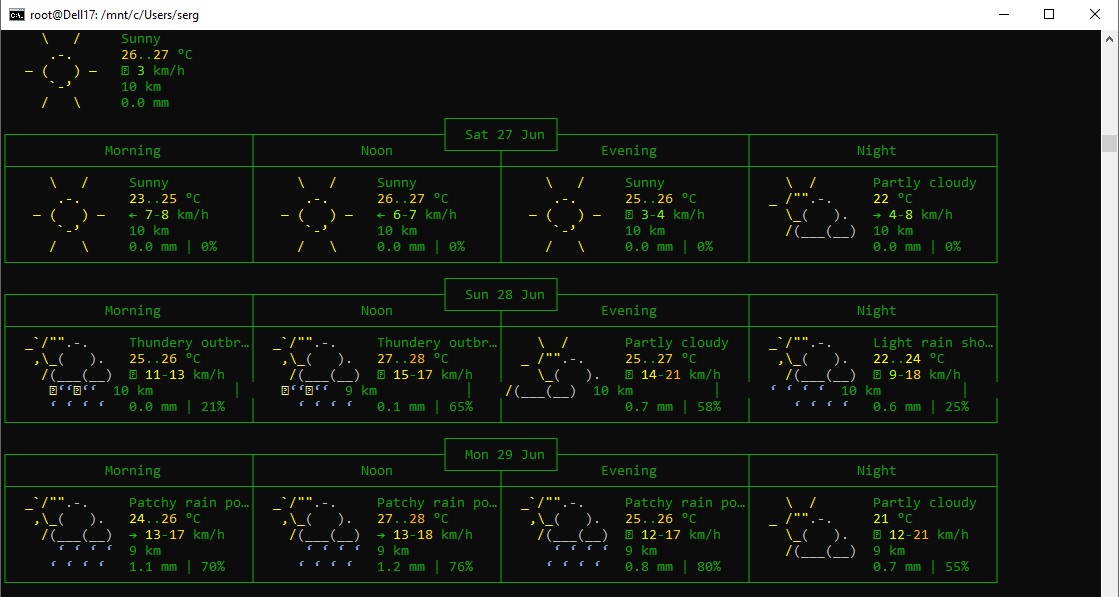
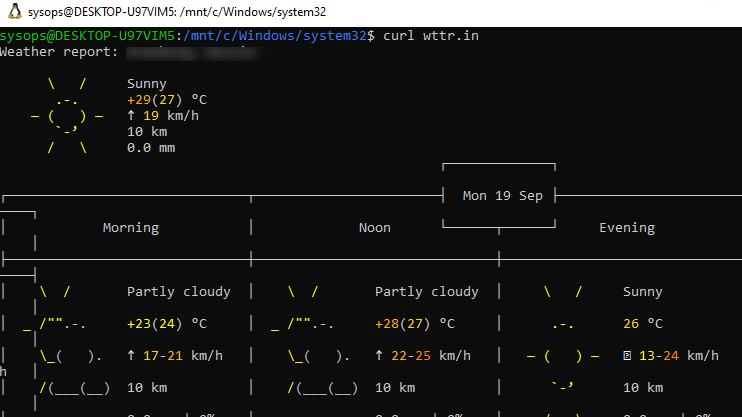
Также вы можете открыть проводник командой explorer.exe, калькулятор – calc.exe, блокнот – notepad.exe, paint – mspaint.exe, календарь – cal, погоду – curl wttr.in
Ещё один пример взаимосвязи 2х систем – вы можете открыть в Windows файл из WSL-дистрибутива по сетевому пути. Для этого в CMD наберите путь к файлу:
notepad \\wsl$\Ubuntu-20.04\home\1122.txt
Из окна консоли вы можете обновить список пакетов в Ubuntu с помощью команд:
sudo apt-get update
sudo apt-get upgrade
После обновления Ubuntu папка …/LocalState будет занимать 1.5 Гб.
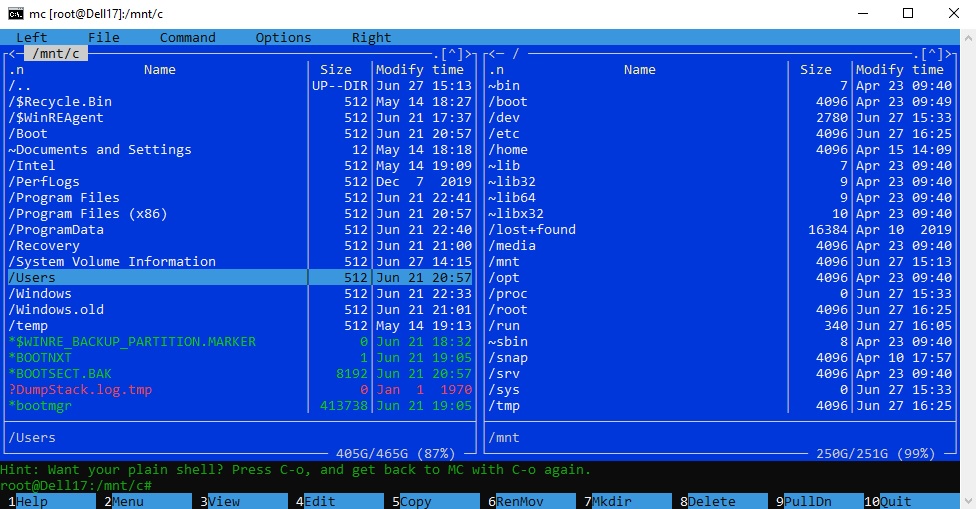
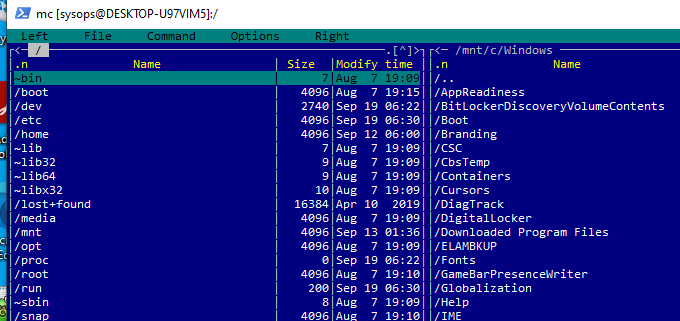
Из командной строки Linux можно не только просмотреть Windows-файлы и каталоги, но и получить к ним доступ. Чтобы удобнее копировать файлы, просматривать директории и их содержимое, установите файловый менеджер Midnight Commander с помощью команды
sudo apt-get install mc
Вы можете запустить Midnight Commander как в командной оболочке Bash, так и внутри CMD. На скриншоте ниже показано, что в двух панелях MC показывается список файлов с обеих ОС.
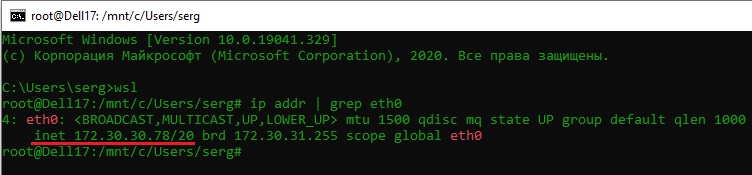
Можно отобрахить сетевые настройки (IP адрес) IP-адрес Linux-системы:
ip addr | grep eth0
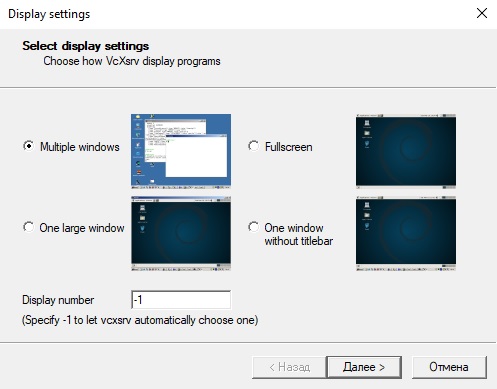
В WSL не предусмотрена работа приложений с графическим интерфейсом. Тем не менее вы можете попробовать их установить и использовать. Чтобы запускать графические приложения в Linux, нужно скачать и установить в Windows программу VcXsrv Windows X Server (https://sourceforge.net/projects/vcxsrv/).
С помощью пакетного менеджера apt-get установим несколько графических программ: например, браузер, текстовый редактор или что-то ещё:
sudo apt-get install gedit
sudo apt-get install firefox
sudo apt-get install x11-app
Затем создайте файл в директории root:
cd /~
vim .bash_login
впишите строку
export DISPLAY=$(cat /etc/resolv.conf | grep nameserver | awk '{print $2}'):0
сохраните запись
Esc -> :wr -> :q
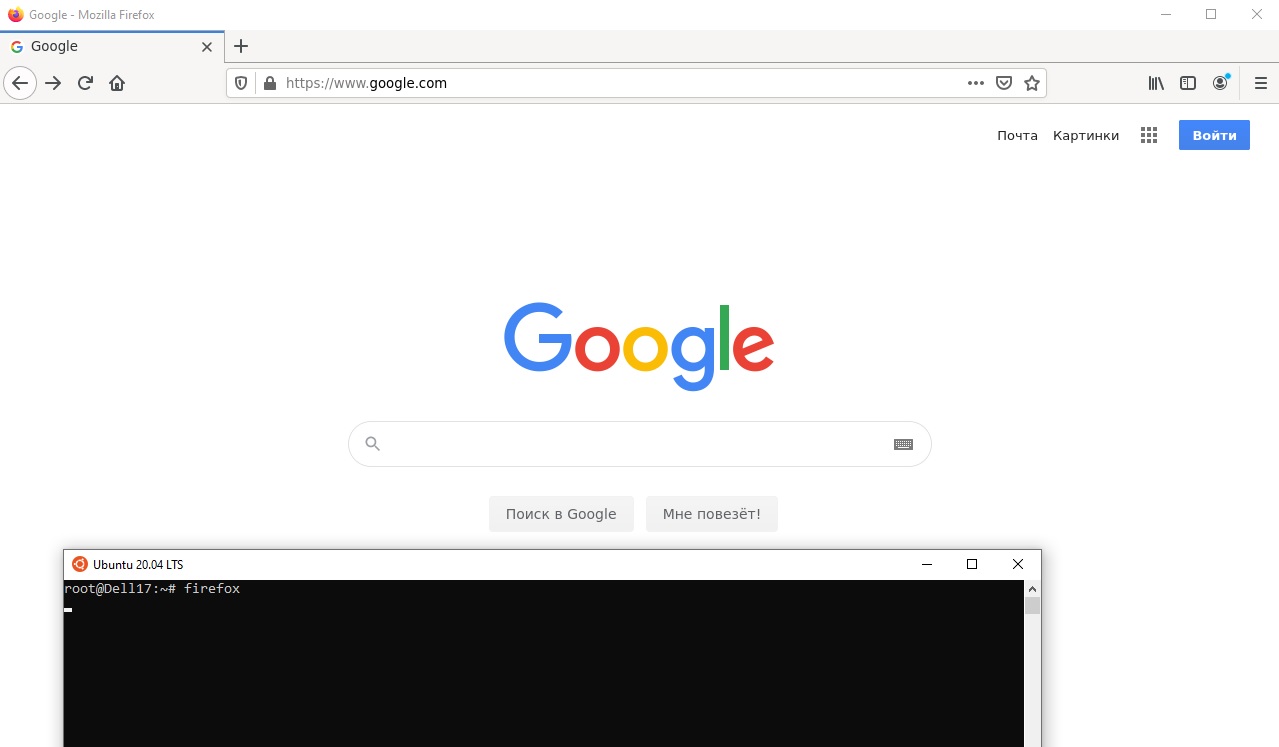
Теперь можете запустить графические программы Linux через WSL командами:
firefox
или
gedit
Вы можете установить в Windows 10 несколько дистрибутивов Linux и запускать одновременно в разных окнах WSL. Вывести весь перечень установленных дистрибутивов можете с помощью команды:
wsl --list –all
чтобы завершить работу всех запущенных дистрибутивов и ядра WSL 2, выполните команду:
wsl --shutdown
Windows Subsystem for Linux (WSL) is a Windows feature that allows developers or testers to run native Linux apps, write scripts, and run bash commands directly from Windows. Starting with Windows 10 (2004) WSL 2 is available which uses a full-featured Linux kernel. It allows running apps or Docker containers, has a high load speed, consumes fewer resources, and supports background management, and kernel updates. Thus, you can run ELF64 apps able to access the Windows file system without using third-party ports (like Cygwin).
A Linux kernel (v4.19) image in Windows 10 is a lightweight virtual machine. To run it, you don’t need to install a full Hyper-V role. Linux system calls are translated into Windows calls on the fly without using any emulator (unlike WSL1).
By default, WSL is disabled. To enable it, open Start -> Control Panel -> All Control Panel Items -> Programs and Features -> Turn Windows features on or off, check Windows Subsystem for Linux, click OK, and restart your computer.
You can enable WSL feature on Windows 10/11 using DISM:
dism.exe /online /enable-feature /featurename:VirtualMachinePlatform /all /norestart
 dism.exe /online /enable-feature /featurename:Microsoft-Windows-Subsystem-Linux /all /norestart
or PowerShell:
Enable-WindowsOptionalFeature -Online -FeatureName Microsoft-Windows-Subsystem-Linux
 Enable-WindowsOptionalFeature -Online -FeatureName VirtualMachinePlatform
To install WSL in Windows Server 2022 or 2004+ Semi-Annual Channel (SAC), use the Install-WindowsFeature cmdlet:
Install-WindowsFeature -Name Microsoft-Windows-Subsystem-Linux
Then you need to restart your computer.
Intel VT (Intel Virtualization Technology) or AMD-V support must be enabled in the BIOS/UEFI settings of your computer.
Then update WSL to version 2. To do it, go to https://docs.microsoft.com/windows/wsl/wsl2-kernel, download wsl_update_x64.msi, and install it.
To make WSL2 a default architecture for new Linux distros, run the following command:
wsl --set-default-version 2
Then open Microsoft Store and enter “Linux” in the search bar. Select the distro you need from the list. Ubuntu, Debian, Kali Linux, SUSE Linux Enterprise Server15, openSUSE Leap 15-1, Fedora Remix for WSL, and others are available. In our example, we will use Ubuntu 20.04 LTS. Then click Get.
If you have Microsoft Store disabled or you want to install a WSL on the Windows Server Core edition, you can download an Ubuntu WSL image using the Invoke-WebRequest PowerShell cmdlet:
Invoke-WebRequest https://aka.ms/wslubuntu2004 -OutFile ubuntu-2004.zip –UseBasicParsing
Extract the archive with PowerShell:
Expand-Archive -Path .\ubuntu-2004.zip
Run the installation of the Linux image using the Ubuntu.exe file.
You can also download the image as an appx file and install it using Add-AppxPackage cmdlet.
After the installation, you can view the installed WSL version using this command:
wsl --list –-verbose

If your Linux environment has version 1, you need to change it to WSL2:
wsl --set-version Ubuntu-20.04 2
A virtual hard disk file with the OS Linux Ubuntu 20.04 is located in the user profile: C:\Users\username\AppData\Local\Packages\CanonicalGroupLimited.Ubuntu20.04onWindows_79rhkp1fndgsc\LocalState.
After the distribution has been installed, its icon appears in the Start menu. To start Ubuntu, open the Start menu, click its icon and the Bash shell will open. You can also start WSL using the wsl command. The first time you run the image, you will be prompted to create a user and password. To run commands as root, use an additional key (prefix): sudo. WSL has common commands for Bash and CMD, and you should remember that Linux is case-sensitive.
You can run Linux commands in CMD. To do it, you must first specify WSL. For example, to view the list of files and folders in your Windows directory, run the following commands:
wsl
 ls /mnt
 ls/mnt/c

wsl ls ‑la /proc/cpuinfo
 wsl ls ‑la “/mnt/c/Program Files”
You can also open Windows Explorer using explorer.exe, Calculator (calc.exe), Notepad (notepad.exe), Paint (mspaint.exe), Calendar (cal), and Weather (curl wttr.in).
Another useful feature: you can open a WSL file from Windows using its system path. To do it, enter the file path in CMD:
notepad \\wsl$\Ubuntu-20.04\home\1122.txt
You can update the list of Ubuntu packages from the console using the following commands:
sudo apt-get update
 sudo apt-get upgrade
After the update, the …/LocalState folder will take up 1.5 GB.
From the Linux command prompt, you can view Windows files and folders, and access them. To make it more convenient to copy files, view directories and their contents, install Midnight Commander using the following command:
sudo apt-get install mc
You can run Midnight Commander both in Bash and in CMD. The screenshot below shows that both MC panels display the list of files from both OSs.
You can display network settings (an IP address) of your WSL subsystem:
ip addr | grep eth0
Apps with graphic interfaces don’t work in WSL. However, you can try to install and use them. To run graphic apps in Linux, download and install VcXsrv Windows X Server (https://sourceforge.net/projects/vcxsrv/) on Windows.
Use the apt-get package manager to install graphic apps. For example, a browser, a text editor, or anything else:
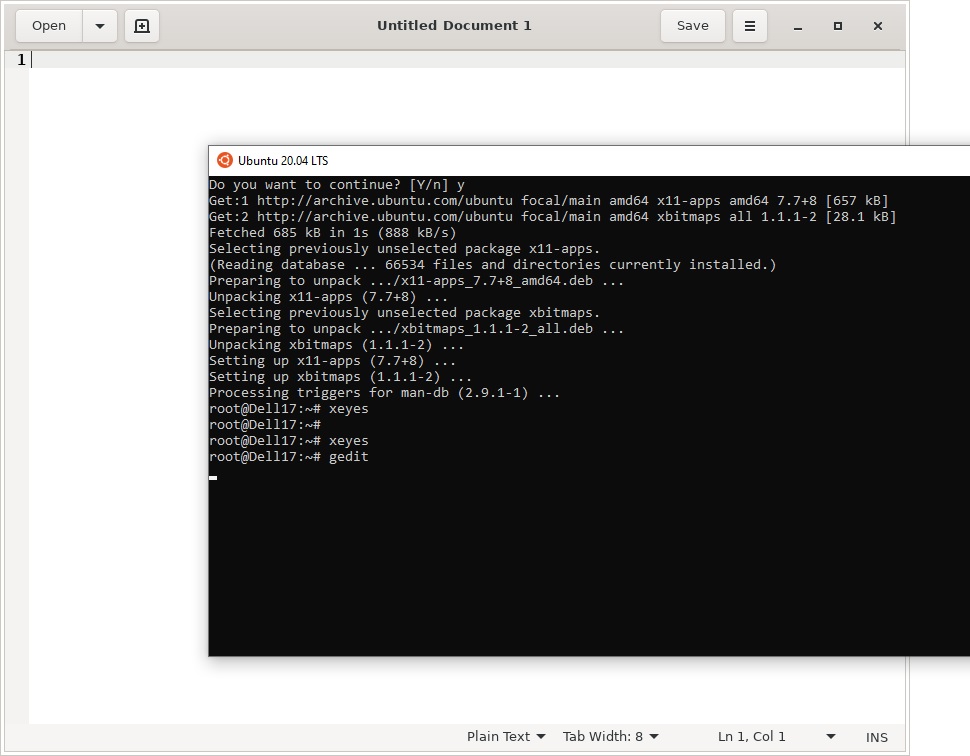
sudo apt-get install gedit
 sudo apt-get install firefox
 sudo apt-get install x11-app
Then create a file in the root directory:
cd /~
 vim .bash_login
Add the following line:
export DISPLAY=$(cat /etc/resolv.conf | grep nameserver | awk '{print $2}'):0
and save the file:
Esc -> :wr -> :q
Then you can run graphic Linux apps in WSL using the commands:
firefox
or
gedit
You can install multiple Linux distros on Windows 10/11 and run them simultaneously in different WSL spaces. You can display the list of all installed WSL distros in Windows with the command:
wsl --list –all
To stop all running Linux distributions and the WSL2 kernel, run the following command:
wsl --shutdown
Microsoft dropped plenty of jaws when it launched the Windows Subsystem for Linux, a way to run actual Linux inside Windows without the need to set up a virtual machine. The project has seen a ton of support, and WSL2 is the latest and greatest.
It takes things a little further and adds yet more awesomeness to the Linux experience on Windows 10 and Windows 11. Now, since the release of version 1.0, it has never been easier to set up WSL2 on your Windows machine, with GUI apps now even supported on Windows 10, too.
Simplified setup of WSL2 on Windows 10 and Windows 11
There is now a new, extremely simplified way to get WSL2 up and running on your Windows 10 and Windows 11 PC. To get the very latest version you need to be running Windows 10 version 21H1, 21H2, or 22H2, or on Windows 11 21H2 with all of the November updates applied.
Once this is in place, open up PowerShell and enter this command:
wsl --installThat’s it. The setup process will begin, and you can relax until it’s finished. By default, WSL will enable all system features required and it will download and install Ubuntu. If you don’t want a distribution installed during setup you can add the — no-distribution tag to the installation command.
Alternatively, if you want a non-Ubuntu distribution installed you can add its name after the install command. For example, wsl —install Debian.
WSL is now distributed through the Microsoft Store and the simplified installation process will pull this version in. Alternatively, you can download it directly from its Microsoft Store listing.
You will also require the optional Windows Subsystem for Linux component if you wish to also use WSL 1 alongside WSL 2.
How to enable Windows Subsystem for Linux optional component for WSL 1
WSL2 is now the standard, but if for any reason you also want to use WSL1 alongside it, you’ll need the optional Windows Subsystem for Linux component enabling. Fortunately, you can do this in two ways. The first is by adding —enable-wsl1 to the install command used above.
But you can also enable the component at any time, even after you already have WSL2 up and running. Open PowerShell as administrator and enter this command:
dism.exe /online /enable-feature /featurename:Microsoft-Windows-Subsystem-Linux /all /norestartEventually, you will need to reboot your PC, adding norestart means you won’t be immediately kicked out of whatever you’re doing. If you want to reboot immediately, simply omit this from the end of the command.
Setting WSL2 for your Linux distros
The good thing about WSL2 is that it doesn’t replace WSL1. It just runs alongside it. This means you can run Linux installs with a combination of different versions. You’re able to set either as default as well as setting a version specifically to each Linux distro you have on your PC.
If you want everything to run on WSL2 as soon as you install it, you can set it as the default version.
wsl --set-default-version 2Listing installed Linux distros and their WSL version
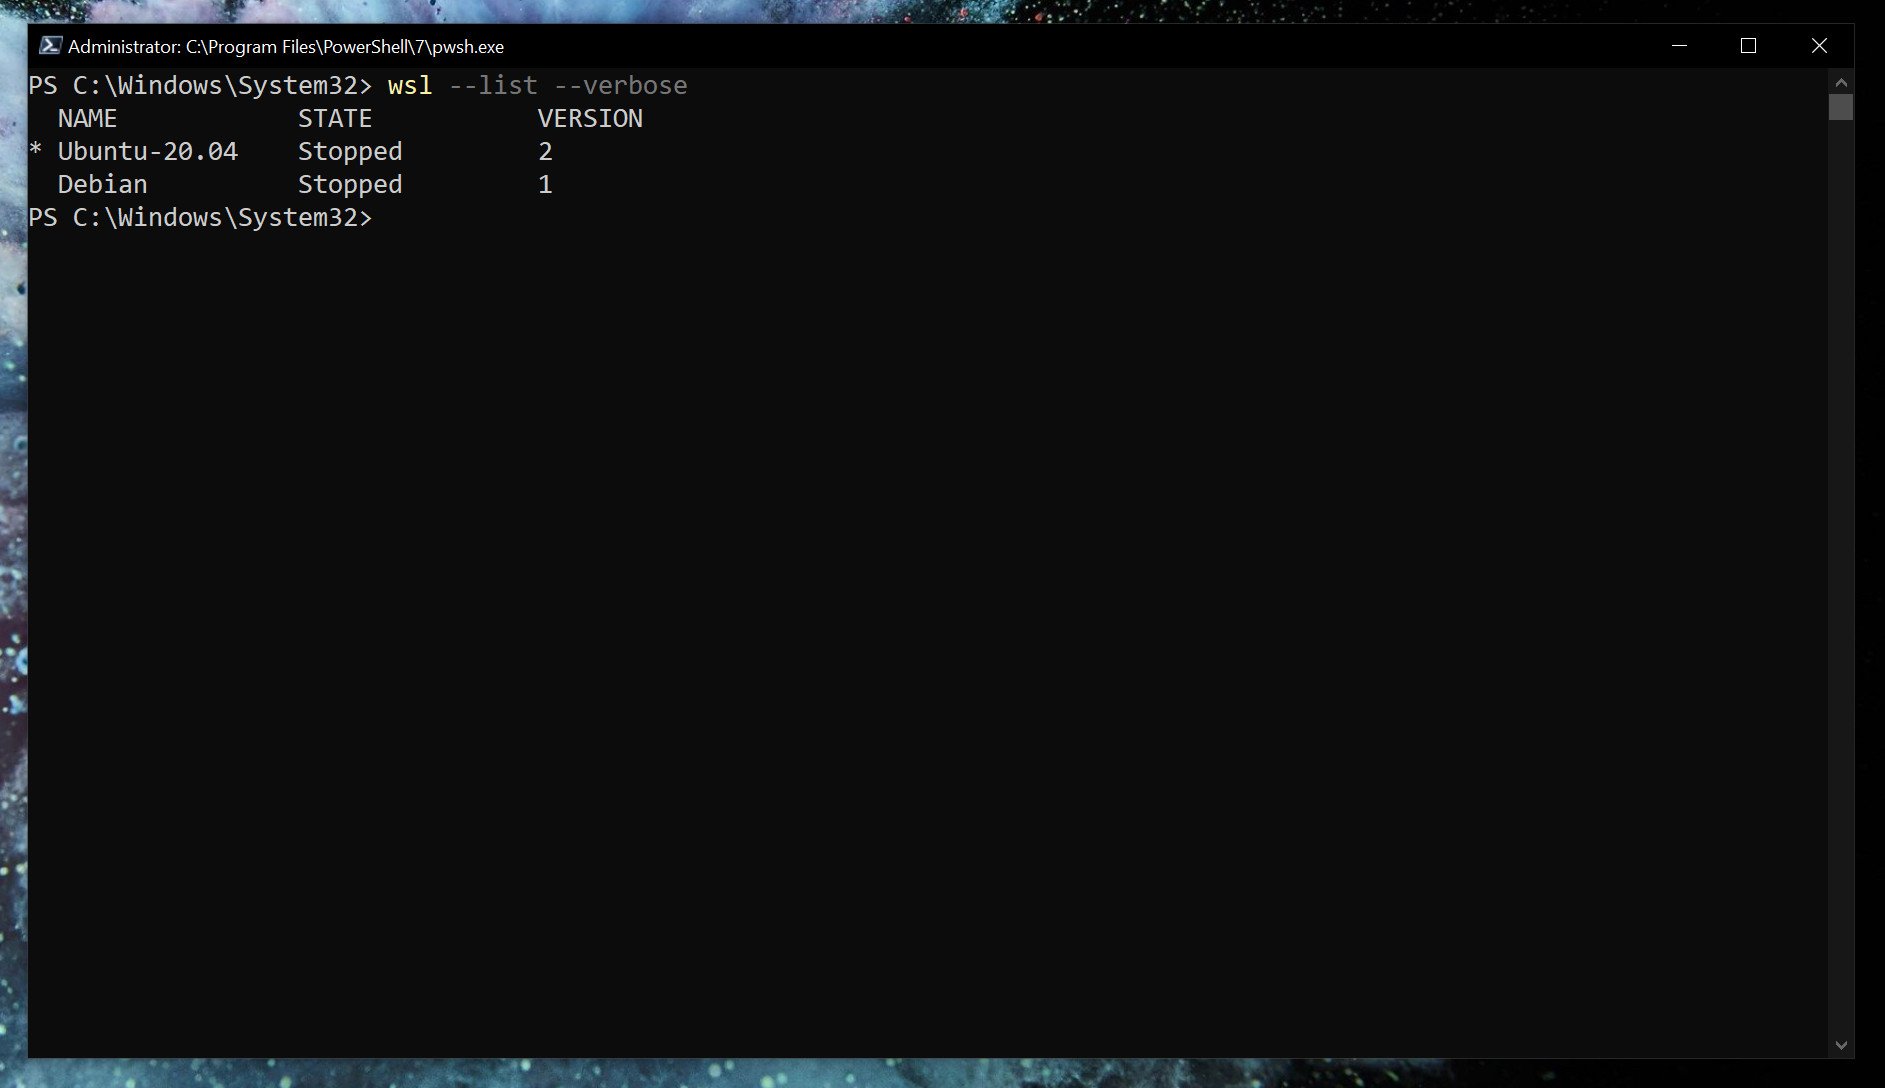
With WSL2 set as default, any Linux installs after that will use it automatically. You can easily check which version of WSL your installed Linux distros are using.
wsl --list --verbose Using the verbose flag will give you the breakdown of which version of WSL is attached to which Linux installation. Without it, you’ll simply get a list of the versions of Linux you have installed.
Changing the version of WSL per Linux installation
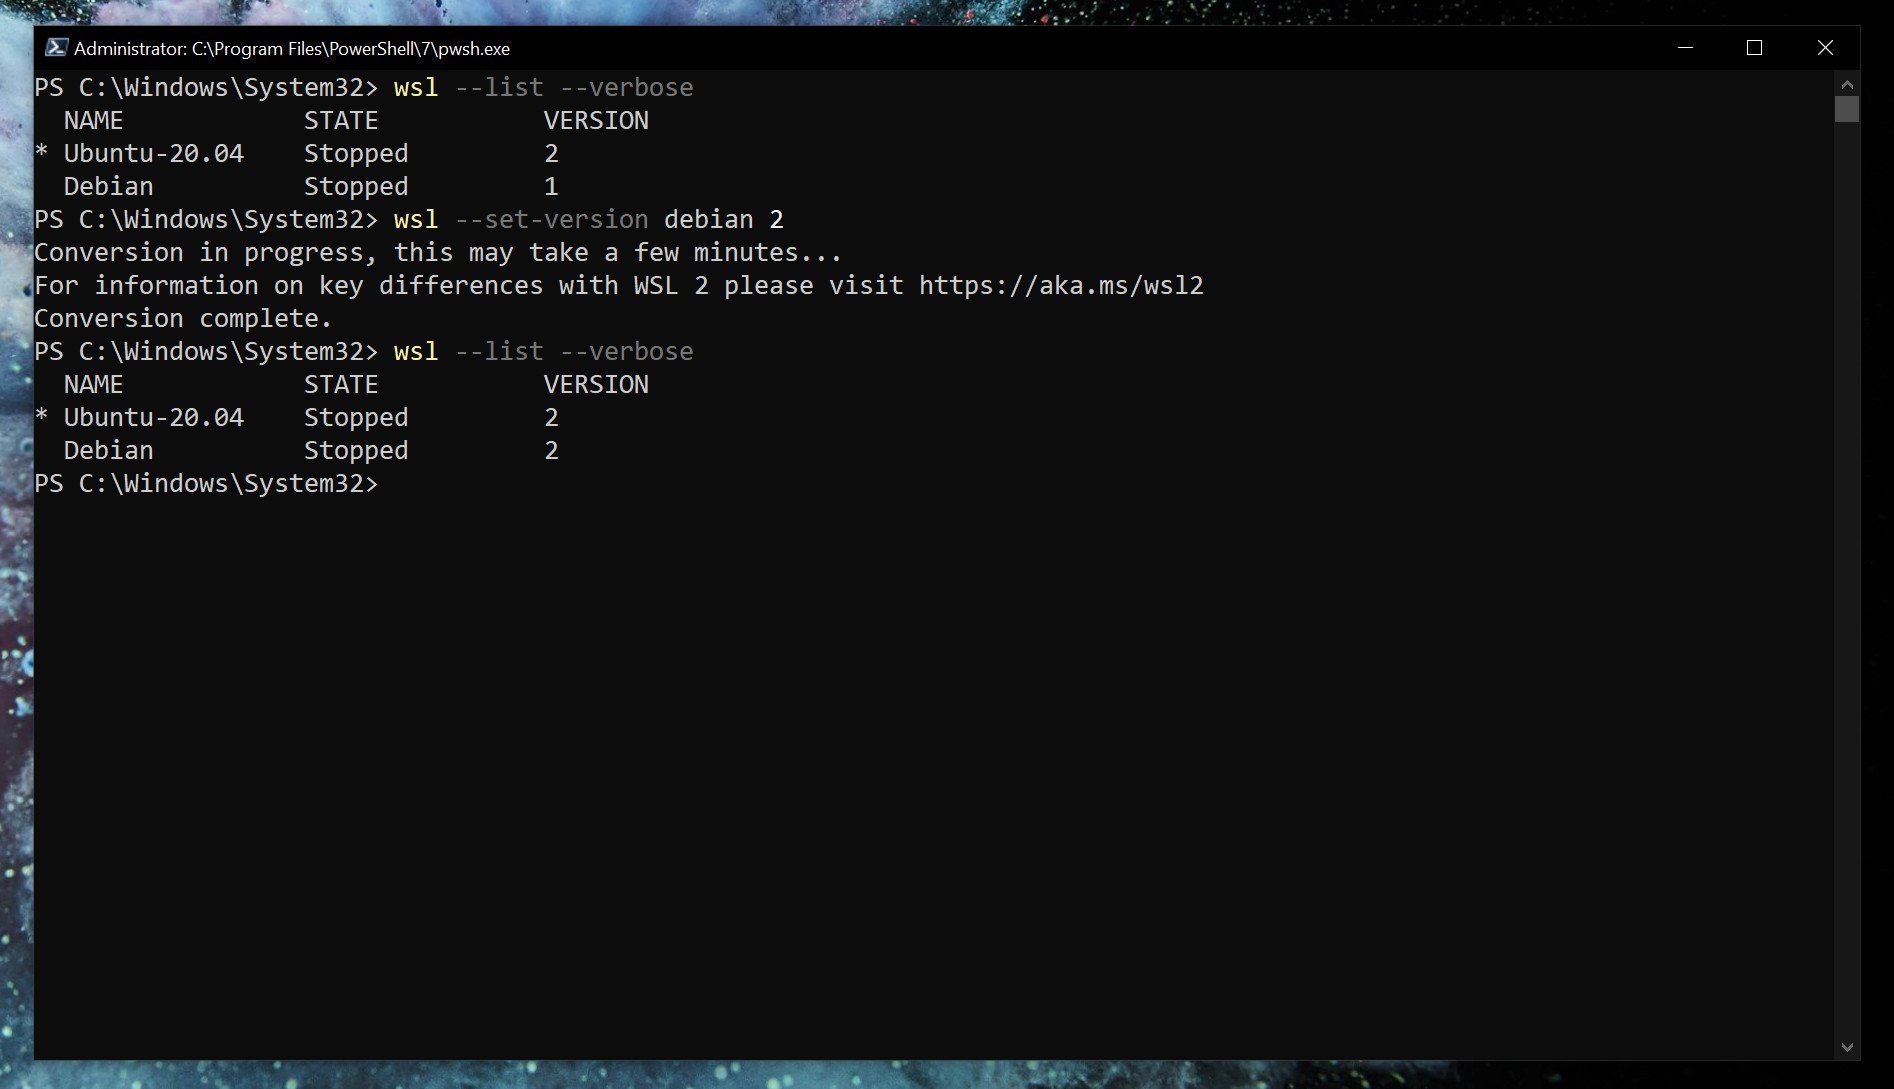
While setting WSL2 as default will apply it to anything you install afterward. If you’re already set up, you’ll need to manually convert. Likewise, if you wish to go between versions 1 and 2 or run a mixture on your system, you can do that.
wsl --set-version <distribution name=""> <versionnumber></versionnumber></distribution>So, as an example, if you have a Debian installation on WSL that you need to convert to WSL2, you’d enter
wsl --set-version debian 2Launch specific Linux installations in PowerShell
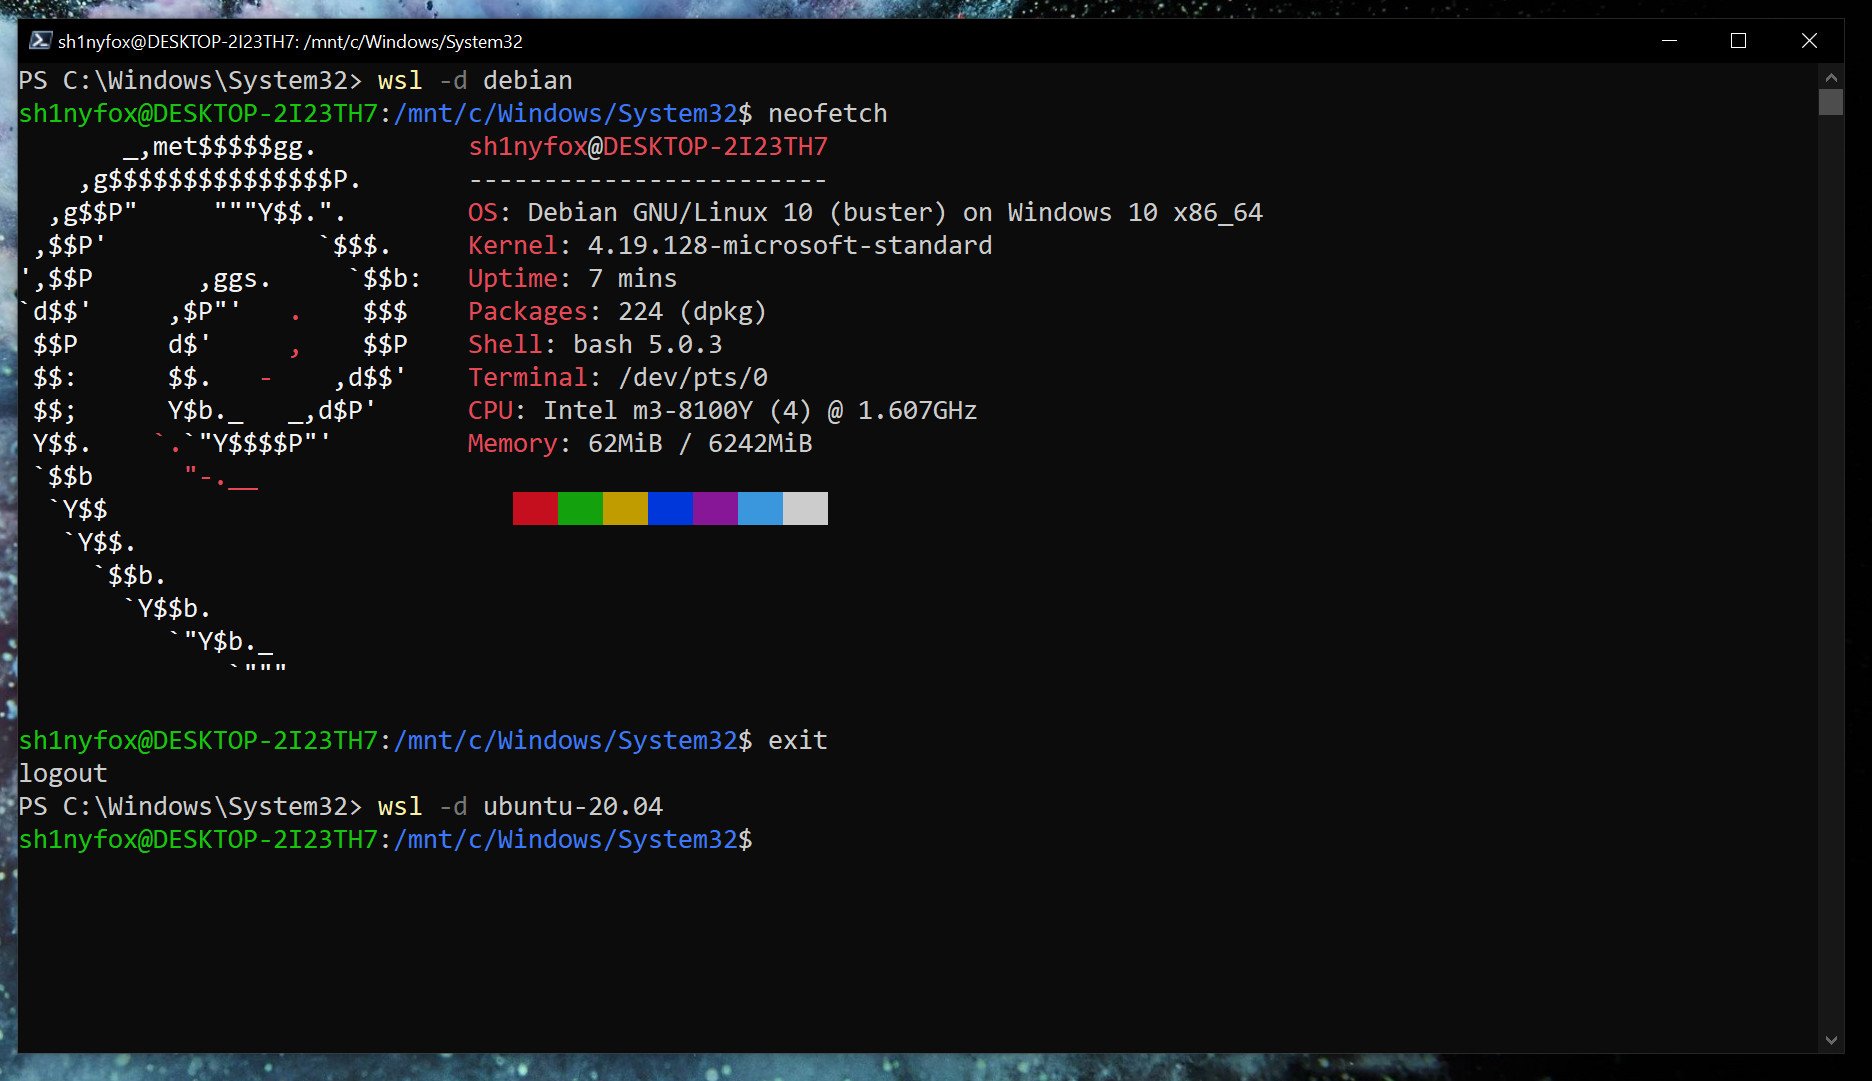
If you only have one version of Linux installed, simply typing
wslin PowerShell will launch you into the associated bash shell. But if you have multiple, you can launch a specific distro with this command.
wsl -d <distribution name=""></distribution>Once you’re done, typing
exitwill take you back into PowerShell.
From here on out, you’re ready to go forth and install all the Linux you want. Our full guide will help you along the way, but once WSL2 is set up how you like it, it just fades into the background.
It’s also worth grabbing the Windows Terminal app from the Microsoft Store if you’re using WSL. While you can just use the standard terminal installed with each or launch through PowerShell as shown above, Windows Terminal has a neat, tabbed interface that lets you run multiple shells at once. Have PowerShell, Linux, Azure Cloud Shell, and even Command Prompt, all open together side-by-side in one window.
All the latest news, reviews, and guides for Windows and Xbox diehards.
Richard Devine is a Managing Editor at Windows Central with over a decade of experience. A former Project Manager and long-term tech addict, he joined Mobile Nations in 2011 and has been found on Android Central and iMore as well as Windows Central. Currently, you’ll find him steering the site’s coverage of all manner of PC hardware and reviews. Find him on Mastodon at mstdn.social/@richdevine