Python is a high-level programming language that has become increasingly popular due to its simplicity, versatility, and extensive range of applications. The process of installing Python on the Windows operating system is relatively easy and involves a few uncomplicated steps. This article aims to take you through the process of downloading and installing Python on your Windows computer. To install Python on Linux or Mac visit the below link:
- Install Python on Linux
- Install Python on Mac
Steps to install Python on Windows
We have provided step-by-step instructions to guide you and ensure a successful installation. Whether you are new to programming or have some experience, mastering how to install Python on Windows will enable you to utilize this potent language and uncover its full range of potential applications.
Downloading the Python Installer
To download Python on your system, you can use the following steps.
- Visit the official download page for Python on the Windows operating system.
- Locate a reliable version of Python 3, preferably version 3.10.11, which was used in testing this tutorial.
- Choose the correct link for your device from the options provided: either Windows installer (64-bit) or Windows installer (32-bit) and proceed to download the executable file.

Python Homepage
Running the Executable Installer
- Once you have downloaded the installer, open the .exe file, such as python-3.10.11-amd64.exe, by double-clicking it to launch the Python installer.
- Choose the option to Install the launcher for all users by checking the corresponding checkbox, so that all users of the computer can access the Python launcher application.
- Enable users to run Python from the command line by checking the Add python.exe to PATH checkbox.

Python Installer
Setup Progress
After Clicking the Install Now Button the setup will start installing Python on your Windows system. You will see a window like this.

Python Setup
Final Installer Window
After completing the setup. Python will be installed on your Windows system. You will see a successful message.
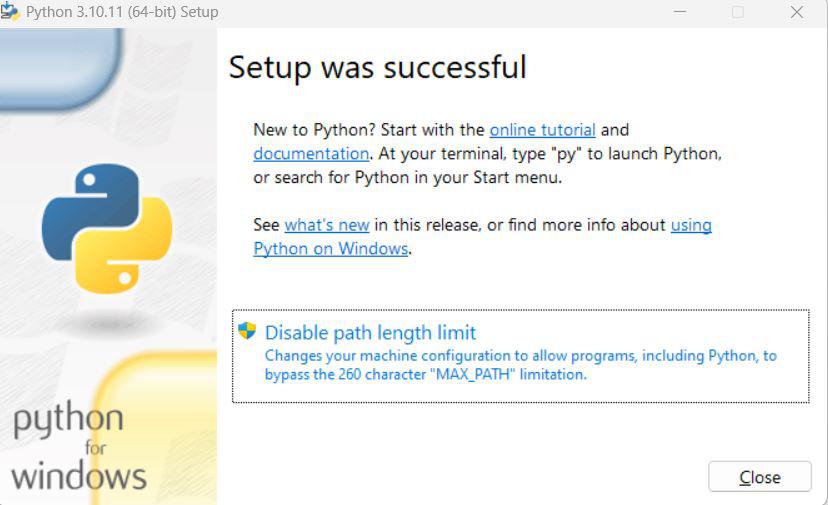
Python Successfully installed
Verify the Installation
Close the window after successful installation. You can check if the installation of Python was successful by using either the command line or the Integrated Development Environment (IDLE), which you may have installed.
To access the command line, click on the Start menu and type “cmd” in the search bar. Then click on Command Prompt.
python --version

Python version
You can also check the version of Python by opening the IDLE application. Go to Start and enter IDLE in the search bar and then click the IDLE app, for example, IDLE (Python 3.10.11 64-bit). If you can see the Python IDLE window then you are successfully able to download and installed Python on Windows.

Python IDLE
Getting Started with Python
Python is a lot easier to code and learn. Python programs can be written on any plain text editor like Notepad, notepad++, or anything of that sort. One can also use an online IDE for writing Python codes or can even install one on their system to make it more feasible to write these codes because IDEs provide a lot of features like an intuitive code editor, debugger, compiler, etc. To begin with, writing Python Codes and performing various intriguing and useful operations, one must have Python installed on their System.
Now, Explore our Python Tutorial
Last Updated :
05 May, 2023
Like Article
Save Article
#статьи
-

0
Python — самый популярный язык программирования, на котором разрабатывают ИИ, игры и сложные системы. Разбираемся с его установкой.
Иллюстрация: Skillbox Media

Любитель научной фантастики и технологического прогресса. Хорошо сочетает в себе заумного технаря и утончённого гуманитария. Пишет про IT и радуется этому.
Python — это высокоуровневый язык программирования общего назначения с минималистичным и простым в освоении синтаксисом. Он был создан под влиянием языка ABC, который изначально задумывался как обучающий и над которым ранее работал автор Python Гвидо ван Россум.
К сожалению, не все ОС содержат Python по умолчанию. В таких случаях, чтобы начать программировать на языке, его придётся установить. В этой статье мы расскажем, как это сделать.
Гайд по установке Python:
- Какую версию выбрать
- Как установить
- Как начать работать
- Как подключить к VS Code
Вообще, для решения простых задач или знакомства с языком хватит и онлайн-интерпретатора. Это сервис, который позволяет писать и запускать код прямо в браузере, ничего не скачивая. Самые популярные онлайн-интерпретаторы — Replit, Programiz и Online Python.
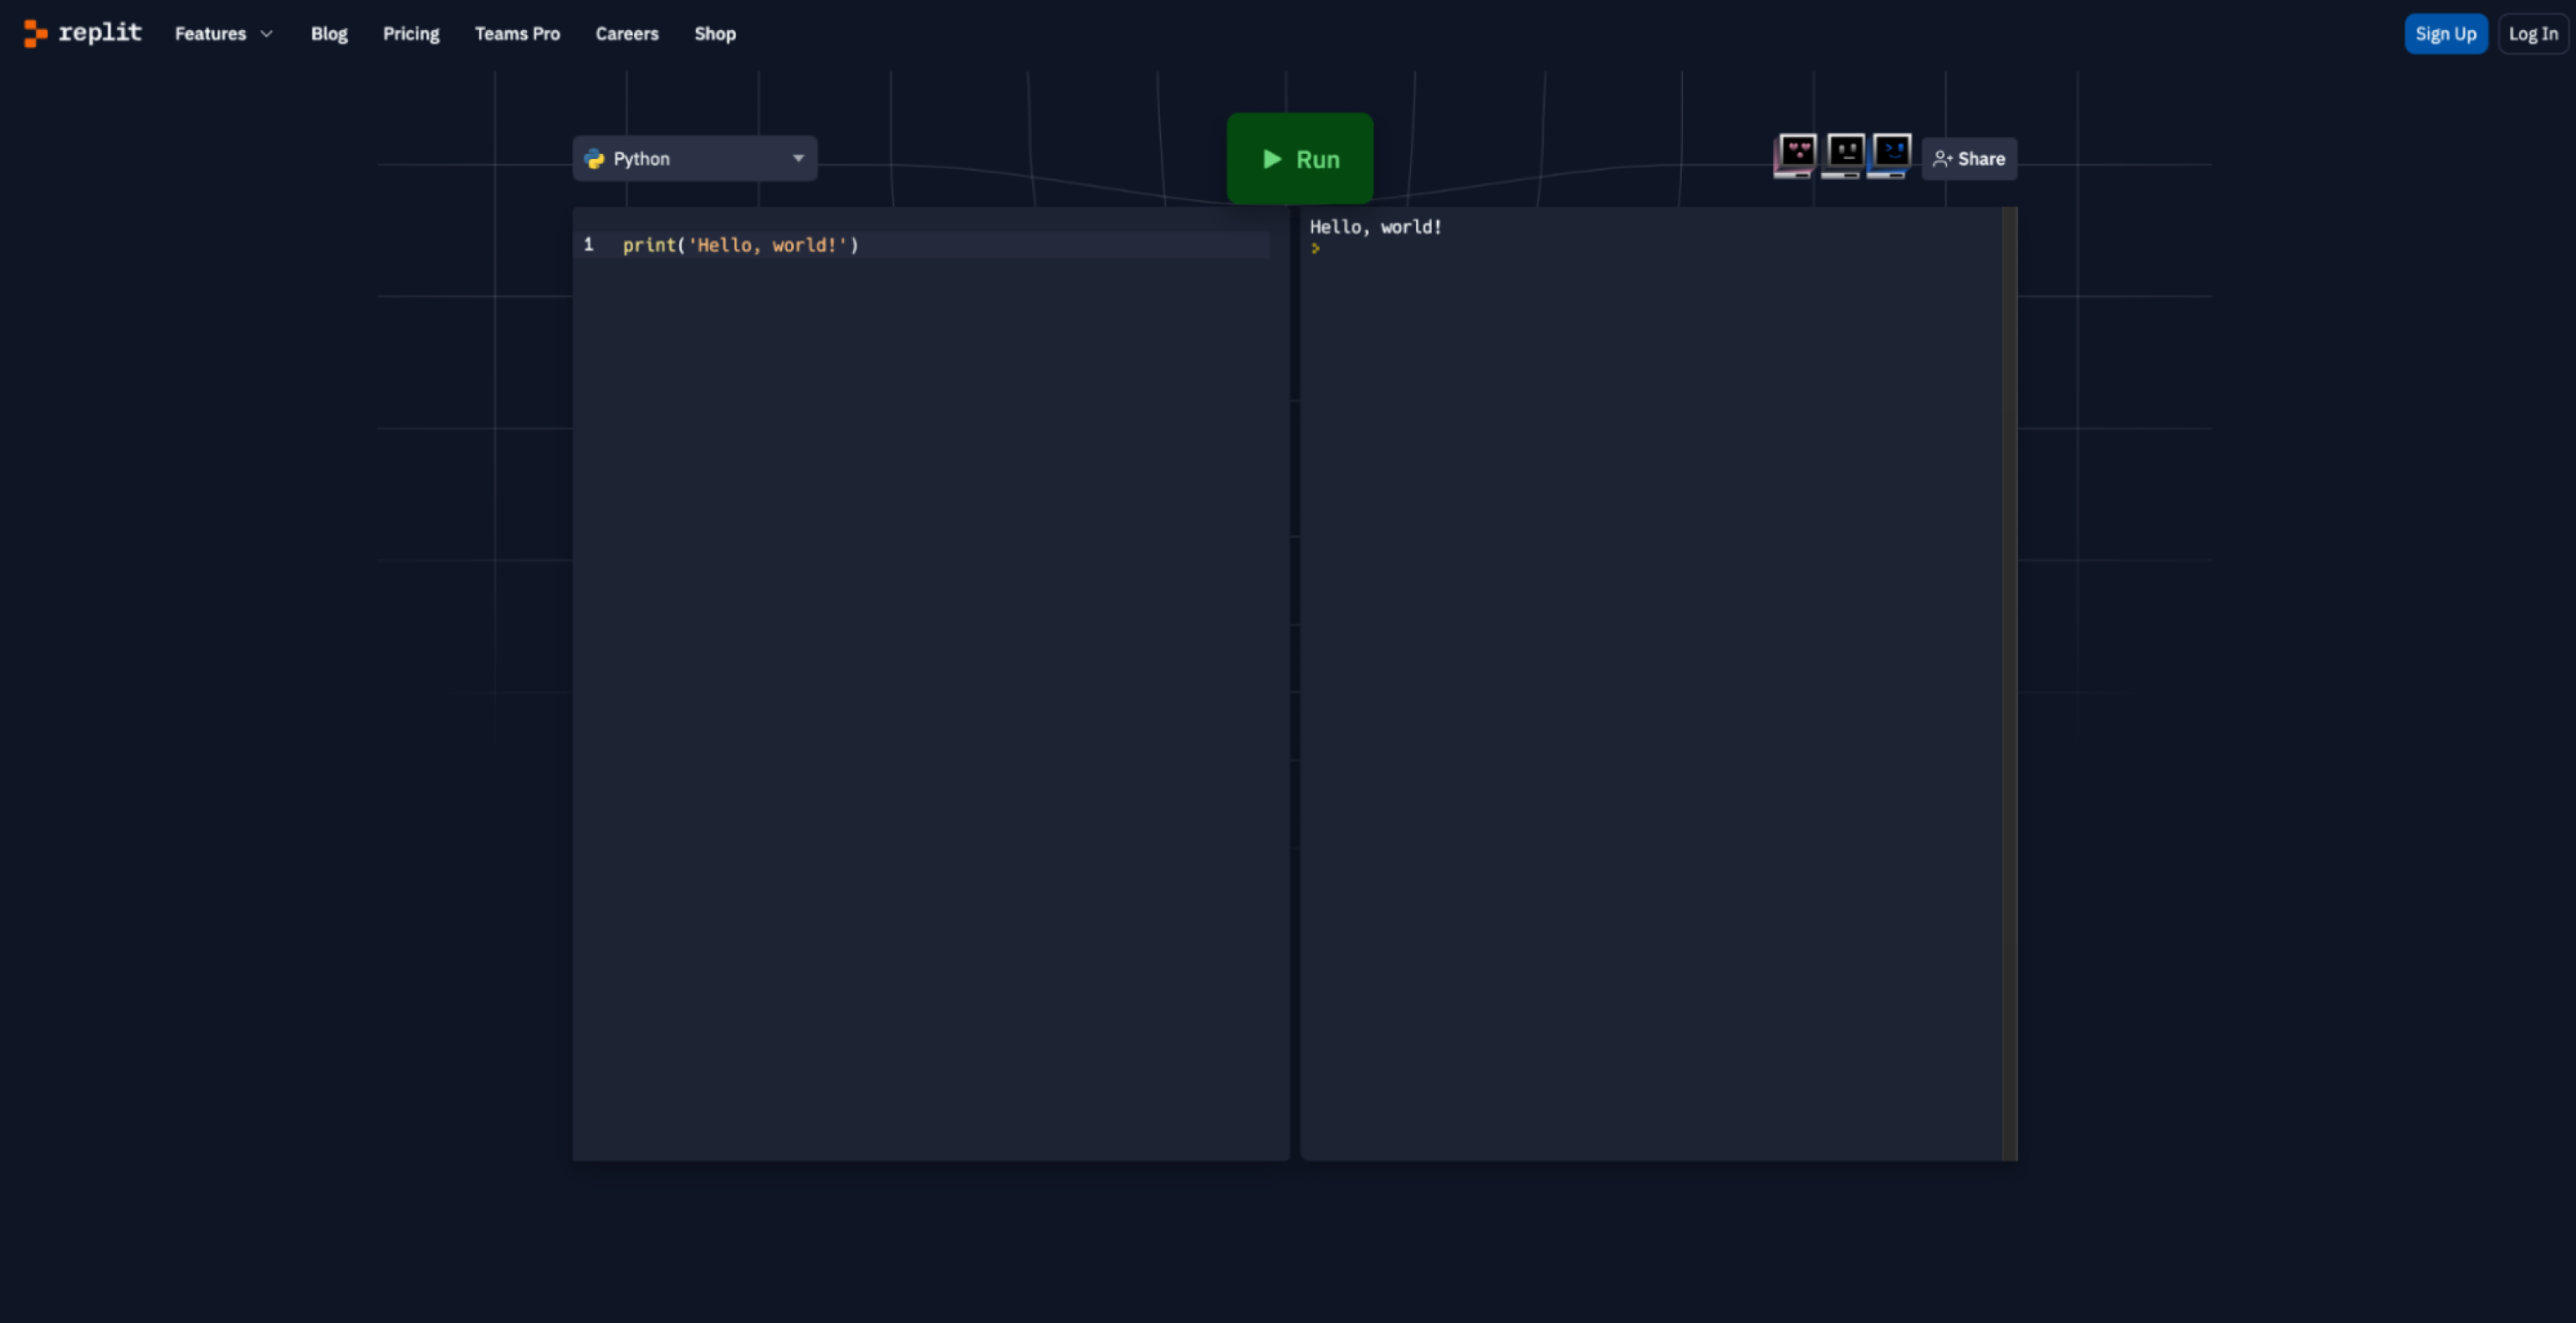
Скриншот: Skillbox Media
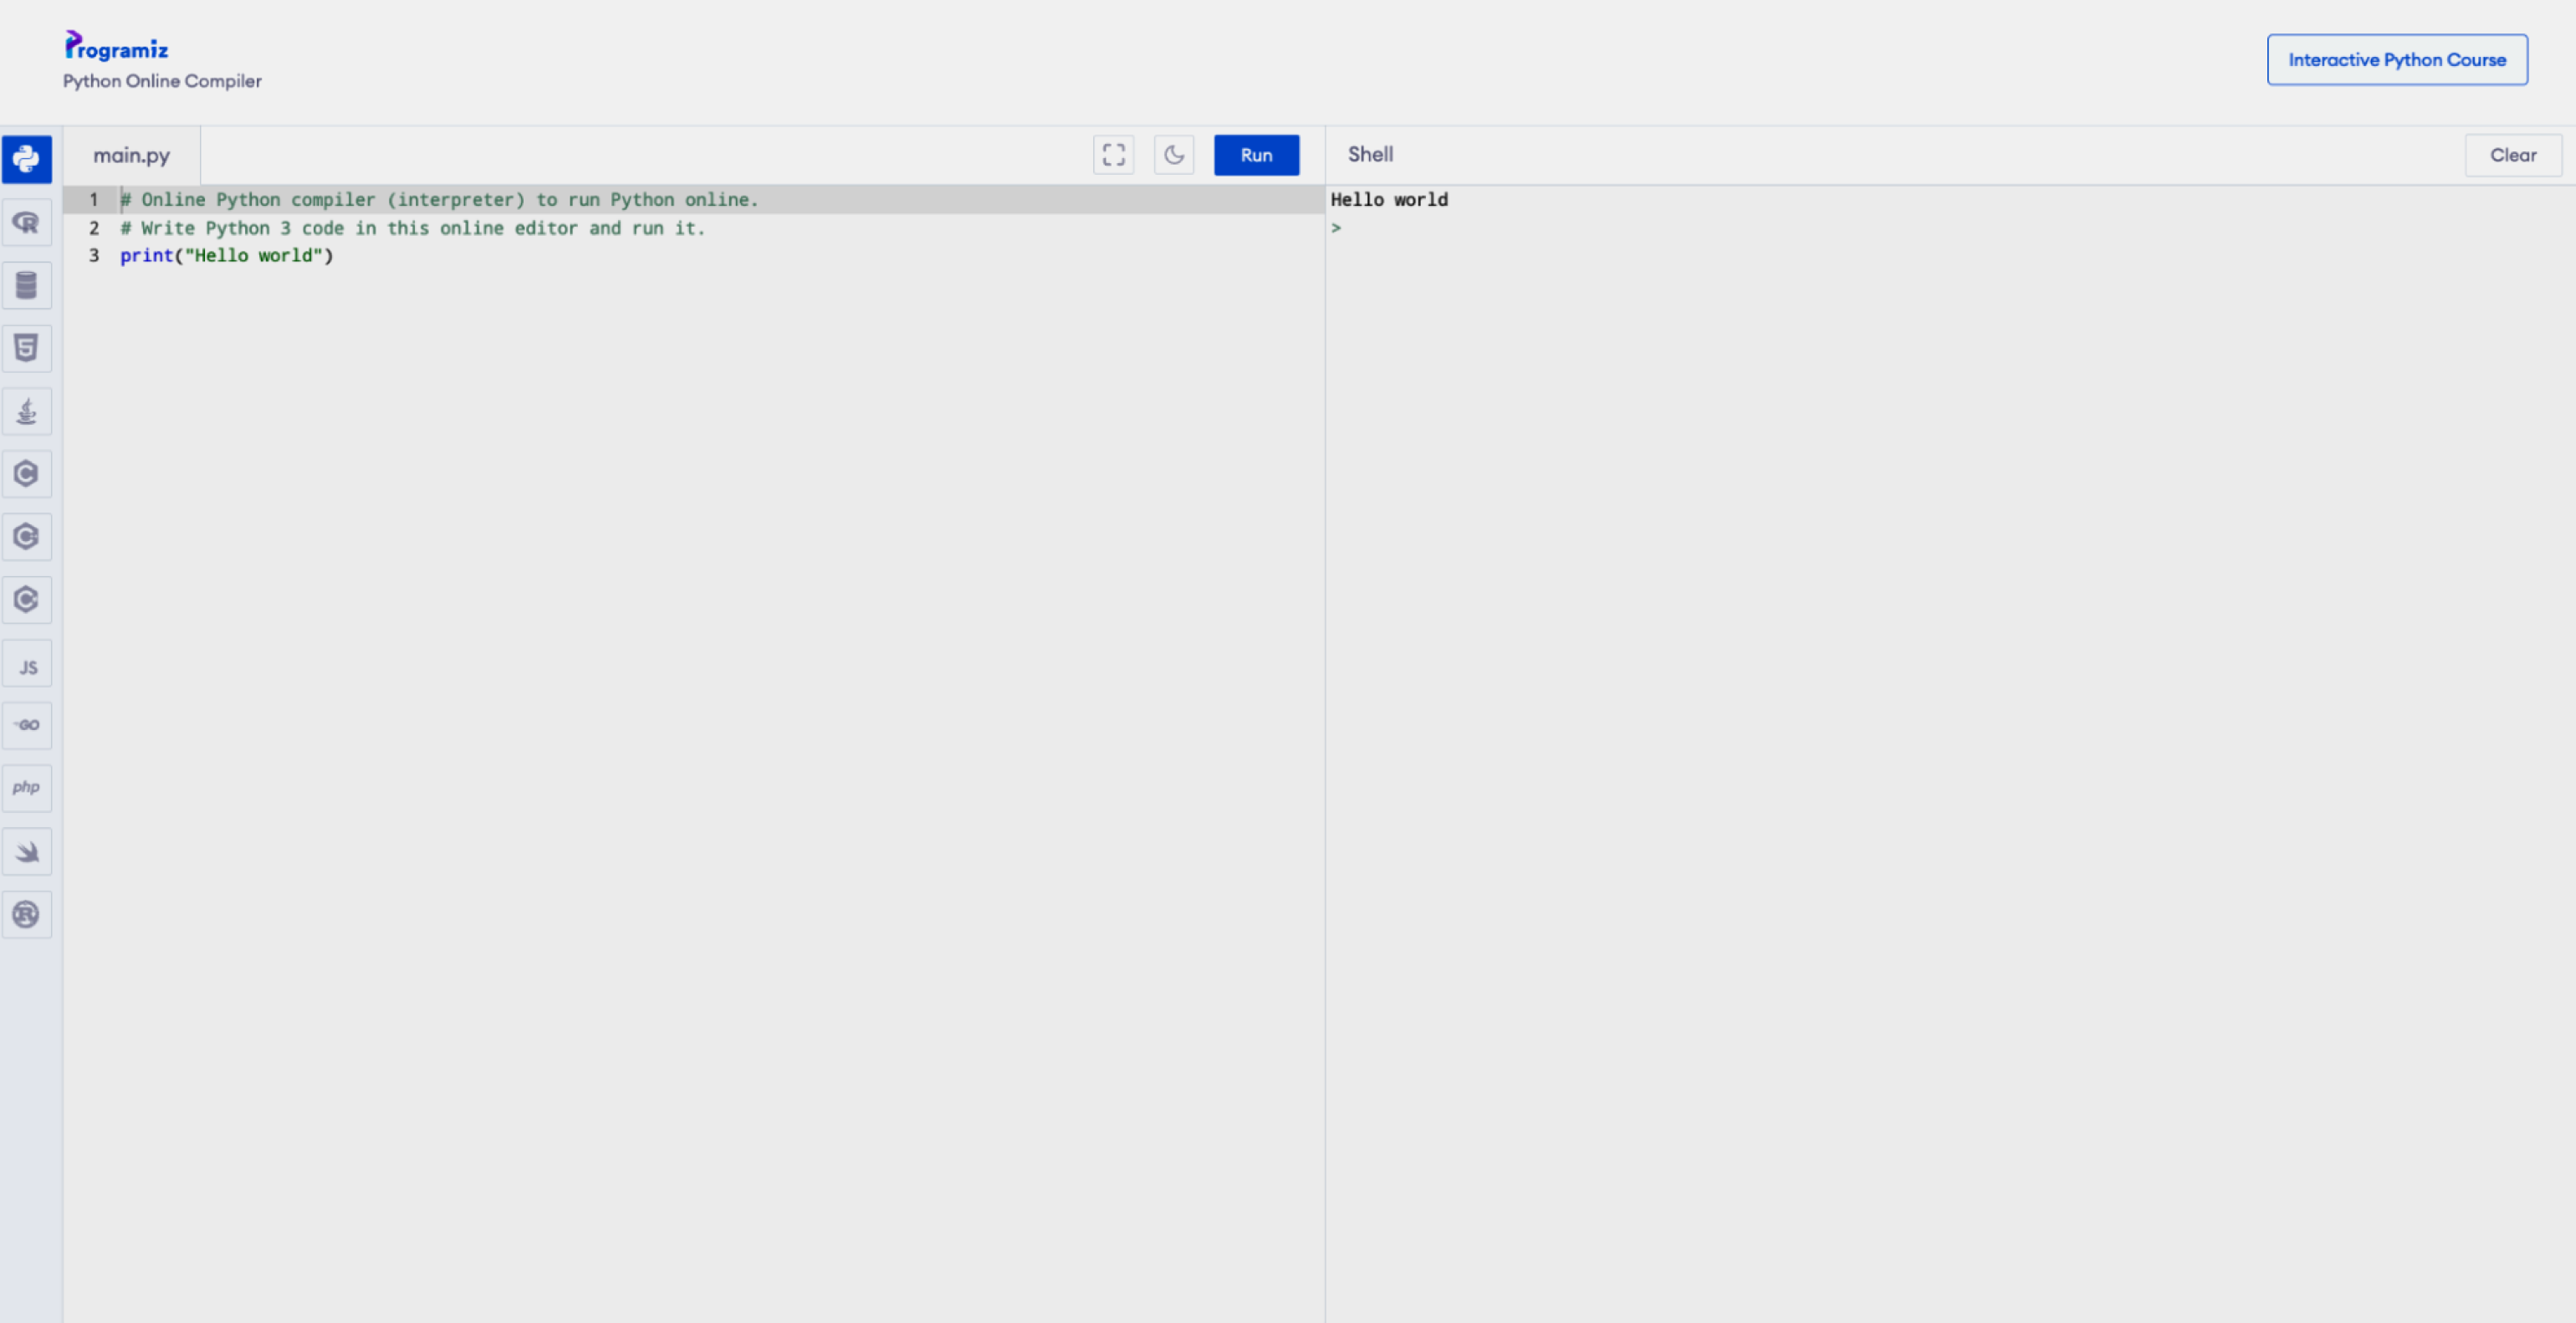
Скриншот: Skillbox Media
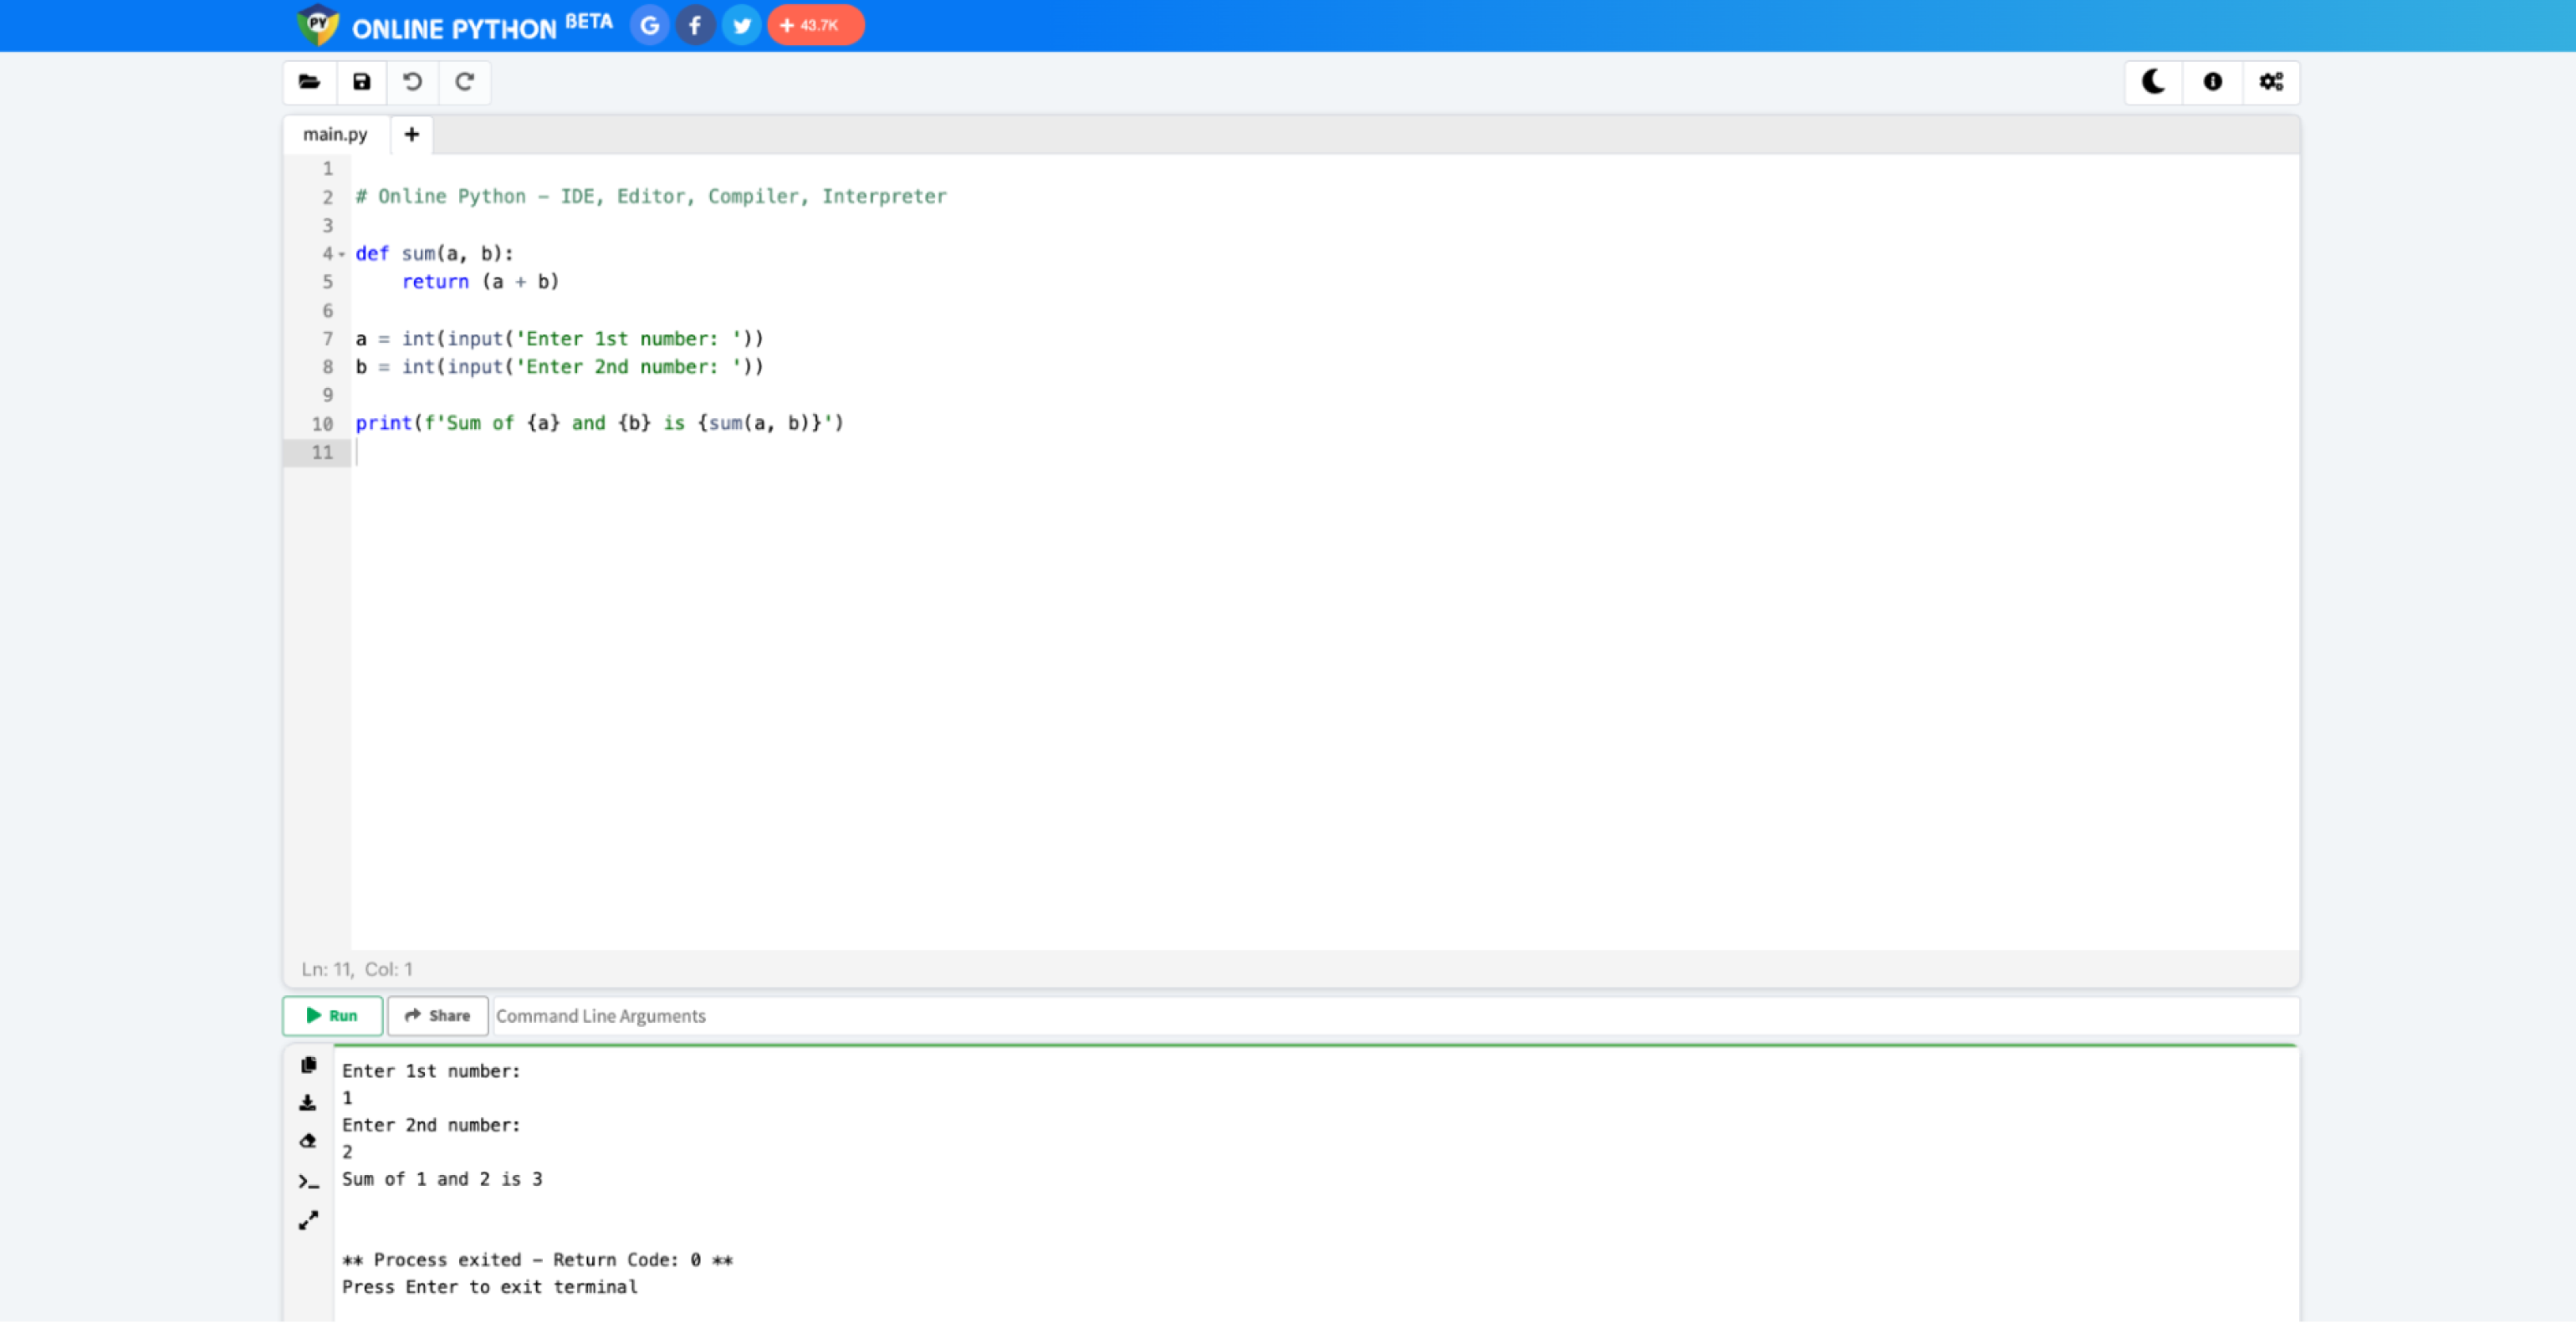
Скриншот: Skillbox Media
Это хороший инструмент, но только для написания простых программ. Там сложно тестировать приложения, полноценно работать с файлами и использовать продвинутые возможности языка.
Для полноценной разработки всё-таки нужно будет установить Python на компьютер. Но, поверьте, оно того стоит: вы сможете легко подключать сторонние библиотеки, использовать утилиты и создавать сложные проекты.
Выбор версии языка — тоже важный этап. Очевидно, что в новых версиях больше интересных фишек и, как правило, меньше багов — поэтому для собственных проектов лучше скачивать самый свежий дистрибутив. На момент написания статьи это Python 3.11.2.
Однако для поддержки старых проектов, которые не могут переехать на Python 3, придётся скачивать Python 2 и разбираться в различиях версий. Поэтому даже в 2023 году в вакансиях среди требований можно найти «уверенное знание Python 2.7».
В состав базовой версии Python входят следующие компоненты:
- IDLE — простая среда разработки Python-программ;
- документация — инструкция по использованию Python;
- стандартная библиотека — набор функций, которые упрощают работу с числами, файлами, API сторонних сервисов и так далее;
- пакетный менеджер PIP — утилита для скачивания и установки библиотек, фреймворков и других пакетов, расширяющих функциональность Python;
- стандартный набор тестов — чтобы проверять надёжность программы;
- Python Launcher — приложение для запуска программ с расширением .py.
Этого набора вполне хватит, чтобы начать изучение языка и писать простые программы.
Перед установкой убедитесь, что ваш компьютер удовлетворяет системным требованиям:
- 64- или 32-разрядный процессор на архитектуре Intel или AMD;
- 2 ГБ оперативной памяти, желательно 4 ГБ;
- 5 ГБ свободного места в памяти компьютера;
- версия операционной системы: не ниже Windows 7, macOS X 10.11, Red Hat Enterprise Linux 6/7.
Дистрибутивы Python есть для всех популярных операционных систем, они перечислены на официальном сайте python.org. По большому счёту, не так важно, какую конкретно версию Python вы скачаете, — главное, чтобы её номер начинался с цифры 3.
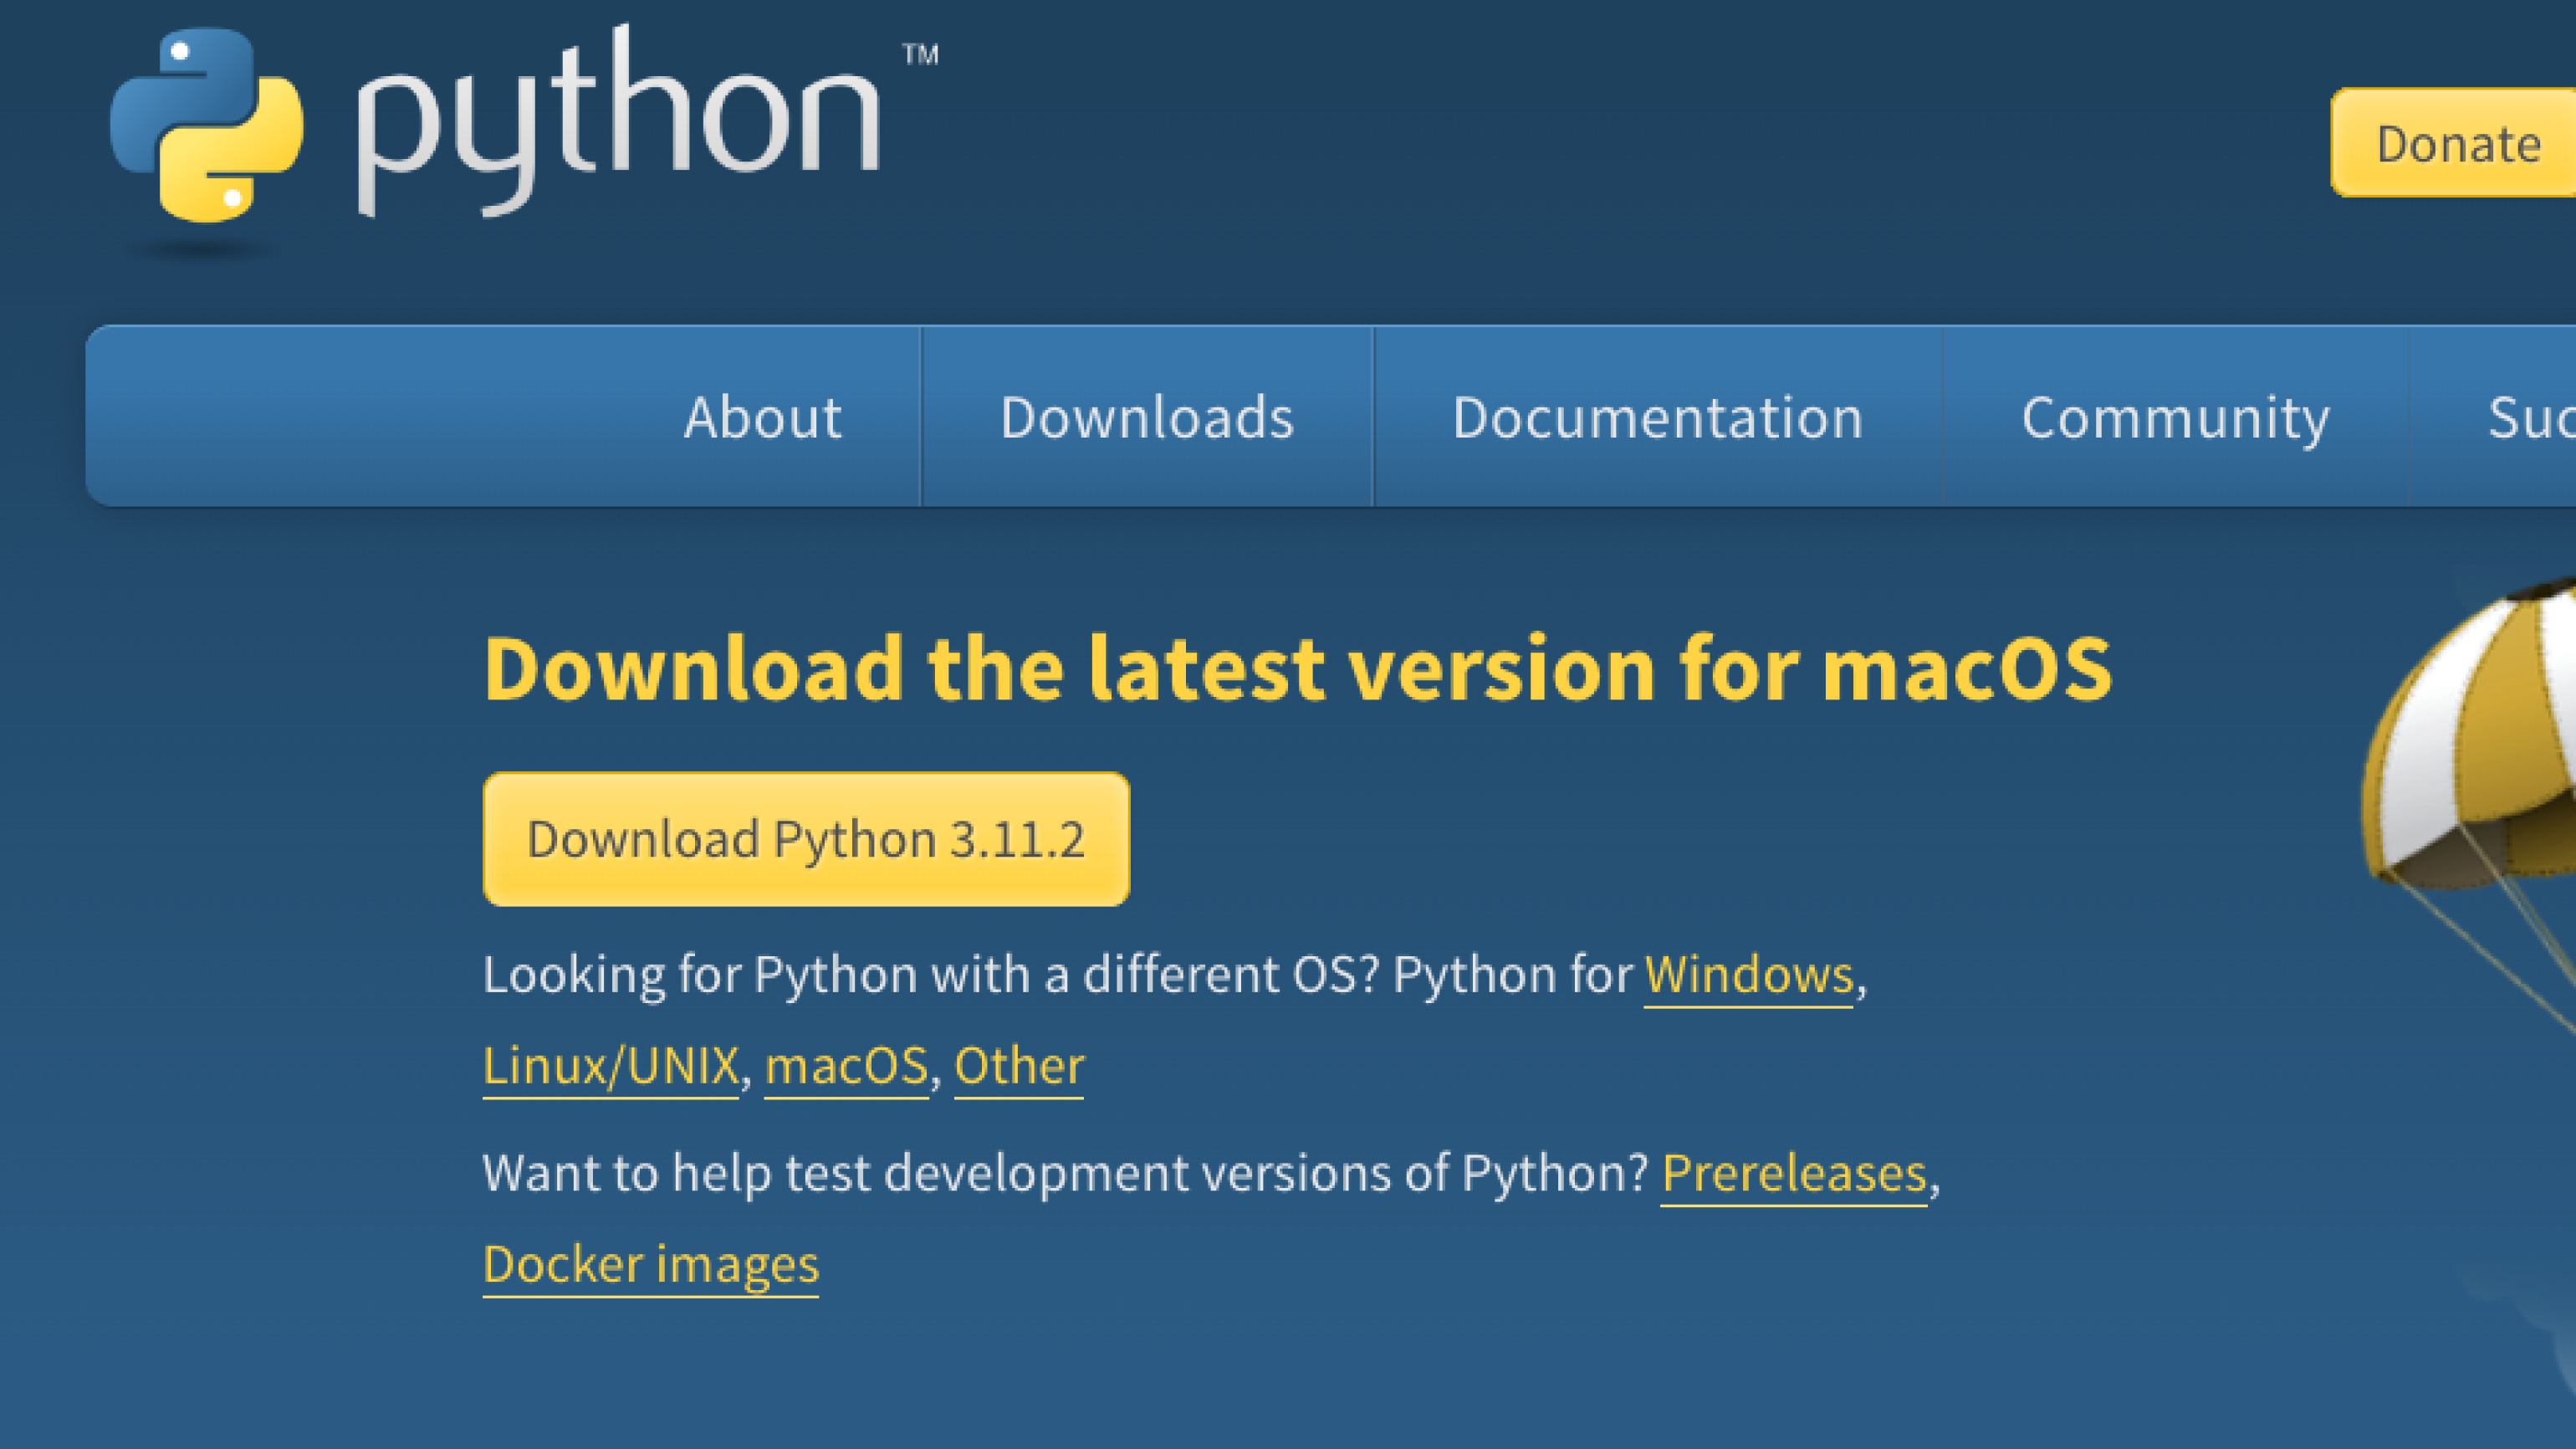
Скачайте установочный файл, нажав на жёлтую кнопку Download Python, и запустите его.
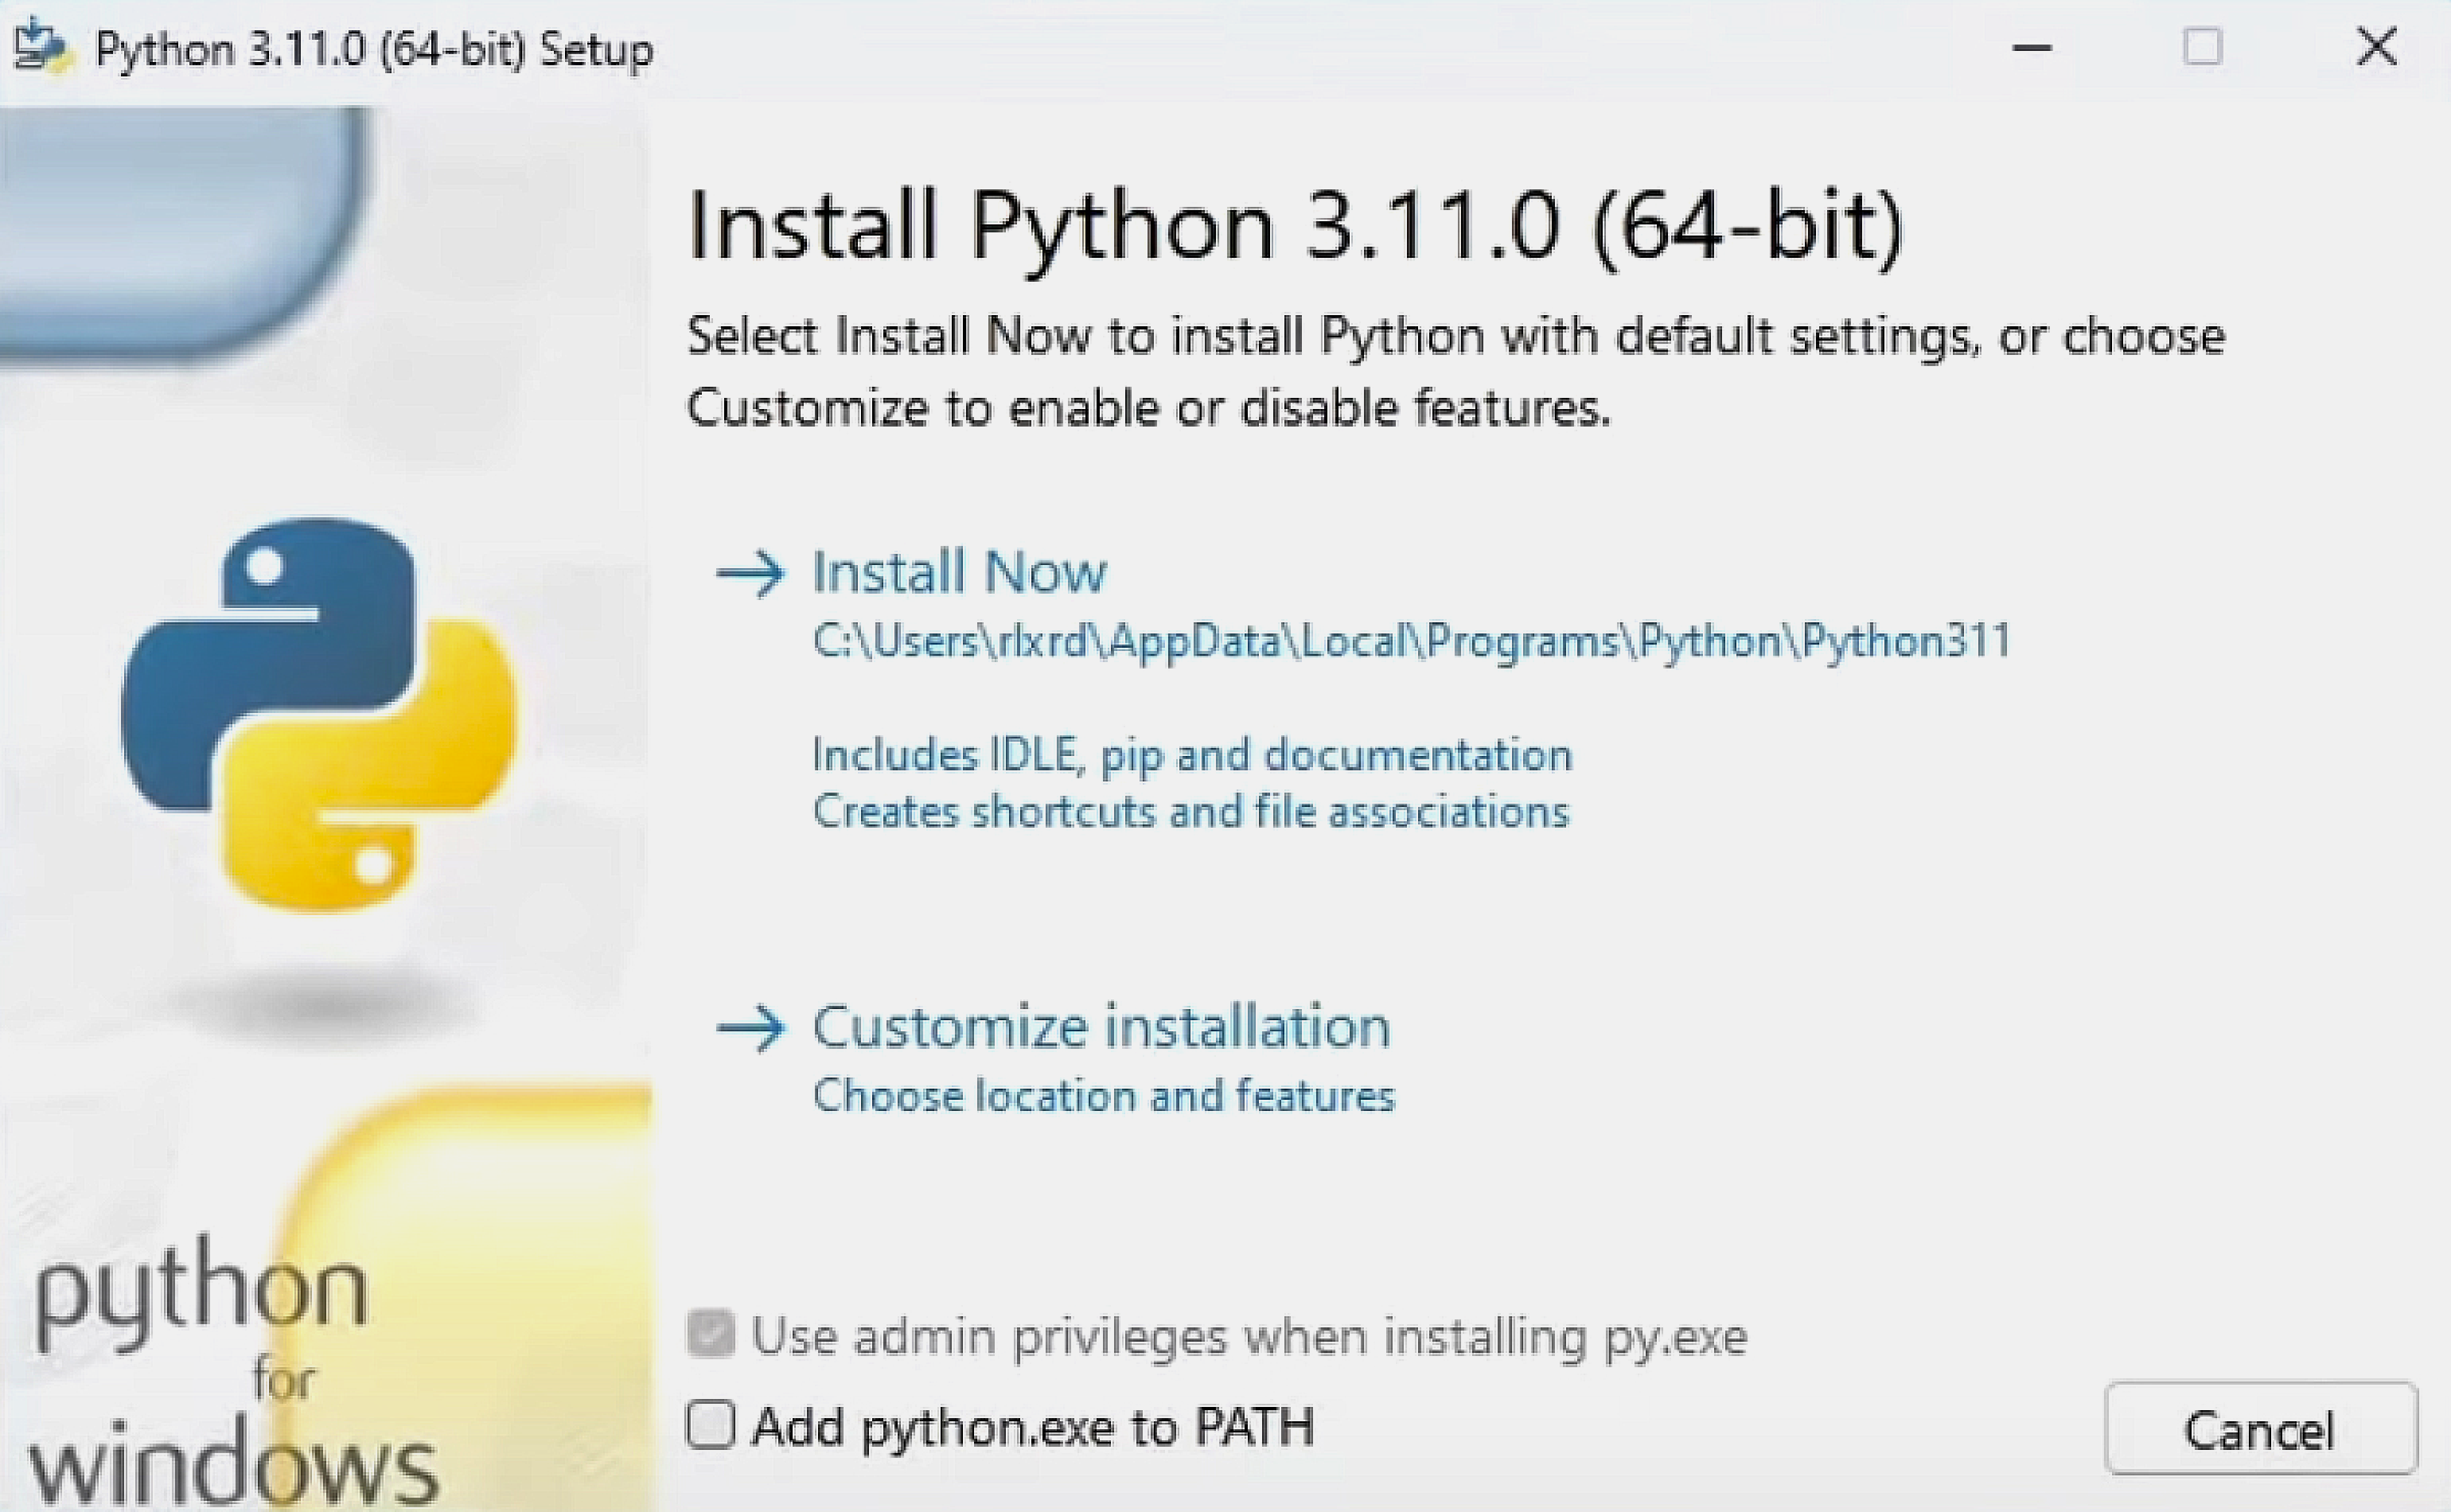
Выберите путь установки и поставьте обе галочки: во втором пункте мы указываем, что нужно добавить Python в переменную окружения PATH — это позволит вызывать его из любой директории. Затем выбираем «Установка для всех пользователей» (Install for all users), нажимаем Install Now и разрешаем приложению вносить изменения:
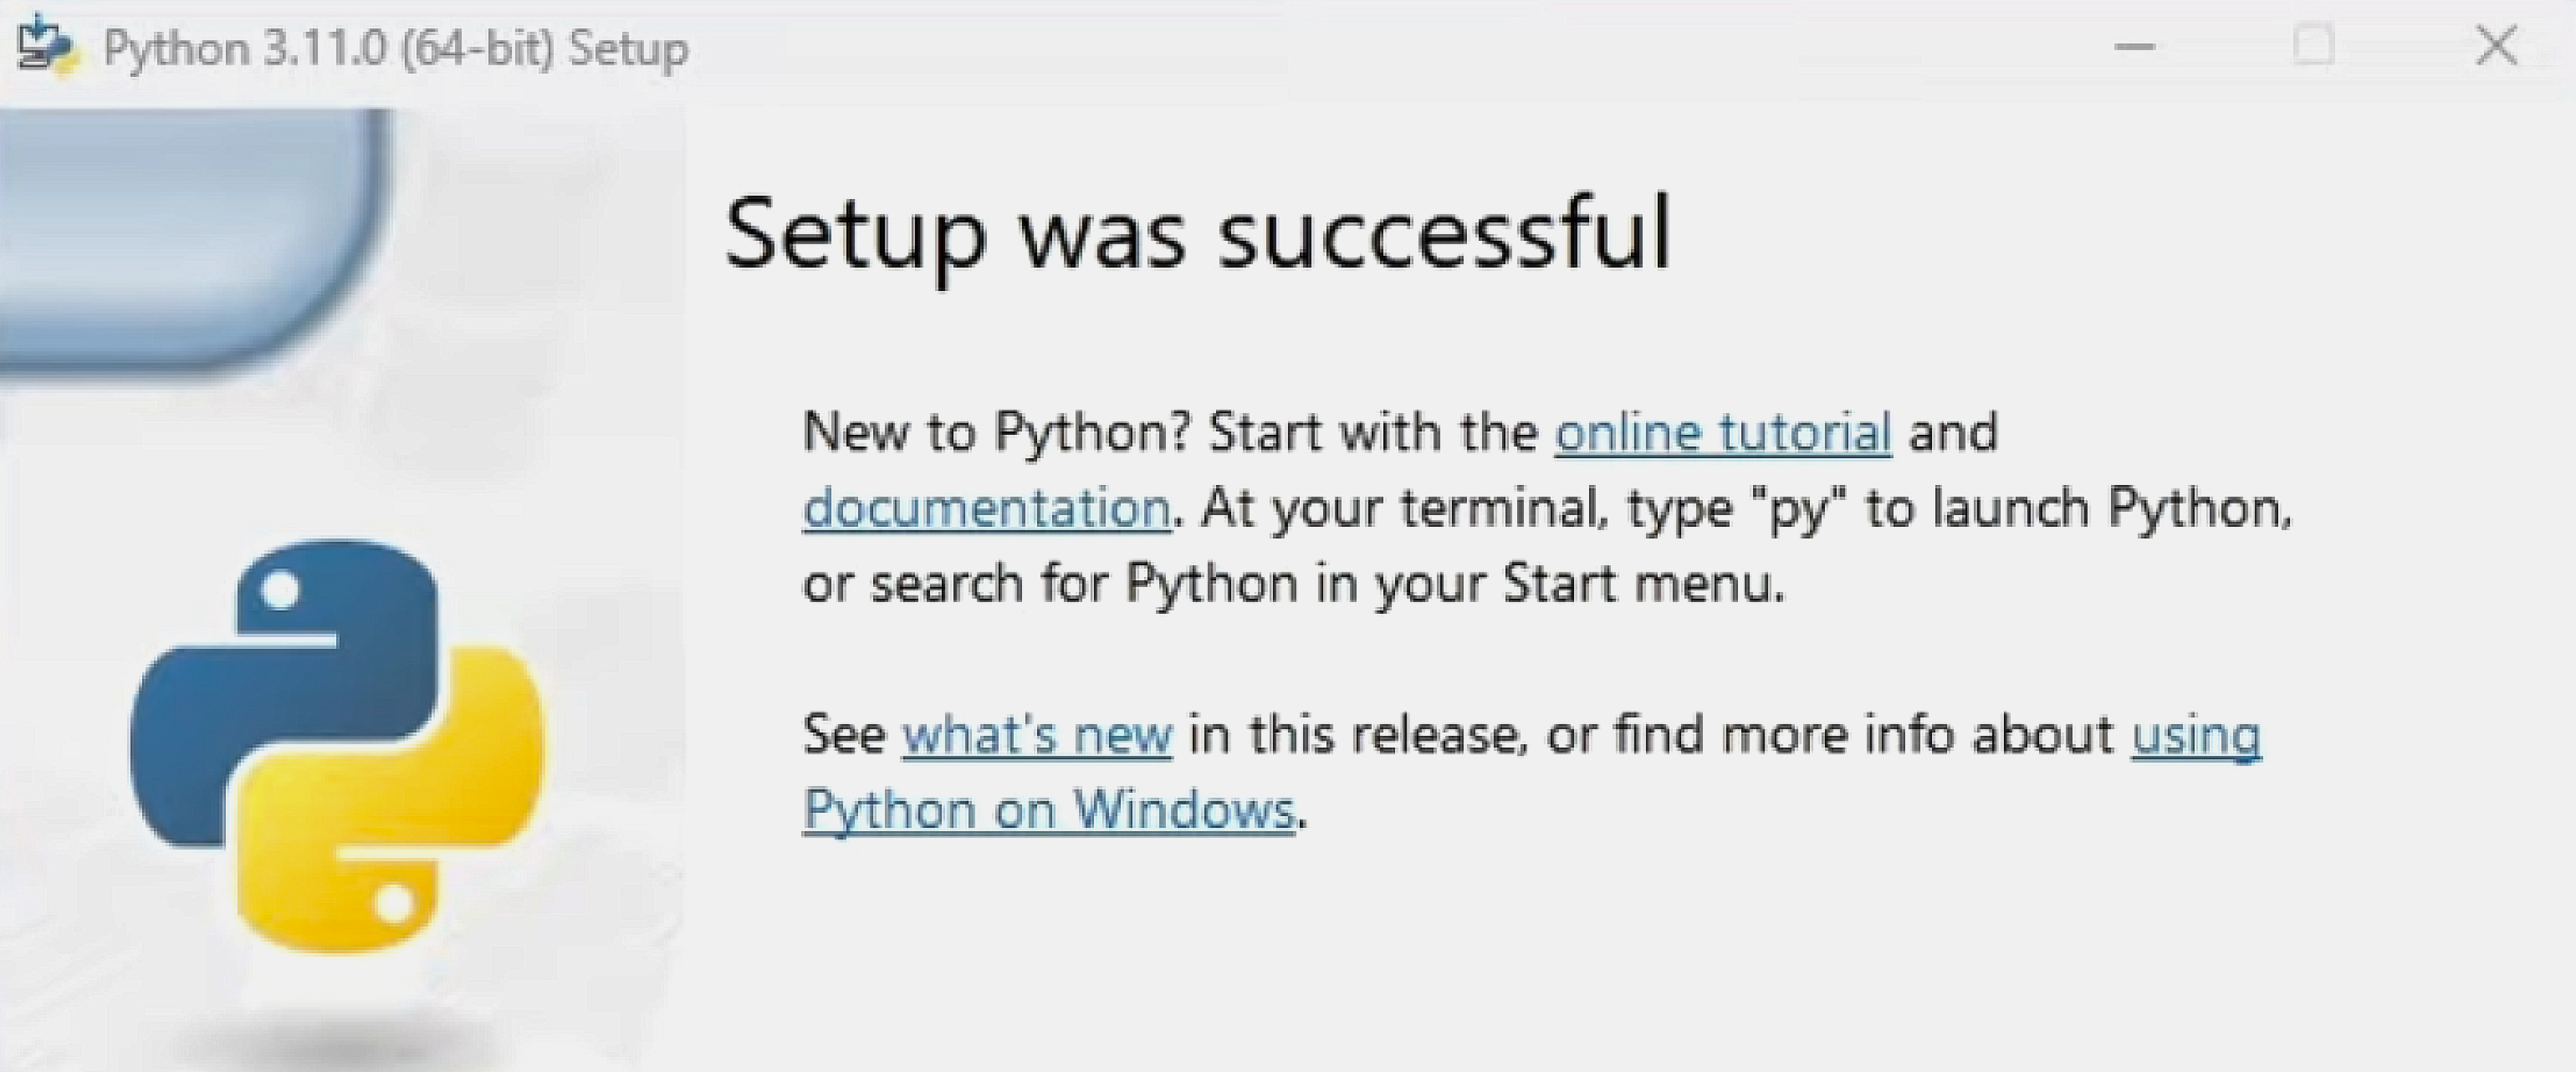
Когда всё установится, вы увидите окно завершения инсталляции:
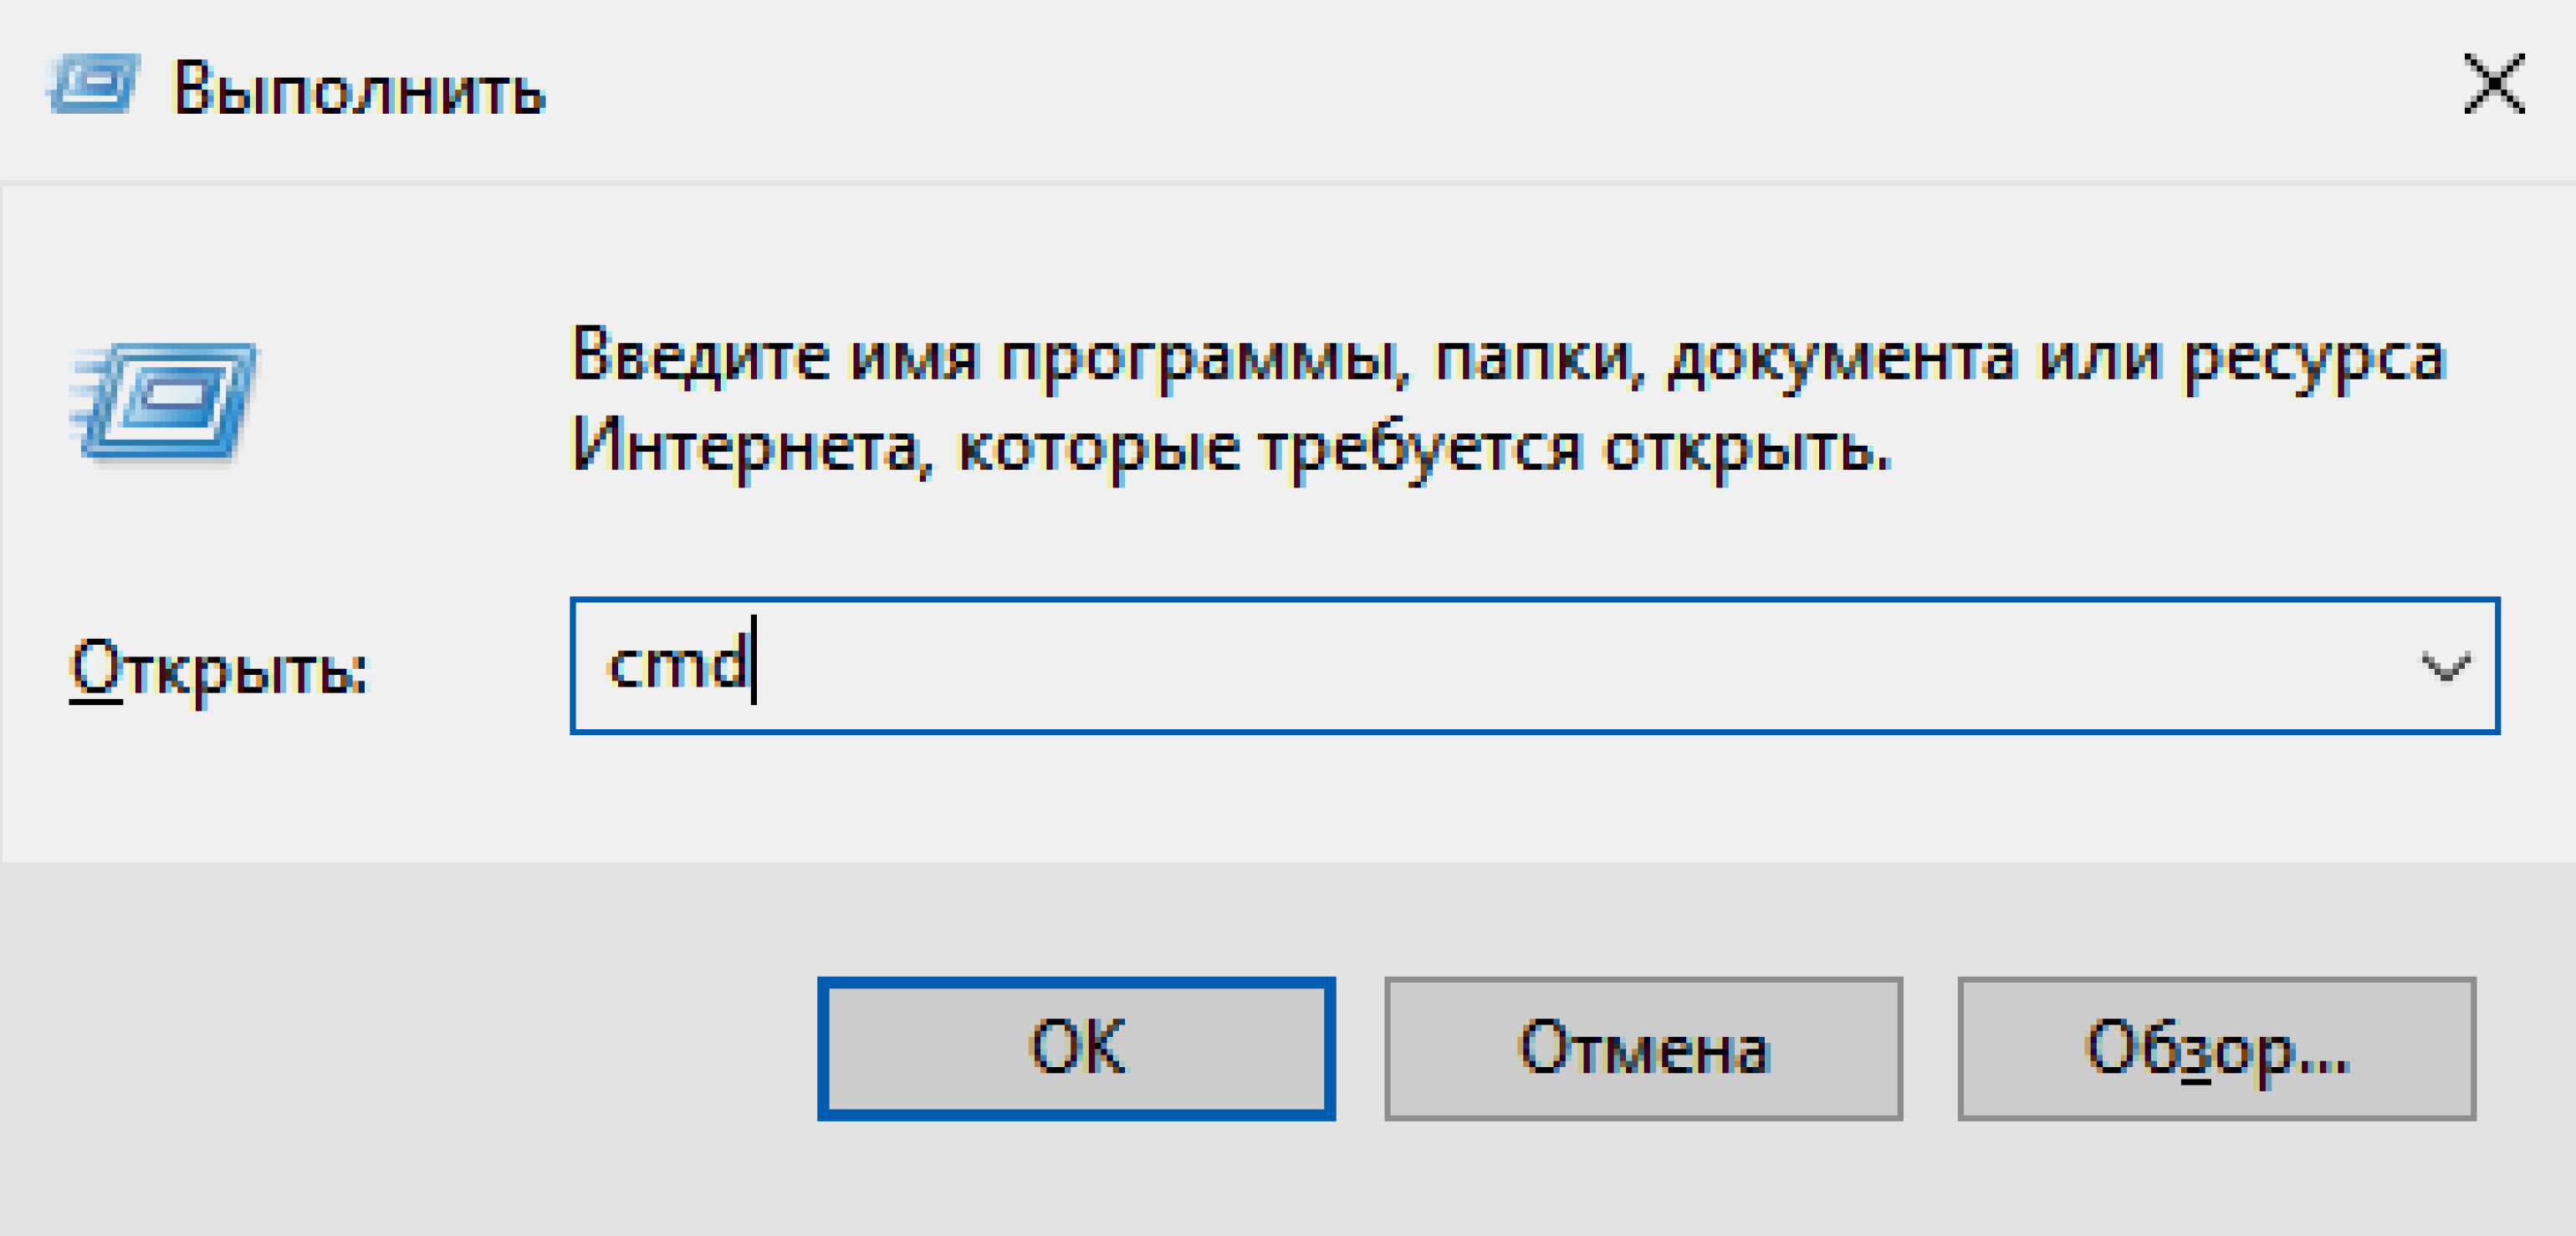
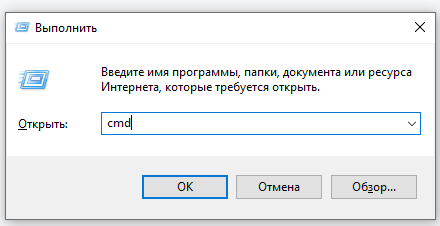
Теперь проверим, что Python действительно установлен. Для этого откроем окно «Выполнить» сочетанием клавиш Win + R и введём cmd:
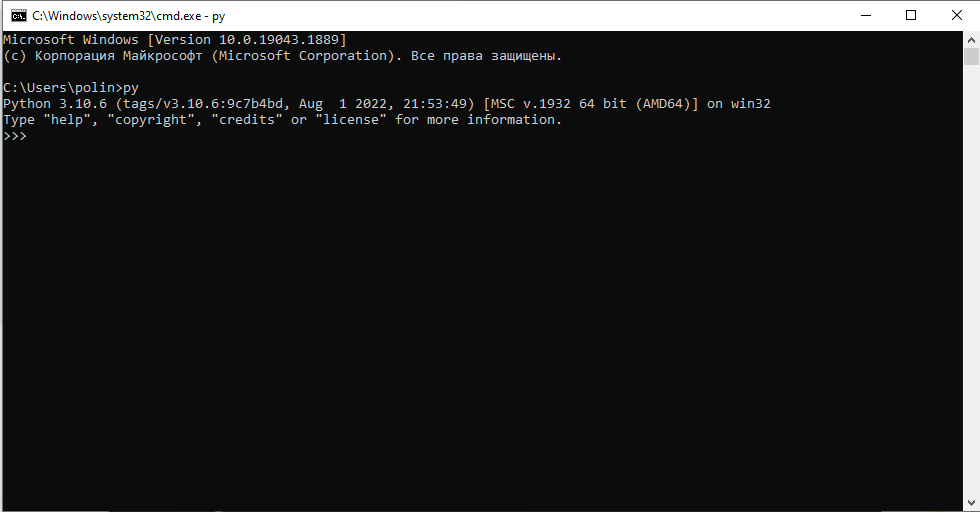
Откроется командная строка. Введите в ней команду py или python, чтобы запустить интерпретатор. На экране появится примерно такое сообщение:
Microsoft Windows [Version 10.0.19043.1889]
(c) Корпорация Майкрософт (Microsoft Corporation). Все права защищены.

C:\Users\User>py
Python 3.11.2 (tags/v3.11.2:9c7b4bd, Feb 2 2023, 18:38:48) [MSC v.1932 64 bit (AMD64)] on win 32
Type "help", "copyright", "credits" or "license" for more information.
>>>
Оно означает, что Python установлен на ваш компьютер и работает.
Если у вас более ранняя версия Windows, процесс установки Python ничем не отличается, кроме того, что некоторые версии языка не поддерживаются на старых операционных системах. Узнать, подходит ли версия Python вашей ОС, можно в примечаниях на странице скачивания:
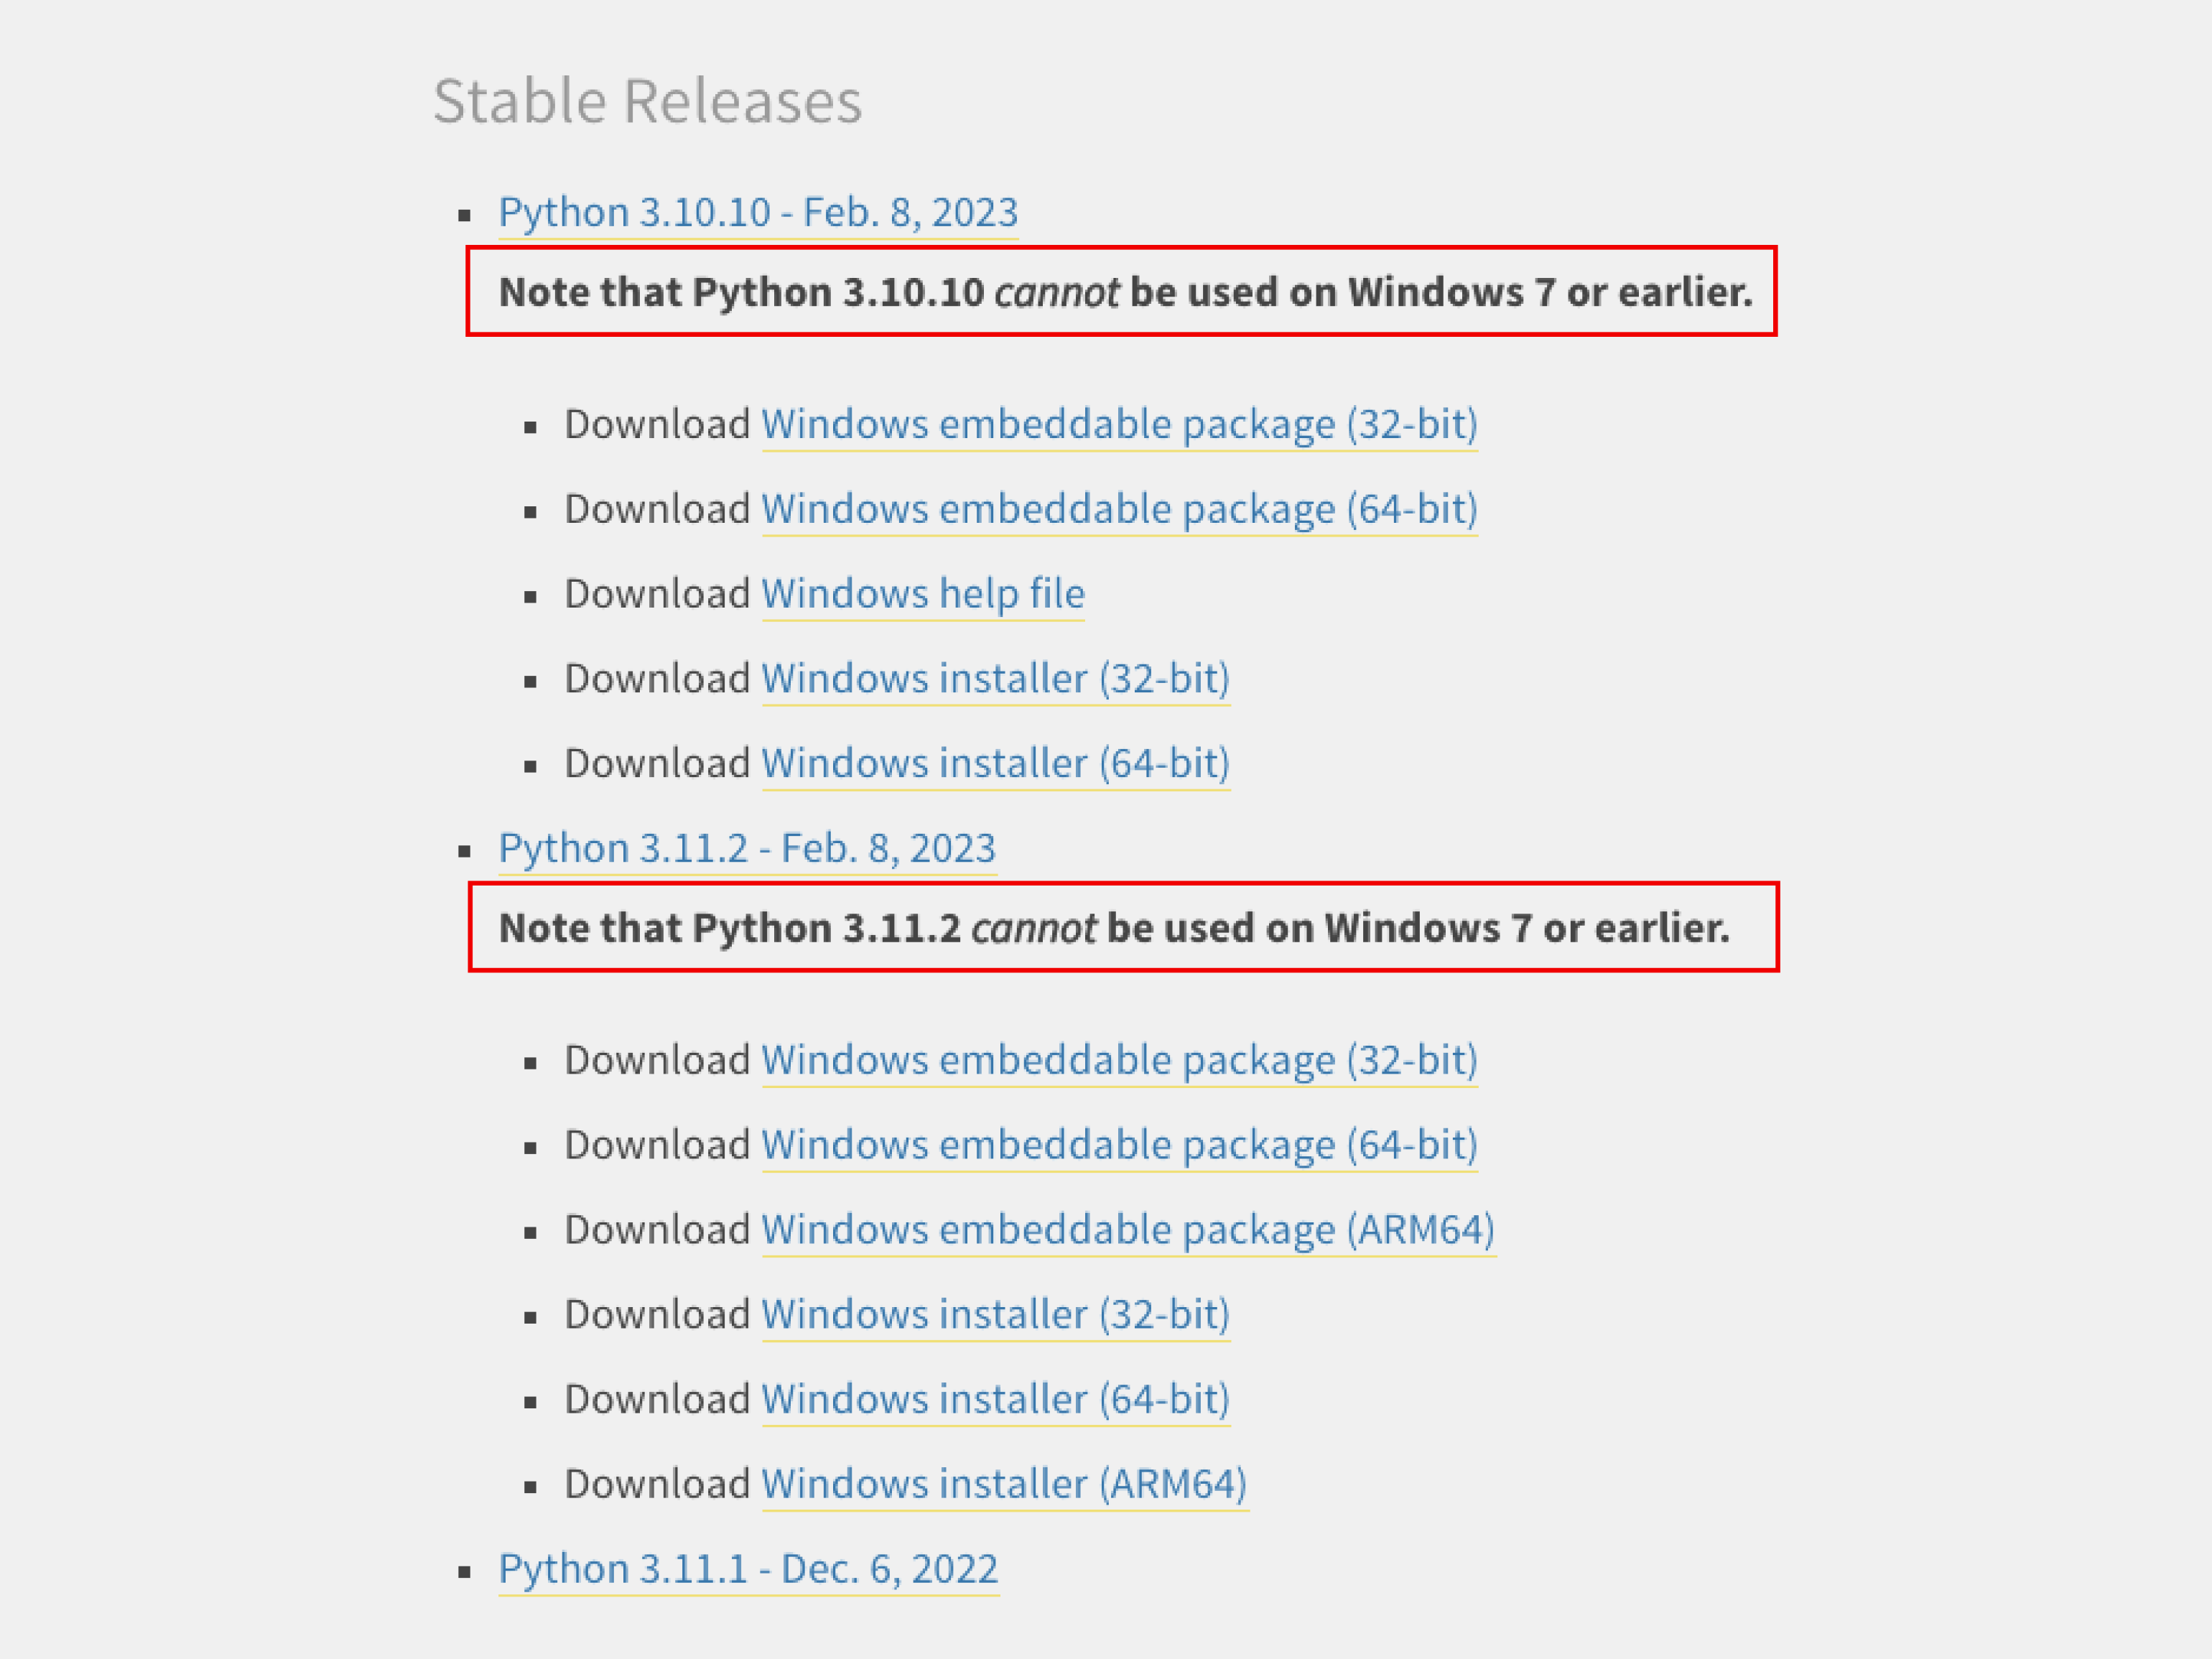
Скриншот: Skillbox Media
Python входит в состав большинства дистрибутивов Linux. Чтобы это проверить, введите в терминале следующую команду:
$ python3 --version
В окне должен появиться номер версии языка. Если этого не произошло, нужно установить Python с помощью пакетного менеджера.
В Ubuntu 16.10 это делается так:
$ sudo apt-get update
$ sudo apt-get install python3.6
Утилита попросит вас ввести пароль и после ввода начнёт установку.
Однако, если вы хотите поставить более свежую версию Python, для установки нужно использовать репозиторий deadsnakes PPA:
$ sudo apt-get install software-properties-common
$ sudo add-apt-repository ppa:deadsnakes/ppa
$ sudo apt-get update
$ sudo apt-get install python3.8
В Fedora Linux процесс установки похожий, но используется другая команда:
$ sudo dnf install python3.9
Ещё можно самостоятельно собрать Python из исходников, которые лежат на сайте Python. Но это очень сложный и мучительный процесс, поэтому останавливаться на нём мы не будем.
С давних времён MacBook и iMac выпускались с предустановленным Python 2.7. Правда, начиная с версии 12.3 разработчики «яблочной» ОС отказались от этой традиции.
Чтобы проверить, установлен ли Python, откройте командную строку и введите следующую команду:
python --version
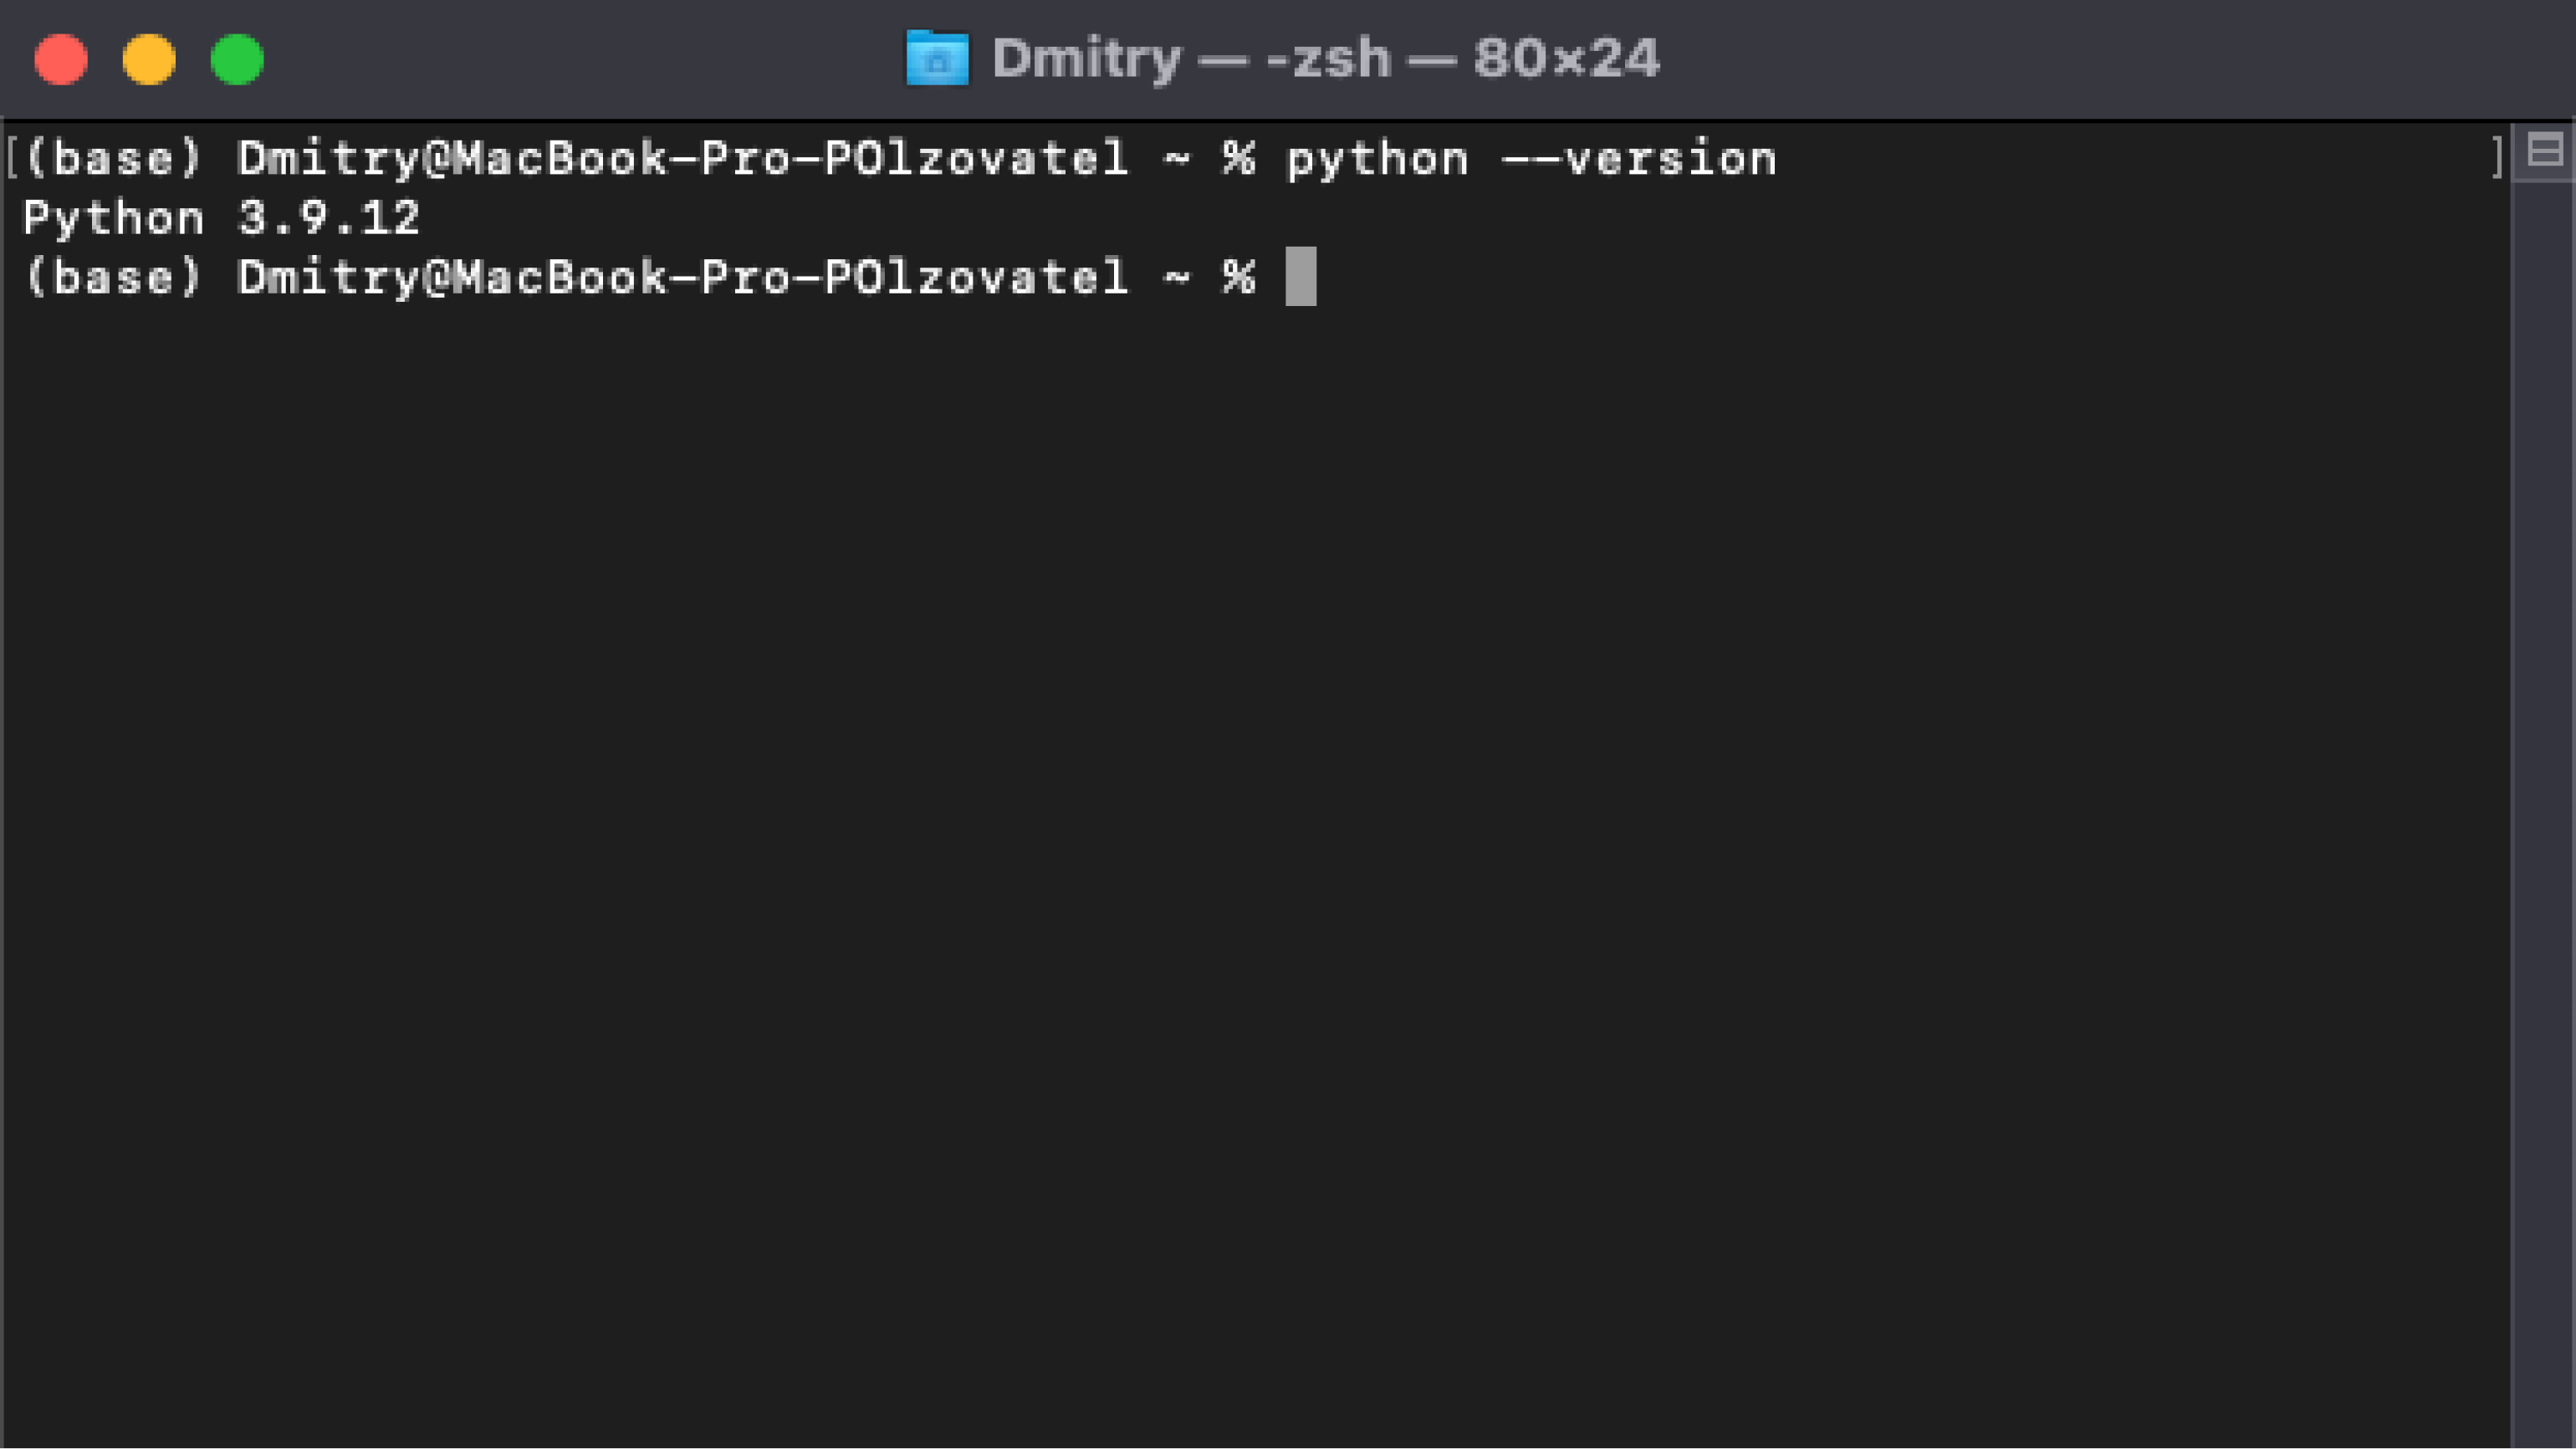
Скриншот: Skillbox Media
В любом случае лучше установить последнюю версию Python — найти её можно на официальном сайте.
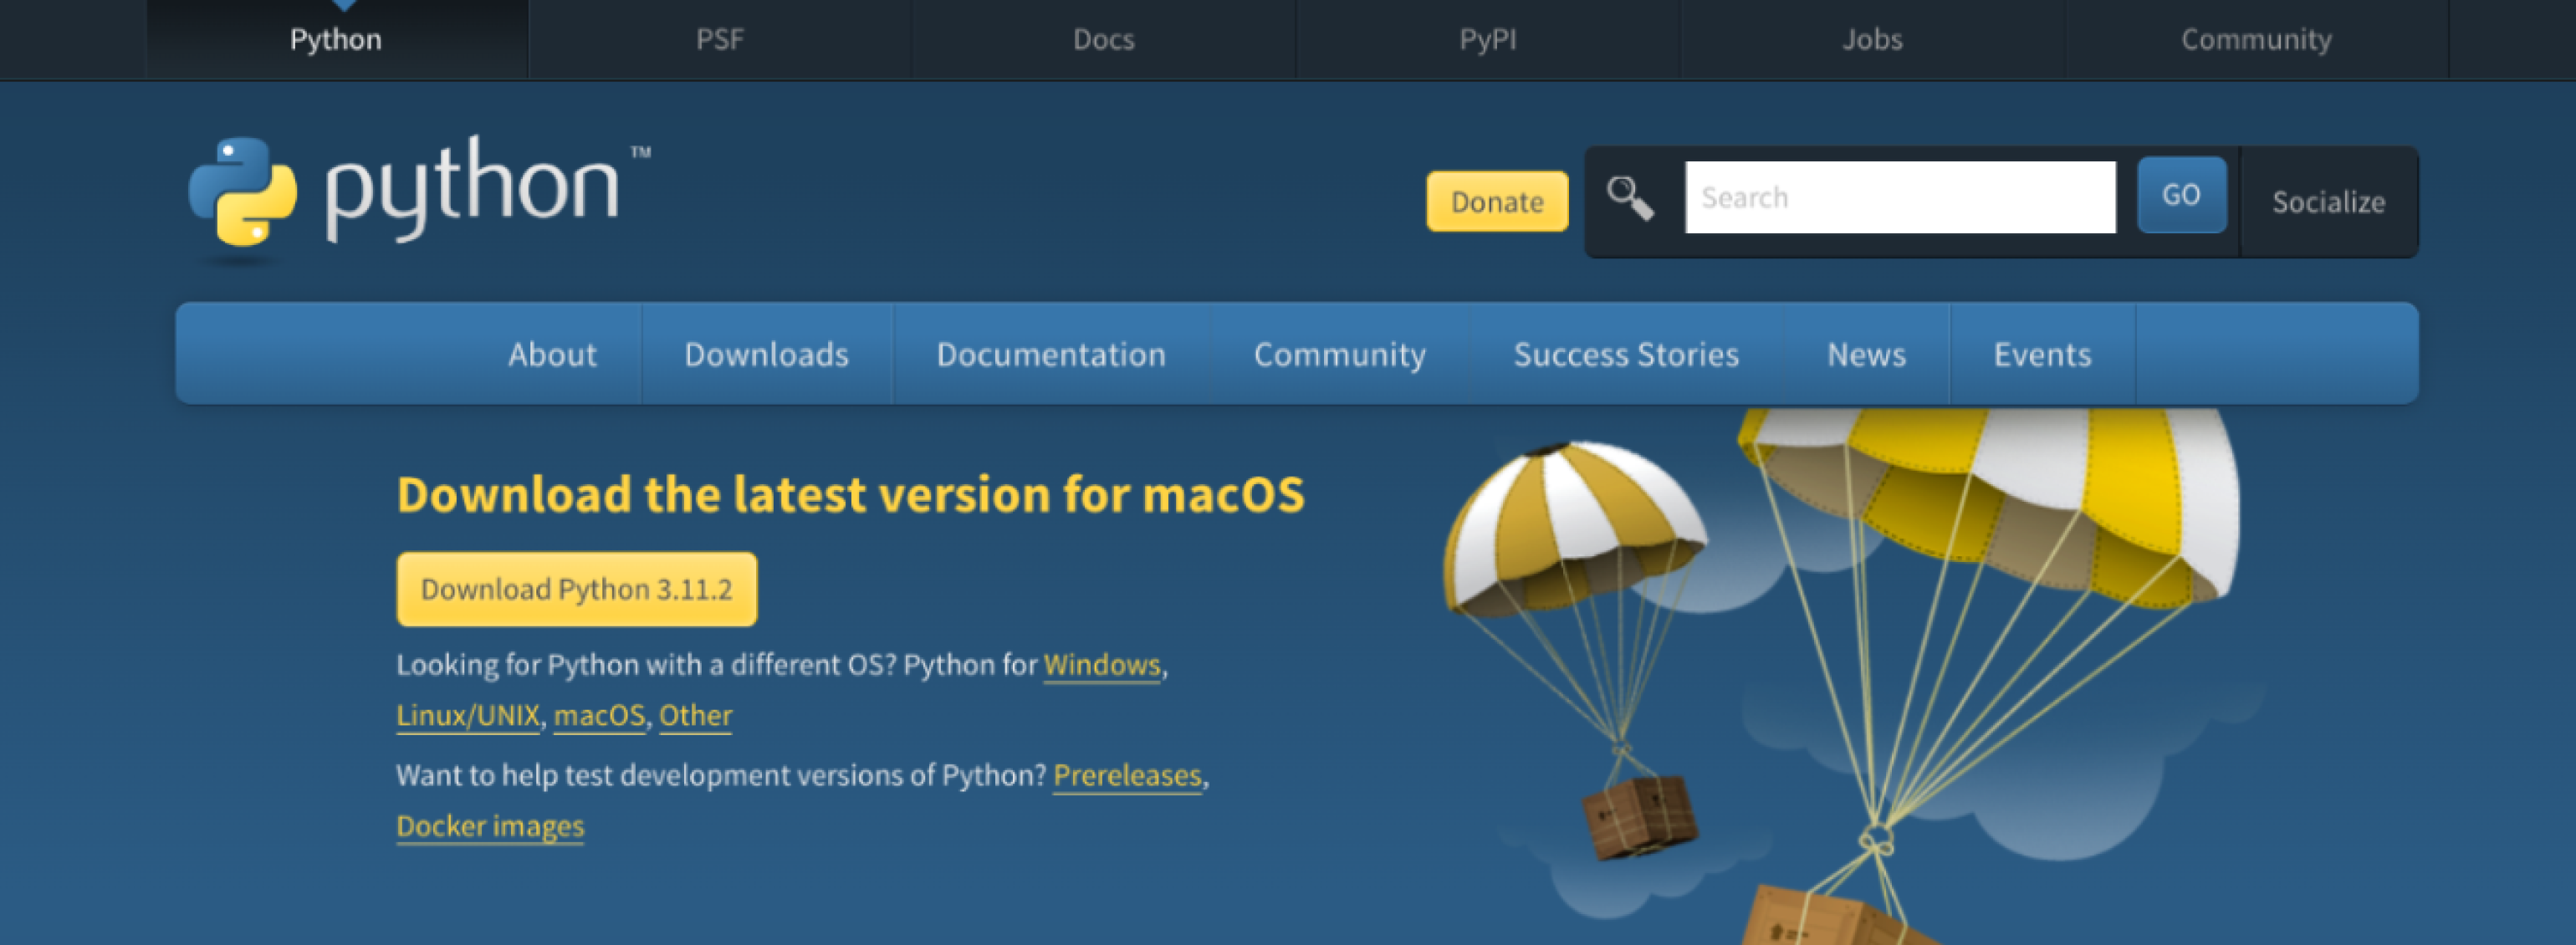
Скриншот: Python Software Foundation / Skillbox Media
Нажмите жёлтую кнопку Download Python 3.11.2, и пакет начнёт скачиваться:

Когда загрузка завершится, откройте его:
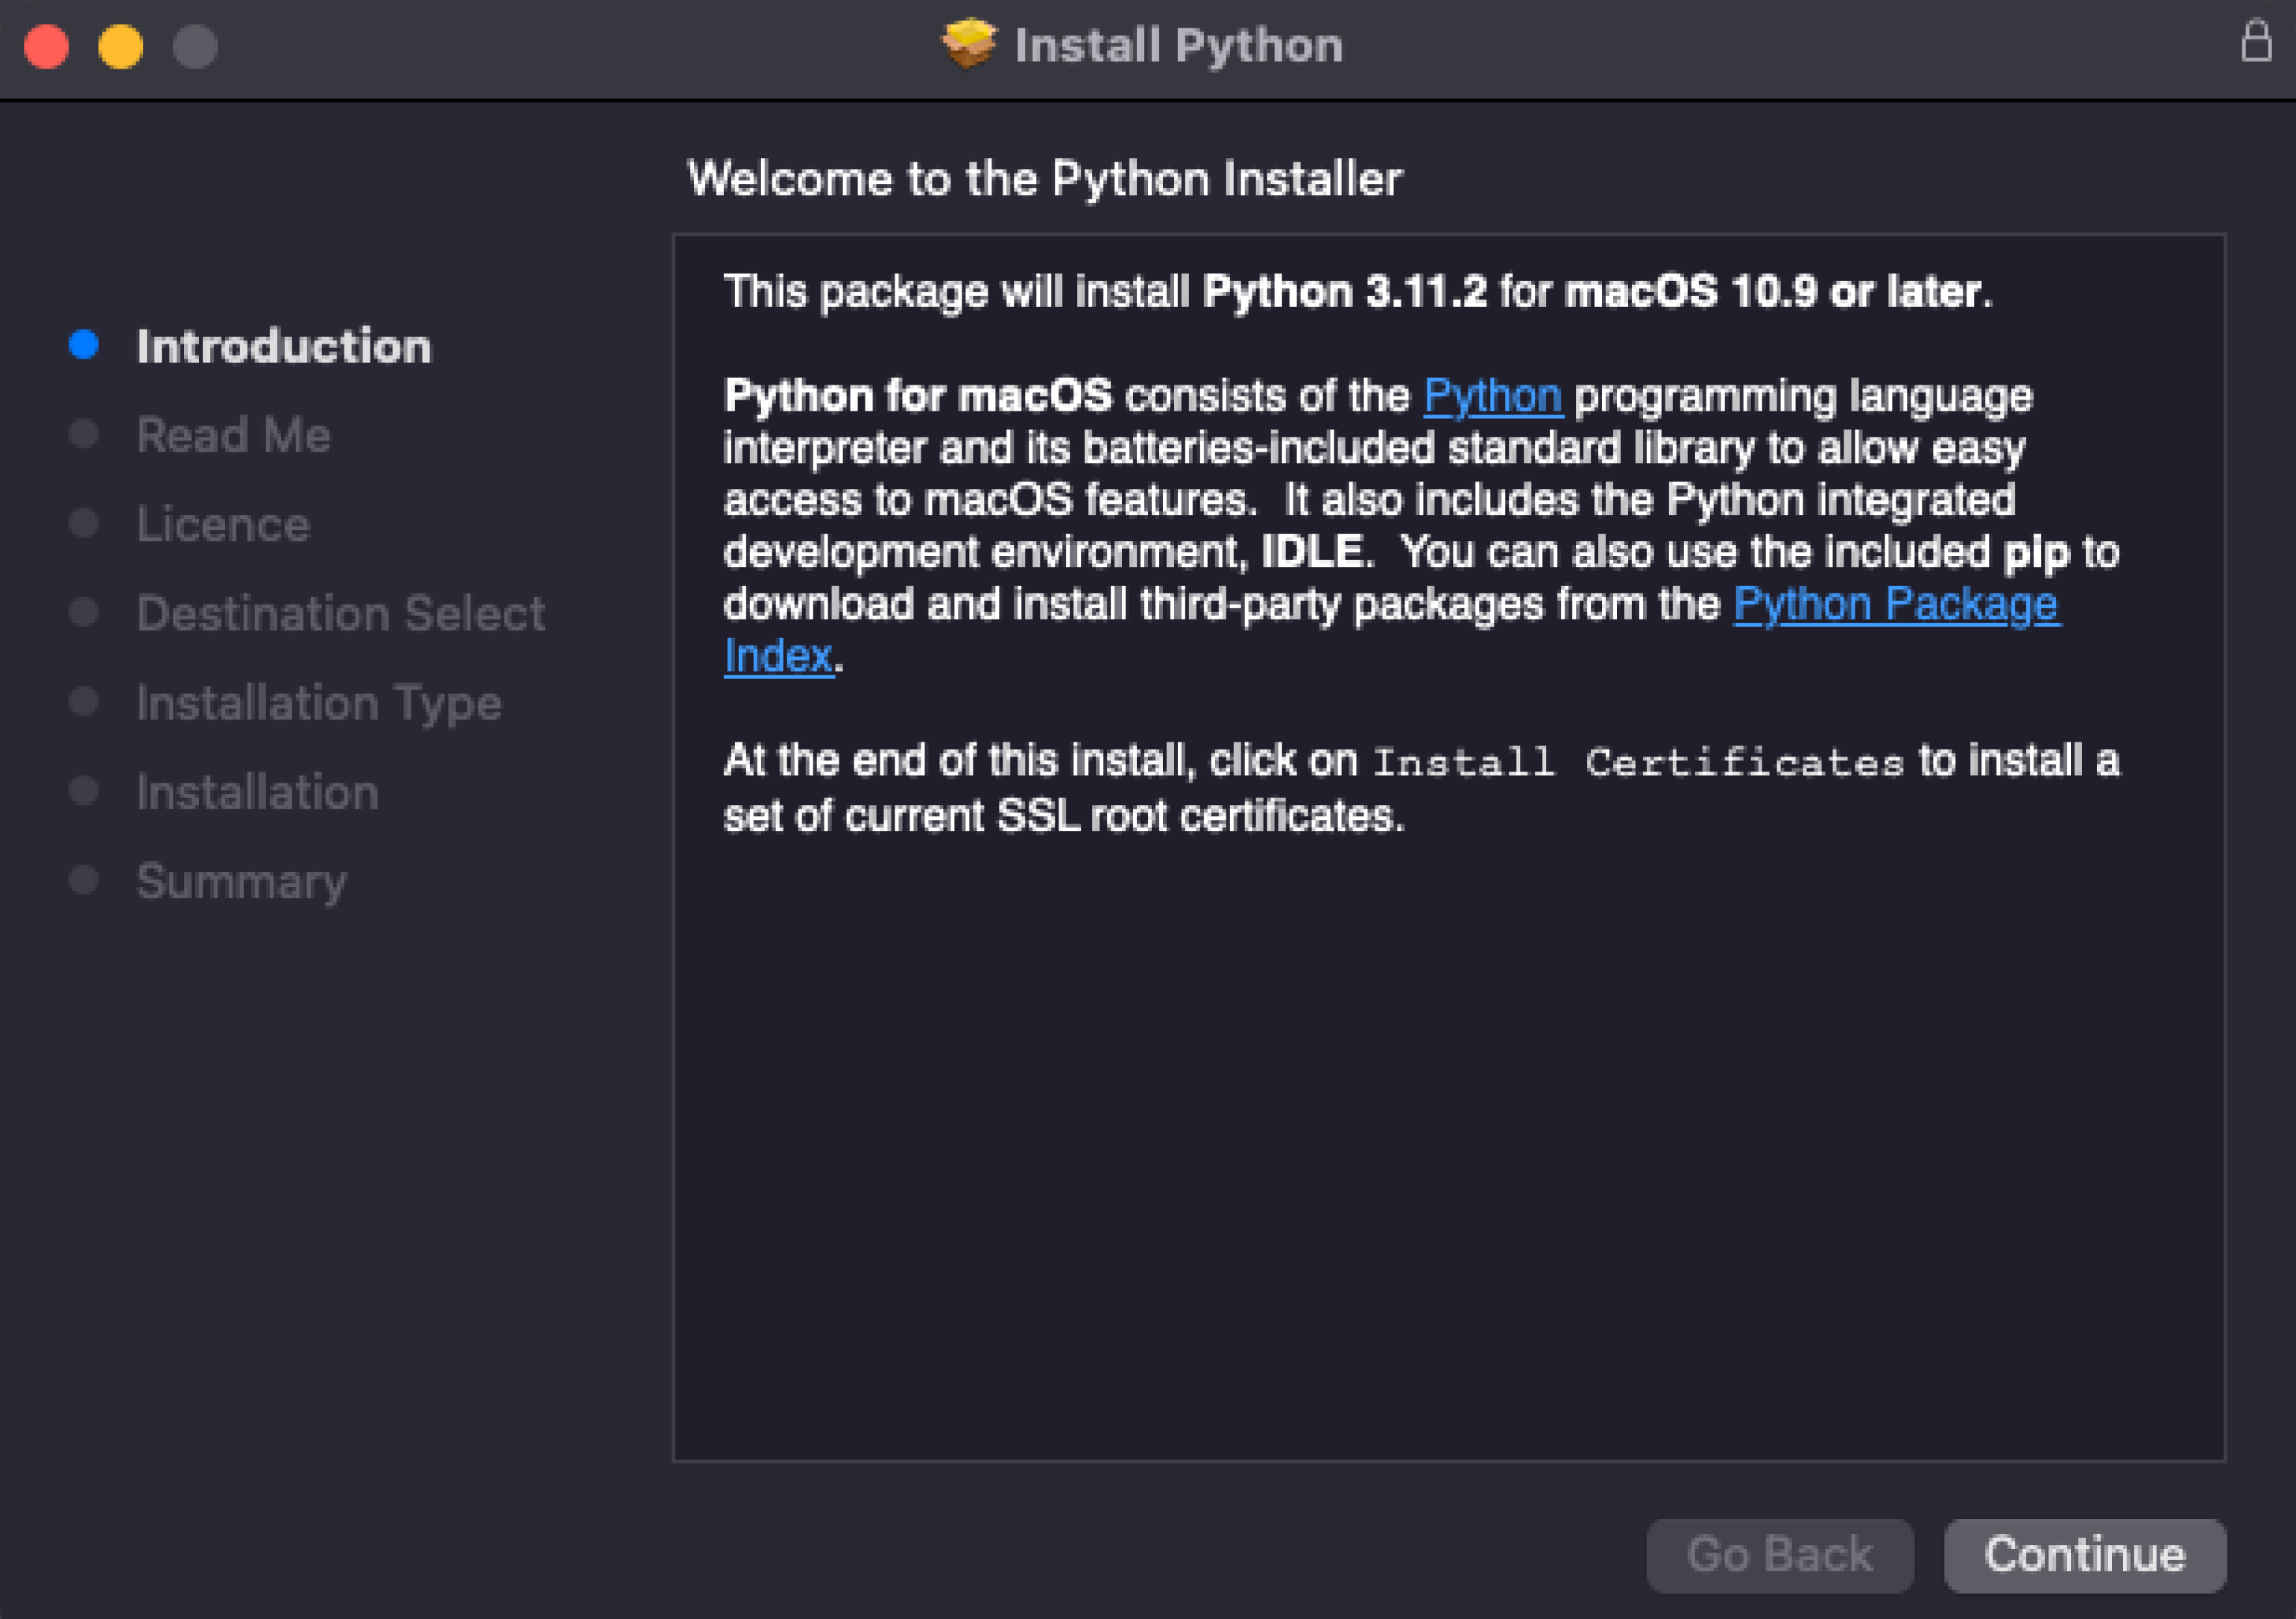
Согласитесь со всеми пунктами и переходите к установке. Вас попросят ввести пароль, а после — начнётся установка, по окончании которой вы увидите такое окно:
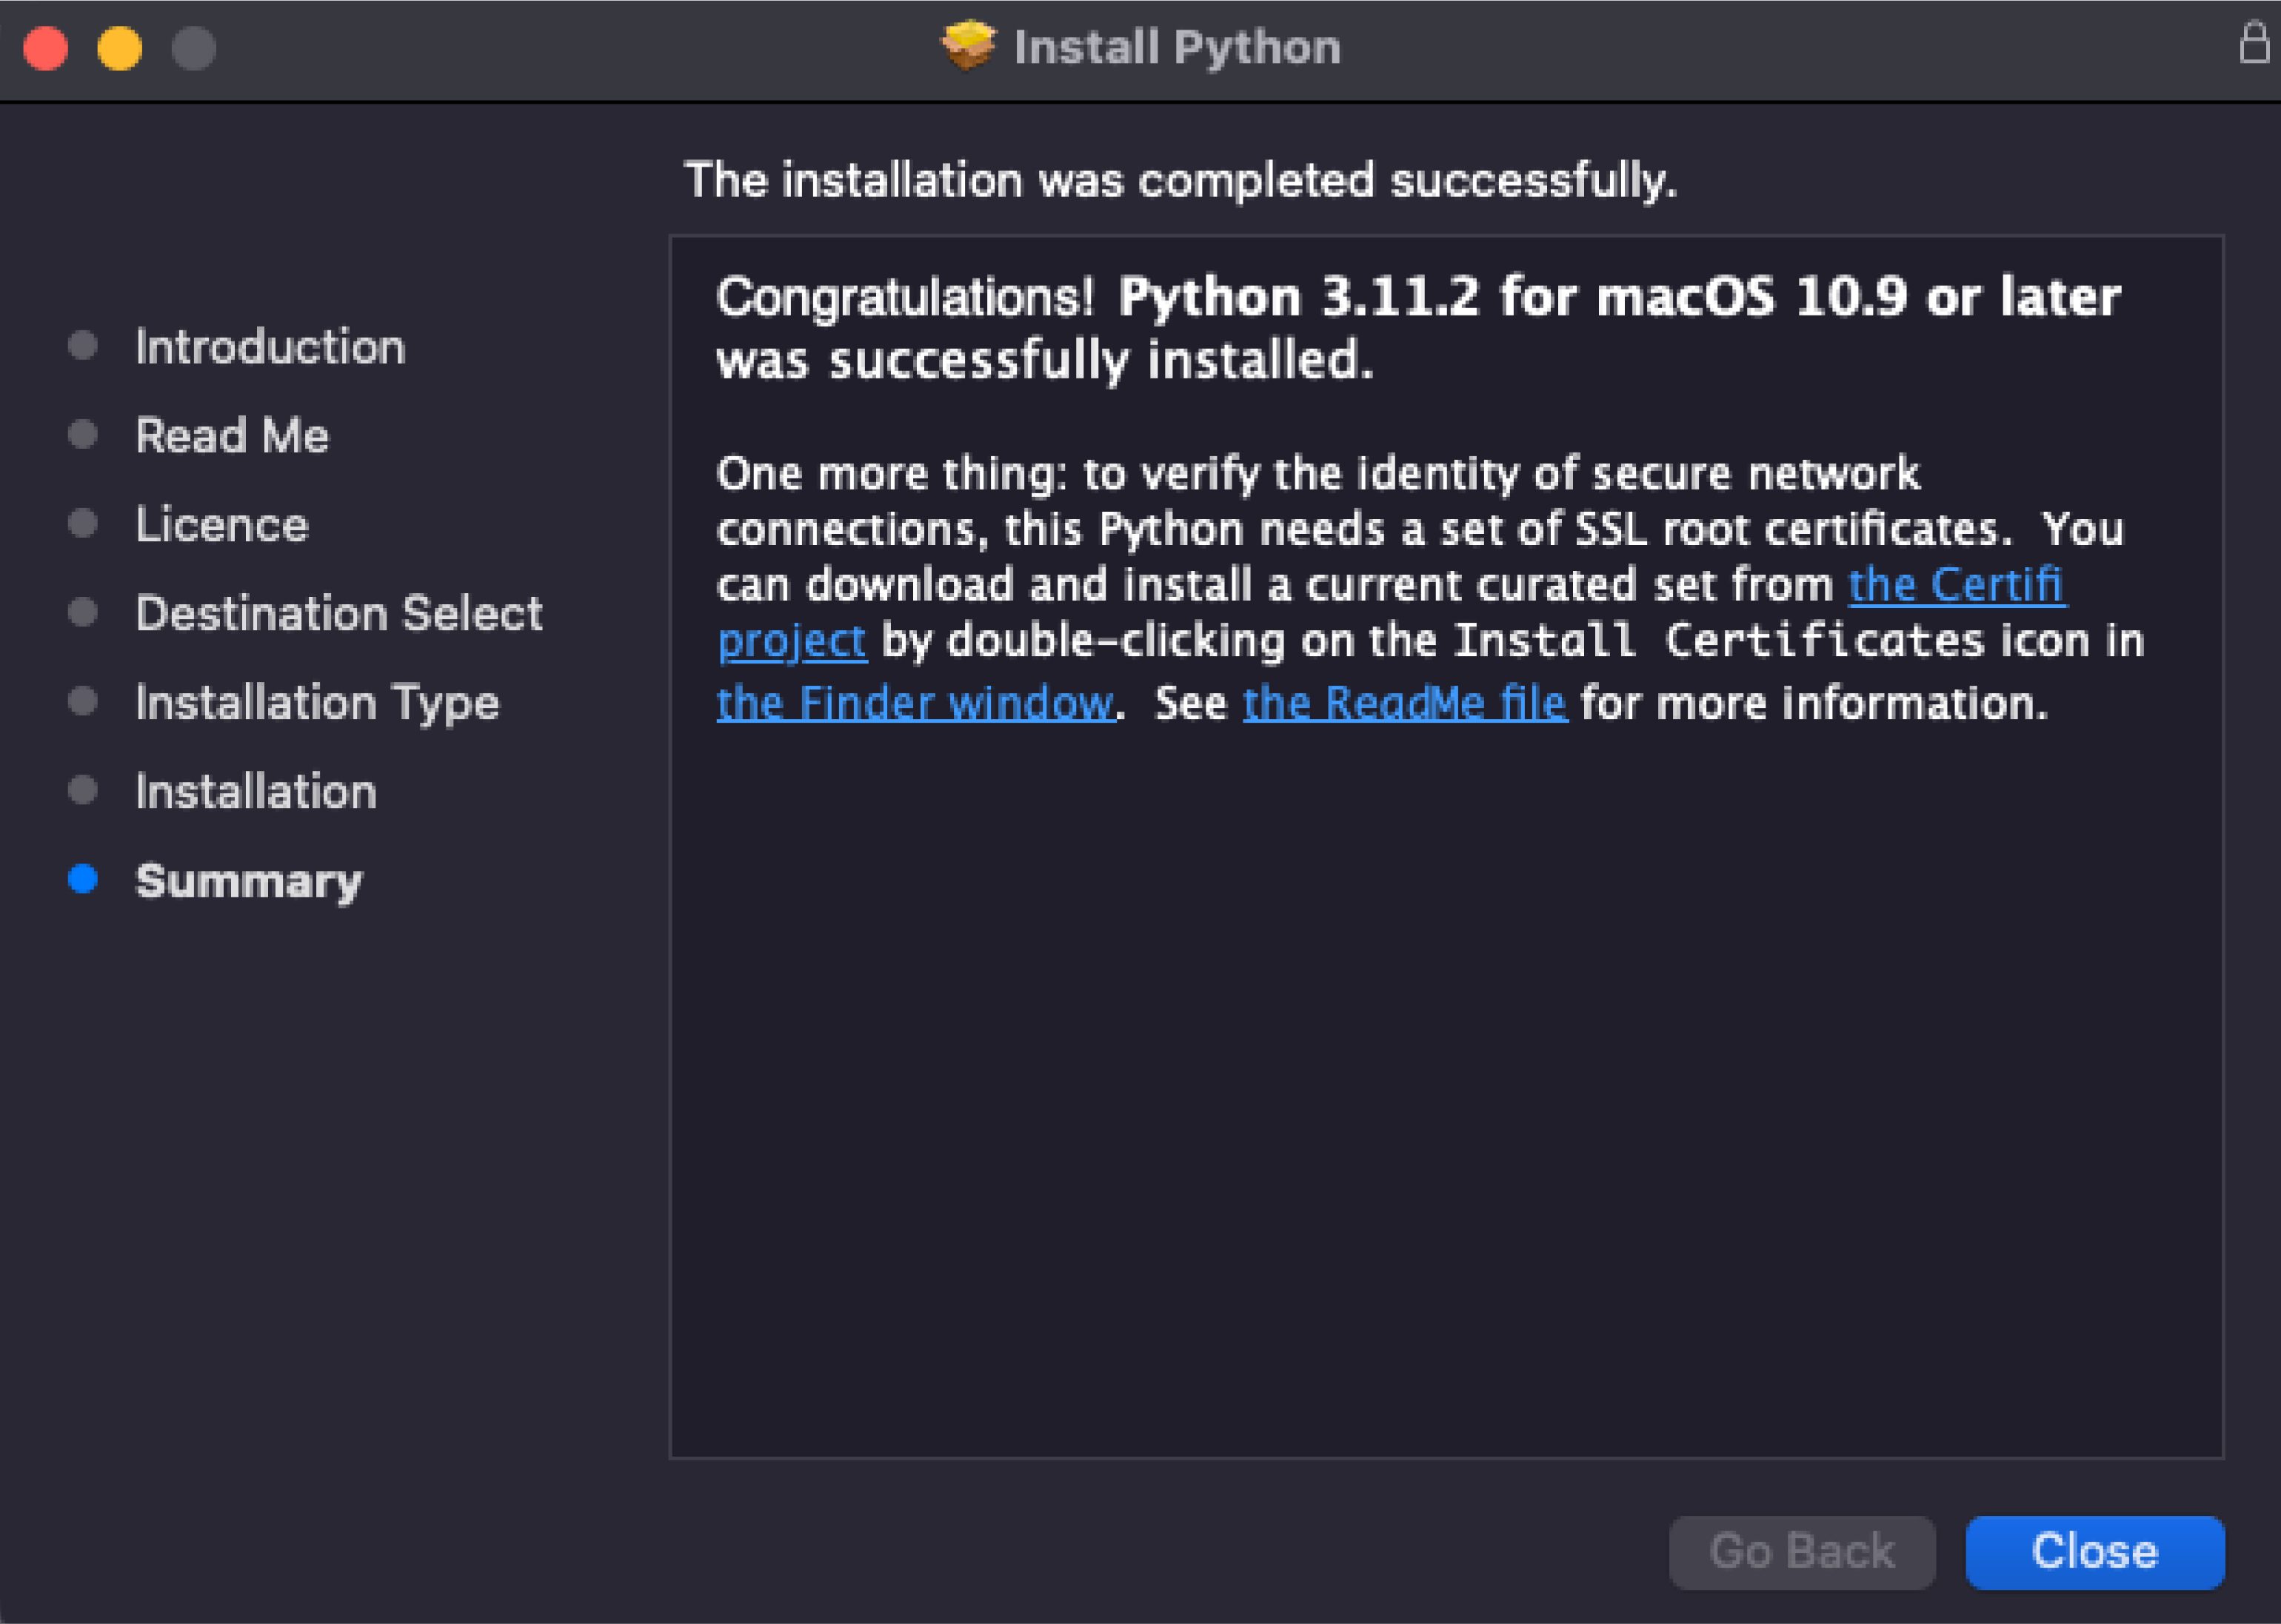
Нажмите Close и откройте терминал, чтобы проверить версию Python:
python --version
Должно быть выведено сообщение Python 3.11.2.
Дата-сайентисты используют свои библиотеки для работы — например, NumPy и Pandas. Их можно устанавливать по отдельности, а можно скачать готовую сборку со всеми библиотеками.
Самый популярный способ — использовать дистрибутив Anaconda. Он бесплатный и легко устанавливаемый, а также доступен для всех операционных систем. Мы покажем, как установить его на macOS.
Нажмите на кнопку Download, чтобы начать скачивание:
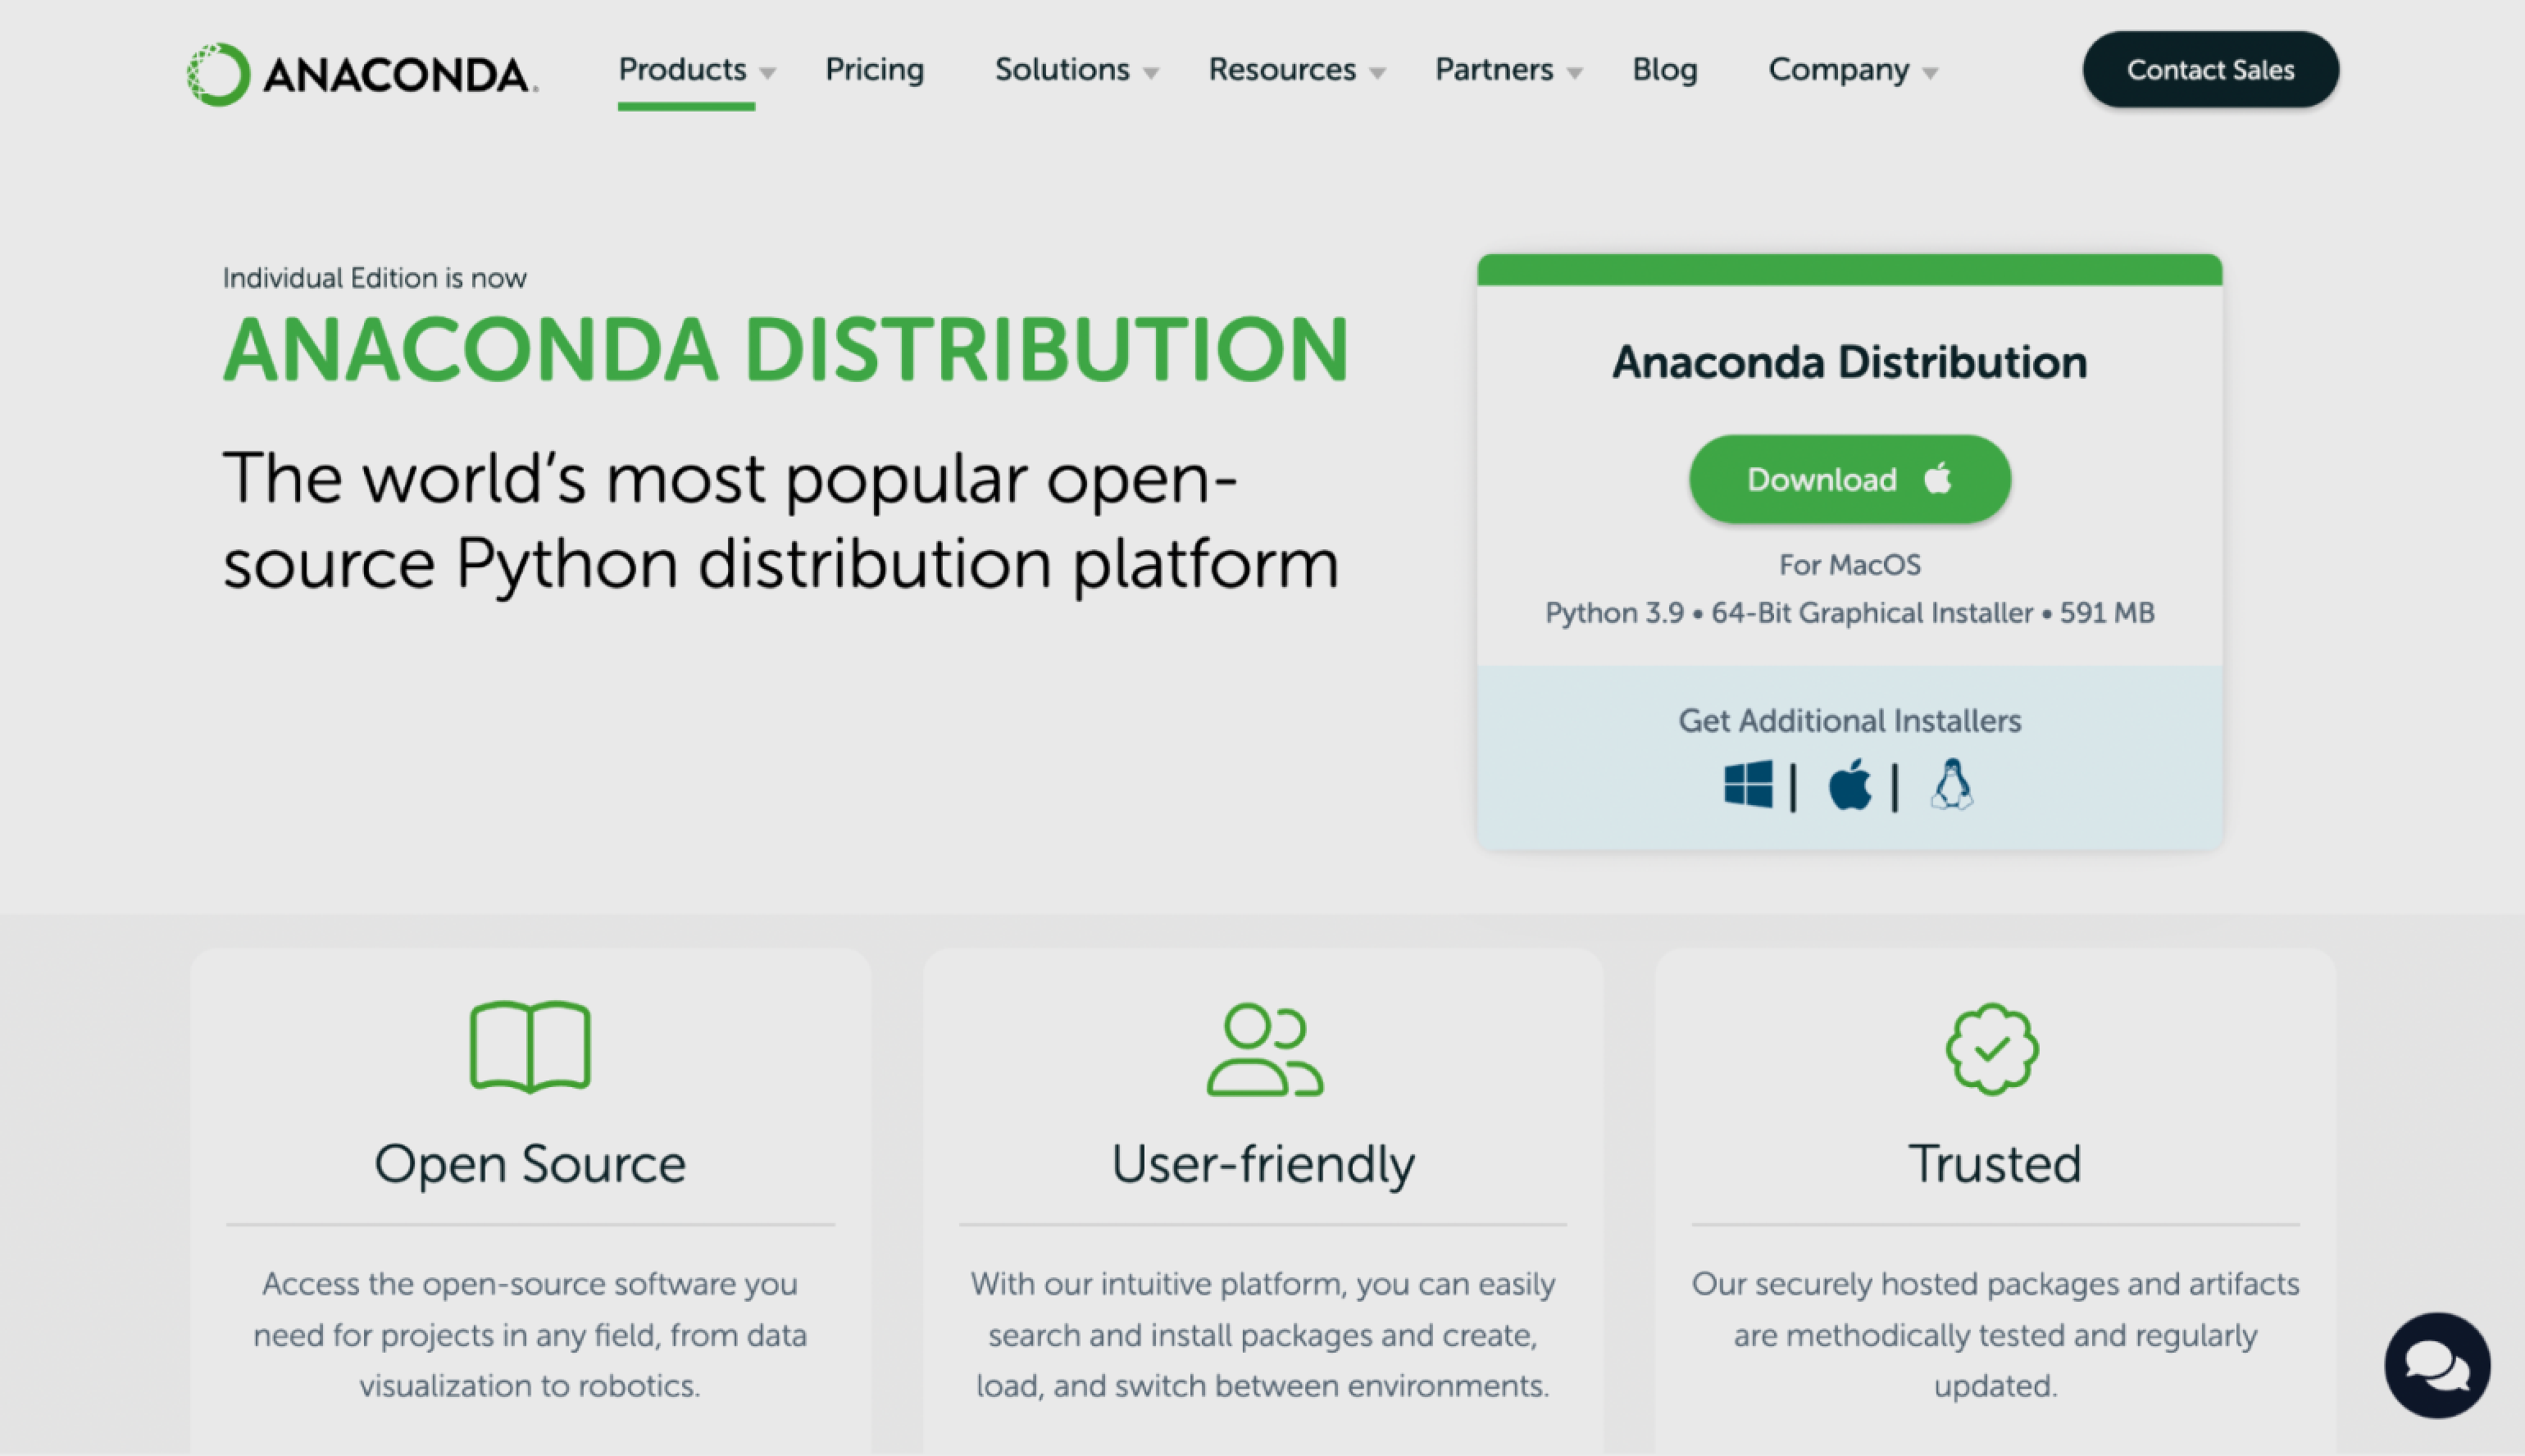
Скриншот: Anaconda Inc. / Skillbox Media
Затем откройте установщик, согласитесь со всеми пунктами и выберите место для установки.

Скриншот: Skillbox Media
Чтобы убедиться, что Python установлен, откройте консоль и введите команду python3 — должен запуститься интерпретатор Python, в котором можно писать код. Выглядит это примерно так:
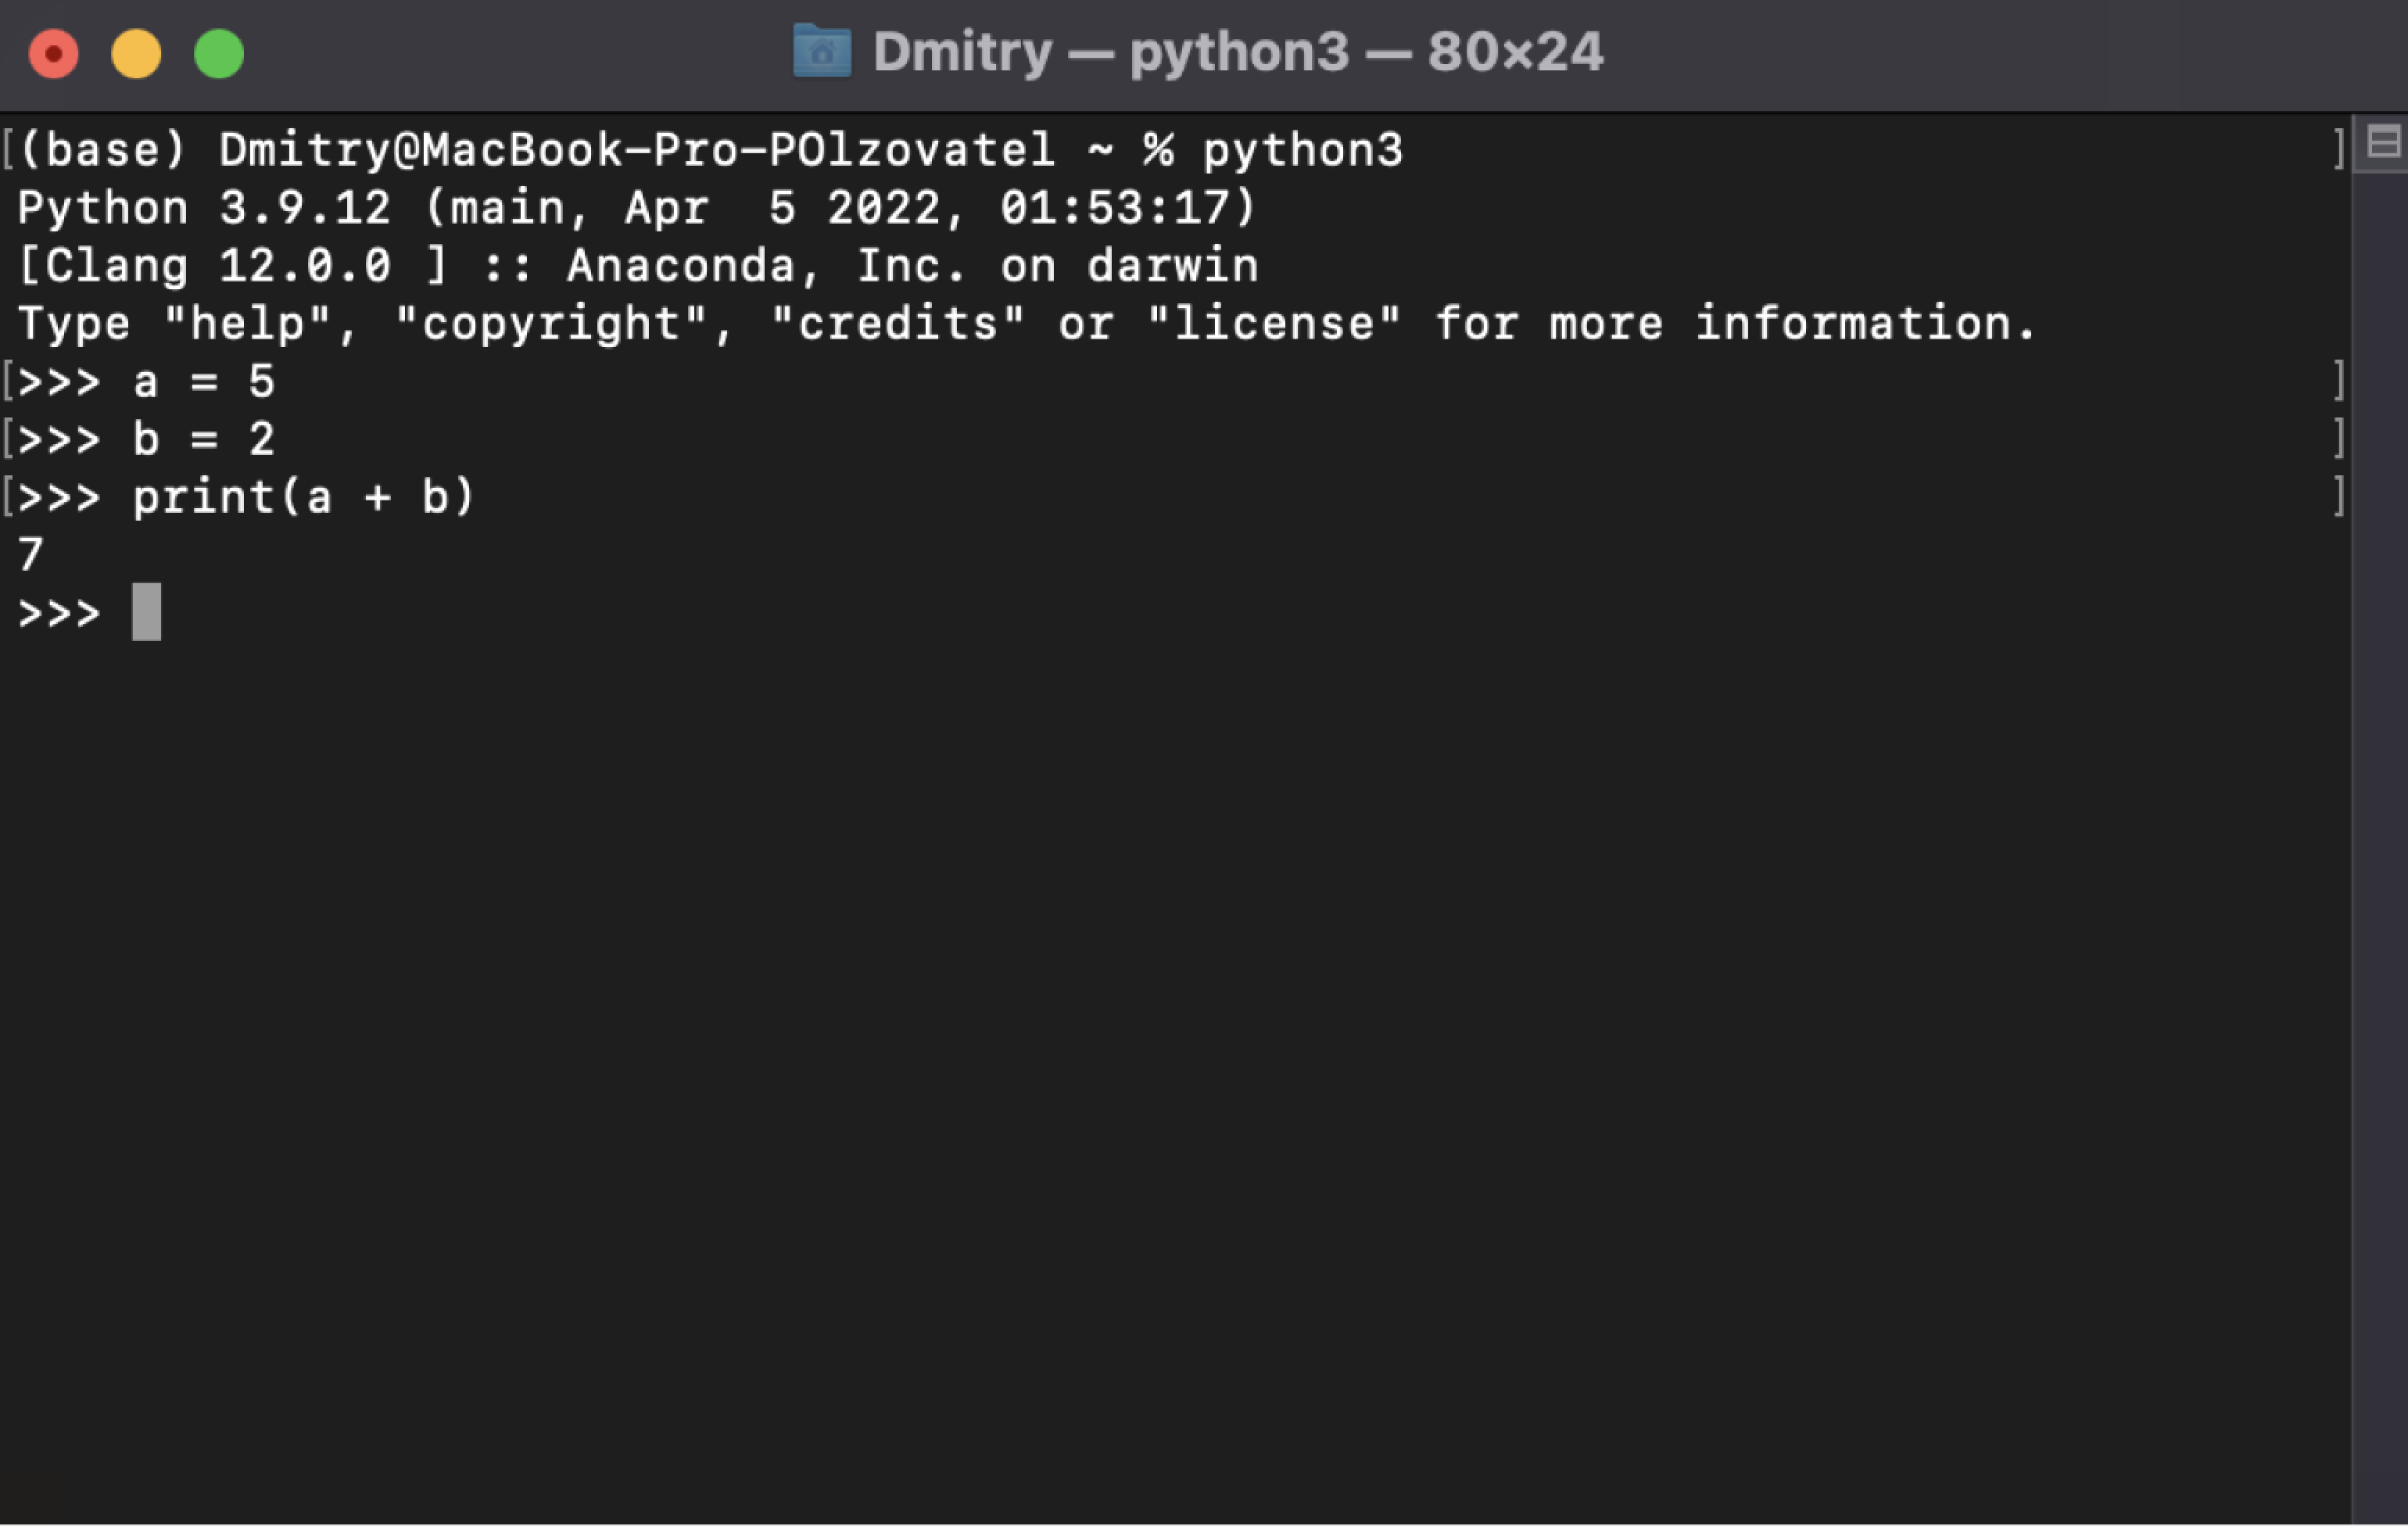
Скриншот: Skillbox Media
Теперь, чтобы использовать одну из библиотек для data science, нужно всего лишь импортировать её в Python-файле:
import numpy
А чтобы проверить, работает ли библиотека, достаточно запустить файл, в котором вы её подключили. Если библиотека не подключилась, то интерпретатор выдаст сообщение об ошибке.
После того как мы установили Python, пора написать пару строк кода. Вы можете использовать любую IDE (в том числе IDLE), редактор кода или даже «Блокнот».
Создадим файл program.py на рабочем столе. В нём мы вызовем всего одну функцию, которая выведет на экран текстовое сообщение:
print("Привет, мир!")
Запустим программу командой py или python в командной строке, прописав полный путь до файла program.py. Например, если он лежит на рабочем столе, запустить его можно так:
Microsoft Windows [Version 10.0.19043.1889]
(c) Корпорация Майкрософт (Microsoft Corporation). Все права защищены.

C:\Users\User>py C:\Users\User\Desktop\program.py
Привет, мир!
Мы передали код интерпретатору, который обработал его и вывел сообщение на экран. Всё получилось!
VS Code — это удобный редактор кода, который поддерживает десятки языков программирования и плагинов. По популярности VS Code сильно опережает аналоги, поэтому будет полезно разобраться, как установить Python туда.
Сначала нужно найти плагин для языка. Откройте вкладку Extensions («Расширения») и введите в поиске следующую строку:
tag:debuggers @sort:installs
В появившемся списке найдите Python и нажмите Install.
Теперь нужно включить подсветку кода. Для этого установите плагин Magic Python — найти его можно в том же поиске, введя команду ext: py3. Чтобы всё заработало, перезапустите VS Code и создайте файл с расширением .py. Когда редактор спросит, на каком языке вы собираетесь программировать, — выберите Python. Готово!
Хоть VS Code является самым популярным редактором кода, многие программисты предпочитают специализированные IDE, заточенные именно под разработку на Python. Абсолютный фаворит здесь — PyCharm, в состав которой уже входит Python.
Чтобы установить PyCharm, зайдите на сайт JetBrains и нажмите кнопку Download:
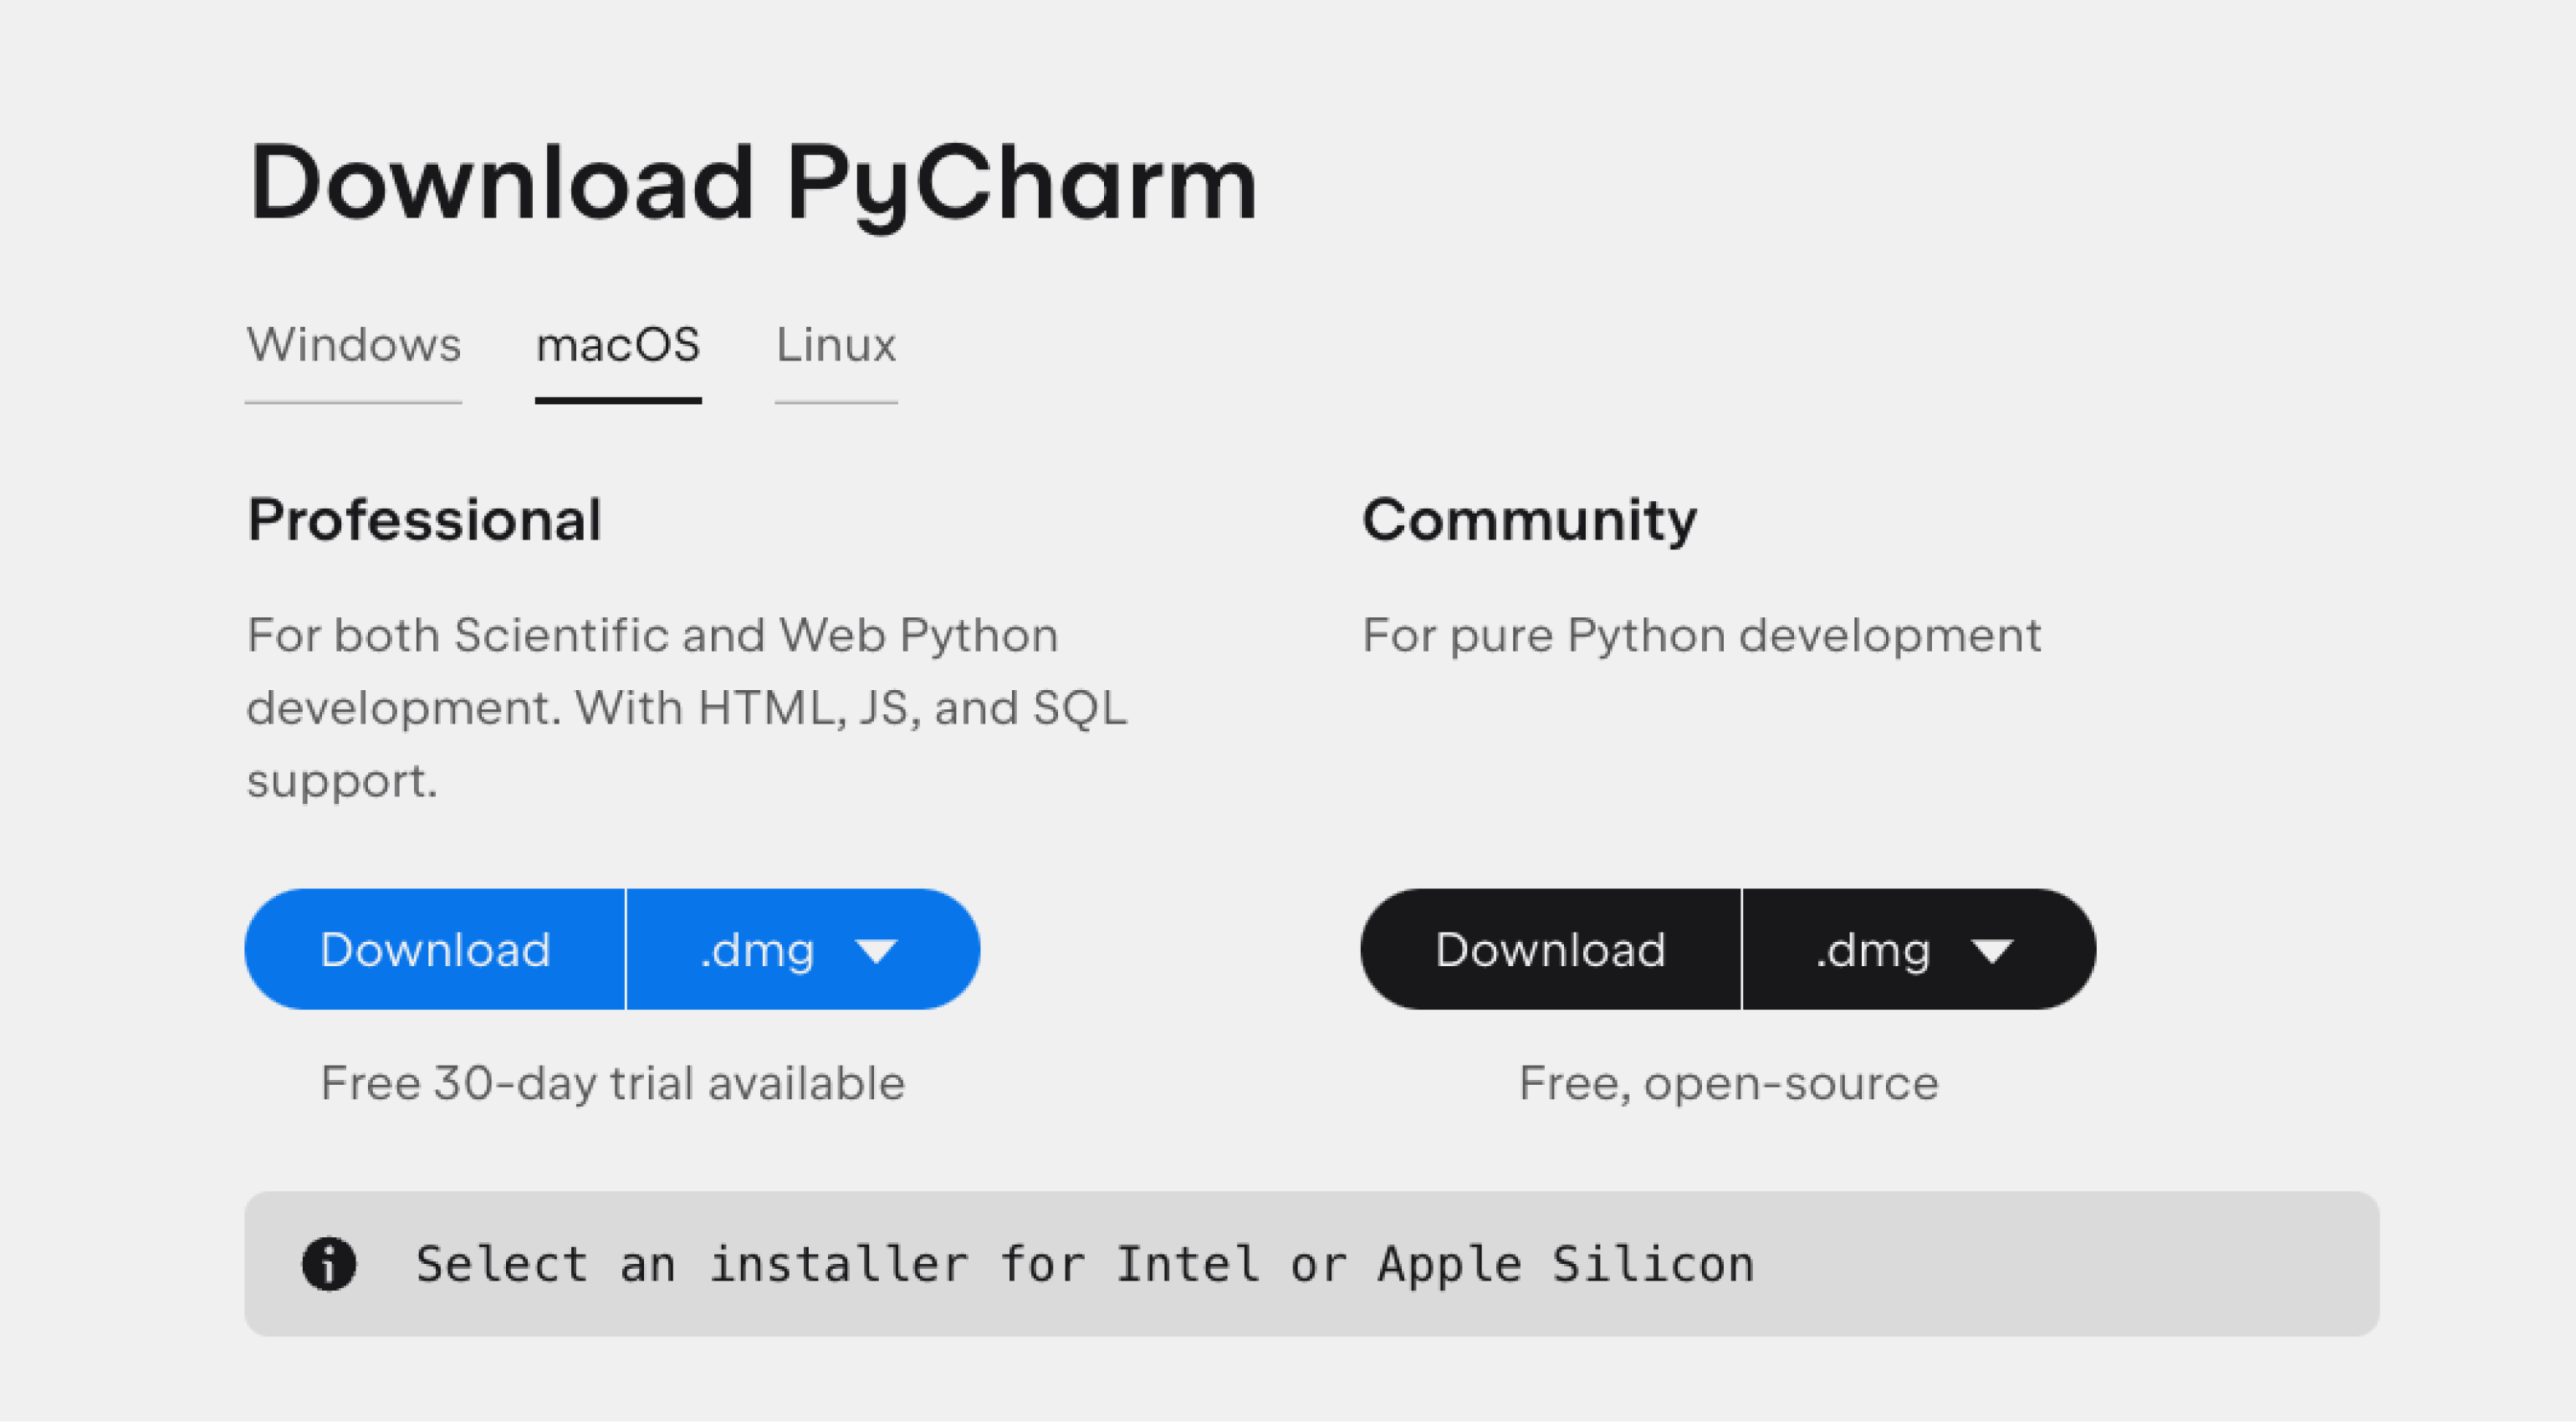
Вам предложат выбрать операционную систему и версию среды разработки: Professional и Community. Community — это бесплатная версия, в которой отсутствует поддержка некоторых функций и фреймворков, например Django. Но на первых порах её вполне хватит, поэтому выбираем её:
Дальше начнётся загрузка файла. Ждём, а затем открываем его:
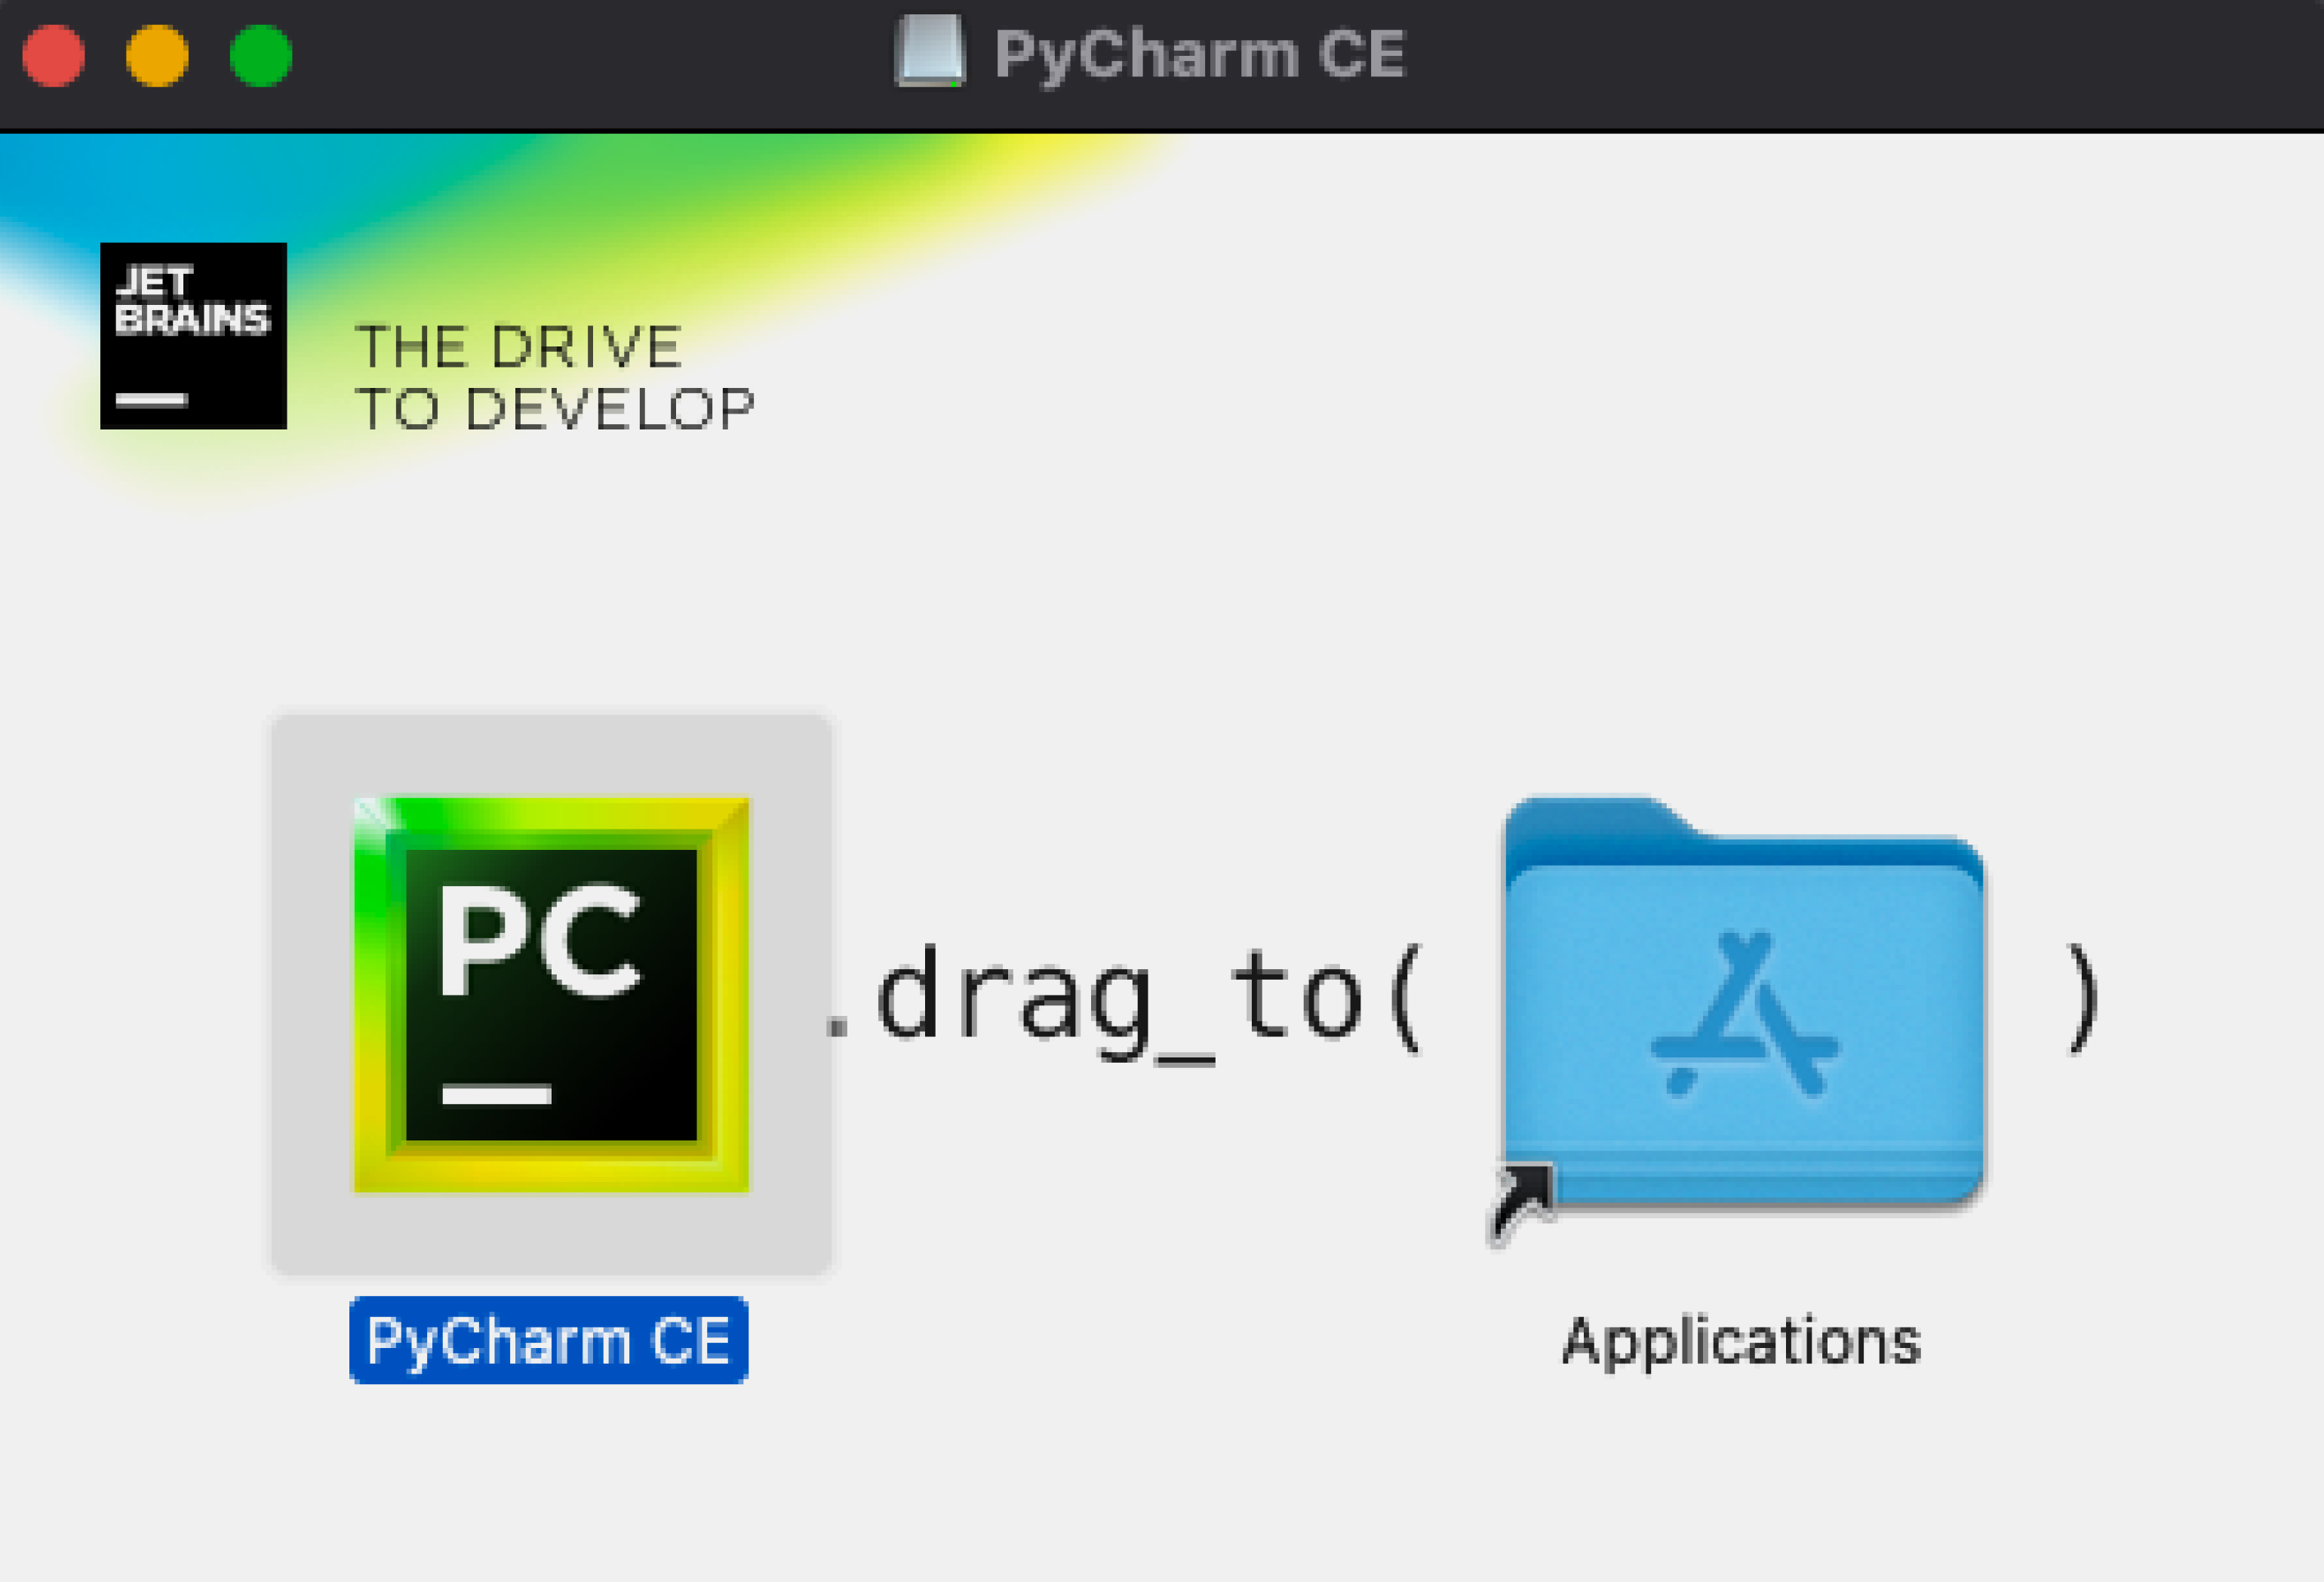
Перетаскиваем в папку Applications — готово.
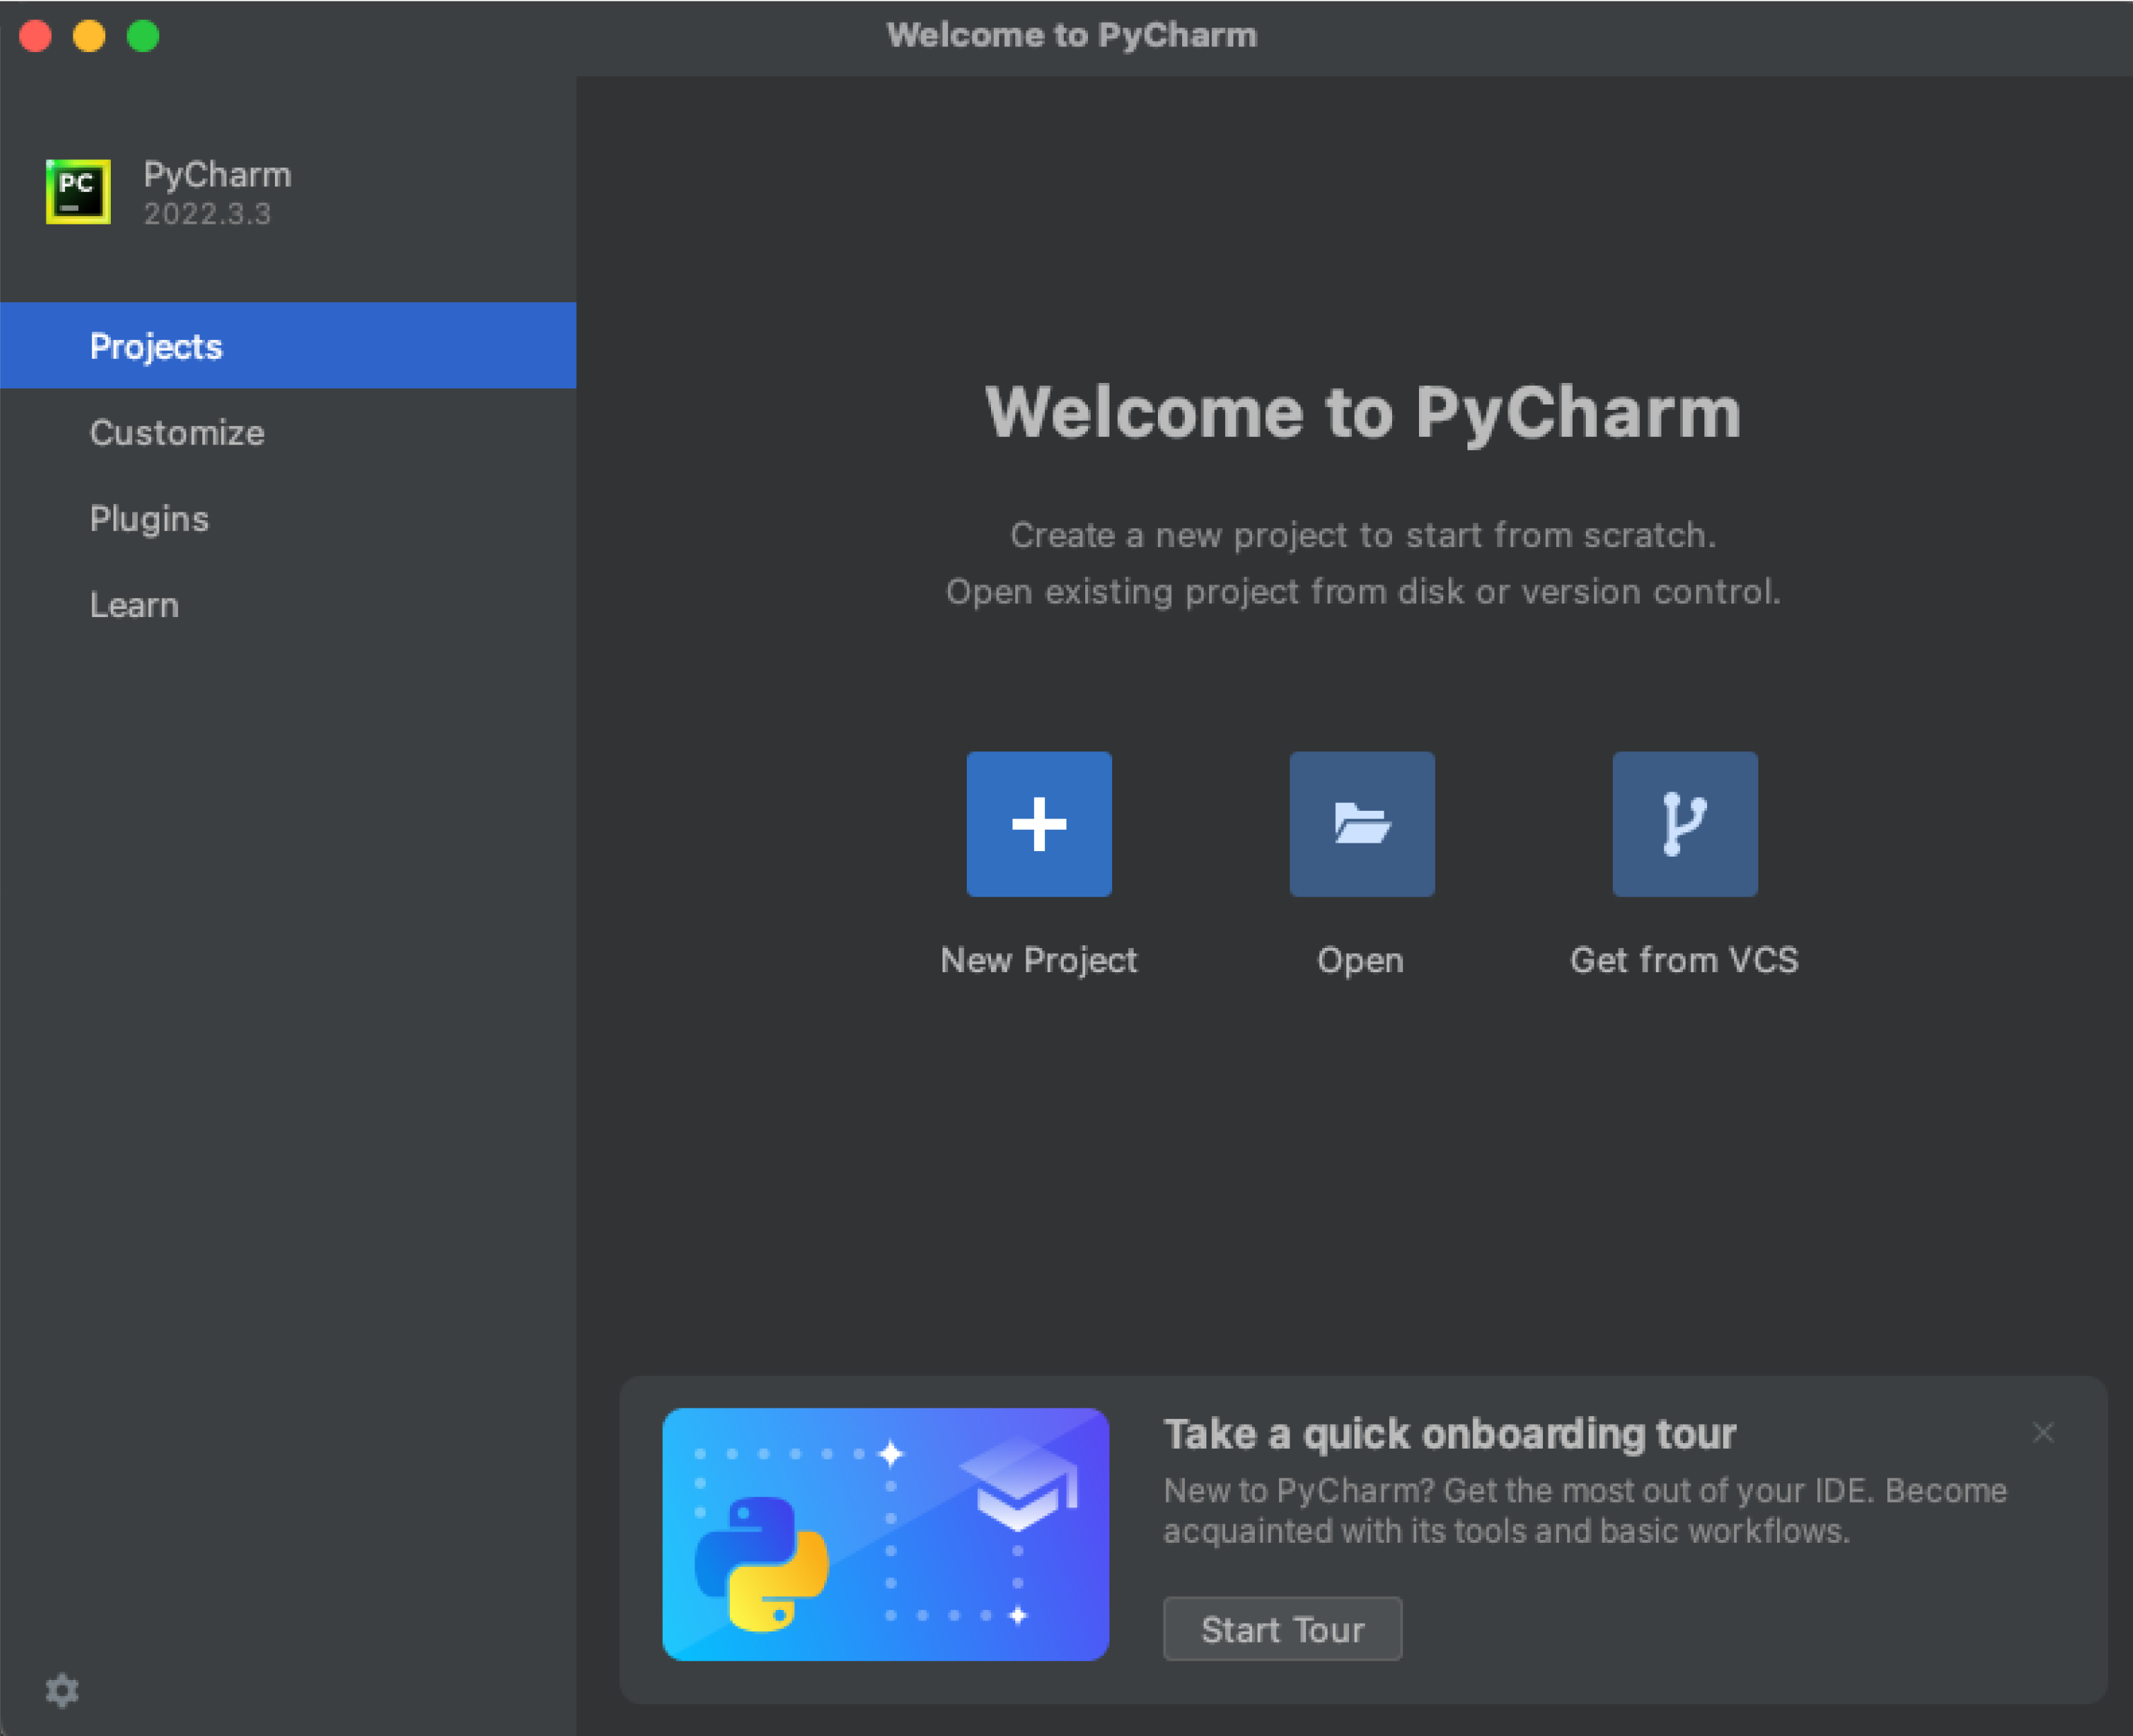
PyCharm установлена, можно создавать проекты и начинать программировать.
Вместо компилятора/интерпретатора CPython иногда используют альтернативные, написанные на других языках и лучше стыкующиеся с другими технологиями. Например, Jython и виртуальную машину JVM (для платформы Java). Или IronPython, написанный полностью на C# и предназначенный для .NET.

Жизнь можно сделать лучше!
Освойте востребованную профессию, зарабатывайте больше и получайте от работы удовольствие. А мы поможем с трудоустройством и важными для работодателей навыками.
Посмотреть курсы
»
This article is part of in the series
Published: Monday 28th December 2020
Last Updated: Wednesday 29th December 2021
Prerequisites
In this article, we will talk more about how to install python on windows. If you’re new to python. You can check our beginner guide to python to know more about its usage. In this article, we will talk about:
- Downloading Python
- How to install it
- Install Python in windows OS
- How to uninstall python
First, let’s get started with
Downloading Python
It depends on which operating system you’re using. Downloading Python is an easy process. This is one of Python’s main goal. To be easy to run, easy to install. You can download python from different resources. The official Python website is the go-to to download python. It has the download links for all operating systems. It has detailed release notes for differences between versions. You need to take a look at the release notes if you’re upgrading your python version. It’ll help you know the changes exactly.
To download python you need to
- Go to the download page on the official website.
- Select your operating system. (Windows, Mac, Unix)
- Click on the exact version you want to download. (latest version is recommended)
Your download will start automatically. Now It’s time to install Python.
Installing Python on windows
After downloading Python. Now we will install it. In this article, we gonna focus on installing python on windows. There are two ways of installing python on windows. The first one if you have Bash ubuntu installed. Bash ubuntu is an ubuntu terminal in the windows operating system. It allows you to run ubuntu commands in windows. It’s very helpful if you need a bash shell to work with. Keep in mind it’s not fully ubuntu terminal. It has some windows restrictions.
To install Python in bash ubuntu. You need first to have to download the ubuntu terminal. You can download it from the Windows store. After downloading it you will need to open the terminal. It might take some time, in the beginning, to download and install terminal necessary packages. After it finished you will find the normal ubuntu terminal. That you can run all the commands you want in it.
- Install dependencies.
$ sudo apt install software-properties-common
$ sudo add-apt-repository ppa:deadsnakes/ppa
- Update the OS package manager
sudo apt update
- Install the latest version
$ sudo apt install python3.8
To check python is installed. You should type the below command.
python --version
output:
Python 3.8.2
Now you have installed python successfully. Note that you installed Python in this shell. This means it’s not installed globally on the system. which means if you have a python script and tried to run this script outside the terminal. You need to run it from the shell.It’ll not run. Let’s explain why.
Your python is installed only on the Ubuntu subsystem. Ubuntu terminal is a container running in windows. It helps to translate your commands into binary system calls to Windows. By installing python. You install it on the subsystem only.
If you want to install python Globally on windows. You should follow these steps. After downloading Python. In your downloads, you’ll have a .exe file. Open it will open this screen.
setup python for windows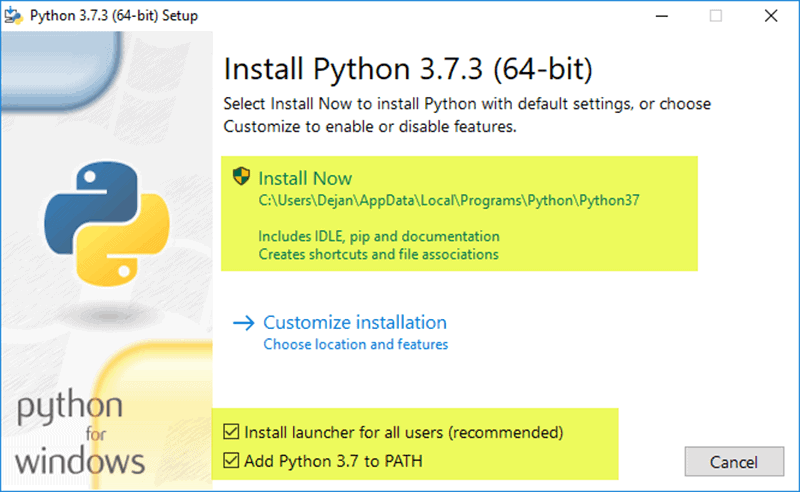
You can choose to install it now. It will add the python path in your system partition. You can customize the installation path and user access.
The final step of windows installation.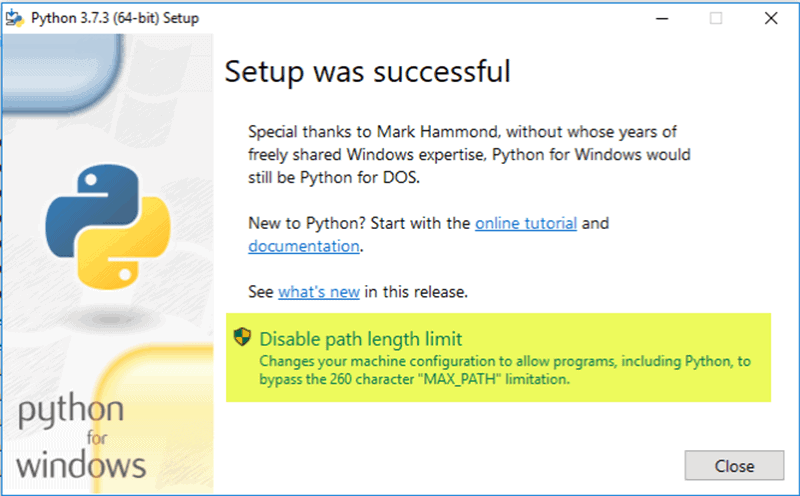
After Finishing the installation. You will have the setup success screen. It’ll have links to documentation and getting start guide. After close this screen you will find a python shortcut on your desktop or windows menu. Now you can run any python script.
How to uninstall python
As you can see installing Python is easy. What about remove it. To remove Python from your device You have two options if you’re using Windows. The simplest way is:
- Go-to control panel
- Search for python
- Right-click and choose uninstall
This will remove python entirely from your system.
If you installed python through the ubuntu subsystem. It means that it’s not globally installed. Now You should open a new terminal window. Run the below command.
$ sudo apt remove python3.8
This will uninstall python from the subsystem. The dependencies package will be installed. This command will not delete the data files of python are still exist on your system. If you want remove it completely from your system. You should run:
$ sudo apt autoremove python3.8
This will remove python dependencies too from your system.
conclusion
Installing or uninstalling python is an easy process. Python was designed to be that from the beginning. You can install it in windows with a simple GUI. Or you can install it using the Ubuntu subsystem. Removing python as easy as installing it. You can uninstall it via the GUI or the terminal.
- Home
- Python How To’s
- Python Tutorials
- Python API References
Watch Now This tutorial has a related video course created by the Real Python team. Watch it together with the written tutorial to deepen your understanding: Python Basics: Setting Up Python
Installing or updating Python on your computer is the first step to becoming a Python programmer. There are a multitude of installation methods: you can download official Python distributions from Python.org, install from a package manager, and even install specialized distributions for scientific computing, Internet of Things, and embedded systems.
This tutorial focuses on official distributions, as they’re generally the best option for getting started with learning to program in Python.
In this tutorial you’ll learn how to:
- Check which version of Python, if any, is installed on your machine
- Install or update Python on Windows, macOS, and Linux
- Use Python on mobile devices like phones or tablets
- Use Python on the Web with online interpreters
No matter what operating system you’re on, this tutorial has you covered. Find your operating system below and dive in!
How to Install Python on Windows
There are three installation methods on Windows:
- The Microsoft Store
- The full installer
- Windows Subsystem for Linux
In this section, you’ll learn how to check which version of Python, if any, is installed on your Windows computer. You’ll also learn which of the three installation methods you should use. For a more comprehensive guide, check out Your Python Coding Environment on Windows: Setup Guide.
How to Check Your Python Version on Windows
To check if you already have Python on your Windows machine, first open a command-line application, such as PowerShell.
You can also use cmd.exe or Windows Terminal.
With the command line open, type in the following command and press Enter:
C:\> python --version
Python 3.8.4
Using the --version switch will show you the version that’s installed. Alternatively, you can use the -V switch:
C:\> python -V
Python 3.8.4
In either case, if you see a version less than 3.8.4, which was the most recent version at the time of writing, then you’ll want to upgrade your installation.
If you’re interested in where the installation is located, then you can use the where.exe command in cmd.exe or PowerShell:
C:\> where.exe python
C:\Users\mertz\AppData\Local\Programs\Python\Python37-32\python.exe
Note that the where.exe command will work only if Python has been installed for your user account.
What Your Options Are
As mentioned earlier, there are three ways to install the official Python distribution on Windows:
-
Microsoft Store package: The most straightforward installation method on Windows involves installing from the Microsoft Store app. This is recommended for beginner Python users looking for an easy-to-set-up interactive experience.
-
Full Installer: This approach involves downloading Python directly from the Python.org website. This is recommended for intermediate and advanced developers who need more control during the setup process.
-
Windows Subsystem for Linux (WSL): The WSL allows you to run a Linux environment directly in Windows. You can learn how to enable the WSL by reading the Windows Subsystem for Linux Installation Guide for Windows 10.
In this section, we’ll focus on only the first two options, which are the most popular installation methods in a Windows environment.
If you want to install in the WSL, then you can read the Linux section of this tutorial after you’ve installed the Linux distribution of your choice.
The two official Python installers for Windows aren’t identical. The Microsoft Store package has some important limitations.
Limitations of the Microsoft Store Package
The official Python documentation has this to say about the Microsoft Store package:
The Microsoft Store package is an easily installable Python interpreter that is intended mainly for interactive use, for example, by students. (Source)
The key takeaway here is that the Microsoft Store package is “intended mainly for interactive use.” That is, the Microsoft Store package is designed to be used by students and people learning to use Python for the first time.
In addition to targeting beginning Pythonistas, the Microsoft Store package has limitations that make it ill-suited for a professional development environment. In particular, it does not have full write access to shared locations such as TEMP or the registry.
Windows Installer Recommendations
If you’re new to Python and focused primarily on learning the language rather than building professional software, then you should install from the Microsoft Store package. This offers the shortest and easiest path to getting started with minimal hassle.
On the other hand, if you’re an experienced developer looking to develop professional software in a Windows environment, then the official Python.org installer is the right choice. Your installation won’t be limited by Microsoft Store policies, and you can control where the executable is installed and even add Python to PATH if necessary.
How to Install From the Microsoft Store
If you’re new to Python and looking to get started quickly, then the Microsoft Store package is the best way to get up and running without any fuss. You can install from the Microsoft Store in two steps.
Step 1: Open the Python App Page in the Microsoft Store
Open the Microsoft Store app and search for Python.
You’ll likely see multiple versions that you can choose to install:
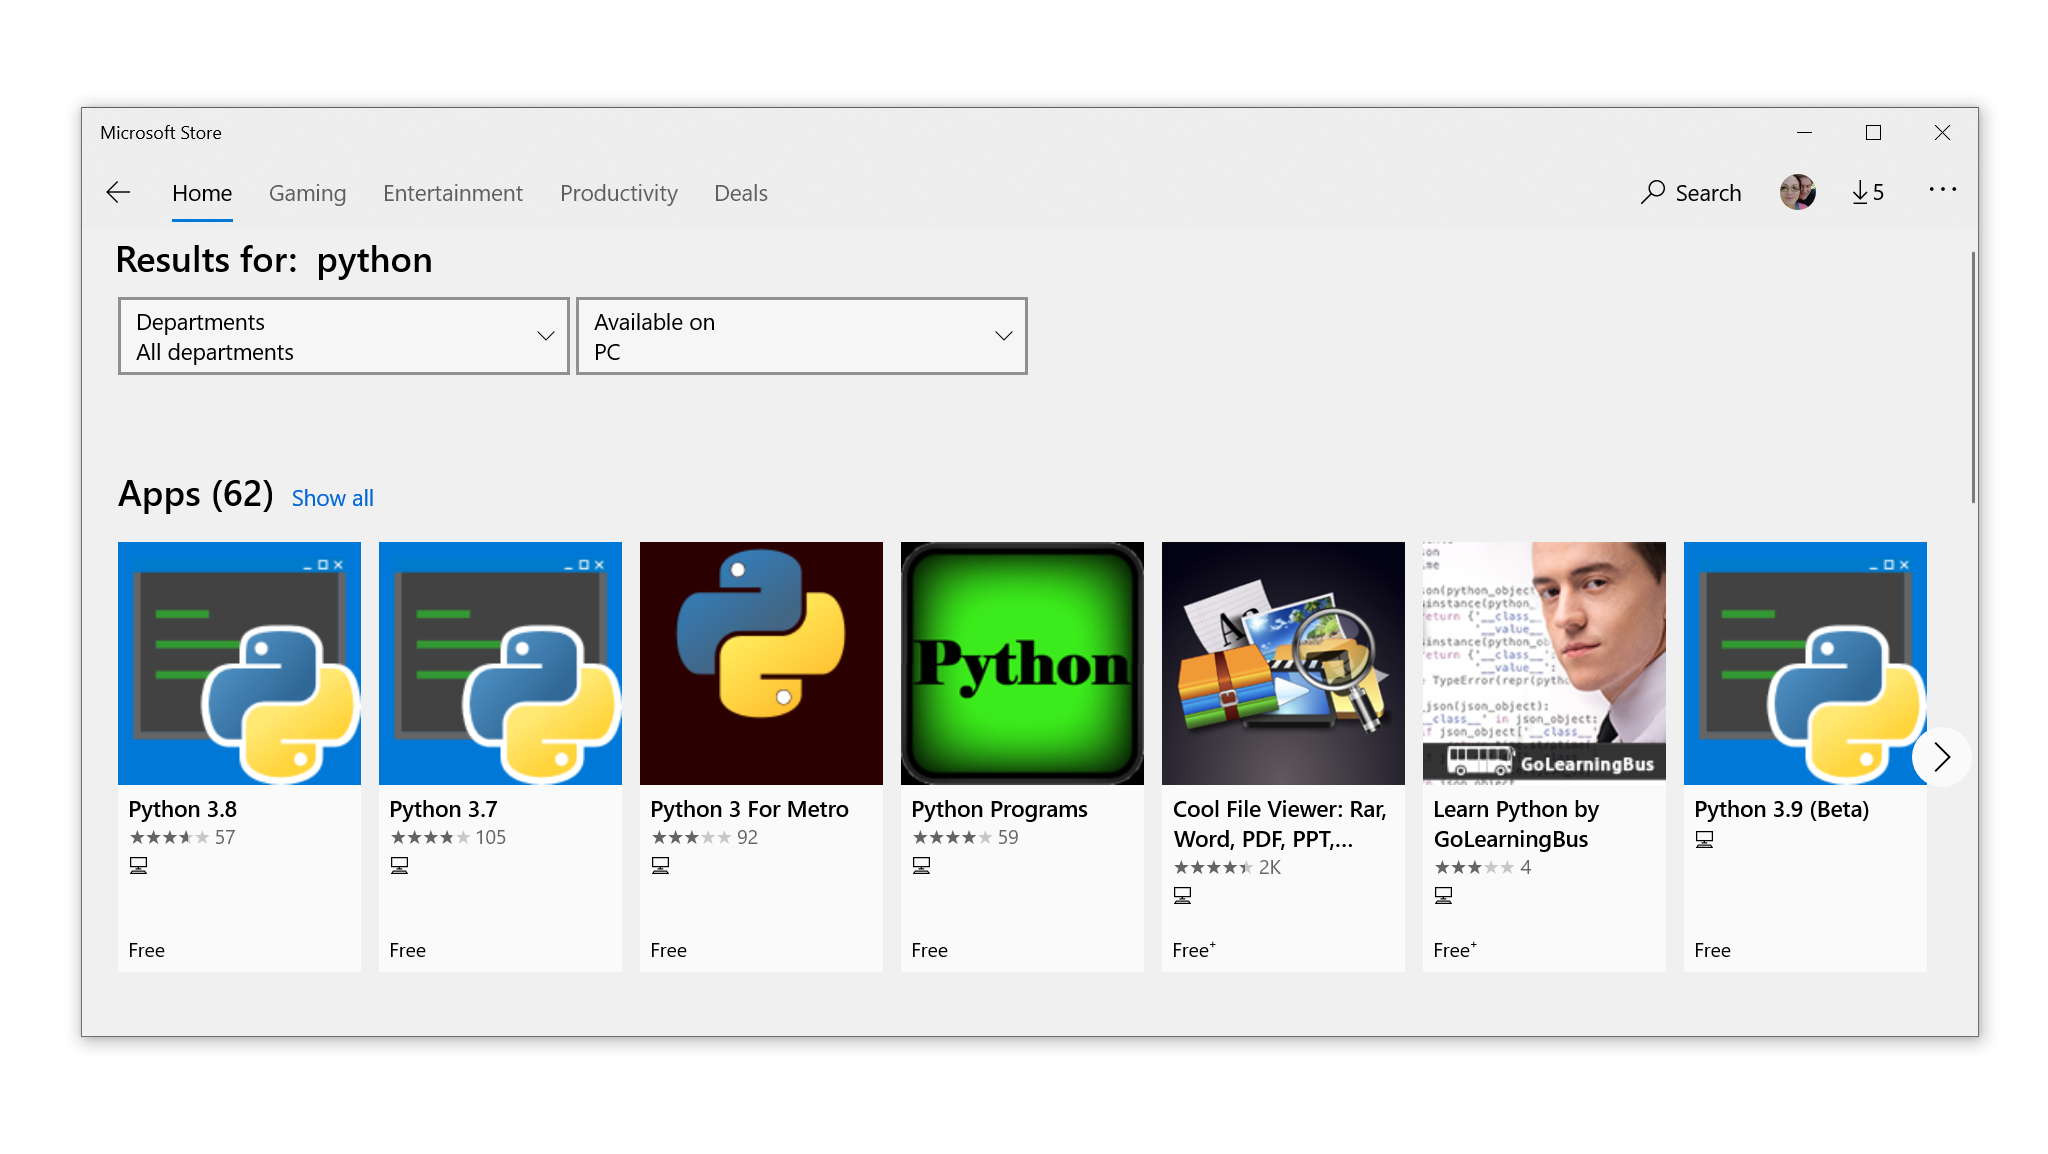
Select Python 3.8, or the highest version number you see available in the app, to open the installation page.
Alternatively, you can open PowerShell and type the following command:
If you don’t already have a version of Python on your system, then when you press Enter, the Microsoft Store will automatically launch and take you to the latest version of Python in the store.
Step 2: Install the Python App
After you’ve selected the version to be installed, follow these steps to complete the installation:
-
Click Get.
-
Wait for the application to download. When it’s finished downloading, the Get button will be replaced with a button that says Install on my devices.
-
Click Install on my devices and select the devices on which you’d like to complete the installation.
-
Click Install Now and then OK to start the installation.
-
If the installation was successful, then you’ll see the message “This product is installed” at the top of the Microsoft Store page.
Congratulations! You now have access to Python, including pip and IDLE!
How to Install From the Full Installer
For professional developers who need a full-featured Python development environment, installing from the full installer is the right choice. It offers more customization and control over the installation than installing from the Microsoft Store.
You can install from the full installer in two steps.
Step 1: Download the Full Installer
Follow these steps to download the full installer:
-
Open a browser window and navigate to the Python.org Downloads page for Windows.
-
Under the “Python Releases for Windows” heading, click the link for the Latest Python 3 Release — Python 3.x.x. As of this writing, the latest version was Python 3.8.4.
-
Scroll to the bottom and select either Windows x86-64 executable installer for 64-bit or Windows x86 executable installer for 32-bit.
If you aren’t sure whether to select the 32-bit or the 64-bit installer, then you can expand the box below to help you decide.
For Windows, you can choose either the 32-bit or the 64-bit installer. Here’s the difference between the two:
-
If your system has a 32-bit processor, then you should choose the 32-bit installer. If you attempt to install the 64-bit version on a 32-bit processor, then you’ll get an error at the beginning and the install will fail.
-
On a 64-bit system, either installer will work for most purposes. The 32-bit version will generally use less memory, but the 64-bit version performs better for applications with intensive computation.
If you’re unsure which version to pick, go with the 64-bit version.
If you have a 64-bit system and would like to switch from 64-bit Python to 32-bit (or vice versa), then you can just uninstall Python and then reinstall it by downloading the other installer from Python.org.
When the installer is finished downloading, move on to the next step.
Step 2: Run the Installer
Once you’ve chosen and downloaded an installer, run it by double-clicking on the downloaded file. A dialog box like the one below will appear:
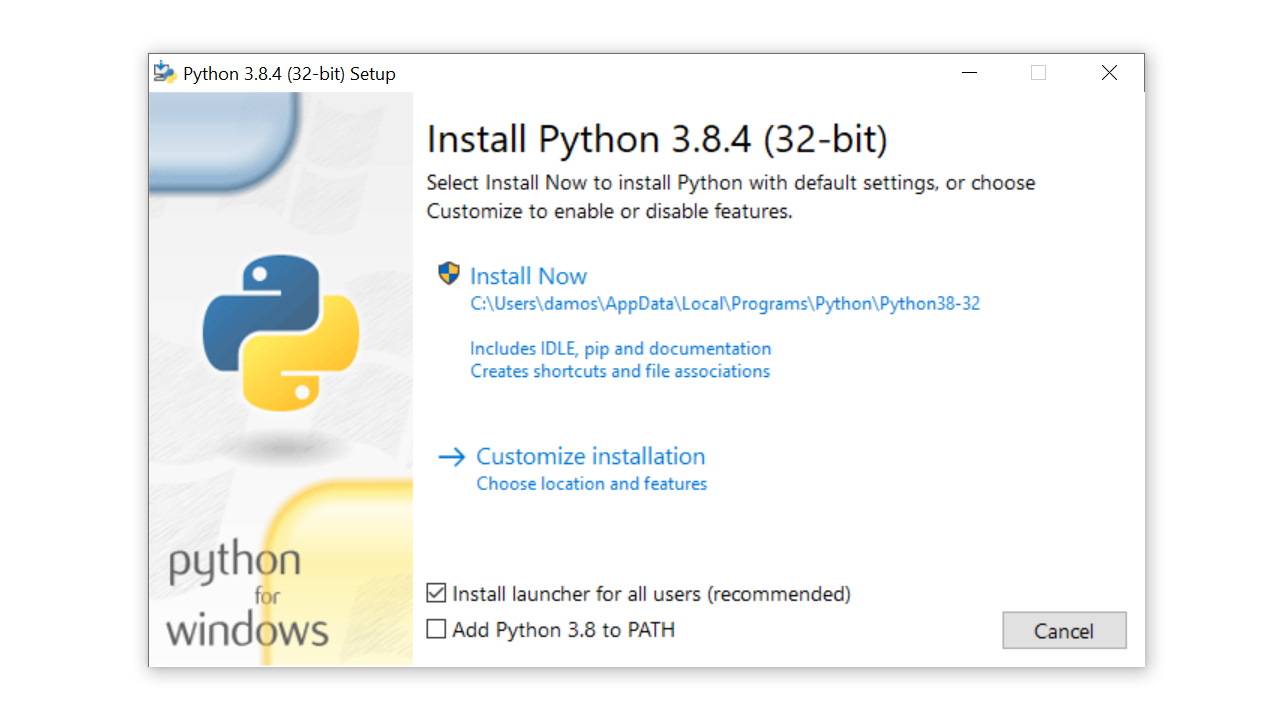
There are four things to notice about this dialog box:
-
The default install path is in the
AppData/directory of the current Windows user. -
The Customize installation button can be used to customize the installation location and which additional features get installed, including
pipand IDLE. -
The Install launcher for all users (recommended) checkbox is checked default. This means every user on the machine will have access to the
py.exelauncher. You can uncheck this box to restrict Python to the current Windows user. -
The Add Python 3.8 to
PATHcheckbox is unchecked by default. There are several reasons that you might not want Python onPATH, so make sure you understand the implications before you check this box.
The full installer gives you total control over the installation process.
Customize the installation to meet your needs using the options available on the dialog box. Then click Install Now. That’s all there is to it!
Congratulations—you now have the latest version of Python 3 on your Windows machine!
How to Install Python on macOS
Python 2 comes preinstalled on older versions of macOS. This is no longer the case for current versions of macOS, starting with macOS Catalina.
There are two installation methods on macOS:
- The official installer
- The Homebrew package manager
In this section, you’ll learn how to check which version of Python, if any, is installed on your macOS device. You’ll also learn which of the two installation methods you should use.
How to Check Your Python Version on a Mac
To check which Python version you have on your Mac, first open a command-line application, such as Terminal.
With the command line open, type in the following commands:
# Check the system Python version
$ python --version

# Check the Python 2 version
$ python2 --version

# Check the Python 3 version
$ python3 --version
If you have Python on your system, then one or more of these commands should respond with a version number.
For example, if Python 3.6.10 were already set up on your computer, then the python3 command would display that version number:
$ python3 --version
Python 3.6.10
You’ll want to get the latest version of Python if any of these conditions is true:
- None of the above commands returns a version number.
- The only version you see displayed is in the Python 2.X series.
- You have a version of Python 3 that isn’t the latest available, which was version 3.8.4 as of this writing.
What Your Options Are
There are two ways to install the official Python distribution on macOS:
-
The official installer: This method involves downloading the official installer from the Python.org website and running it on your machine.
-
The Homebrew package manager: This method involves downloading and installing the Homebrew package manager if you don’t already have it installed, and then typing a command into a terminal application.
Both the official installer and the Homebrew package manager will work, but only the official installer is maintained by the Python Software Foundation.
The distributions installed by the official installer and the Homebrew package manager aren’t identical. Installing from Homebrew has some limitations.
Limitations of Installing From Homebrew
The Python distribution for macOS available on Homebrew doesn’t include the Tcl/Tk dependency required by the Tkinter module. Tkinter is the standard library module for developing graphical user interfaces in Python and is in fact an interface for the Tk GUI toolkit, which isn’t part of Python.
Homebrew doesn’t install the Tk GUI toolkit dependency. Instead, it relies on an existing version installed on your system. The system version of Tcl/Tk may be outdated or missing entirely and could prevent you from importing the Tkinter module.
macOS Installer Recommendations
The Homebrew package manager is a popular method for installing Python on macOS because it’s easy to manage from the command line and offers commands to upgrade Python without having to go to a website. Because Homebrew is a command-line utility, it can be automated with bash scripts.
However, the Python distribution offered by Homebrew isn’t controlled by the Python Software Foundation and could change at any time. The most reliable method on macOS is to use the official installer, especially if you plan on doing Python GUI programming with Tkinter.
How to Install From the Official Installer
Installing Python from the official installer is the most reliable installation method on macOS. It includes all the system dependencies needed for developing applications with Python.
You can install from the official installer in two steps.
Step 1: Download the Official Installer
Follow these steps to download the full installer:
-
Open a browser window and navigate to the Python.org Downloads page for macOS.
-
Under the “Python Releases for Mac OS X” heading, click the link for the Latest Python 3 Release — Python 3.x.x. As of this writing, the latest version was Python 3.8.4.
-
Scroll to the bottom and click macOS 64-bit installer to start the download.
When the installer is finished downloading, move on to the next step.
Step 2: Run the Installer
Run the installer by double-clicking the downloaded file. You should see the following window:
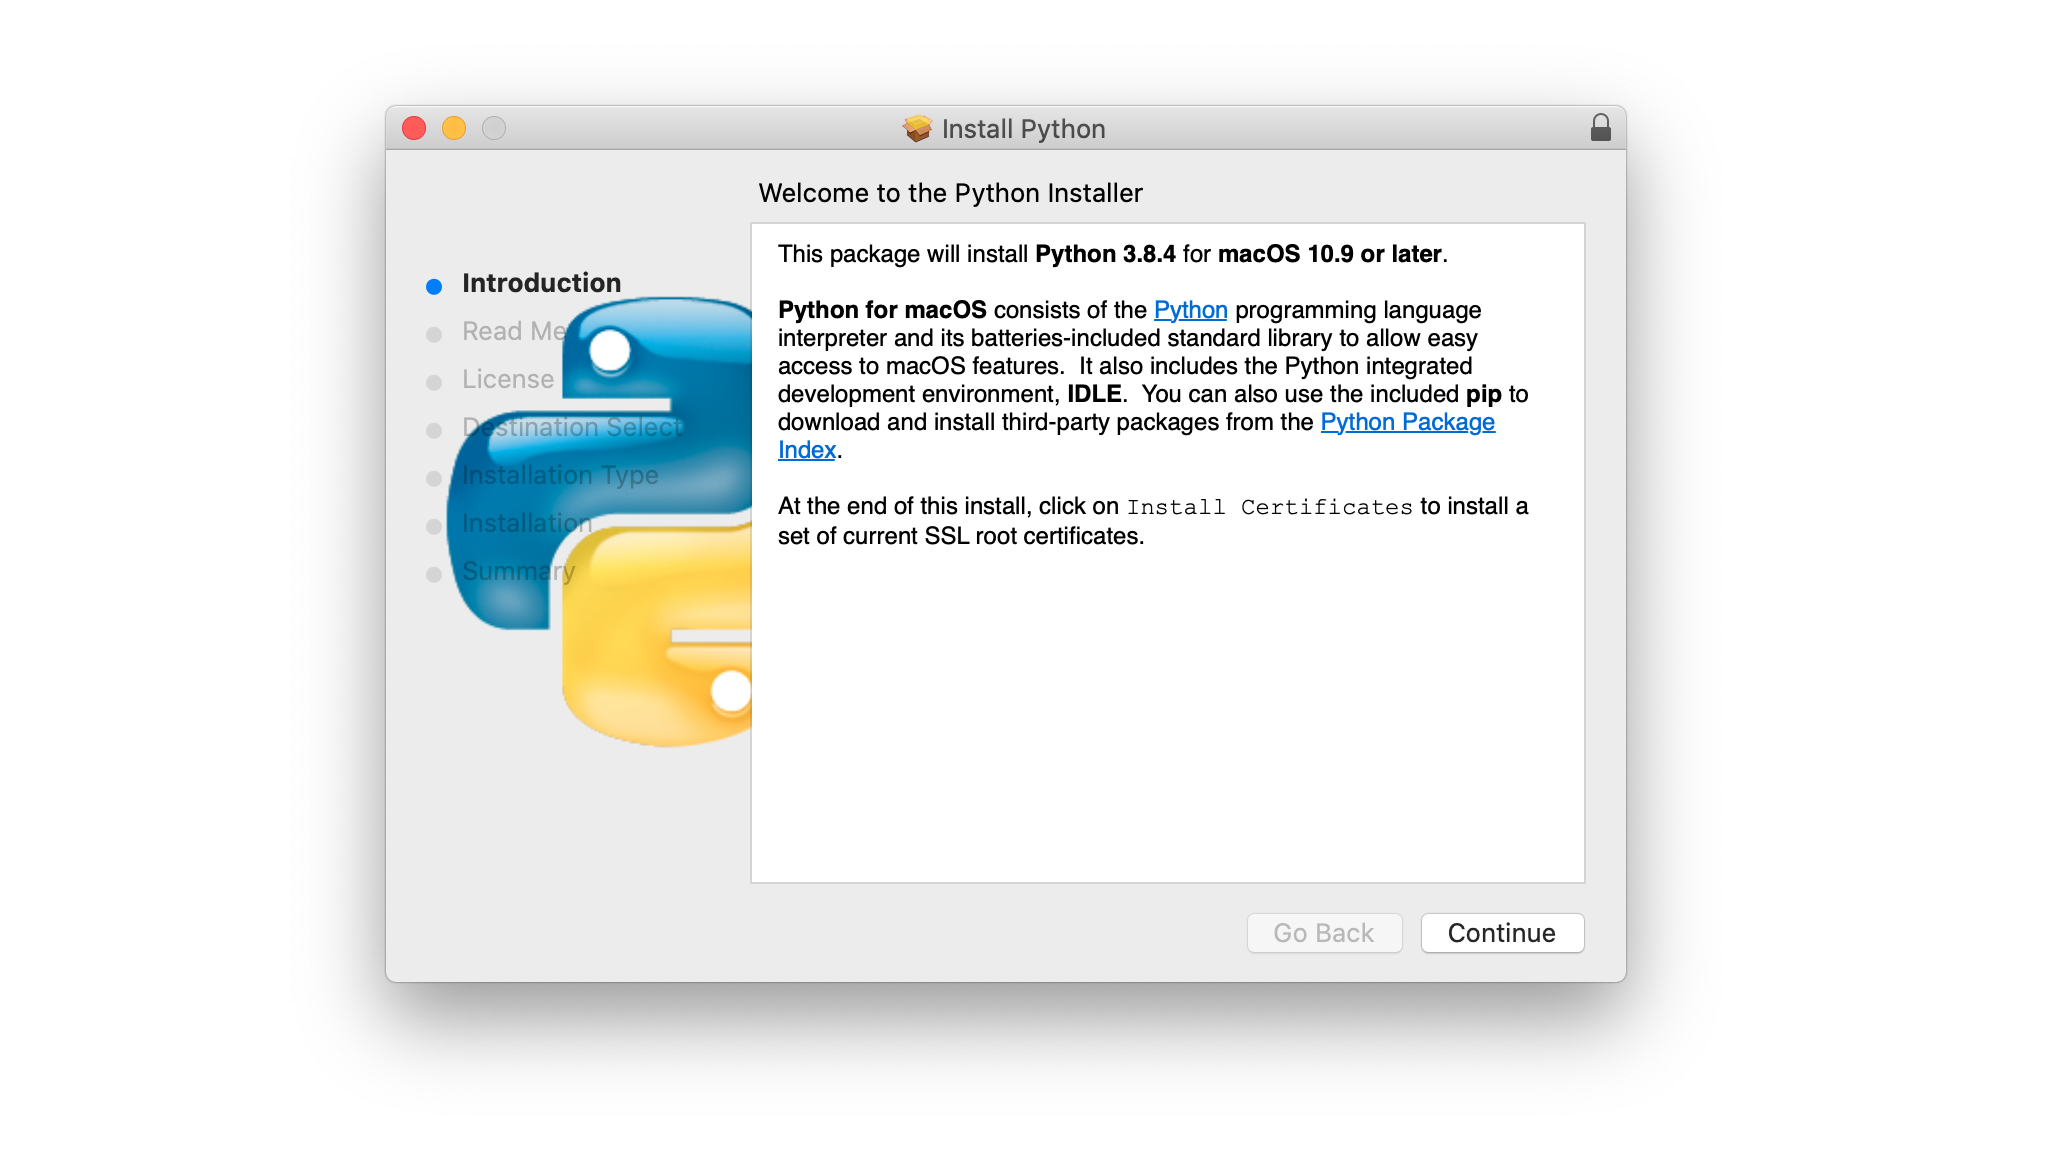
Follow these steps to complete the installation:
-
Press Continue a few times until you’re asked to agree to the software license agreement. Then click Agree.
-
You’ll be shown a window that tells you the install destination and how much space it will take. You most likely don’t want to change the default location, so go ahead and click Install to start the installation.
-
When the installer is finished copying files, double-click the Install Certificates command in the finder window to make sure your SSL root certificates are updated.
Congratulations—you now have the latest version of Python 3 on your macOS computer!
How to Install From Homebrew
For users who need to install from the command line, especially those who won’t be using Python to develop graphical user interfaces with the Tkinter module, the Homebrew package manager is a good option. You can install from the Homebrew package manager in two steps.
Step 1: Install Homebrew
If you already have Homebrew installed, then you can skip this step. If you don’t have Homebrew installed, then use the following procedure to install Homebrew:
-
Open a browser and navigate to http://brew.sh/.
-
You should see a command for installing Homebrew near the top of the page under the tile “Install Homebrew.” This command will be something like the following:
$ /bin/bash -c "$(curl -fsSL https://raw.githubusercontent.com/Homebrew/install/master/install.sh)"Highlight the command with your cursor and press Cmd+C to copy it to your clipboard.
-
Open a terminal window and paste the command, then press Enter. This will begin the Homebrew installation.
-
Enter your macOS user password when prompted.
Depending on your Internet connection, it may take a few minutes to download all of Homebrew’s required files. Once the installation is complete, you’ll end up back at the shell prompt in your terminal window.
Now that Homebrew is installed, you’re ready to install Python.
Step 2: Install Python
Follow these steps to complete the installation with Homebrew:
-
Open a terminal application.
-
Type in the following command to upgrade Homebrew:
$ brew update && brew upgrade
Installing with Homebrew is now as straightforward as running the command brew install python3. This will download and set up the latest version of Python on your machine.
You can make sure everything went correctly by testing if you can access Python from the terminal:
-
Open a terminal.
-
Type
pip3and press Enter. -
You should see the help text from Python’s
pippackage manager. If you get an error message runningpip3, then go through the install steps again to make sure you have a working installation.
Congratulations—you now have Python on your macOS system!
How to Install Python on Linux
There are two installation methods on Linux:
- Using your operating system’s package manager
- Building Python from source code
In this section, you’ll learn how to check which version of Python, if any, is on your Linux computer. You’ll also learn which of the two installation methods you should use.
How to Check Your Python Version on Linux
Many Linux distributions come packaged with Python, but it probably won’t be the latest version and may even be Python 2 instead of Python 3. You should check the version to make sure.
To find out which version of Python you have, open a terminal window and try the following commands:
# Check the system Python version
$ python --version

# Check the Python 2 version
$ python2 --version

# Check the Python 3 version
$ python3 --version
If you have Python on your machine, then one or more of these commands should respond with a version number.
For example, if you already had Python 3.6.10 on your computer, then the python3 --version command would display that version number:
$ python3 --version
Python 3.6.10
You’ll want to get the latest version of Python if your current version is in the Python 2.X series or is not the latest version of Python 3 available, which was 3.8.4 as of this writing.
What Your Options Are
There are two ways to install the official Python distribution on Linux:
-
Install from a package manager: This is the most common installation method on most Linux distributions. It involves running a command from the command line.
-
Build from source code: This method is more difficult than using a package manager. It involves running a series of commands from the command line as well as making sure you have the correct dependencies installed to compile the Python source code.
Not every Linux distribution has a package manager, and not every package manager has Python in its package repository. Depending on your operating system, building Python from source code might be your only option.
Which installation method you use mainly boils down to whether your Linux OS has a package manager and whether you need to control the details of the installation.
Linux Installation Recommendations
The most popular way to install Python on Linux is with your operating system’s package manager, which is a good choice for most users. However, depending on your Linux distribution, Python may not be available through a package manager. In this case, you’ll need to build Python from source code.
There are three main reasons that you might choose to build Python from source code:
-
You can’t download Python from your operating system’s package manager.
-
You need to control how Python gets compiled, such as when you want to lower the memory footprint on embedded systems.
-
You want to try out beta versions and release candidates of the latest and greatest version before it’s generally available.
To complete the installation on your Linux machine, find your Linux distribution below and follow the steps provided.
How to Install on Ubuntu and Linux Mint
In this section, you’ll learn how to install Python using Ubuntu’s apt package manager. If you’d like to build Python from source code, skip ahead to the How to Build Python From Source Code section.
Depending on the version of the Ubuntu distribution you run, the process for setting up Python on your system will vary. You can determine your local Ubuntu version by running the following command:
$ lsb_release -a
No LSB modules are available.
Distributor ID: Ubuntu
Description:    Ubuntu 16.04.4 LTS
Release:        16.04
Codename:       xenial
Follow the instructions below that match the version number you see under Release in the console output:
-
Ubuntu 18.04, Ubuntu 20.04 and above: Python 3.8 doesn’t come by default on Ubuntu 18.04 and above, but it is available in the Universe repository. To install version 3.8, open a terminal application and type the following commands:
$ sudo apt-get update
$ sudo apt-get install python3.8 python3-pip
Once the installation is complete, you can run Python 3.8 with the
python3.8command andpipwith thepip3command. -
Linux Mint and Ubuntu 17 and below: Python 3.8 isn’t in the Universe repository, so you need to get it from a Personal Package Archive (PPA). For example, to install from the “deadsnakes” PPA, use the following commands:
$ sudo add-apt-repository ppa:deadsnakes/ppa
$ sudo apt-get update
$ sudo apt-get install python3.8 python3-pip
Once the installation is complete, you can run Python 3.8 with the
python3.8command and runpipwith thepip3command.
Congratulations! You now have Python 3 set up on your machine!
How to Install on Debian Linux
Before you can install Python 3.8 on Debian, you’ll need to install the sudo command. To install it, execute the following commands in a terminal:
$ su
$ apt-get install sudo
$ sudo vim /etc/sudoers
After that, open the /etc/sudoers file using the sudo vim command or your favorite text editor. Add the following line of text to the end of the file, replacing your_username with your actual username:
your_username ALL=(ALL) ALL
Now you can skip ahead to the How to Build Python From Source Code section to finish installing Python.
How to Install on openSUSE
Building from source is the most reliable way to set up Python on openSUSE. To do that, you’ll need to install the development tools, which can be done in YaST via the menus or by using zypper:
$ sudo zypper install -t pattern devel_C_C
This might take a while to complete as it installs over 150 packages. Once it’s completed, skip ahead to the How to Build Python From Source Code section.
How to Install on CentOS and Fedora
Python 3.8 isn’t available in the CentOS and Fedora repositories, so you’ll have to build Python from source code. Before you compile Python, though, you need to make sure your system is prepared.
First, update the yum package manager:
Once yum finishes updating, you can install the necessary build dependencies with the following commands:
$ sudo yum -y groupinstall "Development Tools"
$ sudo yum -y install gcc openssl-devel bzip2-devel libffi-devel
When everything is finished installing, skip ahead to the How to Build Python From Source Code section.
How to Install on Arch Linux
Arch Linux is fairly diligent about keeping up with Python releases. It’s likely you already have the latest version. If not, use the following command to update Python:
When Python is finished updating, you should be all set!
How to Build Python From Source Code
Sometimes your Linux distribution doesn’t have the latest version of Python, or maybe you just want to be able to build the latest, greatest version yourself. Here are the steps you need to take to build Python from source:
Step 1: Download the Source Code
To start, you need to get the Python source code. Python.org makes this fairly straightforward. If you go to the Downloads page, then you’ll see the latest source for Python 3 at the top. Just make sure you don’t grab Legacy Python, Python 2!
When you select the Python 3 version, you’ll see a “Files” section at the bottom of the page. Select Gzipped source tarball and download it to your machine. If you prefer a command-line method, you can use wget to download the file to your current directory:
$ wget https://www.python.org/ftp/python/3.8.4/Python-3.8.4.tgz
When the tarball finishes downloading, there are a few things you’ll need to do to prepare your system for building Python.
Step 2: Prepare Your System
There are a few distro-specific steps involved in building Python from scratch. The goal of each step is the same on all distros, but you might need to translate to your distribution if it doesn’t use apt-get:
-
First, update your package manager and upgrade your packages:
$ sudo apt-get update $ sudo apt-get upgrade -
Next, make sure you have all of the build requirements installed:
# For apt-based systems (like Debian, Ubuntu, and Mint)
$ sudo apt-get install -y make build-essential libssl-dev zlib1g-dev \
       libbz2-dev libreadline-dev libsqlite3-dev wget curl llvm \
       libncurses5-dev libncursesw5-dev xz-utils tk-dev

# For yum-based systems (like CentOS)
$ sudo yum -y groupinstall "Development Tools"
$ sudo yum -y install gcc openssl-devel bzip2-devel libffi-devel
It’s fine if you already have some of the requirements installed on your system. You can execute the above commands and any existing packages will not be overwritten.
Now that your system is ready to go, it’s time to start building Python!
Step 3: Build Python
-
Once you have the prerequisites and the TAR file, you can unpack the source into a directory. Note that the following command will create a new directory called
Python-3.8.3under the one you’re in:$ tar xvf Python-3.8.4.tgz $ cd Python-3.8.4 -
Now you need to run the
./configuretool to prepare the build:$ ./configure --enable-optimizations --with-ensurepip=installThe
enable-optimizationsflag will enable some optimizations within Python to make it run about 10 percent faster. Doing this may add twenty or thirty minutes to the compilation time. Thewith-ensurepip=installflag will installpipbundled with this installation. -
Next, you build Python using
make. The-joption simply tellsmaketo split the building into parallel steps to speed up the compilation. Even with the parallel builds, this step can take several minutes: -
Finally, you’ll want to install your new version of Python. You’ll use the
altinstalltarget here to avoid overwriting the system Python. Since you’re installing into/usr/bin, you’ll need to run as root:
It might take a while to finish installation. Once it’s done, you can verify that Python is set up correctly.
Step 4: Verify Your Installation
Test that the python3.8 --version command returns the latest version:
$ python3.8 --version
Python 3.8.4
If you see Python 3.8.4, then you’re all set!
If you have some extra time on your hands, you can also run the test suite to make sure everything is working properly on your system.
To run the test suite, type the following command:
You’ll probably want to find something else to do for a while, as your computer will be running tests for some time. If all the tests pass, then you can be confident that your brand-new Python build is working as expected!
How to Install Python on iOS
The Pythonista app for iOS is a full-fledged Python development environment that you can run on your iPhone or iPad. It features a Python editor, technical documentation, and an interpreter all rolled into a single app.
Pythonista is surprisingly fun to use. It’s a great little tool when you’re stuck without a laptop and want to work on your Python skills on the go. It comes with the complete Python 3 standard library and even includes full documentation that you can browse offline.
To set up Pythonista, you need to download it from the iOS app store.
How to Install Python on Android
If you have an Android tablet or phone and want to practice Python on the go, there are several options available. The one that we found most reliably supports Python 3.8 is Pydroid 3.
Pydroid 3 features an interpreter that you can use for REPL sessions, and it also allows you to edit, save, and execute Python code.
You can download and install Pydroid 3 from the Google Play store. There is a free version and also a paid Premium version that supports code prediction and code analysis.
Online Python Interpreters
If you want to try out the examples in this tutorial without setting up Python on your machine, then there are several websites that offer an online Python interpreter:
- Python.org Online Console
- Repl.it
- Python Fiddle
- Trinket
- Python Anywhere
These cloud-based Python interpreters may not be able to execute some of the more complex examples in this tutorial, but they’re adequate for running most of the code and may be a nice way to get started. More information on using these sites is presented in the next tutorial in this series.
Conclusion
Congratulations! You now have access to the latest version of Python for your system. Your Python journey is just beginning.
In this tutorial you’ve learned how to:
- Check which version of Python, if any, is installed on your system
- Install the latest version of Python on Windows, macOS, and Linux
- Use Python on mobile devices like phones or tablets
- Use Python on the Web with online interpreters
You’re now ready to get started programming in Python! Be sure to share your progress and any questions you may have in the comments below.
Watch Now This tutorial has a related video course created by the Real Python team. Watch it together with the written tutorial to deepen your understanding: Python Basics: Setting Up Python
Научим детей и подростков программировать на Python
Поможем освоить самый востребованный язык программирования в мире и создать первые реальные проекты
Как скачать Python и выбрать версию
У вас сразу же может возникнуть вопрос: а для чего вообще скачивать и устанавливать Python на свой компьютер, если есть множество различных онлайн-интерпретаторов? И действительно, онлайн-интерпретаторов существует огромное множество, но они больше подходят для тестирования самых простых программ, а для полноценной работы с инструментами Python их недостаточно. Именно поэтому стоит установить Python на свой компьютер.
Первым делом нужно скачать установщик Python с официального сайта. Не рекомендуем скачивать установщик с других ресурсов — так можно легко подцепить вирусы. Пользуйтесь только официальным сайтом.
Что же насчёт версии? Существует множество различных версий Python, и разработчики не прекращают спорить о том, какая из них лучше. Однако, если вы планируете в будущем работать в сфере IT, то лучше выбрать последнюю версию Python. В нашем примере мы скачаем последнюю версию на момент написания статьи — 3.10.6.
На страничке Downloads официального сайта вы увидите большую жёлтую кнопку «Download Python 3.10.6». Чтобы скачать установщик Python, нужно нажать на неё.
Стартуй в программировании прямо сейчас
Реши свою первую настоящую задачу на JavaScript и поделись крутым результатом с друзьями

Как установить Python
Теперь разберемся, как правильно установить Python на разные операционные системы.
Windows
Как установить Python на Windows 10? Для начала запустите скачанный ранее установщик. После этого на экране появится такое окно:
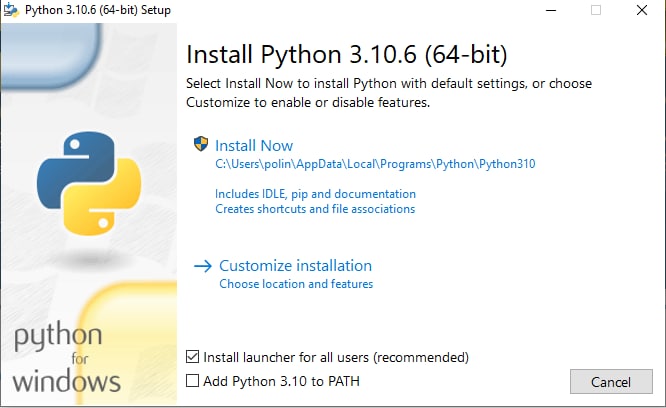
Нажмите Install Now и разрешите приложению вносить изменения на устройстве. Дождитесь, пока выполнится установка необходимых пакетов. После завершения установки должно появиться следующее окно, которое сообщит об успешной установке Python:

Как проверить, что вы всё сделали правильно и Python установлен корректно? Для этого откройте командную строку с помощью комбинации клавиш Win+R, в появившемся окне наберите cmd и нажмите OK (или клавишу Enter):
Теперь в открывшейся командной строке наберите py или python и нажмите Enter. Если установка прошла корректно, то в командной строке вы увидите версию Python и номер сборки, а также Python предложит несколько вариантов знакомства с собой.
Если вам нужно узнать только версию Python, то в командной строке введите py —version. При корректной установке на экране вы увидите текущую версию языка.
Как установить Python на Windows 7?
Для более ранних версий Windows установить Python можно по той же инструкции, так как принципиальных различий в установке не будет.
MacOS
Установка Python на MacOS происходит немного иным образом. Сначала установите Homebrew — это бесплатная открытая система для управления программными проектами. Она упростит установку программного обеспечения на MacOS. Для её установки наберите в терминале следующую команду:
/usr/bin/ruby -e "$(curl -fsSL https://raw.githubusercontent.com/Homebrew/install/master/install)"
Теперь можно приступить к установке Python. Для этого в терминале введите команду:
brew install python3
Чтобы проверить, что установка Python прошла корректно, в терминале нужно написать:
python3 --version
В результате вы должны получить сообщение с версией установленного Python.
Выберите идеального наставника по программированию
15 000+ проверенных преподавателей со средним рейтингом 4,8. Учтём ваш график и цель обучения

Как начать работать с Python
Мы установили Python, но пока он может работать только через командную строку. Для начинающих такой способ не очень удобен, так как для запуска программы нужно будет написать в командной строке:
-
py <полное имя файла> — для Windows;
-
python <полное имя файла> — для MacOS.
Под полным именем файла имеется в виду полный путь до файла (то есть диск, папка и название самого файла).
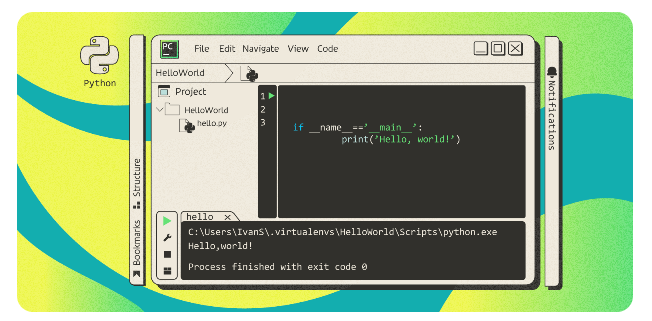
Для примера рассмотрим программу, которая выводит «Hello, world!» на экран. Запишем её в файл hello.py, который сохраним на диске D. Теперь для запуска этого файла нужно записать в командной строке или терминале следующую строку:
-
py D:\hello.py — для Windows;
-
python D:\hello.py — для MacOS.
Результатом работы будет выведенная на экран строка «Hello, world!».
Из-за таких неудобств вместе с Python обычно устанавливают IDE — среду разработки Python-программ. В ней удобнее писать код, запускать и отлаживать его. Также можно довольно просто сохранить написанную программу, нажав на соответствующую кнопку. Посмотрим, как установить такое ПО на примере Visual Studio Code.
Установка и подключение Visual Studio Code
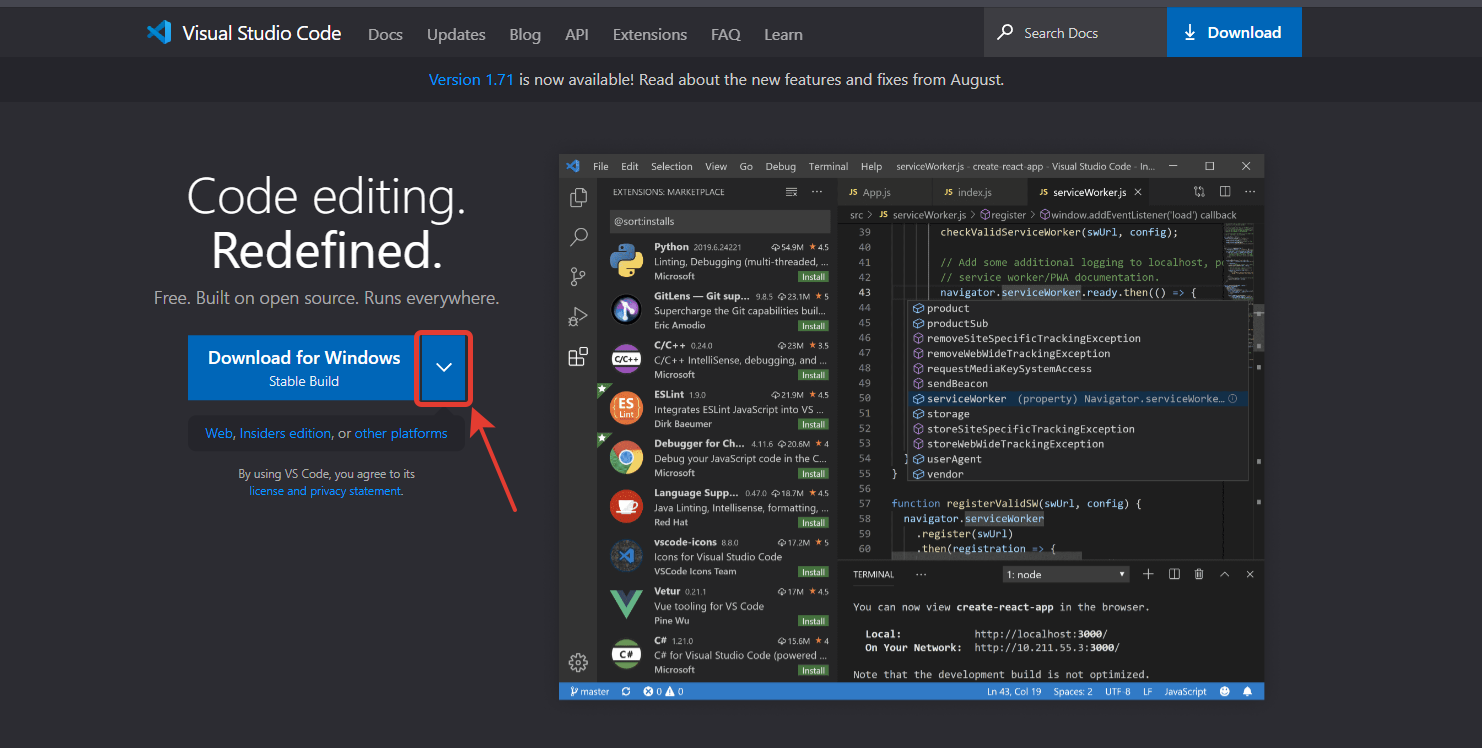
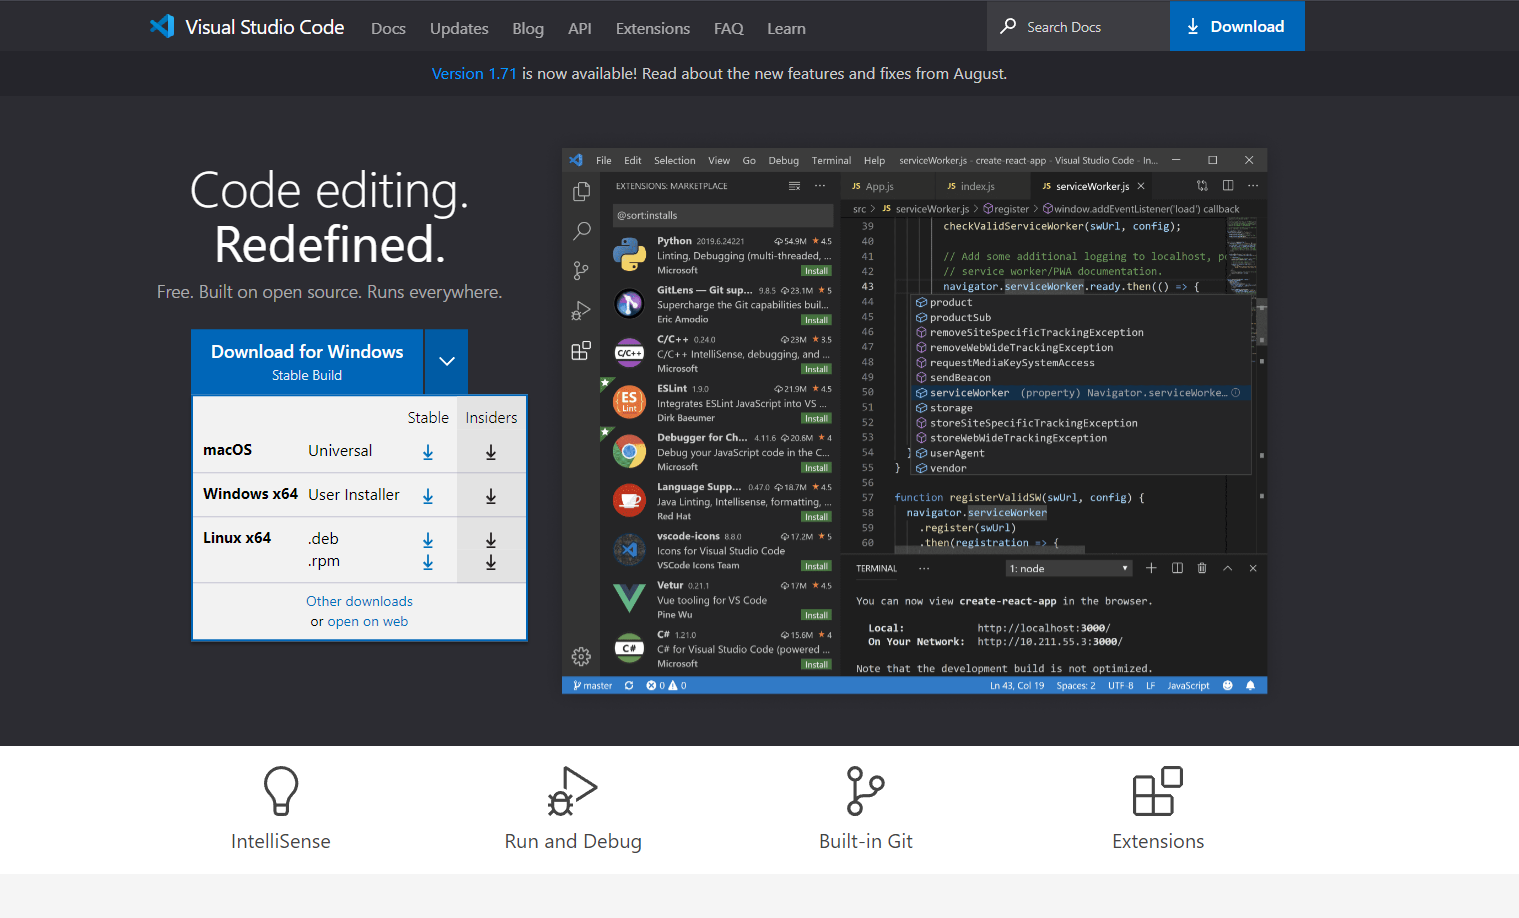
Для установки редактора нужно перейти на официальный сайт. На главной странице нужно нажать на стрелочку рядом с большой синей кнопкой, выбрать свою операционную систему и нажать на синюю стрелочку для скачивания установщика.
После скачивания программы нужно запустить установщик и следовать инструкциям: принять соглашение, выбрать папку для установки (можно оставить папку по умолчанию), проставить все галочки и нажать кнопку «Установить». После завершения установки поставьте галочку в поле «Открыть Visual Studio Code» для того, чтобы сразу запустить Visual Studio Code.
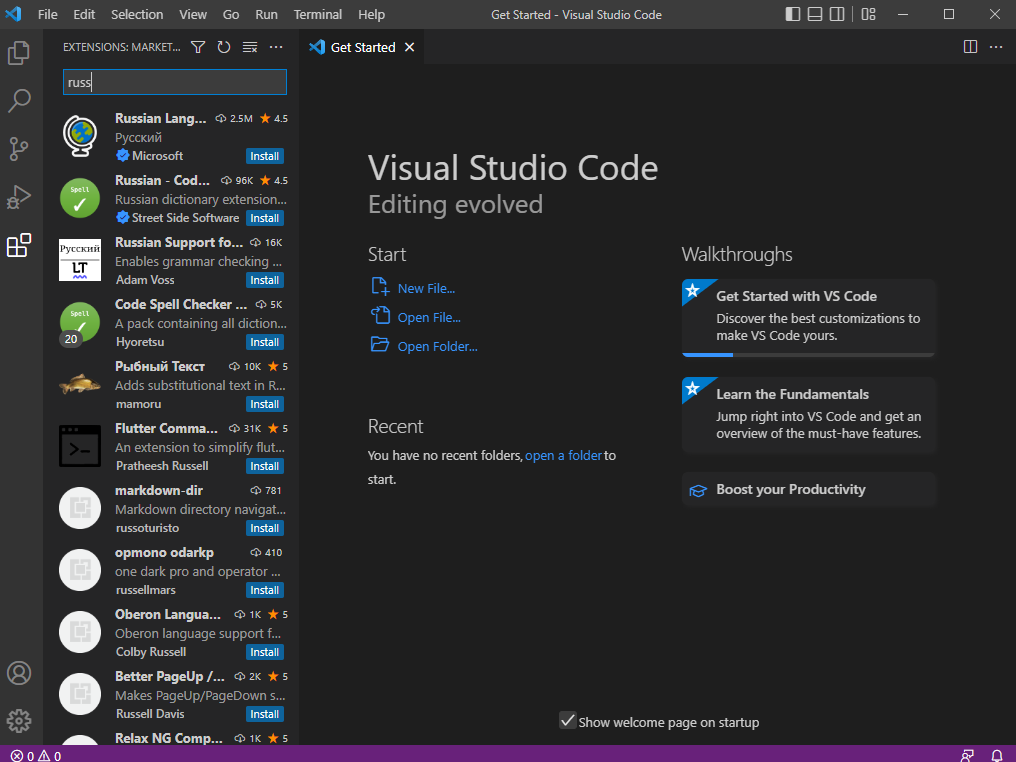
Чтобы было проще работать с редактором, установим русский язык. Для этого нужно нажать на нижний значок с кубиками в меню слева и в поисковой строке ввести Russian:
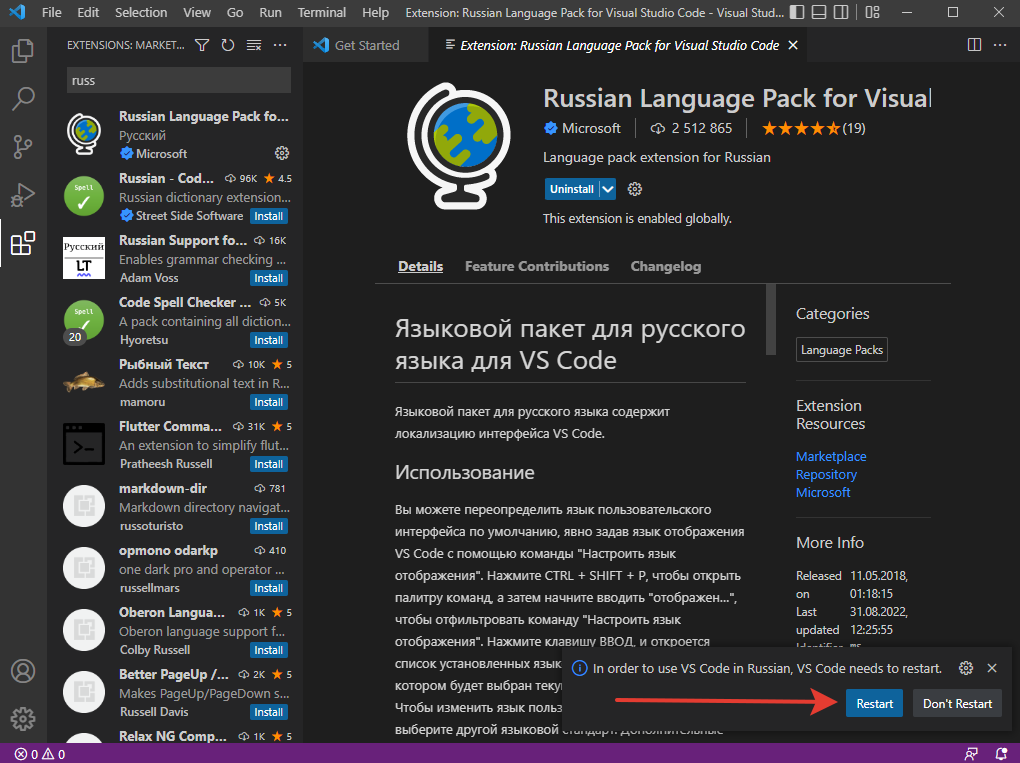
Установите первый пакет. Для этого нужно нажать синюю кнопку Install. После установки потребуется перезагрузить редактор, для этого в левом нижнем углу нужно нажать кнопку Restart.
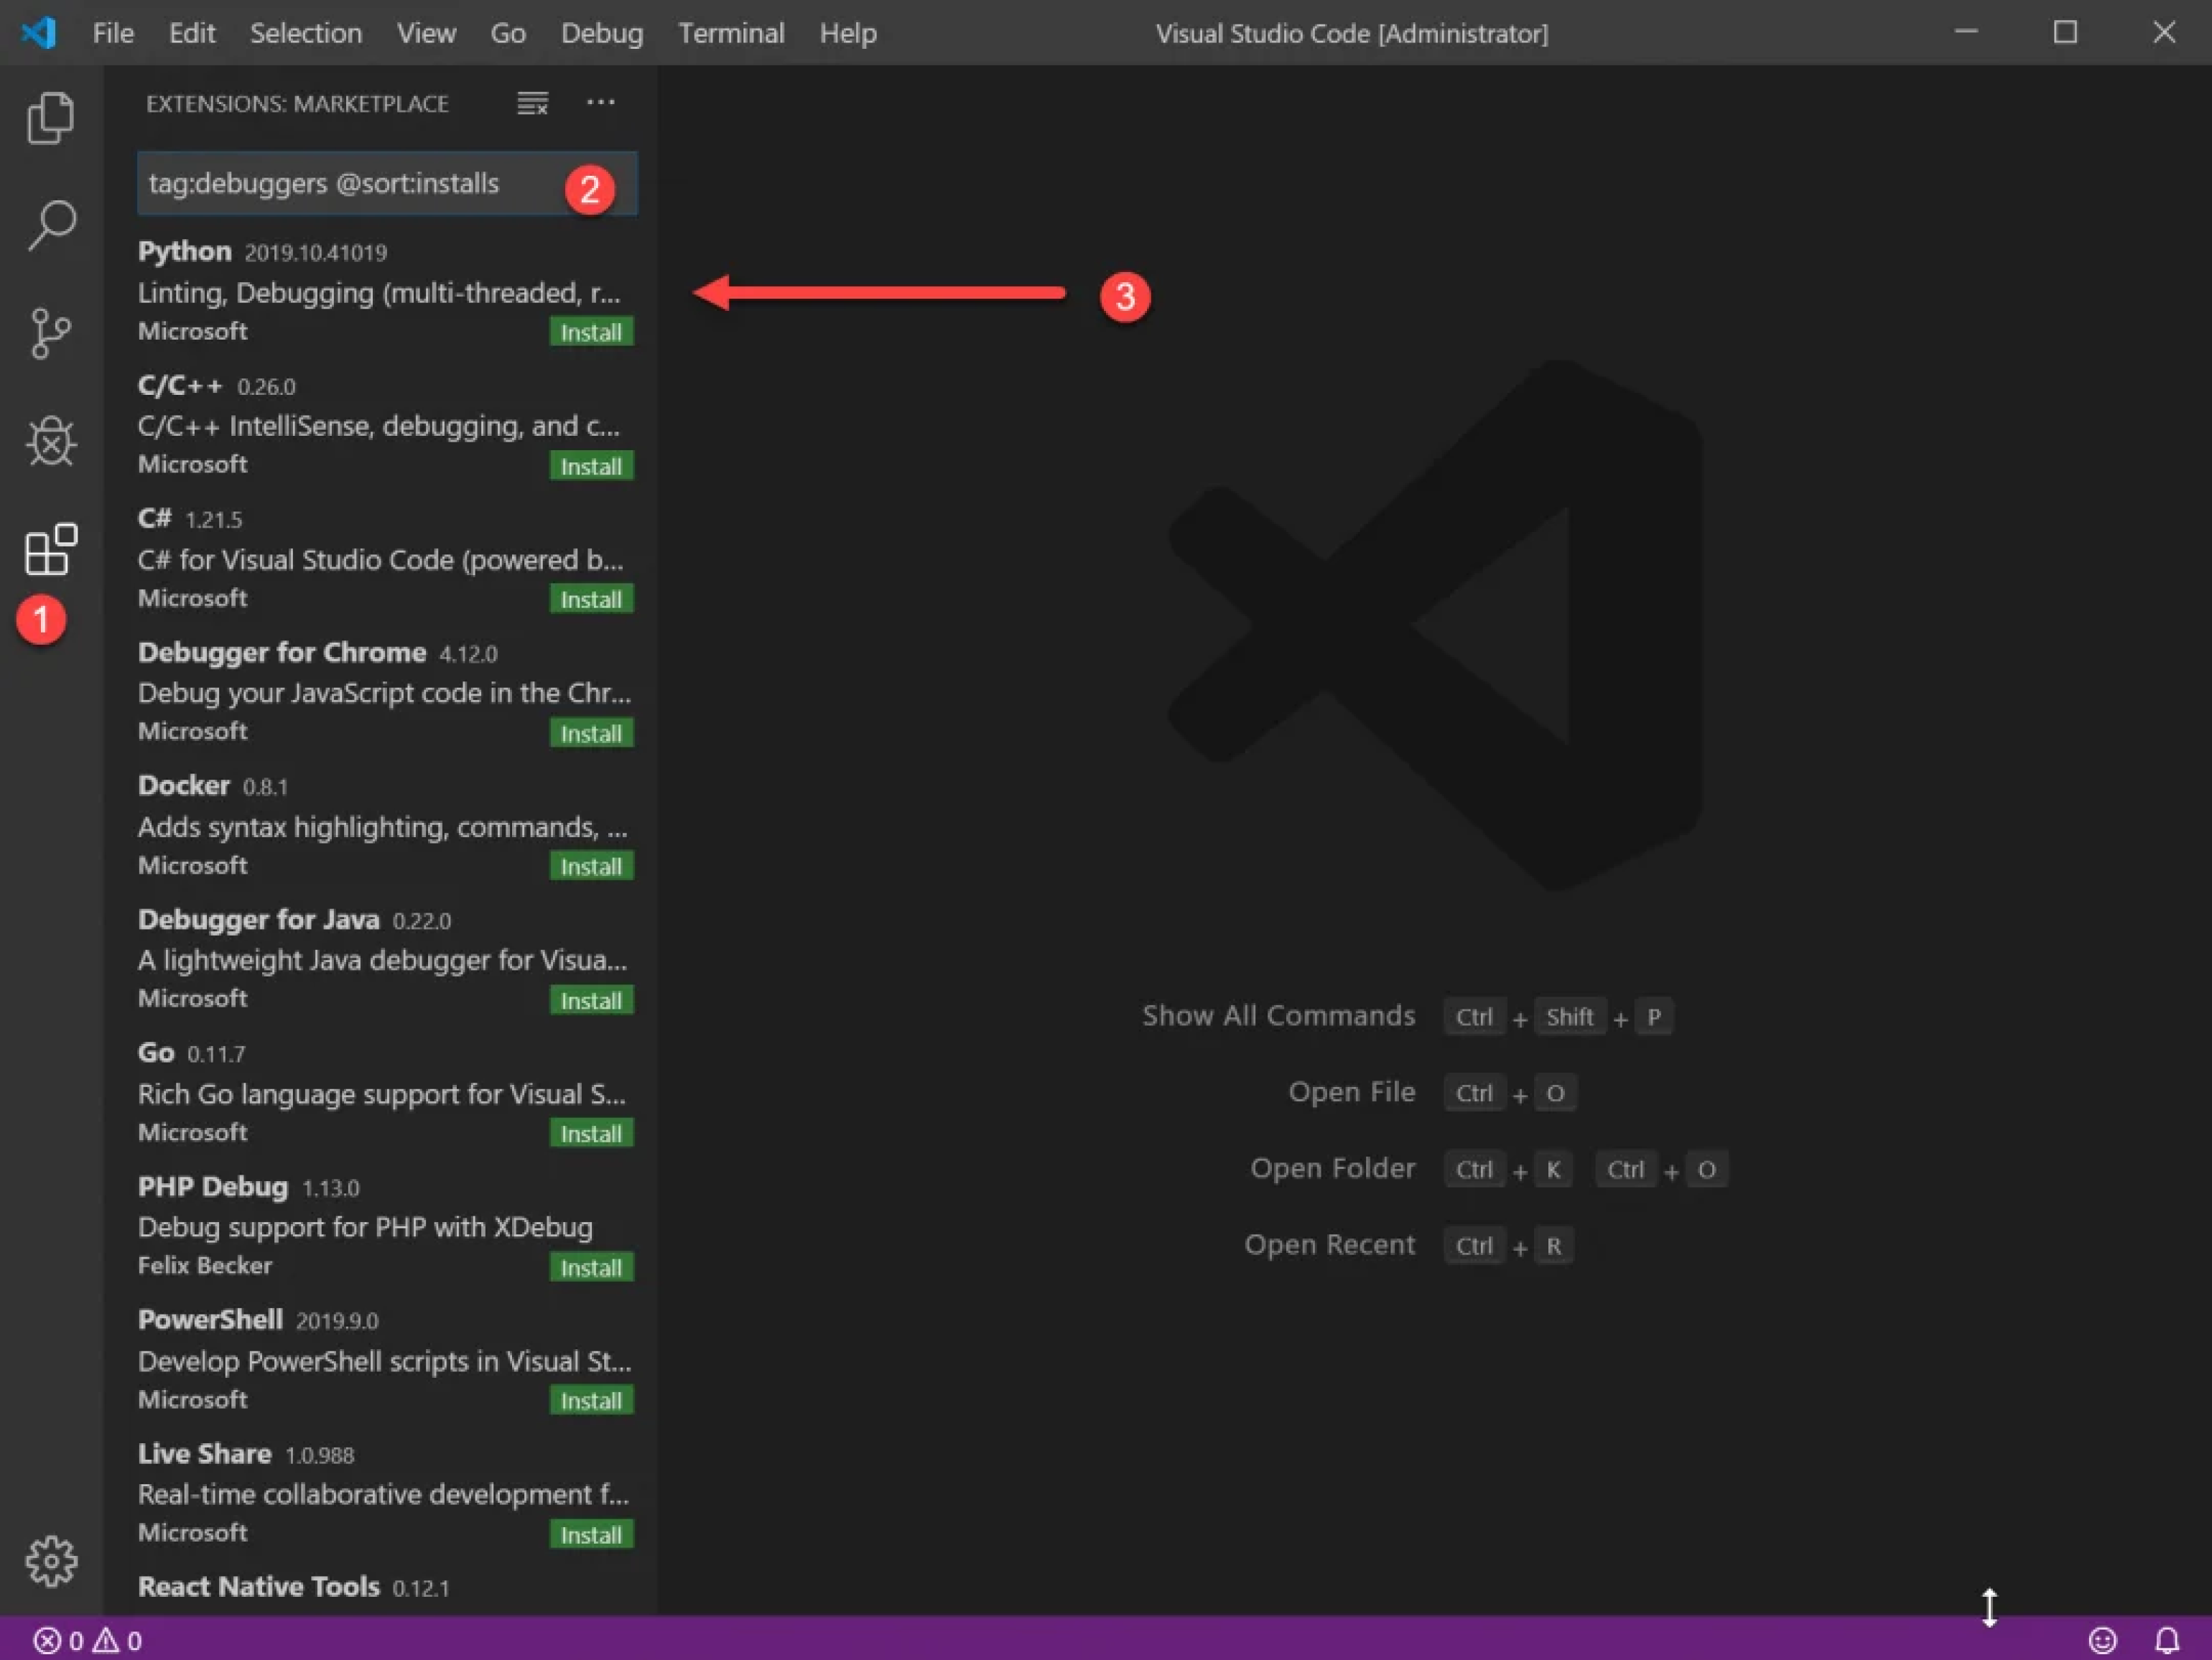
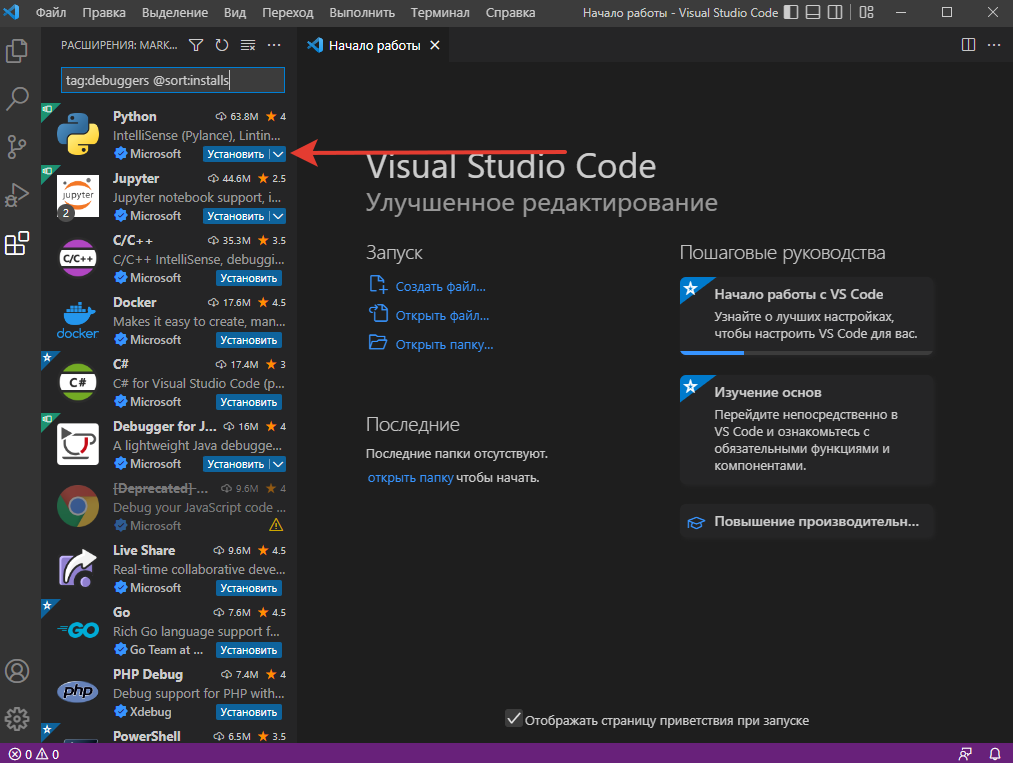
Теперь ориентироваться в редакторе будет проще! Для работы с Python-файлами нужно научить Visual Studio Code понимать и запускать их. Нажмите на тот же значок и в поисковой строке введите tag:debuggers @sort:installs. В результатах поиска нужно найти Python и нажать на кнопку «Установить»:
То же самое нужно проделать для установки подсветки синтаксиса: напишите в поисковой строке ext:py и установите расширение MagicPython. Подсветка нужна для комфортного визуального восприятия различных кусков кода. После установки всех необходимых расширений перезапустите Visual Studio Code.
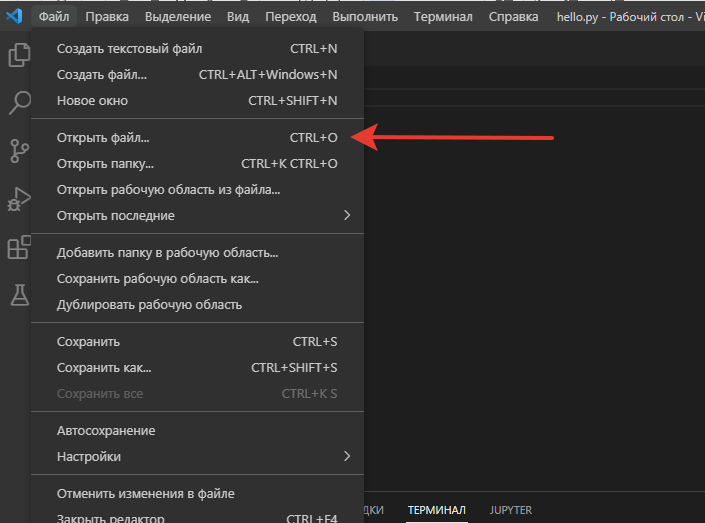
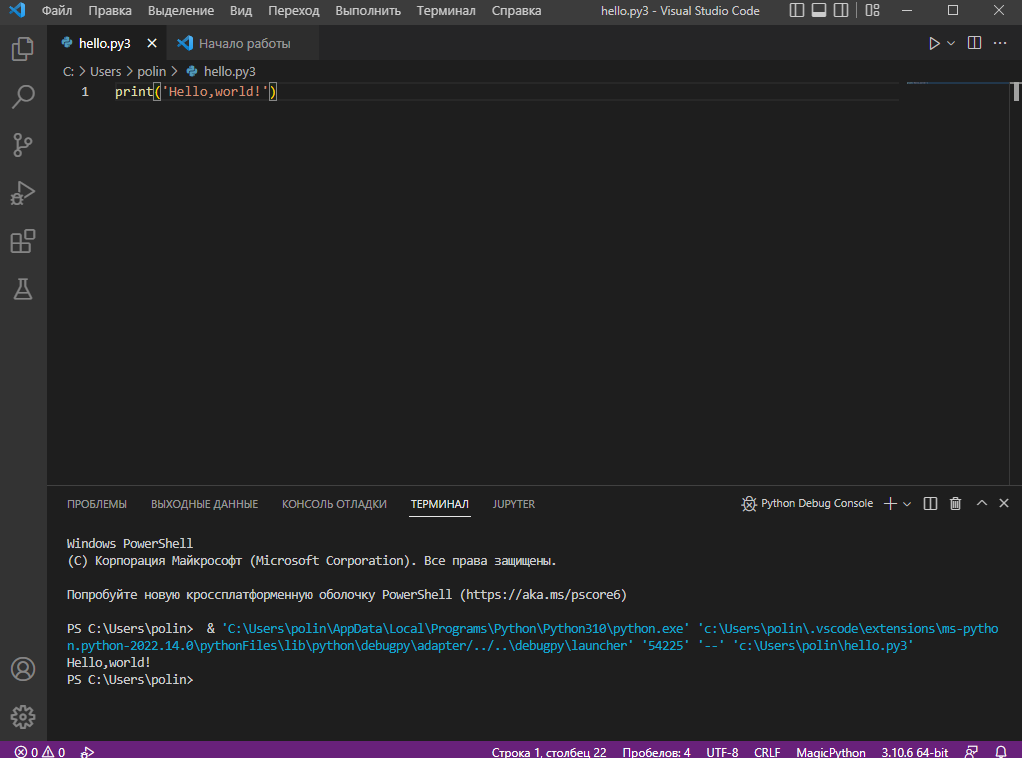
Теперь для примера откроем файл hello.py и запустим его. Для этого в левом верхнем углу выберите «Файл» и нажмите «Открыть файл…».
После открытия файл нужно запустить. Для этого нажмите клавишу F5 или в меню сверху выберите «Выполнить» и нажмите «Запустить отладку». Во всплывающем окне нужно выбрать, с чем работать, в нашем случае это «файл Python».
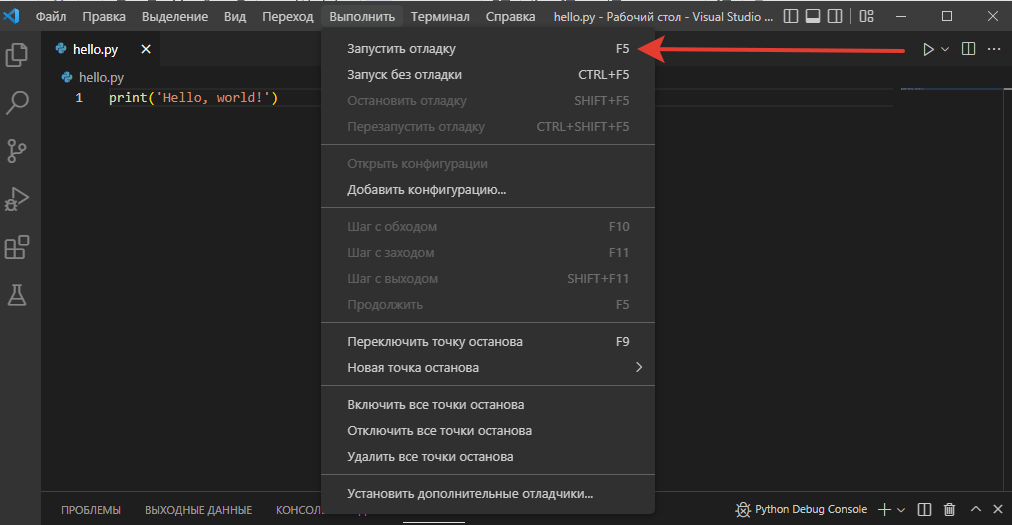
В итоге у нас получилось установить редактор кода с подсветкой синтаксиса, в котором можно с лёгкостью создавать файлы, редактировать и запускать код, а также получать результат его работы.
Если вы хотите ещё ближе познакомиться с этим прекрасным языком программирования и научиться писать программы разного уровня сложности, то приходите на курсы по Python в онлайн-школу Skysmart Pro!