Probably you’re enjoying your video games, however, suddenly your game crashes. As a result, you see this nightmare — a blue screen with a code including dxgmms2.sys. Probably you may see the error code one of these:
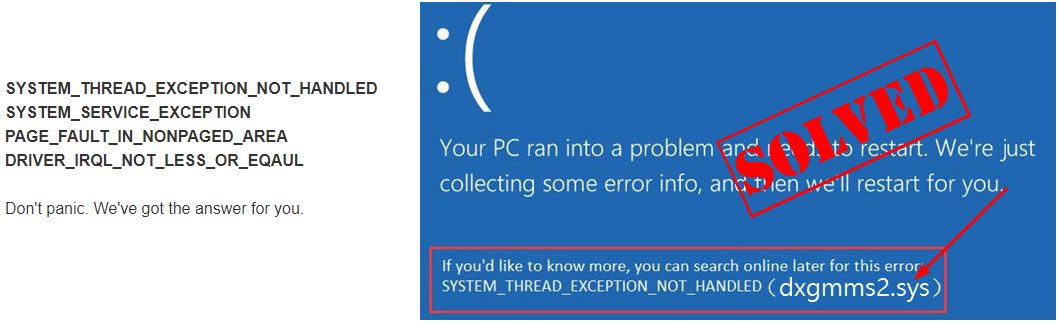
4 easy solutions to fix dxgmms2.sys blue screen error:
- Do a clean install of your graphics card driver
- Disable hardware acceleration
- Repair system files
- Reset or reinstall Windows
IMPORTANT: You need to log into Windows on the problem computer to try these solutions. If you can’t log into Windows due to the error, restart it in Safe Mode, then try these solutions.
Solution 1: Do a clean install of your graphics card driver
This dxgmms2.sys blue screen error could be probably caused by an old, corrupted graphics card driver on your Windows 10. You can probably solve it by updating your graphics card driver.
Part 1: Uninstall your graphics card driver
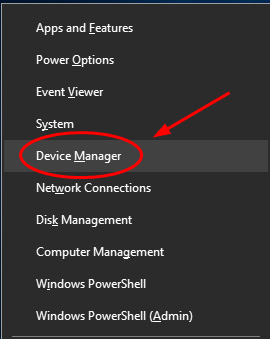
1) On your keyboard, press the Windows logo key ![]() and X (at the same time) to invoke the quick-access menu.
and X (at the same time) to invoke the quick-access menu.
2) Then click Device Manager.
3) Right-click your graphics card under the Display adapters section. Then click Uninstall device.
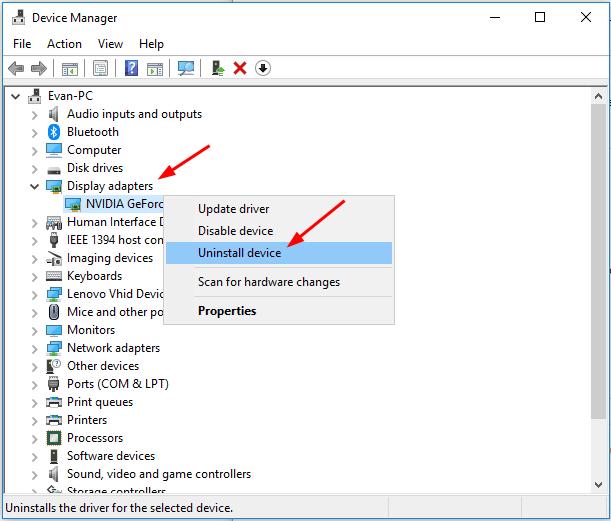
4) Click Yes if asked to confirm.
5) Reboot your computer to take effect. Check to see if the blue screen is gone.
Part 2: Download and install the latest graphics card driver
You have two alternative ways to get the latest graphics card driver: manually and automatically.
Manually download and install the latest graphics card driver – You can update your graphics card driver manually by going to the graphics card manufacturer’s website, like NVIDIA, AMD, Intel, and searching for the most recent correct driver. Be sure to choose only drivers that are compatible with your variant of Windows 10.
Automatically update your graphics card driver – If you don’t have the time, patience or computer skills to update your graphics card driver manually, you can, instead, do it automatically with Driver Easy. Driver Easy will automatically recognize your system and find the correct driver for your exact graphics card, and your variant of Windows 10, and it will download and install them correctly:
1) Download and install Driver Easy.
2) Run Driver Easy and click the Scan Now button. Driver Easy will then scan your computer and detect any problem drivers.

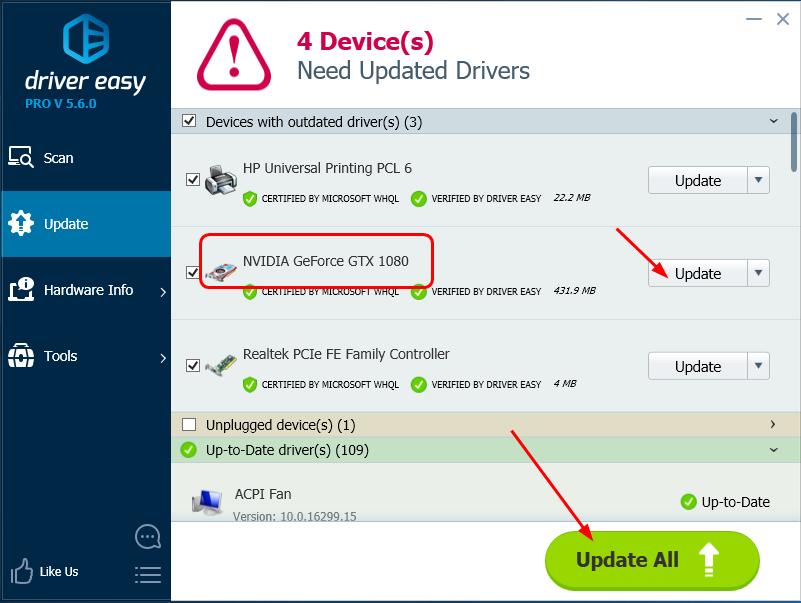
3) Click the Update button next to the flagged graphics card driver to automatically download and install the correct version of that driver (you can do this with the FREE version).
Or click Update All to automatically download and install the correct version of all the drivers that are missing or out of date on your system. (This requires the Pro version which comes with full support and a 30-day money back guarantee. You’ll be prompted to upgrade when you click Update All.)
4) After updating drivers, please restart your computer to make the new drivers take effect. Check to see if the blue screen is gone.
Solution 2: Disable hardware acceleration
The hardware acceleration feature is widely used to maximize performance. But it may cause some errors, too. dxgmms2.sys blue screen error is the one. So we can disable this feature to try to solve the blue screen error.
Follow these:
In Windows 10, we don’t have access to change hardware acceleration in Settings. But we can disable hardware acceleration through editing Registry.
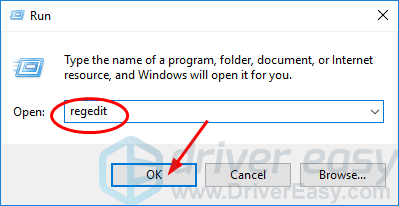
1) On your keyboard, press the Windows logo key ![]() and R (at the same time) to invoke the Run box.
and R (at the same time) to invoke the Run box.
2) Type regedit and click OK.
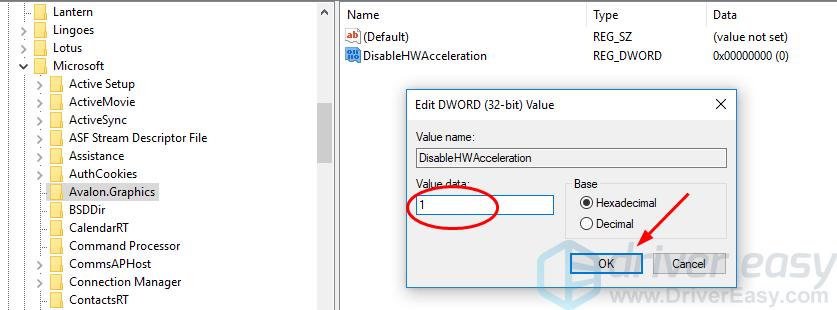
3) Go to HKEY_CURRENT_USER > Software > Microsoft > Avalon.Graphics.
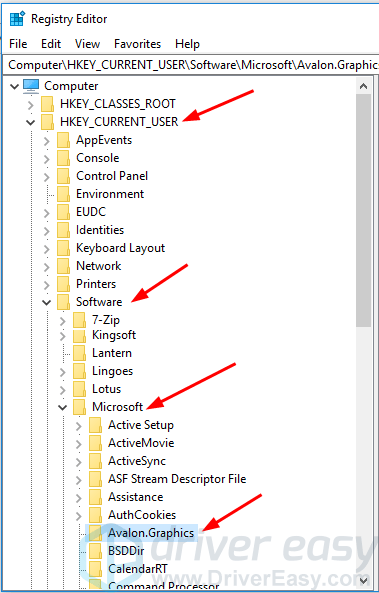
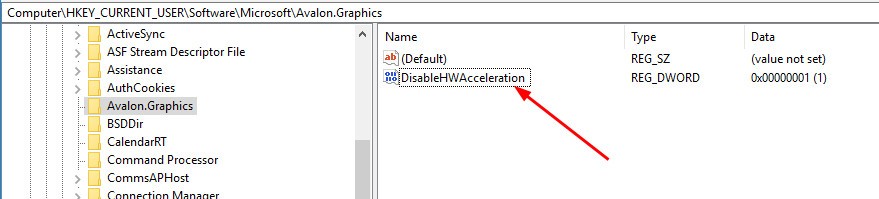
4) Find DisableHWAcceleration on the right pane.
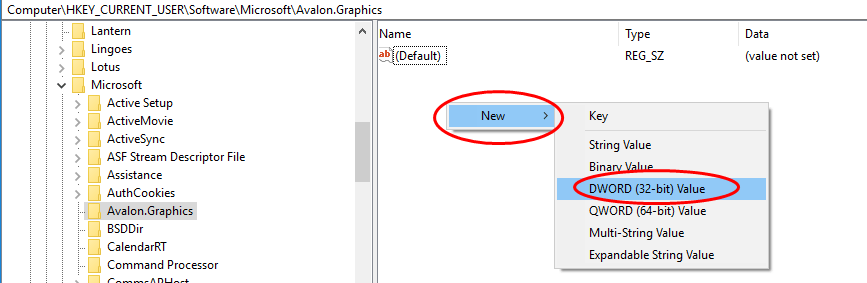
Note: If you don’t see DisableHWAcceleration, follow to create one:
Right-click on the blank area on the right pane and click New > DWORD (32-bit) Value and name it DisableHWAcceleration.
5) Double-click on DisableHWAcceleration and set its value to 1 to disable hardware aceleration on your Windows 10. Click OK to save the setting.
6) Reboot your Windows 10 to see if the blue screen shows again.
Solution 3: Repair system files
The dxgmms2.sys Blue Screen Error on Windows 10 may be related to system files. When the system files were broken or corrupted, it may cause a Blue screen issue.
There are 2 ways to solve it. Here’s how:
- Option 1- Automatically (Recommended)
Use a repair tool to check various areas in your computer to determine the cause of Windows common issues. It will deal with issues related to system errors, critical system files and find the right fix for you. - Option 2 – Manually
System File Checker is a built-in tool to check for corrupt, damaged system files and manage to restore them if there’re any. However, this tool can only diagnose major system files, and won’t deal with damaged DLL, Windows Registry key, etc.
Option 1 – Automatically (Recommended)
Fortect is a computer repair software that can diagnose problems on your computer and fix them immediately.
It is tailored to your specific system and is working in a private and automatic way. It will first check hardware-related issues to identify problems, and then security issues, and finally it detects programs that crash, missing system files. Once complete, it will find a solution to your specific problem.
- Download and install Fortect.
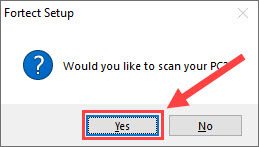
- Open Fortect and click Yes to run a free scan of your PC.

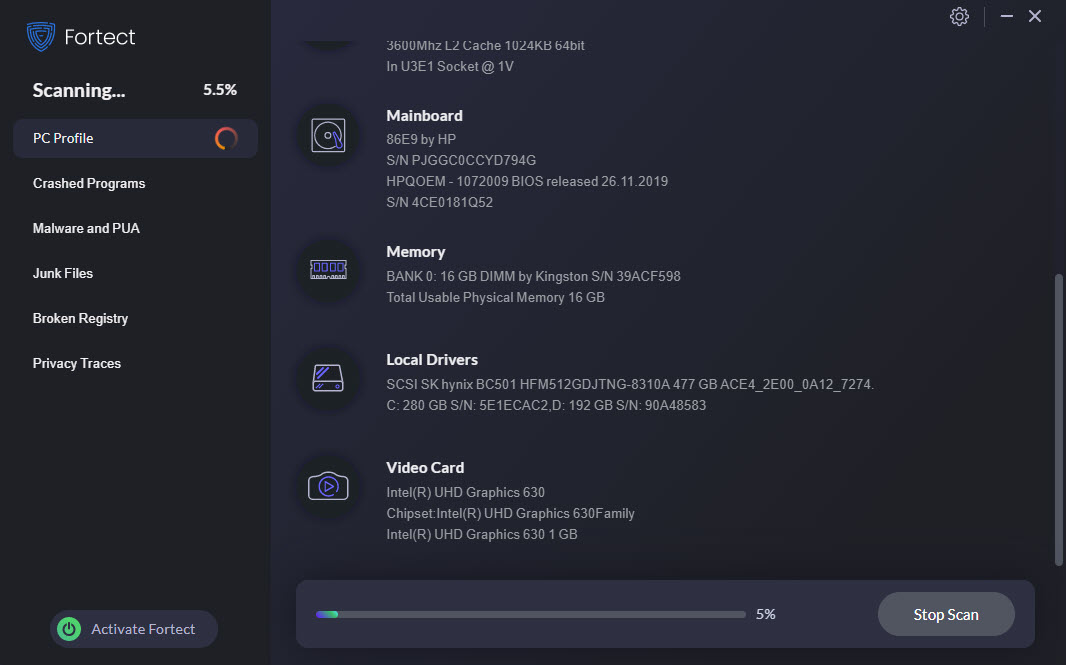
- Fortect will scan your computer thoroughly. This may take a few minutes.

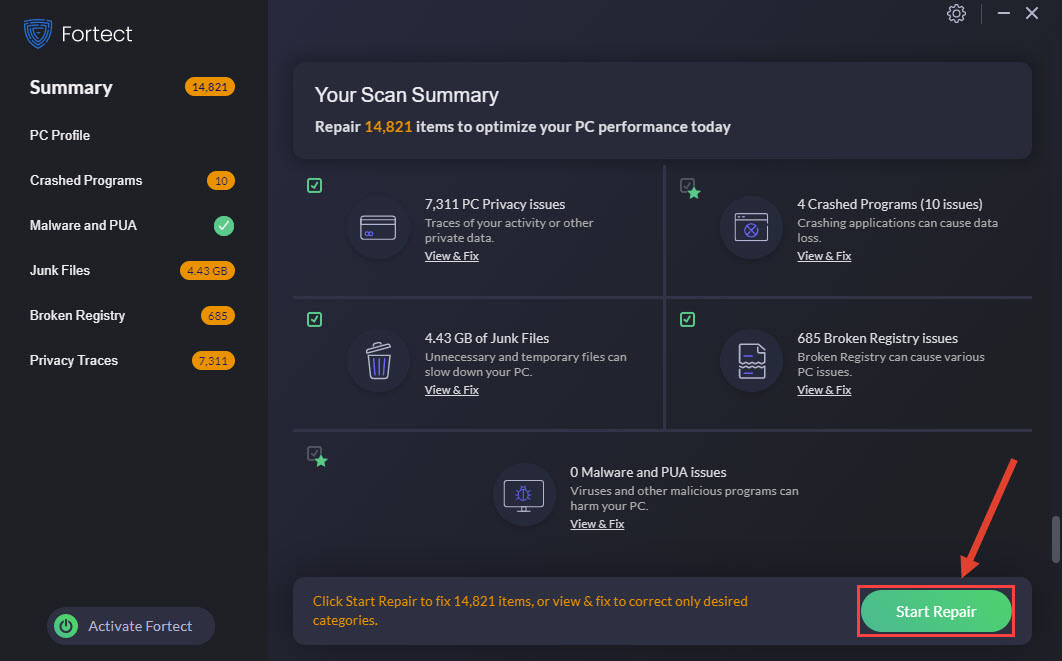
- Once done, you’ll see a detailed report of all the issues on your PC. To fix them automatically, click START REPAIR. This requires you to purchase the full version. But don’t worry. If Fortect doesn’t solve the issue, you can request a refund within 60 days.

The Pro version of Fortect comes with 24/7 technical support. If you need any assistance, please contact Fortect support:
Email: support@fortect.com
Option 2 – Manually
1) On your keyboard, press the Windows logo key and the R key at the same time to invoke the Run box.
2) Type cmd and press Shift+Ctrl+Enter together on your keyboard to open Command Prompt in the administrator mode. 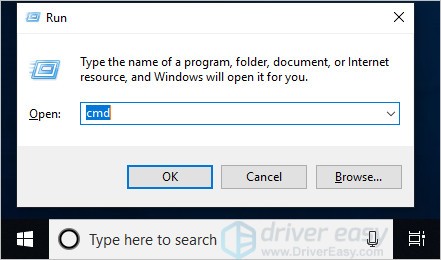
Note: Do NOT click OK or just press the Enter key as that won’t allow you to open Command Prompt in the administrator mode.
3) Type sfc /scannow (or copy-paste) and press Enter. Then wait for the verification is 100% complete. 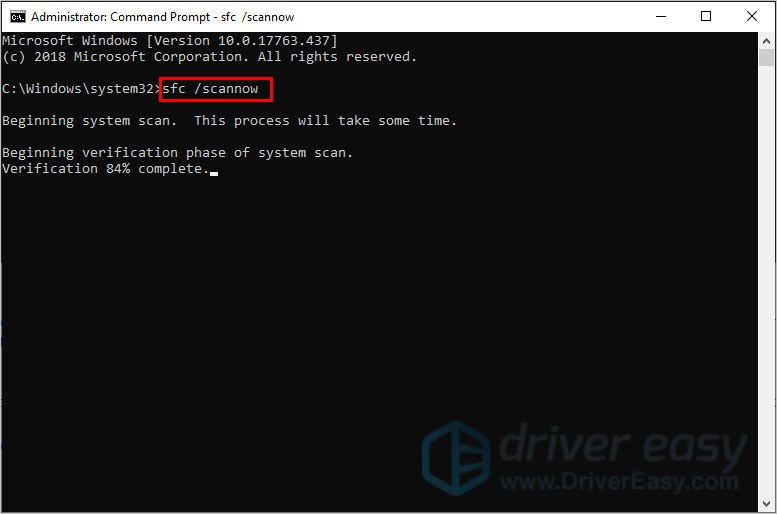
4) Restart your computer to check the blue screen issue is fixed or not.
If the result indicates there are broken files but SFC can’t fix them, you can turn to Deployment Image Servicing and Management (DISM) Tool for deeper examination and repair.
Solution 4: Reset or reinstall Windows
If all else fails, you may have to reset Windows, or maybe even reinstall it together. We all know reinstalling will delete all the data on your hard drive, you have to back up all your important files before doing it.
However, with Fortect, there’s no need for lengthy back-ups, support phone calls, or risk to your personal data. It can reset Windows to the state exactly when it was just installed without affecting third-party software.
But treat these options as a last resort, because they both take quite a long time.
Игры – это ресурсоемкая задача для любого компьютера. В особенности требуется мощное оборудование для запуска новых игр, которые полагаются на высококачественную графику. Игровые ПК обычно оснащаются большим объемом оперативной памяти, мощным многоядерным процессором и дорогой видеокартой. Но даже всего этого недостаточно, чтобы не столкнуться с различными ошибками. Синий экран является кошмаром для каждого геймера, особенно когда возникает на регулярной основе. В некоторых случаях эти проблемы перестают возникать сами по себе, но есть и эффективные решения.

С ошибкой PAGE_FAULT_IN_NONPAGED_AREA (dxgmms2.sys) обычно сталкиваются в ходе игры, но иногда появляется при работе с любым приложением. Похоже, эта неполадка является эксклюзивной для Windows 10 в конфигурациях ПК с видеокартами Nvidia. Коды остановки системы, вызываемые этим драйвером:

Самое неприятное в том, что эта ошибка возникает случайным образом, что приводит к потере несохраненных данных в игре, документе и т.д.
Переустановка драйвера видеокарты
Синий экран с кодом остановки dxgmms2.sys возникает только на конфигурациях ПК с графическими устройствами Nvidia в Windows 10. Пакеты обновлений системы иногда включают видеодрайвера, которые из-за несовместимости с новыми видеокартами Nvidia приводят к нестабильности в работе ОС и сбоям.
Откройте Панель управления (нажмите Win + R, впишите «control panel»). В правом верхнем углу переключите просмотр на крупные или мелкие значки и перейдите в раздел «Устройства и принтера».
Кликните правой кнопкой мыши на значок компьютера и выберите «Параметры установки устройств».
Будут предложены два варианта: следует ли Windows загружать драйверы автоматически или нет. Нажмите «Нет, предоставить возможность выбора». Выберите «Никогда не устанавливать драйверы из Центра обновления WIndows»
Теперь нужно вернуть оригинальный драйвер Nvidia.
Введите «Диспетчер устройств» в строке системного поиска и кликните на найденный результат.
Разверните вкладку «Видеоадаптеры», кликните правой кнопкой мыши на видеокарте и выберите «Удалить устройство».
Перейдите на официальный сайт Nvidia и загрузите последний набор драйверов в любую удобную папку на диске.
Запустите загруженный файл и следуйте инструкциям на экране для его установки. После перезагрузите компьютер. Проверьте, возникает ли синий экран с кодом dxgmms2.sys. Проблема, похоже, появляется после установки новых сборок Windows 10, и придется делать откат к оригинальному драйверу Nvidia после автоматического обновления системы.
Включено несколько мониторов
Аварийный сбой системы dxgmms2.sys может возникнуть, когда к компьютеру подключено несколько мониторов. В этом случае лучше их отключить и дождаться нового обновления от Windows и NVIDIA.
Для отключения дополнительных мониторов кликните на рабочем столе правой кнопкой мыши и выберите «Параметры экрана» или сделать это можно в панели управления NVIDIA. Также для этого можно использовать комбинацию клавиш Win + P.
Еще для отключения можно воспользоваться командой для доступа к старым параметрам экрана:
control.exe desk.cpl, Settings,@Settings
После проверьте, появляются ли ошибки ОС, вызванные файлом dxgmms2.sys на синем экране.
Сброс настроек BIOS
Избавится от синего экрана dxgmms2.sys можно путем очистки CMOS или сбросом настроек BIOS.
Включите компьютер и при появлении первого экрана с логотипом БИОС нажмите на клавишу, которая отображается в тексте «Press _ to run Setup».
Найдите параметр «Load Setup Defaults». Если не можете найти точную формулировку, опция может называться «Reset to Default», «Factory Default» или «Setup Defaults».
Выберите «Load Setup Defaults» и нажмите Enter. Затем перейдите на «Exit» и выберите опцию «Exit Saving Changes» для выхода из БИОС и сохранения изменений.
После загрузки системы проверьте, возникает ли критическая ошибка на синем экране при работе за ПК.
Поскольку проблема BSOD dxgmms2.sys связана с несовместимостью Windows 10 с драйвером видеокарты, то можно вернутся к прошлой версии и подождать выход новых обновлений.
Откройте приложение Параметры (Win + I) – Обновление и безопасность, и перейдите на вкладку Восстановление.
Для возврата к предыдущей версии нажмите на кнопку «Начать». Имейте в виду, что эта функция будет работать, только когда не прошло больше месяца с момента установки последней сборки.
Если функция недоступна на этой вкладке, перейдите в Центр обновления Windows и выберите «Просмотр журнала обновлений». В верхней части экрана кликните «Удалить обновление». В списке выберите последнее по дате загрузки и удалите его.
Изменение параметра TdrDelay
Избавится от синего экрана, вызванного системным драйвером dxgmms2.sys, можно путем увеличения времени отклика от видеокарты, заданным параметром TdrDelay. По умолчание составляет 2 секунды.
Введите запрос regedit в окне «Выполнить» (клавиши Win + R) и нажмите на Enter.
В левой части окна перейдите по пути:
HKEY_LOCAL_MACHINE\SYSTEM\CurrentControlSet\Control\GraphicsDrivers
При отсутствии кликните правой кнопкой мыши и создайте параметр DWORD (32-бита), присвойте ему имя TdrDelay. Установите значение «10».
Таким образом будет установленное время отклика видеокарты в 10 секунд вместо 2 (значение по-умолчанию). При дальнейшем возникновении dxgmms2.sys, попробуйте увеличить это значение до 20 или 30.
Are you viewing a dxgmms2.sys or SYSTEM_THREAD_EXCEPTION_NOT_HANDLED error on the blue screen on your computer? BSOD errors seem to be a nightmare for Windows users. And, dxgmms2.sys stop code is one of the most common annoying errors, usually accompanied by Blue Screen Error Codes: SYSTEM THREAD EXCEPTION NOT HANDLED & SYSTEM SERVICE EXCEPTION.
But what exactly causes the dxgmms2.sys Blue Screen Error to appear? Well, if your system has an old, corrupted, and faulty graphics card driver, there’s a high probability that you may witness this issue while playing games or watching movies. Apart from graphics card driver issues, you may encounter the dxgmms2.sys, stop code when you are dealing with incompatible firmware.
How To Fix dxgmms2.sys Blue Screen Error on Windows 10?
For most of the Windows users, updating the graphics card driver has turned out to be an effective way to fix dxgmms2.sys stop code on Windows 10. If you are not sure how to manually update the drivers, we suggest you try an automatic driver updater tool for the process.
STEP 1- Download, install & launch Smart Driver Care on your PC.
STEP 2- On the main dashboard, click on Start Scan Now button.
STEP 3- Once the driver updater utility completes the scanning process, it will show a complete list of device drivers that are damaged, missing, outdated, or incompatible.

STEP 4- Go through the list & look for faulty graphics drivers, and you can click on the Update button to replace it with the latest and compatible versions.


If you have a registered version of the product, you can update all the faulty drivers at once, by clicking the Update All button to fix all the driver-related issues.
Resolved: dxgmms2.sys Blue Screen Error on Windows 10
Still struggling with the BSOD Error? Well, fret not! If updating the graphics drivers didn’t help you to resolve the issue, you can try below-mentioned workarounds:
| Top 4 Solutions | Workarounds To Fix The Stop Code: dxgmms2.sys |
|---|---|
| Run DirectX Diagnostic Tool | Executing the DirectX Diagnostic Tool will help you fix the bugs related to DirectX Graphics API. |
| Disable Hardware Acceleration | The feature is dedicatedly used for maximizing the performance. But certain times, it may cause the errors too & dxgmms2.sys is one of them. So, try resolving the error code by deactivating the feature. |
| Update the BIOS | You can simply update the BIOS configuration to resolve the stop code dxgmms2.sys on Windows 10. |
| Use CMD To Delete Problematic Windows System Files | Use Command prompt to delete problematic files that might cause this Windows 10 BSOD error. |
METHOD 1- Run DirectX Diagnostic Tool
Follow the instructions to run the DirectX Diagnostic Tool & resolve Windows 10 BSOD error:
STEP 1- Open the Run Window.
STEP 2- Just type “dxdiag” (without semicolons) and hit the Enter button.
STEP 3- Your DirectX Diagnostic Tool will open instantly.
STEP 4- If a pop-up appears on your screen asking to check if the drivers are digitally signed. Just click the Yes button to proceed.

Once the Diagnostic tool finishes the scanning, make sure you check the details related to a video card, game controllers & unsigned drivers.
METHOD 2- Disable Hardware Acceleration
Follow the instructions to deactivate Hardware Acceleration:
STEP 1- Open the Run window.
STEP 2- Type regedit & hit the OK button to open Registry Editor.
STEP 3- Follow the path: HKEY_CURRENT_USER > Software > Microsoft > Avalon.Graphics
STEP 4- Locate DisableHWAcceleration.
STEP 5- Just right-click on the blank area & click on the New option. Select the DWORD (32-bit) Value option and simply name it as DisableHWAcceleration.

STEP 6- Now double-click on the entry and set the value to 1. This will disable the Hardware Acceleration feature on your PC. Hit OK button to implement and save the changes.
Now restart the Windows 10 PC to see whether the Stop Code: dxgmms2.sys appears again.
METHOD 3- Update the BIOS
Implement the steps mentioned below the update the BIOS configuration:
STEP 1- Open the Run window.
STEP 2- Just type “msinfo32” (without semicolons to open System Information Window) & hit the Enter button.
STEP 3- At this point, you need to search for the BIOS version your computer is running.
STEP 4- Once you find the developer & version of the BIOS installed on your Windows PC, Google the manufacturer’s website to install the latest version.

There are plenty of BIOS Update Software as well, that can ease the entire process. You can try them and save your time and effort.
METHOD 4- Use CMD TO Delete Problematic Windows System Files
Implement the steps mentioned below to delete certain fault files responsible for causing the stop code dxgmms2.sys on Windows 10.
Note: Make sure you take a backup of all the necessary files before deleting any Windows 10 file.
STEP 1- Launch the Troubleshoot menu. To do so, go the Start menu & click on the Power button while holding the Shift key & click on the Restart button carefully.

STEP 2- Select the Troubleshoot menu, followed by clicking on the Advanced options.
STEP 3- Hit the Command Prompt option to open the CMD window.
STEP 4- Execute the following set of command lines:
C:
cd windows
attrib -s -r -h DXGMMS1.sys /s
del DXGMMS1.sys /s /q
You must press Enter after typing every command.
Now close CMD & restart PC. Executing the command above lines will help you detect and remove problematic Windows 10 files, if any.
Video Tutorial: Quick Solutions To Fix dxgmms2.sys BSOD Error on Windows 10
If you are short on time, you can check out this quick video tutorial and implement the steps one by one to resolve the stop code dxgmms2.sys on Windows 10.
Did this article help you? Let us know your opinion in the comments section below!
Follow us on social media – Facebook, Instagram and YouTube.
You may have experienced a Blue Screen of Death (BSoD) on your Windows PC stating “System thread exception not handled (Dxgmms2.sys).” This is usually experienced while gaming or performing tasks that require heavy graphics rendering. There is no one reason why this exception may be thrown, but there are a few workarounds for it.
In this article, we discuss various ways through which you can prevent experiencing the same Blue Screen of Death error again on the hardware that you are currently using.
 Error in Windows 10 1")
Table of contents
- What is Dxgmms2.sys
- How to fix Dxgmms2.sys BSoD
- Troubleshoot hardware
- Update drivers
- Run DirectX diagnostics tool
- Reset complete BIOS settings
- Increase tdrdelay time
- Disable sleep mode
- Disable hardware acceleration
- Closing words
What is Dxgmms2.sys
Dxgmms2.sys is a critical file in Windows that is responsible for the graphics rendering capabilities of your computer. If it cannot handle the rendering process it will throw exception which results in a blue screen of death. Therefore the entire computer will need to be restarted to repair the problem.
There are several possible causes for the dxgmms2.sys error:
- Faulty RAM modules/Hard disk.
- Incompatible firmware.
- Outdated/corrupted drivers.
- Unable to cope with hardware acceleration.
- Corrupted BIOS.
How to fix Dxgmms2.sys BSoD
There are several ways you can troubleshoot your PC to overcome the Dxgmms2.sys BSoD. The following steps should be performed sequentially until your problem is resolved, since any one of them could be affecting your computer’s rendering capabilities.
Troubleshoot hardware
We suggest that you start by making sure that your hardware, such as RAM, GPU, and the hard drive is functioning normally.
You can start by removing your RAM modules, cleaning them as well as the bay, and plugging them back in one-by-one to check if any of the modules are faulty. Also, remove your GPU and clean it as well as its bay.
For the hard drive, we recommend that you use any third-party tools to check and monitor its health.
Update drivers
An outdated or corrupted driver can also throw in an exception as it is unable to perform at its optimized configurations. We suggest that you make sure that you have the latest driver for your GPU installed.
You can download the latest drivers for your GPUs on the manufacturer’s website. Download and install the latest drivers for NVIDIA GPUs using this guide, and refer to our GPU section for the latest drivers for Intel GPUs. For AMD drivers, refer to their website.
Run DirectX diagnostics tool
DirectX is a set of Application Programming Interfaces (APIs) that enhances your multimedia experience on a computer. It has a built-in diagnostics tool in Windows 10 that displays all the current information about the graphics hardware as well as the associated software.
To run the tool, type in dxdiag in Run.
 Error in Windows 10 2")
Once the tool launches, switch to the Display tab and check if the 3 features under DirectX Features are enabled. If not, then there might be a compatibility problem with the driver and the GPU.
 Error in Windows 10 3")
If you cannot get the feature to run, then you may have to re-install DirectX on your PC. You can download all versions of DirectX from this post.
Reset complete BIOS settings
A misconfigured BIOS can also lead to BSODs on your PC. Therefore, if your issue has not yet been resolved, we recommend that you reset your BIOS settings entirely.
The process to reset BIOS settings is almost the same on any computer, regardless of the manufacturer. Enter your system BIOS using the respective method given in this post. Then, scroll through different pages and look for “Reset BIOS” or “Restore to default settings.” Usually, this can be found on the Save & Exit page or on the Security page. Press Enter and then select Yes to reset the settings.
 Error in Windows 10 4")
Increase tdrdelay time
TdrDelay is the time delay the GPU takes before preempting the GPU scheduler. This value is set in seconds, and by default, its value is 2. This can be changed through the Registry Editor, which we are going to show you how.
First, we recommend that you create a system restore point for your operating system, as any mistake in setting up the system registry could be fatal to your system’s functionality.
Now launch the Registry Editor by typing in regedit in Run. Once open, paste the following in the address bar at the top and hit Enter. This will automatically open the destination location:
Computer\HKEY_LOCAL_MACHINE\SYSTEM\CurrentControlSet\Control\GraphicsDrivers
 Error in Windows 10 5")
Now right-click GraphicsDrivers in the left pane, expand New, and then click DWORD (32-bit) Value. When created, name this new DWORD as TdrDelay.
 Error in Windows 10 6")
Double-click TdrDelay and set its Value Data to 10. This will ensure that the GPU preempts the Scheduler after 10 seconds, rather than 2. Of course, a system restart will be required before the changes take effect.
 Error in Windows 10 7")
Disable sleep mode
This does not happen often, but the displays of the computers sometimes go into sleep mode, even when the GPU is being used. When the display attempts to return to wake mode, the computer encounters a Dxgmms2.sys exception.
Therefore, you need to disable your computer’s sleep mode. Here are 4 ways to prevent your computer from going to sleep.
Disable hardware acceleration
The purpose of hardware acceleration is to give the best performance while eating up more power. However, it is of no use if it becomes the reason for BSODs. Hardware acceleration may occasionally throw the Dxgmms2.sys exception. Therefore, you need to disable it and check if the problem is resolved.
To disable hardware acceleration system-wide, launch the Registry Editor by typing in regedit in Run. Then, paste the following path in the address bar at the top:
Computer\HKEY_CURRENT_USER\SOFTWARE\Microsoft\Avalon.Graphics
 Error in Windows 10 8")
Now create a new DWORD (as in the previous section) and name it DisableHWAcceleration. When created, set its Value Data to 1.
 Error in Windows 10 9")
As per routine, your system will require a reboot so that the changes take effect.
Closing words
It is very frustrating to be in the middle of a game and suddenly everything stops working. Thus, do not wait for the next BSoD to appear and utilize the troubleshooting steps given in this post to rectify the issue before it occurs again.
Те, кто часто играет в игры, с большой долей вероятности могут столкнуться с синим экраном смерти, который указывает на файл dxgmms2.sys. Ошибка может сопровождаться фразами: SYSTEM SERVICE EXCEPTION, KMODE EXCEPTION NOT HANDLED, PAGE_FAULT_IN_NONPAGED_AREA, IRQL_NOT_LESS_OR_EQUAL и другими. Их вы можете посмотреть на скриншоте. В любом случае Windows 10 пытается нам сообщить, что ей не удалось найти, загрузить файл или dxgmms2.sys поврежден. Дальше мы рассмотрим, почему так получилось и как это можно исправить.
Что вызвало проблему dxgmms2.sys?
Проблему может спровоцировать:
- повреждение драйверов;
- неправильная работа второго монитора или невозможность их использования в паре;
- сбой в аппаратном ускорении.
Как исправить ошибку BSOD dxgmms2.sys?
Не считая откат Windows 10, который тоже может помочь, есть несколько рабочих способов исправления проблемы:
- Чистая установка драйверов. Важно не просто обновить видеодрайвер или запустить установщик поверх старого, но предварительно удалить его. Это можно сделать через интерфейс «Диспетчера устройств» в разделе «Видеоадаптеры». Необходимый параметр расположен в меню драйвера, которое можно открыть двойным кликом по устройству и переходом на одноименную вкладку.
- Выключить второй монитор. Если драйвер работает некорректно, он может не обрабатывать сразу пару мониторов. Самый простой способ это сделать – нажать Win + P и выбрать вариант «Только экран компьютера» или «Только второй экран».
- Отключить аппаратное ускорение. Оно активно практически у всех пользователей, так как используется для прироста производительности операционной системы. Сложность в том, что Windows 10 не предоставляет доступ к данному параметру через интерфейс, поэтому нужно редактировать реестр. В него попадем, если нажать Win + R, ввести regedit и нажать Ок. Далее нужно перейти по пути HKEY_CURRENT_USER > Software > Microsoft > Avalon.Graphics. Осталось только нажать дважды на параметр DisableHWAcceleration и установить ему значение 1. Если его нет, нужно просто создать этот элемент.
Еще можно попробовать откатить систему, сбросить настройки BIOS, обновить Windows 10. Плюс некоторые пользователи говорят, что Microsoft Office Access 2010 тоже может стать причиной сбоя. Можно попробовать его временно удалить. Все остальное – чересчур фантастические варианты, которые вряд ли смогут помочь при ошибке dxgmms2.sys.