Today, Microsoft announced the general availability of Windows Server 2016, and with it, Docker engine running containers natively on Windows. This blog post describes how to get setup to run Docker Windows Containers on Windows 10 or using a Windows Server 2016 VM. Check out the companion blog posts on the technical improvements that have made Docker containers on Windows possible and the post announcing the Docker Inc. and Microsoft partnership.
Before getting started, It’s important to understand that Windows Containers run Windows executables compiled for the Windows Server kernel and userland (either windowsservercore or nanoserver). To build and run Windows containers, a Windows system with container support is required.
Windows 10 with Anniversary Update
For developers, Windows 10 is a great place to run Docker Windows containers and containerization support was added to the the Windows 10 kernel with the Anniversary Update (note that container images can only be based on Windows Server Core and Nanoserver, not Windows 10). All that’s missing is the Windows-native Docker Engine and some image base layers.
The simplest way to get a Windows Docker Engine is by installing the Docker for Windows public beta (direct download link). Docker for Windows used to only setup a Linux-based Docker development environment (slightly confusing, we know), but the public beta version now sets up both Linux and Windows Docker development environments, and we’re working on improving Windows container support and Linux/Windows container interoperability.
With the public beta installed, the Docker for Windows tray icon has an option to switch between Linux and Windows container development. For details on this new feature, check out Stefan Scherers blog post.
Switch to Windows containers and skip the next section.

Windows Server 2016
Windows Server 2016 is the where Docker Windows containers should be deployed for production. For developers planning to do lots of Docker Windows container development, it may also be worth setting up a Windows Server 2016 dev system (in a VM, for example), at least until Windows 10 and Docker for Windows support for Windows containers matures.
For Microsoft Ignite 2016 conference attendees, USB flash drives with Windows Server 2016 preloaded are available at the expo. Not at ignite? Download a free evaluation version and install it on bare metal or in a VM running on Hyper-V, VirtualBox or similar. Running a VM with Windows Server 2016 is also a great way to do Docker Windows container development on macOS and older Windows versions.
Once Windows Server 2016 is running, log in, run Windows Update to ensure you have all the latest updates and install the Windows-native Docker Engine directly (that is, not using “Docker for Windows”). Run the following in an Administrative PowerShell prompt:
Install-PackageProvider -Name NuGet -MinimumVersion 2.8.5.201 -Force
Install-Module -Name DockerMsftProvider -Force
Install-Package -Name docker -ProviderName DockerMsftProvider -Force
Restart-Computer -Force
Docker Engine is now running as a Windows service, listening on the default Docker named pipe. For development VMs running (for example) in a Hyper-V VM on Windows 10, it might be advantageous to make the Docker Engine running in the Windows Server 2016 VM available to the Windows 10 host:
# Open firewall port 2375
netsh advfirewall firewall add rule name="docker engine" dir=in action=allow protocol=TCP localport=2375

# Configure Docker daemon to listen on both pipe and TCP (replaces docker --register-service invocation above)
Stop-Service docker
dockerd --unregister-service
dockerd -H npipe:// -H 0.0.0.0:2375 --register-service
Start-Service docker
The Windows Server 2016 Docker engine can now be used from the VM host by setting DOCKER_HOST:
$env:DOCKER_HOST = "<ip-address-of-vm>:2375"
See the Microsoft documentation for more comprehensive instructions.
Running Windows containers
First, make sure the Docker installation is working:
> docker version
Client:
Version:      1.12.1
API version:  1.24
Go version:   go1.6.3
Git commit:   23cf638
Built:        Thu Aug 18 17:32:24 2016
OS/Arch:      windows/amd64
Experimental: true

Server:
Version:      1.12.2-cs2-ws-beta
API version:  1.25
Go version:   go1.7.1
Git commit:   62d9ff9
Built:        Fri Sep 23 20:50:29 2016
OS/Arch:      windows/amd64
Next, pull a base image that’s compatible with the evaluation build, re-tag it and to a test-run:
docker pull microsoft/windowsservercore
docker run microsoft/windowsservercore hostname
69c7de26ea48
Building and pushing Windows container images
Pushing images to Docker Cloud requires a free Docker ID. Storing images on Docker Cloud is a great way to save build artifacts for later user, to share base images with co-workers or to create build-pipelines that move apps from development to production with Docker.
Docker images are typically built with docker build from a Dockerfile recipe, but for this example, we’re going to just create an image on the fly in PowerShell.
"FROM microsoft/windowsservercore `n CMD echo Hello World!" | docker build -t <docker-id>/windows-test-image -
Test the image:
docker run <docker-id>/windows-test-image
Hello World!
Login with docker login and then push the image:
docker push <docker-id>/windows-test-image
Images stored on Docker Cloud available in the web interface and public images can be pulled by other Docker users.
Using docker-compose on Windows
Docker Compose is a great way develop complex multi-container consisting of databases, queues and web frontends. Compose support for Windows is still a little patchy and only works on Windows Server 2016 at the time of writing (i.e. not on Windows 10).
To develop with Docker Compose on a Windows Server 2016 system, install compose too (this is not required on Windows 10 with Docker for Windows installed):
Invoke-WebRequest https://dl.bintray.com/docker-compose/master/docker-compose-Windows-x86_64.exe -UseBasicParsing -OutFile $env:ProgramFiles\docker\docker-compose.exe
To try out Compose on Windows, clone a variant of the ASP.NET Core MVC MusicStore app, backed by a SQL Server Express 2016 database. A correctly tagged microsoft/windowsservercore image is required before starting.
git clone https://github.com/friism/Musicstore
...
cd Musicstore
docker-compose -f .\docker-compose.windows.yml build
...
docker-compose -f .\docker-compose.windows.yml up
...
To access the running app from the host running the containers (for example when running on Windows 10 or if opening browser on Windows Server 2016 system running Docker engine) use the container IP and port 5000. localhost will not work:
docker inspect -f "{{ .NetworkSettings.Networks.nat.IPAddress }}" musicstore_web_1
172.21.124.54
If using Windows Server 2016 and accessing from outside the VM or host, simply use the VM or host IP and port 5000.
Summary
This post described how to get setup to build and run native Docker Windows containers on both Windows 10 and using the recently published Windows Server 2016 evaluation release. To see more example Windows Dockerfiles, check out the Golang, MongoDB and Python Docker Library images.
Please share any Windows Dockerfiles or Docker Compose examples your build with @docker on Twitter using the tag #windows. And don’t hesitate to reach on the Docker Forums if you have questions.
More Resources:
- Sign up to be notified of GA and the Docker Datacenter for Windows Beta
- Docker for Windows Server
- Learn more about the Docker and Microsoft partnership
Docker containers become unavoidable for infrastructure development as it provides, Isolation, Simplicity, Rapid Continuous Deployment, and Faster Configuration with Security. Earlier, Docker has only used for Linux based applications as it is using the Linux kernel baseline for creating Containers. But Windows applications are widely used in Software development and Hence, windows developers need Docker Containers for Windows. In this article, we will discuss How to Create Docker Windows Containers from Docker Desktop.
Table of Contents
Docker Desktop Installation
Requirement
- Minimum Windows 10 (Home and All other Editions)
- Hyper-V (In-Built and can be Enabled)
- Only 64bit Processor Architecture
- Virtualization Enablement from Bios Level
Installation
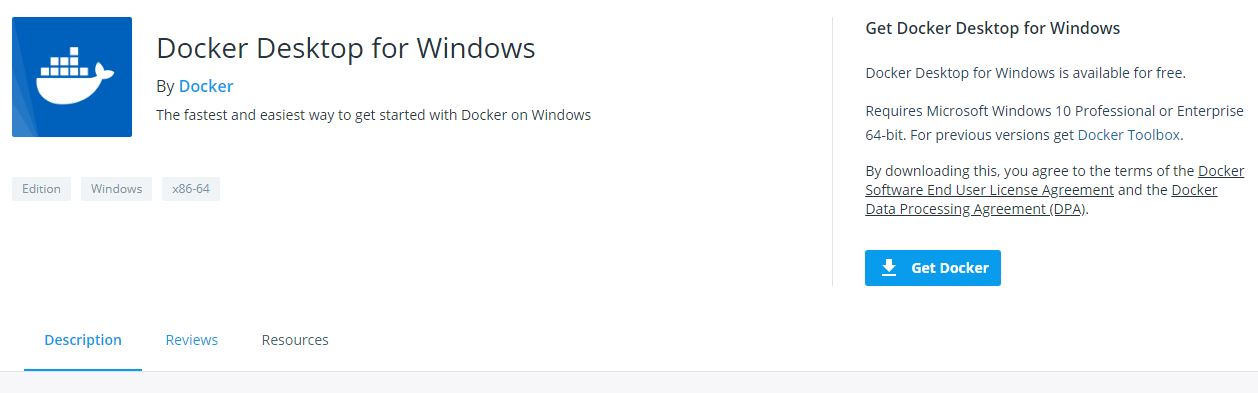
- Step-1: Download the “Docker Desktop for Windows” exe file from here (https://hub.docker.com/editions/community/docker-ce-desktop-windows/) and run it to install.
- Step-2: Enable Docker Running Environment 1. For Windows Home – Enable Windows Subsystem for Linux (Instructions Here: https://docs.microsoft.com/en-us/windows/wsl/install-win10). 2. For Windows Other Editions – Enable Hyper-V (Instructions Here: https://docs.microsoft.com/en-us/virtualization/hyper-v-on-windows/quick-start/enable-hyper-v)
- Step-3: Follow the instructions on the Installation process
- Step-4: If you are the Only user with Admin access, you can proceed. Else add the current user into a docker-users group (Instructions Here: https://www.tenforums.com/tutorials/88049-add-remove-users-groups-windows-10-a.html)
NOTE:
Docker Desktop Installed in the Windows Machine can run Linux Based Docker Containers and Windows-based Docker Container. But You cannot run Windows Based Docker Containers on Docker Engine installed in Linux. Refer the below image.

About Docker on Windows Machine
As we all know, the Docker Engine will run as a daemon that uses the Linux specific kernel features. So, running the Docker Engine on Windows directly is not possible. Hence, we must create a Linux based environment in Windows to run docker. In order to enable Linux environment on the windows, we have two options,
- Windows Subsystem for Linux (WSL) – is the compatibility layer to run Linux applications
- Hyper-V – Microsoft solution for virtualization.

Both these features are available from Windows 10. Running docker on windows will be ultimately using the Linux environment. But it is using some of the Host’s features. So, Docker Engine will sit on top of the Linux Kernel created by the Hyper-V/WSL. On top of the Docker Engine, Docker Containers can be created. All this is managed by the Docker Desktop. So, Application Program which will be written by the developers will sit on top of the Containers.
Simple Windows Container with Example
Let’s learn how to create the Docker Windows container using Docker Desktop. For that, first, we are going to create Dockerfile which is the simple text file with the instructions of the application and configurations.
Creating Dockerfile
Let’s run a simple application which will return the “hello world” print output from the Windows Docker Container. For the same, create a file called “Dockerfile” and put the bellow content.
# Base Image
FROM microsoft/nanoserver

# Copy powershell init-script from the host machine (windows) to the docker container.
COPY init-setup.ps1 c:\\workspace\application\init-setup.ps1

# Run the Powershell script in the Docker Container
CMD ["powershell.exe", "c:\\workspace\application\init-setup.ps1"]
- In this, Line number #2 is setting the container from the base image. Here it is “
microsoft/nanoserver”. - Inline Number #5 is giving
init-script.ps1from the host to the docker container. - Line Number #8 is to run the script in PowerShell executable.
And Create a script file called “init-setup.ps1” and put the below content inside the file
Building Docker Image
Once you have this file in your folder you can start building the Dockerfile as Docker image using the command.
$ docker build -t digitalvarys/print-hello-world .
where digitalvarys/print-hello-world is the tag name of the docker image.
Once the Docker image is been built, you can check the Image by passing the following commad
This will display the created image.
Running the Docker Container
Now, it is time to run the Docker image which we have created. Hence, run the following command
$ docker run digitalvarys/print-hello-world
This will print the string “hello world” as we provided.
If you run it with -it parameter, you can explore the Created Docker Container with Windows CMD.
ASP.net example of the Windows Docker Container.
The above sample application will tell you about the basic container feature. This one will tell you the real-time advantage of the Windows Docker Container.
Sample application
For this tutorial, we are going to use, cloud foundry’s sample Dotnet core hello world application (https://github.com/cloudfoundry-samples/dotnet-core-hello-world). Just clone it and keep it in your working directory
Dockerfile creation.
Now, we are going to create Dockerfile to create the image of the above application.
# Base Image
FROM microsoft/dotnet:nanoserver-core

# Copy entire application code folder dotnet-application to the working directory in Container.
COPY c:\\workspace\dotnet-application .

# Relax the firewall rule to expose port 5000
EXPOSE 5000

# Run the dotnet application
CMD ["dotnet", "run", "--server.urls", "http://0.0.0.0:5000"]
Just like the PowerShell example, we are going to take the base image and copy the application from the host to the container. Then, we are going to expose the port 5000 to run the dotnet application in this port. Then, we are going to run the application using the dotnet executable.
Building the Docker Image.
Once the Dockerfile is ready, we have to build the Docker container.
$ docker build -t digitalvarys/simple-dotnet-application .
Here, I am giving the image name as “digitalvarys/simple-dotnet-application”.
Running the Docker Container
Now, we have to run the application in background (detached mode),
$ docker run -d -p 5000:5000 digitalvarys/simple-dotnet-application
This will run the container and expose the container port to the host port 5000.
Getting the IP address of the Created Docker Container.
Now, Just inspect the Docker container and see the assigned IP address of the running container,
$ docker inspect [container-id]
This will show you the JSON response. In that, check for “networks” -> “nat” -> “IPAddress”. This will be your container IP address.
Now, Just enter the URL in the browser as https://[container-ip-address]:5000, then you will see the Hello world message in the browser. This means your application is running in a container.
Conclusion
As we already discussed, Docker is unavoidable for the application development or at least in the process of application development. But the Containerization of the Windows application like dotnet application needs extra lookup. Hope this article covers enough concepts and procedures for the Windows Docker Containers running on windows application. In our upcoming article, we will discuss more running a cluster of Microsoft Windows-based applications in Docker Swarm and Kubernetes. Stay tuned and subscribe DigitalVarys for more articles and study materials on DevOps, Agile, DevSecOps and App Development.

Experienced DevSecOps Practitioner, Tech Blogger, Expertise in Designing Solutions in Public and Private Cloud. Opensource Community Contributor.
Эта статья даст вам полное представление о Docker Desktop для пользователей Windows и MAC. Мы изучим установку Docker Desktop на компьютерах с Windows и Mac. После установки мы также попытаемся выполнить некоторые операции Docker.
Docker Desktop — это собственное настольное приложение, разработанное Docker для пользователей Windows и MAC. Это самый простой способ запуска, сборки, отладки и тестирования приложений Dockerized.
Docker Desktop предлагает важные и наиболее полезные функции, такие как быстрые циклы редактирования, уведомления об изменениях файлов, встроенная поддержка корпоративной сети и гибкость для работы с собственным выбором прокси и VPN.
Docker Desktop состоит из инструментов для разработчика, приложения Docker, Kubernetes и синхронизации версий. Он позволяет вам создавать сертифицированные образы и шаблоны языков и инструментов.
Скорость, безопасность и выбор — все, что вам нужно для разработки и доставки контейнерных приложений, доступных на вашем рабочем столе, будет представлено вам.
Прежде чем перейти к процессу установки, давайте разберемся с его версиями.
Версии Docker
Docker в основном поставляется в двух версиях, в Community и ENterprise.
Community версия поставляется с бесплатным набором продуктов Docker. ENterprise корпоративная версия представляет собой сертифицированную контейнерную платформу, которая предоставляет коммерческим пользователям дополнительные функции, такие как безопасность образов, управление образами, оркестровка и управление средой выполнения контейнеров, но по разумной цене.
Мы начнем наше обучение с Community Edition. Контейнеры Docker, работающие в конкретной операционной системе, совместно используют ядро ОС. Это означает, что мы не можем использовать ядро Windows (хост) для запуска контейнеров Linux или наоборот. Чтобы проделать это, у нас есть Docker Desktop для Windows и MAC.
Выпуски Docker Desktop
Docker Desktop выпускается в двух вариантах.
- Stable: как видно из названия, стабильный выпуск тщательно протестирован и может быть использован при разработке более надежных приложений. Его версии полностью синхронизированы с версиями Docker Engine.
- Edge: эти версии состоят из всех новых и экспериментальных функций Docker Engine. Есть больше шансов ошибок, сбоев и проблем, которые могут возникнуть. Тем не менее, пользователи получат возможность ознакомиться с предстоящими функциями.
Docker на Windows
Есть два варианта Docker на Windows.
1. Использование Docker Toolbox
Docker Toolbox предоставляет набор легких инструментов.
- Oracle virtual box
- Docker Engine
- Docker Machine
- Docker compose
- Kitematic GUI
Вышеуказанные инструменты устраняют необходимость развертывания отдельной виртуальной машины для запуска Docker. Просто установите исполняемый файл панели инструментов Docker непосредственно в Windows и начните разработку приложений. Требуется 64-битная ОС и Windows 7 или выше с включенным режимом виртуализации.
Но опять же, панель инструментов Docker — это оригинальная поддержка, предоставляемая в Windows для запуска Docker и его устаревшего решения для всех ОС Windows, которые не соответствуют требуемой конфигурации.
2. Использование Docker Desktop
Docker Desktop — это новейшая технология, используемая для Docker в Windows. Он заменяет виртуальную машину Oracle собственной технологией виртуализации, доступной в Windows, то есть Microsoft Hyper-V.
Он по-прежнему будет запускать Docker на Linux-машине, созданной под ним. Но на этот раз вместо виртуальной машины Oracle мы использовали нативный Microsoft Hyper-V.
Установка Docker на Windows
Вы можете скачать репозиторий Docker Desktop из Docker Hub.
истемные требования:
- Windows 10 или Windows Server 2016 Professional или Enterprise Edition
- Поддержка Hyper-V.
Чтобы запустить Hyper-V, оборудование должно соответствовать следующим требованиям:
- 64-битный процессор
- > = 4 ГБ ОЗУ
- Поддержка виртуализации оборудования на уровне BIOS
Следовательно, программная и аппаратная зависимость заключается в запуске Docker Desktop на Windows.
Установка Docker на macOS
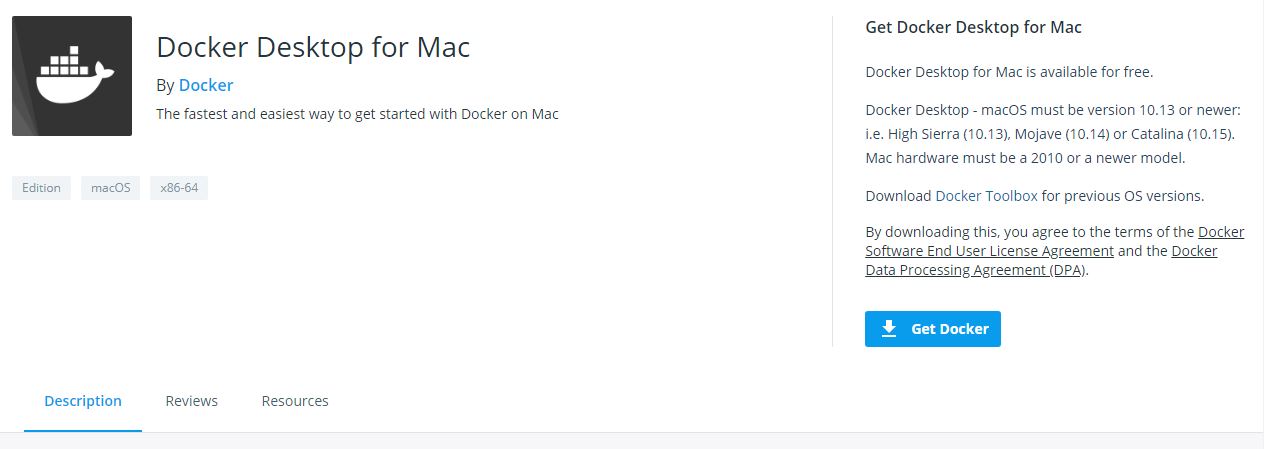
Вы можете скачать репозиторий Docker Desktop из Docker Hub.
Системные требования:
- MAC Hardware 2010 или новее с аппаратной поддержкой управления памятью и неограниченным режимом. Выполните команду kern.hv_support, чтобы проверить, поддерживает ли оборудование MAC инфраструктуру гипервизора.
- MAC OS версии 10.13 или новее.
- > = 4 ГБ ОЗУ
- Virtual-Box до версии 4.3.30
Работа с образами
После установки проверьте версию установленного Docker Engine.
docker --versionDocker работает с доставкой и запуском контейнерных приложений. Вам либо нужно создать свое собственное контейнерное приложение, либо Docker поддерживает контейнерные образы в Docker Hub, и его можно легко загрузить с помощью простой команды docker run.
Здесь мы будем тянуть образ Redis.
docker pull redis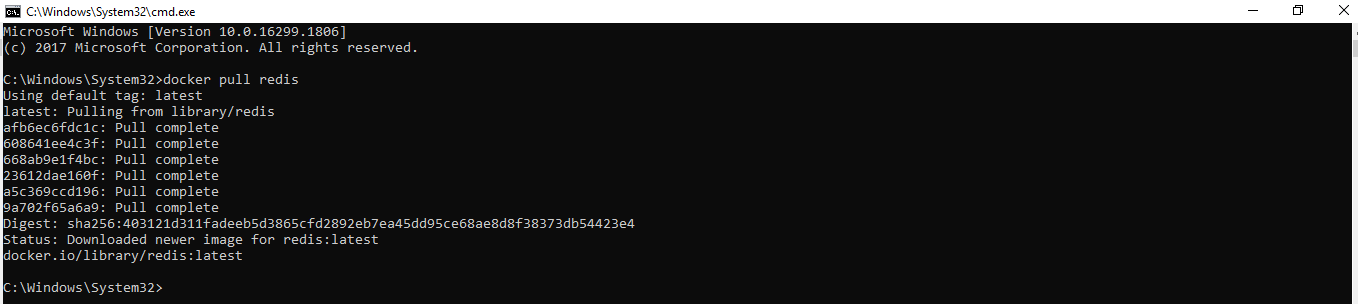
С помощью простой команды run образы можно скачивать и загружать на GitHub или Docker Hub, и любой пользователь во всем мире может получить к нему доступ и начать работать с ним.
Docker Container запускает образ Docker. Следующим шагом является запуск контейнера.
docker run -p 6379 Redis
Будет создан зашифрованный идентификатор контейнера. Вы можете быстро проверить состояние работающего экземпляра в Docker, нажав на Dashboard option.

Обязательно остановите контейнер, прежде чем удалять его из Docker Engine.

Возможности Docker Desktop
Существует множество преимуществ:
- Поддерживает широкий спектр инструментов разработки.
- Обеспечьте быстрый и оптимизированный способ создания и публикации контейнерного образа на любой облачной платформе.
- Простота установки и настройки полной среды Docker
- Повышение производительности благодаря встроенной виртуализации Hyper-V для Windows и HyperKit для MAC.
- Возможность работать в Linux через WSL 2 на компьютерах с Windows.
- Легкий доступ к работающим контейнерам в локальной сети.
- Возможность поделиться любым приложением на облачной платформе, на разных языках и в разных средах.
- Для обеспечения безопасности и актуальности выполняются автоматические обновления.
- Включены последние версии Kubernetes.
- Возможность переключения между Linux и Windows сервером на Windows.
Docker Desktop — это нативное приложение, разработанное на Windows и MAC OS для запуска, сборки и доставки контейнерных приложений или сервисов.
Однако
Docker Desktop предназначен не для производственной среды, а для рабочего стола и среды разработки.
Также рекомендуем прочитать:
- Docker для начинающих — технология контейнеров
- В чем разница между Docker и Kubernetes?
- Введение в Docker Hub и все, что вы должны знать о нем
- Как установить Docker на Ubuntu, Windows, Debian и CentOS?
- Kubernetes — Введение для начинающих
- Docker посмотреть запущенные контейнеры, запустить или остановить контейнеры
If you’re new to containers and Docker and work primarily on Windows, you’re in for a treat. In this article, you’re going to learn how to set up Docker on Windows 10 using Docker Desktop for Windows or simply referred to as Docker Desktop in this article.
Not a reader? Watch this related video tutorial!
Not seeing the video? Make sure your ad blocker is disabled.
Docker Desktop is the Docker Engine and a management client packaged together for easy use in Windows 10. In this article, you will install Docker Desktop, deploy your first container, and share data between your host and your containers.
Prerequisites for Docker on Windows
This is a walkthrough article demonstrating various steps in Docker Desktop for Docker on Windows. To follow along, be sure you have a few specific requirements in place first.
- An Internet connection to download 800MB+ of data
- Windows 10 64-bit running Pro, Enterprise, or Education edition with release 1703 or newer. This is necessary to run Hyper-V on Windows 10.
- A CPU with SLAT (nested paging) compatibility. All AMD/Intel processors since approximately 2008 are SLAT compatible
- At least 4GB of RAM
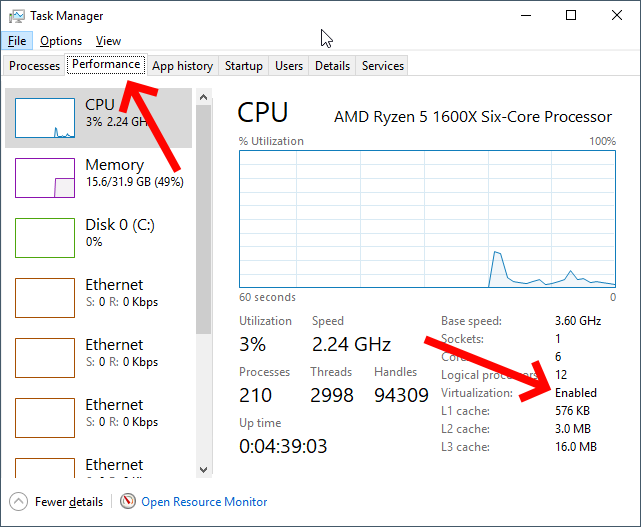
- BIOS hardware virtualization sometimes labeled as Virtualization Technology or VTx. This must be enabled and show as Enabled in the performance tab of Task Manager as shown below.
Downloading and Installing Docker Desktop
Up first, you need to download and install Docker Desktop to get Docker on Windows going. Docker Desktop comes available in two releases; a stable release and a testing release.
The stable release is released quarterly and ensures a fully-tested application. In this article, you will be using the stable release.
Warning: Upon installation, Docker Desktop will prompt you to install the Hyper-V hypervisor if not already installed. By doing so, the Hyper-V hypervisor prevents any user-mode hypervisors such as VirtualBox, VMWare, etc. from running guest VMs. Hyper-V support for VirtualBox and VMWare is limited but coming.
You also have the option of a download source through manually downloading Docker Desktop directly from Docker.com or via the Windows package manager, Chocolatey. Let’s briefly cover each method.
From Docker.com
To download Docker Desktop directly from docker.com, you can go to the product page, register for an account and download it from there. This is preferred if you intend to use Docker in production by registering an account.
However, if you’re just testing Docker out for the first time, you can also download it directly which is much easier.
Once the EXE is downloaded, run the executable and click through the prompts accepting all of the defaults.
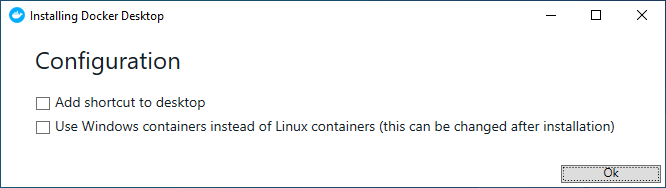
When asked whether you plan to Use Windows containers instead of Linux containers, as shown below, do not enable the checkbox. You will be using Linux containers in this article.
Once installation is complete, reboot your computer.
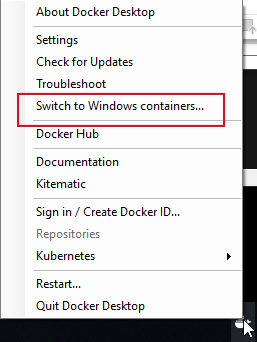
Selecting the option to use Windows containers or Linux containers tells Docker to attach images to a Windows kernel or Linux kernel. You can change this setting at any time after installation by right-clicking the Docker icon in the System Tray and selecting Switch to Windows containers as shown below.
Using Chocolatey
The other option to get Docker Desktop downloaded and installed is with Chocolatey. Chocolatey automates many of the download/install tasks for you. To do so, open up a command-line console (either cmd or PowerShell) as an administrator to download and install the program in one shot by running the command below.
choco install docker-desktopOnce complete, reboot Windows 10.
If you’d like to try out the testing release at some point, you can download and install this by running
choco install docker-desktop --pre.
Validating the Docker Desktop Installation
Once installed, Docker Desktop automatically runs as a service providing Docker on Windows. It’s shown in the system tray when you log in to Windows after you reboot. But how do you actually know it’s working?
To validate Docker Desktop is working correctly, open a command-line console and run the docker command. If the installation went well, you will see a Docker command reference.
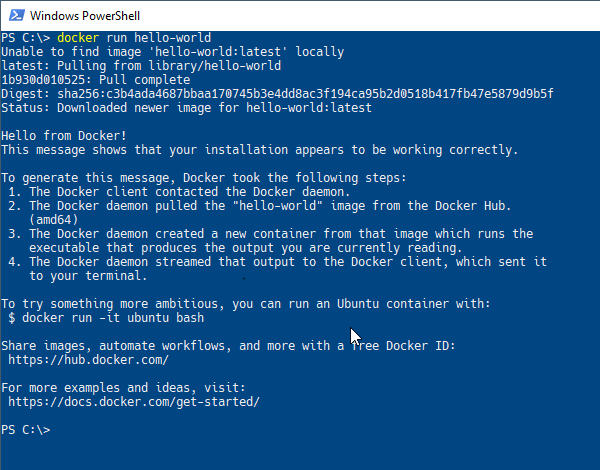
Finally, have Docker download and run an example container image called hello-world by running the command docker run hello-world. If all is well, you will see output like below.
Running Commands in Docker Containers
Docker Desktop is installed and you’ve verified all is well? Now what? To get started with Docker on Windows, one common task to perform in a Docker container is running commands. Through the docker run command, you can send commands through the host (your Windows 10 PC) directly into a running container.
To run commands in a container with docker run, you’ll first specify an image name followed by the command. To get started, tell Docker to run the command hostname inside of a container called alpine as seen below.
> docker run alpine hostname
b74ff46601af
Since you don’t have the alpine Docker image on your computer now, Docker on Windows will download the tiny image from the Docker Hub, bring up a container from that image, and send the command directly into the container and shut it down all in one swoop.
If you’d like to keep the container running, you can also use the -it parameter. This parameter tells Docker to keep the container in “interactive mode” leaving it running in the foreground after executing the command. You’ll see that you are then presented with a terminal prompt ready to go.
> docker run -it alpine sh
/ #
When you’re done in the terminal, type exit to return to Windows 10.
Accessing Files from the Docker Host in Containers
Another common task is accessing host files from containers. To access host files in containers, Docker on Windows allows you to link a folder path from your desktop to share that folder to your container. This process is called binding.
To create a binding, make a folder on a local drive. For this example, I’ll use E:\ and call it input. It’ll then create a new text document named file.txt in the folder. Feel free to use whatever path and file you wish.
Once you have the folder you’d like to share between the host and container, Docker needs to mount the folder using the --mount parameter. The --mount parameter requires three arguments; a mount type, a source host directory path and a target directory path. The target path will be a symbolic link within the container.
Below you will see an example of mounting the entire E:\ within the Windows 10 host to show up as the /home/TEST directory inside of the Linux container.
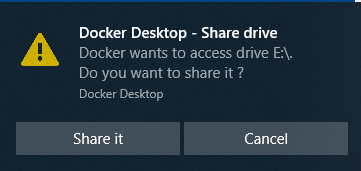
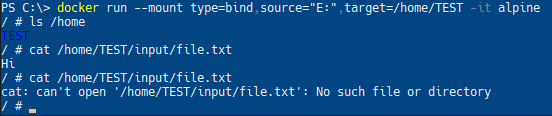
> docker run --mount type=bind,source="E:/",target=/home/TEST -it alpineWhen you attempt to mount a host folder, Docker Desktop will ask for your permission to share this drive with the Docker containers as seen below.
If you created the file.txt file in the Windows 10 folder as described earlier, run cat /home/TEST/input/file.txt. You will see that contents are displayed.
Now, delete the input folder that you just created and run the cat ... command again. Observe that the shell now reports that the file does not exist anymore.
Mapping Network Ports
Another important concept to know is how Docker on Windows handles networking. For a brief introduction, let’s see what it takes to access a web service running in a container from the local host.
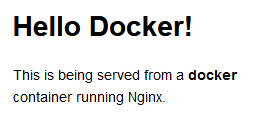
First, spin up a demo image that will run an example webpage. Download and run the Docker image called dockersamples/static-site. You’ll use docker container run to do so.
The following command does four actions at once:
- Downloads a Docker image from Docker Hub called static-site in the docker-samples “directory”
- Starts a container instance up from the static-site image
- Immediately detaches the container from the terminal foreground (
—detach) - Makes the running container’s network ports accessible to the Windows 10 host (
—publish-all)
docker container run --detach --publish-all dockersamples/static-site
## Alternate/shorthand syntax that does the same thing:
## docker container run -d -P dockersamples/static-site
## docker run -d -P dockersamples/static-site
Once run, Docker will return the container ID that was brought up as shown below.
Publishing Network Ports
Since using the --publish-all parameter, local host ports are now mapped to the container’s network stack. You can use the docker ps subcommand to list all running containers including what ports are assigned to all of the running containers. In the instance below, one container is running mapping host port 32777 to container port 80 and host port 32776 to container port 443.
Docker on Windows assigns containers random ports when using the --publish-all parameter unless explicitly define them.
Now open up a web browser and navigate to http://localhost:32777 or the port that Docker assigned to map to port 80 as output by docker ps. If all goes well, you should see the below webpage show up.
Changing the Published Ports
You now have a Docker container running in Docker on Windows serving up a simple web page. Congratulations! But now you need to specify a specific port binding not relying on the random port selection with --publish-all. No problem. Use the -p parameter.
First, stop the running container by specifying a unique string of it’s container ID. You can find this container ID by running docker ps. Once you know the container ID, stop the container and start a new one while designating Docker to assign a specific port to publish.
The syntax for specifying a port is <external port>:<container port>. For each port that you want to publish, use the --publish or -p switch with the external and container port numbers as shown below.
> docker stop f766
> docker run --detach -p 1337:80 dockersamples/static-site
When you are specifying a container ID, you only have to type enough of the ID to be unique. If you are only running a single container and its ID is
f766f4ac8d66bf7, you can identify the container using any number of characters including justf. The requirement is that whatever you type allows it to uniquely identify a single container.
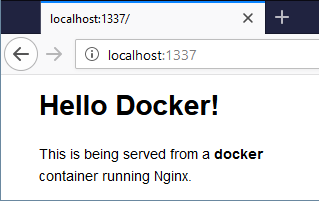
Now go to your web browser and navigate to localhost:1337. Remember, you are not changing the image and it always listens on port 80; you are changing the port translation rule in the Docker configuration that lets you connect to the container.
Stopping all Containers
Using docker stop, you can stop a container but how do you stop multiple containers at once? One way to do so is by providing multiple, space-delimited container IDs. You can see below an example of how to stop three containers with IDs of fd50b0a446e7, 36ee57c3b7da, and 7c45664906ff.
> docker stop fd50 36ee 7c45If you’re managing Docker containers in PowerShell, you can also use a shortcut to stop all containers. Feed a list of container IDs via
docker ps -qto the stop parameter through PowerShell’s command expansiondocker stop (docker ps -q).
Confirm all containers are stopped by seeing no containers listed when you type docker ps.
Cleaning Up
You’ve downloaded a few container images and run some containers that are now stopped. Even though they’re stopped, their allocated storage isn’t gone off of the local host disk. You must delete the containers free up that space and avoid cluttering up your workspace.
To delete a single container, use the container remove rm parameter like below.
> docker container rm <container ID>Or, to delete all stopped containers, use the prune parameter as below.
Время на прочтение
4 мин
Количество просмотров 12K

Хотелось бы поделиться «граблями», на которые успел наступить при работе с docker, интересными фишками и вообще рассказать про эту замечательную технологию.
Что за зверь такой?
Думаю, сегодня уже все слышали про docker, но все же:
Docker — контейнеризатор приложений. =) (более развернутое пояснение на вики)
А тут я собрал основные свойства технологии:
Система контейнеров
Возможность добавлять в контейнер сам проект , среду окружения , сервер и все остальное
Запуск на любой машине без установки среды
Запуск с помощью одной команды
Безопасность
Возможность тестирования новых технологий без ее установки
Установка
Установка вполне дефолтная, но все же уделю этому немного внимания
Первое, что необходимо сделать — перейти на официальный сайт (удивительно, правда?!)

далее, как показано на скриншоте выше, вбираем вашу систему, и дожидаемся загрузки.
Стандартная установка и все, поздравляю, Вы установили себе Docker Desktop.

На ОС Windows может появиться ошибка, связанная с Hyper-V (система аппаратной визуализации)
Решение:
Переходим в папку с Docker -> открыть файл start.sh ->открываем в любом текстовом редакторе -> найти следующую строку:
«${DOCKER_MACHINE}» create -d virtualbox $PROXY_ENV «${VM}»
->заменить на :
«${DOCKER_MACHINE}» create -d virtualbox —virtualbox-no-vtx-check $PROXY_ENV «${VM}«
->снова запустить процесс установки (готово)
Работа с Docker
Есть несколько способов работы с Docker :
-
Работать в Docker Desktop (как устанавливать смотреть выше!)
-
При помощи cmd
-
Через IDE
Первый запуск
Запускаем наш Docker Desktop и открываем командную строку. После запуска приложения, у Вас должна отображаться следующая иконка (в скрытых значках):

в командной сроке пишем следующую команду:
dockerи если все верно сделано, то у Вас отобразиться список всех доступных команд и их описание:

Проверьте переменные зависимости. В переменной Patch мог не прописаться путь до docker.exe. Найдите путь до docker.exe (обычно в папке bin) и добавьте путь в переменную Patch
Надеюсь у Вас все хорошо, и команда docker заработала и описание команд появилось и погода хорошая. Теперь то можно и скопировать команду из Docker Desktop

и выполнить ее в командной строке. По идее должно получиться следующее:

И что же мы сделали? Создали и запустили контейнер docker/getting-started на порту 80.
Вернемся в наш Docker Desktop и видим следующее:

Поздравляю — мы запустили контейнер.
Перейдем во вкладку Images и увидим следующее:

Видим образ, на основе которого создался наш контейнер. (это все мы сделали командой выше)
Посмотреть информацию можно вернувшись в командную строку и прописав команду:
docker infoтогда увидим следующее

Видим всю информацию про все контейнеры и образы.
Давайте-то уже посмотрим, что у нас получилось. Переходим в Docker Desktop во вкладку Containers/Apps и нажимаем следующее:
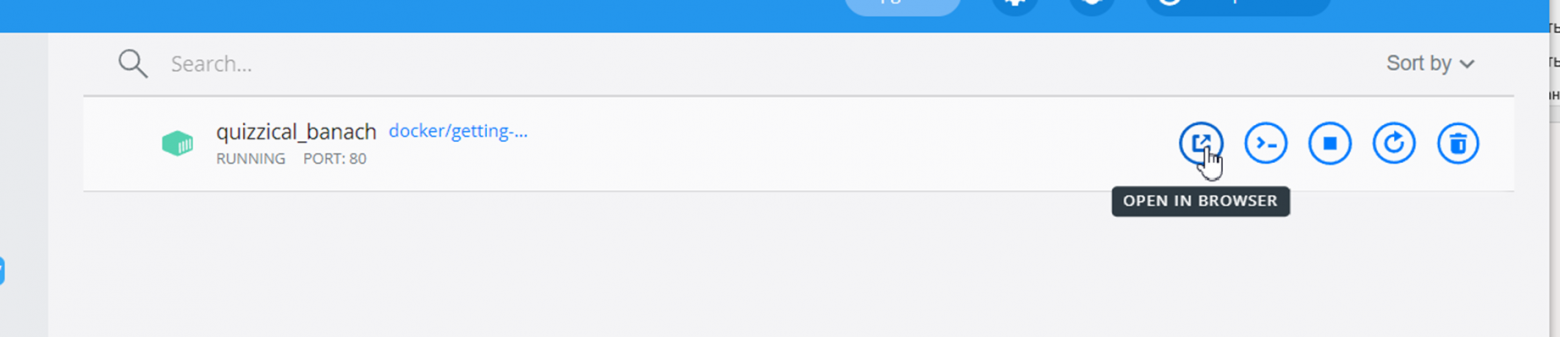
Hello world! по docker-ски

Можем насладиться проделанной работой)
Контейнеры и образы
Контейнеры, образы — чтооооо?!
Давайте теперь немного теории(совсем чуть-чуть)
Образ – готовое решение , содержащее некий функционал(нельзя изменять), на его основе можем создать свой контейнер
Контейнер – это собранный проект , состоящий из образов: упакованное (контейнеризированное) приложение на основе образов
Посмотрим на картинку ниже:

Тут наглядно показан принцип работы технологии docker, но все же, уточним моменты:
-
Docker deamon – промежуточный api для нахождение и скачивания нужного image
-
Docker hub — место сбора различных образов
-
Images –образы
-
Containers- контейнеры
Установка образа
Давайте попробуем развернуть какой-нибудь контейнер (что-то повеселее стартовой страницы).
-
Заходим на сайт docker
-
Переходим во вкладку: Explore
-
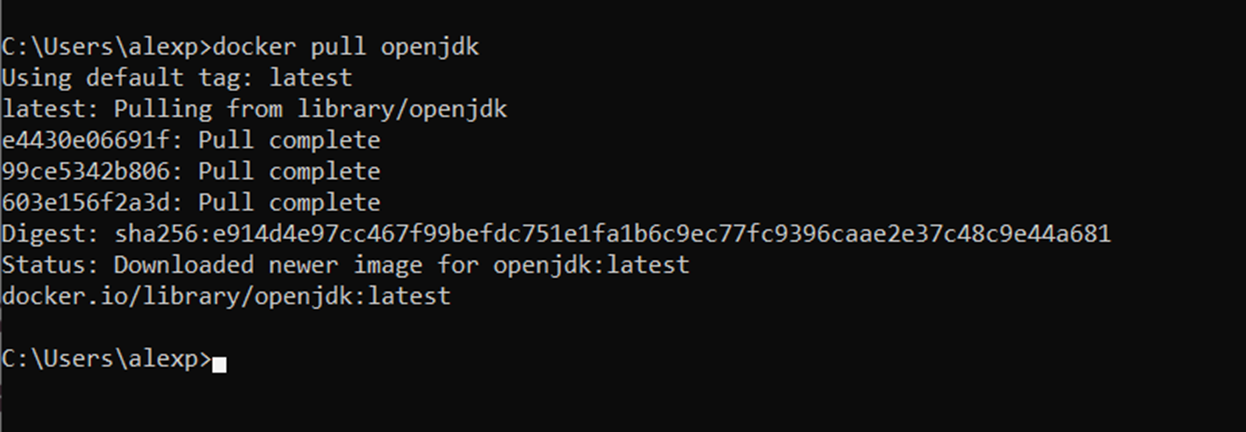
В поиске вводим название нужного образа (я буду скачивать образ java- вы можете выбрать любой другой)

находим следующее

нажимаем, видим сразу готовенькую команду:

Копируем и вставляем в командную строку –> тем самым устанавливаем себе образ java:
Запуск образа
Давайте теперь создадим и запустим контейнер на основе только что скачанного образа.
docker run имя_образа «Стоп» — скажите Вы . А откуда взять имя образа? А вот от куда:
docker imagesНа вас вывалится список образов, находим там нужный и вставляем в команду выше:

Что получили
Запустить образ без контейнера невозможно – противоречит принципу docker, следовательно у нас создался контейнер на основе нашего образа, который мы пытались запустить

Давайте запустим наш контейнер в интерактивном режиме и убедимся, что мы все сделали верно. Вводим команду для запуска (даем свое имя- тут я обозвал его как JavaContainer):
docker run -it --name JavaContainer openjdkПолучаем запушенный контейнер:

Видим — запустили контейнер с java (об этом нам говорит надпись jshell- java оболочка). Ну хорошо, поигрались с java, а как вернуться обратно, команды docker то уже не работают. И что делать ?


Спокойствие, только спокойствие. Нажимаем магическую комбинацию Ctrl + D:
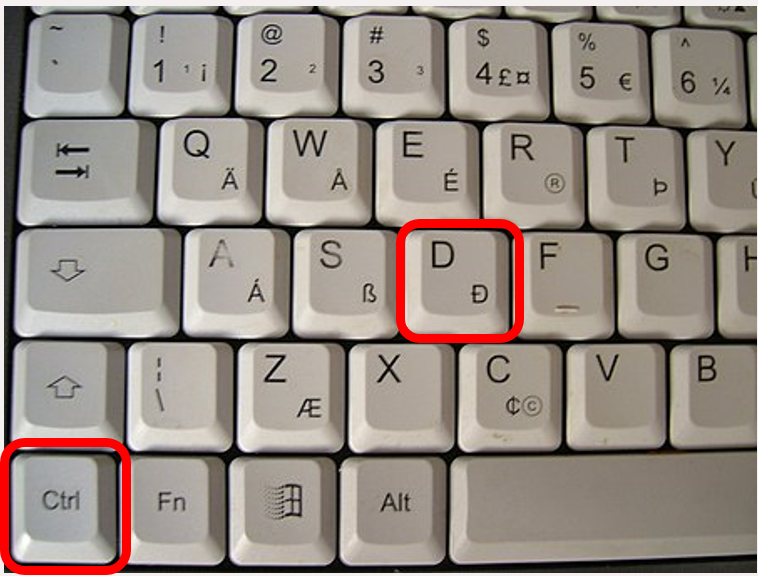
и о чудо, можно выдохнуть)
А что еще можно запустить?
Давайте , на последок, посмотрим еще возможности docker и запустим Ubuntu.
Схема запуска не сложнее, чем мы занимались выше, все действия аналогичные:
-
Аналогично шагам выше , зайдем на сайт и найдем Ubuntu, после воспользуемся командой в описании на сайте
-
Далее запустим в интерактивном режиме:
docker run –it –name имя_контейнера имя_образа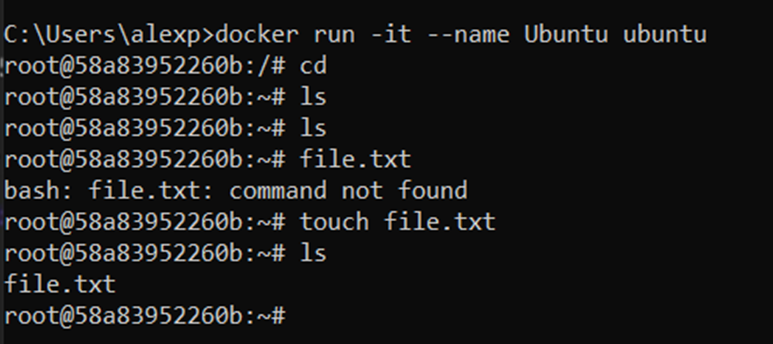
как-то так )
Итоги
Тут я собрал некоторые полезные команды docker и их описание на русском. Может кому пригодится).
Это был краткий обзор на технологию Docker, разумеется он не претендует на полноценный гайд: не было рассказано про Dockerfile или Docker compose или про запуск контейнеров в IDE, про создание собственных образов; НО цель данной статьи — помочь ознакомиться с базой а не рассказать про все и вся). В будущем поговорим про незатронутые тут моменты в Docker. Надеюсь моя статья была для Вас полезной!