Are you new to Docker Windows Images? Are you currently working in a Windows shop and curious to learn about Docker builds for container images? You have come to the right place. The best way to learn about new something is by doing with the docker build and docker build "tag" commands!
Not a reader? Watch this related video tutorial!
Not seeing the video? Make sure your ad blocker is disabled.
In this article, you are going to learn how to create your first Windows Docker image from a Dockerfile using the docker build command.
Let’s get started!
Understanding Docker Container Images
For years, the only way to test or perform development on multiple operating systems (OS) was to have several dedicated physical or virtual machines imaged with the OS version of your choice. This methodology required more hardware and overhead to provision new machines for each software and OS specification.
However, these days the usage of Docker container images has grown partly due to the popularity of micro-service architecture. In response to the rise in Docker’s popularity, Microsoft has started to publicly support Docker images for several flagship products on their Docker Hub page. They have even added native support for images for Windows as a product feature in Windows 10 and Windows Server 2016!
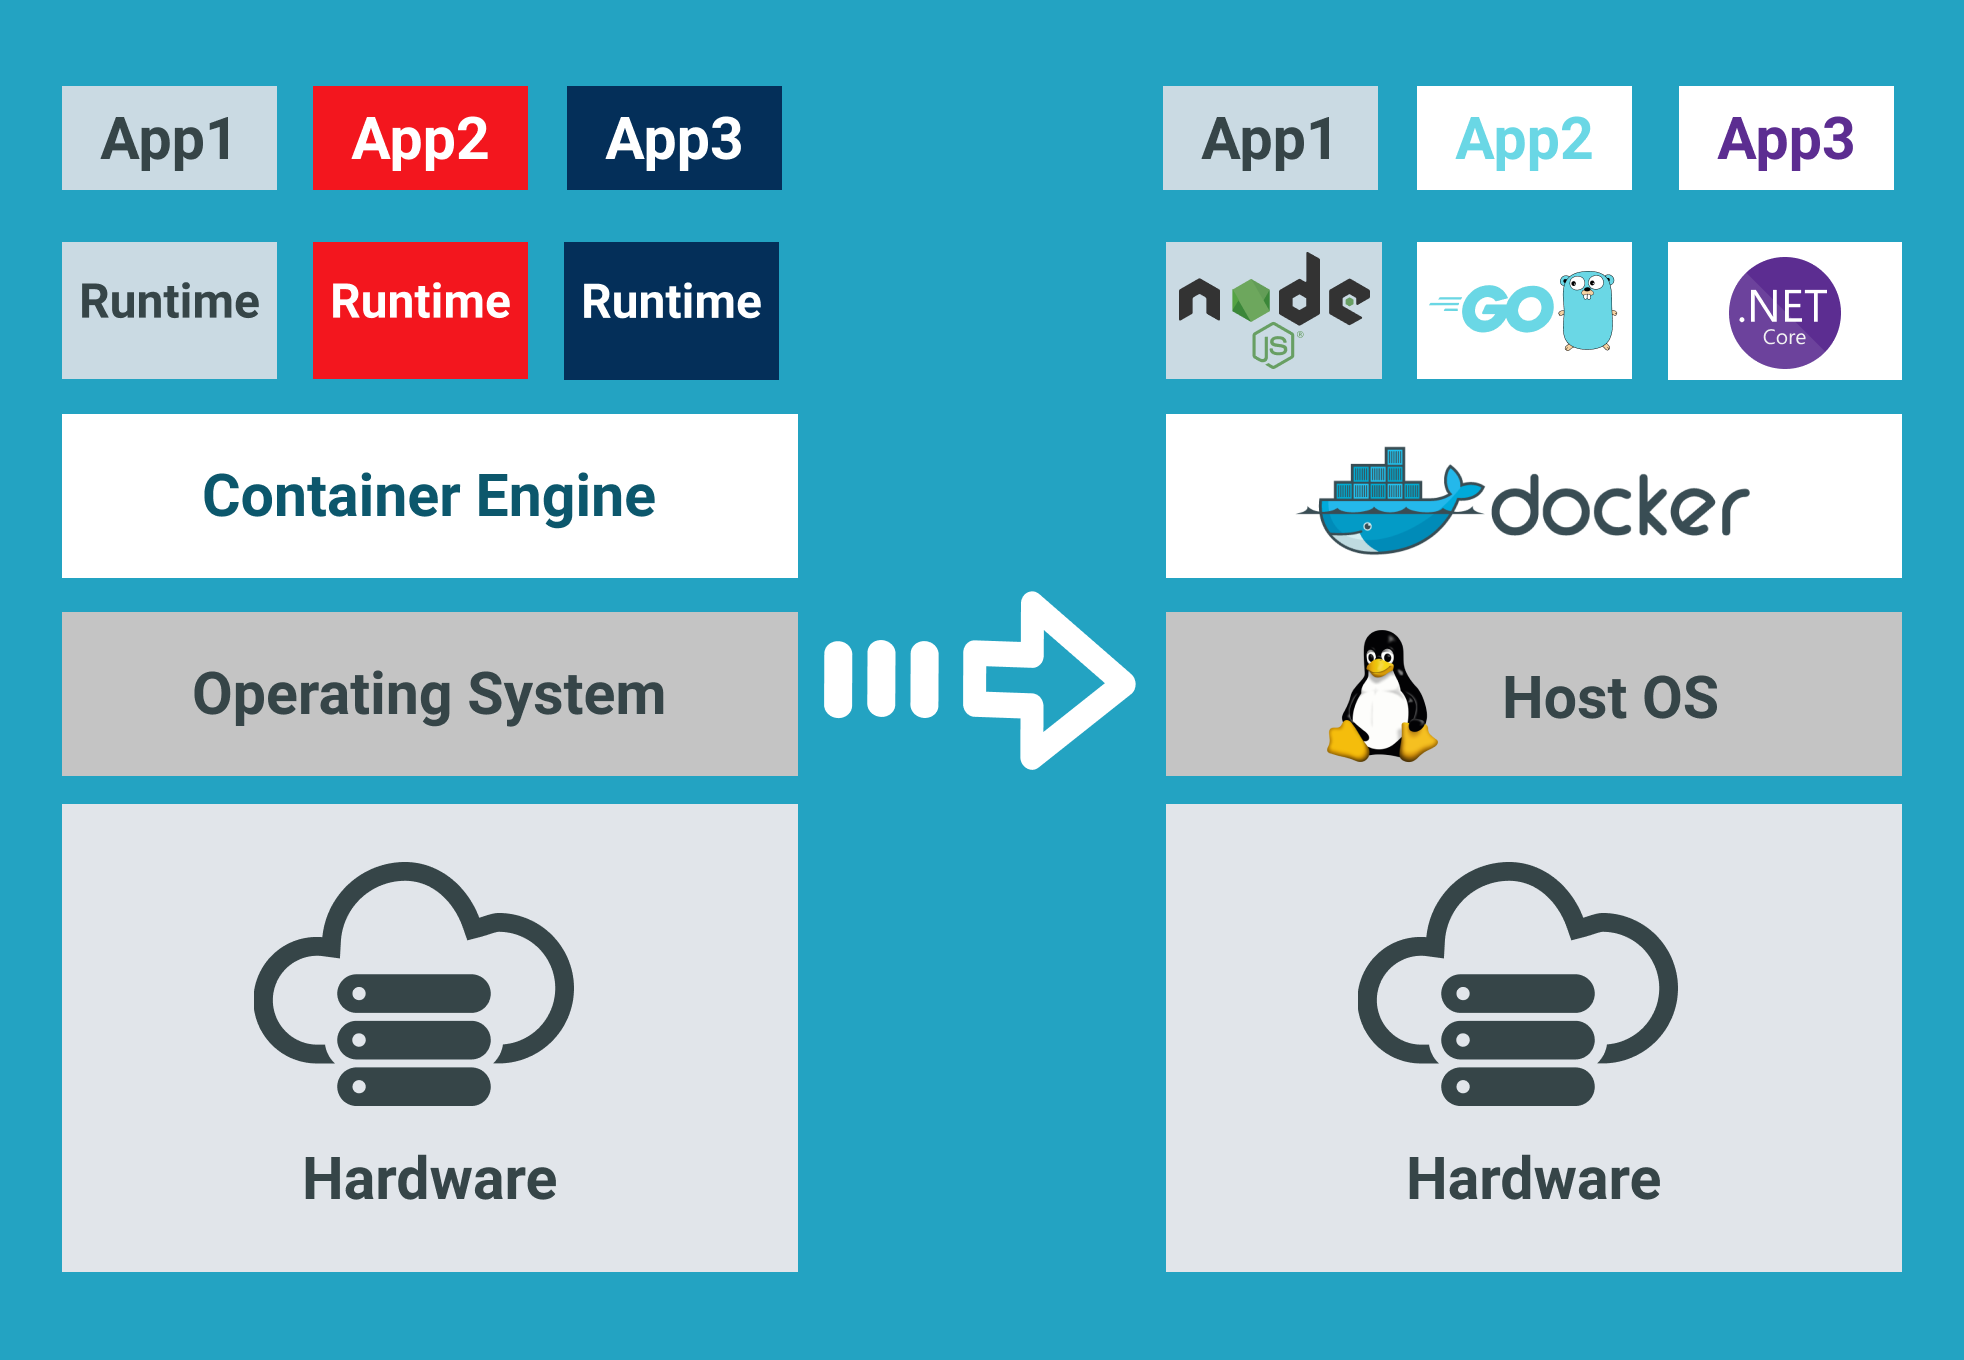
A Docker image is run on a container by using the Docker Engine. Docker images have many benefits such as portability (applicable to multiple environments and platforms), customizable, and highly scalable. As you can see below, unlike traditional virtual machines, the Docker engine runs on a layer between the host OS kernel and the isolated application services that are being containerized.
Understanding Docker Build and Images
The docker build command can be leveraged to automate container image creation, adopt a container-as-code DevOps practice, and integrate containerization into the development cycle of your projects. Dockerfiles are simply text files that contain build instructions used by Docker to create a new container image that is based on an existing image.
The user can specify the base image and list of commands to be run when a container image is deployed or startup for the first time. In this article, you will learn how to create a Windows-based docker image from Dockerfile using a Windows container.
This process has several benefits over using a pre-built container image:
- You are able to rebuild a container image for several versions of Windows – which is great for testing code changes on several platforms.
- You will have more control over what is installed in the container. This will allow you to keep your container size to a minimum.
- For security reasons, you might want to check the container for vulnerabilities and apply security hardening to the base image
Prerequisites/Requirements
This article is a walkthrough on learning about learning how to build a Docker image using a Dockerfile. If you’d like to follow along, ensure that you have the following prerequisites in place.
- Docker for Windows installed. I’ll be using the Docker Community Edition (CE) version 2.1.0.4 in my environment.
- Internet access is needed for downloading the Docker images
- Windows 10+ Operating System (version 1709 is being used for this tutorial)
- Nested virtualization enabled
- 5 GB of free diskspace on your local machine
- PowerShell 5.0+
- This tutorial uses the Visual Studio Code IDE. However feel free to use what ever IDE you’d prefer.
Note: Be sure to enable Windows Containers Configuration when installing Docker.
Getting Prepared
You’ll first need a folder to store all of the Docker images and containers you’ll be building from those images. To do so, open a Powershell or cmd terminal (you’ll be using PowerShell throughout this article) and create a new directory called C:\Containers.
Once the folder is created, change to that directory. This puts the console’s current working directory to C:\Containers to default all downloads to this directory.
PS51> mkdir C:\Containers
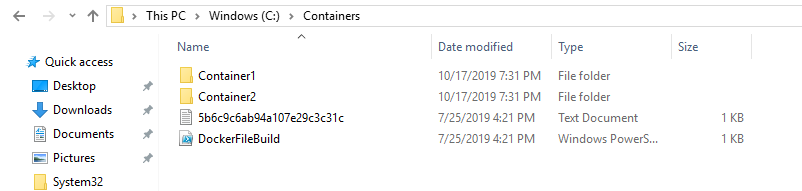
PS51> cd C:\ContainersIn this article, you’ll get a headstart. Most of the files to work through this project are already available. Once the folder is created, perform a Git pull to copy over the files needed for this article from the TechSnips Github repository to the C:\Containers folder. Once complete, check to make sure that the C:\Containers folder looks like below.
Downloading the IIS Windows Docker Image
The first task to perform is to download a “template” or base image. You’ll be building your own Docker image later but first, you need an image to get started with. You’ll be downloading the latest IIS and Windows Server Core Images that are required for this tutorial. The updated list of images can be found on the official Microsoft Docker hub image page.
Reviewing the Current Docker Base Images
Before downloading the image from the image repository, let’s first review the current Docker base images that you currently have on your local system. To do so, run a PowerShell console as Administrator and then type docker images. This command returns all images on your local system.
As you can see below, the images available are initially empty.

Downloading the Base Image
Now it’s time to download the base IIS image from Docker Hub. To do so, run docker pull as shown below. This process can take some time to complete depending on your internet speeds.
PS51> docker pull mcr.microsoft.com/windows/servercore/iis
Now run docker images and you should have the latest Microsoft Windows Core IIS image available for this tutorial.

Inspecting the Dockerfile
In an earlier step, you had downloaded an existing Dockerfile for this tutorial. Let’s now take a look at exactly what that entails.
Open the C:\Containers\Container1\Dockerfile file in your favorite editor. The contents of this Dockerfile are used to define how the container image will be configured at build time.
You can see an explanation of what each piece of this file does in the in-line comments.
# Specifies that the latest microsoft/iis image will be used as the base image
# Used to specify which base container image will be used by the build process.

# Notice that the naming convention is "**owner/application name : tag name**"
# (shown as microsoft/iis:latest); so in our case the owner of the image is
# Microsoft and the application is IIS with the "latest" tag name being used
# to specify that you will pull the most recent image version available.
FROM microsoft/iis:latest

# Copies contents of the wwwroot folder to the inetpub/wwwroot folder in the new container image
# Used to specify that you want to copy the WWWroot folder to the IIS inetpub WWWroot
# folder in the container. You don't have to specify the full path to your local
# files because docker already has the logic built-in to reference files and folders
# relative to the docker file location on your system. Also, make note that that
# docker will only recognize forward slashes for file paths - since this is a
# Windows based container instead of Linux.
COPY wwwroot c:/inetpub/wwwroot

# Run some PowerShell commands within the new container to set up the image

# Run the PowerShell commands to remove the default IIS files and create a new
# application pool called TestPool
RUN powershell Remove-Item c:/inetpub/wwwroot/iisstart.htm -force
RUN powershell Remove-Item c:/inetpub/wwwroot/iisstart.png -force
RUN powershell Import-Module WebAdministration
RUN powershell New-WebAppPool -Name 'TestPool'

# Exposes port 80 on the new container image
# Used to open TCP port 80 for allowing an http connection to the website.
# However, this line is commented out, because the IIS container has this port
# already open by default.
#EXPOSE 80

# Sets the main command of the container image
# This tells the image to run a service monitor for the w3svc service.
# When this is specified the container will automatically stop running
# if the w3svc service stopped. This line is commented out because of the
# IIS container already has this entrypoint in place by default.
#ENTRYPOINT ["C:\\ServiceMonitor.exe", "w3svc"]
Building a New Docker Image
You’ve got the Dockerfile ready to go and a base IIS image downloaded. Now it’s time to build your new Docker image using the Dockerfile.
To build a new image, use the docker build "tag" command. This command creates the image. For this article, you can see below you’re also using the -t ** option which replaces the “tag” portion. This option allows you to give your new image a friendly tag name and also reference the Dockerfile by specifying the folder path where it resides.
Below you can see an example of ensuring the console is in the C:\Containers directory and then building a new image from the Dockerfile in the C:\Containers\Container1 directory.
PS51> cd C:\Containers
PS51> docker build -t container1 .\Container1
Once started, you can see the progress of the command as it traverses each instruction in the docker file line by line:
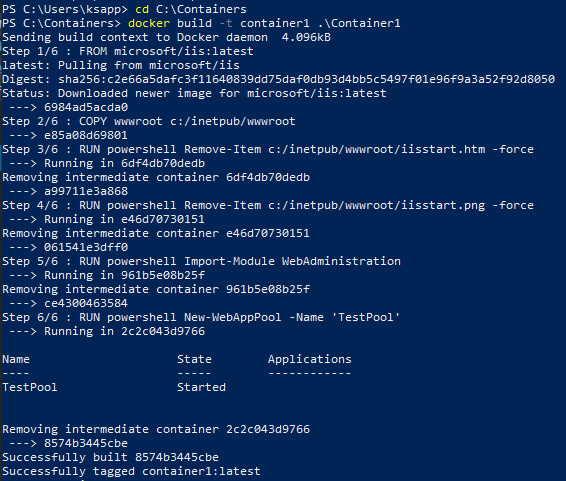
Once done, you should now have a new Docker image!
Now run the docker images command to view the images that are available. You can see below an example of the container1 image created.

Note: The
docker build —helpcommand is a useful parameter to display detailed information on the docker command being run.
Running the Docker Container
At this point, you should have a new image created. It’s time to spin up a container using that image. To bring up a new container, use the docker run command.
The docker run command will bring up a new Docker container based on the container1 image that you created earlier. You can see an example of this below.
Notice that the -d parameter is used. This tells the docker runtime to start the image in the detached mode and then exit when the root process used to run the container exits.
When docker run completes, it returns the ID of the container created. The example below is capturing this ID into a $containerID variable so we can easily reference it later.
PS51> $containerID = docker run -d container1
PS51> $containerID
Once the container is brought up, now run the docker ps command. This command allows you to see which containers are currently running using each image. Notice below that the running image is automatically generated a nickname (busy_habit in this case). This nickname is sometimes used instead of the container ID to manage the container.

Running Code Inside a Docker Container
A new container is built from a new image you just created. Let’s now start actually using that container to run code. Running code inside of a Docker container is done using the docker exec command.
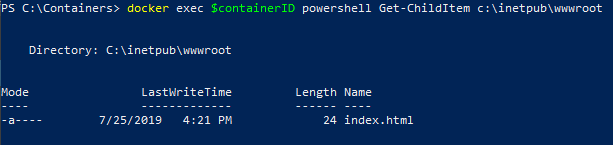
In this example, run docker exec to view PowerShell output for the Get-ChildItem command in the container using the command syntax below. This will ensure the instructions in the Dockerfile to remove the default IIS files succeeded.
PS51> docker exec $containerID powershell Get-ChildItem c:\inetpub\wwwrootYou can see below that the only file that exists is index.html which means the default files were removed.
Now run the ipconfig command in the container to get the local IP address of the container image so that you can try to connect to the IIS website.
PS51> docker exec $containerID ipconfigYou can see below that ipconfig was run in the container just as if running on your local computer and has return all of the IP information.
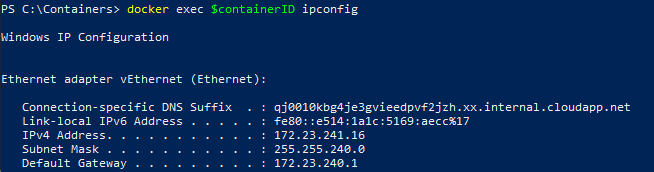
ipconfig in a Docker containerInspecting the IIS Website
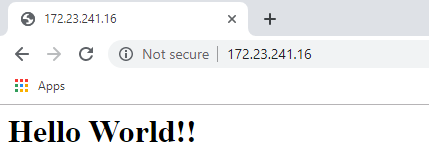
Now it’s time to reveal the fruits of your labor! It’s time to see if the IIS server running in the Docker container is properly serving up the index.html page.
Open a browser and paste the IP4 Address found via ipconfig into the address bar. If all is well, you should see a Hello World!! message like below.
Reviewing Docker History
One useful command to use when working with Docker containers i the docker history command. Although not necessarily related to creating an image or container itself, the docker history command is a useful command that allows you to review changes made to the container image.
PS51> docker history container1You can see below, that docker history returns all of the Dockerfile and PowerShell activity performed on the container1 container you’ve been working with.
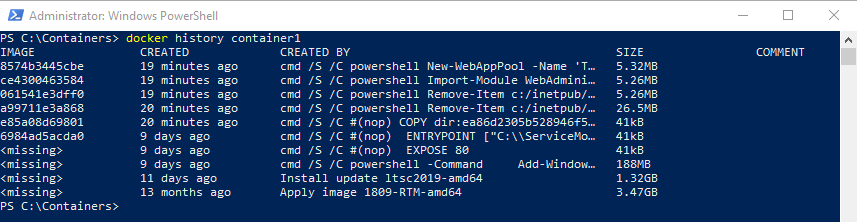
docker historyCleaning up the Running Docker Images
The steps below are used to cleanup all stopped containers running on your machine. This will free up diskspace and system resources.
Run the docker ps command to view a list of the containers running on your system:

Now stop the running containers using the docker stop command:
PS51> docker stop <image nick name: busy_haibt in my case>
PS51> docker stop <image nick name: unruffled_driscoll in my case>
Finally you can permanently remove the stopped containers using the docker system prune command.
PS51> docker system prune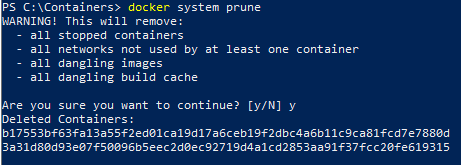
Further Reading
- Creating Your First Docker Windows Server Container
- How to Manage Docker Volumes on Windows
This article describes how to create docker images for Windows desktop applications.
• 5 min read
What’s wrong with the legacy monolithic architecture of Windows applications?
- Typically, the core business logic of a legacy monolithic application is tightly coupled to its GUI.
- Legacy applications may not scale well enough to meet new customer needs, resulting in decreased performance and increased customer frustration.
- Developers often get stuck in old code when there are so many exciting new technologies available to innovate.
The good news is that moving from a legacy desktop application to a microservice architecture stops the monolithic nightmare.
Dividing a monolithic application into subsystems that can be scaled, developed, and deployed individually is your entry point into the microservices realm.
Docker containers.
Docker is currently the leading container toolbox to deploy microservices to the cloud.
A software container packages the code, its libraries, frameworks, and other dependent components. As a result, the application runs quickly and reliably in any environment, be it a local data center, a public cloud, or a developer’s laptop.
Software containerization solves many of the challenges of software development and deployment, so we embraced this concept when moving our Windows desktop applications to the cloud.
The most suitable types of software to embed in a docker container are non-user interface applications that are run from the command line. Typically Linux-based Docker images are lightweight and widely used in cloud environments.
Unfortunately, in most cases, rewriting all of your Windows application code from scratch to make it cross-platform is too expensive and time-consuming.
Besides, when it comes to platform design, sharing the kernel between Dockerized applications has significant limitations. For example, Windows containers will not be able to run on a Linux host.
Windows container base images.
Microsoft offers Windows containers to deliver containerized services on the Windows platform.
Check out a good article from Microsoft that describes Windows docker container images that users can build from.
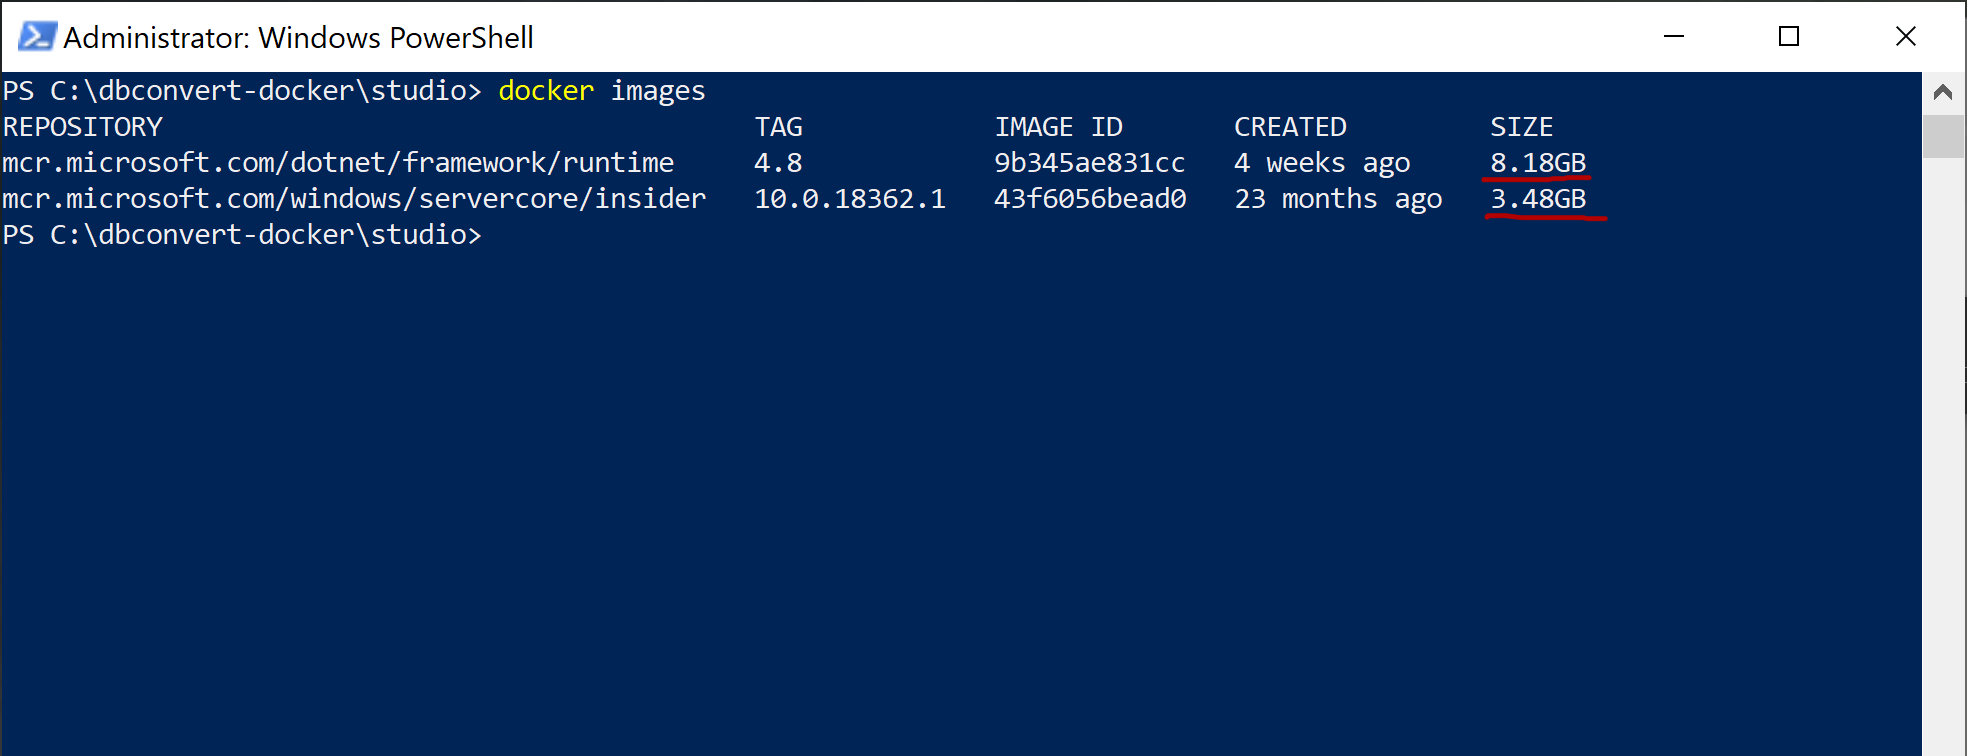
I will use an Insider Windows Server Core image as a base. This image includes a subset of the Windows Server APIs and is suitable for packaging typical .NET framework applications.
- Insider images are >50% smaller than the .Net Framework Runtime Images.
- Container startup into Windows PowerShell is 30-45% faster.
Dockerizing DBConvert tools.
As an example, I will show how to build a Docker image for DBConvert Studio. It is a classic .NET Windows application running either in GUI mode or in headless mode from the command line. It is also a good source of Docker-related techniques if you want to customize your own Dockerfiles further.
FROM mcr.microsoft.com/windows/servercore/insider:10.0.18362.1

RUN echo "Downloading dbconvert studio"
ADD https://dbconvert.com/downloads/dbconvert_studio.zip /
COPY DBConvert-Studio.reg /
RUN powershell -Command "Write-Host 'Expanding dbconvert archive'; \
    Expand-Archive dbconvert_studio.zip; \
    Write-Host 'Installing dbconvert'; \
    Start-Process msiexec -ArgumentList '/i', 'C:\dbconvert_studio\dbconvert_studio_x64\DbConvertStudioSetup_x64.msi', '/quiet', '/norestart' -NoNewWindow -Wait; \
    Start-Process reg import DBConvert-Studio.reg; \
    Remove-Item -Path c:\dbconvert* -recurse -force; \
    Set-Location -Path 'C:\Program Files\DBConvert\DBConvert Studio x64';"
CMD ["powershell"]Let’s dive deeper into what the Dockerfile actually does.
- The first FROM line pulls the Insider Windows Server Core image.
- The next RUN simply displays the status of the following ADD command. It downloads the installation zip package directly to our new image.
- COPY DBConvert-Studio.reg / command copies the DBConvert registration file info to the root of the image. We will use it later to remove all restrictions on the DBConvert studio unregistered copy of the. (See the reg import command, which will appear later).
Let’s take a look at the rest of the PowerShell commands combined into the following RUN command.
- The Write-Host command displays the current status of the operation.
- Expand-Archive — extracts the contents of the newly downloaded zip archive to the root directory of our image.
- Start-Process msiexec command installs the unpacked archive.
- The next «Start-Process reg» command imports the registration file’s contents into our docker image’s Windows registry.
- Remove-Item removes all unnecessary intermediary files from the final image.
- Set-Location sets the specified location as a working directory.
- CMD [«powershell»] specifies what command to run within the container. In fact, we can call straight CMD [«DBConvert.exe», «/ Session:», «mysql2mysql»] , but each time it may be a different session configuration file. Therefore, it is better to bind the directory on the host to the directory inside the container with the —volume (-v) flag
Building Docker image and starting container.
Launch the following command in the terminal to build your Docker image.
docker build -t slotix/dbconvert-studio .The next command docker run starts a container from the newly created DBConvert Studio image.
docker run --name studio -it --rm -v "c:\dbconvert-docker\studio\workSettings:C:\PROGRAM FILES\DBCONVERT\DBConvert Studio x64\workSettings" slotix/dbconvert-studio:latest DBConvert.exe /Session:"my2my_copy"Containers are immutable in design. This means that the container will not be changed during its life cycle: no updates, no patches, no configuration changes.
When starting DBConvert studio from the command line, you need to pass in a ready-made session file that includes the configured database connections involved in the migration and some other parameters.
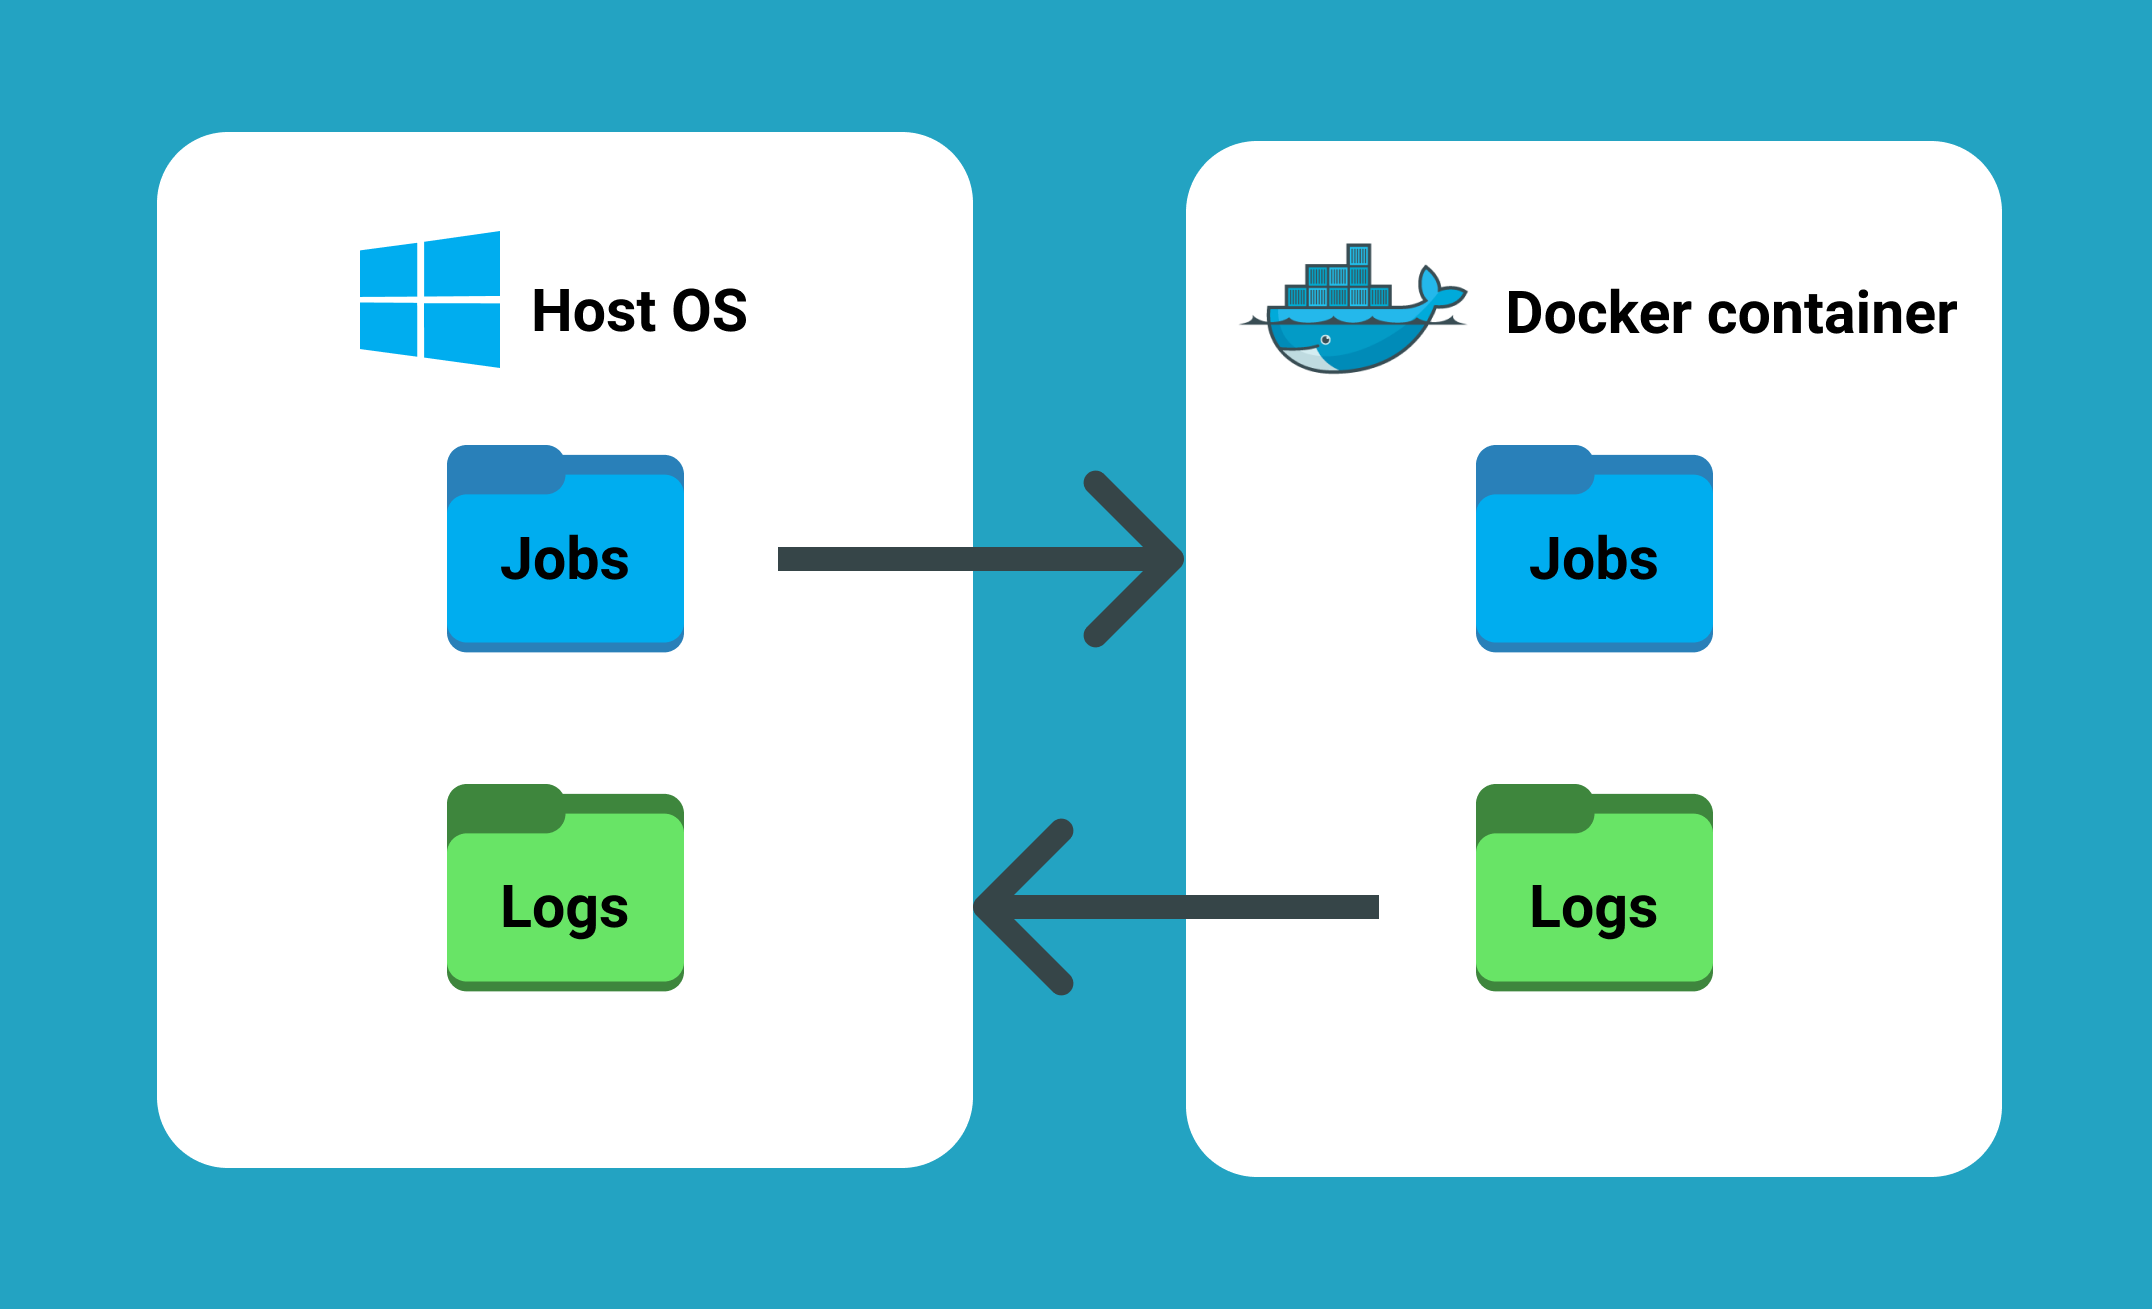
-v flag mounts c:\dbconvert-docker\studio\workSettings directory on the host machine into the folder C:\PROGRAM FILES\DBCONVERT\DBConvert Studio x64\workSettings inside the running container.
- This way we can feed DBConvert Studio with jobs located outside of the container.
- Another advantage of directory binding is that it works and vice versa. When a process completes, a log file is generated. It appears both inside the container directory and on the host computer.
Check out github repository with Dockerfile from this article at https://github.com/slotix/dbconvert-docker
Final thoughts.
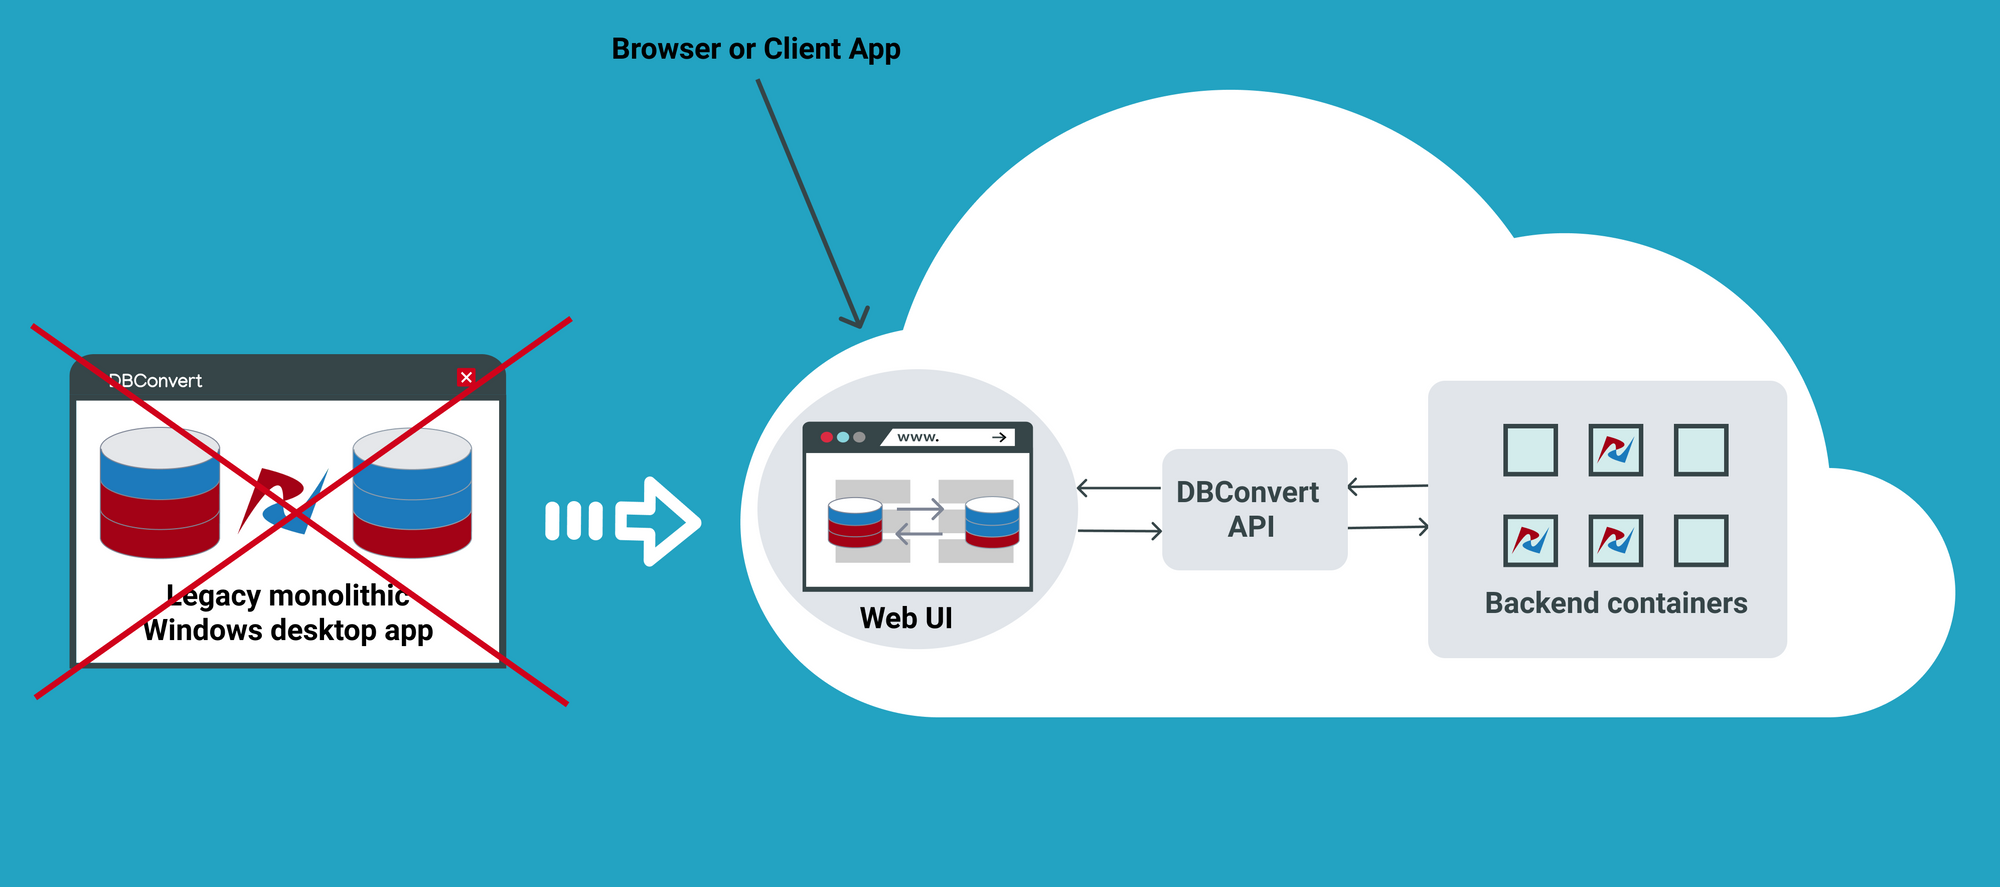
Unfortunately, there is currently no way to create new session files (jobs) outside of the DBConvert Studio GUI. The new web interface and DBConvert API functionality is included in our plans as shown here.
DBConvert’s current products are Windows desktop applications. Using Docker and Kubernetes to run applications in the cloud has been gaining popularity for several years now. Following today’s trends and demands, we will gradually move to the cloud and build a hybrid Windows and Linux host infrastructure.
This is the very first and obvious step of moving to a cloud environment. We are ready to help you launching dockerized DBConvert tools on your own infrastructure.
DBConvert tools are the most suitable software solutions for database administrators who need complex migration and synchronization between the most popular RDBMS, including MySQL, SQL Server, Oracle, PostgreSQL, and many others.
In this tutorial, I will demonstrate how to host an ASP.NET Core 2.2 application on Windows Containers by using a Docker image. A Docker image will be packaged with an ASP.NET Core application that will be run when a container is spun up.
Before we get started with creating a Docker image. Let’s make sure we have prerequisites done.
Prerequisites
- Installing docker-cli and other components to get started
- Visual Studio code.
- Docker extension for visual studio code.
Once you have the prerequisites, we will use a publicly available ASP.NET Core base image from Microsoft. Microsoft maintains their Docker images on Docker hub. Docker hub is a container registry to manage your Docker images either by exposing the image publicly or maintaining it privately. Private image responsibilities cost money. Visit Docker Hub website to learn more about image repository management.
Step 1: Open the PowerShell console as an administrator
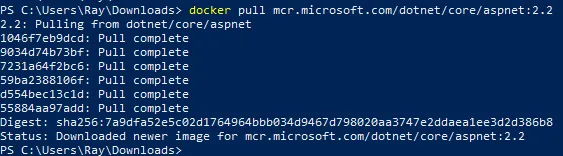
Step 2: Let’s get started by pulling ASP.NET Core 2.2 Docker image from Docker hub by executing the below command.
docker pull mcr.microsoft.com/dotnet/core/aspnet:2.2Your output should look similar to what is shown below:
Step 3: Create a folder with your preference name whatever you prefer. I will use c:\docker\ for demonstration purposes.
Step 4: Download ASP.NET Core application package from this URL.
Invoke-WebRequest -UseBasicParsing -OutFile c:\docker\WebAppCore2.2.zip https://github.com/rahilmaknojia/WebAppCore2.2/archive/master.zipWhat we are doing in the above command is downloading packaged code that is already built to save time on building a package.
Step 5: Extract WebAppCore2.2.zip by using the PowerShell 5.0 native command. If you do not have PowerShell 5.0 and above, you will have to manually extract the package.
Expand-Archive c:\docker\WebAppCore2.2.zip -DestinationPath c:\docker\ -Force Step 6: Now let’s create a Docker file in c:\docker folder.
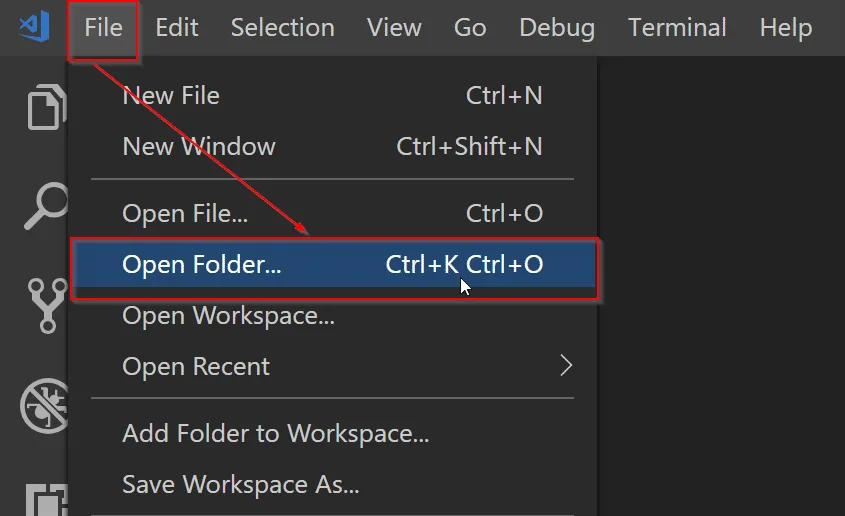
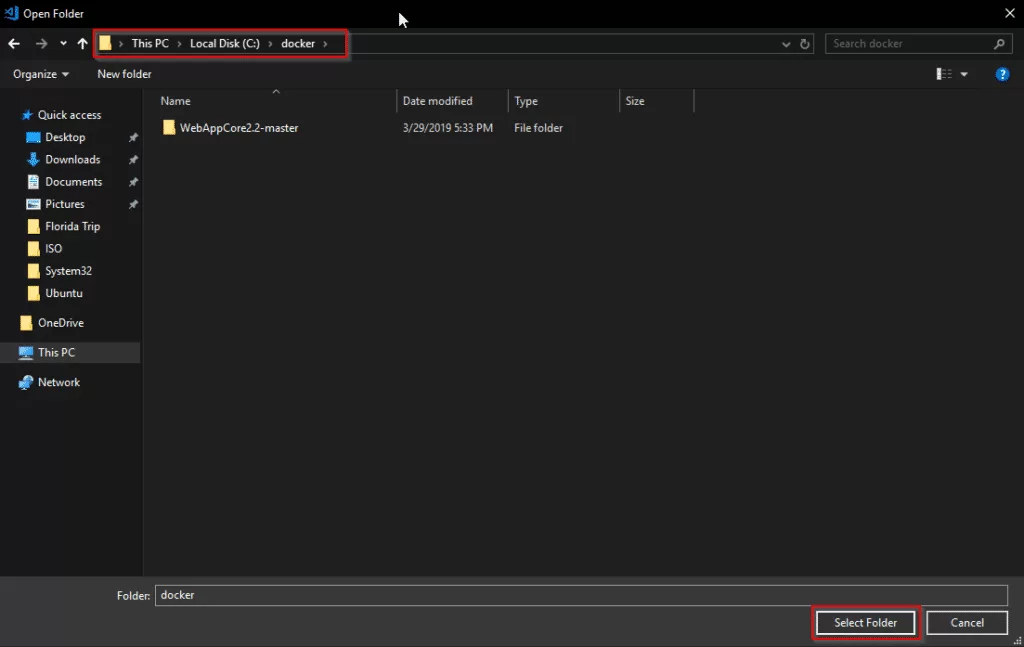
New-Item -Path C:\docker\Dockerfile -ItemType FileStep 7: Go ahead and open C:\docker folder path in Visual Studio Code.
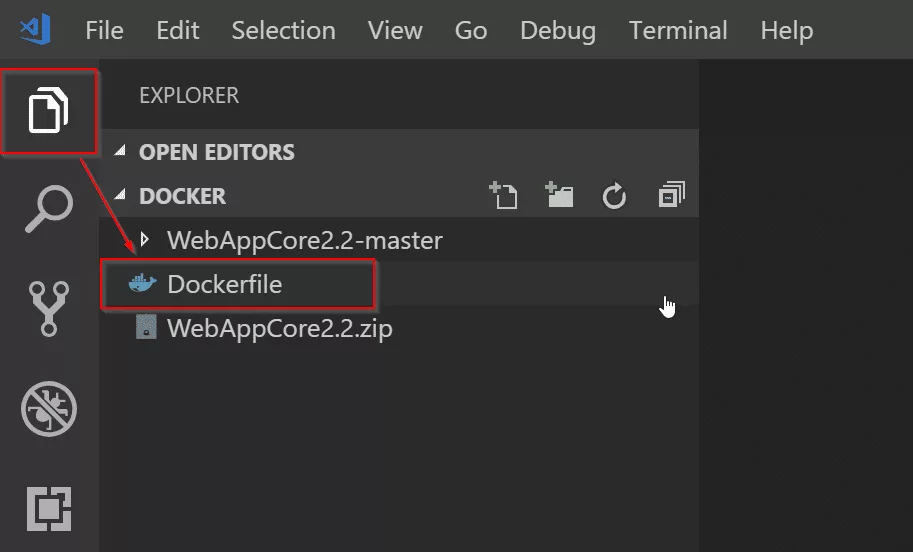
Step 8: Now we will open Dockerfile by double-clicking on the file in Visual Studio Code to start writing the required steps to build an image.
Copy and paste the code below into Dockerfile.
# Pull base image from Docker hub
FROM mcr.microsoft.com/dotnet/core/aspnet:2.2

# Create working directory
RUN mkdir C:\\app

# Set a working directory
WORKDIR c:\\app

# Copy package from your machine to the image. Also known as staging a package
COPY WebAppCore2.2-master/Package/* c:/app/

# Run the application
ENTRYPOINT ["dotnet", "WebAppCore2.2.dll"]
What we told the
Dockerfileis to pull an asp.net core base image from Docker hub. Then we ran a command to create a directory calledappinc:\apppath. We also told the container to setc:\appas a working directory. That way we can access binary directly when the container is spun up. We also added a step to copy all the binaries fromc:\docker\WebAppCore2.2-master\Package\to destination path in containerc:\app. Once we had the package staged in the container, we told it to run the application by executingdotnet WebAppCore2.2.dllso that the app would be accessible from outside the container. To learn more aboutDockerfilefor Windows, check out this Microsoft documentation.Now that you have the required steps to build an image, let’s go ahead with the below steps.
Step 9: Navigate to Dockerfile working directory from PowerShell console. If you are already in that path, you can ignore it.
Step 10: Execute the below command to build a container image.
docker build -t demo/webappcore:2.2.0The above command will create a Docker image under demo path. With the image name called as webappcore and version 2.2.0.
Your output should look like below once it is successful:
PS C:\docker> docker build -t demo/webappcore:2.2.0 .
Sending build context to Docker daemon  9.853MB
Step 1/5 : FROM mcr.microsoft.com/dotnet/core/aspnet:2.2
 ---> 36e5a01ef28f
Step 2/5 : RUN mkdir C:\\app
 ---> Using cache
 ---> 8f88e30dcdd0
Step 3/5 : WORKDIR c:\\app
 ---> Using cache
 ---> 829e48e68bda
Step 4/5 : COPY WebAppCore2.2-master/Package/* c:/app/
 ---> Using cache
 ---> 6bfd9ae4b731
Step 5/5 : ENTRYPOINT ["dotnet", "WebAppCore2.2.dll"]
 ---> Running in 4b5488d5ea5f
Removing intermediate container 4b5488d5ea5f
 ---> 9729270fe1ac
Successfully built 9729270fe1ac
Successfully tagged demo/webappcore:2.2.0
Step 11: Once the image has been built, you are now ready to run the container. Execute the below command.
docker run --name webappcore --rm -it -p 8000:80 demo/webappcore:2.2.0The above command will create a new container called webappcore with parameters.
--rmis used to automatically remove the container after it is shutdown.-itwill open a session into your container and output all the logs.-pis used for creating an external port and assigning it to the internal port of a container. Port 8000 is exposed to outside containers, and port 80 is used to access the app within the container.demo/webappcore:2.2.0is the path to the Docker image to run as a container.
Output of a running container

Step 12: Browsing your application from your local machine localhost:8000.
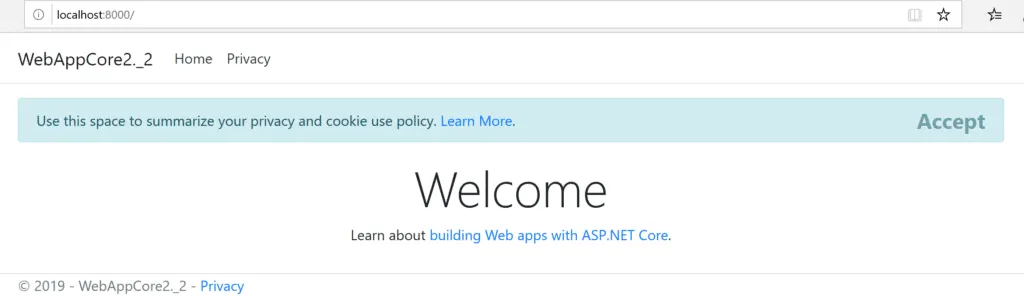
This is it! You ran your first Docker container in your local environment. Thank you for following the tutorial. Please comment below for any issue or feedback you would like to share.
Windows Images
This repository contains build instructions and Dockerfile to build Docker images with Windows-only browsers: Internet Explorer and Microsoft Edge.
System Requirements
- Bare metal machine or on VM with nested virtualization enabled and Linux installed. This example was tested on
Ubuntu 18.04.
$ uname -a
Linux desktop 4.15.0-46-generic #49-Ubuntu SMP Wed Feb 6 09:33:07 UTC 2019 x86_64 x86_64 x86_64 GNU/Linux
To check that virtualization is supported — verify that /dev/kvm file is present:
$ ls -l /dev/kvm
crw-rw---- 1 root kvm 10, 232 мар  8 19:38 /dev/kvm
- Qemu machine emulator installed. It is important to use the same
qemuversion on host machine where images are built and inside Docker image. To checkqemuversion type:
$ qemu-system-x86_64 -version
QEMU emulator version 2.11.1(Debian 1:2.11+dfsg-1ubuntu7.10)
Copyright (c) 2003-2017 Fabrice Bellard and the QEMU Project developers
- Windows license key
Build Procedure
1. Preparative Steps
1.1) Clone this repository and change dir to it:
$ git clone https://github.com/aerokube/windows-images.git
$ cd windows-images
1.2) Download Windows 10 installation image from Microsoft Software Download website.
1.3) Download virtio drivers virtio-win-0.1.141.iso. In the next steps we assume that you now have two files in current directory:
$ ls
virtio-win-0.1.141.iso  Win10_1809Oct_English_x32.iso
2. Windows Installation
2.1) Create hard disk image where Windows will be installed:
$ qemu-img create -f qcow2 hdd.img 40G
2.2) Run virtual machine and begin installation:
$ sudo qemu-system-x86_64 -enable-kvm \
        -machine q35 -smp sockets=1,cores=1,threads=2 -m 2048 \
        -usb -device usb-kbd -device usb-tablet -rtc base=localtime \
        -net nic,model=virtio -net user,hostfwd=tcp::4444-:4444 \
        -drive file=hdd.img,media=disk,if=virtio \
        -drive file=Win10_1809Oct_English_x32.iso,media=cdrom \
        -drive file=virtio-win-0.1.141.iso,media=cdrom
2.3) Windows will boot from installation image. Install Windows.
2.3.1) Proceed to the next step:

2.3.2) Click Install now:

2.3.3) Enter license key:

2.3.4) Choose Windows edition:

2.3.5) Read and accept license agreement:

2.3.6) Choose custom installation type:

2.3.7) Now you have to install virtio storage driver. Click Load driver:

2.3.8) Point to E:\viostor\w10\x86 directory:

2.3.9) Click next to install driver:

2.3.10) Choose installation partition and click next:

2.3.11) Wait while installation finishes:

2.3.12) Setup user and password:

2.3.13) Do other post-install configuration steps until you get Windows installed:

2.3.14) Install Ethernet virtio driver. Open device manager and click Update driver:

Choose virtio cdrom and click OK:

Install driver:

Connect to network:

2.3.15) Disable Windows Firewall or add firewall rule to allow access to port 4444. This is needed to access webdriver binary port with Selenium test.

2.3.16) Configure Windows as you wish: install updates, change screen resolution, apply registry modifications and so on.
3. Adding WebDriver Binaries
These binaries will handle Selenium test requests and launch respective browser.
-
For Internet Explorer — download an archive with driver binary from Selenium official website, unpack it and put the binary to
C:\Windows\System32directory. -
For Microsoft Edge web driver binary can be installed with the following command:
> DISM.exe /Online /Add-Capability /CapabilityName:Microsoft.WebDriver~~~~0.0.1.0

4. Creating Quick Boot Memory Snapshot
This snapshot contains memory state and is needed to quickly restore virtual machine instead of doing full boot which is slow. To create it:
4.1) Shutdown virtual machine.
4.2) Create overlay image that will contain VM state:
$ qemu-img create -b hdd.img -f qcow2 snapshot.img
4.3) Run VM using snapshot.img as filesystem:
$ sudo qemu-system-x86_64 -enable-kvm \
        -machine q35 -smp sockets=1,cores=1,threads=2 -m 2048 \
        -usb -device usb-kbd -device usb-tablet -rtc base=localtime \
        -net nic,model=virtio -net user,hostfwd=tcp::4444-:4444 \
        -drive file=snapshot.img,media=disk,if=virtio \
        -monitor stdio
Please note that qemu runs with monitor connected to stdio.
4.4) Browser configuration (required only for Internet Explorer).
Open Internet Explorer. The first time this browser is launched, it asks for the security setup. The option «Don’t use recommended settings» need to be selected as follows:

Then, the Internet Options have to be changed. These options can be opened using the configuration button located at the top of Internet Explorer. In the tab «Security», the protect mode for the zones «Internet» and «Restricted sites» have to be disabled, as shown in the following picture:

At this point, you have to close Internet Explorer. Select the option «Always close all tabs» when Internet Explorer is closing. Finally, you have to open again Internet Explorer and double check that the protected mode is turned off (it can be seen in a message box at the bottom of the browser).
4.5) Run web driver binary command.
- For Microsoft Edge — open command prompt with administrator privileges and run:
> MicrosoftWebDriver.exe --host=10.0.2.15 --port=4444 --verbose

- For Internet Explorer — open command prompt as unprivileged user and run:
> C:\Windows\System32\IEDriverServer.exe --host=0.0.0.0 --port=4444 --log-level=DEBUG

4.6) Minimize command line prompt window when driver is up and running.
4.7) Switch to terminal where qemu runs and type at qemu prompt:
Then type quit to stop VM:
To start VM from snapshot manually use the following command:
$ sudo qemu-system-x86_64 -enable-kvm \
        -machine q35 -smp sockets=1,cores=1,threads=2 -m 2048 \
        -usb -device usb-kbd -device usb-tablet -rtc base=localtime \
        -net nic,model=virtio -net user,hostfwd=tcp::4444-:4444 \
        -drive file=snapshot.img,media=disk,if=virtio \
        -loadvm windows
The command above is used in Dockerfile entry point script.

5. Build Docker Image
5.1) Move filesystem and state files to image directory in this repository:
$ mv hdd.img snapshot.img image
$ cd image
5.2) Build Docker image using provided Dockerfile:
$ docker build -t windows/edge:18 . # For Microsoft Edge
For Internet Explorer use:
$ docker build -t windows/ie:11 . # For Internet Explorer
5.3) Run a container from image:
$ docker run -it --rm --privileged -p 4444:4444 -p 5900:5900 windows/edge:18 # For Microsoft Edge
$ docker run -it --rm --privileged -p 4444:4444 -p 5900:5900 windows/ie:11 # For Internet Explorer
5.4) To see Windows screen inside running container — connect to vnc://localhost:5900 using selenoid as password.
5.5) To run Selenium tests — use http://localhost:4444 as Selenium URL.
Are you new to Docker Windows Images? Are you currently working in a Windows shop and curious to learn about Docker builds for container images? You have come to the right place. The best way to learn about new something is by doing with the docker build and docker build "tag" commands!
Not a reader? Watch this related video tutorial!
Not seeing the video? Make sure your ad blocker is disabled.
In this article, you are going to learn how to create your first Windows Docker image from a Dockerfile using the docker build command.
Let’s get started!
Understanding Docker Container Images
For years, the only way to test or perform development on multiple operating systems (OS) was to have several dedicated physical or virtual machines imaged with the OS version of your choice. This methodology required more hardware and overhead to provision new machines for each software and OS specification.
However, these days the usage of Docker container images has grown partly due to the popularity of micro-service architecture. In response to the rise in Docker’s popularity, Microsoft has started to publicly support Docker images for several flagship products on their Docker Hub page. They have even added native support for images for Windows as a product feature in Windows 10 and Windows Server 2016!
A Docker image is run on a container by using the Docker Engine. Docker images have many benefits such as portability (applicable to multiple environments and platforms), customizable, and highly scalable. As you can see below, unlike traditional virtual machines, the Docker engine runs on a layer between the host OS kernel and the isolated application services that are being containerized.
Understanding Docker Build and Images
The docker build command can be leveraged to automate container image creation, adopt a container-as-code DevOps practice, and integrate containerization into the development cycle of your projects. Dockerfiles are simply text files that contain build instructions used by Docker to create a new container image that is based on an existing image.
The user can specify the base image and list of commands to be run when a container image is deployed or startup for the first time. In this article, you will learn how to create a Windows-based docker image from Dockerfile using a Windows container.
This process has several benefits over using a pre-built container image:
- You are able to rebuild a container image for several versions of Windows – which is great for testing code changes on several platforms.
- You will have more control over what is installed in the container. This will allow you to keep your container size to a minimum.
- For security reasons, you might want to check the container for vulnerabilities and apply security hardening to the base image
Prerequisites/Requirements
This article is a walkthrough on learning about learning how to build a Docker image using a Dockerfile. If you’d like to follow along, ensure that you have the following prerequisites in place.
- Docker for Windows installed. I’ll be using the Docker Community Edition (CE) version 2.1.0.4 in my environment.
- Internet access is needed for downloading the Docker images
- Windows 10+ Operating System (version 1709 is being used for this tutorial)
- Nested virtualization enabled
- 5 GB of free diskspace on your local machine
- PowerShell 5.0+
- This tutorial uses the Visual Studio Code IDE. However feel free to use what ever IDE you’d prefer.
Note: Be sure to enable Windows Containers Configuration when installing Docker.
Getting Prepared
You’ll first need a folder to store all of the Docker images and containers you’ll be building from those images. To do so, open a Powershell or cmd terminal (you’ll be using PowerShell throughout this article) and create a new directory called C:Containers.
Once the folder is created, change to that directory. This puts the console’s current working directory to C:Containers to default all downloads to this directory.
PS51> mkdir C:Containers
PS51> cd C:Containers
In this article, you’ll get a headstart. Most of the files to work through this project are already available. Once the folder is created, perform a Git pull to copy over the files needed for this article from the TechSnips Github repository to the C:Containers folder. Once complete, check to make sure that the C:Containers folder looks like below.
Downloading the IIS Windows Docker Image
The first task to perform is to download a “template” or base image. You’ll be building your own Docker image later but first, you need an image to get started with. You’ll be downloading the latest IIS and Windows Server Core Images that are required for this tutorial. The updated list of images can be found on the official Microsoft Docker hub image page.
Reviewing the Current Docker Base Images
Before downloading the image from the image repository, let’s first review the current Docker base images that you currently have on your local system. To do so, run a PowerShell console as Administrator and then type docker images. This command returns all images on your local system.
As you can see below, the images available are initially empty.
Downloading the Base Image
Now it’s time to download the base IIS image from Docker Hub. To do so, run docker pull as shown below. This process can take some time to complete depending on your internet speeds.
PS51> docker pull mcr.microsoft.com/windows/servercore/iis
Now run docker images and you should have the latest Microsoft Windows Core IIS image available for this tutorial.
Inspecting the Dockerfile
In an earlier step, you had downloaded an existing Dockerfile for this tutorial. Let’s now take a look at exactly what that entails.
Open the C:ContainersContainer1Dockerfile file in your favorite editor. The contents of this Dockerfile are used to define how the container image will be configured at build time.
You can see an explanation of what each piece of this file does in the in-line comments.
# Specifies that the latest microsoft/iis image will be used as the base image
# Used to specify which base container image will be used by the build process.

# Notice that the naming convention is "**owner/application name : tag name**"
# (shown as microsoft/iis:latest); so in our case the owner of the image is
# Microsoft and the application is IIS with the "latest" tag name being used
# to specify that you will pull the most recent image version available.
FROM microsoft/iis:latest

# Copies contents of the wwwroot folder to the inetpub/wwwroot folder in the new container image
# Used to specify that you want to copy the WWWroot folder to the IIS inetpub WWWroot
# folder in the container. You don't have to specify the full path to your local
# files because docker already has the logic built-in to reference files and folders
# relative to the docker file location on your system. Also, make note that that
# docker will only recognize forward slashes for file paths - since this is a
# Windows based container instead of Linux.
COPY wwwroot c:/inetpub/wwwroot

# Run some PowerShell commands within the new container to set up the image

# Run the PowerShell commands to remove the default IIS files and create a new
# application pool called TestPool
RUN powershell Remove-Item c:/inetpub/wwwroot/iisstart.htm -force
RUN powershell Remove-Item c:/inetpub/wwwroot/iisstart.png -force
RUN powershell Import-Module WebAdministration
RUN powershell New-WebAppPool -Name 'TestPool'

# Exposes port 80 on the new container image
# Used to open TCP port 80 for allowing an http connection to the website.
# However, this line is commented out, because the IIS container has this port
# already open by default.
#EXPOSE 80

# Sets the main command of the container image
# This tells the image to run a service monitor for the w3svc service.
# When this is specified the container will automatically stop running
# if the w3svc service stopped. This line is commented out because of the
# IIS container already has this entrypoint in place by default.
#ENTRYPOINT ["C:\ServiceMonitor.exe", "w3svc"]
Building a New Docker Image
You’ve got the Dockerfile ready to go and a base IIS image downloaded. Now it’s time to build your new Docker image using the Dockerfile.
To build a new image, use the docker build "tag" command. This command creates the image. For this article, you can see below you’re also using the -t ** option which replaces the “tag” portion. This option allows you to give your new image a friendly tag name and also reference the Dockerfile by specifying the folder path where it resides.
Below you can see an example of ensuring the console is in the C:Containers directory and then building a new image from the Dockerfile in the C:ContainersContainer1 directory.
PS51> cd C:Containers
PS51> docker build -t container1 .Container1
Once started, you can see the progress of the command as it traverses each instruction in the docker file line by line:
Once done, you should now have a new Docker image!
Now run the docker images command to view the images that are available. You can see below an example of the container1 image created.
Note: The
docker build —helpcommand is a useful parameter to display detailed information on the docker command being run.
Running the Docker Container
At this point, you should have a new image created. It’s time to spin up a container using that image. To bring up a new container, use the docker run command.
The docker run command will bring up a new Docker container based on the container1 image that you created earlier. You can see an example of this below.
Notice that the -d parameter is used. This tells the docker runtime to start the image in the detached mode and then exit when the root process used to run the container exits.
When docker run completes, it returns the ID of the container created. The example below is capturing this ID into a $containerID variable so we can easily reference it later.
PS51> $containerID = docker run -d container1
PS51> $containerID
Once the container is brought up, now run the docker ps command. This command allows you to see which containers are currently running using each image. Notice below that the running image is automatically generated a nickname (busy_habit in this case). This nickname is sometimes used instead of the container ID to manage the container.
Running Code Inside a Docker Container
A new container is built from a new image you just created. Let’s now start actually using that container to run code. Running code inside of a Docker container is done using the docker exec command.
In this example, run docker exec to view PowerShell output for the Get-ChildItem command in the container using the command syntax below. This will ensure the instructions in the Dockerfile to remove the default IIS files succeeded.
PS51> docker exec $containerID powershell Get-ChildItem c:inetpubwwwrootYou can see below that the only file that exists is index.html which means the default files were removed.
Now run the ipconfig command in the container to get the local IP address of the container image so that you can try to connect to the IIS website.
PS51> docker exec $containerID ipconfigYou can see below that ipconfig was run in the container just as if running on your local computer and has return all of the IP information.
ipconfig in a Docker containerInspecting the IIS Website
Now it’s time to reveal the fruits of your labor! It’s time to see if the IIS server running in the Docker container is properly serving up the index.html page.
Open a browser and paste the IP4 Address found via ipconfig into the address bar. If all is well, you should see a Hello World!! message like below.
Reviewing Docker History
One useful command to use when working with Docker containers i the docker history command. Although not necessarily related to creating an image or container itself, the docker history command is a useful command that allows you to review changes made to the container image.
PS51> docker history container1You can see below, that docker history returns all of the Dockerfile and PowerShell activity performed on the container1 container you’ve been working with.
docker historyCleaning up the Running Docker Images
The steps below are used to cleanup all stopped containers running on your machine. This will free up diskspace and system resources.
Run the docker ps command to view a list of the containers running on your system:
Now stop the running containers using the docker stop command:
PS51> docker stop <image nick name: busy_haibt in my case>
PS51> docker stop <image nick name: unruffled_driscoll in my case>
Finally you can permanently remove the stopped containers using the docker system prune command.
PS51> docker system prune
Further Reading
- Creating Your First Docker Windows Server Container
- How to Manage Docker Volumes on Windows
Today, Microsoft announced the general availability of Windows Server 2016, and with it, Docker engine running containers natively on Windows. This blog post describes how to get setup to run Docker Windows Containers on Windows 10 or using a Windows Server 2016 VM. Check out the companion blog posts on the technical improvements that have made Docker containers on Windows possible and the post announcing the Docker Inc. and Microsoft partnership.
Before getting started, It’s important to understand that Windows Containers run Windows executables compiled for the Windows Server kernel and userland (either windowsservercore or nanoserver). To build and run Windows containers, a Windows system with container support is required.
Windows 10 with Anniversary Update
For developers, Windows 10 is a great place to run Docker Windows containers and containerization support was added to the the Windows 10 kernel with the Anniversary Update (note that container images can only be based on Windows Server Core and Nanoserver, not Windows 10). All that’s missing is the Windows-native Docker Engine and some image base layers.
The simplest way to get a Windows Docker Engine is by installing the Docker for Windows public beta (direct download link). Docker for Windows used to only setup a Linux-based Docker development environment (slightly confusing, we know), but the public beta version now sets up both Linux and Windows Docker development environments, and we’re working on improving Windows container support and Linux/Windows container interoperability.
With the public beta installed, the Docker for Windows tray icon has an option to switch between Linux and Windows container development. For details on this new feature, check out Stefan Scherers blog post.
Switch to Windows containers and skip the next section.

Windows Server 2016
Windows Server 2016 is the where Docker Windows containers should be deployed for production. For developers planning to do lots of Docker Windows container development, it may also be worth setting up a Windows Server 2016 dev system (in a VM, for example), at least until Windows 10 and Docker for Windows support for Windows containers matures.
For Microsoft Ignite 2016 conference attendees, USB flash drives with Windows Server 2016 preloaded are available at the expo. Not at ignite? Download a free evaluation version and install it on bare metal or in a VM running on Hyper-V, VirtualBox or similar. Running a VM with Windows Server 2016 is also a great way to do Docker Windows container development on macOS and older Windows versions.
Once Windows Server 2016 is running, log in, run Windows Update to ensure you have all the latest updates and install the Windows-native Docker Engine directly (that is, not using “Docker for Windows”). Run the following in an Administrative PowerShell prompt:
Install-PackageProvider -Name NuGet -MinimumVersion 2.8.5.201 -Force
Install-Module -Name DockerMsftProvider -Force
Install-Package -Name docker -ProviderName DockerMsftProvider -Force
Restart-Computer -Force
Docker Engine is now running as a Windows service, listening on the default Docker named pipe. For development VMs running (for example) in a Hyper-V VM on Windows 10, it might be advantageous to make the Docker Engine running in the Windows Server 2016 VM available to the Windows 10 host:
# Open firewall port 2375
netsh advfirewall firewall add rule name="docker engine" dir=in action=allow protocol=TCP localport=2375

# Configure Docker daemon to listen on both pipe and TCP (replaces docker --register-service invocation above)
Stop-Service docker
dockerd --unregister-service
dockerd -H npipe:// -H 0.0.0.0:2375 --register-service
Start-Service docker
The Windows Server 2016 Docker engine can now be used from the VM host by setting DOCKER_HOST:
$env:DOCKER_HOST = "<ip-address-of-vm>:2375"
See the Microsoft documentation for more comprehensive instructions.
Running Windows containers
First, make sure the Docker installation is working:
> docker version
Client:
Version:      1.12.1
API version:  1.24
Go version:   go1.6.3
Git commit:   23cf638
Built:        Thu Aug 18 17:32:24 2016
OS/Arch:      windows/amd64
Experimental: true

Server:
Version:      1.12.2-cs2-ws-beta
API version:  1.25
Go version:   go1.7.1
Git commit:   62d9ff9
Built:        Fri Sep 23 20:50:29 2016
OS/Arch:      windows/amd64
Next, pull a base image that’s compatible with the evaluation build, re-tag it and to a test-run:
docker pull microsoft/windowsservercore
docker run microsoft/windowsservercore hostname
69c7de26ea48
Building and pushing Windows container images
Pushing images to Docker Cloud requires a free Docker ID. Storing images on Docker Cloud is a great way to save build artifacts for later user, to share base images with co-workers or to create build-pipelines that move apps from development to production with Docker.
Docker images are typically built with docker build from a Dockerfile recipe, but for this example, we’re going to just create an image on the fly in PowerShell.
"FROM microsoft/windowsservercore `n CMD echo Hello World!" | docker build -t <docker-id>/windows-test-image -
Test the image:
docker run <docker-id>/windows-test-image
Hello World!
Login with docker login and then push the image:
docker push <docker-id>/windows-test-image
Images stored on Docker Cloud available in the web interface and public images can be pulled by other Docker users.
Using docker-compose on Windows
Docker Compose is a great way develop complex multi-container consisting of databases, queues and web frontends. Compose support for Windows is still a little patchy and only works on Windows Server 2016 at the time of writing (i.e. not on Windows 10).
To develop with Docker Compose on a Windows Server 2016 system, install compose too (this is not required on Windows 10 with Docker for Windows installed):
Invoke-WebRequest https://dl.bintray.com/docker-compose/master/docker-compose-Windows-x86_64.exe -UseBasicParsing -OutFile $env:ProgramFilesdockerdocker-compose.exe
To try out Compose on Windows, clone a variant of the ASP.NET Core MVC MusicStore app, backed by a SQL Server Express 2016 database. A correctly tagged microsoft/windowsservercore image is required before starting.
git clone https://github.com/friism/Musicstore
...
cd Musicstore
docker-compose -f .docker-compose.windows.yml build
...
docker-compose -f .docker-compose.windows.yml up
...
To access the running app from the host running the containers (for example when running on Windows 10 or if opening browser on Windows Server 2016 system running Docker engine) use the container IP and port 5000. localhost will not work:
docker inspect -f "{{ .NetworkSettings.Networks.nat.IPAddress }}" musicstore_web_1
172.21.124.54
If using Windows Server 2016 and accessing from outside the VM or host, simply use the VM or host IP and port 5000.
Summary
This post described how to get setup to build and run native Docker Windows containers on both Windows 10 and using the recently published Windows Server 2016 evaluation release. To see more example Windows Dockerfiles, check out the Golang, MongoDB and Python Docker Library images.
Please share any Windows Dockerfiles or Docker Compose examples your build with @docker on Twitter using the tag #windows. And don’t hesitate to reach on the Docker Forums if you have questions.
More Resources:
- Sign up to be notified of GA and the Docker Datacenter for Windows Beta
- Docker for Windows Server
- Learn more about the Docker and Microsoft partnership
Building your first docker image for Windows
Mar 29, 2019
• 4 min read

In this tutorial, I will demonstrate how to host a ASP.NET Core 2.2 application on Windows Containers by using a Docker image. A Docker image will be packaged with a ASP.NET Core application that will be ran when a container in spun up.
Before we get started with creating Docker image. Let’s make sure we have prerequisites done.
Prerequisites
- Installing docker-cli and other components to get started
- Visual Studio code.
- Docker extension for visual studio code.
Once you have the prerequisites, we will use publicly available ASP.NET Core base image from Microsoft. Microsoft maintains their Docker images on Docker hub. Docker hub is a container registry to manage your Docker images either by exposing the image publicly or maintain it privately. Private image responsibilities cost money. Visit Docker Hub website to learn more about image repository management.
Building your first Docker Image
-
Open PowerShell console as an administrator
-
Let’s get started by pulling ASP.NET Core 2.2 docker image from Docker hub by executing below command.
docker pull mcr.microsoft.com/dotnet/core/aspnet:2.2Your output should look similar to what is shown below:

-
Create a folder with your preference name whereever you prefer. I will use c:docker for demonstration purpose.
mkdir c:docker -
Download
ASP.NET Coreapplication package from this URL.Invoke-WebRequest -UseBasicParsing -OutFile c:dockerWebAppCore2.2.zip https://github.com/rahilmaknojia/WebAppCore2.2/archive/master.zipWhat we are doing in above command is downloading packaged code that is already build to save time on building a package.
-
Extract
WebAppCore2.2.zipby using PowerShell 5.0 native command. If you do not have PowerShell 5.0 and above, you will have to manually extract the package.Expand-Archive c:dockerWebAppCore2.2.zip -DestinationPath c:docker -Force -
Now let’s create a Docker file in c:docker folder.
New-Item -Path C:dockerDockerfile -ItemType File -
Go ahead and open C:docker folder path in Visual Studio Code.
-
Now we will open
Dockerfileby double clicking on the file in Visual Studio Code to start writing required steps to build an image.Copy and paste below code to
Dockerfile.# Pull base image from Docker hub FROM mcr.microsoft.com/dotnet/core/aspnet:2.2 # Create working directory RUN mkdir C:\app # Set a working directory WORKDIR c:\app # Copy package from your machine to the image. Also known as staging a package COPY WebAppCore2.2-master/Package/* c:/app/ # Run the application ENTRYPOINT ["dotnet", "WebAppCore2.2.dll"]What we told the
Dockerfileis to pull a asp.net core base image from Docker hub . Then we ran a command to create a directory calledappinc:apppath. We also told the container to setc:appas a working directory. That way we can access binary directly when the container is spun up. We also added a step to copy all the binaries fromc:dockerWebAppCore2.2-masterPackageto destination path in containerc:app. Once we had package staged in container, we told it to run the application by executingdotnet WebAppCore2.2.dllso that the app would be accessible from outside the container. To learn more aboutDockerfilefor windows, check out this microsoft documentation.Now that you have required steps to build an image, lets go ahead with below steps.
-
Navigate to
Dockerfileworking directory from PowerShell console. If you are already in that path you can ignore it.cd c:docker -
Execute below command to build container image.
docker build -t demo/webappcore:2.2.0What above command will do is create a docker image under
demopath. With the image name called aswebappcoreand version 2.2.0.Your output should look like below once it is successful:
PS C:docker> docker build -t demo/webappcore:2.2.0 . Sending build context to Docker daemon 9.853MB Step 1/5 : FROM mcr.microsoft.com/dotnet/core/aspnet:2.2 ---> 36e5a01ef28f Step 2/5 : RUN mkdir C:\app ---> Using cache ---> 8f88e30dcdd0 Step 3/5 : WORKDIR c:\app ---> Using cache ---> 829e48e68bda Step 4/5 : COPY WebAppCore2.2-master/Package/* c:/app/ ---> Using cache ---> 6bfd9ae4b731 Step 5/5 : ENTRYPOINT ["dotnet", "WebAppCore2.2.dll"] ---> Running in 4b5488d5ea5f Removing intermediate container 4b5488d5ea5f ---> 9729270fe1ac Successfully built 9729270fe1ac Successfully tagged demo/webappcore:2.2.0 -
Once the image has been built, you are now ready run the container. Execute below command.
docker run --name webappcore --rm -it -p 8000:80 demo/webappcore:2.2.0


The above command will create new container called as webappcore with parameters.
--rmis used to automatically remove the container after it is shutdown.-itwill open a session into your container and output all the logs.-pis used for creating external port and assigning it to internal port of a container. Port 8000 is exposed to outside container, and port 80 is used to access the app within the container.demo/webappcore:2.2.0is the path to the docker image to run as a container.
Output of a running container

- Browsing your application from your local machine
localhost:8000.

This is it! You ran your first docker container in your local environment. Thank you for following the tutorial. Please comment below for any issue or feedback you would like to share.
This article describes how to create docker images for Windows desktop applications.
Feb 14, 2021
• 5 min read
What’s wrong with the legacy monolithic architecture of Windows applications?
- Typically, the core business logic of a legacy monolithic application is tightly coupled to its GUI.
- Legacy applications may not scale well enough to meet new customer needs, resulting in decreased performance and increased customer frustration.
- Developers often get stuck in old code when there are so many exciting new technologies available to innovate.
The good news is that moving from a legacy desktop application to a microservice architecture stops the monolithic nightmare.
Dividing a monolithic application into subsystems that can be scaled, developed, and deployed individually is your entry point into the microservices realm.
Docker containers.
Docker is currently the leading container toolbox to deploy microservices to the cloud.
A software container packages the code, its libraries, frameworks, and other dependent components. As a result, the application runs quickly and reliably in any environment, be it a local data center, a public cloud, or a developer’s laptop.
Software containerization solves many of the challenges of software development and deployment, so we embraced this concept when moving our Windows desktop applications to the cloud.
The most suitable types of software to embed in a docker container are non-user interface applications that are run from the command line. Typically Linux-based Docker images are lightweight and widely used in cloud environments.
Unfortunately, in most cases, rewriting all of your Windows application code from scratch to make it cross-platform is too expensive and time-consuming.
Besides, when it comes to platform design, sharing the kernel between Dockerized applications has significant limitations. For example, Windows containers will not be able to run on a Linux host.
Windows container base images.
Microsoft offers Windows containers to deliver containerized services on the Windows platform.
Check out a good article from Microsoft that describes Windows docker container images that users can build from.
I will use an Insider Windows Server Core image as a base. This image includes a subset of the Windows Server APIs and is suitable for packaging typical .NET framework applications.
- Insider images are >50% smaller than the .Net Framework Runtime Images.
- Container startup into Windows PowerShell is 30-45% faster.
Dockerizing DBConvert tools.
As an example, I will show how to build a Docker image for DBConvert Studio. It is a classic .NET Windows application running either in GUI mode or in headless mode from the command line. It is also a good source of Docker-related techniques if you want to customize your own Dockerfiles further.
FROM mcr.microsoft.com/windows/servercore/insider:10.0.18362.1

RUN echo "Downloading dbconvert studio"
ADD https://dbconvert.com/downloads/dbconvert_studio.zip /
COPY DBConvert-Studio.reg /
RUN powershell -Command "Write-Host 'Expanding dbconvert archive';
    Expand-Archive dbconvert_studio.zip;
    Write-Host 'Installing dbconvert';
    Start-Process msiexec -ArgumentList '/i', 'C:dbconvert_studiodbconvert_studio_x64DbConvertStudioSetup_x64.msi', '/quiet', '/norestart' -NoNewWindow -Wait;
    Start-Process reg import DBConvert-Studio.reg;
    Remove-Item -Path c:dbconvert* -recurse -force;
    Set-Location -Path 'C:Program FilesDBConvertDBConvert Studio x64';"
CMD ["powershell"]Let’s dive deeper into what the Dockerfile actually does.
- The first FROM line pulls the Insider Windows Server Core image.
- The next RUN simply displays the status of the following ADD command. It downloads the installation zip package directly to our new image.
- COPY DBConvert-Studio.reg / command copies the DBConvert registration file info to the root of the image. We will use it later to remove all restrictions on the DBConvert studio unregistered copy of the. (See the reg import command, which will appear later).
Let’s take a look at the rest of the PowerShell commands combined into the following RUN command.
- The Write-Host command displays the current status of the operation.
- Expand-Archive — extracts the contents of the newly downloaded zip archive to the root directory of our image.
- Start-Process msiexec command installs the unpacked archive.
- The next «Start-Process reg» command imports the registration file’s contents into our docker image’s Windows registry.
- Remove-Item removes all unnecessary intermediary files from the final image.
- Set-Location sets the specified location as a working directory.
- CMD [«powershell»] specifies what command to run within the container. In fact, we can call straight CMD [«DBConvert.exe», «/ Session:», «mysql2mysql»] , but each time it may be a different session configuration file. Therefore, it is better to bind the directory on the host to the directory inside the container with the —volume (-v) flag
Building Docker image and starting container.
Launch the following command in the terminal to build your Docker image.
docker build -t slotix/dbconvert-studio .The next command docker run starts a container from the newly created DBConvert Studio image.
docker run --name studio -it --rm -v "c:dbconvert-dockerstudioworkSettings:C:PROGRAM FILESDBCONVERTDBConvert Studio x64workSettings" slotix/dbconvert-studio:latest DBConvert.exe /Session:"my2my_copy"Containers are immutable in design. This means that the container will not be changed during its life cycle: no updates, no patches, no configuration changes.
When starting DBConvert studio from the command line, you need to pass in a ready-made session file that includes the configured database connections involved in the migration and some other parameters.
-v flag mounts c:dbconvert-dockerstudioworkSettings directory on the host machine into the folder C:PROGRAM FILESDBCONVERTDBConvert Studio x64workSettings inside the running container.
- This way we can feed DBConvert Studio with jobs located outside of the container.
- Another advantage of directory binding is that it works and vice versa. When a process completes, a log file is generated. It appears both inside the container directory and on the host computer.
Check out github repository with Dockerfile from this article at https://github.com/slotix/dbconvert-docker
Final thoughts.
Unfortunately, there is currently no way to create new session files (jobs) outside of the DBConvert Studio GUI. The new web interface and DBConvert API functionality is included in our plans as shown here.
DBConvert’s current products are Windows desktop applications. Using Docker and Kubernetes to run applications in the cloud has been gaining popularity for several years now. Following today’s trends and demands, we will gradually move to the cloud and build a hybrid Windows and Linux host infrastructure.
This is the very first and obvious step of moving to a cloud environment. We are ready to help you launching dockerized DBConvert tools on your own infrastructure.
DBConvert tools are the most suitable software solutions for database administrators who need complex migration and synchronization between the most popular RDBMS, including MySQL, SQL Server, Oracle, PostgreSQL, and many others.
You can run any application in Docker as long as it can be installed and executed unattended, and the base operating system supports the app. Windows Server Core runs in Docker which means you can run pretty much any server or console application in Docker.
TL;DR
Update! For a full walkthrough on Dockerizing Windows apps, check out my book Docker on Windows and my Pluralsight course Modernizing .NET Apps with Docker.
Check out these examples:
- openjdk:windowsservercore — Docker image with the Java runtime on Windows Server Core, by Docker Captain Stefan Scherer
- elasticsearch:nanoserver — Docker image with a Java app on Nano Server
- kibana:windowsservercore — Docker image with a Node.js app on Windows Server Core
- nats:nanoserver — Docker image with a Go app on Nano Server
- nerd-dinner — Docker image with an ASP.NET app on Windows Server Core
- dotnetapp — Docker image with a .NET Core app on Nano Server
The 5 Steps
Lately I’ve been Dockerizing a variety of Windows apps — from legacy .NET 2.0 WebForms apps to Java, .NET Core, Go and Node.js. Packaging Windows apps as Docker images to run in containers is straightforward — here’s the 5-step guide.
1. Choose Your Base Image
Docker images for Windows apps need to be based on microsoft/nanoserver or microsoft/windowsservercore, or on another image based on one of those.
Which you use will depend on the application platform, runtime, and installation requirements. For any of the following you need Windows Server Core:
- .NET Framework apps
- MSI installers for apps or dependencies
- 32-bit runtime support
For anything else, you should be able to use Nano Server. I’ve successfully used Nano Server as the base image for Go, Java and Node.js apps.
Nano Server is preferred because it is so drastically slimmed down. It’s easier to distribute, has a smaller attack surface, starts more quickly, and runs more leanly.
Being slimmed down may have problems though — certain Windows APIs just aren’t present in Nano Server, so while your app may build into a Docker image it may not run correctly. You’ll only find that out by testing, but if you do find problems you can just switch to using Server Core.
Unless you know you need Server Core, you should start with Nano Server. Begin by running an interactive container with
docker run -it --rm microsoft/nanoserver powershelland set up your app manually. If it all works, put the commands you ran into a Dockerfile. If something fails, try again with Server Core.
Derived Images
You don’t have to use a base Windows image for your app. There are a growing number of images on Docker Hub which package app frameworks on top of Windows.
They are a good option if they get you started with the dependencies you need. These all come in Server Core and Nano Server variants:
- microsoft/iis — basic Windows with IIS installed
- microsoft/aspnet — ASP.NET installed on top of IIS
- microsoft/aspnet:3.5 — .NET 3.5 installed and ASP.NET set up
- openjdk — OpenJDK Java runtime installed
- golang — Go runtime and SDK installed
- microsoft/dotnet — .NET runtime and SDK installed.
A note of caution about derived images. When you have a Windows app running in a Docker container, you don’t connect to it and run Windows Update to apply security patches. Instead, you build a new image with the latest patches and replace your running container. To support that, Microsoft release regular updates to the base images on Docker Hub, tagging them with a full version number (10.0.14393.693 is the current version).
Base image updates usually happen monthly, so the latest Windows Server Core and Nano Server images have all the latest security patches applied. If you build your images from the Windows base image, you just need to rebuild to get the latest updates. If you use a derived image, you have a dependency on the image owner to update their image, before you can update yours.
If you use a derived image, make sure it has the same release cadence as the base images. Microsoft’s images are usually updated at the same time as the Windows image, but official images may not be.
Alternatively, use the Dockerfile from a derived image to make your own «golden» image. You’ll have to manage the updates for that image, but you will control the timescales. (And you can send in a PR for the official image if you get there first).
2. Install Dependencies
You’ll need to understand your application’s requirements, so you can set up all the dependencies in the image. Both Nano Server and Windows Server Core have PowerShell set up, so you can install any software you need using PowerShell cmdlets.
Remember that the Dockerfile will be the ultimate source of truth for how to deploy and run your application. It’s worth spending time on your Dockerfile so your Docker image is:
- Repeatable. You should be able to rebuild the image at any time in the future and get exactly the same output. You should specify exact version numbers when you install software in the image.
- Secure. Software installation is completely automated, so you should make sure you trust any packages you install. If you download files as part of your install, you can capture the checksum in the Dockerfile and make sure you verify the file after download.
- Minimal. The Docker image you build for your app should be as small as possible, so it’s fast to distribute and has a small surface area. Don’t install anything more than you need, and clean up any installations as you go.
Adding Windows Features
Windows features can be installed with Add-WindowsFeature. If you want to see what features are available for an image, start an interactive container with docker run -it --rm microsoft/windowsservercore powershell and run Get-WindowsFeature.
On Server Core you’ll see that .NET 4.6 is already installed, so you don’t need to add features to run .NET Framework applications.
.NET is backwards-compatible, so you can use the installed .NET 4.6 to run any .NET application, back to .NET 2.0. In theory .NET 1.x apps can run too. I haven’t tried that.
If you’re running an ASP.NET web app but you want to use the base Windows image and control all your dependencies, you can add the Web Server and ASP.NET features:
RUN Add-WindowsFeature Web-server, NET-Framework-45-ASPNET, Web-Asp-Net45
Downloading Files
There’s a standard pattern for installing dependencies from the Internet — here’s a simple example for downloading Node.js into your Docker image:
ENV NODE_VERSION="6.9.4" `
    NODE_SHA256="d546418b58ee6e9fefe3a2cf17cd735ef0c7ddb51605aaed8807d0833beccbf6"

WORKDIR C:/node

RUN Invoke-WebRequest -OutFile node.exe "https://nodejs.org/dist/v$($env:NODE_VERSION)/win-x64/node.exe" -UseBasicParsing; `
    if ((Get-FileHash node.exe -Algorithm sha256).Hash -ne $env:NODE_SHA256) {exit 1} ;
The version of Node to download and the expected SHA-256 checksum are captured as environment variables with the ENV instruction. That makes it easy to upgrade Node in the future — just change the values in the Dockerfile and rebuild. It also makes it easy to see what version is present in a running container, you can just check the environment variable.
The download and hash check is done in a single RUN instruction, using Invoke-WebRequest to download the file and then Get-FileHash to verify the checksum. If the hashes don’t match, the build fails.
After these instructions run, your image has the Node.js runtime in a known location — C:nodenode.exe. It’s a known version of Node, verified from a trusted download source.
Expanding Archives
For dependencies that come packaged, you’ll need to install them as part of the RUN instruction. Here’s an example for Elasticsearch which downloads and uncompresses a ZIP file:
ENV ES_VERSION="5.2.0" `
    ES_SHA1="243cce802055a06e810fc1939d9f8b22ee68d227" `
    ES_HOME="c:elasticsearch"

RUN Invoke-WebRequest -outfile elasticsearch.zip "https://artifacts.elastic.co/downloads/elasticsearch/elasticsearch-$($env:ES_VERSION).zip" -UseBasicParsing; `
    if ((Get-FileHash elasticsearch.zip -Algorithm sha1).Hash -ne $env:ES_SHA1) {exit 1} ; `
    Expand-Archive elasticsearch.zip -DestinationPath C: ; `
    Move-Item c:/elasticsearch-$($env:ES_VERSION) 'c:elasticsearch'; `
    Remove-Item elasticsearch.zip
It’s the same pattern as before, capturing the checksum, downloading the file and checking the hash. In this case, if the hash is good the file is uncompressed with Expand-Archive, moved to a known location and the Zip file is deleted.
Don’t be tempted to keep the Zip file in the image, «in case you need it». You won’t need it — if there’s a problem with the image you’ll build a new one. And it’s important to remove the package in the same RUN command, so the Zip file is downloaded, expanded and deleted in a single image layer.
It may take several iterations to build your image. While you’re working on it, it’s a good idea to store any downloads locally and add them to the image with
COPY. That saves you downloading large files every time. When you have your app working, replace theCOPYwith the proper download-verify-deleteRUNpattern.
Installing MSIs
You can download and run MSIs using the same approach. Be aware that not all MSIs will be built to support unattended installation. A well-built MSI will support command-line switches for any options available in the UI, but that isn’t always the case.
If you can install the app from an MSI you’ll also need to ensure that the install completed before you move on to the next Dockerfile instruction — some MSIs continue to run in the background. This example from Stefan Scherer’s iisnode Dockerfile uses Start-Process ... -Wait to run the MSI:
RUN Write-Host 'Downloading iisnode' ;
    $MsiFile = $env:Temp + 'iisnode.msi' ;
    (New-Object Net.WebClient).DownloadFile('https://github.com/tjanczuk/iisnode/releases/download/v0.2.21/iisnode-full-v0.2.21-x64.msi', $MsiFile) ;
    Write-Host 'Installing iisnode' ;
    Start-Process msiexec.exe -ArgumentList '/i', $MsiFile, '/quiet', '/norestart' -NoNewWindow -Wait
3. Deploy the Application
Packaging your own app will be a simplified version of step 2. If you already have a build process which generates an unattended-friendly MSI, you can can copy it from the local machine into the image and install it with msiexec:
COPY UpgradeSample-1.0.0.0.msi /

RUN msiexec /i c:UpgradeSample-1.0.0.0.msi RELEASENAME=2017.02 /qn
This example is from the Modernize ASP.NET Apps — Ops Lab from Docker Labs on GitHub. The MSI supports app configuration with the RELEASENAME option, and it runs unattended with the qn flag.
With MSIs and other packaged deployment options (like Web Deploy) you need to choose between using what you currently have, or changing your build output to something more Docker friendly.
Web Deploy needs an agent installed into the image which adds an unnecessary piece of software. MSIs don’t need an agent, but they’re opaque, so it’s not clear what’s happening when the app gets installed. The Dockerfile isn’t an explicit deployment guide if some of the steps are hidden.
An xcopy deployment approach is better, where you package the application and its dependencies into a folder and copy that folder into the image. Your image will only run a single app, so there won’t be any dependency clashes.
This example copies an ASP.NET Web app folder into the image, and configures it with IIS using PowerShell:
RUN New-Item -Path 'C:web-app' -Type Directory; `
    New-WebApplication -Name UpgradeSample -Site 'Default Web Site' -PhysicalPath 'C:web-app'

COPY UpgradeSample.Web /web-app
If you’re looking at changing an existing build process to produce your app package, you should think about building your app in Docker too. Consolidating the build in a multi-stage Dockerfile means you can build your app anywhere without needing to install .NET or Visual Studio.
See Dockerizing .NET Apps with Microsoft’s Build Images on Docker Hub.
4. Configure the Entrypoint
When you run a container from an image, Docker starts the process specified in the CMD or ENTRYPOINT instruction in the Dockerfile.
Modern app frameworks like .NET Core, Node and Go run as console apps — even for Web applications. That’s easy to set up in the Dockerfile. This is how to run the open source Docker Registry — which is a Go application — inside a container:
CMD ["registry", "serve", "config.yml"]
Here registry is the name of the executable, and the other values are passed as options to the exe.
ENTRYPOINTandCMDwork differently and can be used in conjunction. See how CMD and ENTRYPOINT interact to learn how to use them effectively.
Starting a single process is the ideal way to run apps in Docker. The engine monitors the process running in the container, so if it stops Docker can raise an error. If it’s also a console app, then log entries written by the app are collected by Docker and can be viewed with docker logs.
For .NET web apps running in IIS, you need to take a different approach. The actual process serving your app is w3wp.exe, but that’s managed by the IIS Windows service, which is running in the background.
IIS will keep your web app running, but Docker needs a process to start and monitor. In Microsoft’s IIS image they use a tool called ServiceMonitor.exe as the entrypoint. That tool continually checks a Windows service is running, so if IIS does fail the monitor process raises the failure to Docker.
Alternatively, you could run a PowerShell startup script to monitor IIS and add extra functionality — like tailing the IIS log files so they get exposed to Docker.
5. Add a Healthcheck
HEALTHCHECK is one of the most useful instructions in the Dockerfile and you should include one in every app you Dockerize for production. Healthchecks are how you tell Docker if the app inside your container is healthy.
Docker monitors the process running in the container, but that’s just a basic liveness check. The process could be running, but your app could be in a failed state — for a .NET Core app, the dotnet executable may be up but returning 503 to every request. Without a healthcheck, Docker has no way to know the app is failing.
A healthcheck is a script you define in the Dockerfile, which the Docker engine executes inside the container at regular intervals (30 seconds by default, but configurable at the image and container level).
This is a simple healthcheck for a web application, which makes a web request to the local host (remember the healthcheck executes inside the container) and checks for a 200 response status:
HEALTHCHECK CMD powershell -command `
    try { `
     $response = iwr http://localhost:80 -UseBasicParsing; `
     if ($response.StatusCode -eq 200) { return 0} `
     else {return 1}; `
    } catch { return 1 }
Healthcheck commands need to return 0 if the app is healthy, and 1 if not. The check you make inside the healthcheck can be as complex as you like — having a diagnostics endpoint in your app and testing that is a thorough approach.
Make sure your
HEALTHCHECKcommand is stable, and always returns0or1. If the command itself fails, your container may not start.
Any type of app can have a healthcheck. Michael Friis added this simple but very useful check to the Microsoft SQL Server Express image:
HEALTHCHECK CMD [ "sqlcmd", "-Q", "select 1" ]
The command verifies that the SQL Server database engine is running, and is able to respond to a simple query.
There are additional advantages in having a comprehensive healthcheck. The command runs when the container starts, so if your check exercises the main path in your app, it acts as a warm-up. When the first user request hits, the app is already running warm so there’s no delay in sending the response.
Healthchecks are also very useful if you have expiry-based caching in your app. You can rely on the regular running of the healthcheck to keep your cache up-to date, so you could cache items for 25 seconds, knowing the healthcheck will run every 30 seconds and refresh them.
Summary
Dockerizing Windows apps is straightforward. The Dockerfile syntax is clean and simple, and you only need to learn a handful of instructions to build production-grade Docker images based on Windows Server Core or Nano Server.
Following these steps will get you a functioning Windows app in a Docker image — then you can look to optimizing your Dockerfile.
Windows Images
This repository contains build instructions and Dockerfile to build Docker images with Windows-only browsers: Internet Explorer and Microsoft Edge.
System Requirements
- Bare metal machine or on VM with nested virtualization enabled and Linux installed. This example was tested on
Ubuntu 18.04.
$ uname -a
Linux desktop 4.15.0-46-generic #49-Ubuntu SMP Wed Feb 6 09:33:07 UTC 2019 x86_64 x86_64 x86_64 GNU/Linux
To check that virtualization is supported — verify that /dev/kvm file is present:
$ ls -l /dev/kvm
crw-rw---- 1 root kvm 10, 232 мар  8 19:38 /dev/kvm
- Qemu machine emulator installed. It is important to use the same
qemuversion on host machine where images are built and inside Docker image. To checkqemuversion type:
$ qemu-system-x86_64 -version
QEMU emulator version 2.11.1(Debian 1:2.11+dfsg-1ubuntu7.10)
Copyright (c) 2003-2017 Fabrice Bellard and the QEMU Project developers
- Windows license key
Build Procedure
1. Preparative Steps
1.1) Clone this repository and change dir to it:
$ git clone https://github.com/aerokube/windows-images.git
$ cd windows-images
1.2) Download Windows 10 installation image from Microsoft Software Download website.
1.3) Download virtio drivers virtio-win-0.1.141.iso. In the next steps we assume that you now have two files in current directory:
$ ls
virtio-win-0.1.141.iso  Win10_1809Oct_English_x32.iso
2. Windows Installation
2.1) Create hard disk image where Windows will be installed:
$ qemu-img create -f qcow2 hdd.img 40G
2.2) Run virtual machine and begin installation:
$ sudo qemu-system-x86_64 -enable-kvm
        -machine q35 -smp sockets=1,cores=1,threads=2 -m 2048
        -usb -device usb-kbd -device usb-tablet -rtc base=localtime
        -net nic,model=virtio -net user,hostfwd=tcp::4444-:4444
        -drive file=hdd.img,media=disk,if=virtio
        -drive file=Win10_1809Oct_English_x32.iso,media=cdrom
        -drive file=virtio-win-0.1.141.iso,media=cdrom
2.3) Windows will boot from installation image. Install Windows.
2.3.1) Proceed to the next step:
2.3.2) Click Install now:
2.3.3) Enter license key:
2.3.4) Choose Windows edition:
2.3.5) Read and accept license agreement:
2.3.6) Choose custom installation type:
2.3.7) Now you have to install virtio storage driver. Click Load driver:
2.3.8) Point to E:viostorw10x86 directory:
2.3.9) Click next to install driver:
2.3.10) Choose installation partition and click next:
2.3.11) Wait while installation finishes:
2.3.12) Setup user and password:
2.3.13) Do other post-install configuration steps until you get Windows installed:
2.3.14) Install Ethernet virtio driver. Open device manager and click Update driver:
Choose virtio cdrom and click OK:
Install driver:
Connect to network:
2.3.15) Disable Windows Firewall or add firewall rule to allow access to port 4444. This is needed to access webdriver binary port with Selenium test.
2.3.16) Configure Windows as you wish: install updates, change screen resolution, apply registry modifications and so on.
3. Adding WebDriver Binaries
These binaries will handle Selenium test requests and launch respective browser.
-
For Internet Explorer — download an archive with driver binary from Selenium official website, unpack it and put the binary to
C:WindowsSystem32directory. -
For Microsoft Edge web driver binary can be installed with the following command:
> DISM.exe /Online /Add-Capability /CapabilityName:Microsoft.WebDriver~~~~0.0.1.0
4. Creating Quick Boot Memory Snapshot
This snapshot contains memory state and is needed to quickly restore virtual machine instead of doing full boot which is slow. To create it:
4.1) Shutdown virtual machine.
4.2) Create overlay image that will contain VM state:
$ qemu-img create -b hdd.img -f qcow2 snapshot.img
4.3) Run VM using snapshot.img as filesystem:
$ sudo qemu-system-x86_64 -enable-kvm
        -machine q35 -smp sockets=1,cores=1,threads=2 -m 2048
        -usb -device usb-kbd -device usb-tablet -rtc base=localtime
        -net nic,model=virtio -net user,hostfwd=tcp::4444-:4444
        -drive file=snapshot.img,media=disk,if=virtio
        -monitor stdio
Please note that qemu runs with monitor connected to stdio.
4.4) Browser configuration (required only for Internet Explorer).
Open Internet Explorer. The first time this browser is launched, it asks for the security setup. The option «Don’t use recommended settings» need to be selected as follows:
Then, the Internet Options have to be changed. These options can be opened using the configuration button located at the top of Internet Explorer. In the tab «Security», the protect mode for the zones «Internet» and «Restricted sites» have to be disabled, as shown in the following picture:
At this point, you have to close Internet Explorer. Select the option «Always close all tabs» when Internet Explorer is closing. Finally, you have to open again Internet Explorer and double check that the protected mode is turned off (it can be seen in a message box at the bottom of the browser).
4.5) Run web driver binary command.
- For Microsoft Edge — open command prompt with administrator privileges and run:
> MicrosoftWebDriver.exe --host=10.0.2.15 --port=4444 --verbose
- For Internet Explorer — open command prompt as unprivileged user and run:
> C:WindowsSystem32IEDriverServer.exe --host=0.0.0.0 --port=4444 --log-level=DEBUG
4.6) Minimize command line prompt window when driver is up and running.
4.7) Switch to terminal where qemu runs and type at qemu prompt:
Then type quit to stop VM:
To start VM from snapshot manually use the following command:
$ sudo qemu-system-x86_64 -enable-kvm
        -machine q35 -smp sockets=1,cores=1,threads=2 -m 2048
        -usb -device usb-kbd -device usb-tablet -rtc base=localtime
        -net nic,model=virtio -net user,hostfwd=tcp::4444-:4444
        -drive file=snapshot.img,media=disk,if=virtio
        -loadvm windows
The command above is used in Dockerfile entry point script.
5. Build Docker Image
5.1) Move filesystem and state files to image directory in this repository:
$ mv hdd.img snapshot.img image
$ cd image
5.2) Build Docker image using provided Dockerfile:
$ docker build -t windows/edge:18 . # For Microsoft Edge
For Internet Explorer use:
$ docker build -t windows/ie:11 . # For Internet Explorer
5.3) Run a container from image:
$ docker run -it --rm --privileged -p 4444:4444 -p 5900:5900 windows/edge:18 # For Microsoft Edge
$ docker run -it --rm --privileged -p 4444:4444 -p 5900:5900 windows/ie:11 # For Internet Explorer
5.4) To see Windows screen inside running container — connect to vnc://localhost:5900 using selenoid as password.
5.5) To run Selenium tests — use http://localhost:4444 as Selenium URL.
Docker containers become unavoidable for infrastructure development as it provides, Isolation, Simplicity, Rapid Continuous Deployment, and Faster Configuration with Security. Earlier, Docker has only used for Linux based applications as it is using the Linux kernel baseline for creating Containers. But Windows applications are widely used in Software development and Hence, windows developers need Docker Containers for Windows. In this article, we will discuss How to Create Docker Windows Containers from Docker Desktop.
Docker Desktop Installation
Requirement
- Minimum Windows 10 (Home and All other Editions)
- Hyper-V (In-Built and can be Enabled)
- Only 64bit Processor Architecture
- Virtualization Enablement from Bios Level
Installation
- Step-1: Download the “Docker Desktop for Windows” exe file from here (https://hub.docker.com/editions/community/docker-ce-desktop-windows/) and run it to install.
- Step-2: Enable Docker Running Environment 1. For Windows Home – Enable Windows Subsystem for Linux (Instructions Here: https://docs.microsoft.com/en-us/windows/wsl/install-win10). 2. For Windows Other Editions – Enable Hyper-V (Instructions Here: https://docs.microsoft.com/en-us/virtualization/hyper-v-on-windows/quick-start/enable-hyper-v)
- Step-3: Follow the instructions on the Installation process
- Step-4: If you are the Only user with Admin access, you can proceed. Else add the current user into a docker-users group (Instructions Here: https://www.tenforums.com/tutorials/88049-add-remove-users-groups-windows-10-a.html)
NOTE:
Docker Desktop Installed in the Windows Machine can run Linux Based Docker Containers and Windows-based Docker Container. But You cannot run Windows Based Docker Containers on Docker Engine installed in Linux. Refer the below image.

About Docker on Windows Machine
As we all know, the Docker Engine will run as a daemon that uses the Linux specific kernel features. So, running the Docker Engine on Windows directly is not possible. Hence, we must create a Linux based environment in Windows to run docker. In order to enable Linux environment on the windows, we have two options,
- Windows Subsystem for Linux (WSL) – is the compatibility layer to run Linux applications
- Hyper-V – Microsoft solution for virtualization.

Both these features are available from Windows 10. Running docker on windows will be ultimately using the Linux environment. But it is using some of the Host’s features. So, Docker Engine will sit on top of the Linux Kernel created by the Hyper-V/WSL. On top of the Docker Engine, Docker Containers can be created. All this is managed by the Docker Desktop. So, Application Program which will be written by the developers will sit on top of the Containers.
Simple Windows Container with Example
Let’s learn how to create the Docker Windows container using Docker Desktop. For that, first, we are going to create Dockerfile which is the simple text file with the instructions of the application and configurations.
Creating Dockerfile
Let’s run a simple application which will return the “hello world” print output from the Windows Docker Container. For the same, create a file called “Dockerfile” and put the bellow content.
# Base Image
FROM microsoft/nanoserver

# Copy powershell init-script from the host machine (windows) to the docker container.
COPY init-setup.ps1 c:\workspaceapplicationinit-setup.ps1

# Run the Powershell script in the Docker Container
CMD ["powershell.exe", "c:\workspaceapplicationinit-setup.ps1"]
- In this, Line number #2 is setting the container from the base image. Here it is “
microsoft/nanoserver”. - Inline Number #5 is giving
init-script.ps1from the host to the docker container. - Line Number #8 is to run the script in PowerShell executable.
And Create a script file called “init-setup.ps1” and put the below content inside the file
Building Docker Image
Once you have this file in your folder you can start building the Dockerfile as Docker image using the command.
$ docker build -t digitalvarys/print-hello-world .
where digitalvarys/print-hello-world is the tag name of the docker image.
Once the Docker image is been built, you can check the Image by passing the following commad
This will display the created image.
Running the Docker Container
Now, it is time to run the Docker image which we have created. Hence, run the following command
$ docker run digitalvarys/print-hello-world
This will print the string “hello world” as we provided.
If you run it with -it parameter, you can explore the Created Docker Container with Windows CMD.
ASP.net example of the Windows Docker Container.
The above sample application will tell you about the basic container feature. This one will tell you the real-time advantage of the Windows Docker Container.
Sample application
For this tutorial, we are going to use, cloud foundry’s sample Dotnet core hello world application (https://github.com/cloudfoundry-samples/dotnet-core-hello-world). Just clone it and keep it in your working directory
Dockerfile creation.
Now, we are going to create Dockerfile to create the image of the above application.
# Base Image
FROM microsoft/dotnet:nanoserver-core

# Copy entire application code folder dotnet-application to the working directory in Container.
COPY c:\workspacedotnet-application .

# Relax the firewall rule to expose port 5000
EXPOSE 5000

# Run the dotnet application
CMD ["dotnet", "run", "--server.urls", "http://0.0.0.0:5000"]
Just like the PowerShell example, we are going to take the base image and copy the application from the host to the container. Then, we are going to expose the port 5000 to run the dotnet application in this port. Then, we are going to run the application using the dotnet executable.
Building the Docker Image.
Once the Dockerfile is ready, we have to build the Docker container.
$ docker build -t digitalvarys/simple-dotnet-application .
Here, I am giving the image name as “digitalvarys/simple-dotnet-application”.
Running the Docker Container
Now, we have to run the application in background (detached mode),
$ docker run -d -p 5000:5000 digitalvarys/simple-dotnet-application
This will run the container and expose the container port to the host port 5000.
Getting the IP address of the Created Docker Container.
Now, Just inspect the Docker container and see the assigned IP address of the running container,
$ docker inspect [container-id]
This will show you the JSON response. In that, check for “networks” -> “nat” -> “IPAddress”. This will be your container IP address.
Now, Just enter the URL in the browser as https://[container-ip-address]:5000, then you will see the Hello world message in the browser. This means your application is running in a container.
Conclusion
As we already discussed, Docker is unavoidable for the application development or at least in the process of application development. But the Containerization of the Windows application like dotnet application needs extra lookup. Hope this article covers enough concepts and procedures for the Windows Docker Containers running on windows application. In our upcoming article, we will discuss more running a cluster of Microsoft Windows-based applications in Docker Swarm and Kubernetes. Stay tuned and subscribe DigitalVarys for more articles and study materials on DevOps, Agile, DevSecOps and App Development.

Experienced DevSecOps Practitioner, Tech Blogger, Expertise in Designing Solutions in Public and Private Cloud. Opensource Community Contributor.