kernel.dll — файл служащий для работы игр или любых других программ на компьютере. Если у Вас появилось сообщение об отсутствии данного файла, то в этой статье вы поймете почему так бывает.
На самом деле причин не так и уж много.
Ошибки могу быть вызваны следующими проблемами:
- Система не обнаружила файл потому что его нет — он просто удален (Часто это может сделать антивирус).
- Отсутствует файл kernel.dll, а именно структуры которые находятся в нем (Проще говоря файл изменен).
Решений данной проблемы также не много. Хоть и многие пишут в интернете разные версии, но на самом деле половина из них никогда не будет работать. Давайте разберемся как исправить и что делать если отсутствует файл kernel.dll
Рабочие способы:
- скачать kernel.dll для Windows 7/8/10/11 32×64 bit и поместить файл в каталог Windows
- скачать файл и поместить в корень с игрой или программой которая вызывает данную ошибку.
- Переустановить игру. Помочь может если файл в игре есть, и он перепишется. Но если вы на нашем сайте, значит вы скорей всего уже пробовали переустановить и у Вас мало что получилось
Первое что следует сделать это скачать файл и поместить его в корень с игрой, и после попробовать запустить. Это самый действенный и простой способ. Если он не помог, пробуем поместить данный файл в папку Виндовс (чуть ниже есть ссылка как правильно это сделать). Если ничего не помогает, тогда уже нужно разбираться в сборке игры и искать ее на другом источнике.
Как установить DLL файл вы можете прочитать на страницы, в которой максимально подробно описан данный процесс.
Скачать файл kernel.dll
Разработчик
Microsoft Corporation
ОС
Windows XP, Vista,7,8,10,11
Разрядность
32/64bit
Кол-во скачиваний
374- Рейтинг
Поделиться файлом
Первым делом:
Скачайте библиотеку — скачать KERNEL.DLL
Затем:
Поместите KERNEL.DLL
в одну из следующих папок:
Если у вас 64-битная версия Windows, то поместите файл в:
«C:\Windows\SysWOW64»
Если у вас 32-битная версия Windows, то поместите файл в:
«C:\Windows\System32»
После этого
Перезагрузите компьютер, чтобы изменения вступили в силу.
Всё равно выдаёт ошибку KERNEL.DLL
не был найден?
Тогда придётся установить этот файл вручную. Для этого:
Зайдите в меню «Пуск».
В строчке поиска введите «cmd». И запустите найденную программу от имени администратора.
В открывшемся окне введите «regsvr32 KERNEL.DLL
«.
После этого снова перезагрузите компьютер. Теперь ошибка должна быть исправлена.
Если что-то не понятно прочитайте более подробную инструкцию — как установить dll файл.
About Kernel.dll
The Kernel.dll library is a dynamic link library developed by NetEase. This library includes important functions that may be needed by programs, games or other basic Windows tools.
The size of this dynamic link library is 0.1 MB and its download links are healthy. It has been downloaded 18778 times already and it has received 4.3 out of 5 stars.
Table of Contents
- About Kernel.dll
- Operating Systems Compatible with the Kernel.dll Library
- All Versions of the Kernel.dll Library
- How to Download Kernel.dll Library?
- Methods for Fixing Kernel.dll
- Method 1: Installing the Kernel.dll Library to the Windows System Directory
- Method 2: Copying the Kernel.dll Library to the Program Installation Directory
- Method 3: Doing a Clean Install of the program That Is Giving the Kernel.dll Error
- Method 4: Fixing the Kernel.dll error with the Windows System File Checker
- Method 5: Getting Rid of Kernel.dll Errors by Updating the Windows Operating System
- Explanations on Updating Windows Manually
- Our Most Common Kernel.dll Error Messages
- Other Dynamic Link Libraries Used with Kernel.dll
Operating Systems Compatible with the Kernel.dll Library
- Windows 10
- Windows 8.1
- Windows 8
- Windows 7
- Windows Vista
- Windows XP
All Versions of the Kernel.dll Library
The last version of the Kernel.dll library is the 0.0.0.0 version released on 2013-10-31. There have been 1 versions previously released. All versions of the Dynamic link library are listed below from newest to oldest.
- 0.0.0.0 — 32 Bit (x86) (2013-10-31) Download directly this version
- 0.0.0.0 — 32 Bit (x86) Download directly this version
How to Download Kernel.dll Library?
- First, click the «Download» button with the green background (The button marked in the picture).

Step 1:Download the Kernel.dll library - The downloading page will open after clicking the Download button. After the page opens, in order to download the Kernel.dll library the best server will be found and the download process will begin within a few seconds. In the meantime, you shouldn’t close the page.

Methods for Fixing Kernel.dll
ATTENTION! Before continuing on to install the Kernel.dll library, you need to download the library. If you have not downloaded it yet, download it before continuing on to the installation steps. If you are having a problem while downloading the library, you can browse the download guide a few lines above.
Method 1: Installing the Kernel.dll Library to the Windows System Directory
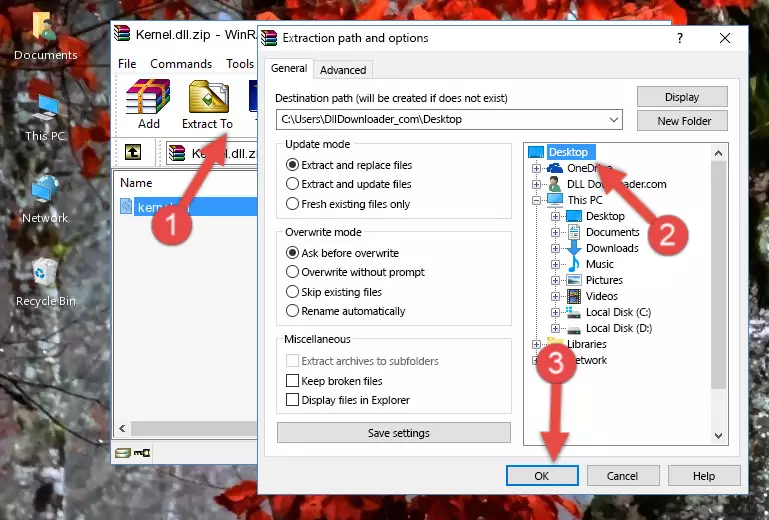
- The file you are going to download is a compressed file with the «.zip» extension. You cannot directly install the «.zip» file. First, you need to extract the dynamic link library from inside it. So, double-click the file with the «.zip» extension that you downloaded and open the file.
- You will see the library named «Kernel.dll» in the window that opens up. This is the library we are going to install. Click the library once with the left mouse button. By doing this you will have chosen the library.
Step 2:Choosing the Kernel.dll library - Click the «Extract To» symbol marked in the picture. To extract the dynamic link library, it will want you to choose the desired location. Choose the «Desktop» location and click «OK» to extract the library to the desktop. In order to do this, you need to use the Winrar program. If you do not have this program, you can find and download it through a quick search on the Internet.
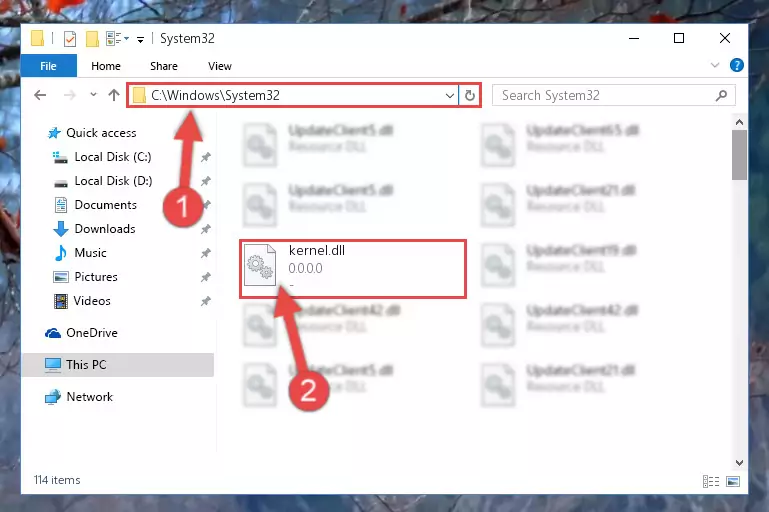
- Copy the «Kernel.dll» library you extracted and paste it into the «C:\Windows\System32» directory.
Step 4:Copying the Kernel.dll library into the Windows/System32 directory - If your system is 64 Bit, copy the «Kernel.dll» library and paste it into «C:\Windows\sysWOW64» directory.
NOTE! On 64 Bit systems, you must copy the dynamic link library to both the «sysWOW64» and «System32» directories. In other words, both directories need the «Kernel.dll» library.
Step 5:Copying the Kernel.dll library to the Windows/sysWOW64 directory - In order to run the Command Line as an administrator, complete the following steps.
NOTE! In this explanation, we ran the Command Line on Windows 10. If you are using one of the Windows 8.1, Windows 8, Windows 7, Windows Vista or Windows XP operating systems, you can use the same methods to run the Command Line as an administrator. Even though the pictures are taken from Windows 10, the processes are similar.
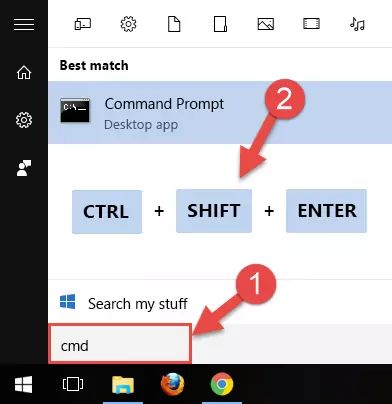
- First, open the Start Menu and before clicking anywhere, type «cmd» but do not press Enter.
- When you see the «Command Line» option among the search results, hit the «CTRL» + «SHIFT» + «ENTER» keys on your keyboard.
- A window will pop up asking, «Do you want to run this process?«. Confirm it by clicking to «Yes» button.
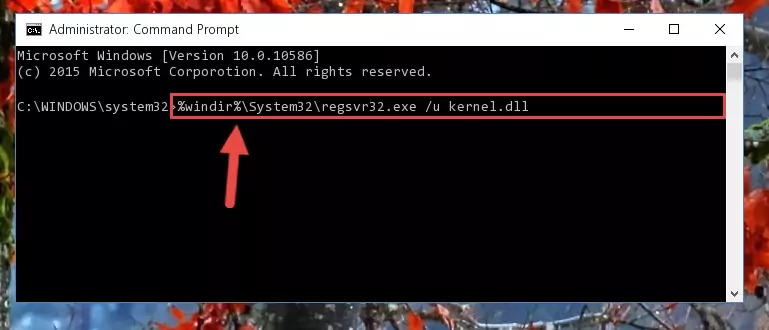
Step 6:Running the Command Line as an administrator - Paste the command below into the Command Line that will open up and hit Enter. This command will delete the damaged registry of the Kernel.dll library (It will not delete the file we pasted into the System32 directory; it will delete the registry in Regedit. The file we pasted into the System32 directory will not be damaged).
%windir%\System32\regsvr32.exe /u Kernel.dll
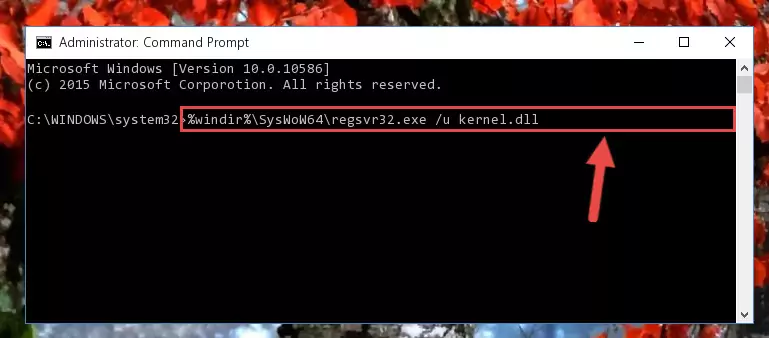
Step 7:Deleting the damaged registry of the Kernel.dll - If you have a 64 Bit operating system, after running the command above, you must run the command below. This command will clean the Kernel.dll library’s damaged registry in 64 Bit as well (The cleaning process will be in the registries in the Registry Editor< only. In other words, the dll file you paste into the SysWoW64 folder will stay as it).
%windir%\SysWoW64\regsvr32.exe /u Kernel.dll
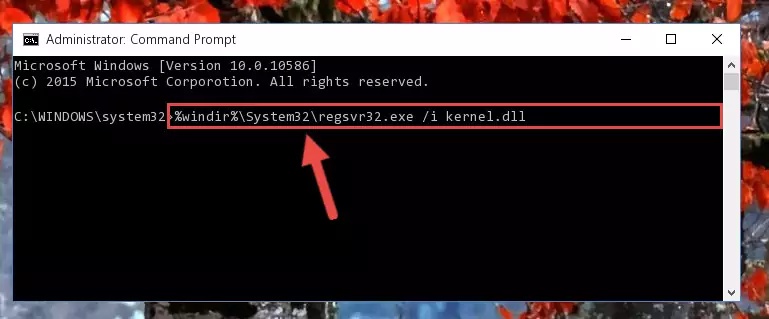
Step 8:Uninstalling the Kernel.dll library’s broken registry from the Registry Editor (for 64 Bit) - We need to make a clean registry for the dll library’s registry that we deleted from Regedit (Windows Registry Editor). In order to accomplish this, copy and paste the command below into the Command Line and press Enter key.
%windir%\System32\regsvr32.exe /i Kernel.dll
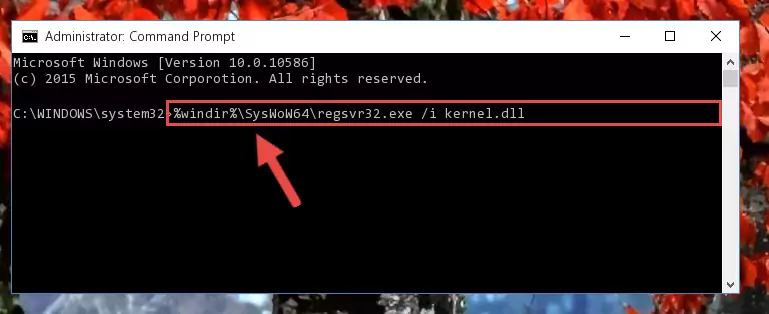
Step 9:Making a clean registry for the Kernel.dll library in Regedit (Windows Registry Editor) - If the Windows version you use has 64 Bit architecture, after running the command above, you must run the command below. With this command, you will create a clean registry for the problematic registry of the Kernel.dll library that we deleted.
%windir%\SysWoW64\regsvr32.exe /i Kernel.dll
Step 10:Creating a clean registry for the Kernel.dll library (for 64 Bit) - If you did all the processes correctly, the missing dll file will have been installed. You may have made some mistakes when running the Command Line processes. Generally, these errors will not prevent the Kernel.dll library from being installed. In other words, the installation will be completed, but it may give an error due to some incompatibility issues. You can try running the program that was giving you this dll file error after restarting your computer. If you are still getting the dll file error when running the program, please try the 2nd method.

Method 4: Fixing the Kernel.dll error with the Windows System File Checker
- In order to run the Command Line as an administrator, complete the following steps.
NOTE! In this explanation, we ran the Command Line on Windows 10. If you are using one of the Windows 8.1, Windows 8, Windows 7, Windows Vista or Windows XP operating systems, you can use the same methods to run the Command Line as an administrator. Even though the pictures are taken from Windows 10, the processes are similar.
- First, open the Start Menu and before clicking anywhere, type «cmd» but do not press Enter.
- When you see the «Command Line» option among the search results, hit the «CTRL» + «SHIFT» + «ENTER» keys on your keyboard.
- A window will pop up asking, «Do you want to run this process?«. Confirm it by clicking to «Yes» button.
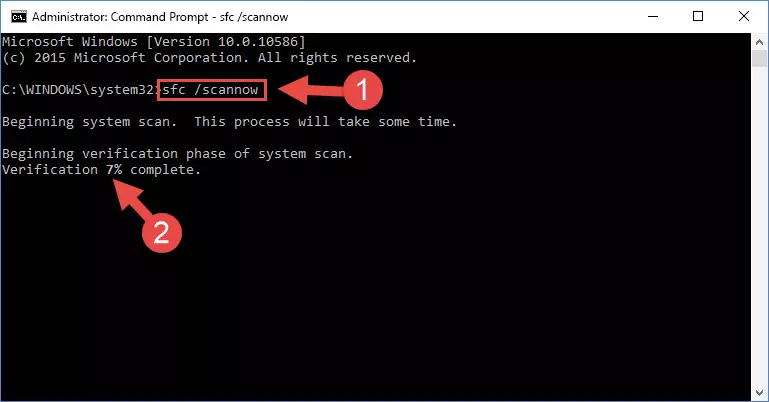
Step 1:Running the Command Line as an administrator - Paste the command in the line below into the Command Line that opens up and press Enter key.
sfc /scannow
Step 2:fixing Windows system errors using the sfc /scannow command - The scan and repair process can take some time depending on your hardware and amount of system errors. Wait for the process to complete. After the repair process finishes, try running the program that is giving you’re the error.
Our Most Common Kernel.dll Error Messages
If the Kernel.dll library is missing or the program using this library has not been installed correctly, you can get errors related to the Kernel.dll library. Dynamic link libraries being missing can sometimes cause basic Windows programs to also give errors. You can even receive an error when Windows is loading. You can find the error messages that are caused by the Kernel.dll library.
If you don’t know how to install the Kernel.dll library you will download from our site, you can browse the methods above. Above we explained all the processes you can do to fix the dll error you are receiving. If the error is continuing after you have completed all these methods, please use the comment form at the bottom of the page to contact us. Our editor will respond to your comment shortly.
- «Kernel.dll not found.» error
- «The file Kernel.dll is missing.» error
- «Kernel.dll access violation.» error
- «Cannot register Kernel.dll.» error
- «Cannot find Kernel.dll.» error
- «This application failed to start because Kernel.dll was not found. Re-installing the application may fix this problem.» error
Other Dynamic Link Libraries Used with Kernel.dll
- Kernel32.dll
- Npdjvu.dll
- Npdrmv2.dll
- Npdocbox.dll
- Npdsplay.dll
Работа операционной системы Windows строится на множестве файлов, которые содержат различный код. Одним из видов файлов являются dll-библиотеки. Они применяются в работе абсолютно всех программ, приложений и отдельных процессов в работе системы. Один dll-файл может применяться одновременно двумя и даже пятью программами.
Как исправить проблему с файлом kernel.dll
Если при запуске какой-либо программы или игры, система не обнаружила файл dll, то на рабочем столе Windows высветится уведомление, что отсутствует файл. В таком случае пользователю необходимо устранить проблему для того, чтобы продолжить корректную работу системы. Для понимания, что делать для устранения проблемы, рассмотрим причины её появления:
- В процессе установки программы, которая применяет файл kernel.dll в работе, данная библиотека не установилась или отсутствовала.
- В процессе работы системы между файлами произошло взаимодействие и нужный dll-файл был удален или поврежден.
Часто рекомендуют скачать kernel.dll, чтобы исправить возникшую ситуацию. Однако, данный способ достаточно сложный для новых пользователей. Это связанно с тем, что установка происходит вручную, и в случае неверной установки, произойдет повреждение других файлов. Используйте способ скачать для Windows 7/8/10/11 32×64 bit установочные файлы программы, при запуске которой система оповестила об возникшей проблеме. Если переустановка не поможет, то проведите способ с ручной установкой, но по инструкции.
kernel.dll для 32 bit
Windows XP, Vista,7,8,10,11
Microsoft Corporation
49 kb
kernel.dll для 64 bit
Windows XP, Vista,7,8,10,11
Microsoft Corporation
49 kb
Добавить комментарий
Note: Outbyte PC Repair tool has been proven to identify and fix the KERNEL.DLL error. See more information about Outbyte and Uninstall Instructions. Please review Outbyte EULA and Privacy Policy.
Introduction
One of the most common errors a Windows user faces is the missing DLL error. This error will simply not let you run the application. When you try to open the application you will notice a pop-up window with the following error message.
‘The program can’t start because KERNEL.DLL is missing from your computer’
Don’t worry! This is a common issue faced by Windows users all over the world and there are several ways to fix this.
In this detailed post, I’ll provide multiple solutions to fix the DLL file not found errors on Windows 11, 10, 8.1, 8, and 7 PCs.
What is a KERNEL.DLL error?
The term ‘DLL’ refers to dynamically linked libraries, which may be found in Windows 11, 10, 8, 7, and other previous OS versions. A dynamic link library (DLL) is a collection of small programs that larger programs can load when needed to complete specific tasks. The small program, called a DLL file, contains instructions that help the larger program handle what may not be a core function of the original program. These instructions can be called upon multiple programs simultaneously. When you run a program on any Windows operating system, much of the functionality of the program may be provided by DLLs.
A dependency is created every time a DLL is used by a program. If another program uses a DLL and somehow breaks the dependency between the two programs then the first program will no longer execute. That is when you will see errors like,
‘The program can’t start because KERNEL.DLL is missing from your computer. Try reinstalling the program to fix this problem.’
Causes of KERNEL.DLL Missing Error
The typical reasons for the ‘KERNEL.DLL missing error’ on Windows 10, 11, 8, 7, and other versions, are compiled below,
a) Deleted or corrupted KERNEL.DLL — The DLL file used by a certain program has modified or deleted KERNEL.DLL.
b) Missing or corrupted files of Microsoft Visual C++ Redistributable — The KERNEL.DLL file is part of the Microsoft Visual C++ software runtime library. VC++ Runtime libraries are DLL files required to run programs compiled with Microsoft Visual Studio. If some files are missing or if Visual Studio is not installed correctly, then the ‘KERNEL.DLL is missing’ error might appear.
c) System is infected with virus or malware – There is a possibility your system is corrupted or damaged with virus/malware. As a result, KERNEL.DLL may have been damaged or corrupt.
d) Damaged/corrupted System files – If your Windows system files are corrupted after engaging with programs containing a virus or some malicious applications then KERNEL.DLL might not work correctly.
Some other common KERNEL.DLL errors include:
KERNEL.DLL is missing
Cannot register KERNEL.DLL
Problem starting KERNEL.DLL
KERNEL.DLL Access Violation
The procedure entry point KERNEL.DLL error
KERNEL.DLL error loading
KERNEL.DLL crash
Cannot find KERNEL.DLL
KERNEL.DLL was not found
KERNEL.DLL could not be located
KERNEL.DLL — System Error
![]()
The program can’t start because KERNEL.DLL is missing from your computer. Try reinstalling the program to fix the problem.
There are several ways to fix this DLL error and we will be looking at them in detail below.
1. Download KERNEL.DLL
The KERNEL.DLL file can be manually downloaded and added/replaced with the missing or corrupt DLL file.
Step 1: Select and download the DLL files from the table below irrespective of the version of your OS i.e. Windows 11, 10, 8.1, 8 or 7.,
Download KERNEL.DLL
| Version | Description | OS | Size | Language | MD5 | SHA1 | Download |
|---|---|---|---|---|---|---|---|
| 0.0.0.0 | — | 32 | 0.1 MB | — |
5c258b6… 5c2… |
0a567a9… 0a5… |
Step 2: Once downloaded, extract each file into separate folders using either Windows Compressed folders (comes with windows) or with an app like WinRAR.
Step 3: Next, copy the 64-bit ‘KERNEL.DLL’ file and paste it into the C:\Windows\System32 folder. And copy the 32-bit ‘KERNEL.DLL’ file and paste it into the C:\Windows\SysWOW64 folder. If there is an existing ‘KERNEL.DLL’ file in either of these folders then replace it with the new file. However, if you have a 32-bit Windows system then place only the 32-bit file into the C:\Windows\System32 folder.
Re-launch the affected program to see if the issue is fixed. If not, please try the next method.
2. Fix missing KERNEL.DLL error automatically
The missing DLL error can be fixed using a repair tool, like Outbyte PC Repair, which helps to solve any system issues, cleans up junk files, and fixes any DLL errors in the process.
Step 1: Download the installation file from here.
Step 2: Install PC Repair and scan your PC
Step 3: Click ‘Repair’ to fix all items that may cause the missing DLL errors.
Step 4: Launch the application to see if the error is fixed.
Recommended Download: Fix KERNEL.DLL error or missing KERNEL.DLL error with Outbyte.
![]()
Compatible with Windows 11, 10, 8, 7, Vista, XP and 2000
3. Re-register the DLL file
Another efficient method to fix the DLL error is to re-register the DLL file.
Step 1: Launch the Run utility by pressing Windows + R keys on your keyboard. Type in ‘cmd’ in the text input field. Then press Ctrl+Shift+Enter keys to open the Command Prompt in administrator mode.
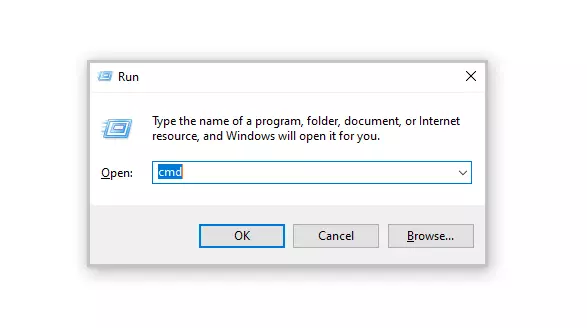
Step 2: In the prompt window, select ‘Yes’ to allow Command Prompt to make modifications to your device.
Step 3: Now it’s time to unregister the DLL file from your computer. Type in or copy and paste the following command, then press Enter,
regsvr32 /u KERNEL.DLL
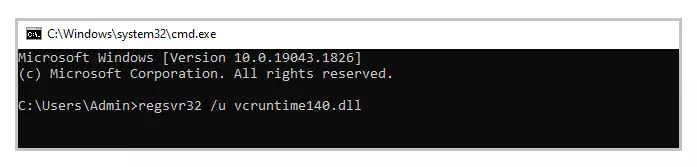
Note: Replace vcruntime140.dll with KERNEL.DLL
Step 4: Next, you need to re-register the file. To do this run the following command,
regsvr32 KERNEL.DLL
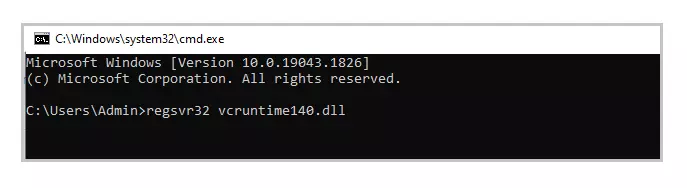
Note: Replace vcruntime140.dll with KERNEL.DLL
Step 5: Exit the Command Prompt and run the application again.
4. Reinstall the Latest Visual C++ Redistributable 2015 — 2022 for Visual Studio
The most commonly used solution is to re-install Microsoft Visual C++ Redistributable to fix DLL errors. Follow the steps mentioned below,
Step 1: To access the official page from where Microsoft Visual C++ Redistributable can be downloaded, please click on the link provided here
Select ‘Install’. The installation will begin and will take a couple of seconds to complete.
Step 2: Alternatively, you can also download it from below based on the version of Windows,
Download x86 version from here
Download x64 version from here
Step 3: Once you’ve selected the file, proceed to download. The download may take a while, depending on your internet connection speed.
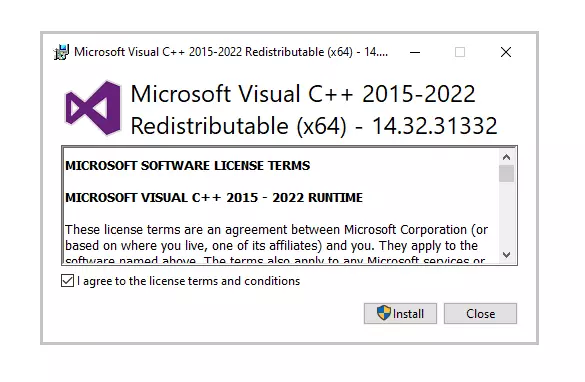
Step 4: Once the download is complete install the downloaded file. When the installation begins tick the ‘I agree to the license terms and conditions’ box and then click on ‘Install’.
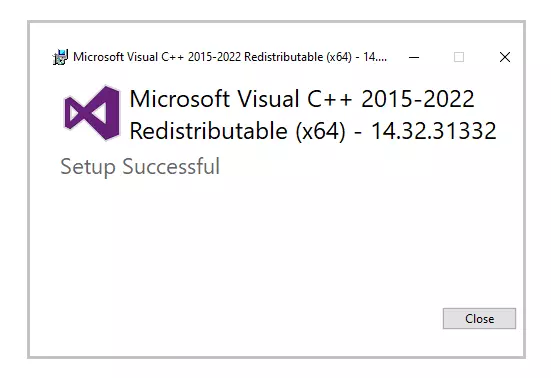
Step 5: It may take a few minutes for the installation to finish. Once the installation is completed restart the computer and launch the program again to see if the DLL error is fixed.
5. Run System File Checker (SFC) Scan
Step 1: To open the Run utility, press Windows + R on your computer. Enter ‘cmd’ in the input area and then press Ctrl+Shift+Enter.
Step 2: Select ‘Yes’ in the pop-up window to open the command prompt in administrator mode.
Step 3: Next, enter the below command and press Enter to execute it,
sfc/scannow
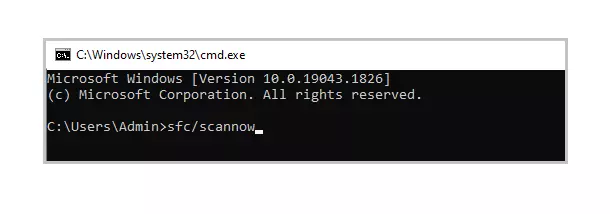
Step 4: This command will try to search and fix corrupt system files (including DLL files). Once the process is complete, you can check the log file created in the path shown in the command prompt. If in the log file you find details of the fixed DLL File then you can run the application again.

6. Reinstall the Program that cannot be launched
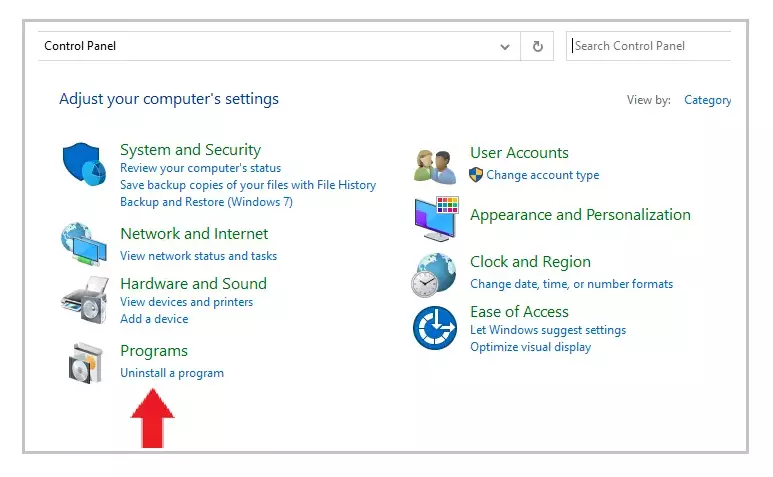
Step 1: Open Control Panel and click on ‘Uninstall a program’ under ‘Programs’.
Step 2: Search and find the program you’re experiencing problems with and click on it.
Step 3: Then click on the ‘Uninstall’ button, and proceed to continue with the uninstallation procedure of the application.
Step 4: Reinstall the program from its source. Either download the setup file or if you already have it then run the installation again to check if you can run the application this time.
7. Update drivers
In some cases, DLL errors can occur due to drivers. If the DLL error message appeared during or after you installed a program, then first update your drivers to the latest version.
Alternatively, there is also a possibility you might face the DLL error after updating drivers. In such a scenario, you need to roll back the driver to the previous version.
There are two ways to update drivers,
Method 1: Automatically Update Drivers
Step 1: Use a tool like Outbyte Driver Updater that automatically searches for missing and out dated drivers in your system and updates it. You can download the tool from here
Step 2: Download time depends on your internet speed connection. Once the download is completed start with the installation of the tool.
Step 3: Launch the application.
Step 4: Inside the application run update. Then, the Driver Updater tool will scan your computer for out dated and missing drivers.
Step 5: Finally, select the drivers and click update.
Method 2: Manually Update Drivers
Step 1: Go to the Taskbar search box – enter the text Device Manager and select Device Manager.
Step 2: Select the hardware device that needs to be updated. Expand the selection – select the device, right-click and select ‘Update Driver’.
Step 3: Choose the ‘Search automatically for drivers’ option.
Step 4: If the latest drivers are found then they will be installed automatically.
Step 5: Sometimes, Windows might not be able to find the latest driver. In such cases, the user can visit the manufacturer’s website, search for the driver, and instructions on how to proceed with the installation.
8. System Restore
In this method, your PC needs to be restored to its earlier version when it was working without any error. There is a chance the new updates to your PC caused the error, so the user must remove the new updates and roll back to a previous version.
To apply System Restore, first, check if you have a previous backup of your system. To check this,
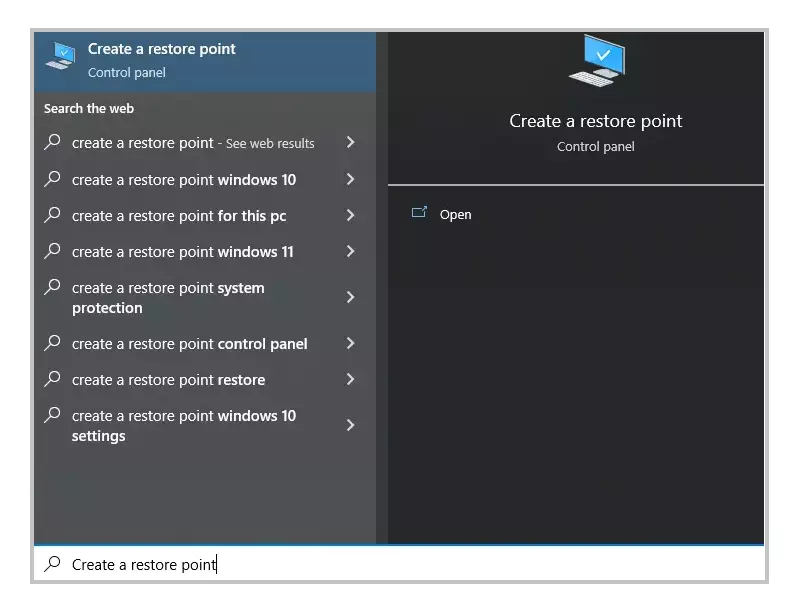
Step 1: Begin by clicking on the start button.
Step 2: To access the System Properties window, search for ‘Create a restore point’ and click the first result.
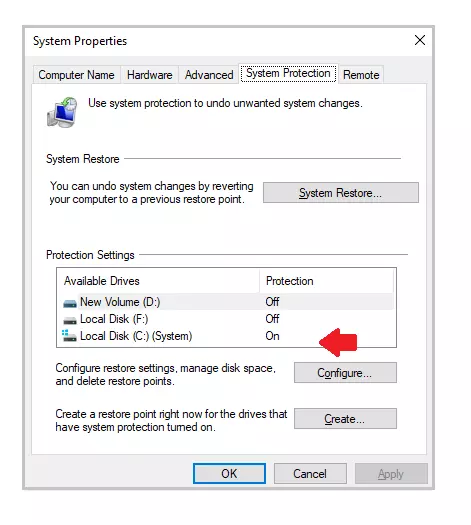
Step 3: Under the ‘System Protection’ tab select the ‘System’ drive. ‘Protection’ should be turned on for this drive.
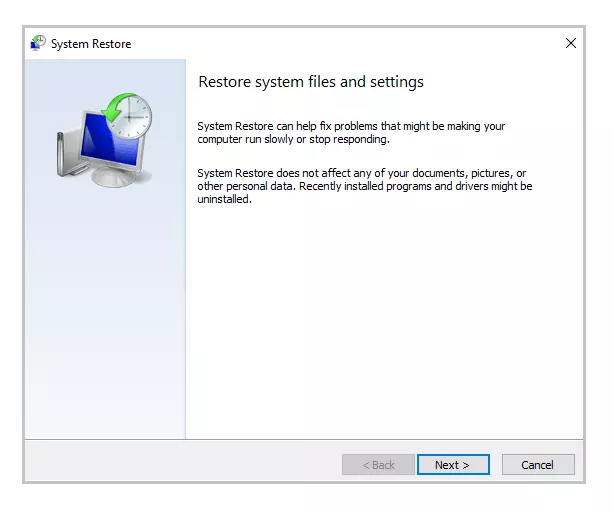
Step 4: Select ‘System Restore’ and click ‘Next’ on the initial screen
Step 5: A list of restore points will be displayed. Select the restore point when your application was running correctly without any error. Then select ‘Next’.
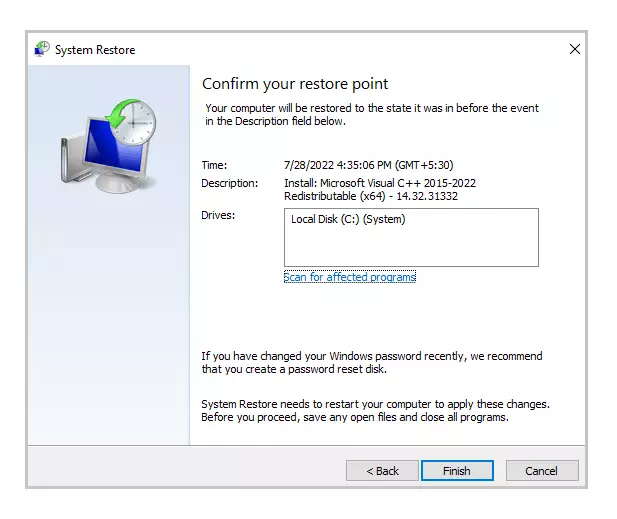
Step 6: Review your selection and click ‘Finish’. If a warning window pop-up appears then select Yes’.
Step 7: The System Restore will begin and your PC will restart once the process is complete. When you log in again, you will see a notification that the System Restore is complete. Now, you can run the application again to see if the error is fixed.
Note: If System Restore was not set up earlier or you’ve never backed up your PC before then this method might not apply to you.
9. Update Windows
KERNEL.DLL missing issues have been reported by several windows users to disappear by upgrading to the latest edition of Windows.
Step 1: Go to settings by selecting Start > Settings or using Windows + I shortcut
Step 2: Open the ‘Update and security’ option.

Step 3: See if there are any new updates by clicking on ‘Check for updates.’
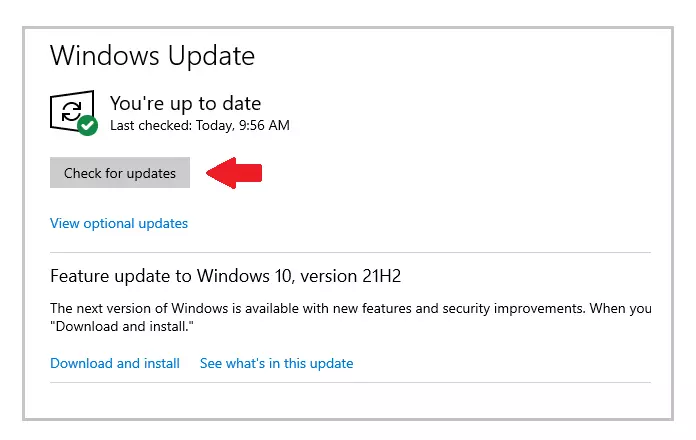
Step 4: If a newer version is discovered, then the windows update will download and install to the latest version.
Step 5: After installing the newest version, run the program again to check if you face the KERNEL.DLL was not found error.
Following these steps should have definitely helped you to fix the missing KERNEL.DLL error.