Время на прочтение
4 мин
Количество просмотров 24K
В данной статье будет представлена подробная инструкция по установке и настройке программ Apache, Python и PostgreSQL для обеспечения работы Django проекта в ОС MS Windows. Django уже включает в себя упрощенный сервер разработки для локального тестирования кода, но для задач, связанных с продакшен, требуется более безопасный и мощный веб-сервер. Мы настроим mod_wsgi для взаимодействия с нашим проектом и настроим Apache в качестве шлюза в внешний мир.
Стоит отметить, что установка и настройка будет производиться в ОС MS Windows 10 с 32 разрядностью. Также 32 битная реакция будет универсальна и будет работать на 64 битной архитектуре. Если вам нужна 64 битная установка повторите те же действия для 64 битных дистрибутивов программ, последовательность действий будет идентична.
В качестве Django проекта будем использовать программу Severcart. Она предназначена для управления перемещениями картриджей, учёта печатающего оборудования и договоров поставки и обслуживания. Установка всех программ и модулей будет производиться в каталог C:\severcart. Местоположение не принципиально.
Python
Первым шагом является загрузка и установка Python с веб-сайта Python. Выбираем Windows в качестве операционной системы и 32-битную версию. На момент написания статьи текущей версией является 3.9.0rc2.
Загрузив файл установки, щелкните правой кнопкой мыши файл установки и выберите «Запуск от имени администратора». Вы должны увидеть экран ниже
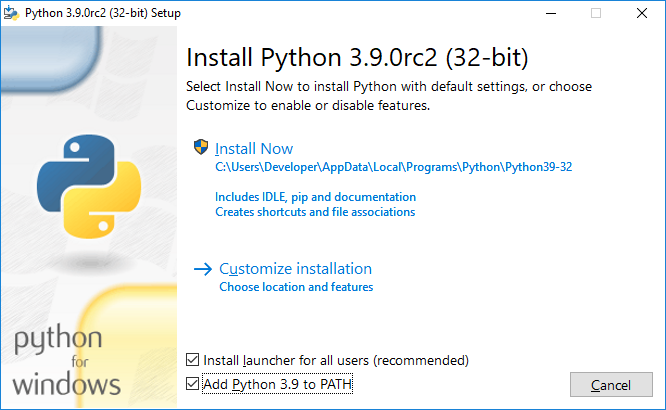
Устанавливаем галочки напротив чекбоксов «Install launcher for add user (recomended)» и «Add Python 3.9 to PATH» и нажимаем на «Customize installation».

Устанавливаем галочки на против «pip», «py launcher», «for all users (requires elevation)» и нажимаем «Next».
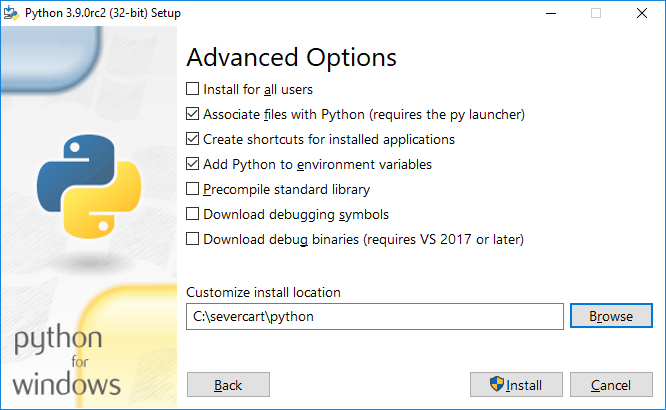
Выбираем все поля ввода как на картинке выше и нажимаем на «Install».
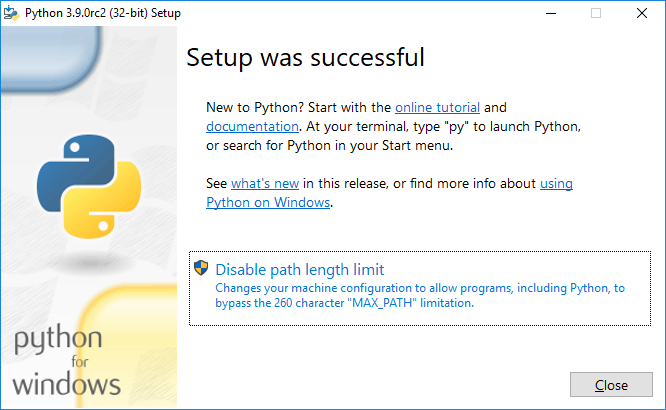
Чтобы убедиться, что установка прошла успешно, откройте cmd и введите python. Если установка прошла успешно, вы должны увидеть приглашение, подобный приведенному ниже

Устанавливаем mod_wsgi
Скачиваем скомпилированный пакет с mod_wsgi c сайта
www.lfd.uci.edu/~gohlke/pythonlibs. Модуль выполняет функции посредника межу сервером Apache и Django проектом. Самый свежий пакет будет с именем mod_wsgi-4.7.1-cp39-cp39-win32.whl. Обратите внимание, что пакет скомпилирован для 32 битной Windows CPython версии 3.9. Также стоит отметить, что очевидная установка модуля pip install mod_wsgi скорее всего завершится ошибкой, т.к. в процессе установки потребуется компилятор Visual Studio C++. Ставить компилятор целиком ради одного Python пакета в Windows считаем нецелесообразным.
Устанавливаем модуль с помощью стандартного пакетного менеджера pip в cmd или powershell:
pip install -U mod_wsgi-4.7.1-cp39-cp39-win32.whl

Apache
Скачиваем дистрибутив с сайта https://www.apachelounge.com/download/.
Самая свежая версия Web-сервера является Apache 2.4.46 win32 VS16. Также для работы программы понадобиться заранее установленный пакет «Visual C++ Redistributable for Visual Studio 2019 x86».
Распаковываем дистрибутив Apache в каталог C:\severcart\Apache24, далее меняем строку с номером 37 на свою
Define SRVROOT "C:/severcart/Apache24"
Проверяем работу Apache, выполнив в командной строке
C:/severcart/Apache24/bin> httpd.exe
В результате должны увидеть в браузере по адресу 127.0.0.1 строку «It works!».

Устанавливаем службу Apache, для этого выполним в командной строке от имени Администратора инструкцию:
C:\severcart\Apache24\bin>httpd.exe -k install -n "Apache24"
Далее подключим модуль mod_wsgi к Apache. Для этого выполним в командной строке инструкцию
C:\Windows\system32>mod_wsgi-express module-config
В результате в стандартный вывод будет распечатаны строки:
LoadFile "c:/severcart/python/python39.dll"
LoadModule wsgi_module "c:/severcart/python/lib/site-packages/mod_wsgi/server/mod_wsgi.cp39-win32.pyd"
WSGIPythonHome "c:/severcart/python"
Создаем файл C:\severcart\Apache24\conf\extra\httpd-wsgi.conf и копипастим туда распечатанные строки выше.
Подключаем новую конфигурацию к основному файлу httpd.conf
Include conf/extra/httpd-wsgi.conf
Сохраняем изменения, перезагружаем службы Apache
Net stop Apache24
Net start Apache24
PostgreSQL
Устанавливаем PostgreSQL взятый с сайта https://postgrespro.ru/windows. Текущая версия программного продукта – 12. Преимущества Российского дистрибутива от канонического представлены на том же сайте.


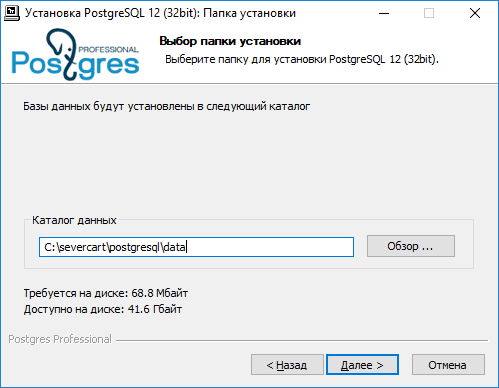

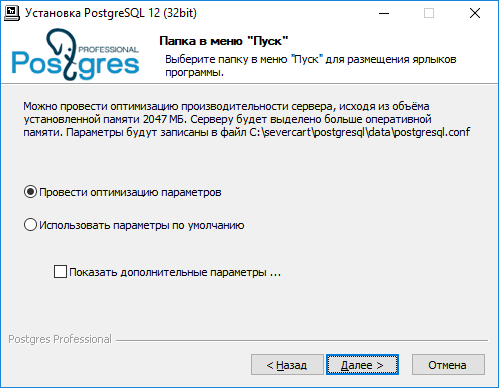
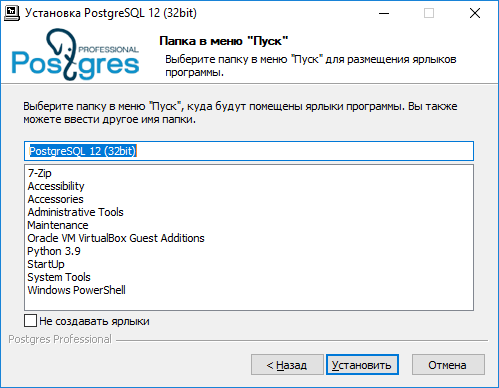
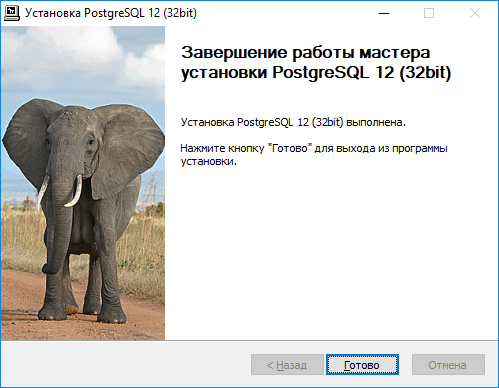
Действия по установке представлены выше и комментариях не нуждаются. Установка крайне проста.
Создаем БД в postgres, где потом будут храниться структуры данных Django проекта
C:\severcart\postgresql\bin>psql -h 127.0.0.1 -U postgres -W

CREATE DATABASE severcart WITH ENCODING='UTF8' OWNER=postgres CONNECTION LIMIT=-1 template=template0;

БД создана. Теперь разворачиваем Django проект.
Устанавливаем web приложение
Для этого скачиваем zip архив с сайта https://www.severcart.ru/downloads/ и распаковываем в каталог C:\severcart\app\

Вносим изменения в главный конфигурационный файл C:\severcart\app\conf\settings_prod.py для указания реквизитов подключения к БД
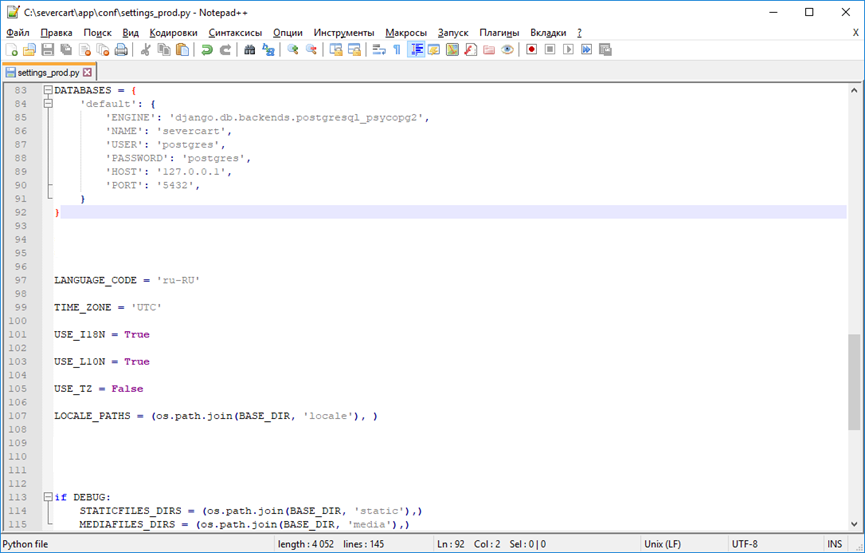
Python словарь DATABASES содержит в себе реквизиты подключения к БД. Подробности по настройке читайте здесь https://docs.djangoproject.com/en/3.1/ref/databases/#connecting-to-the-database
Устанавливаем Python пакеты значимостей для работы приложений внутри Django проекта
C:\severcart\app\tkinstaller>python install.py

В процессе работы скрипта будет произведена инициализация БД таблицами, констрейтами, индексами и прочим, а будет предложено создать пользователя, от имени которого будет производиться работа в программе.
Подключаем Django приложение к серверу Apache для этого дополняем конфигурационный файл
httpd-wsgi.conf следующим текстом
Alias /static "c:/severcart/app/static"

Alias /media "c:/severcart/app/media"

<Directory "c:/severcart/app/static">
    # for Apache 2.4
    Options Indexes FollowSymLinks
    AllowOverride None
    Require all granted
</Directory>

<Directory "c:/severcart/app/media">
    # for Apache 2.4
    Options Indexes FollowSymLinks
    AllowOverride None
    Require all granted
</Directory>


WSGIScriptAlias / "c:/severcart/app/conf/wsgi_prod.py"
WSGIPythonPath "c:/severcart/python/"

<Directory "c:/severcart/app/conf/">
<Files wsgi_prod.py>
    Require all granted
</Files>
</Directory>
Перезагружаем службу Apache и проверяем работу приложения
На этом все. Спасибо что дочитали.
В следующей статье будем создавать установочный самораспаковывающийся архив в InnoSetup для быстрого развертывания Django проекта на компьютере заказчика. Для тех кто хочет повторить все действия на Яндекс.Диск загружены все используемые дистрибутивы.
This is a guide on setting up Python/Django apps to run on a Windows server using IIS as the webserver. I’ll go over the specifics below. We’re starting things off with the following assumptions:
- Windows Server is installed somewhere and running with a static IP and domain name all set.
- Server SSL Certificate has already been provisioned and set up. (Optional but extremely recommended to run HTTPS)
- (not specifically necessary) any SSO setup/shibboleth stuff has already been set up. (This is if you want to leverage SSO login, etc.)
- Everything is running 64-bit architecture.
Python
Install the latest Python version using the GUI Windows x64 installer downloaded from the python.org. As of writing, the latest version available is 3.8.2.
Make the following settings changes to the Python installation (we’re going for a minimal installation with just the Python core and a few niceties):
- Check option for “Add Python 3.8 to PATH”
- Click “Customize Installation”
- Deselect all options except pip.
- click Next
- Check “Install for all users”
- Deselect “Create shortcuts for installed applications”
- Check “Add Python to environment variables”
- Check “Precompile standard library” (not specifically necessary, but doesn’t hurt anything)
- NO “debugging symbols” or “debug binaries” (this is supposed to be a prod environment, after all)
- Change the Installation directory:
C:\Python38\ - Install.
Virtualenv
Once Python’s installation is complete open an administrative terminal/Powershell window (winkey+x, a) and complete the following:
Note: If any of the following commands come back with something like “command not found” double-check that
C:\Python38\andC:\Python38\Scripts\are in the system PATH environment variable (run$Env:Pathin powershell). If you had the terminal window before installing Python, close and re-open it. Or just add the Python directories to the system PATH manually.
- upgrade pip
python -m pip install --upgrade pip
- install virtualenv
pip install virtualenv
IIS Setup / Prerequisites
IIS needs to be installed, with the CGI option. Once that is installed there should be a directory C:\inetpub\wwwroot\
Method 1
- Open “Windows Features” (search for “Windows Features” > “Turn Windows Features on or off” should be the result or Run (
winkey+r) >optionalfeatures.exe– If that doesn’t do anything, try Method 2 Below. - Select IIS feature, with the additional options highlighted as in the below image.
- CGI
- HTTP Redirection
- Request Monitor
- OK
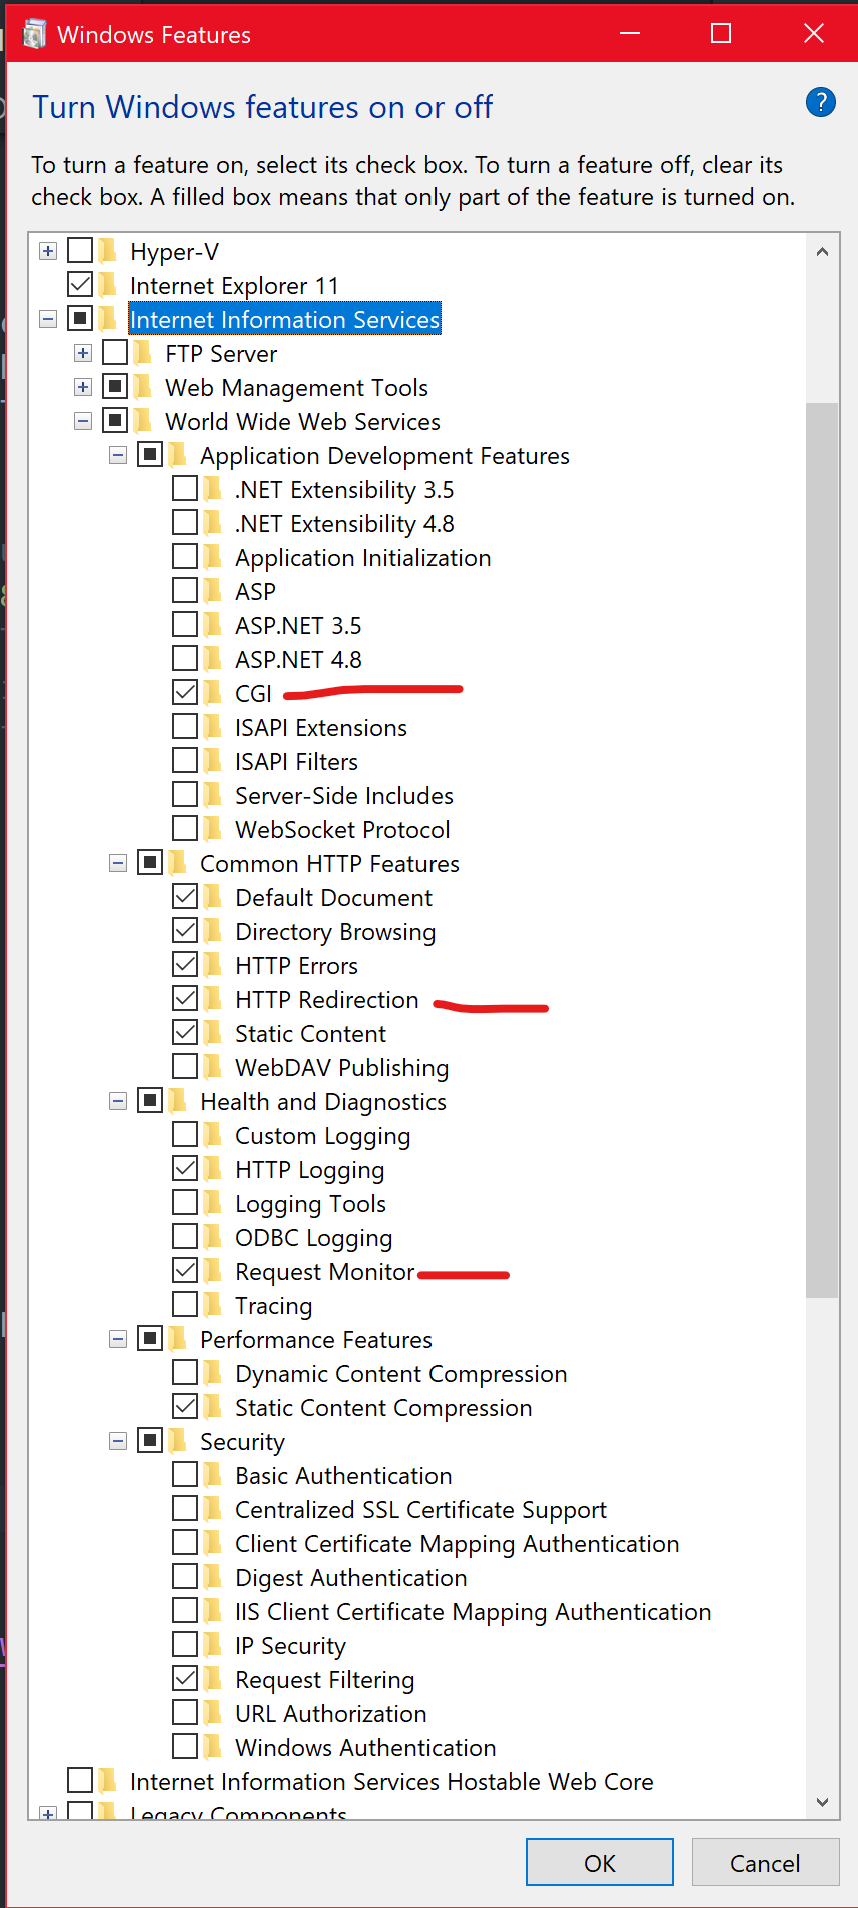
Windows Features
options may vary, features available may vary, etc. etc.
Method 2
- Open the Server Manager
- Click “Manage”
- Click “Add Roles and Features”
- Go through the wizard and ensure that all the features listed in Method 1 are selected, specifically IIS services and especially CGI, HTTP Redirection, and Request Monitor. The items are the same as above in Method 1, but are organized a little differently.
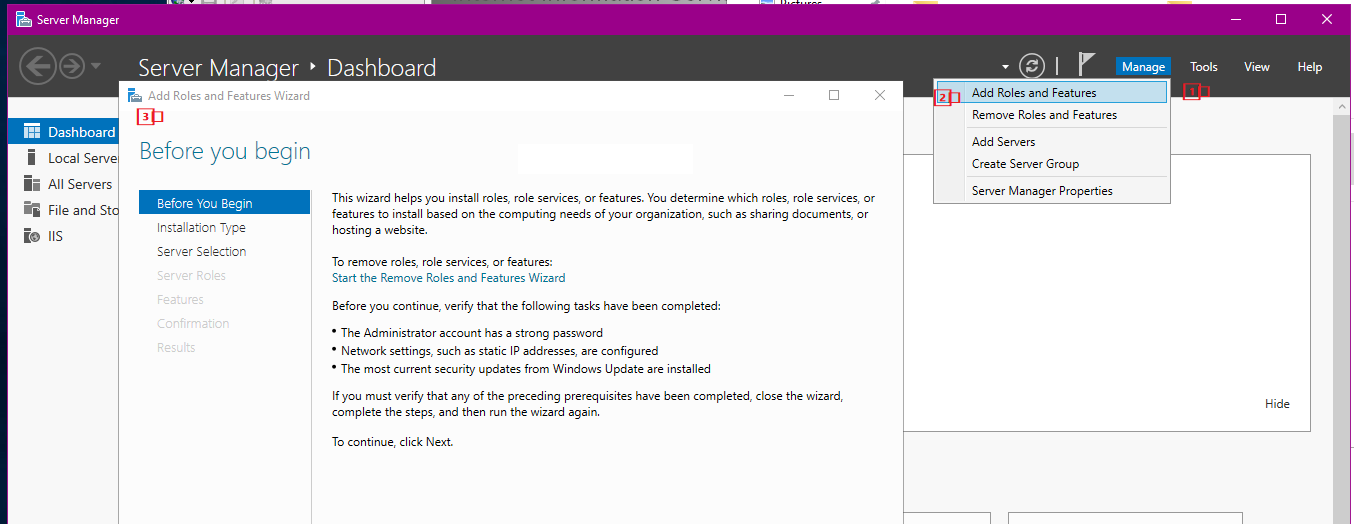
Server Manager Screenshot
Select Manage, then Add Roles and Features, then the wizard shown at 3️⃣ should show
Test
Finally, test that the IIS server installation worked and that you can browse to http://localhost on a browser, and that you get the default IIS page.
Set Up Django Application Directory and Virtual Environment for Python
Here’s where we set up the application folder that will host our Django application and all the required Python libraries to support that application without installing anything globally. This will make sure that if there’s any other Python apps that need to run on the server or be served by the server, there won’t be dependency version conflicts.
- Create an application folder to host your application. I wanted my app to be served from
<webserver_root_url>/appso I put my application folder atc:\inetpub\wwwroot\app\. NOTE this does not necessarily have to be in your inetpub/wwwroot folder, it’s just a bit easier to do it this way. - Open an elevated console within the
\appdirectory (typically will need to be elevated to do things in this directory because security stuff) - Create a virtual environment with virtualenv
> virtualenv venv
- This should create a directory called “venv” in
\app\. - Activate the virtual environment so that any Python or Pip commands work against it instead of the global Python environment.
> .\venv\Scripts\activate
- Copy in your Django application, including your requirements.txt file.
- Install python dependencies from requirements:
> pip install -r requirements.txt
- We’ll need the latest wfastcgi python package too (in case it’s not in your requirements, since it’s not needed to run the development server):
pip install wfastcgi
Note: if you run into problems with wfastcgi not working, or are getting errors like “the fastcgi process exited unexpectedly” then try to force wfastcgi to upgrade:
pip install wfastcgi --upgrade
MySQL Client Python Wheels (precompiled binary for Windows)
Pip doesn’t install mysqlclient correctly on Windows, at least not that I’ve been able to manage. The easiest way to get correct MySQL clients for Windows systems is from Christoph Gohlke, Laboratory for Fluorescence Dynamics, University of California, Irvine. Download the appropriate mysqlclient package for Windows there and then move that to the server. Install with
pip install <path to .whl file>
Set Up Django Site in IIS
IIS has specific requirements around how a site is set up, in order for it to work properly. Specifically, each site must have at least 1 application and each application must have at least 1 virtual directory. This page from Microsoft Docs has detailed information on the requirements for a site to publish correctly on IIS.
- Open IIS manager (
winkey+r) Run >inetmgr - Select the Server and from the main page, double-click “FastCGI Settings”
- “Add Application”
- Fill out the settings dialog accordingly:
- “Full Path”: Where your virtual environment’s
python.exelives (such asC:\inetpub\wwwroot\app\venv\Scripts\python.exe) - “Arguments”: path to
wfastcgi.pywhich should also be in the virtual environment directory:C:\inetpub\wwwroot\app\venv\Lib\site-packages\wfastcgi.py - In the “FastCGI Settings” section, under “General > Environment Variables” click on the “(Collection)” line, then on the little ellipsis («[…]») button, which will allow entering Environment Variables specific to the runtime environment that Django will be running in when a request comes into the web server.
- In the “EnvironmentVariables Collection Editor” window:
- Add: Name:
DJANGO_SETTINGS_MODULEValue: whatever matches up to your setting inwsgi.py. For me this wasserver.environment - Add: Name:
PYTHONPATHValue:C:\inetpub\wwwroot\app - Add: Name:
WSGI_HANDLERValue:django.core.wsgi.get_wsgi_application() - If you want WSGI Logging: Add: Name:
WSGI_LOGValue: wherever you want logs to be written. I put:C:\inetpub\logs\WSGI\app.log(this file can get verbose, consider removing this once you’ve made sure the application is working well)- ⚠ WARNING — READ THIS ⚠: You must make sure that the local server’s worker processes have write permission on this file or it’s directory. If you do not, wfastcgi/python will crash out and IIS will throw 500 server errors. I spent days fighting with this. The easiest fix is to manually create the file
C:\inetpub\logs\WSGI\app.logand then edit the security permissions on that file, granting full write permission to the local server group “IIS_IUSRS”.
- ⚠ WARNING — READ THIS ⚠: You must make sure that the local server’s worker processes have write permission on this file or it’s directory. If you do not, wfastcgi/python will crash out and IIS will throw 500 server errors. I spent days fighting with this. The easiest fix is to manually create the file
- “Full Path”: Where your virtual environment’s
This should correctly set up the environment for FastCGI to be able to run the Django application (assuming that the paths above match to where you’re working from). Note (1): For DJANGO_SETTINGS_MODULE I used server.environment — this matches my environment, since I have /app/server/environment.py and environment.py lists out which server settings should be loaded. Note (2): All of the above settings for Environment Variables are case sensitive.
- Close the Environment Variables window and the FastCGI Settings windows.
- On the left-hand pane of IIS Manager, under “connections” where the server we’re working on, expand the server, and under “Default Web Site«, there should be a listing of directories that are in
wwwroot\. Here, we’ll convert\app\into an application (right-click on the directory, then select “convert to application”) — Click OK on the “Add Application” window that pops up. - Open Handler Mappings for the application
- Click “Add module mapping” and enter the following settings:
- Path:
* - Module (dropdown): “FastCgiModule”
- Executable: type in:
C:\inetpub\wwwroot\app\venv\Scripts\python.exe|C:\inetpub\wwwroot\app\venv\Lib\site-packages\wfastcgi.py - Name: “Django Handler” or “Python FastCGI handler” or whatever — it’s just a friendly name for the mapping.
- Click “Request Restrictions”
- Deselect “Invoke handler only if… mapped to:”
- Verbs: All verbs
- Access: Script
- Click OK
- Click OK
- When a popup asks “Do you want to create a FastCGI Application for this executable?” click “No” as that has already been handled / set up.
- Path:
- The handler should now show in the list of Handler Mappings.
- Click “View Ordered List…” on the right, and move the newly created handler to the top of the list. This will ensure that the python handler is the first one considered for all requests to this application.
Restart your IIS website and it should now be working where the Django application should be reachable at http://localhost/app/ (assuming your Django site has a page listed there).
IIS restart commands:
> iisreset /stop
> net start e3svc
Configure Django and IIS Static Files
The Django development server automatically handles serving static files when working on your computer, but now that it’s in a production environment, we need to collect the static files to a directory and then tell IIS to serve them from that directory. Most details on serving static files, as well as handling additional details should be found on Django’s documentation site: static files deployment.
Settings
Django’s settings need to be modified to include the options STATIC_ROOT and STATIC_URL.
STATIC_ROOT is used to tell Django’s collectstatic command where in the filesystem to place the found static files. This location could, in theory, be anywhere on the filesystem, but it’s good practice to keep these files in a location that makes sense in terms of compartmentalization and context. I put my files inside the project folder next to manage.py.
|
|
Move Files
Run the collectstatic management command from the project directory.
Activate the virtualenv:
.\venv\scripts\activate
Run the command:
python manage.py collectstatic
Say “yes” to the prompt from the collectstatic management command to confirm the directory you want to copy static files to.
Set Up a Virtual Directory for IIS to Serve the Static Files
IIS needs to know where these files are located and how to serve them up when browsers request them. THe name of a virtual directory must match the value of the STATIC_URL setting in Django’s settings.py, absent the beginning and trailing slashes. For this sample, the url is app/static.
- Open IIS Manager
- On the left pane, under “Connections” expand the server’s tree
- Expand the “Sites” folder
- Right-Click the web site your app lives in (for me, I put everything in “default web site”)
- Click “Add Virtual Directory”
- Enter the following values:
Alias: static
Physical Path: C:\inetpub\wwwroot\app\static
static virtual directory in IIS
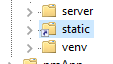
Your «static» folder should now have a shortcut-looking icon on it, as shown here.
Configure Handler Mappings for Static Files
- Select the “static” virtual directory
- Open “Handler Mappings”
- On the right side, select “View Ordered List…”
- Move the “StaticFile” handler to the top of the list by selecting it, then on the right under “Actions” click “Move Up” until the handler is above all others. If IIS warns you about diverging from inheriting settings, click OK — this is what we want to do.
At this point Django app(s) should be available and serving from IIS at /app or /app/admin from your webserver, with all the static assets and CSS loaded properly. If not, go back over the Static Files settings, and make sure that the static assets collected by collectstatic correctly found and placed all the files you’re relying on in the correct location.
Shibboleth / SSO / REMOTE_USER
⚠ Warning: This section describes some elements of setting up SSO login / security for your sites and server. I don’t claim to be an authority on setting up Shibboleth or configurations, or the security implications of any of the settings and configuration in this section. Please review all the relevant security documentation / best practices for Shibboleth, Django, and/or IIS. This setup will use session authentication from a trusted Identity Provider (IDP) with Shibboleth in this case being set up as a Service Provider (SP).
- Shibboleth Wiki
- Django Security
IIS / Shibboleth (as Service Provider / SP)
The Shibboleth service needs to be installed and configured on the webserver. Once installed and configured, the path to the API / App / Site must be listed in shibboleth’s configuration file Shibboleth2.xml. By default this file can be found in C:\opt\shibboleth-sp\etc\shibboleth\. The relevant path(s) to change for shibboleth to protect a url path on the webserver is listed in the section noted below (note: Shibboleth2.xml tags shown are truncated).
|
|
REMOTE_USER / Shibboleth Setting
In the same Shibboleth2.xml file, set the REMOTE_USER setting to whatever is provided by the associated identity provider. The setting can be changed as one of the attributes on the ApplicationDefaults element in the configuration file:
|
|
Setting the REMOTE_USER environment variable allows Django to read the logged in SSO username (or some other SAML value) and use that to see who is logged in in the session.
Once any changes have been saved to Shibboleth2.xml, the Shibboleth service on the server needs to be restarted. Open Services (Run -> services.msc) -> select “Shibboleth Daemon (Default)” -> Restart.
Django Configuration
A few things need to be added to middleware and authentication backends to enable use of the remote user environment variable set by shibboleth in IIS for purposes of authenticating users to Django / Apps.
In prod.py (or wherever production settings are stored, like settings.py) add the following to allow reading of REMOTE_USER from the request:
|
|
Note that in this case PersistentRemoteUserMiddleware is appended to the end of the MIDDLEWARE list, which is imported from base.py. If your configuration has other middleware that depends on specific ordering, then this solution may not be optimal for all cases.
There are also two flavors of Remote User Middleware — the generic and the .Persistent... variety. For more details on use see Authenticating using REMOTE_USER.
Thanks and Resources
Below is a listing of all the tabs I had open for reference when figuring this out and writing this.
- Microsoft Docs: How to Use HTTP Detailed Errors in IIS
- Stack Overflow: python.exe the fastcgi process exited unexpectedly
- DigitalOcean community: How to Deploy Python WSGI Applications Using uWSGI Web Server with Nginx
- Microsoft Docs: Configure Python web apps for IIS
- Django Documentation: How Django processes a request
- Nitin Nain: Setting up Django on Windows IIS Server
- Microsoft Docs: About Sites, Applications, and Virtual Directories in IIS 7 and Above
Article Changes
2020/04/24
- Added this changelog because this article is getting revised a lot
- Added notes on MySQL client and resource for precompiled wheels from uci.edu
- Added more details on Shibboleth configuration steps to leverage preexisting SSO infrastructure for setting REMOTE_USER
Развертывание Django сервера на Windows
Django — это мощный фреймворк для разработки веб-приложений на языке Python. Он предоставляет множество удобных функций, упрощающих процесс разработки и обеспечивающих безопасность и масштабируемость приложений. В этой статье мы рассмотрим, как развернуть Django сервер на операционной системе Windows.
Подготовка к развертыванию
Прежде чем начать развертывание, вам понадобятся некоторые предварительные настройки и установки.
1. Установите Python
Для запуска Django на Windows вам понадобится установить Python. Вы можете скачать установщик Python с официального сайта Python и следовать инструкциям установки.
2. Установите Virtualenv
Virtualenv — это инструмент для создания изолированных сред для разработки Python-приложений. Он позволяет вам создавать отдельные виртуальные среды, чтобы избежать конфликта зависимостей между разными проектами.
Установите Virtualenv с помощью pip, запустив следующую команду в командной строке:
pip install virtualenv
3. Создайте виртуальную среду
Перейдите в папку вашего проекта и создайте виртуальную среду, используя следующую команду:
virtualenv venv
Эта команда создаст папку `venv` в вашем проекте, содержащую изолированную среду Python.
4. Активируйте виртуальную среду
Успешное создание виртуальной среды даст вам возможность активировать ее. Для активации виртуальной среды введите следующую команду:
venv\Scripts\activate
После выполнения этой команды вы увидите, что ваша командная строка изменилась и отображает имя вашей виртуальной среды.
Установка Django
Теперь, когда вы подготовили свою виртуальную среду, можно приступить к установке Django.
1. Установите Django с помощью pip:
pip install django
2. Создайте новый проект Django, используя команду:
django-admin startproject myproject
Эта команда создаст новый проект Django в папке myproject.
Настройка базы данных
Следующим шагом является настройка базы данных для вашего проекта Django.
1. Откройте файл `myproject/settings.py` и найдите раздел `DATABASES`. В этом разделе вы найдете настройки подключения к базе данных.
2. Измените настройки вашей базы данных в соответствии с вашими предпочтениями. Например, вы можете использовать SQLite для локальной разработки, или настроить подключение к базе данных MySQL или PostgreSQL. Вот пример настройки для SQLite:
DATABASES = {
    'default': {
        'ENGINE': 'django.db.backends.sqlite3',
        'NAME': os.path.join(BASE_DIR, 'db.sqlite3'),
    }
}
3. Создайте базу данных, выполнив следующую команду:
python manage.py migrate
Эта команда создаст необходимые таблицы в вашей базе данных.
Запуск Django сервера
Теперь, когда у вас есть настроенный проект Django и база данных, вы можете запустить Django сервер.
1. Введите следующую команду для запуска сервера:
python manage.py runserver
2. Откройте веб-браузер и перейдите по адресу `http://localhost:8000`. Вы должны увидеть страницу приветствия Django, что означает успешный запуск сервера.
Настройка продакшн среды
Если вы планируете развернуть ваш Django проект на реальном сервере, вам также понадобится настроить продакшн среду.
1. Измените настройки `DEBUG` и `ALLOWED_HOSTS` в `myproject/settings.py`:
DEBUG = False
ALLOWED_HOSTS = ['your_domain.com']
Установите `your_domain.com` на доменное имя вашего сервера.
2. Создайте статические файлы и соберите статические ассеты:
python manage.py collectstatic
Эта команда скопирует все статические файлы, такие как CSS и JavaScript, в одну папку. Вы можете настроить путь, куда они будут скопированы в настройках `STATIC_ROOT` в `myproject/settings.py`.
3. Настройте ваш веб-сервер (например, Apache или Nginx) для проксирования запросов к вашему Django серверу.
4. Запустите ваш Django сервер в продакшн среде:
python manage.py runserver --settings=myproject.settings.production
Эта команда запустит сервер с настройками продакшн окружения, переданными через параметр `—settings`.
В заключение
В этой статье мы рассмотрели, как развернуть Django сервер на операционной системе Windows. Мы подготовили окружение, установили Django и настроили базу данных. Затем мы запустили сервер в разных окружениях, как локально, так и на продакшн сервере.
Django предоставляет мощные инструменты для разработки веб-приложений, и развертывание его на Windows — самый первый шаг к созданию и развертыванию вашего полноценного веб-приложения.
Goals
Getting Django to run on Windows, with pages served by IIS, and a SQL Server backend. Assume Windows Server 2003, IIS 6 and SQL Server 2005 where no versions are specified. You should already have Windows, IIS and SQL installed and working before following this guide.
Note: As of PyISAPIe version 1.0.4, this works with Python 2.5. The provided handler works with the current (1-11-08) CVS version of Django.
Note2: PyISAPIe also provides a WSGI adapter that may work with earlier versions of Django. Refer to the new release and docs: http://pyisapie.sourceforge.net/
Note3: This article is outdated. To install current version of Django on Windows with IIS 7 or later please read this article instead: http://www.helicontech.com/articles/running-django-on-windows-with-performance-tests/
Note4: While the site listed as part of note 3 puts forth a solution, the tutorial is missing steps and relies on a closed solution. The DJango-windows-tools project was created to not have these limitations: http://django-windows-tools.readthedocs.org/en/latest/
Steps
- Install Python
- Install PyISAPIe — an extension for IIS to connect Python with IIS
- Install Django and connect Django to PyISAPIe
- ADODB-API — the Python / SQL Server driver
- Configure Django to look at SQL Server
- Test, celebrate
Install Python
A simple download and install for this bit, so open http://www.python.org/ and look for «Quick Links» -> «Windows Installer» in the menu on the left. Download and run it, following the wizard steps until it is complete.
Install PyISAPIe — an ISAPI extension for IIS
PyISAPIe is an IIS extension that loads the Python interpreter into memory while IIS is running, and uses it to serve page requests — it avoids the CGI overhead of restarting Python for every request. It does mean that some Django files will be cached and you wont see changes while testing your Django site until you restart the Python process. With IIS 6 you have to right-click on the application pool running your services and select ‘recycle’ for changes to take. Previous versions of IIS will need the whole IIS service to be restarted.
I will assume you are using c:\python25 as the folder where Python is installed, but please change these where necessary for your setup.
If you have problems with PyISAPIe, check out the PyISAPIe Google Group for support.
Setting up Files
- Go to http://pyisapie.sourceforge.net/ and download it (look in the menu on the right, under «Links» for a download link). Unzip the archive to c:\pyisapie.
- Edit the properties -> security settings of c:\pyisapie\PyISAPIe.dll, add «Network Service» and tick «read» permission. (So IIS can use it).
- Go to c:\pyisapie\source\PyISAPIe\Python\ and copy the entire Http folder to c:\python25\lib\site-packages. Note: the Http folder is case sensitive. Saving in ‘http’ (or any other variation) will not work [SF].
Setting up IIS
You don’t have to create a virtual directory — you can do this with the root folder. If you do use a virtual directory, say /myfolder, then only urls starting with /myfolder will be handled by PyISAPIe. If you use the root folder, all URLs will be handled by PyISAPIe, and you risk anything else on the site being inaccessible afterwards if you’re not careful.
- Open the IIS Management Console, and create a new virtual directory, and allow executing ISAPI extensions when prompted by the wizard.
Multiple Django Installations on IIS
You can only run multiple instances of Django on IIS 6.0 if you use a separate instance of PyISAPIe for each Django instance. This is accomplished by setting up an IIS Application Pool for each PyISAPIe/Django instance that needs to be run. It would be great if multiple instances of Django could run under a single PyISAPIe instance. Please encourage the Django developers to work on this issue and/or contribute a fix yourself. You can find more information about this issue here:
- Trac Ticket: Provide a way to use django under IIS
- PyISAPIe Group: Multiple PyISAPIe Instances (for Django)
- Developers Group: IIS, pyisapie, and DJANGO_SETTINGS_MODULE
- A brief tutorial on getting multiple instances of Django running on IIS (including directory structure diagram)
Multiple instances of Django on IIS 5.1 is not currently possible.
IIS 7
- Add the PyISAPIe handler by selecting «Handler Mappings ==> Add Script Map» with the following settings:
- Request Path = *
- Executable = Path to the PyISAPIe.dll
- Name = PyISAPIe (name can be anything)
- Also, be sure that the PyISAPIe handler is higher than the StaticFile handler by clicking «View Ordered List» and reordering as needed.
IIS 6
- View the properties of the new folder and click on the «configuration» button (if it’s greyed out, click ‘create’ first), then add a new wildcard extension (the lower box), locate the pyisapie.dll file and untick the «check that file exists» box.
- In the IIS Manager, go to the «Web Service Extensions» section, and right click -> add new web service extension.
- Give it a name (it doesn’t matter what), add the pyisapie.dll fill as a required file and check the box to set the extension status to allowed.
IIS 5
- IIS 5.x doesn’t support wildcard application maps, at least not through the configuration interface. On IIS 5, the procedure is as follows:
- Right Click on virtual directory and choose «properties»
- Ensure «Execute Permissions» is set to «Scripts and Executables»
- Click «Configuration» (opposite «Scripts and Executables»)
- On «App Mappings» tab, select «Add»
- For Executable, browse to pyisapie.dll (needs full path if you enter manually)
- For extension enter * (this will redirect all requests to pyisapi)
- Using star DOES NOT work in IIS 5, you must specify an extension. [pjs]
- You should probably limit the verbs allowed; I left as all since it was for internal use.
- Untick the «check that file exists» box.
- ‘OK’ to close all the open dialogs.
That’s it installed. In c:\pyisapie\source\PyISAPIe\Python\examples folder is a file called Info.py. Copy this to your new virtual directory folder, and then try and view http://site/Info.py to test it. It should work. If it doesn’t, when you find out why, please come back and explain what happened and how you fixed it. 
If you have a 64-bit server, and you want to use 32-bit Python and PyISAPIe (otherwise you have to compile your own PyISAPIe.dll) you may need to:
- Create a new application pool, set it to 32-bit mode, create an application instead of a virtual directory, and set your application to use that pool (http://www.timvasil.com/blog14/post/2007/11/Run-a-32-bit-ISAPI-DLL-on-64-bit-IIS-7.aspx)
- If you then get Error 500 due to (error number 2147942593) try removing all AboMapperCustom-* handlers from the applications handlers/mappings (http://social.msdn.microsoft.com/Forums/en-US/sharepointdevelopment/thread/1131026f-7d8b-4e88-8d2c-398b12f4336d/)
IIS Troubleshooting
- «Import Error: couldn’t locate module Http.Isapi» — see Users Group: IIS 6 PyISAPIe problems
Text below saved in hope of an update to PyISAPIe:
If you want to keep up with the latest Django development version, you will need to download and install a subversion client for Windows, e.g. Tortoise SVN, install it, then create a new folder somewhere. Right click on the folder, and choose «SVN Checkout». Give the URL of the repository as: http://code.djangoproject.com/svn/django/trunk/ and click OK.)
Otherwise, just download the latest Django release from the main site, and extract the archive to a folder, e.g. c:\python25\django\.
Installing Django
Drop to a command prompt (start -> run -> «cmd» -> OK), change to your Python folder and install Django. Example:
c:\> cd python25\django
c:\python25\django> ..\python setup.py install
NB: You will probably need to do some messing around with paths and such to make this work neatly. I’m afraid I’m leaving that to you for now, because I don’t have clear steps. If you know any, please put them here. Without doing that you can still test the Django install, but will need a full path to django-admin.py:
c:\> md test
c:\> cd test
c:\test>c:\Python25\python c:\Python25\django\django\bin\django-admin.py startproject proj

c:\test> cd proj

c:\test\proj> python manage.py runserver
Validating models...
0 errors found.

Django version 0.95 (post-magic-removal), using settings 'proj.settings'
Development server is running at http://127.0.0.1:8000/
Quit the server with CTRL-BREAK.
Now open a web browser, and visit the site. It should serve a neat page to you.
Linking Django to PyISAPIe
Next, you must follow the readme.txt in the PyISAPIe examples\django folder, basically copy two files into specific folders. Then edit them a bit in order to fit your needs.
- Put Isapi.py in c:\python25\lib\site-packages\Http folder. According to the example given above, you’ll make the following changes to it:
# Add these two lines, and python will import DJANGO_SETTINGS_MODULE with no problem
import sys
sys.path.append(r'c:\test')

# Indicate the settings module of your project
os.environ["DJANGO_SETTINGS_MODULE"] = "proj.settings"
- Put pyisapie.py (from the PyISAPIe folder you installed earlier) in c:\python25\lib\site-packages\django\core\handlers folder.
Serving Django with IIS
Supposed that you have successfully settled everything above, and pointed the virtual directory /myfolder to c:\test folder, we’ll now make a Hello World page in Django.
- Create a file called helloworld.py in c:\test\proj folder with the following content:
from django.http import HttpResponse

def index(request):
    return HttpResponse("Hello world!")
- Modify urls.py in c:\test\proj folder, so you get the url «dispatched»:
from django.conf.urls.defaults import *

urlpatterns = patterns('',
    # Example:
    # (r'^newtest/', include('proj.apps.foo.urls.foo')),
    (r'^.*$', 'proj.helloworld.index'),

    # Uncomment this for admin:
#     (r'^admin/', include('django.contrib.admin.urls')),
)
You have everything you need to have Django running from IIS. Now visit http://site/myfolder/ to take a look. Notice that you don’t need to manually start a Django server.
Known Issues
- On IIS 5, you have to use the console command «iisreset» for code changes to take effect. Just restarting the website in IIS Management Console has no use. How about IIS 6? (20070304/henrik: — same for iis6 on win2k3)
- NOT true for IIS6: right-click on the application pool your site is using and select «Recycle.» [pjs]
- For debugging purposes in IIS6 you could set «Recycle worker process (number of requests)» = 1 in your application pool properties so you don’t need to «Recycle» all the time. NOT recommended for production usage. [ta]
- I had to create a «media» virtual directory for the stylesheets, etc, at the root of my IIS directory tree (urgh) with read permissions to get the admin site to load styles. Looking at the source for the admin page in my browser, the stylesheet link is absolute (/media/…) [rnm]
Configure Django for SQL Server
There are two external Django database backends for SQL Server:
- http://code.google.com/p/django-mssql/
- http://code.google.com/p/django-pyodbc/
Both of these projects are tracking the Django 1.0 release. Issues with those projects should be reported in their corresponding issue trackers.
Credits
- http://thinkhole.org/wp/2006/04/03/django-on-windows-howto/ for the Django on Windows with Postgres/Apache guide, from which I took some parts of the django-on-windows setup.
Additional Info
- Deploying Django 1.3 on IIS using PyISAPIe 64 bit on Python 2.7 http://www.bardiak.com/2012/05/deploying-django-13-on-iis-using.html
- For a Chinese translation, please try this http://wiki.woodpecker.org.cn/moin/D4I
- Several links appeared to be broken, so I created an alternative installation approach. Details here: http://www.kelvinism.com/howtos/using-django-sql-server-iis/
- Up-to-date 1.1RC4 installation notes (DB oracle) : http://groups.google.com/group/pyisapie/web/django-1-1-iis6-pyisapie-1-1-rc4-cx-oracle
- Alternative way to run django app on IIS 7 or IIS Express (with FastCGI) : http://www.helicontech.com/articles/run-django-apps-on-iis/
Though many Django Developers might consider it blasphemous, sometimes it is actually necessary to deploy Django applications on Windows/IIS, especially when working with a client that has based its infrastructure around the Windows ecosystem. The “blasphemy” part comes from Django having really been targeted at the Unix environment, relying heavily on features like WSGI, FastCGI, and command-line tooling, all of which are foreign to Windows. Fortunately, Django/IIS compatibility is improving, thanks to the addition of features (which would otherwise be a kludge) on both the Windows and the Python+Django sides of the equation, thereby helping to resolve compatibility issues between these two disparate technical worlds.
This short, focused tutorial walks you through the basic setup of a Django project on Windows. It covers the installation of Python, Django, and related tools, including running the Django project both standalone and as a FastCGI server. The latter is increasingly important, incidentally, since IIS now officially supports FastCGI (on IIS 7+, simply install the CGI feature).
Note: This tutorial is intended for those with a working understanding of Windows and who are familiar with the IIS management console. The version of IIS used in this tutorial is 8.5, but the descriptions and techniques are similar on earlier versions. The tutorial is based on Python 2.7 and Django 1.7, since those are the versions I use for my projects.
You can find another Django tutorial here.
Pro tip: If you are going to deploy multiple Django (or even plain Python) projects, or if you are a developer, you should look at virtualenv, a tool for creating isolated Python environments.
Installing Python on Windows
First, download Python. Both 32-bit and 64-bit MSI installers are provided, and you should choose the one appropriate for the machine you are installing on.
The Basics of PIP
PIP is the tool which installs and maintains Python libraries (of which Django is only one example). It is invoked by running the pip command at the command prompt. It implements several sub-commands, and two of the most useful ones are install and freeze. PIP will also install project dependencies (additional libraries) are installed, should the project have any.
Running pip install <package_name> will download and install the package and all of its dependencies (which may be nested and fairly complex). Running pip install —upgrade <package_name> will likewise upgrade an existing package to its most recent version. PIP supports a special syntax for installing precise versions of a package instead of just «the most recent one». It is done by appending an operator and a version number to the package name; e.g. «Jinja2==2.7.3» (to install a precise version) or «six>=1.8» (to install any version equal to or greater than the specified version number).
Running pip freeze simply shows the list of currently installed packages in a format which is directly usable by pip install.
Note that some Python / PIP packages come with libraries written in C, which must be compiled for the package to work. Unless you set up your system to have a working C compiler which is also compatible with the Python executables, you will not be able to install such packages. Django is a pure Python library so it does not require a C compiler to install.
It’s important that you install Python 2.7.9 or later, since Python versions beginning with 2.7.9 include PIP, the Python library/package/software manager which is used to install everything else in this tutorial.
The installer process is very straightforward and simple. It will offer to install Python in the C:\Python27 directory, which you should accept as it makes life easier afterwards. Try not to give in to the Windows habit of installing stuff in directories with spaces in their names.
The basic directory after installation will contain around 8 subdirectories, some miscellaneous files and two executables named Python.exe and PythonW.exe. The former is the default command-line interpreter and Python shell, while the latter is only the interpreter, which will not use (or spawn) a console window if invoked, and because of this is suitable for running GUI Python applications.
Next, Python should be added to the system’s PATH environment variable. This is done in Advanced System Settings (or System Properties), in the Advanced tab, by clicking on the Environment Variables button. There are two directories to be added: C:\Python27 and C:\Python27\Scripts. These should be appended to the PATH list, separated by semicolons (;). The ending of your PATH variable should look like ;C:\Python27;C:\Python27\Scripts.
Pro tip: You may also want to install GOW, a light-weight collection of Unix command-line utilities similar to Cygwin. It will provide you with tools such as
ls, but also more interesting ones such asmake,wget,curl,ssh,scp,gzipandtar.
Installing Django on Windows
Django can be installed using PIP with a command such as pip install django. The process may pull in some additional dependencies if they are not already present on your system. Otherwise, it will simply install only Django, with output similar to the following:
Downloading/unpacking django
Installing collected packages: django
Successfully installed django
Cleaning up...
You can check if both Python and Django for Windows are working by starting a new Windows Command Prompt, running the python command, and entering the import django command at the Python prompt. If it works properly, there should be no output or messages after the import django command; i.e.:
Python 2.7.9 (default, Dec 10 2014, 12:24:55) [MSC v.1500 32 bit (Intel)] on win32
Type "help", "copyright", "credits" or "license" for more information.
>>> import django
>>>
Installing a Django project on Windows
A Django “project” consists of one or more “apps”. A project’s top-level directory usually contains one special project subdirectory which contains settings and some general project-level information, one subdirectory per app, and a command-line script called manage.py. For example:
C:\Devel\djangoproject\src>dir
 Volume in drive C is OS
 Volume Serial Number is 6A3D-C1B8

 Directory of C:\Devel\djangoproject\src

22/12/2014  04:25    <DIR>          .
22/12/2014  04:25    <DIR>          ..
22/12/2014  04:19    <DIR>          project
22/12/2014  04:58    <DIR>          djangoapp
16/12/2014  03:30    <DIR>          templates
16/12/2014  00:50               250 manage.py
               1 File(s)            250 bytes
               5 Dir(s)  23,552,929,792 bytes free
Django projects can be simply distributed by archiving the entire project directory and decompressing it on another machine. In the example above, the project contains the project subdirectory, the application directory named djangoapp, and an auxiliary templates subdirectory.
The manage.py script is the “swiss army knife” of Django applications. It does everything from creating new apps, to database migrations, to running a test (embedded) HTTP server or even a FastCGI server.
Running a test HTTP server
If the project and its apps are functional, you should be able to start the default Django development-only HTTP server by running the command manage.py runserver, which should result in output similar to the following:
C:\Devel\djangoproject\src>manage.py runserver
Performing system checks...

System check identified no issues (0 silenced).
December 23, 2014 - 01:19:02
Django version 1.7.1, using settings 'project.settings'
Starting development server at http://127.0.0.1:8000/
Quit the server with CTRL-BREAK.
As you can see from the messages, this starts a server on localhost, port 8000. You can access it immediately with your web browser.
Configuring and running a FastCGI server
A more interesting option is to enable a FastCGI server. With FastCGI, you can use IIS, Apache, or any other web server, to serve the application in a production setting. For this to work, you need to download the fcgi.py (the Django management command to run Django on Windows with IIS through FastCGI) and put it into the management/commands subdirectory of the Django app’s (not the project’s!) subdirectory. Both the management and the commands subdirectories must have an empty file named __init__.py (which turn those directories into Python modules).
fcgi.py is a very simple and minimalistic WSGI to FastCGI adapter that does not support listening on a TCP socket or a pipe, and does all its processing by using stdin and stdout`. As such, it is not usable with modern web servers such as nginx, but will work with IIS.
Configuring IIS to run a FastCGI application
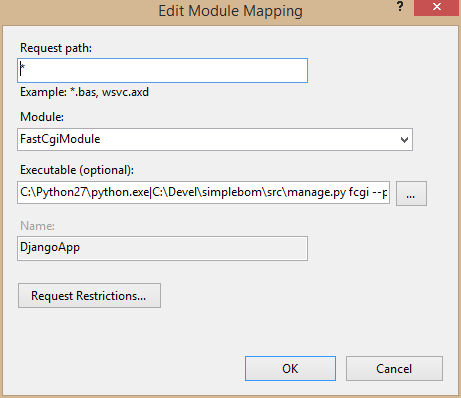
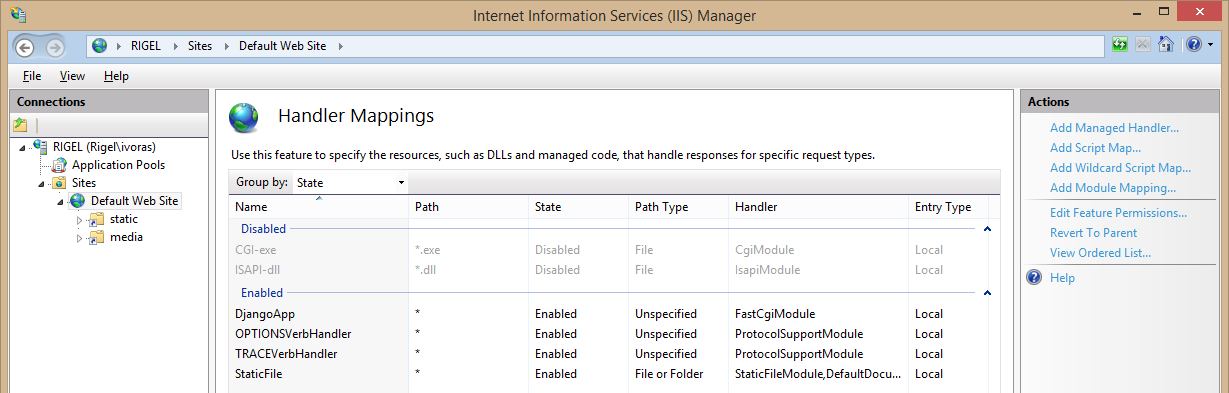
If the FastCGI module is loaded in IIS (or simply the CGI module in IIS 7+), the IIS management console will have the “FastCGI Settings” icon available. Django is a framework which has its own URL routing, so Django apps must be installed as a “handler” in IIS for specific paths. To install a Django app on the IIS’s Default Web Site, select it in the management console, and open the Handler mappings configuration feature. In it, click on the Add Module Mapping… action, and enter the following information:
-
Request path: Set it to
\*to handle all requests with internal Django routing -
Module: Set it to
FastCgiModuleto use the IIS’ FastCGI module -
Executable: Here, both the
python.exepath and its command line arguments need to be set, using the pipe character (|) as a separator. An example value for this setting is:C:\Python27\python.exe|C:\app\src\manage.py fcgi --pythonpath C:\app\src --settings project.settings. Note that you need to specify thefcgicommand for themanage.pyscript, and manually set the Python interpreter’s search path for the project, as well as the Python module name for the project’s setting module. - Name: You can set this to whatever you like.
Your configuration dialog should look something like this:
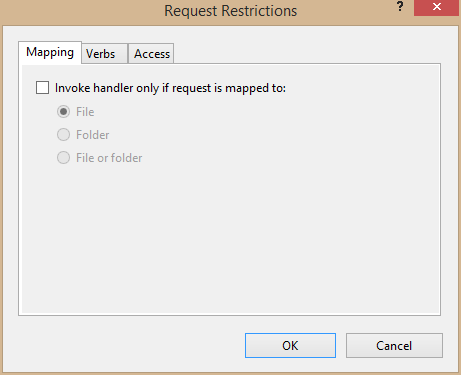
Next, click the Request restrictions button and edit the Mapping tab. Uncheck the “Invoke handler only if the request is mapped to…” checkbox (otherwise, IIS will have problems mapping what it thinks are subdirectories in the URL request):
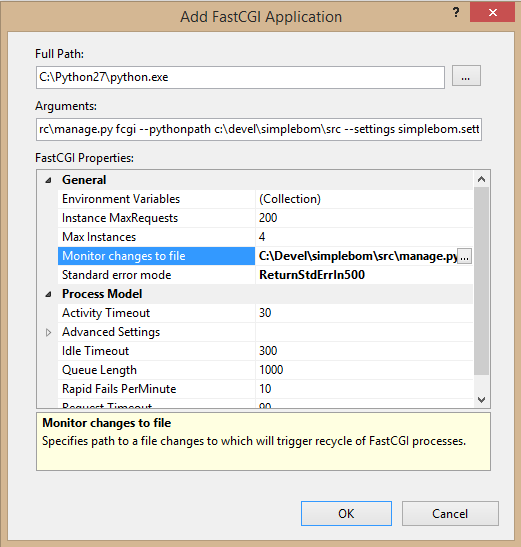
Click OK on the handler information dialog. IIS will then ask you to confirm the creation of a matching FastCGI application entry which you will need to confirm. This entry will be visible in the FastCGI Settings feature, accessible at the root screen of the IIS Management Console. The default entry created by IIS itself is adequate, but there are some optional settings available which you may want to take advantage of:
- Max instances: The approach we’re employing for running FastCGI applications is single-process, single-threaded, meaning that a separate Python interpreter process will be started for each simultaneous request. This setting limits the number of simultaneous Django app instances.
- Monitor changes to file: By default, once started, the app processes will be active either until manually shut down, or until they handle Instance MaxRequest requests. By using this setting, IIS will monitor a timestamp of an arbitrary file, and if it changes, it will stop and reload app instances. This is convenient both for developers and for production environments, as it allows apps to be reloaded when changed. The “monitor a file’s timestamp for a reload indicator” is a fairly strange concept on Windows, but it’s normal in Unix-like environments, and so it was carried over here with FastCGI.
Modern web applications use multiple resource files, such as CSS, JavaScript and others, and Django apps are no exception. Django provides for a very convenient feature which allows developers to integrate the needed resources into the application directory tree, but which can be extracted and copied by Django into a proper, static directory. This is basically a developer-controlled feature, and the locations where Django will store the static files is controlled in the project’s settings.py. Well-behaved projects will use a reasonably sane path for this, but it is not standardized.
Apps which handle uploaded files store them in a similarly-managed directory which, in Django, is traditionally named media. The static and media directories need to be added to the IIS configuration as virtual directories:
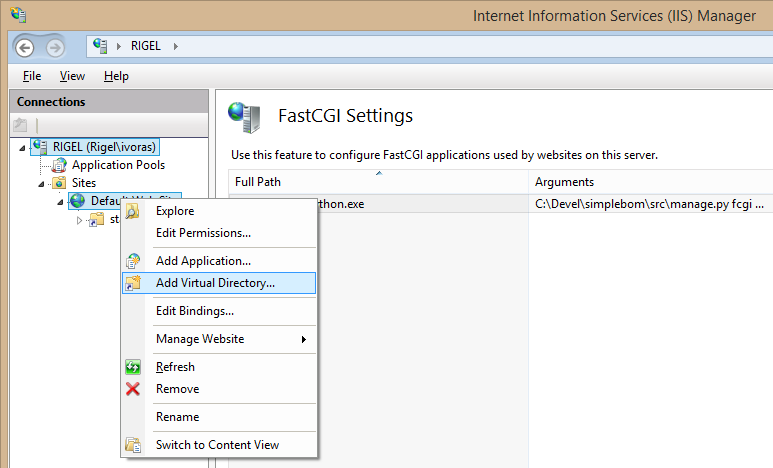
The important step here is to reconfigure the Handler Mappings feature for each of the directories and remove the Django App handler, leaving the StaticFile handler as the most important one.
Note that the static directory must be readable by IIS (as well as all other files and directories in the Django project), but the media directory must also be writable by IIS. The final site configuration should resemble the following:
A note about databases
SQLite works by default on Windows, as it does on Unix-like systems. Most of the other open source databases now work on Windows, even PostgreSQL, which I recommend. On existing Windows installations, though, there could be a requirement to deploy Django with the MS SQL Server. This is possible either by using an ODBC bridge driver or by using a native MS SQL driver. In theory, both work, but I haven’t tested them. At least the database connection parameters (in the project’s settings.py file) need to be changed to switch to a new database. Data migration needs to be done manually.
Note that if using the SQLite database, both the database file and the directory where it is located need to be writable by IIS.
Troubleshooting
The described configuration is tested and proven to work, but if something goes wrong, here are some basic steps for troubleshooting your Django for Windows install:
- Try starting the FastCGI command line yourself. This is the command configured in the FastCGI Settings and which must match the one configured in Handler Mappings for the site.
- Install the Tracing feature for IIS, then configure it for the Django site in Failed Request Tracing Rules to trace all content (), the status code “500” and the event severity “Error”. The traces will be available as XML files (with attached XSLT) in the IIS’s
C:\inetpub\logs\FailedReqLogFilesdirectory (or a similar one, depending on your configuration). You then need to enable tracing for the particular web site (or a virtual directory) in the *Configure->Failed request tracing… action.
Conclusion
To be sure, Django is tailored for a Unix-like environment, and the most wide-spread and supported way of running Django is on a Linux system (e.g., with uwsgi and nginx).
Yet it doesn’t take much work to make Django run on Windows, as shown in this tutorial. Some of the steps described may seem counter-intuitive from a pure Windows perspective, but they are necessary and, fortunately, the effort spent in the configuration is one-time only. Once configured, the Django application should then behave in much the same way that it would on a Linux platform.