I have a django project. I have installed nginx server. I want to run nginx along with django on windows machine. I have tried a few blogs Nginx Django Uwsgi. But all of them required uwsgi. But the uwsgi is not installing on windows and gives «uname» error. Is there any way to install and run nginx and django on windows ? Any pointers will be very helpfull thanks.
asked Jan 12, 2014 at 5:01
![]()
Akash DeshpandeAkash Deshpande
2,58310 gold badges42 silver badges82 bronze badges
Best way (IMHO) is using apache+mod_wsgi. Both uWSGI and Gunicorn are not windows-friendly (albeit uWSGI has cygwin support, so you can eventually try it [if you are brave enough]).
Another approach would be installing a linux vm (virtualbox, vmware…) on the windows machine to host your application and proxy requests from local IIS to the virtual system.
answered Jan 12, 2014 at 10:17
![]()
2
This question is from a year ago but I’ll answer this for the others looking for a solution to their Windows Django/nginx problems.
As uWSGI is clearly not an option for Windows (forget about cygwin/virtual environments). I didn’t want to go for mod_wsgi + Apache because I had to merge an existing AngularJS/nginx project together with my newly created Django project.
I ended up using FastCGI, even though Django support for it will soon be deprecated, it still works. This (somewhat badly written but it does help) tutorial helped me with this.
The key actions were:
- Make sure
flupis installed (pip install flup) -
Edit your nginx.conf as shown in the tutorial:
location / { # host and port to fastcgi server fastcgi_pass 127.0.0.1:<port nr>; fastcgi_pass_header Authorization; fastcgi_hide_header X-Accel-Redirect; fastcgi_hide_header X-Sendfile; fastcgi_pass_header Authorization; fastcgi_intercept_errors off; fastcgi_param CONTENT_LENGTH $content_length; fastcgi_param CONTENT_TYPE $content_type; fastcgi_param PATH_INFO $fastcgi_script_name; fastcgi_param QUERY_STRING $query_string; fastcgi_param REMOTE_ADDR $remote_addr; fastcgi_param REQUEST_METHOD $request_method; fastcgi_param REQUEST_URI $request_uri; fastcgi_param SERVER_NAME $server_name; fastcgi_param SERVER_PORT $server_port; fastcgi_param SERVER_PROTOCOL $server_protocol; } -
Then run your Django project with fcgi, with the port being the same one as seen above in the .conf
python manage.py runfcgi method=threaded host=127.0.0.1 port=<port nr>
Worked for me.
If you don’t have any reason like I had for which you really want to use nginx, I’d suggest going for the mod_wsgi + Apache webserver approach, it will probably make your life a lot easier.
answered Oct 20, 2015 at 9:58
![]()
FluppeFluppe
4797 silver badges22 bronze badges
1
After the Django1.9+, the FastCGI support via the runfcgi management command is removed.
So you have to use old version django, or use the mod_wsgi + apache.
If you only want to develop the django code, then you can just edit nginx.conf add proxy_pass http://127.0.0.1:8000 into the location option. For example:
    location /api/ {
        proxy_pass http://127.0.0.1:8000;
    }

    location /static/ {
        proxy_pass http://127.0.0.1:8000;
    }
answered Feb 22, 2017 at 7:49
![]()
You can try to use Helicon Zoo to run Django applications on Windows machine with IIS 7+. Helicon Zoo is stable and production-ready.
Tutorial here: Running Django on Windows
answered May 5, 2014 at 14:41
![]()
rukebarukeba
6831 gold badge7 silver badges9 bronze badges
It’s quite simple to run django on nginx on windows. Here are some key steps to follow —
1. Download nginx/windows from http://nginx.org/en/download.html
2. Unzip the pckage (like nginx-1.7.2.zip) to a folder in your machine)
3. Install flup (fastcgi connecting nginx and django) from https://pypi.python.org/pypi/flup
4. Configure nginx config file. Some key section is shown below,
server {
        listen       8000;
        server_name  localhost;

        location ~ ^/ {
            fastcgi_pass 127.0.0.1:8001;
            #fastcgi_index index.html

            fastcgi_param PATH_INFO $fastcgi_script_name;
            fastcgi_param REQUEST_METHOD $request_method;
            fastcgi_param QUERY_STRING $query_string;
            fastcgi_param CONTENT_TYPE $content_type;
            fastcgi_param CONTENT_LENGTH $content_length;
            fastcgi_param SERVER_PROTOCOL $server_protocol;
            fastcgi_param SERVER_PORT $server_port;
            fastcgi_param SERVER_NAME $server_name;
            fastcgi_pass_header Authorization;
            fastcgi_intercept_errors off;
        }
    }
Nginx would listen on 8000 port, and when you access the django site, it would pass the request to your django application listening on 8001 port.
Also add the following section to the conf file to tell nginx to render static files in your django application.
location ~ ^/static/ {
            root   "C:/Users/yufa/Desktop/Document/Study/Django/sqlmonitor/";
            expires 30d;
           # root  html;
           # index  index.html index.htm;
            break;
        }
5. Start nginx (nginx.exe)
6. Start django, binding to nginx.
python manage.py runfcgi host=127.0.0.1 port=8001 protocol=fcgi method=threaded
7. It’s done, open a browser, and try http://127.0.0.1:8000
Setting Nginx Django App with Postgres and Gunicorn on Ubuntu and Windows
Setting up a Nginx Django web application with a powerful stack like Postgres, and Gunicorn can greatly enhance its performance and scalability. In this guide, we will walk you through the process of configuring Nginx Django with Postgres as the database, Nginx as the web server, and Gunicorn as the application server on both Ubuntu and Windows operating systems.
Nginx and Django Integration
Nginx and Django are two powerful tools commonly used in web development. Nginx is a high-performance web server and reverse proxy, while Django is a popular Python web framework. Integrating Nginx with Django can greatly enhance the performance, scalability, and security of your web application.
Nginx acts as a middle layer between the client and Django, handling various tasks such as load balancing, caching, serving static files, and proxying requests to the Django application server. This integration allows Nginx to efficiently handle incoming web traffic, offload resource-intensive tasks from Django, and provide additional functionalities to optimize the overall performance of your application.
Prerequisites:
- A working Django project
- A running Postgres database
- Ubuntu or Windows operating system
Nginx Django :Installing and Configuring
Before we get into installing and configuring Nginx Django app you must understand the Role of Nginx in Django Deployment.
In a typical Django deployment, Nginx plays a crucial role in managing the flow of incoming requests. When a client makes a request to your application, it first goes through Nginx, which acts as a reverse proxy. Nginx can then perform various tasks before forwarding the request to the Django application server.
One of the primary functions of Nginx is load balancing. With Nginx, you can distribute incoming requests across multiple instances of your Django application, ensuring optimal utilization of server resources and improving the overall responsiveness of your application.
Nginx also excels at serving static files efficiently. By configuring Nginx to handle static files directly, you can reduce the load on Django, allowing it to focus on processing dynamic requests. This approach significantly improves the performance of your application, especially when dealing with large volumes of static files. Let’s get started!
Install Postgres On Ubuntu
- Open the terminal and run the following commands:
sudo apt update
sudo apt install postgresql postgresql-contrib
- Configure Postgres: Create a new database and user for your Django project. Replace your_database_name, your_username, and your_password with your desired values:
sudo -u postgres psql
CREATE DATABASE your_database_name;
CREATE USER your_username WITH PASSWORD 'your_password';
GRANT ALL PRIVILEGES ON DATABASE your_database_name TO your_username;
\q
Download and Install Postgres On Windows
- Visit the official PostgreSQL website and download the installer suitable for your Windows version. Follow the installation wizard to complete the setup.
- Launch the pgAdmin application and create a new database and user for your Django project. Take note of the database name, username, and password for later use.
Install and Configure Django
- Open the terminal or command prompt and run the following command:
- In your Django project’s settings.py file, update the database settings with the Postgres details:
DATABASES = {
'default': {
'ENGINE': 'django.db.backends.postgresql',
'NAME': 'your_database_name',
'USER': 'your_username',
'PASSWORD': 'your_password',
'HOST': 'localhost',
'PORT': '',
}
}
Installing and Configuring Nginx on Ubuntu
- Open the terminal and run the following command:
- Create a new server block configuration file:
sudo nano /etc/nginx/sites-available/your_project_name
- Inside the file, add the following configuration:
server {
listen 80;
server_name your_domain_or_ip;

location / {
proxy_pass http://localhost:8000;
proxy_set_header Host $host;
proxy_set_header X-Real-IP $remote_addr;
}
}
- Save the file and exit the editor. Then, enable the new server block and restart Nginx:
sudo ln -s /etc/nginx/sites-available/your_project_name /etc/nginx/sites-enabled/
sudo nginx -t
sudo systemctl restart nginx
Please note above steps are just a basic steps to configure Nginx Django, For complete and deep Nginx config please read our article on Install Nginx and Nginx Config.
Installing and Configuring Nginx on Windows
- Download and Install Nginx: Visit the official Nginx website and download the Windows version. Extract the downloaded package and place it in a desired location.
- Configure Nginx: Open the nginx.conf file located in the extracted Nginx directory. Inside the http block, add the following configuration:
server {
listen 80;
server_name your_domain_or_ip;

location / {
proxy_pass http://localhost:8000;
proxy_set_header Host $host;
proxy_set_header X-Real-IP $remote_addr;
}
}
Please replace your_domain_or_ip with your actual domain name or IP address.
- Save the changes to the nginx.conf file and start Nginx by running the following command in the command prompt:
Installing and Configuring Gunicorn
- Open the terminal or command prompt and run the following command:
- Navigate to the root directory of your Django project where the “manage.py” file is located. Run the following command to start Gunicorn:
gunicorn your_project_name.wsgi:application --bind localhost:8000
Testing Your App
- Open your web browser and visit
http://your_domain_or_ip. You should see your Django application running successfully.
Congratulations! You have successfully set up Django with Postgres, Nginx, and Gunicorn on both Ubuntu and Windows operating systems. This powerful stack will provide a robust foundation for your web application, ensuring efficient handling of requests and reliable database management. Happy coding!
Nginx Django Benefits
- Nginx’s efficient handling of requests, load balancing capabilities, and optimized serving of static files contribute to improved performance and reduced response times for your Django application. It allows you to handle higher traffic loads and delivers a smoother user experience.
- Nginx’s load balancing feature enables easy scalability by distributing requests across multiple Django application instances. This horizontal scaling approach ensures that your application can handle increased traffic and provides high availability by preventing any single point of failure.
- Nginx acts as a reverse proxy and can implement security measures such as request filtering, rate limiting, and SSL/TLS encryption. These features protect your Django application from various types of attacks, ensuring the security and integrity of user data.
- By offloading the serving of static files to Nginx, you reduce the workload on Django, enabling it to focus on dynamic content generation. Nginx’s efficient file-serving capabilities enhance the overall performance and responsiveness of your application.
- Nginx provides a flexible and powerful configuration system that allows you to customize various aspects of your Django application’s deployment. You can fine-tune Nginx settings to optimize performance, caching, and security based on your application’s specific requirements.
Nginx use
#1 download
http://nginx.org/en/download.html

#2 Installation / Configuration
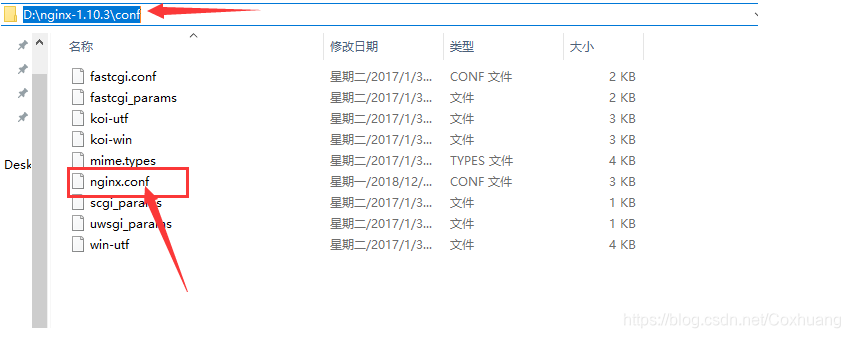
Unzip the newly installed installation package, put it in your favorite directory, I put it on the D drive, use cmd to enter the directory, configure the Nginx file.

Start Nginx
>start nginx.exe

Enter 127.0.0.1 and you can see that Nginx is working.

#3 Django
Create a working Django project and run it. The Django project port number I used is 8080.
python manage.py runserver 0.0.0.0:8080
Restart Nginx
nginx.exe -s reload

#
Nginx.exe -s stop //stop nginx
 Nginx.exe -s reload //reload nginx
 Nginx.exe -s quit //quit nginx