Windows 7 Service Pack 1 Windows 7 Ultimate Windows 7 Enterprise More…Less
INTRODUCTION
Windows 7 language packs are available for computers that are running Windows 7 Ultimate or Windows 7 Enterprise. The Windows 7 language packs can be installed only from the Optional Updates section in Windows Update. However, these language packs are not available on the Microsoft Windows Server Update Services (WSUS) server or through the Microsoft Download Center.
More Information
How to install a Windows 7 language pack
To download and install a Windows 7 language pack, follow these steps:
-
Start Microsoft Update. To do this, click Start
 , type Windows Update in the Search programs and files box, and then click Windows Update in the Programs list.
 -
Click the optional update links for the language packs.
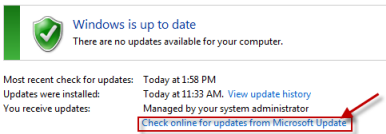
Note If the optional update links cannot be found, click Check online for updates from Microsoft Update to search the optional updates.
-
Under the Windows 7 Language Packs category,select the desired language pack.
Note If you install many additional language packs, the disk space and system performance are affected. In particular, disk space and system performance are affected during servicing operations, such as Service Pack installations. Therefore, we recommend that you only add a language pack to your computer if you will use the language pack.
-
Click OK, and then click Install updates to start the download and installation process.
 , type Windows Update in the Search programs and files box, and then click Windows Update in the Programs list.
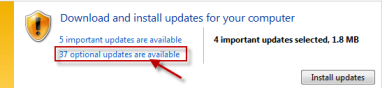
How to change the interface of Windows 7 after a language pack is installed
When you install a language pack, you can change the interface language of Windows 7 to the language that you select.
Language packs also let multiple users who share a computer select distinct display languages. For example, one user can select to see the dialog boxes, menus, and other text in Japanese, whereas another user can select to see the same content in French.
To change the display language, follow these steps:
-
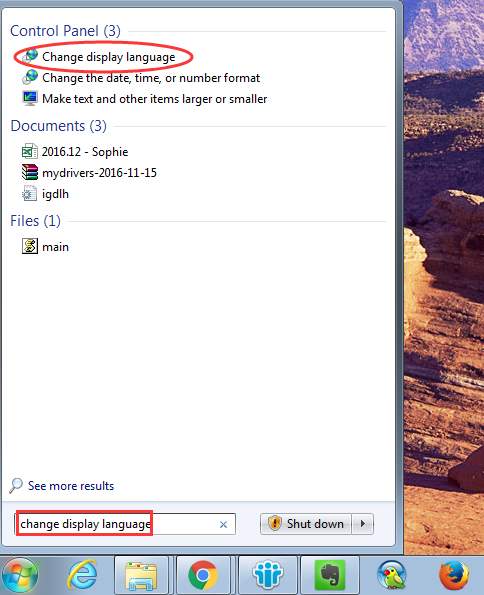
Click Start, and then type Change display language in the Start Search box.
-
Click Change display language.
-
In the drop-down list that appears, select the language that you want, and then click OK.
How to uninstall a Windows 7 language pack
To uninstall a language pack, follow these steps:
-
Click Start, and then type Uninstall display language in the Start Search box.
-
Click Install or uninstall display languages.
-
Click Uninstall display languages.
-
Select the language or the languages that you want to uninstall, and then click Next.
-
Follow the rest of the steps to uninstall this language or these languages.
After you install the desired language packs, you can hide unwanted language packs in Windows Update. To hide unwanted language packs in Windows Update, follow these steps:
-
Click the Windows 7 Language Packs category in the Select the updates you want to install page to highlight all the language packs.
-
Right-click the highlighted updates, and then select Hide update.
STILL NEED HELP?
If this article does not answer your question, click this button to pose your question to other community members at Microsoft Community:
Need more help?
Want more options?
Explore subscription benefits, browse training courses, learn how to secure your device, and more.
Communities help you ask and answer questions, give feedback, and hear from experts with rich knowledge.
Язык интерфейса — это язык, который используется Windows в диалоговых окнах, меню, разделах центра справки и поддержки, а также в других элементах пользовательского интерфейса. В зависимости от версии вашей Windows существует несколько способов поменять язык интерфейса. В этой статье я опишу как поменять язык во всех возможных версиях Windows7, а именно Домашняя базовая \ Home Basic, Домашняя расширенная \ Home Premium, Профессиональная \ Professional, Корпоративная \ Enterprise, Максимальная \ Ultimate.
Для начала предлагаю рассмотреть как поменять язык в Window7 Professional, Корпоративная \ Enterprise, Максимальная \ Ultimate, поскольку для этих версий предусмотрен штатный способ смены языков.
Смена языка на Window7 Корпоративная \ Enterprise, Максимальная \ Ultimate.
Существует два способа изменить язык:
1) с помощью обновлений
2) скачать EXE файлы и установить.
Начнем, на мой взгляд, с самого легкого, скачаем необходимый нам язык и запустим его установку. Если вы хотите изменить язык с неведомого (английского, французского, итальянского и т.д.) на русский, для этого скачайте файл соответствующей вашей систем.
Русский язык для Windows7 (KB972813):
Windows7 x86 (32 bit) без SP1
Windows7 x64 без SP1
Windows7 x86 (32 bit) SP1
Windows7 x64 SP1
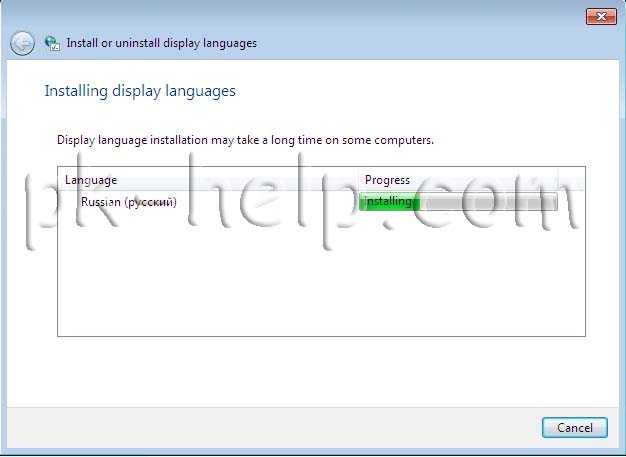
После того как вы скачали необходимое обновление, запустите его, кликнув на нем двойным кликом и запустите установку. Установка может занять до 15-30 мин.
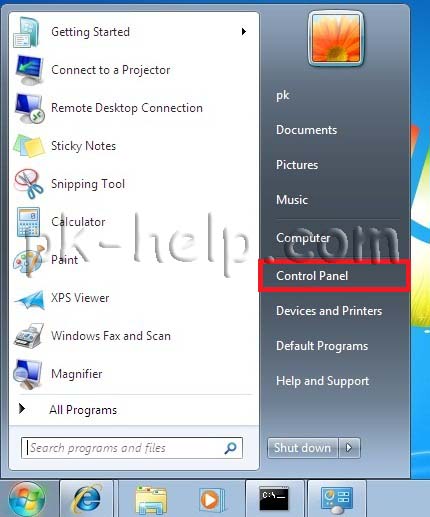
Следующим шагом необходимо сменить язык в настройках Windows 7, для этого нажимаете «Пуск- Control Panel (Панель управления)».
Выбрав «Smoll icons» (Мелки значки) нажмите на «Region and Language» (Язык и региональные настройки).

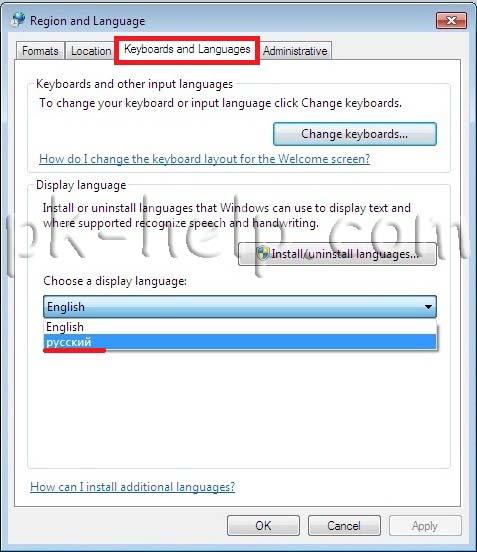
.В открывшемся окне выберите вкладку «Keyboards and Languages» (Языки и клавиатуры) и в поле Choose a display language выберите необходимый язык, если вы хотите русифицировать необходимо выбрать «Русский«.
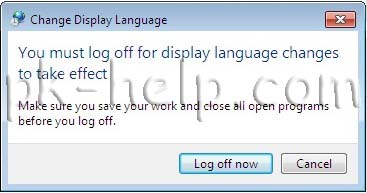
После этого вам будет предложено перелогиниться. Нажимаем «Log off now» и при следующем входе в систему, вы увидите изменившийся язык интерфейса Windows7.
Если вам по каким то причинам вам не подошел первый способ русификации Windows7, предлагаю рассмотреть второй способ- Изменения языка интерфейса с помощью установки обновлений.
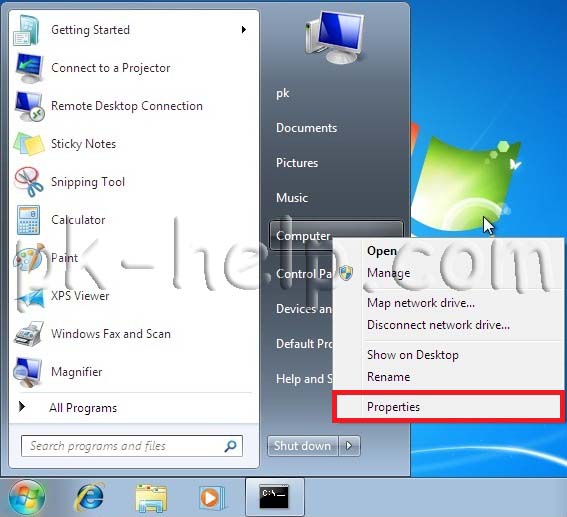
Нажимаем «Пуск» находим кнопку «Computer» (Компьютер), нажимаем правой кнопкой и выбираем «Properties«.
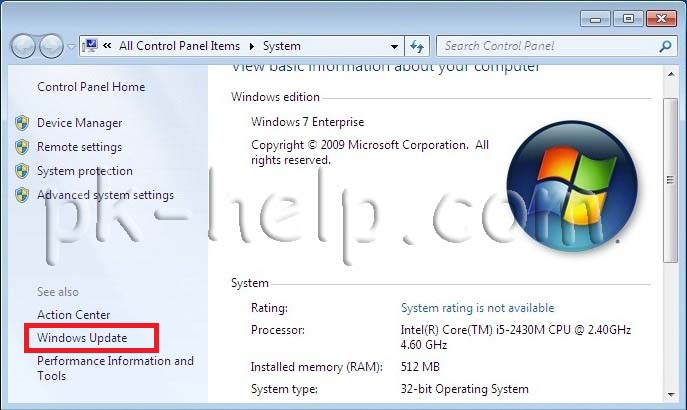
В открывшемся окне выбираем «Windows Update» (Центр обновления Windows).
Затем нажимаем «Check for updates» (Проверить наличие обновлений). Наличие интернет обязательно!!!
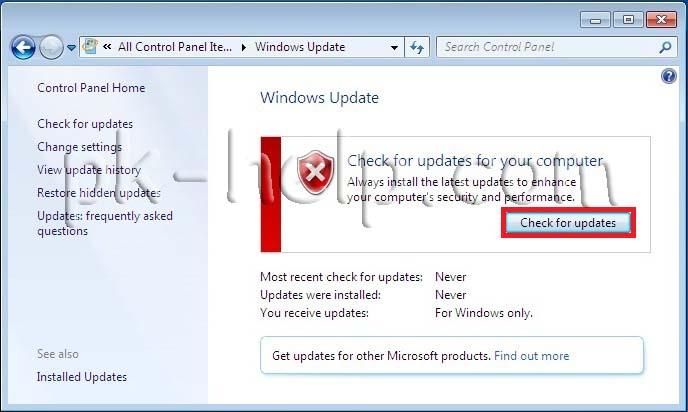
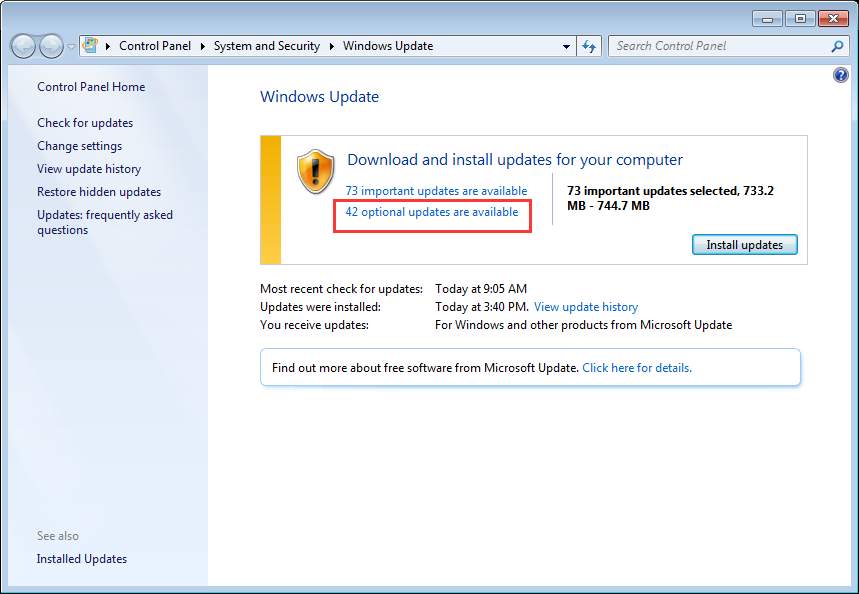
После того как пройдет процесс поиска обновлений, он может занять несколько минут, необходимо выбрать необязательные обновления «optional updates are available«.
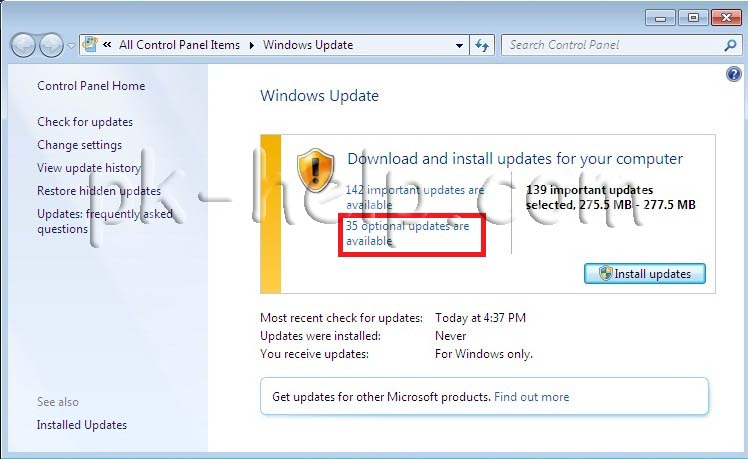
В открывшейся вкладке находим язык на который мы хотим изменить интерфейс Window7, в данном случае- Русский, ставим галочку на против необходимого языка и нажимаем «Ok«.
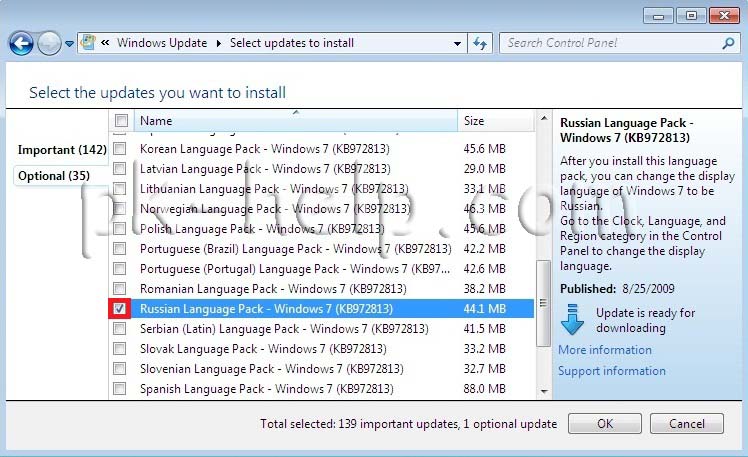
После этого устанавливаем все обновления, установка языка может занять до 15- 30 мин.
После установки языка необходимо изменить настройки Windows, как это сделано описано выше.
Смена языка на Window7 Домашняя базовая \ Home Basic, Домашняя расширенная \ Home Premium, Профессиональная \ Professional.
Сменить язык интерфейса в Windows7 Домашняя базовая \ Home Basic, Домашняя расширенная \ Home Premium, Профессиональная \ Professional, можно различными способами, можно самому с помощью командной строки, а можно и готовыми инструментами, например программой Vistalizator. Использование этой программой для смены языка- элементарно:
1 Скачиваете программу с официального сайта.
2 Скачиваете необходимый язык. Скачать можно с сайта программы Vistalizator, или если вам необходимо русифицировать Windows7 можно по ссылка в этой статье.
3 Заходите в компьютер под локальным администратором, запускаете программу (она не требует установки).
4 Выбираете добавить язык, указываете на скачанный ранее файл, и спустя 15-20 мин у вас необходимый для вас язык интерфейса Windows7.
Я очень надеюсь, моя статья помогла Вам! Просьба поделиться ссылкой с друзьями:
Достаточно часто начинающие пользователи испытывают проблемы с русификацией Windows 7. Здесь есть несколько нюансов. Есть отличия в русификации различных версий Window 7. Наиболее прост и понятен процесс русификации Microsoft Windows 7 Enterprise и Ultimate.
Для начала необходимо скачать русский языковой пакет для Windows 7, наиболее простой способ – воспользоваться службой обновлений Microsoft. Для чего нужно перейти в Start › All Programs › Windows Update. Из интерфейса центра обновлений Windows нужно запустить загрузку и установку пакета русской локализации. Это наиболее простой и безопасный способ русификации Windows.
Пакеты русской локализации для Windows 7 можно скачать с сайта Microsoft и установить вручную. Вы должны скачивать пакет локализации в соответствием разрядности своей ОС и установленного Service Pack.
Русский язык Windows 7 без SP1 (KB972813):
- windows6.1-kb972813-x86-ru-ru_f4df4bcb8d3194323f17a086a17f46dd0c9c492a.exe (x86);
- windows6.1-kb972813-x64-ru-ru_f0acfc688d609ee45d43cc60c6412a3071a665bd.exe (x64).
Русский язык для Windows 7 с установленным Service Pack 1 (KB2483139): Напомню, что я уже писал заметку о том, где можно скачать Windows 7 Service Pack 1.
- windows6.1-kb2483139-x86-ru-ru_6532a8f36ad7d15277d5d60da92555f0fbee4daa.exe (x86);
- windows6.1-kb2483139-x64-ru-ru_0587eb296a2f04e0d3699650d39b53ee18b97a79.exe (x64).
Чтобы русифицировать интерфейс Windows 7 Enterprise или Ultimate, необходимо перейти в панель управления (Start Menu -> Control Panel) и выбрать элемент Clock, Language and Region.

В появившемся окне нужно нажать на ссылку «Change display language», а потом перейти на вкладку Keyboards and Languages.

На этой форме есть кнопка Install/Uninstall Languages, нажав на которую вы перейдете к мастеру настройки языка интерфейса Windows 7. В появившемся мастере вы сможете русифицировать систему, для чего вам нужно будет указать скачанный файл . cab с русским MUI Windows 7, и выбрать установку русского языка интерфейса.
В том случае, если ваша версия windows 7 не максимальная (не Ultimate или Enteprise), то windows 7 Language Pack придется ставить вручную.
Для чего запускаем командную строку (cmd) с правами администратора и выполняем следующие команды:
DISM /Online /Add-Package /PackagePath:"D:\Downloads\ru-RU\lp.cab"
bcdedit /set {current} locale ru-RU
bcdboot %WinDir% /l ru-RU
Где, D:\Downloads\ru-RU\ – это путь к папке, в которую вы распаковали скачанные языковые пакеты. В этой папке должен находится файл локализации lp.cab.
После чего запускаем редактор реестра (regedit), перейти в ветку HKEY_LOCAL_MACHINE/SYSTEM/CurrentControlSet/Control/MUI/UILanguages и удалить параметр en-US, после чего компьютер нужно перезагрузить.
После загрузки компьютера вы получите русифицированную версию Windows 7.
Также вы можете познакомиться со статьей о русификации Windows Server 2008 R2.
![]()
Download Article
![]()
Download Article
- Display Language (Ultimate and Enterprise)
- Display Language (Any Version)
- Input Language
- Video
- Q&A
|
|
|
|
Windows 7 allows you to change the display language for most of the interface. The process is fairly straightforward and the most comprehensive if you have Windows 7 Ultimate or Enterprise. If you are using Windows 7 Starter, Basic, or Home, you can install Language Interface Packs, which translate the most-used elements into your chosen language. You can also change the keyboard input language so that you can easily type in other languages.
-
1
Open the Control Panel. If you are using Windows 7 Ultimate or Enterprise, you can install language packs that translate most of the Windows interface. These are only available for Ultimate and Enterprise. If you are using Starter, Basic, or Home, you can install Language Interface Packs (LIPs).[1]
These translate parts of the interface, and require a base language installed. See the next section for details.- You can open the Control Panel from the Start menu.
-
2
Click the «View by» menu and select «Large icons» or «Small icons». This will allow you to quickly access any Control Panel option.
Advertisement
-
3
Select Windows Update. You can use the Windows Update tool to download any of the available language packs.
-
4
Click the «# optional updates are available» link. If the link is not there, click «Check for updates».
-
5
Check the box for the language you want to download. After selecting the language, click OK.
-
6
Click the .Install updates. You may be prompted by UAC to continue, and you may be asked to input the administrator password.
- It may take a few minutes for the language pack to download.
-
7
Return to the Control Panel and select «Region and Language». Select the Keyboards and Language tab.
-
8
Select the language you just installed from the «Choose a display language» drop-down menu. All of your installed languages will be listed here.[2]
[3]
-
9
Click .Apply and then Log off now to log out. Your changes will be applied when you log back into Windows.
-
10
Change your system locale if the language is not displaying in some programs. Some programs may not display your new language until you change your system locale settings to match that region.
- Open the Control Panel and select «Region and Language».
- Click the Administrative tab and click Change system locale.
- Select the language you’ve just installed and click OK. You’ll be prompted to restart your computer.[4]


Advertisement
-
1
Understand the difference between language packs and Language Interface Packs (LIPs). Traditional language packs translate the majority of the UI elements, and are only available to Ultimate and Enterprise users (see the above section). For everyone else, there are LIPs. These are smaller packs that translate the most-used parts of the interface. They require a base-language installed, since not everything is translated.[5]
-
2
Visit the LIP download page. You can browse through all of the available LIPs here.
-
3
Check the requirements. The third column of the table will let you know what base language the LIP requires, as well as what versions of Windows it works with.
- If the LIP requires Ultimate or Enterprise, you’ll need to upgrade your copy of Windows to change the language.
-
4
Click the «Get it now» link. This will open the page for the language you’ve selected. The page will be displayed in that language.
-
5
Click the «Download» button. This will open a new window displaying the language files.
-
6
Select the appropriate file for your computer. You will have the option to choose between a 32-bit or a 64-bit file. You can find the version that you have by opening the Start menu, right-clicking «Computer», and selecting «Properties». Look for the «System type» entry.
-
7
Check the box for the file and then click the «Download» button. The LIP file will be downloaded to your Downloads folder.
-
8
Double-click the downloaded file. This will open the language installer with your new language automatically selected. Click Next to start the installation.
- You’ll be asked to read and accept the Microsoft terms before the language is installed.
-
9
Review the ReadMe file. The ReadMe file for the language you select will be displayed before it is installed. You usually don’t need to review this, but it may contain information about known issues or compatibility problems.
-
10
Wait for the language to install. This may take a few moments.
-
11
Select and apply your new language. After the installation is complete, you’ll see a list of all of your installed languages. Select your newly-installed language and click Change display language.
- If you want the Welcome screen to change, as well as any system accounts, check the box beneath the list of languages.
-
12
Log out to complete the change. You will be prompted to log out in order for your new language to be applied. When you log back in, Windows will be using the new language. Anything that isn’t translated with the LIP will be displayed in the base language.
-
13
Set a new system locale if some programs don’t recognize the new language. Some programs designed for certain languages will only display the language if the system is set to that region.
- Click the Start menu and open the Control Panel.
- Open the «Region and Language» option.
- Click the Administrative tab and then click Change system locale.
- Select the language that you just installed, and reboot your computer when prompted.


Advertisement
-
1
Open the Control Panel. You can add additional keyboard layouts to your Windows installation that will allow you to type in different languages.
-
2
Click the «View by» drop-down menu and select «Large icons» or «Small icons». This will make it easier to find the correct option.
-
3
Select «Region and Language» and then click the .Keyboards and Languages tab. Click the Change keyboards… button.[6]
-
4
Click .Add to install another language. A list of available languages will appear.
-
5
Select the keyboard language you want to install. Expand the language, and then expand the «Keyboard» option. Select the specific form of that language that you want by checking the box. Click OK to add the language.
- Languages will have multiple options if different regions speak different dialects.
-
6
Switch between languages using the Language bar. This is located in the taskbar, to the left of the System Tray and clock.[7]
The abbreviation for the active language will be displayed. Clicking the abbreviation will allow you to switch between your different input methods.- You can also press ⊞ Win+Space to cycle through the installed languages.
- If you can’t find the Language bar, right-click on the taskbar, select «Toolbars», and then click «Language bar»


Advertisement
Add New Question
-
Question
I lost my MSN homepage for news, and it is now in Japanese. How do I get the English version for the USA back again?

Click the Settings wheel in the top right corner and select Options to open the Outlook.com Mail settings. Here, under General, you will see the setting to change Region & Time Zone; you’ll find the setting to change the Language there as well.
-
Question
What If l can’t read German?
The coding cat
Community Answer
If you cannot read the language displayed on screen, use a translating app until you get to the language settings.
-
Question
I tried to change the language of a Windows 7, which is Arabic. I tried the first method seeing the pics but it didn’t work. The whole system is in Arabic so I cant understand a single word.
The coding cat
Community Answer
If you cannot understand the language your machine is displaying, use a translating app until you can change the language.
See more answers
Ask a Question
200 characters left
Include your email address to get a message when this question is answered.
Submit
Advertisement
References
About This Article
Article SummaryX
To change the display language on Windows 7, open the Control Panel, and change the view to Large icons. Click the Region and Language icon and select a language from the menu. If you don’t see what you’re looking for, click the Install/uninstall languages button to add it to the list. Once the language is selected, click Apply, and then follow the on-screen instructions to log out and back into Windows 7 with the new language. If you don’t see the correct language, return to the Region and Language panel, select Administrative, and then click Change system locale. Select your language and reboot when prompted.
To change the keyboard or input language, open the Control Panel and change the view to Large icons. Click the Region and Language icon. On the Keyboard and Languages tab, click the Change keyboards button, and click Add to install another language. Check the box next to the language you want to install, and then click OK to install it. You can now switch between input languages using the taskbar language menu near the bottom-right corner of the screen.
Did this summary help you?
Thanks to all authors for creating a page that has been read 735,354 times.
Reader Success Stories
-

«Thank you for such a big help. I had this problem for two years and with your images, it made it much easier for…» more
Is this article up to date?
Windows 7 allows you to change the display language yourself. If you purchased a computer having English installed, and you want to change it to other language, you can follow instructions below to change the language.
Firstly, install the language pack:
1. Click the Start button in bottom left corner of the desktop.
2. Type change display language in the search box then select Change display language from the result list. Then Region and Language dialog box will open.
3. Click the Install/Uninstall languages… button.
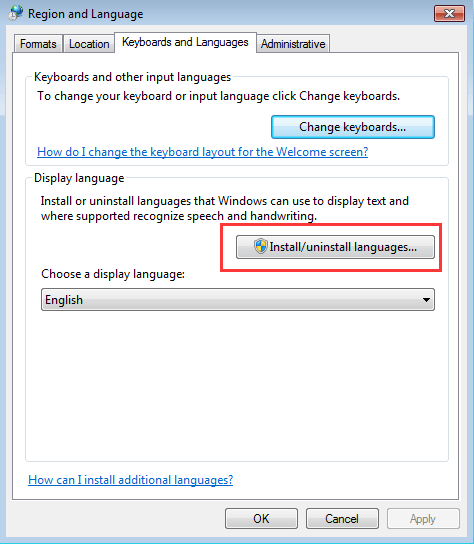
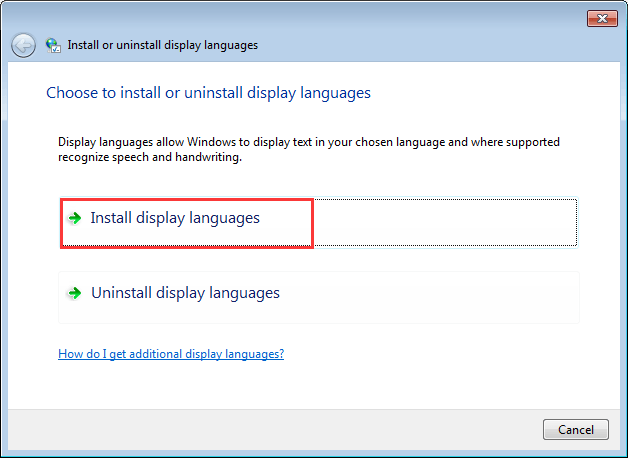
4. Select Install display languages.
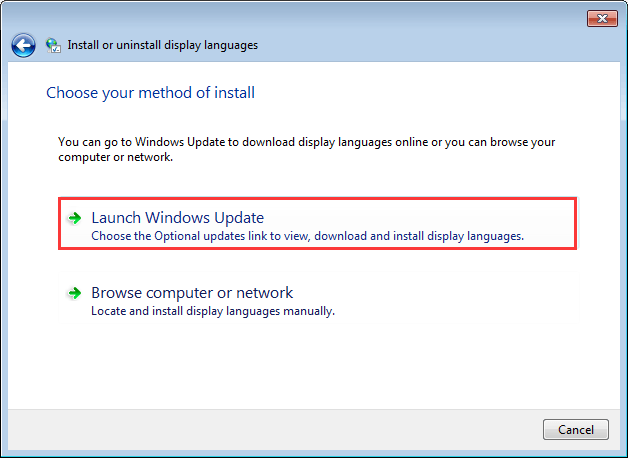
5. Select Launch Windows Update.
6. Click on optional updates are available.
7. Under Windows 7 Language Packs, select the language that you want to install on Windows 7 (for example, select Danish Language Pack).
Note: The Important updates may be selected by default. If you just need to install the language pack, check for Important updates and make sure they are not selected.
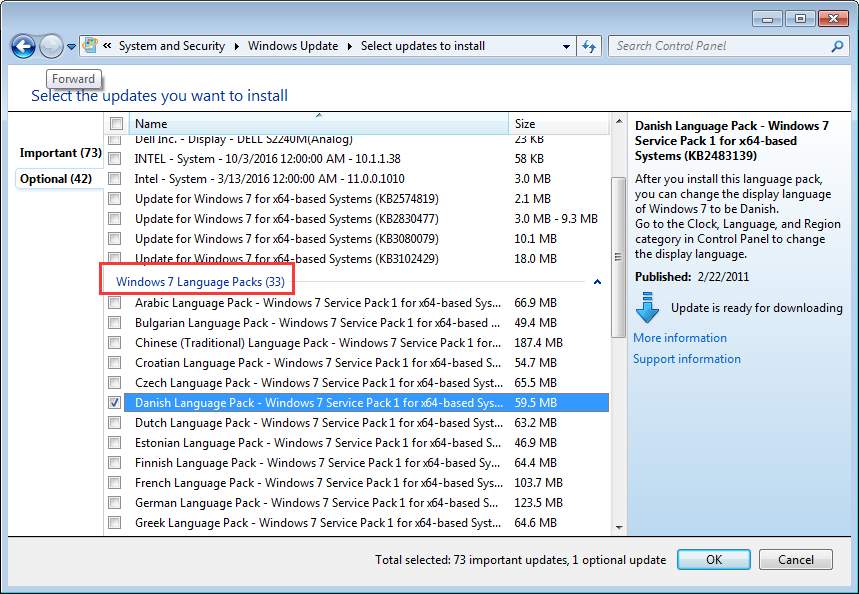
8. Then click the OK button to go back to Windows Update screen.
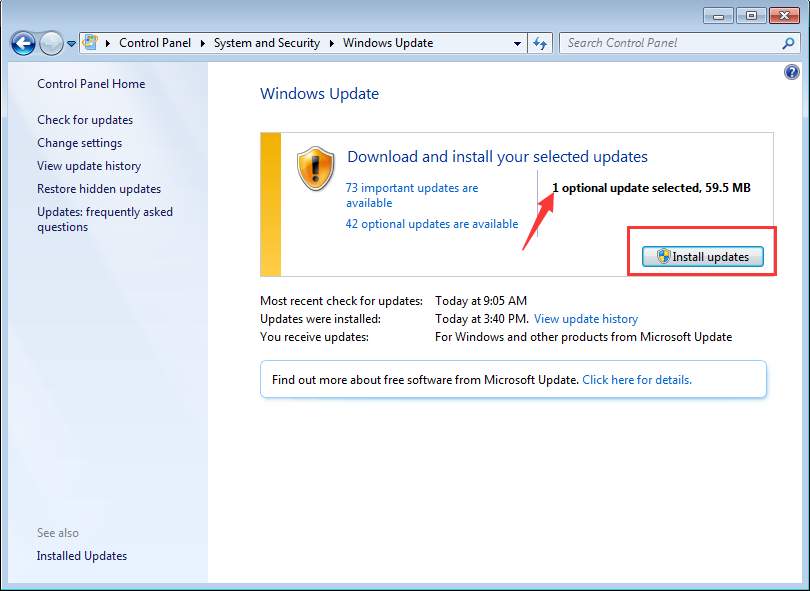
9. Click Install updates then the selected language pack will start downloading and installing. (In the screen, you also get how many updates will be installed.)
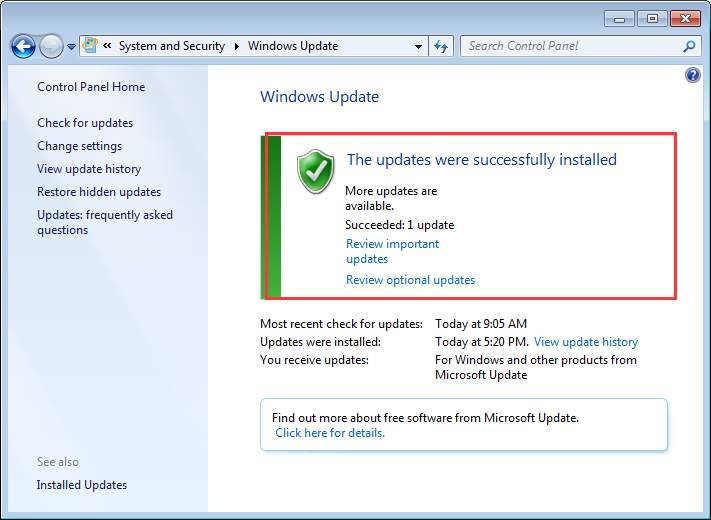
When the update is done, you will see the message as follows:
Secondly, change the display language:
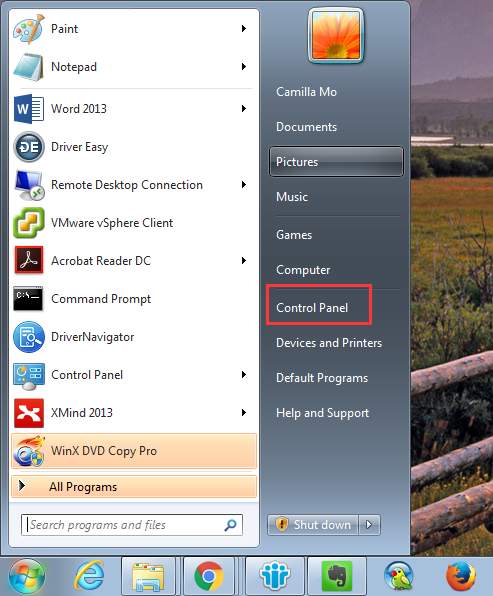
1. Click the Start button and click Control Panel on the pop-up menu.
2. View by Category in Control Panel. Under “Clock, Language and Region”, click Change display language.
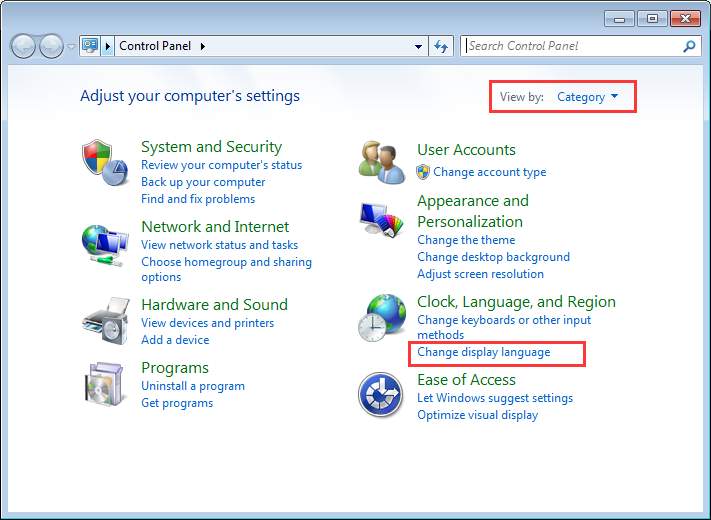
3. Then Choose a display language (In my case, I will choose dansk.).
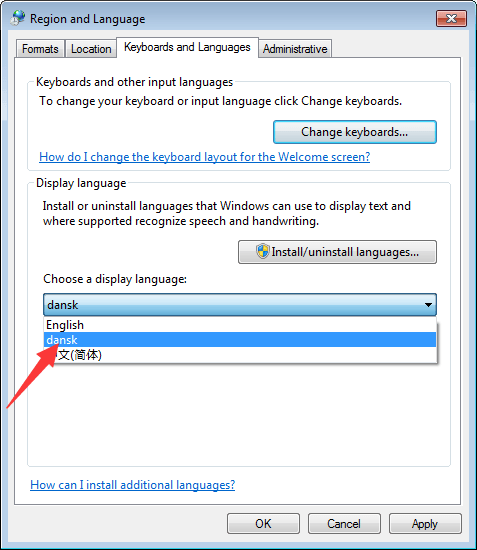
4. Click OK.
5. Restart your PC for the changes to take effect.