From Wikipedia, the free encyclopedia

Task Manager in Windows 11 2022 Update |
|
| Original author(s) | David Plummer[1] |
|---|---|
| Developer(s) | Microsoft |
| Initial release | August 24, 1996; 27 years ago |
| Written in | C++ |
| Operating system | Windows NT 4.0 and onwards |
| Platform | IA-32, x86-64, ARM and Itanium (and historically DEC Alpha, MIPS, and PowerPC) |
| Predecessor | System Monitor |
| Type | Task manager, system monitor and startup manager |
Task Manager, previously known as Windows Task Manager, is a task manager, system monitor, and startup manager included with Microsoft Windows systems. It provides information about computer performance and running software, including name of running processes, CPU and GPU load, commit charge, I/O details, logged-in users, and Windows services. Task Manager can also be used to set process priorities, processor affinity, start and stop services, and forcibly terminate processes.
The program can be started in recent versions of Windows by pressing ⊞ Win+R and then typing in taskmgr.exe,or by typing launchtm.exe, or by pressing Ctrl+Alt+Delete and clicking Task Manager, by pressing Ctrl+⇧ Shift+Esc, by using Windows Search in the Start Menu and typing taskmgr, by right-clicking on the Windows taskbar and selecting «Task Manager», by typing taskmgr in the File Explorer address bar, or by typing taskmgr in Command Prompt or Windows PowerShell.
Task Manager was introduced in its current form with Windows NT 4.0. Prior versions of Windows NT, as well as Windows 3.x, include the Task List application, are capable of listing currently running processes and killing them, or creating new processes. Windows 9x has a program known as Close Program which lists the programs currently running and offers options to close programs as well shut down the computer.[2]
Functionality[edit]

Since Windows 8, Task Manager has two views. The first time Task Manager is invoked by a user, it shows in a simplified summary mode (described in the user experience as Fewer Details). It can be switched to a more detailed mode by clicking More Details. This setting is remembered for that user on that machine.[3]
Since at least Windows 2000, the CPU usage can be displayed as a tray icon in the task bar for quick glance.[4][5]
Summary mode[edit]
In summary mode, Task Manager shows a list of currently running programs that have a main window. It has a «more details» hyperlink that activates a full-fledged Task Manager with several tabs.
Right-clicking any of the applications in the list allows switching to that application or ending the application’s task. Issuing an end task causes a request for graceful exit to be sent to the application.
Processes and details[edit]
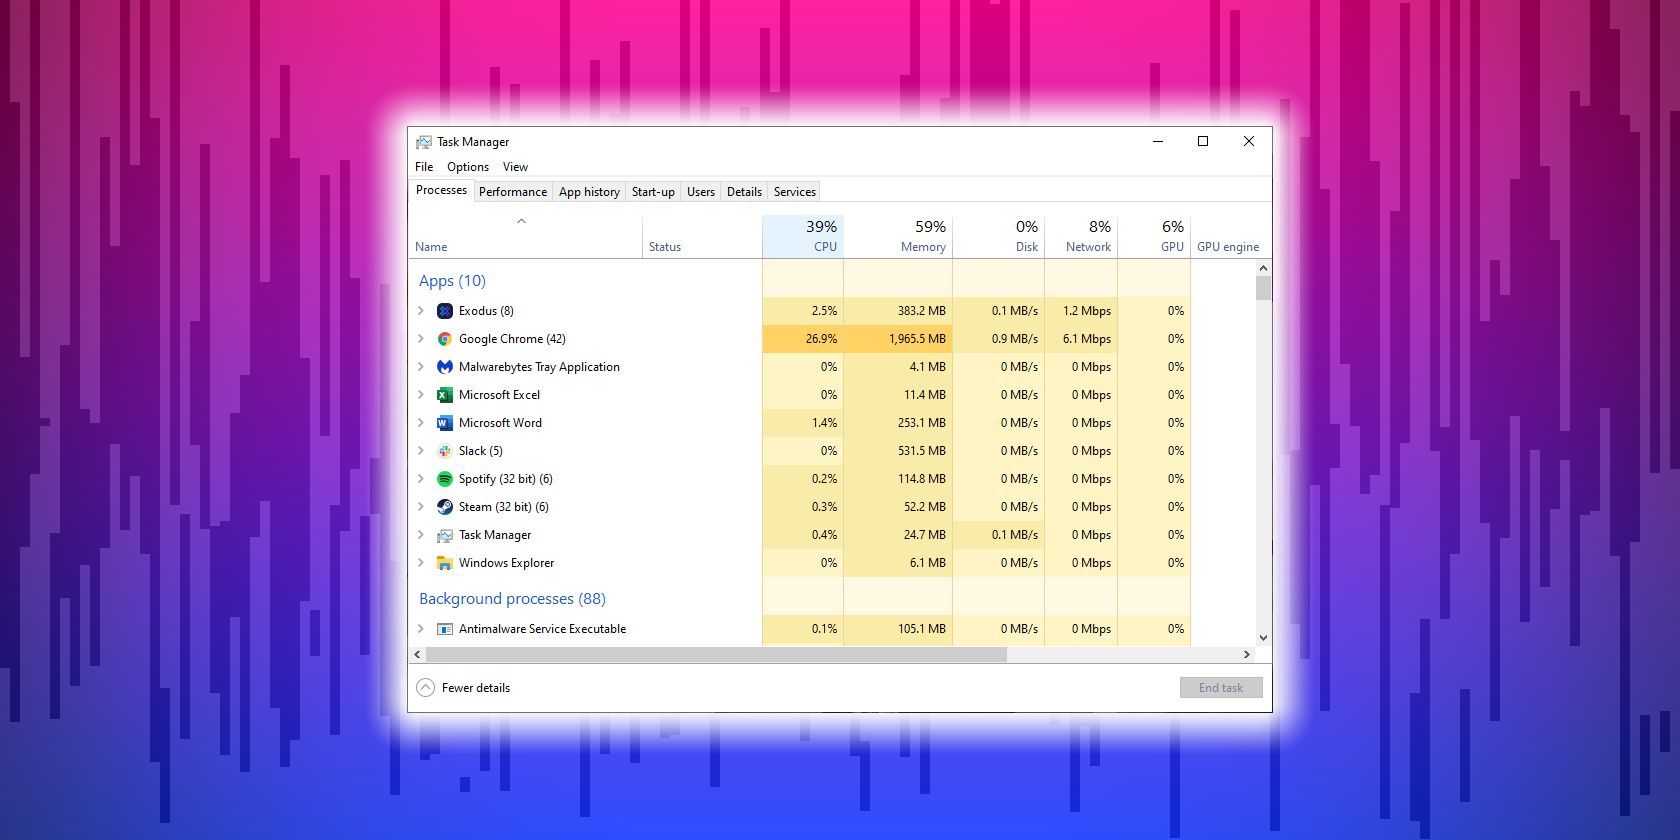
The Processes tab shows a list of all running processes on the system. This list includes Windows Services and processes from other accounts. The Delete key can also be used to terminate processes on the Processes tab. By default, the processes tab shows the user account the process is running under, the amount of CPU, and the amount of memory the process is currently consuming. There are more columns that can be shown. The Processes tab divides the process into three categories:
- Apps: Programs with a main window
- Windows processes: Components of Windows itself that do not have a main window, including services
- Background process: Programs that do not have a main window, including services, and are not part of the Windows itself
This tab shows the name of every main window and every service associated with each process. Both a graceful exit command and a termination command can be sent from this tab, depending on whether the command is sent to the process or its window.
The Details tab is a more basic version of the Processes tab, and acts similar to the Processes tab in Windows 7 and earlier. It has a more rudimentary user experience and can perform some additional actions. Right-clicking a process in the list allows changing the priority the process has, setting processor affinity (setting which CPU(s) the process can execute on), and allows the process to be ended. Choosing to End Process causes Windows to immediately kill the process. Choosing to «End Process Tree» causes Windows to immediately kill the process, as well as all processes directly or indirectly started by that process. Unlike choosing End Task from the Applications tab, when choosing to End Process the program is not given a warning nor a chance to clean up before ending. However, when a process that is running under a security context different from the one which issued the call to Terminate Process, the use of the KILL command-line utility is required.[6]
Performance[edit]
The Performance tab shows overall statistics about the system’s performance, most notably the overall amount of CPU usage and how much memory is being used. A chart of recent usage for both of these values is shown. Details about specific areas of memory are also shown.
There is an option to break the CPU usage graph into two sections: kernel mode time and user mode time. Many device drivers, and core parts of the operating system run in kernel mode, whereas user applications run in user mode. This option can be turned on by choosing Show kernel times from the View menu. When this option is turned on the CPU usage graph will show a green and a red area. The red area is the amount of time spent in kernel mode, and the green area shows the amount of time spent in user mode.
The Performance tab also shows statistics relating to each of the network adapters present in the computer. By default, the adapter name, percentage of network utilization, link speed, and state of the network adapter are shown, along with a chart of recent activity.
App history[edit]
The App history tab shows resource usage information about Universal Windows Platform apps. Windows controls the life cycle of these apps more tightly. This tab is where the data that Windows has collected about them, and then be viewed at a later time.
Startup[edit]
The Startup tab manages software that starts with Windows shell.
Users[edit]
The Users tab shows all users that currently have a session on the computer. On server computers, there may be several users connected to the computer using Terminal Services (or the Fast User Switching service, on Windows XP). Users can be disconnected or logged off from this tab.
History[edit]
Task Manager was originally an external side project developed at home by Microsoft developer David Plummer; encouraged by Dave Cutler and coworkers to make it part of the main product «build», he donated the project in 1995. The original task manager design featured a different Processes page with information being taken from the public Registry APIs rather than the private internal operating system metrics.
Windows 9x[edit]
A Close Program dialog box comes up when Ctrl+Alt+Delete is pressed in Windows 9x.[2] Also, in Windows 9x, there is a program called Tasks (TASKMAN.EXE) located in the Windows directory. It is rudimentary and has fewer features. The System Monitor utility in Windows 9x contains process and network monitoring functionality similar to that of the Windows Task Manager. Also, the Tasks program is called by clicking twice on the desktop if Explorer process is down.
Windows XP[edit]
In Windows XP only, there is a «Shut Down» menu that provides access to Standby, Hibernate, Turn off, Restart, Log Off, and Switch User. This is because, by default in Windows XP, pressing Ctrl+Alt+Delete opens the Task Manager instead of opening a dialog that provides access to the Task Manager in addition to the options mentioned above.
On the Performance tab, the display of the CPU values was changed from a display mimicking a LED seven-segment display, to a standard numeric value. This was done to accommodate non-Arabic numeral systems, such as Eastern Arabic numerals, which cannot be represented using a seven-segment display.[7]
Prior to Windows XP, process names longer than 15 characters in length are truncated. This problem is resolved in Windows XP.[8]
The users tab is introduced by Windows XP.
Beginning with Windows XP, the Delete key is enabled on the Processes tab.
Windows Vista[edit]
Windows Task Manager has been updated in Windows Vista with new features,[9] including:
- A «Services» tab to view and modify currently running Windows services and start and stop any service as well as enable/disable the User Account Control (UAC) file and registry virtualization of a process.
- New «Image Path Name» and «Command Line», and «Description» columns in the Processes tab. These show the full name and path of the executable image running in a process, any command-line parameters that were provided, and the image file’s «Description» property.
- New columns showing DEP and virtualization statuses. Virtualization status refers to UAC virtualization, under which file and registry references to certain system locations will be silently redirected to user-specific areas.
- By right-clicking on any process, it is possible to directly open the Properties of the process’s executable image file or of the directory (folder) containing the process.
- The Task Manager has also been made less vulnerable to attack from remote sources or viruses as it must be operating under administrative rights to carry out certain tasks, such as logging off other connected users or sending messages. The user must go into the «Processes» tab and click «Show processes from other users» in order to verify administrative rights and unlock these privileges. Showing processes from all users requires all users including administrators to accept a UAC prompt, unless UAC is disabled. If the user is not an administrator, they must enter a password for an administrator account when prompted to proceed, unless UAC is disabled, in which case the elevation does not occur.
- By right-clicking on any running process, it is possible to create a dump. This feature can be useful if an application or a process is not responding, so that the dump file can be opened in a debugger to get more information.
- The «Shut Down» menu containing Standby, Hibernate, Turn off, Restart, Log Off and Switch User has been removed. This was done due to low usage, and to reduce the overall complexity of Task Manager.[10]
- The Performance tab shows the system uptime.
Windows 8[edit]
In Windows 8, Windows Task Manager has been overhauled and the following changes[3] were made:
- Starting in Windows 8, the tabs are hidden by default and Task Manager opens in summary mode (Fewer details). This view only shows applications and their associated processes. Prior to Windows 8, what is shown in the summary mode was shown in the tab named «Applications».
- Resource utilization in the Processes tab is shown with various shades of yellow, with darker color representing heavier use.
- The Performance tab is split into CPU, memory, disk, ethernet, and wireless network (if applicable) sections. There are overall graphs for each, and clicking on one reaches details for that particular resource. This includes consolidating information that previously appeared in the Networking tab from Windows XP through Windows 7.
- The CPU tab no longer displays individual graphs for every logical processor on the system by default. It now can show data for each NUMA node.
- The CPU tab now displays simple percentages on heat-mapping tiles to display utilization for systems with many (64 up to 640) logical processors.[11] The color used for these heat maps is blue, with darker color again indicating heavier utilization.
- Hovering the cursor over any logical processor’s data now shows the NUMA node of that processor and its ID.
- A new Startup tab has been added that lists running startup applications.[12] Previously, MSConfig was in charge of this task, or in Windows Vista only, the «Software Explorer» section of Windows Defender.[13] The Windows Defender that shipped built-into Windows 7 lacked this option, and it was also not present in the downloadable Microsoft Security Essentials either.
- The Processes tab now lists application names, application status, and overall usage data for CPU, memory, hard disk, and network resources for each process.
- A new App History tab is introduced.
- The application status can be changed to suspended.
- The normal process information found in the older Task Manager can be found in the new Details tab.
Windows 10[edit]
- The Processes tab is divided into categories.[14]
- Display GPU information in the Performance tab, if available.
Windows 11[edit]
- Windows 11 22H2 has introduced a redesigned Task Manager.
Weakness[edit]
Task Manager is a common target of computer viruses and other forms of malware; typically malware will close the Task Manager as soon as it is started, so as to hide itself from users. Some malware will also disable task manager as an administrator. Variants of the Zotob and Spybot worms have used this technique, for example.[15][obsolete source] Using Group Policy, it is possible to disable the Task Manager. Many types of malware also enable this policy setting in the registry. Rootkits can prevent themselves from getting listed in the Task Manager, thereby preventing their detection and termination using it.
See also[edit]
- Resource Monitor
- Process Explorer
- Taskkill
- Tasklist
- Windows Task Scheduler
References[edit]
- ^ Windows 10: The developer who wrote Windows Task Manager reveals its secrets | ZDNet
- ^ a b «How to end task on the items that are running in the background». Nuance Communications. June 22, 2002.
- ^ a b «Windows 8 Task Manager In-Depth». Microsoft Corporation. June 6, 2013. Retrieved February 6, 2019.
- ^ Hoffman, Chris (August 19, 2020). «How to Keep the Task Manager’s CPU Stats In Your System Tray». How-To Geek. Retrieved January 25, 2022.
- ^ Bailey, Carol (November 16, 2001). «Get IT Done: Start your troubleshooting with the Windows 2000 Task Manager». TechRepublic. Retrieved January 25, 2022.
- ^ «Cannot End Service Processes with Task Manager». Support. Microsoft. February 27, 2007. Archived from the original on March 8, 2007. Retrieved December 6, 2012.
- ^ Raymond Chen (July 25, 2007). «What is Dave’s frame class?».
- ^ Magic 15 with GetProcessesByName on Windows 2000[dead link]
- ^ Brien Posey (May 2008). «Microsoft’s Windows Task Manager: What’s new in Vista?». Retrieved February 4, 2019.
- ^ Raymond Chen (June 19, 2014). «What happened to the Shut Down menu in classic Task Manager?».
- ^ Sinofsky, Steven (October 27, 2011). «Using Task Manager with 64+ logical processors». Building Windows 8. Microsoft. Archived from the original on February 17, 2012. Retrieved October 29, 2011.
- ^ Serban, Alex (October 24, 2011). «How to Get the Most out of New Windows 8 Task Manager?». ITProPortal. Future Publishing.
- ^ «Manage startup programs in Vista using Windows Defender’s Software Explorer». August 9, 2007.
- ^ Corden, Jez (September 4, 2015). «How to use Task Manager to optimize your Windows 10 experience». Windows Central. Retrieved February 4, 2019.
- ^ «Task Manager, MSCONFIG, or REGEDIT disappears while opening». Ramesh’s website. December 19, 2005. Archived from the original on December 6, 2010. Retrieved September 17, 2007.
External links[edit]
- How to use and troubleshoot issues with Windows Task Manager, Microsoft Help and Support
- Windows 8 Task Manager In-Depth Archived April 2, 2015, at the Wayback Machine, Gavin Gear, Blogging Windows
- Youtube, Inside Task Manager with the Original Author, Dave’s Garage Dave Plummer History of writing and debugging Task Manager.
Did you know there are a dozen ways to open the Task Manager in Windows?
Windows 10 provides you with several ways to launch the Task Manager utility on your PC. You can use a keyboard shortcut, a Start menu icon, Windows search, or even the Windows taskbar to open this utility on your computer.
In this guide, we’ll show you many of these ways to open Task Manager in Windows 10.
1. Use a Keyboard Shortcut
The easiest and quickest way to launch Task Manager is to use the tool’s keyboard shortcut. When pressed, this shortcut quickly opens the Task Manager utility on your Windows 10 PC.
To use this method, press the Ctrl + Shift + Esc keys simultaneously on your keyboard. Task Manager screen will immediately open.
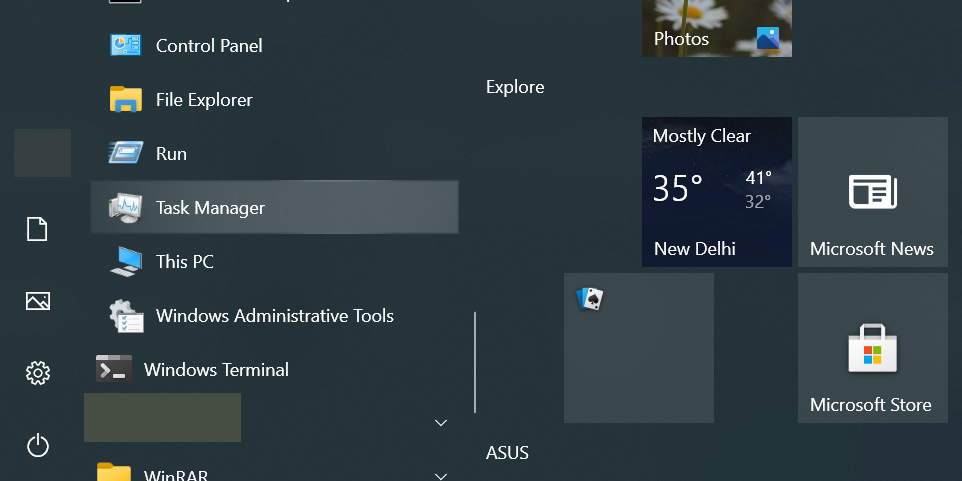
Windows 10’s Start menu consists of nearly all of the apps you have on your computer, including Task Manager. You can navigate to the Task Manager directory in the Start menu and then launch the tool from there.
To do so:
- Press the Windows key to bring up the Start menu.
- In the Start menu, click Windows System.
- From the options under Windows System, click Task Manager.
3. From Windows Search
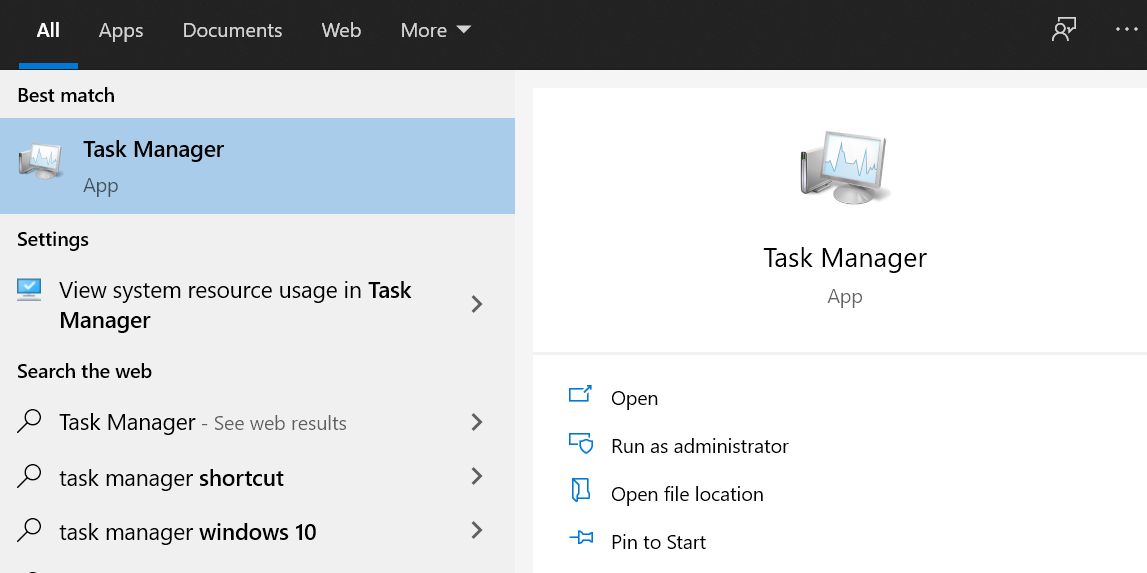
The Windows search feature helps you find all the apps, files, and folders stored on your hard drives. You can use this search function to find and open Task Manager, too.
- Click the search box at the bottom-left corner of your Windows PC.
- Type Task Manager in the search box.
- In the search results that come up, select Task Manager to open the tool.
4. From the File Explorer
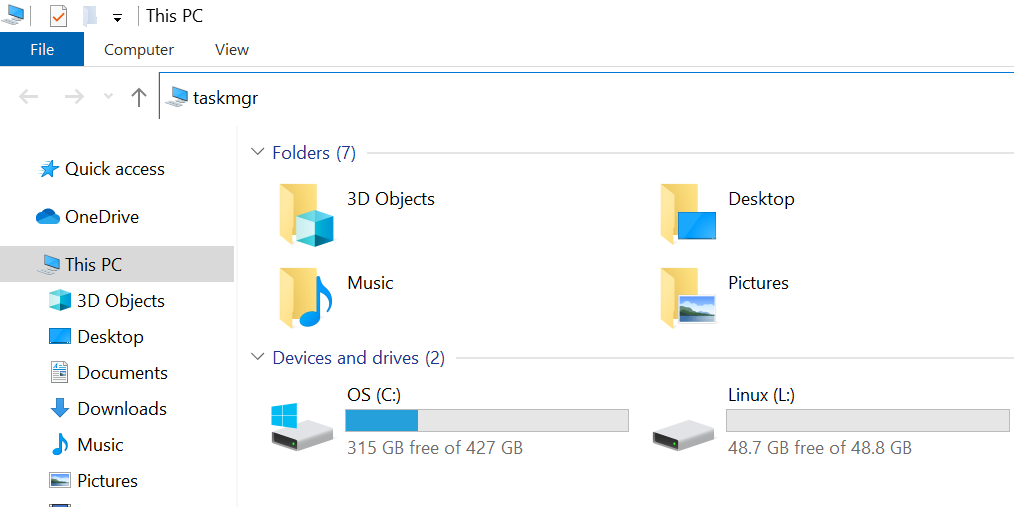
If you’re inside a File Explorer window, you don’t have to come out of it to open Task Manager. Using a command in the address bar, you can launch Task Manager from within the Explorer.
Here’s the quick way to do that:
- While you’re in a File Explorer window, click the address bar at the top.
- Type taskmgr in the address bar field and press Enter.
- Task Manager should open.
Another way to open Task Manager from File Explorer is to navigate to the tool’s actual directory:
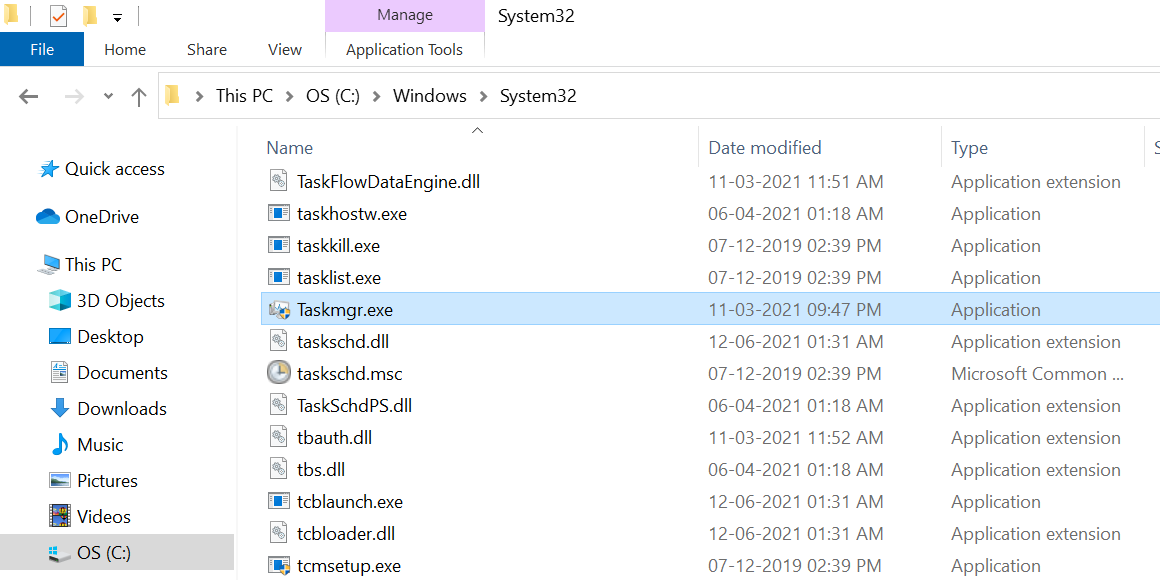
- In File Explorer, navigate to the following path. If you haven’t installed Windows 10 on the C drive, replace C with the letter of the drive where Windows is installed on your PC.
C:\Windows\System32 - Find Taskmgr.exe in the directory that opens, and double-click it.
- Task Manager will open.
5. From the Windows Security Screen
The Windows Security screen offers various options, like locking your PC and signing out of your user account. This security menu includes the option to launch Task Manager, too.
To use this method:
- Press Ctrl + Alt + Delete on your keyboard.
- On the screen that opens, select Task Manager.
The Windows Power Menu gives you quick access to some of the useful utilities installed on your Windows 10 PC. This includes the option for Task Manager, too.
To proceed with this method:
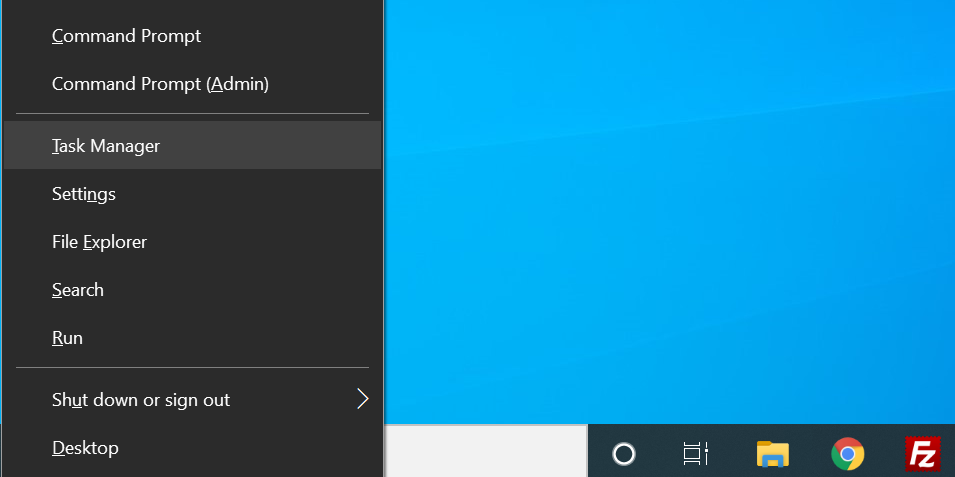
- Open the Power User Menu. To do so, either press Windows key + X at the same time or right-click the Start menu icon.
- In the menu that opens, choose Task Manager.
7. From the Taskbar
If you keep the taskbar visible on your PC (you can hide the taskbar), it’s a quick way to launch Task Manager. You just have to right-click the taskbar and select an option:
- Right-click the Windows taskbar (the bar at the bottom of your screen).
- Select Task Manager from the menu that opens.

8. Use the Command Prompt
If you’re someone who prefers using command-line methods, you can use Command Prompt to launch Task Manager on your PC. There’s a command that specifically triggers the Task Manager executable file.
To use this:
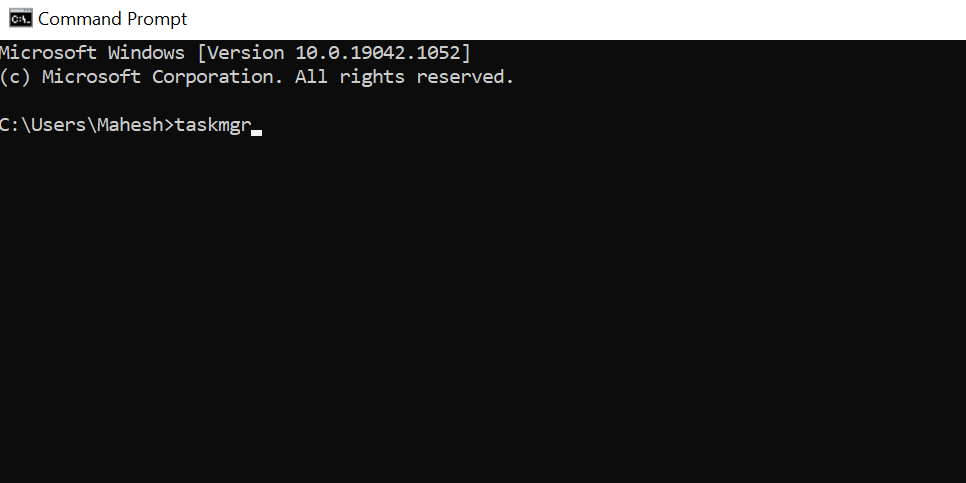
- Open the Start menu, search for Command Prompt, and select the Best match.
- On the Command Prompt window that opens, type taskmgr and hit Enter.
- Task Manager should open.
- You may now close the Command Prompt window.
9. Use the Windows PowerShell
If you prefer using Windows PowerShell, there’s a command you can run from this utility to open Task Manager on your PC.
Here’s how:
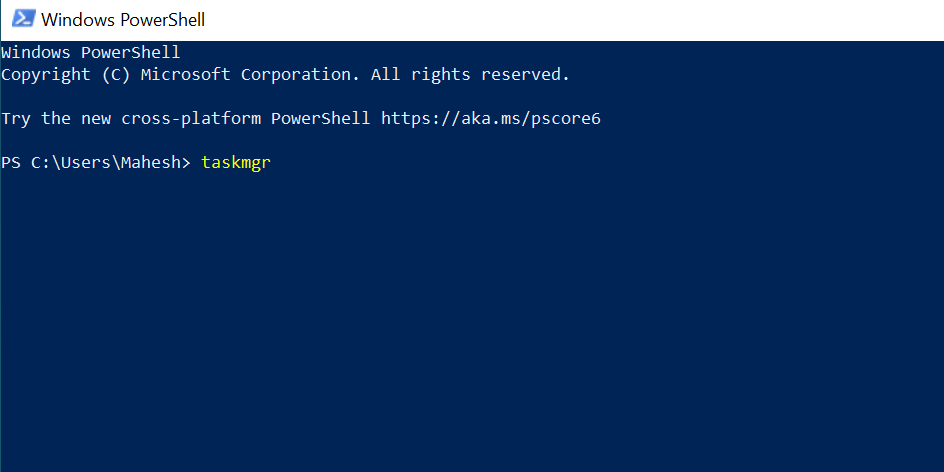
- Launch the Start menu, search for Windows PowerShell, and select the Best match.
- Type taskmgr on the PowerShell window and press Enter.
- Task Manager will open.
- Close the PowerShell window as you no longer need it.
10. From the Run Box
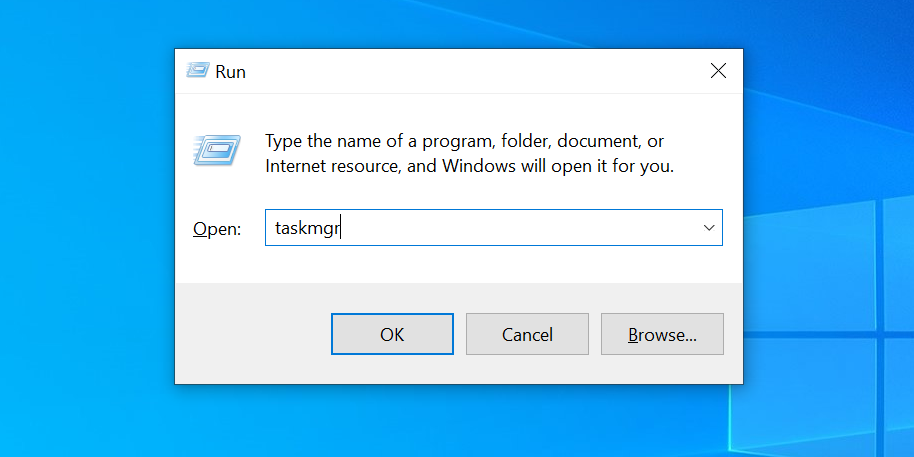
Windows Run dialog allows you to launch various apps and tools installed on your PC. You can use this box to open Task Manager, too, and we’ll show you how:
- Press Windows key + R at the same time to open Run.
- In the box, type taskmgr and hit Enter.
- Task Manager should open.
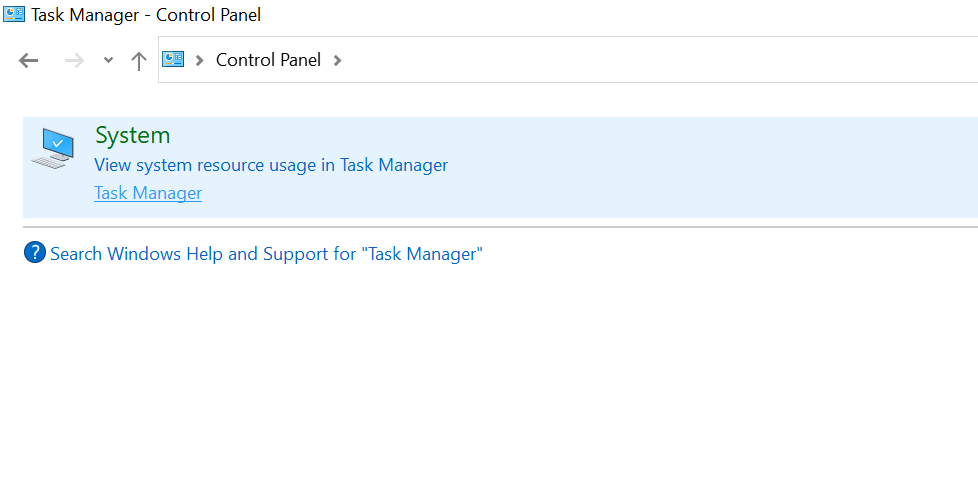
11. From the Control Panel
If you’re modifying your settings in Control Panel, you don’t have to exit it to launch Task Manager. There’s an option to open this utility from within Control Panel.
- Launch Control Panel if it isn’t already open on your PC.
- In Control Panel, click the search box at the top-right corner.
- Type Task Manager in the box and press Enter.
- From the search results, select Task Manager beneath System.
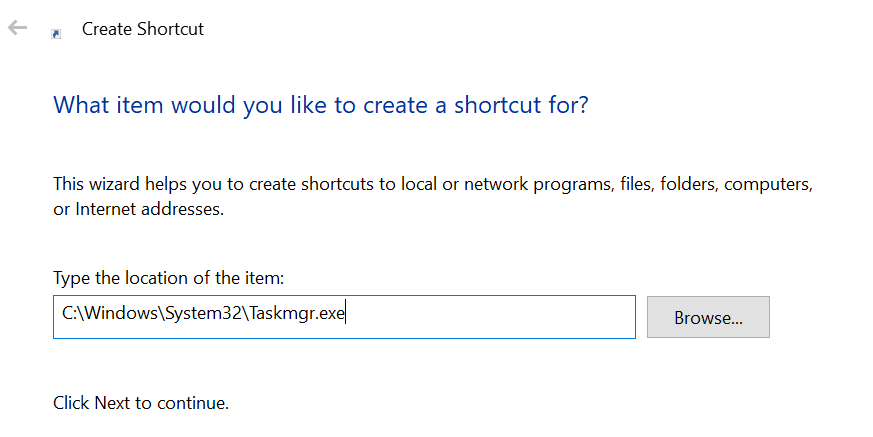
12. Create a Desktop Shortcut
Like other apps, you can create a desktop shortcut for Task Manager on your desktop. This way, you can quickly access the utility right from your PC’s main screen.
To create this shortcut:
- Access your PC’s desktop.
- Right-click anywhere blank on the desktop and select New > Shortcut from the menu.
- On the Create Shortcut window, enter the following path in the box. Then, click Next at the bottom. If your Windows installation is not in the C drive, change the drive letter in the command below.
C:\Windows\System32\Taskmgr.exe - Windows will ask you to choose a name for your shortcut. Here, type Task Manager or any other name of your choice. Then, click Finish at the bottom.
- You can now double-click the newly added shortcut on your desktop to launch Task Manager.
Almost Every Way You Could Launch the Task Manager in Windows 10
As you can see above, there are over a dozen ways to launch Task Manager on Windows 10. The next time you need this utility, you can open it from pretty much anywhere on your computer.
Fastest ways: Press Ctrl+Shift+Esc or right-click Start. A desktop shortcut is another handy option
What to Know
- Search for Task Manager, press Ctrl+Shift+Esc, or right-click Start and choose Task Manager.
- To create a shortcut, right-click the desktop and select New > Shortcut. Type taskmgr.exe and select Next > Finish.
- Enter taskmgr in the Command Prompt, Terminal, PowerShell, Run box, or File Explorer address bar.
This article explains how to open Task Manager in Windows 11. With Windows Task Manager, you can keep track of system processes, monitor resource usage, and force-stop applications.
How to Open Task Manager Using the Search Bar
One of the easier ways to access Task Manager in Windows 11 is to use the search bar.
-
Press the Windows Key+S or select Search (the magnifying glass icon) in the taskbar. If you don’t see the Search icon, select Start (the Windows icon).
To add the Search icon to the taskbar, right-click the taskbar, select Taskbar settings, and pick an option from the Search drop-down menu.
-
Enter Task Manager.
-
Select Task Manager when it appears in the results.
Open Task Manager From the Taskbar
Right-click Start (the Windows icon) or press Win+X to open the Power User Menu, then select Task Manager.
Open Task Manager With Keyboard Shortcuts
The keyboard shortcut to open Task Manager in Windows 11 is Ctrl+Shift+Esc. Alternatively, press Win+X to open the Power User Menu, then press the T key.
Open Task Manager With Run Command
The Run command to open Task Manager is taskmgr. You can get to the Run dialog box by pressing Win+R or by right-clicking Start (the Windows key) and choosing Run. Once it’s open, type taskmgr and press OK to launch Task Manager.
Open Task Manager From File Explorer
Another option is to access Task Manager from File Explorer:
-
Select File Explorer (the folder icon) from the Windows 11 taskbar. Press Win+E if you don’t see that icon.
-
Select an empty part of the address bar at the top of File Explorer to highlight the current path. For example, if it says Home, select off to the right of that word to highlight it.
Alt+D is an easy way to do this with a keyboard.
-
Type taskmgr in place of whatever was written there, and then press Enter.
Open Task Manager With Command Prompt
You can likewise use Command Prompt or PowerShell to open Task Manager, both of which are accessible via Terminal. Just type taskmgr.exe, and then press Enter.
How to Create a Desktop Shortcut for Windows Task Manager
If you want to make a desktop shortcut for Task Manager, follow these steps:
-
Right-click anywhere on the desktop and select New > Shortcut.
-
In the pop-up window, type taskmgr.exe, and then select Next.
-
You’ll be asked to give your shortcut a name. Enter Task Manager (any name works) and select Finish.
-
The Task Manager shortcut will appear on your Windows 11 desktop. Double-click it to open Task Manager directly from the desktop at any time.
FAQ
-
How do I open the Command Prompt in other versions of Windows?
Windows 10 and 11 use the same method for opening the Command Prompt: Press the Windows key on your keyboard > type cmd > Select Command Prompt from the list. For Windows 8 and 8.1: Hold the WIN and X keys down
together, or right-click the Start button, and choose Command Prompt. We cover additional versions of Windows in our How to Open Command Prompt (Windows 11, 10, 8, 7, etc.) article.
-
Can you copy and paste inside the Command Prompt?
Yes, you can use the same keyboard shortcuts you use to copy/paste in other programs: Ctrl + and Ctrl + V.
Thanks for letting us know!
Get the Latest Tech News Delivered Every Day
Subscribe

Начну сразу с небольшого ликбеза. Диспетчер задач (от английского Windows Task Manager) — это компьютерная утилита в операционной системе Windows для вывода на экран списка запущенных процессов, а также потребляемых ими ресурсов. Также здесь имеется целый ряд дополнительных функций, среди которых возможность наблюдения загруженности оперативной памяти, процессов, сетевых подключений и т.д.
В большинстве случаев обычный пользователь обращается к диспетчеру задач только в экстренных случаях, когда, например, необходимо закрыть приложение, которое не хочет закрываться стандартным методом (то есть зависло).
Способ 1
Самый простой метод — это воспользоваться специальным сочетанием клавиш.
- Ctrl+Alt+Del
- Ctrl+Shift+Esc
Первый способ работает исключительно для Windows XP, а для Windows 7 актуальны оба метода. После нажатия на клавиши перед вами появится панель диспетчера задач.
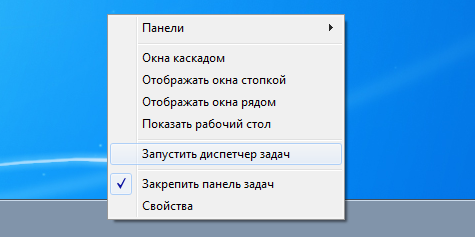
Способ 2
Не уверен, работает ли он для ОС XP, но для «семерки» работает 100 %. Вам необходимо навести на нижнюю панель курсор мыши и нажать на правую кнопку. Появится небольшое меню, в котором вам нужно будет выбрать пункт «Запустить диспетчер задач».
Способ 3
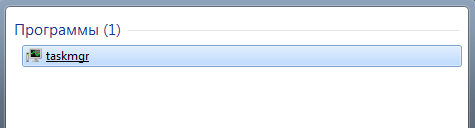
Нажимаем на кнопку «Пуск» и в графе «Найти программы и файлы» прописываем слово taskmgr, после чего нажимаем на клавишу Enter.
Как включить диспетчер задач?
В некоторых случаях при использовании любого из описанных выше способов диспетчер задач может не запускаться и выдавать ошибку вида «Диспетчер задач отключен администратором». Это достаточно распространенная проблема и столкнуться с ней может абсолютно каждый. Как правило, это проделки вирусов или троянов, которые намеренно отключают данную утилиту. В такой ситуации можно сделать следующее.
- Откройте меню «Пуск».
- В графе «Найти программы и файлы» пропишите команду gpedit.msc и нажмите Enter.
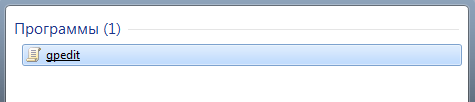
- Откроется редактор локальной групповой политики.
- Пройдите по пути «Конфигурация пользователя» — «Административные шаблоны» — «Система» — «Варианты действий после нажатия CTRL+ALT+DEL».
- Кликните два раза на пункт «Удалить диспетчер задач», в появившемся окне выберите «Не задано» и нажмите ОК.
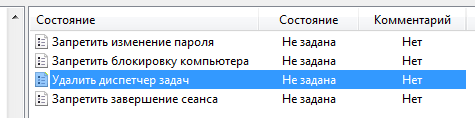
- Диспетчер задач должен загрузиться.
Немного об утилите
Диспетчер задач содержит в себе несколько основных вкладок:
- Приложения. Здесь вы можете наблюдать все запущенные на данный момент приложений, которые можете самостоятельно завершить или, наоборот, запустить новые (с помощью строки «Выполнить»).
- Процессы. Тут находятся данные о всех запущенных в данный момент процессах, включая системные. Вы можете задавать самостоятельно приоритет, менять его, а также завершать процессы.
- Службы. Данная вкладка появилась в Windows Vista. В этой вкладке располагается информация о всех службах ОС.
- Быстродействие. Данная вкладка представляет из себя этакий график загрузки процессора, а также использования оперативной памяти.
- Сеть. График загрузки сетевых подключений.
- Пользователи. Здесь происходит манипулирование активными пользователям. Вкладка доступна только для администратора.
В Windows 8 диспетчер задач был несколько изменен. Так, утилита в подробном состоянии способна группировать одни и те же запущенные процессы в один, зато в кратком состоянии диспетчер не показывает запущенные окна проводника.
Между прочим, для Windows есть аналоги утилиты, правда, от сторонних производителей. Например, неплохой альтернативой является программа System Explorer, которая обладает более расширенными функциональными возможностями и при этом остается бесплатной. И таких альтернатив — великое множество. Чем лучше пользоваться, решать только вам.
Хотя бы один из них должен сработать, даже если сломалась клавиатура или вы подцепили вирус.

1. Нажмите Ctrl + Alt + Delete
Хорошо знакомая всем без исключения комбинация. В старых версиях Windows использование этих клавиш приводило к мгновенному запуску «Диспетчера задач». Начиная с Vista эта комбинация стала использоваться для вывода экрана безопасности системы.
Нажмите Ctrl + Alt + Delete, и вам будут предложены варианты действий: заблокировать компьютер, переключиться на другого пользователя, выйти из системы, и, собственно, открыть «Диспетчер задач».
2. Нажмите Ctrl + Shift + Esc
А вот эта комбинация уже открывает непосредственно «Диспетчер задач». Конечно, при условии, что ваша клавиатура работает.
Кроме того, комбинация Ctrl + Shift + Esc может использоваться для запуска диспетчера задач при работе с удалённым рабочим столом или в виртуальной машине, в то время как Ctrl + Alt + Delete воздействует только на ваш компьютер.
3. Нажмите Windows + X и откройте меню опытного пользователя
В Windows 8 и Windows 10 имеется так называемое Power User Menu («Меню опытного пользователя»). Оно позволяет получить быстрый доступ к таким инструментам, как «Командная строка», «Панель управления», «Выполнить», и, само собой, «Диспетчеру задач».
Нажмите Windows + X, и меню откроется в левом нижнем углу экрана. Найти нужный пункт там будет несложно.
4. Щёлкните правой кнопкой мыши по панели задач
Если вы предпочитаете использовать мышь, а не клавиатуру, или последняя не работает, запустить «Диспетчер задач» можно безо всяких комбинаций. Просто щёлкните по панели задач правой кнопкой мыши, и в открывшемся меню выберите нужный пункт. Быстро и просто.
5. Найдите «Диспетчер задач» в меню «Пуск»
Диспетчер задач — стандартная программа Windows 10. И запускается она, как всякая уважающая себя программа, в том числе и через главное меню. Откройте меню «Пуск», затем найдите папку «Служебные — Windows». «Диспетчер задач» будет там.
Либо в «Пуске» начните набирать taskmgr или «диспетчер задач» — искомый найдётся.
6. Запустите через меню «Выполнить»
Через меню «Выполнить» можно сделать немало интересных штук, в том числе и открыть «Диспетчер задач». Нажмите Windows + R, чтобы открыть окно «Выполнить», а затем напечатайте команду taskmgr и нажмите Enter.
7. Найдите файл taskmgr.exe в «Проводнике»
Самый долгий способ. Не представляем, зачем он может вам понадобиться, но вдруг? Откройте «Проводник» и перейдите в папку C:\Windows\System32. Прокрутите список файлов вниз или выполните поиск через панель «Проводника» — найдёте taskmgr.exe. Дважды щёлкните его.
8. Создайте ярлык на панели задач
Если вы устали от всех этих манипуляций и хотите простоты и удобства, почему бы просто не прикрепить «Диспетчер задач» к панели Windows 10? Запустите его любым из перечисленных ранее способов, щёлкните значок на панели и выберите «Закрепить на панели задач». Теперь в любое время легко запустить диспетчер одним кликом.
А ещё можно закрепить его в быстром доступе в меню «Пуск» простым перетаскиванием. Отыщите «Диспетчер задач» в папке «Служебные — Windows», как в пятом пункте, и перетащите его на пустое место в «Пуске», правее списка приложений.
9. Создайте ярлык на «Рабочем столе»
Хотите создать ярлык для диспетчера не на панели, а на рабочем столе или в какой-нибудь папке? Щёлкните правой кнопкой мыши по пустому месту, где вы хотите разместить ярлык, и выберите «Создать» → «Ярлык». В поле расположения объекта введите:
C:\Windows\System32\taskmgr.exe
Нажмите «Далее», присвойте имя и щёлкните «Готово». Ярлык сохранится на рабочем столе или в папке.
Читайте также 🧐
- Какие службы Windows можно отключить, чтобы ускорить систему
- Горячие клавиши Windows 10, которые необходимо знать
- Что делать, если зависает компьютер на Windows