Одним из нововведений в Windows Server 2008 R2 является утилита DISM . Она пришла на смену программе OCSETUP и предназначена для установки и настройки ролей и компонентов сервера, причем ее можно использовать как с работающей операционной системой, так и с образами Windows (Windows image, WIM) и с виртуальными жесткими дисками (VHD).
Функционал DISM огромен, и одной из полезных функций утилиты является возможность изменения редакции операционной системы без использования установочного диска. Эта возможность — эквивалент Windows Anytime Upgrade в Windows 7. Обновление может быть выполнено в онлайн или автономном режиме в обеих вариантах установки — полная установка и установка в режиме ядра (Server Core).
Обновление с помощью DISM производится очень быстро и не требует полной переустановки операционной системы. Все роли и компоненты, развернутые на сервере, а также другие характеристики (имя компьютера, пользователи, настройки приложений, и т.д.) сохраняются.
Обновление редакции ограничивается текущей версией операционной системы и вариантом установки (нельзя перейти от полной установки к Server Core и наоборот). Вот возможные варианты обновления:
- Windows Server 2008 R2 Standard — > Windows Server 2008 R2 Enterprise — > Windows Server 2008 R2 Datacenter
- Windows Server 2008 R2 Standard Server Core — > Windows Server 2008 R2 Enterprise Server Core — > Windows Server 2008 R2 Datacenter Server Core
- Windows Server 2008 R2 Foundation — > Windows Server 2008 R2 Standard
Также имейте в виду, что изменения являются необратимыми, и вы не сможете понизить редакцию ОС после того, как произвели обновление.
Описание процесса
Утилита DISM.exe входит в комплект установки Windows Server 2008 R2, поэтому для обновления нам потребуется только действительный 25-значный продукт ключ для редакции, на которую мы планируем перейти.
Сначала определяем текущую редакцию ОС:
DISM /online /Get-CurrentEdition

Затем определяем редакции, на которые возможен переход:
DISM /online /Get-TargetEditions

И, наконец, запускаем обновление:
DISM /online /Set-Edition:<edition ID> /ProductKey:XXXXX-XXXXX-XXXXX-XXXXX-XXXXX
Так, например, для обновления Windows Server 2008 R2 Standart до Enterprise:
DISM /online /Set-Edition:ServerEnterprise /ProductKey:ABCDE-ABCDE-ABCDE-ABCDE-ABCDE

По завершению операции соглашаемся на требование перезагрузки и ждем минут 5-10. Система пару раз перезагружается, применяя сделанные изменения. Затем заходим на сервер и активируем Windows с новым ключом. Переход на новую редакцию состоялся.
Некоторые проблемы, с которыми можно столкнуться при обновлении:
1. Если сервер является контролером домена (DC), то его нельзя обновлять подобным образом. Сначала DC надо понизить до обычного сервера (передав перед этим роли FSMO другому DC), затем обновить редакцию, а потом снова повысить до контролера домена.
2. При обновлении вы можете получить сообщение о том, что указанный ключ продукта не подходит для выбранной редакции (The specified product key is not valid for the target edition).

В этом случае можно воспользоваться временным ключом от Microsoft: 489J6-VHDMP-X63PK-3K798-CPX3Y. С его помощью можно провести обновление, а затем зайти в систему и активировать ОС уже со своим ключом продукта.
3. При использовании KMS ключа для активации надо проделать следующие действия:
- Открыть cmd и перейти в директорию system32;
- slmgr.vbs -ckms — очистить текущую KMS запись;
- slmgr.vbs -upk — удалить другие установленные ключи продукта;
- slmgr.vbs -ipk xxxxx-xxxxx-xxxxx-xxxxx-xxxxx — установить новый ключ;
- slmgr.vbs -ato — активировать ОС.
Вот вроде и все. Удачного обновления 🙂
Windows Server 2008 R2 Datacenter Windows Server 2008 R2 Enterprise Windows Server 2008 R2 Standard More…Less
Summary
This KB article describes a hotfix that enables Windows Deployment Services in Windows Server 2008 R2 to support the Source Specific Multicast (SSM) protocol. The hotfix must be integrated into Windows 7 or Windows Server 2008 R2 image files (.wim). After the integration, the Source Specific Multicast (SSM) protocol is supported when you use Windows Deployment Services to deploy a Windows 7 or Windows Server 2008 R2 image.
INTRODUCTION
Consider the following scenario in a domain environment:
-
The network infrastructure supports SSM.
-
You create a Windows Deployment Services multicast transmission to deploy a Windows 7 or Windows Server 2008 R2 image.
In this scenario, the deployment fails.
This failure occurs because of the multicast packets that client computers send out during the deployment. The packets contain a multicast source address that has a value of «any source» instead of the IP address of the Windows Deployment Services server. This causes the deployment to fail.
After you integrate the hotfix into a Windows 7 or Windows Server 2008 R2 image file, the value of multicast source address is set correctly to the IP address of the Windows Deployment Services server.
More Information
Hotfix information
A supported hotfix is available from Microsoft. However, this hotfix is intended to correct only the problem that is described in this article. Apply this hotfix only to systems that are experiencing the problem described in this article. This hotfix might receive additional testing. Therefore, if you are not severely affected by this problem, we recommend that you wait for the next software update that contains this hotfix.
If the hotfix is available for download, there is a «Hotfix download available» section at the top of this Knowledge Base article. If this section does not appear, contact Microsoft Customer Service and Support to obtain the hotfix.
Note If additional issues occur or if any troubleshooting is required, you might have to create a separate service request. The usual support costs will apply to additional support questions and issues that do not qualify for this specific hotfix. For a complete list of Microsoft Customer Service and Support telephone numbers or to create a separate service request, visit the following Microsoft website:
http://support.microsoft.com/contactus/?ws=supportNote The «Hotfix download available» form displays the languages for which the hotfix is available. If you do not see your language, it is because a hotfix is not available for that language.
Prerequisites
To apply this hotfix, you must have the Boot.wim of Windows 7 or of Windows Server 2008 R2. Additionally, you must have a computer on which the Dism.exe tool is installed.
Note By default, the Dism.exe tool is installed with Windows 7 and with Windows Server 2008 R2. The Dism.exe tool is also included in one of the following packages:
-
Windows 7 OEM Preinstallation Kit (OPK)
-
Windows Automated Installation Kit (AIK) for Windows 7
How to integrate this hotfix into the Boot.wim file
-
Extract the Windows6.1-KB2495879-x64.cab file from the hotfix package. Assume that you save the Windows6.1-KB2495879-x64.cab file to the C:\Test\Updates folder.
-
Copy the Boot.wim file to a folder for update. Assume that the folder is C:\Test\Images.
Note If you want to use the Out-of-box Boot.wim file, that file is located in the Sources folder of the Windows 7 or Windows Server 2008 R2 installation media.
-
Create a folder to mount images. Assume that the folder is C:\Test\Offline.
-
Open a Command Prompt window by using the Run as administrator option.
-
Run the following command to mount the second image of the Boot.wim file:
Dism /Mount-Wim /WimFile:C:\Test\Images\Boot.wim /Index:2 /MountDir:C:\Test\Offline
-
Run the following command to extract the Wdstptc.dll file from the Windows6.1-KB2495879-x64.cab file:
Expand -R C:\test\updates\Windows6.1-KB2495879-x86.cab C:\test\updates
-
Run the following command to replace the Wdstptc.dll file in the sources folder:
xcopy C:\Test\Updates\Wdstptc.dll C:\Test\Offline\sources /Y
-
Run the following command to load the registry hive of the image:
Reg load HKLM\test C:\Test\Offline\Windows\System32\config\SOFTWARE
-
Open Registry Editor, and then locate the following registry subkey:
HKEY_LOCAL_MACHINE\Test\Microsoft\Windows\CurrentVersion\WDSTPTC\SSM
Note If the WDSTPTC\SSM subkey does not exist, you must manually create it. -
Under the SSM registry subkey, create a DWORD value, name it AllowSSM, and then set the value to 1.
-
Exit Registry Editor.
-
Run the following command to unload the registry hive of the image.
Reg unload HKLM\test
-
Run the following command to commit the changes and unmount the image.
Dism /Unmount-WIM /MountDir:C:\Test\Offline /Commit
Important The value of the AllowSSM registry entry is necessary to make Windows Deployment Services support SSM. To verify that this value is set correctly, follow these steps:
-
Start a client computer by using this updated Boot.wim file.
-
Use SHIFT+F10 to open a Command Prompt window.
-
Type regedit, and then press ENTER.
-
In Registry Editor, verify that the value of the AllowSSM registry entry is set to 1.
Restart information
You do not have to restart the computer after you apply this hotfix.
File information
The English (United States) version of this hotfix installs files that have the attributes that are listed in the following tables. The dates and the times for these files are listed in Coordinated Universal Time (UTC). The dates and the times for these files on your local computer are displayed in your local time together with your current daylight saving time (DST) bias. Additionally, the dates and the times may change when you perform certain operations on the files.
Windows 7 and Windows Server 2008 R2 file information notes
Important Windows 7 hotfixes and Windows Server 2008 R2 hotfixes are included in the same packages. However, hotfixes on the Hotfix Request page are listed under both operating systems. To request the hotfix package that applies to one or both operating systems, select the hotfix that is listed under «Windows 7/Windows Server 2008 R2» on the page. Always refer to the «Applies To» section in articles to determine the actual operating system that each hotfix applies to.
-
The files that apply to a specific product, SR_Level (RTM, SPn), and service branch (LDR, GDR) can be identified by examining the file version numbers as shown in the following table.
Version
Product
SR_Level
Service branch
6.1.760
0.
20xxxWindows 7 and Windows Server 2008 R2
RTM
LDR
6.1.760
1.
21xxxWindows 7 and Windows Server 2008 R2
SP1
LDR
-
The MANIFEST files (.manifest) and the MUM files (.mum) that are installed for each environment are listed separately in the «Additional file information for Windows Server 2008 R2 and for Windows 7» section. MUM and MANIFEST files, and the associated security catalog (.cat) files, are extremely important to maintain the state of the updated components. The security catalog files, for which the attributes are not listed, are signed with a Microsoft digital signature.
For the x86-based version of Windows 7 boot images
|
File name |
File version |
File size |
Date |
Time |
Platform |
|---|---|---|---|---|---|
|
Wdstptc.dll |
6.1.7601.21643 |
123,904 |
16-Jan-2011 |
13:39 |
x86 |
For the x64-based version of Windows 7 boot images and of Windows Server 2008 R2 boot images
|
File name |
File version |
File size |
Date |
Time |
Platform |
|---|---|---|---|---|---|
|
Wdstptc.dll |
6.1.7600.20882 |
149,504 |
16-Jan-2011 |
14:17 |
x64 |
For the IA-64-based version of Windows Server 2008 R2 boot images
|
File name |
File version |
File size |
Date |
Time |
Platform |
|---|---|---|---|---|---|
|
Wdstptc.dll |
6.1.7600.20882 |
301,568 |
16-Jan-2011 |
13:11 |
IA-64 |
Status
Microsoft has confirmed that this is a problem in the Microsoft products that are listed in the «Applies to» section.
More Information
For more information about software update terminology, click the following article number to view the article in the Microsoft Knowledge Base:
824684 Description of the standard terminology that is used to describe Microsoft software updates
Additional file information
Additional file information for Windows 7 and for Windows Server 2008 R2
Additional files for the x86-based version of Windows 7 boot images
|
File name |
X86_184827cf7d85485a7824e91632d0a359_31bf3856ad364e35_6.1.7601.21642_none_2d3daa4c5a38f199.manifest |
|
File version |
Not Applicable |
|
File size |
691 |
|
Date (UTC) |
17-Jan-2011 |
|
Time (UTC) |
20:53 |
|
File name |
X86_d4edbcfbe16acf195aea6e6117219635_31bf3856ad364e35_6.1.7600.20882_none_9071518771bb3253.manifest |
|
File version |
Not Applicable |
|
File size |
691 |
|
Date (UTC) |
17-Jan-2011 |
|
Time (UTC) |
20:53 |
|
File name |
X86_microsoft-windows-ftp_31bf3856ad364e35_6.1.7600.20882_none_ad485798d2fddb88.manifest |
|
File version |
Not Applicable |
|
File size |
2,537 |
|
Date (UTC) |
17-Jan-2011 |
|
Time (UTC) |
06:17 |
|
File name |
X86_microsoft-windows-ftp_31bf3856ad364e35_6.1.7601.21642_none_af59f44ed003d7b0.manifest |
|
File version |
Not Applicable |
|
File size |
2,537 |
|
Date (UTC) |
15-Jan-2011 |
|
Time (UTC) |
06:10 |
Additional files for the x64-based version of Windows 7 boot images and of Windows Server 2008 R2 boot images
|
File name |
Amd64_05aaa73457d45b252ac8378ebcf464cc_31bf3856ad364e35_6.1.7600.20882_none_ccabe4544990dbef.manifest |
|
File version |
Not Applicable |
|
File size |
695 |
|
Date (UTC) |
17-Jan-2011 |
|
Time (UTC) |
20:53 |
|
File name |
Amd64_184827cf7d85485a7824e91632d0a359_31bf3856ad364e35_6.1.7601.21642_none_895c45d0129662cf.manifest |
|
File version |
Not Applicable |
|
File size |
693 |
|
Date (UTC) |
17-Jan-2011 |
|
Time (UTC) |
20:54 |
|
File name |
Amd64_1ebb52c40539d18eaee328709f48f9a6_31bf3856ad364e35_6.1.7601.21642_none_9af8594cd2a783b0.manifest |
|
File version |
Not Applicable |
|
File size |
1,030 |
|
Date (UTC) |
17-Jan-2011 |
|
Time (UTC) |
20:54 |
|
File name |
Amd64_482f45ceef83bd58ff5dedc46dd624ad_31bf3856ad364e35_6.1.7600.20882_none_3e3142eb56c80985.manifest |
|
File version |
Not Applicable |
|
File size |
1,030 |
|
Date (UTC) |
17-Jan-2011 |
|
Time (UTC) |
20:53 |
|
File name |
Amd64_d4edbcfbe16acf195aea6e6117219635_31bf3856ad364e35_6.1.7600.20882_none_ec8fed0b2a18a389.manifest |
|
File version |
Not Applicable |
|
File size |
693 |
|
Date (UTC) |
17-Jan-2011 |
|
Time (UTC) |
20:53 |
|
File name |
Amd64_ddccb986f8f349f7e227e0c3fd495b17_31bf3856ad364e35_6.1.7601.21642_none_50fd5da29472bc50.manifest |
|
File version |
Not Applicable |
|
File size |
695 |
|
Date (UTC) |
17-Jan-2011 |
|
Time (UTC) |
20:54 |
|
File name |
Amd64_microsoft-windows-ftp_31bf3856ad364e35_6.1.7600.20882_none_0966f31c8b5b4cbe.manifest |
|
File version |
Not Applicable |
|
File size |
2,541 |
|
Date (UTC) |
17-Jan-2011 |
|
Time (UTC) |
07:05 |
|
File name |
Amd64_microsoft-windows-ftp_31bf3856ad364e35_6.1.7601.21642_none_0b788fd2886148e6.manifest |
|
File version |
Not Applicable |
|
File size |
2,541 |
|
Date (UTC) |
15-Jan-2011 |
|
Time (UTC) |
07:09 |
Additional files for theIA-64-based version of Windows Server 2008 R2 boot images
|
File name |
Ia64_184827cf7d85485a7824e91632d0a359_31bf3856ad364e35_6.1.7601.21642_none_2d3f4e425a36fa95.manifest |
|
File version |
Not Applicable |
|
File size |
692 |
|
Date (UTC) |
17-Jan-2011 |
|
Time (UTC) |
20:53 |
|
File name |
Ia64_d462f00f3ca57997c257c64b4c1a7b5c_31bf3856ad364e35_6.1.7601.21642_none_1ecaf0115c05f81b.manifest |
|
File version |
Not Applicable |
|
File size |
693 |
|
Date (UTC) |
17-Jan-2011 |
|
Time (UTC) |
20:53 |
|
File name |
Ia64_d4edbcfbe16acf195aea6e6117219635_31bf3856ad364e35_6.1.7600.20882_none_9072f57d71b93b4f.manifest |
|
File version |
Not Applicable |
|
File size |
692 |
|
Date (UTC) |
17-Jan-2011 |
|
Time (UTC) |
20:53 |
|
File name |
Ia64_eed6c9b9883e49d08d3f545aff194fb4_31bf3856ad364e35_6.1.7600.20882_none_735f42a259de7e13.manifest |
|
File version |
Not Applicable |
|
File size |
693 |
|
Date (UTC) |
17-Jan-2011 |
|
Time (UTC) |
20:53 |
|
File name |
Ia64_microsoft-windows-ftp_31bf3856ad364e35_6.1.7600.20882_none_ad49fb8ed2fbe484.manifest |
|
File version |
Not Applicable |
|
File size |
2,539 |
|
Date (UTC) |
17-Jan-2011 |
|
Time (UTC) |
06:49 |
|
File name |
Ia64_microsoft-windows-ftp_31bf3856ad364e35_6.1.7601.21642_none_af5b9844d001e0ac.manifest |
|
File version |
Not Applicable |
|
File size |
2,539 |
|
Date (UTC) |
15-Jan-2011 |
|
Time (UTC) |
07:03 |
References
Need more help?
Want more options?
Explore subscription benefits, browse training courses, learn how to secure your device, and more.
Communities help you ask and answer questions, give feedback, and hear from experts with rich knowledge.
Last year I wrote a post where I explained what the Winsxs folder was and which were the possible solutions to contain its bad habit of eating free space on your hard drive. Some days ago I have discovered that, starting from Service Pack 1, Windows 2008 R2 (… and Windows 7) finally has a built-in tool to reduce the size of the Windows Side-by-Side DLL repository and free up some GBs on your server storage. This tool is DISM.exe.
Cool news isn’t it? Personally I am happy to know that someone at Microsoft has finally decided to make it possible to reclaim a few GBs on the system partition and to partially solve this major bug.
The procedure is the following:
-
Install Windows Service Pack 1 then …
-
Start and elevated command prompt (run ‘CMD’ as administrator) and …
-
Run the DISM command, which replaces the old VSP1CLN and COMPCLN we used on previous Windows versions: DISM.exe /online/Cleanup-Image /spsuperseded
-
Wait 10 minutes before the task completes ( it ends with “Service Pack Cleanup operation completed. The operation completed successfully”)
Normally you should have been able to reduce the Winsxs folder size by 1 or maybe 2 GBs, sometimes more. Saved space may vary a lot.
Just know that after using DISM you will not be able to uninstall the Service Pack 1 anymore.
Let’s have a look at the used switches for DISM.exe:
-
The /online switch tells DISM to work on the running OS installation
-
The /spsuperseded option removes the backup files created during installation.
Optionally you could use the /hidesp option which will remove SP1 (KB976932) from the “Installed Updates” section of Programs and Features, to ensure that users do not try to uninstall the Service Pack.
I hope this helps. Please let me know how much disk space you were able to free up using the given command.
Continue reading here: Powershell hashtables, dictionaries and objects
Was this article helpful?
null
По-умолчанию значительная часть компонентов (они называются Features) Windows не активирована — и системному администратору при установке и первоначальной настройке системы требуется эти самые компоненты установить.
Server Manager
Самый простой способ установить компонент — с помощью графической утилиты Server Manager. Здесь некоторые из компонентов сгруппированы в т.н. роли, например — DNS-сервер, AD, и т. п.
Нужно зайти на главную страницу Server Manager и нажать на ссылку Add Roles или Add Features:

После этого будет открыто окно мастера, в котором нужно в соответствующих мастах галочки:
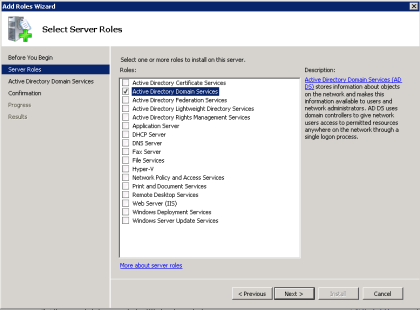
Для ролей к тому же будет доступна их конфигурация:

Готово!
Утилита коммандной строки DISM
Утилита dism преназначена в первую очередь для создания образов WIM операционной системы Windows, в частности установки в них ПО. Однако в ней есть опция /online которая позволяет проделывать тоже самое на живой системе.
Прежде чем устанавливать софт, придется выяснить, как же он называется, что делается с помощью опции get-features. К сожалению названия не всегда очевидны, например NetFx4 — это .NET Framework.
C:\Users\Administrator>dism /online /get-features
...
Feature Name : OEMHelpCustomization
State : Disabled
Feature Name : CorporationHelpCustomization
State : Disabled
...
Прочитать подробную информацию по компоненту можно с помощью команды Get-FeatureInfo
C:\Users\Administrator>dism /online /Get-FeatureInfo:TelnetServer
...
Feature Information:
Feature Name : TelnetServer
Display Name : Telnet Server
Description : Allow others to connect to your computer by using the Telnet protocol
Restart Required : Possible
State : Disabled
Custom Properties:
(No custom properties found)
The operation completed successfully.
Установка и удаление компонентов выглядит следующим образом:
C:\Users\Administrator>dism /online /Enable-Feature:TelnetClient
C:\Users\Administrator>dism /online /Disable-Feature:TelnetClient
PowerShell
Кроме графической среды Server Manager, он имеет также модуль для PowerShell, который также позволяет устанавливать компоненты. Импортируем его (для Server Core потребуется предварительно установить его через DISM):
PS C:\Users\Administrator> Import-Module ServerManager
Посмотреть список доступных фич можно с помощью следующих комманд. В отличие от Dism, он печатает и название и имя компонента, а также ставит галочки уже установленным, так что разобраться куда проще:
PS C:\Users\Administrator> Get-WindowsFeature

	...

	[X] Active Directory Domain Services                    AD-Domain-Services

	    [X] Active Directory Domain Controller              ADDS-Domain-Controller

	    [ ] Identity Management for UNIX                    ADDS-Identity-Mgmt

	        [ ] Server for Network Information Services     ADDS-NIS

	        [ ] Password Synchronization                    ADDS-Password-Sync

	...
Можно еще и так:
PS C:\Users\Administrator> Get-WindowsFeature AD*
Установка и удаление выглядят следующим образом:
PS C:\Users\Administrator> Add-WindowsFeature Telnet-Client
Success Restart Needed Exit Code Feature Result
------- -------------- --------- --------------
True No Success {Telnet Client}
PS C:\Users\Administrator> Remove-WindowsFeature Telnet-Client
Success Restart Needed Exit Code Feature Result
------- -------------- --------- --------------
True No Success {Telnet Client}
Обратите внимание, что здесь TelnetServer и TelnetClient имеют дефис в имени компонента. Ну в общем винда в очередной раз показала насколько она сложная и запутанная система 
- Remove From My Forums
-
Question
-
Is dism.exe available as part of any Windows kit for Windows 2008 (R1) server? I see it is there in Windows 7 as well as windows 2008 R2 but not in windows 2008 (non R2) editions. Is there any way I can make it work and available in windows 2008?
-
Changed type
Friday, February 8, 2013 1:47 PM
Question
-
Changed type
Answers
-
Thanks for quick reply Ravikumar.
I found the solution. I installed ADK setup on Windows 2008 and DISM.exe came along it. But post install it is not immediately available and need to execute:
C:\Program Files (x86)\Windows Kits\8.0\Assessment and Deployment
Kit\Deployment Tools\<architecture>\DISM\WimMountAdkSetup<ARCH>.exe
/Install /qRef: http://technet.microsoft.com/en-us/library/hh825262.aspx
But for some reason doing above didn’t work for me so I copied files:
From
C:\Program Files (x86)\Windows Kits\8.0\Assessment and Deployment
Kit\Deployment Tools\<architecture>\DISM\To
C:\windows\system32\
(Skipped overwriting) and now dism.exe just works wonderfully for me. Tried (un)mounting wim and went just fine.
Cheers,
Aniket
-
Marked as answer by
Santosh Bhandarkar
Friday, February 8, 2013 1:47 PM
-
Marked as answer by