This tutorial contains instructions to resolve the following error when running the DISM command «Dism.exe /Online /Cleanup-Image /Restorehealth» from the Windows Recovery Environment: «Error 50, DISM does not support servicing Windows PE with the /Online option».
The above error is occurred, because in WinRE the operating system is not running, so the /Online switch is useless at this case. In fact the /Online switch in DISM tool, specifies that the action is to be taken on the operating system that is currently running.

How to fix: Error 50 DISM does not support servicing Windows PE with the /Online option. (Windows 10)
1. After booting your computer from the Windows 10 installation media, press SHIFT + F10 keys at the first install screen to launch Command Prompt.
2. Inside the WinRE command prompt window, get a list of all available drives, by giving this command:
- wmic logicaldisk get name

3. Then find out which drive contains the «Windows» folder, by typing this command: *
- dir drive-letter:
* e.g. To see the contents of the C: drive, type: «dir C:» (without quotes). If you cannot see the «Windows» folder on the C: drive, then continue to the next drive (e.g. «dir D:», «dir E:», etc.), until see the «Windows» folder.
[As you can see at the screenshot below, the Windows folder (at this case) is located at the D: drive.]

4. Once you find the «Windows» drive (e.g. the «D» in this example), give this command to repair the offline Windows image:
- dism.exe /Image:D:\ /Cleanup-Image /Restorehealth
* Notes:
1. Where D = the Windows drive. (Change it according your situation)
2. There is space between \ / («…/Image:D:\ /Cleanup-Image…»)
3. If after executing the above command, you receive the «Error 0x800f081f: The source files could not be found», then perform a repair upgrade. To do that: **
a. Boot from the Windows 10 installation media.
b. At Windows Setup wizard, press ‘Next‘ and then click ‘Install Now‘.
c. Accept the ‘License agreement’.
d. When asked, select Upgrade: Install Windows and keep files, settings, and applications.** If you able to start your Windows 10 in Safe Mode with networking , then run the following command (in Admin Command Prompt):
- DISM /Online /Cleanup-Image /RestoreHealth

5. When the DISM operation is completed, give the following SFC command to complete the repairs. *
- SFC /SCANNOW /OFFBOOTDIR=D:\ /OFFWINDIR=D:\Windows
* Notes:
1. Where D = the Windows drive. (Change it according your situation).
2. There is space between \ / («…/OFFBOOTDIR=D:\ /OFFWINDIR…»)

6. When the operation is completed, reboot your computer. *
* Note: If you cannot fix the error using the above instructions, backup your files and clean install Windows.
Did it work for you?
Please leave a comment in the comment section below or even better: like and share this blog post in the social networks to help spread the word about this solution.
If this article was useful for you, please consider supporting us by making a donation. Even $1 can a make a huge difference for us.

Пользователи операционной системы Windows 10 могут сталкиваться с «Ошибка 50: Средство DISM не поддерживает обслуживание среды предустановки Windows PE с использованием параметра /Online». В сегодняшней статье мы во всех подробностях рассмотрим эту ошибку и расскажем вам, как от нее можно избавиться.
Почему возникает «Ошибка 50: Средство DISM…»?
Система обслуживания образов развертывания и управлениями ими (DISM) позволяет пользователям Windows 10 монтировать образ Windows PE (среду предустановки Windows) для добавления пакетов, драйверов и языковых наборов в систему.
Как правило, Windows PE предназначена для подготовки образа системы и развертывания его на нескольких компьютерах, находящихся в одной и той же сети. Такой подход зачастую используют в рабочей обстановке. Подобный образ нельзя использовать в качестве полноценной ОС.
Причина за «Ошибка 50: Средство DISM…» — недоступность функционала среды предустановки на ОС Windows 10 последних сборок. Проще говоря, утилита DISM пытается воспользоваться Windows PE, однако та недоступна, вследствие чего и возникает ошибка.
Это можно исправить двумя методами:
- удаление ключа, имеющего отношение к Windows PE, в реестре системы;
- задействование «revertpendingactions» в DISM.
Однако знайте, что они сработают лишь в том случае, если у вас действительно установлена полноценная Windows 10, которая по ошибке воспринимается DISM в качестве Windows PE.
Как исправить «Ошибка 50: Средство DISM…»?
Ниже вы сможете найти парочку проверенных методов для решения этой ошибки. Давайте начнем с чего-то полегче…
Метод №1 Удаление ключа, имеющего отношение к Windows PE, в реестре системы
В реестре системы находится особый ключ, который имеет прямое отношение к среде предустановки Windows. Когда DISM начинает свою работу, он проверяет данный ключ. Находится этот ключик в следующей ветке реестра:
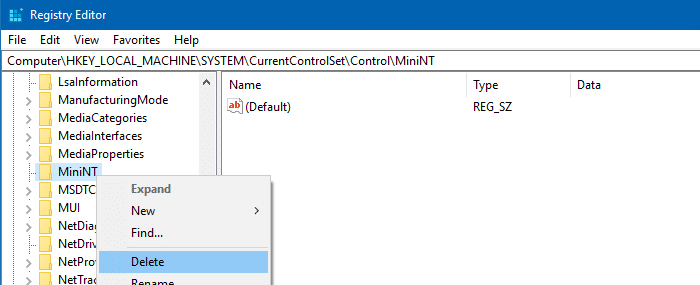
- HKEY_LOCAL_MACHINE\SYSTEM\CurrentControlSet\Control\MiniNT
Чтобы исправить ошибку, вам необходимо попросту избавиться от этого ключа. Для этого сделайте следующее:
- нажмите комбинацию Windows+R;
- пропишите в пустую строчку значение «regedit» и нажмите Enter;
- перейдите в ветку, указанную выше;
- нажмите правой кнопкой мыши на MiniNT (или WinPE) и выберите «Удалить»;
- теперь попытайтесь воспользоваться DISM с параметром «/Online» и посмотрите, исчезла ли ошибка.
Все теперь должно заработать, но только в том случае, если ваша система не является Windows PE. «Ошибка 50: Средство DISM…» возникает лишь в полноценных операционных системах по причине присутствует указанного выше ключа в реестре.
Метод №2 Задействование «revertpendingactions» в DISM
- создайте локальный аккаунт Администратора у себя на компьютере;
- войдите в среду восстановления Windows 10 и запустите через нее Командную строку;
- пропишите в ней следующую команду:
- dism.exe /image:C:\ /cleanup-image /revertpendingactions
- далее перезапустите компьютер и войдите в Безопасный режим;
- откройте Командную строку с правами Администратора и выполните в ней следующую команду:
- SFC/ scannow
- перезапустите компьютер и войдите в систему в нормальном режиме;
- запустите DISM в работу с опцией «/online».
Команда по откату (revertpendingactions) должна отменить изменения в системе, которые могли быть внесены тем или иным обновлением. Когда вы примените эту команду и перезагрузите свой компьютер, перед вами должен будет появиться синий экран, который укажет на откат обновлений.
Мы надеемся, что данный материал помог разрешить проблему с Windows PE и «Ошибка 50: Средство DISM…» вас больше не беспокоит.
Ошибка 50: Средство DISM не поддерживает обслуживание среды предустановки Windows с использованием параметра /Online.
Инструмент DISM позволяет пользователям Windows 10 монтировать образ Windows PE (он же Windows RE) — среды предустановки системы или среды восстановления системы. Это делается с целью добавления/удаления пакетов, драйверов, языковых наборов и т.д. При этом «раскидать» полученный образ по машинам в сети. Однако в последних сборках Windows 10 от среды Windows PE абстрагируется и эта фишка просто-напросто исчезает. Ошибка 50 Средство DISM не поддерживает обслуживание среды предустановки Windows появляется именно потому, что ваша DISM продолжает при подключении к сети искать возможности обращения к Windows PE, когда её уже нет.
Если вы столкнулись с ошибкой Средство DISM не поддерживает обслуживание среды Windows PE, могу предложить следующие варианты её исправления.
- Открываем редактор реестра
regedit.exe
- Проходим слева до ключа-идентификатора Windows PE:
HKEY_LOCAL_MACHINE\SYSTEM\CurrentControlSet\Control\MiniNT
Если такой обнаружился (создайте его резервную копию на случай, если что-то пойдёт не так) — удаляем его полностью. Выходим из редактора реестра и повторно запускаем средство DISM с целью проверить, исчезла ли ошибка.
КСТАТИ
Некоторые из пользователей сообщили о том, что, по привычке используя сброс настроек BIOS до «по умолчанию», избавлялись от проблемы без всяких излишних телодвижений. Попробуйте и вы как запасной вариант.
Вариант два более витиеватый. Для этого вам придётся активировать скрытую учётную запись локального администратора. Она же учётка супер-пользователя. Подробные инструкции по созданию таковой лежат в одноимённой статье. Если читать не интересно, то краткий набор команд в консоли cmd таков:
- запускаем консоль от имени администратора
- вводим команду
net user administrator /active:yes
Запаролим её:
net user administrator pAr0L
где pAr0L — ваш пароль латиницей и цифрами. Подтверждаем действие:
net user administrator activate:yes
- Перезагружаем машину и входим в учётную запись администратора. Уже отсюда переходим в утилиту конфигурации системы. Зажимаем WIN + R и вводим:
msconfig
- Во вкладке Загрузка выставляем галочку в чек-боксе Безопасный режим. Снова перезагружаем компьютер с выходом на SaveMode.

- В Безопасном режиме запускаем консоль команд от имени администратора и вводим команду на откат применённых ранее обновлений
dism.exe /image:C:\ /cleanup-image /revertpendingactions

- По окончанию работы DISM галочку в msconfig не снимаем! Снова перезагружаемся (картинка экрана будет перемежаться синими окнами), и снова в Безопасный режим, где…
- …придётся в той же консоли от имени администратора запустить уже проверку целостности системных файлов sfc.exe
sfc /scannow
А вот теперь возвращаемся к msconfig и снимем галочку с Безопасного режима. Возвращаемся в свою учётную запись в нормальном варианте работы и запускаем DISM с флагом /online, проверяя, исправлена ли ошибка.
Как исправить ошибку с помощью загрузочной флешки?
Этот подход общий и основывается на попытке предпринять ремонт образа Windows с внешнего (загрузочного) носителя.
- загружаемся с флешки с W10
- вызываем окно консоли cmd при попытке установить Windows сочетанием Shift + F10
- проверим буквы дисков командой
wmic logicaldisk get name
Лишние карты и флешки лучше изъять, чтобы под руками не путались.
- переходим в том с установленной на жёстком диске Windows командой
dir буква-диска:
типа
dir D:
- Теперь запустите вот эту команду:
dism.exe /Image:D:\ /Cleanup-Image /Restorehealth
Кому помог или нет, отпишитесь.
Успехов всем.
The DISM utility may display Error 50, which is “DISM does not support servicing Windows PE with the /online option error,” when you use it to analyze or recover the condition of the operating system parts. Although it is frustrating, there are numerous approaches you can carry to rectify this condition.
Error 50 DISM is an error that occurs while running specific commands with the DISM tool in Windows 10, caused due to misplaced registry key. You can fix this error by running Command Promt as administrator and entering the command: DISM.exe/Online/Cleanup-Image/StartComplonentCleanup. You can either update the DISM or delete the relevant registry key to fix this.
There are multiple strategies to tackle this issue. You can fix the problem by testing each one independently as we examine various options to address it. So let’s have a look at it right away.
See Also: {Solved} 10 Ways To Fix Windows Key Not Working On Windows 10
Table of Contents
- 1 What is DISM?
- 2 How to resolve DISM Does Not Support Servicing Windows PE issue?
- 2.1 Get rid of the related registry key.
- 2.2 Update DISM
- 2.3 BIOS reset
- 2.4 Make a second user account
- 3 FAQs
- 3.1 What does it mean that the online option for DISM does not support Windows PE?
- 3.2 Can DISM be executed from Windows PE?
- 3.3 Is there a workaround for Windows that makes use of DISM?
- 3.4 What Does DISM/Online Exactly Mean?
- 4 Conclusion
What is DISM?
The command line utility DISM, which stands for Deployment Image Servicing and Management, can maintain a Windows image (.wim) or a virtualized hard disc (.vhd or .vhdx). It is compatible with Windows Setup, Windows RE (Windows Recovery Environment), and Windows PE (Windows Preinstallation Environment). In addition to being a part of many other installations and restoration technologies like Windows Setup, Windows RE, Windows DS (Windows Deployment Services), etc., Windows PE is one of them.
Some users may see the warning of Error 50; DISM does not support servicing Windows PE with the online option. DISM is typically used to fix issues like system crashes. The DISM tool believes that you are running commands on Windows PE rather than the Windows system, which is why this error occurs.
DISM examines the operating system’s integrity and fixes corrupted or altered system files. But just like the user’s predicament, mistakes might happen when using DISM, negatively impacting the user experience.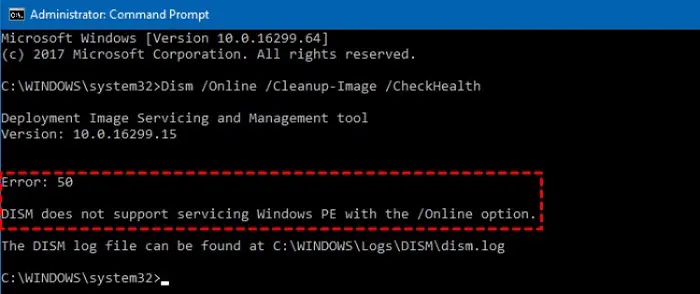 But just like the user’s predicament, errors might occur when using DISM, negatively impacting the consumer experience. It would be best if you solved it promptly. You can find repair options for the error mentioned above notice in the sections below. But to address the problem more effectively, it is advised that we first understand what caused the error.
How to resolve DISM Does Not Support Servicing Windows PE issue?
To resolve “Error: 50 – DISM does not support servicing Windows PE with the /online option,” adhere to the guidelines in this section.
To identify Windows PE, utilize a particular registry key. In Windows PE, the DISM tools will look for the registry key when launched. The missing registry key for Windows PE may prevent DISM from supporting servicing Windows PE. You can remove the related registry key to solve this problem.
Steps to follow:
- To open the Run dialogue, press Win + R simultaneously.
- Following entering regedit, hit Enter to start Registry Editor.
- Continue to the next destination:
HKEY_LOCAL_MACHINE\SYSTEM\CurrentControlSet\Control\MiniNT - Into the navigation box, enter this URL.
- Select Permissions from the MiniNT file’s context list.
- Locate your user name under Groups or user names and click it.
- To commit the changes, select Full Control and then click OK.
- Select Delete by doing a second right-click on the MiniNT folder.
- Restart your PC, then use the DISM tool once more.
Update DISM
After deleting the MiniNT registry key, you can try refreshing DISM if the deism the function attempted to use a name that reserve error still occurs. Resolving several minor software-related issues assists you in fixing them.
Steps to follow:
- To enter the Run dialogue, press the Win + R keys simultaneously. Type cmd and press Ctrl+ Shift+Enter simultaneously to start the Cmd prompt as an administrator.
- Enter the command that follows to act out this directive.
dism.exe /image:C: /cleanup-image /revertpendingactions - By typing msconfig into the Run input field and clicking Enter, one can open System Configuration.
- Tick the Safe Boot checkbox and choose Minimal under the Boot tab at the top of the window. To confirm the changes and move on, click OK. When the machine restarts, Safe Mode will be active.
- Use the actions listed above to launch the Cmd Prompt in safe mode. Type SFC/scannow and hit Enter.
- Simply wait for the command to finish.
BIOS reset
Windows Error 50 DISM does not support servicing Windows PE with the /online option can also be handled by restarting the output/input system to the most recent saved configuration using the BIOS reset technique.
Steps to follow:
- Just use the key to boot into your computer’s or laptop’s BIOS, depending on the brand of your PC motherboard.
- To begin the reset procedure, go to the Exit tab, select Optimized Load Defaults, and then save your settings.
- Restart your computer after completing the reset to see whether the error persists.
See Also: {Solved} 4 Ways To Fix Reboot And Select Proper Boot Device
Make a second user account
Windows Error 50 may often result from an issue with a specific user account. Setting up a new user profile on your computer will allow you to get around the problem. To achieve this, go through the steps listed below in order.
Steps to follow:
- Enter User Account in the taskbar search box and select “Open” to open the necessary Control Panel settings.
- Pick “Add a new user in PC settings” from the “Manage another account” menu.

- Under the Other User header, select “Add additional account to this System.”
- Select the account shown as a User account handled by the system by clicking “Users” after that. Select “New User” under “More Actions.”
- Now, input the username and password in the pop-up box. Verify the password to complete the account setup procedure and click Create.
- Last but not least, connect to your system with the new account to see if the error still occurs.

FAQs
What does it mean that the online option for DISM does not support Windows PE?
However, occasionally you encounter Error 50: DISM does not support servicing Windows PE with the/online option with the preceding command and cannot fix faults like system crashes. The DISM utility thinks you use it in the recovery environment rather than on a Windows machine, which creates this problem.
Can DISM be executed from Windows PE?
You can, indeed. Hit Shift + F10 concurrently to launch Cmd Prompt and perform the DISM commands while in Windows PE. The failure warning Error 50 DISM does not support servicing Windows PE with the /Online option is likely to appear.
Is there a workaround for Windows that makes use of DISM?
Indeed, with DISM you can fix Windows. The DISM commands normally employ the Windows Update file to correct any damaged or lost system files on your behalf.
What Does DISM/Online Exactly Mean?
The DISM command services your operating system with the /Online argument. The inverse of this is achieved by serving an offline Windows WIM, VHD, or VHDX image through the /Image option.
Conclusion
When the DISM /Online command is performed from the Windows recovery console, DISM produces an error (essentially in a WinPE environment). We discussed fixing the “DISM does not support servicing Windows PE with the /online option” error if it happens to your computer. We also examined the definition of DISM and the numerous problems it faces.
See Also: 3 Ways To Fix GDI+ Window Preventing To Shutdown

Mauro Huculak: Technical writer specializing in Windows 10 and related technologies. Microsoft MVP with extensive IT background and certifications.
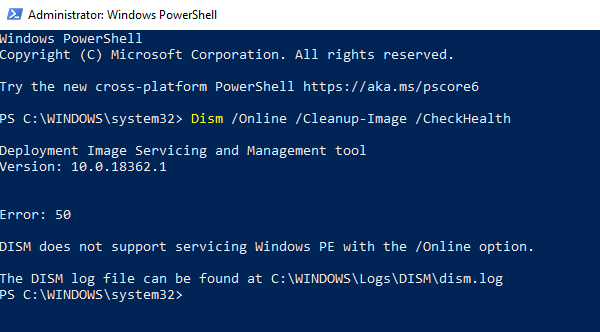
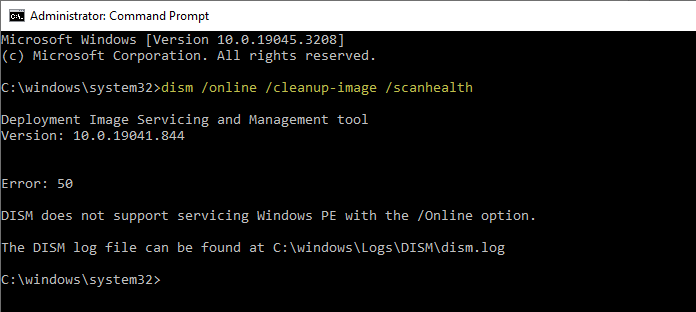
When you run the DISM tool (with the /online switch) to scan or restore the health of the operating system components, the tool may throw up Error 50. Here is the full error message verbatim:
Deployment Image Servicing and Management tool
Version: 10.0.19041.844
Error: 50

DISM does not support servicing Windows PE with the /Online option.

The DISM log file can be found at C:\Windows\Logs\DISM\dism.log
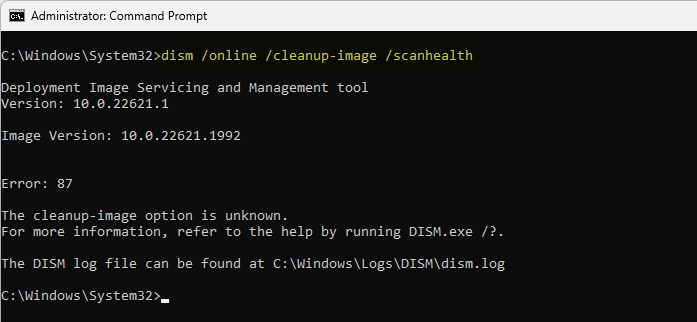
On Windows 11, you may see a different error code — Error 87.
Deployment Image Servicing and Management tool
Version: 10.0.22621.1

Image Version: 10.0.22621.1992

Error: 87

The cleanup-image option is unknown.
For more information, refer to the help by running DISM.exe /?.
This occurs when running any of these /online commands to scan or repair the components of the running Windows 8/10/11 installation:
Dism /Online /Cleanup-Image /CheckHealth
Dism /Online /Cleanup-Image /ScanHealth
Dism /Online /Cleanup-Image /RestoreHealth
Related article: Repair Windows 10/11 Using DISM and SFC
The DISM.log file may contain the following errors and warnings:
Error      DISM   DISM SetupPlatform Provider: PID=6748 TID=4916 SetupPlatformProvider is not supported when running DISM online in Windows PE - CSetupPlatformManager::Initialize(hr:0x80070032)
Warning    DISM   DISM Provider Store: PID=6748 TID=4916 Failed to call Initialize method on IDismServicingProvider Interface - CDISMProviderStore::Internal_LoadProvider(hr:0x80070032)
Warning    DISM   DISM Provider Store: PID=6748 TID=4916 Failed to load the provider: C:\Windows\System32\Dism\SetupPlatformProvider.dll. - CDISMProviderStore::Internal_GetProvider(hr:0x80070032)
Error      DISM   DISM.EXE: No providers were found that support the command(cleanup-image). HRESULT=80070057
Cause
DISM thinks you’re running Windows PE
Apparently, the DISM tool thinks that you’re using it from the Windows Preinstallation Environment (Windows PE) or Windows Recovery Environment (Windows RE), whereas you may be running the tool on a running operating system. The presence of the following registry key causes Windows to think that you’re running Windows PE.
HKEY_LOCAL_MACHINE\SYSTEM\CurrentControlSet\Control\MiniNT
Windows PE is a standalone preinstallation environment and is an integral component of other setup and recovery technologies, such as Setup for Windows, Windows Deployment Services (Windows DS), the Windows Recovery Environment (Windows RE), etc.
The “MiniNT” key doesn’t exist by default when you install Windows. As for how the key ended up on your registry, it’s possible that you (or a third-party program) have applied the following registry tweak in an attempt to enable ReFS file system format.
[HKEY_LOCAL_MACHINE\SYSTEM\CurrentControlSet\Control\MiniNT]
"AllowRefsFormatOverNonmirrorVolume"=dword:00000001
Resilient File System (ReFS) is a Microsoft proprietary file system with the intent of becoming the “next generation” file system after NTFS. You can read more on that in Microsoft Docs post Resilient File System (ReFS) overview.
Or it may have the following entries:
"DoNotCreatePagefile"=dword:00000001
"MaxPageFileUsage"=dword:00000000
"CrashDumpEnabled"=dword:00000000
"AutoReboot"=dword:00000000
"KernelDumpOnly"=dword:00000000
"WriteDebugInfo"=dword:00000000
Please note that the MiniNT key and those registry values don’t exist in a standard Windows installation.
Resolution
To fix DISM Error: 50 “DISM does not support servicing Windows PE” and Error: 87 “The cleanup-image option is unknown”, delete the MiniNT registry key using these steps:
-
- Right-click Start, click Run.
- Type
regedit.exeand click OK. - Navigate to the following registry key:
HKEY_LOCAL_MACHINE\SYSTEM\CurrentControlSet\Control\MiniNT

- Right-click
MiniNT, and choose Delete - Exit the Registry Editor.
- No restart is required, usually. See if you can run DISM now.
This fixes DISM Errors 50 and 87 on Windows 10 and 11, respectively.
Note that the DISM error 87 has multiple causes and the “MiniNT” key is just one of those causes. The DISM log needs to be analyzed to find the reason for the DISM error code 87.
One small request: If you liked this post, please share this?
One «tiny» share from you would seriously help a lot with the growth of this blog.
Some great suggestions:
- Pin it!
- Share it to your favorite blog + Facebook, Reddit
- Tweet it!
So thank you so much for your support. It won’t take more than 10 seconds of your time. The share buttons are right below. 