To delete temporary files:
-
In the search box on the taskbar, type disk cleanup, and select Disk Cleanup from the list of results.
-
Select the drive you want to clean up, and then select OK.
-
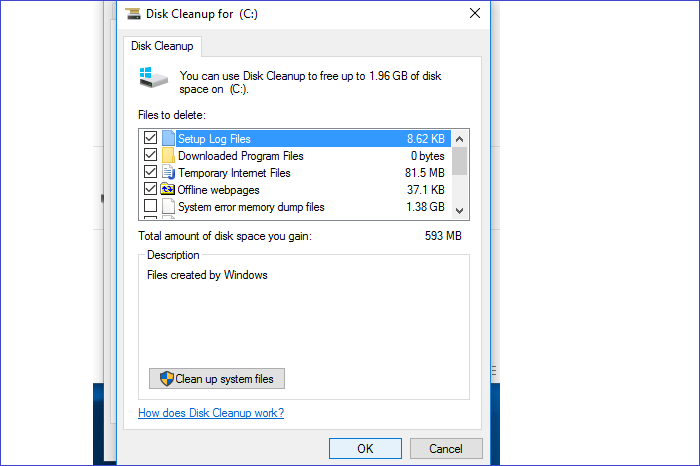
Under Files to delete, select the file types to get rid of. To get a description of the file type, select it.
-
Select OK.
If you need to free up more space, you can also delete system files:
-
In Disk Cleanup, select Clean up system files.
-
Select the file types to get rid of. To get a description of the file type, select it.
-
Select OK.
Note: If you notice that the Temp folder fills up quickly after running Disk Cleanup, see Low Disk Space error due to a full Temp folder.
For more on freeing up space on your PC, see Free up drive space in Windows.
Need more help?
Want more options?
Explore subscription benefits, browse training courses, learn how to secure your device, and more.
Communities help you ask and answer questions, give feedback, and hear from experts with rich knowledge.
Many people encountered low disk space issue in Windows 10 computer. Windows Updates, system log, temp, programs and many other types of files are writing to C drive continuously, so C drive is full sooner or later. If you replace disk with a new one, hard disk manufacturers will be very glad. In this article, I’ll introduce how to clean up C: drive in Windows 10 to reclaim disk space. You may run Disk Cleanup in Windows 10 via command or GUI wizard. If you cannot get enough free space, try additional effective methods.
Content:
- About Windows 10 Disk Cleanup utility
- How to open Disk Cleanup in Windows 10
- How to clean up C drive in Windows 10 with wizard
- How to clean up disk in Windows 10 with command
- Additional options after cleaning up disk
About Windows 10 Disk Cleanup utility
«Disk Cleanup» is a Microsoft Windows computer native included maintenance utility that is used to free up disk space on hard disk drives. This utility is easy to use and runs fast. It analyzes the hard drive and searches for files that are no longer of any use, and then removes the unnecessary files safely. These unnecessary and junk files include Windows Updates, Temporary files, Logs, Cache, files in Recycle Bin, etc.
You can run Disk Cleanup in all Windows versions from XP, however, in some Windows version such as Server 2008 and 2012, Disk Cleanup is not enabled by default, so you need to manually install this component. Starting with Windows 10 version 1803, Disk Cleanup are incorporated into Windows 10’s Settings app, however, the standalone Disk Cleanup utility is still available.
There are 3 common ways to open Disk Cleanup in Windows 10 laptop/desktop/tablet computer:
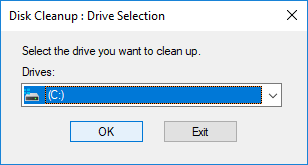
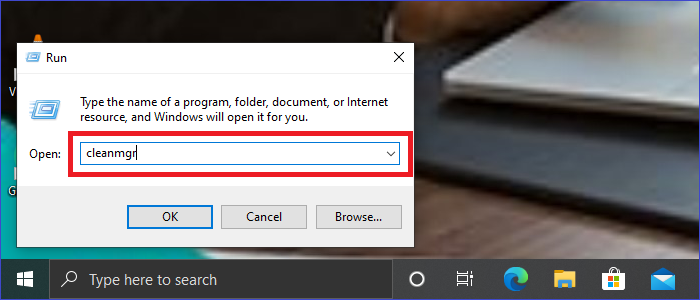
① Press Windows + R key on keyboard, type cleanmgr, and then click OK.
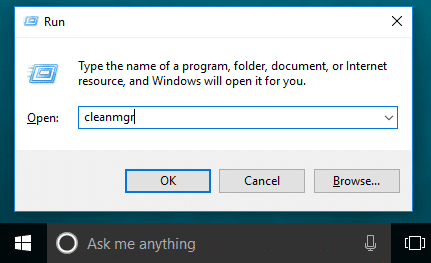
Select C: drive or other one that you want to clean up.
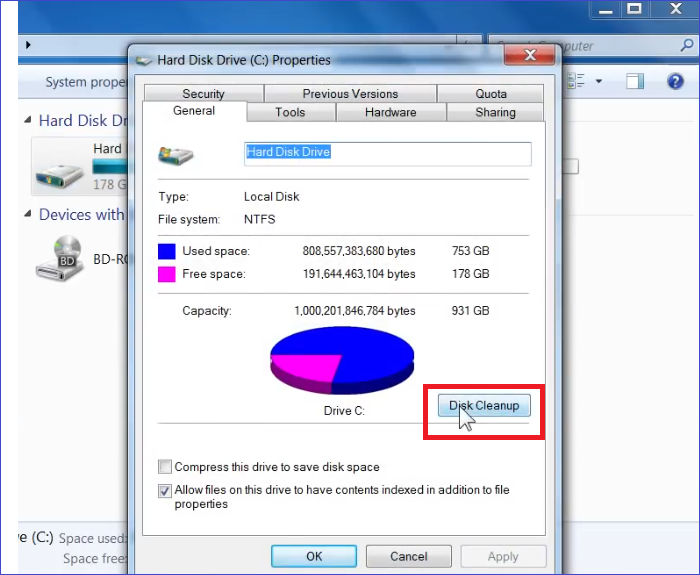
② Open Windows File Explorer, right click C: drive and select Properties.
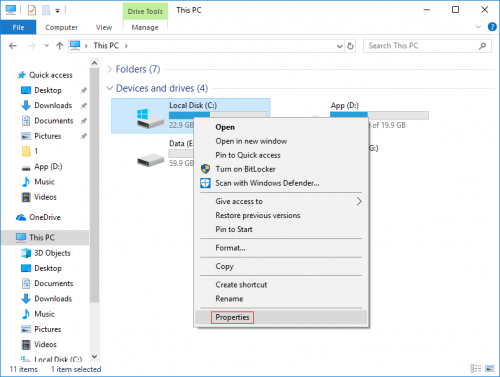
Click Disk Cleanup in the pop-up window.

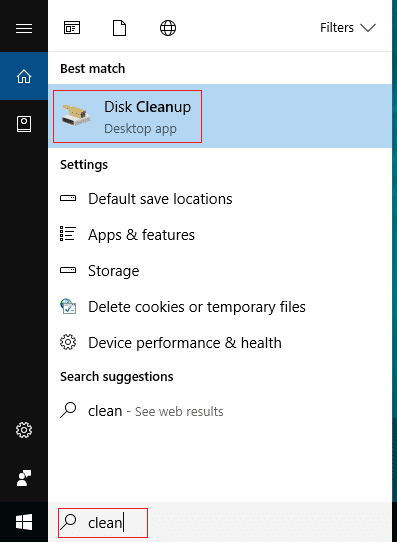
③ Search from task bar at bottom left. Type clean then Disk Cleanup is shown on the top.
How to clean up C drive in Windows 10 with wizard
When the Disk Cleanup window is opened, it is very easy to complete the next steps, only several clicks are needed.
Steps to run Disk Cleanup in Windows 10 to clean up C drive:
1. Click the check-boxes to select the files that you want to remove and click OK to begin. If you are not sure about the meaning of these files, click it and you’ll see corresponding description on the bottom.

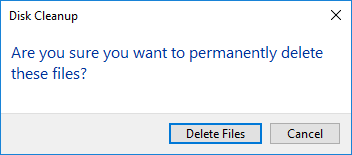
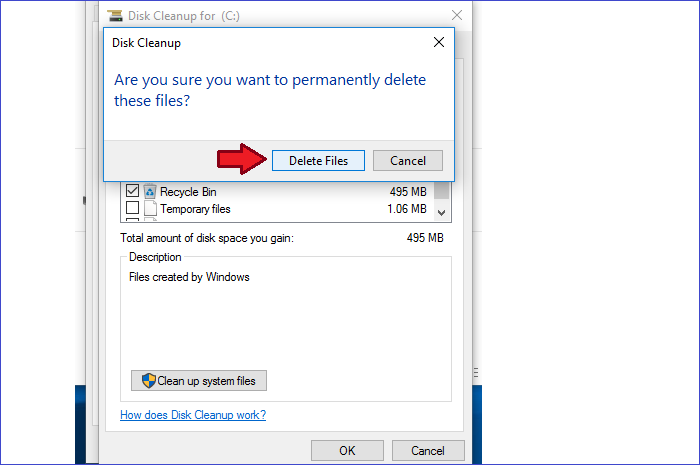
2. Confirm this operation by clicking Delete Files.
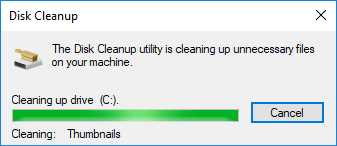
After that, Disk Cleanup will begin deleting the unnecessary and junk files.
3. Repeat to Clean up system files.
How to clean up disk in Windows 10 with command
There are 3 ways to run disk cleanup in Windows 10 via command line, select the one that fit for your needs.
① Command with all files selected
- Press Windows and R together on the keyboard.
- Input cleanmgr /LOWDISK and press Enter.
- Disk Cleanup dialog box will pop up with all types of files selected by default, so you just need to click OK to confirm.
② Clean up all junk files automatically
- Press Windows and R together on the keyboard.
- Input cleanmgr /VERYLOWDISK and press Enter.
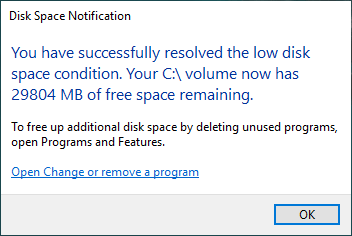
Then Disk Cleanup will delete all junk files automatically and then show you a dialog box with result.
③ Clean up specified junk files automatically
- Press Windows and R together on the keyboard to open Run.
- Input cleanmgr /sageset:1 and press Enter. (You can specify the value from 0 to 65535).
- Disk Cleanup dialog box will pop up, select the files to delete and click OK.
- In the future, you just need to run cleanmgr /sageset:1 and press Enter, the preselected junk files will be deleted automatically. If you want to delete different types of files, input cleanmgr /sageset:2 in step 2 and run cleanmgr /sageset:2 in step 4.
5. Additional options after cleaning up disk
If you did not get plenty of free space after running Disk Cleanup in Windows 10, the 3 methods below are very useful.
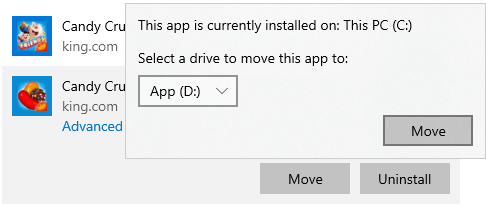
① Move installed apps and games
When installing programs, many people use default settings to C: drive. The more you installed, the less space left. It’s better to install programs to separated partition. Better than previous versions, Windows 10 can move applications installed from Windows Store to other partition without reinstalling.
How to clean C drive in Windows 10 by moving applications:
- Press Windows and X on keyboard, then click Settings > Apps > Apps & features
- Click an app or game.
- Click the Move bottom.
- Select the new location from the drop-down list.
- Click the Move button.
- Repeat the steps to move more items.
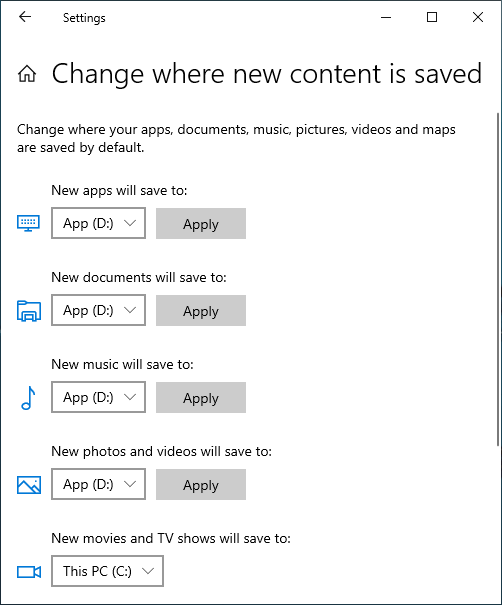
② Save files to new location
Windows 10 has another new option to save new files of apps, documents, music, pictures, and videos to other place, steps:
- Press Windows and X on keyboard, then click Settings
- Click System> Storage.
- Click Change where new content is saved under More storage settings.
- Click the drop-down list to select new location and click Apply.
③ Move more free space to C: drive
If you cannot reclaim large amount of disk space (at least 20GB), C drive will be full again in the near future, so you’d better allocate more space to C drive. In most of computers, there is free space in other partition on the same disk, NIUBI Partition Editor can move these free space to C drive without losing data. Operating System, programs and associated setting keep the same with before. It has free edition for Windows 11/10/8/7/Vista/XP home computer users.
Download this tool and follow the steps in the video to increase C drive space:
Besides shrinking, moving and extending partition, this free tool help you copy, convert, defrag, hide, wipe partition, scan bad sectors, optimize file system and much more.
From Wikipedia, the free encyclopedia
 |
|
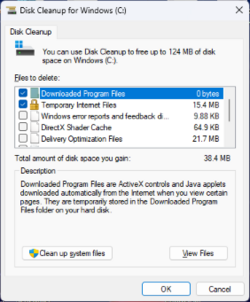
Screenshot of Disk Clean-up in Windows 11 |
|
| Developer(s) | Microsoft |
|---|---|
| Operating system | Microsoft Windows |
| Type | Disk maintenance application |
| Website | www |
Disk Clean-up (cleanmgr.exe) is a computer maintenance utility included in Microsoft Windows designed to free up disk space on a computer’s hard drive. It was introduced in Windows 98, but has now been deprecated and replaced with a modern version in the Settings app, although it still exists as a legacy tool in Windows.
About[edit]
The utility searches files that are no longer of any use, and then removes the selected unnecessary files. There are a number of different file categories that Disk Clean-up targets when performing the initial disk analysis:
- Compression of old files
- Temporary Internet files
- Temporary Windows files
- Downloaded program files
- Recycle Bin
- Removal of unused applications or optional Windows components
- Setup log files
- Offline web pages (cached)
- WinSxS (Windows component store)
The above list, however, is not exhaustive. For instance, ‘Temporary Remote Desktop files’ and ‘Temporary Sync Files’ may appear only under certain computer configurations, differences such as Windows Operating System and use of additional programs such as Remote Desktop. The option of removing hibernation data may not be ideal for some users as this may remove the hibernate option.
In Windows 10 and 11 you can also choose an option “Clean up system files”. You will have more files to delete. One of new categories is “Windows Update Cleanup”. It allows to free up a few gigabytes of space. But notice, that if you clean this category it would be impossible to uninstall current Windows update version.[1]
Aside from removing unnecessary files, users also have the option of compressing files that have not been accessed over a set period of time. This option provides a systematic compression scheme. Infrequently accessed files are compressed to free up disk space while leaving the frequently used files uncompressed for faster read/write access times. If after file compression, a user wishes to access a compressed file, the access times may be increased and vary from system to system.
In addition to the categories that appear on the Disk Clean-up tab, the More Options tab offers additional options for freeing up hard drive space through removal of optional Windows components, installed programs, and all but the most recent System Restore point or Shadow Copy data in some versions of Microsoft Windows.
Deprecation[edit]
Starting with Windows 10 version 1803 (RS4), the capabilities of Disk Clean-up are incorporated into Windows 10’s Settings app.[2] The standalone Disk Cleanup tool is still included, but deprecated in favor of the new interface.
See also[edit]
- Desktop Cleanup Wizard
- Disk Space Analyzers
References[edit]
- ^ «How to clean C drive space fast?». August 10, 2022.
- ^ «Windows 10 Redstone 4 (version 1803): All the new features and changes».
External links[edit]
- Microsoft Help and Support — Description of the Disk Cleanup Tool in Windows XP
- Creating a Disk Cleanup Handler
Running out of disk space on your computer always slows down things, including core programs. In most cases, the things that consume important disk space include temporary files, unnecessary files, internet caches, etc.
What is the best way to eliminate such files and optimize your system performance? The answer is as good as your guess: Disk Cleanup! This tutorial will discuss Disk Cleanup in detail and attempt to answer the question, «What does Disk Cleanup do?» Read on.
What Is Disk Cleanup?
Disk Cleanup is a built-in tool on Windows operating systems that allows users to scan their hard drives and remove files taking up unnecessary space, such as temporary files, caches, and items in the recycle bin. Once you open this Windows utility, it displays all the available files and the hard drive space consumed by each.
You’ll then have the option to select the files to delete and the ones to keep.
1. Benefits of Disk Cleanup
Disk Cleanup saves you the time and effort you’ll have spent manually searching for files taking up extra space on your Windows computer. This utility can scan all the files within a few seconds! With this tool, you can pick on the files to delete and those to keep.
Since Disk Cleanup helps delete unwanted files on your computer, it contributes to the safe running of other essential programs. This gets attributed to the additional storage space created.
2. Can Disk Cleanup Remove Viruses on Your Windows Device?
Although the main function of Disk Cleanup is to remove unwanted files from your computer, it can also aid in getting rid of viruses that may have accompanied downloaded files. Since this utility wipes out all the data associated with a given file, it guarantees the safety of your device from undetected viruses.
However, it’s important to note that Disk cleanup shouldn’t be used as a substitute for antivirus software since it doesn’t possess such capabilities.
How to Open Disk Cleanup on Windows?
Now that you know the benefits of Disk Cleanup on your device, it’s important to learn the correct steps to open it. Below are easy methods to open Disk Cleanup on your Windows computer:
1. Open Disk Cleanup on Windows 11/10/8.1/8
If your computer runs any of these operating systems, you can access Disk Cleanup through the following steps.
Step 1. Press Windows logo + X.
Step 2. Once the Power User Task Menu opens, click on «Run.»
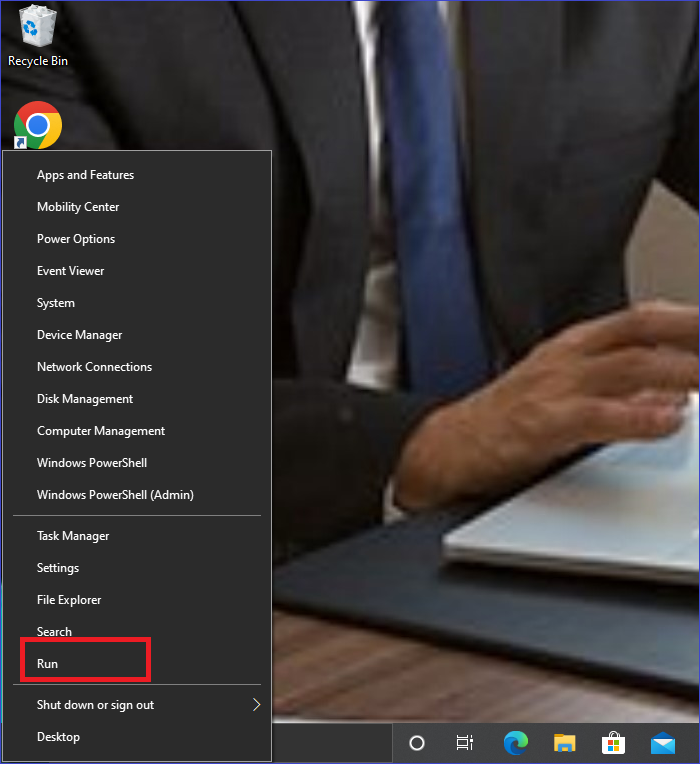
Step 3. Next, type cleanmgr and press Enter. This opens Disk Cleanup.
2. Open Disk Cleanup on Windows 7 or Earlier
If running Windows 7 or other older OS versions, you can apply the following steps to open Disk Cleanup:
Step 1. Click on the Start Menu.
Step 2. Next, go to «Computer.»
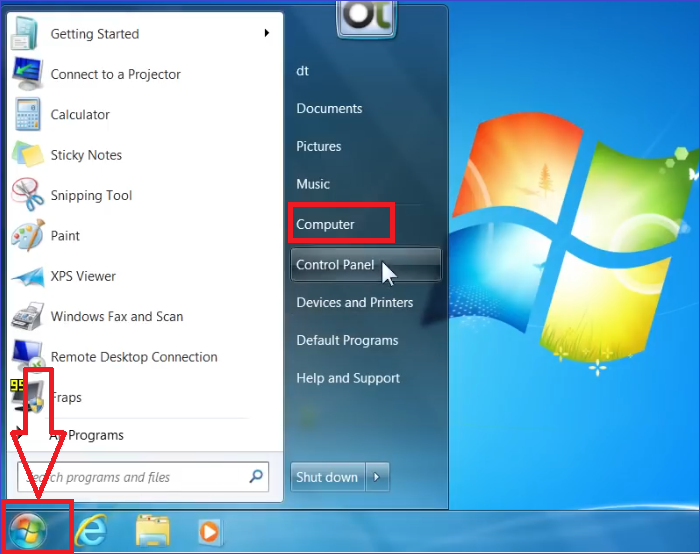
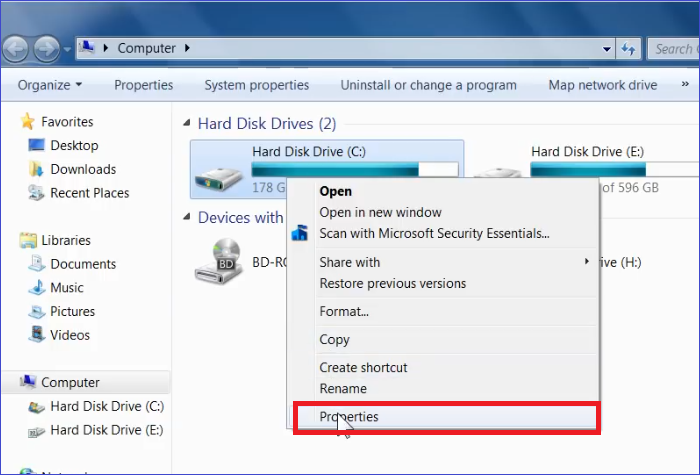
Step 3. Right-click on your hard drive and select «Properties.»
Step 4. Click the Disk Cleanup button to open it under the «General» tab.
What Does Disk Cleanup Do?
Disk Cleanup allows you to free up space on your computer’s hard disk, boosting the overall system performance. This built-in Windows utility searches your computer for unimportant files, internet caches, and temporary files before safely allowing you to delete them.
With this amazing tool, you can schedule to clean files automatically or manually when necessary. Below are the steps to use Disk Cleanup on your Windows computer.
Step 1. Open File Explorer.
Step 2. Right-click on the icon for your hard drive and choose «Properties.»
Step 3. Click on «Disk Cleanup» under the «General» tab.
Step 4. Disk Cleanup will start calculating the possible space to free up your computer. Be patient until the process finishes.
Step 5. Once the «Files to delete» list displays, check all the files you want to remove and click «OK.»
Step 6. On the popup that displays, click the button for «Delete Files.» Wait for the disk cleaning process to finish. Once completed, you’ll have extra space on your computer to store other important files.
If you suspect that your PC has slowed down due to an increase in the number of temporary or unnecessary files, you should use Disk Cleanup to solve the issue. This utility will conduct a deep scan of your computer and list all the files you can delete to boost the overall performance of your device.
From the list of steps outlined in this section, it’s not difficult to use Disk Cleanup. Just follow the steps to the latter, and you’ll easily create extra space on your computer!
Final Verdict
The best way to eliminate unnecessary files on your Windows computer is by using a built-in disk cleanup tool. If your computer programs aren’t running as expected, try using Disk Cleanup to see how it works out the magic. Since it helps delete unnecessary files and other internet caches, this tool can help eliminate viruses on your computer.
In the long run, it optimizes the overall performance of your computer. This tool also saves time and effort since it identifies all the unnecessary files on your computer hard drive quickly. Ensure you start using Disk Cleanup today to enjoy its amazing benefits. I hope you enjoyed reading this tutorial!
Disk Cleanup FAQs
Some of the common questions about Disk Cleanup for Windows include the following:
1. Is Disk Cleanup Safe, and Can It Speed Up My Computer?
Yes. Since it’s a built-in tool, Disk Cleanup is safe to scan for unnecessary files on your hard drive. This tool helps identify and delete unimportant files taking up extra disk space. Therefore, it boosts the overall device performance.
2. Which Files Should I Delete in Disk Cleanup?
Some of the files that you should consider deleting to boost system performance include the following:
- Downloaded program files.
- Set up log files.
- Offline web pages.
- Temporary internet files.
3. Why Does Disk Cleanup Take So Long?
If everything is okay, Disk Cleanup takes a very short time to scan for unnecessary files on your device. However, when this built-in utility takes so long to scan your computer, it could result from corrupted or missing system files. Since it requires these files to function appropriately, this tool won’t run as expected when none is available.
Ensure your computer is updated to download the required system files to avoid this issue.
![]() Приветствую!
Приветствую!
В операционных системах семейства Windows разработчик в лице Microsoft предусмотрел специальный инструмент, который помогает очистить систему от временных и «мусорных» файлов, что накапливаются в процессе работы как самой системы, так и программ в ней установленных.
Содержание:
- Что конкретно очищает и удаляет «Очистка диска»
- Как открыть утилиту «Очистка диска»
- Видеоинструкция
Что конкретно очищает и удаляет «Очистка диска»
Т.к. данный инструмент базовый (встроенный в систему по умолчанию), то особой гибкостью и эффективностью он не отличается. С помощью него вы сможете высвободить занимаемое место на системном диске от временных файлов интернет браузера Internet Explorer и EDGE, системных лог файлов, файлов с дампами памяти, что формируются при возникновении ошибок, временных файлов, что располагаются в специально отведённых для этого директориях в системе, технических файлов, что формируются при установке обновлений и в дальнейшем не нужны и так далее.
![]()
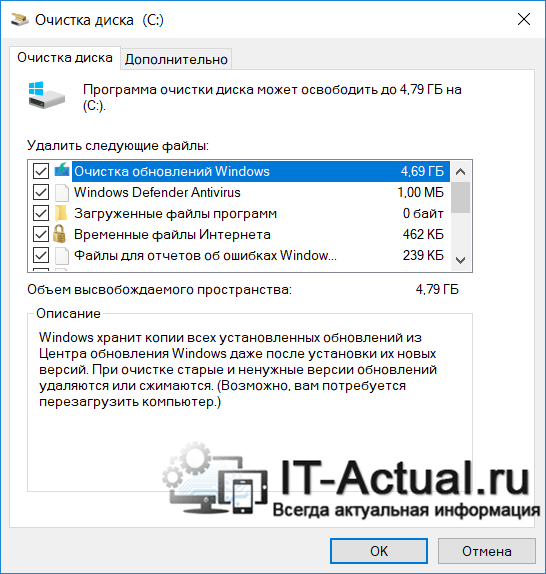
Он работает в двух режимах: просто очистка от временных файлов и очистка с включением системных файлов, для чего потребуется предварительно нажать кнопку Очистить системные файлы – всегда используйте данный вариант.
![]()
Вы можете смело установить галочки напротив всех пунктов, что имеются в окне инструмента очистки диска. Очистка системы от данных файлов не повлияет на стабильность работы операционной системы.
Если вы давно не проводили очистку системы, то с помощью данного инструменты вы сможете высвободить приличное место, исчисляемое десятками гигабайт на системном диске. Если у вас больше чем один диск, то применение данной утилиты на не системных разделах практически не даст никакого эффекта.
Естественно, по эффективности данный инструмент уступает специализированным решениям, которые заточены на поиск и удаление всевозможных временных, мусорных и прочих видов файлов на всём жёстком диске или SSD, которые лишь занимают место, но никак не участвуют в работе самой системы.
![]()
Как открыть утилиту «Очистка диска»
Данная утилита присутствует во всех существующих версиях Windows, включая актуальную Виндовс 10. Существует несколько способов открытия «Очистка диска» в Windows.
- Можно воспользоваться системным поиском – нажав на соответствую кнопку в панели задач, что выводит поисковую строку, вам останется ввести туда название искомой программы, а именно «Очистка диска» (без кавычек) и кликнуть по идущему первым по списку результату.

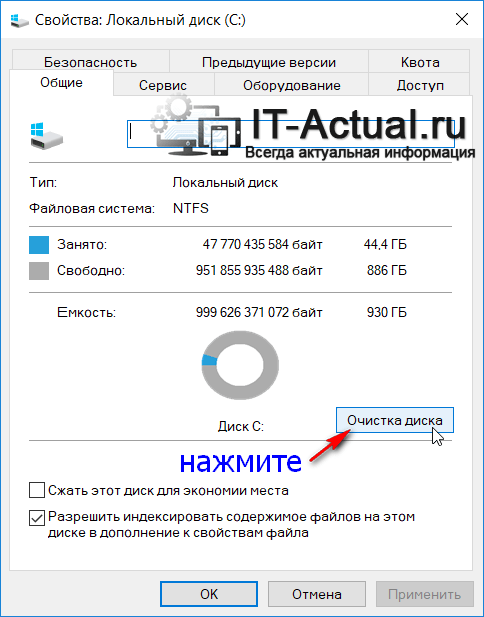
- Также можно открыть системную утилиту через свойства диска, для этого потребуется открыть окно файлового менеджера, где перечисляются диски. Далее требуется кликнуть правой клавишей мышки по тому диску, который в конечном итоге должен быть очищен, и в выведенном контекстном меню выбрать Свойства.

В результате откроется окно со свойствами диска, причём с активной вкладкой под именем Общие, в которой имеется кнопка Очистка диска – это именно то, что нам нужно.


Видеоинструкция
На этом всё. Теперь вы знаете, что собой представляет встроенная системная утилита «Очистка диска» в Windows и как с ней работать.