A user must enter a password for a local or Microsoft (online) account each time they log on to Windows. This allows you to restrict access to your computer. In this article, we will look at how to disable the password prompt on the logon screen in Windows 10/11 and allow automatic login to the computer using specific user credentials. Auto-logon assumes that user credentials (username and password) are stored in the Windows registry and used for automatic login.
Contents:
- How to Disable Login Password on Windows
- Enable Windows Auto Login via the Registry
- Disable Password After Resuming from Sleep/Hibernation on Windows
- Enable Auto Sign-in to Windows with the AutoLogon Tool
Warning. Automatic login to Windows is a convenience for the user, but it is a compromise to the security of your computer. You should only use Autologon if you are the only person who has access to the computer.
Disabling the Windows logon password does not mean that your account should have a blank password. Windows can use saved user credentials (name and password) to automatically logon to the computer. In all other cases, for example, when accessing from another computer over the network (SMB) or when connecting to a Remote Desktop (RDP), you will be prompted for a password.
How to Disable Login Password on Windows
On a standalone computer and in a workgroup environment, the easiest way to turn off the logon password prompt on the Windows sign-in screen is to use the User Accounts Control Panel.
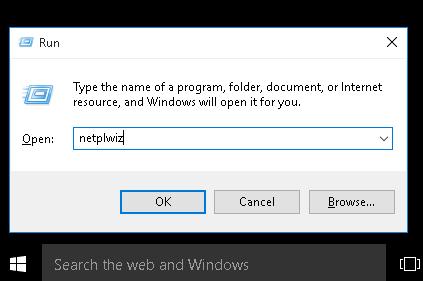
- Press Win+R and run the command
netplwizorcontrol userpasswords2;
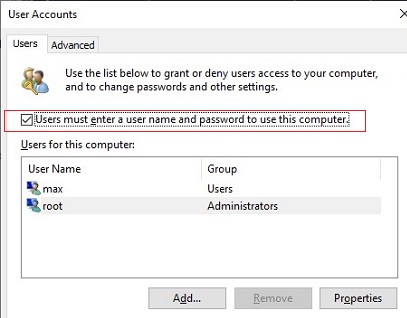
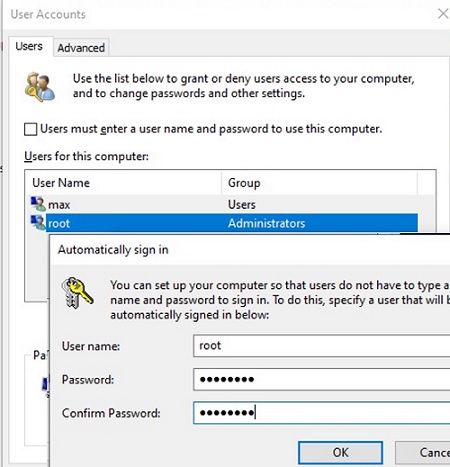
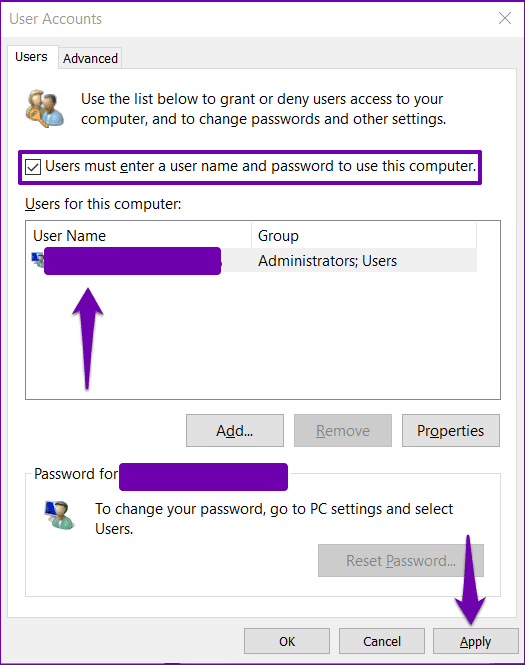
- A list of local Windows accounts will appear. Uncheck the option “User must enter a username and password to use this computer” and save changes (OK);

Starting with Windows 10 20H1, the option “User must enter a username and password to use this computer” is not shown by default if you use a local user account to sign-in Windows instead of a Microsoft cloud account (MSA). Create the DevicePasswordLessBuildVersion registry value with a value of 0 in the HKLM\SOFTWARE\Microsoft\Windows NT\CurrentVersion\PasswordLess\Device key to display this check box.
You can make changes to the registry using PowerShell:New-ItemProperty -Path "HKLM:\SOFTWARE\Microsoft\Windows NT\CurrentVersion\PasswordLess\Device" -Name DevicePasswordLessBuildVersion -Value 0 -Type Dword –ForceThis will disable the “Require Windows Hello sign-in for Microsoft accounts” option. Re-open thenetplwizconsole and make sure that the checkbox has appeared.
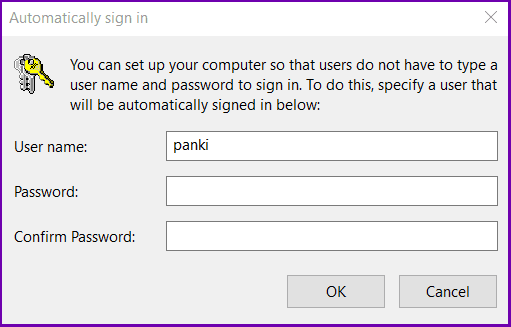
- Enter the user name and password (twice) for the account you want to use to automatically log on to Windows;

- Restart your computer and make sure that the Windows boots directly to the desktop without entering a password.
The AutoLogonSID registry parameter in the HKLM\Software\Microsoft\Windows NT\CurrentVersion\Winlogon key stores the user SID used to log on.
On computers that have been added to an Active Directory domain, you cannot turn off the “Require username and password” option because of the domain password policy. In this case, you can enable Windows autologin via the registry (see below).
Enable Windows Auto Login via the Registry
You can save a user password in the computer’s registry to allow Windows to log on automatically. This allows you to set up automatic logon without prompting for a password and to skip the Login Screen for your Microsoft account, domain account, or local account.
Warning. This autologin method is not secure, as the user’s password is stored in plain text in the registry and can be viewed by any local user.
- Press Win+R and type
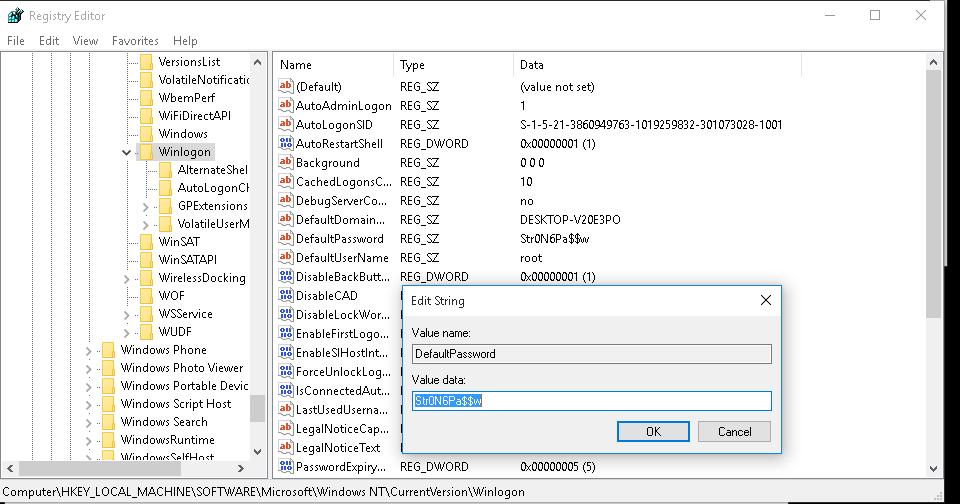
regedit; - Go to the registry key HKEY_LOCAL_MACHINE\Software\Microsoft\Windows NT\CurrentVersion\Winlogon;
- Change the value of the registry parameter AutoAdminLogon from 0 to 1;
- Create a new string parameter DefaultDomainName and specify the domain or a local computer name as its value;
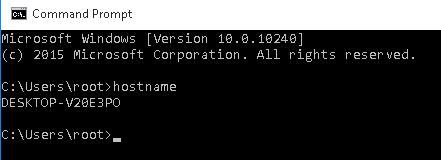
Tip. You can find out your current computer name using the
hostnamecommand.
- In the DefaultUserName parameter you need to specify the user account name you want to sign in with;
- Specify the user account password in plain text in a string reg parameter DefaultPassword (create if missing);

- Close the Registry Editor and restart your computer;
- When Windows boots, it should automatically log on using the saved user name and password, without prompting for user credentials on the logon screen.
You can enable Windows autologin via the registry using the following BAT script. Replace root and P@ssword with your username and password, and replace WORKGROUP with the name of your AD domain (if the domain user account is used).
reg add "HKLM\SOFTWARE\Microsoft\Windows NT\CurrentVersion\Winlogon" /v AutoAdminLogon /t REG_SZ /d 1 /f
 reg add "HKLM\SOFTWARE\Microsoft\Windows NT\CurrentVersion\Winlogon" /v DefaultUserName /t REG_SZ /d root /f
 reg add "HKLM\SOFTWARE\Microsoft\Windows NT\CurrentVersion\Winlogon" /v DefaultPassword /t REG_SZ /d  P@ssword /f
 reg add "HKLM\SOFTWARE\Microsoft\Windows NT\CurrentVersion\Winlogon" /v ForceAutoLogon /t REG_SZ /d 1 /f
 reg add "HKLM\SOFTWARE\Microsoft\Windows NT\CurrentVersion\Winlogon" /v DefaultDomainName /t REG_SZ /d WORKGROUP /f
 reg add "HKLM\SOFTWARE\Microsoft\Windows NT\CurrentVersion\Winlogon" /v IgnoreShiftOvveride /t REG_SZ /d 1 /f
If the automatic login is not working, you may need to remove the AutoLogonChecked and AutoLogonCount registry items.
reg delete "HKEY_LOCAL_MACHINE\SOFTWARE\Microsoft\Windows NT\CurrentVersion\Winlogon" /v AutoLogonCount /f
 reg delete "HKEY_LOCAL_MACHINE\SOFTWARE\Microsoft\Windows NT\CurrentVersion\Winlogon" /v AutoLogonChecked /f
The AutoLogonCount contains the number of times you can log Windows in using the automatic logon feature. This value decreases each time the computer boots. If the value reaches 0, the automatic login is disabled.
Or you can run a PowerShell script to write the user’s logon credentials to the registry:
$Username ='max'
 $Pass = 'Max$uperP@ss'
 $RegistryPath = 'HKLM:\SOFTWARE\Microsoft\Windows NT\CurrentVersion\Winlogon'
 Set-ItemProperty $RegistryPath 'AutoAdminLogon' -Value "1" -Type String
 Set-ItemProperty $RegistryPath 'DefaultUsername' -Value $Username -type String
 Set-ItemProperty $RegistryPath 'DefaultPassword' -Value $Pass -type String
 Restart-Computer
Automatic logon will not work if a logon banner policy is enabled on the computer: Computer Configuration -> Policies -> Windows Settings >Security Settings > Local Policies -> Security Options -> Interactive Logon : Message text for users attempting to log on.
The value of the DefaultUserName registry entry changes when a different user is logged on to the computer (it contains the name of the last logged in user). After this, the automatic Windows logon will no longer work.
Disable Password After Resuming from Sleep/Hibernation on Windows
Windows may require you to enter a password when your computer wakes from sleep or hibernation. This is called a Secondary Logon.
You can disable the password prompt after waking from sleep using the Windows Control Panel:
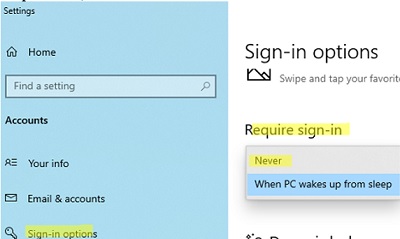
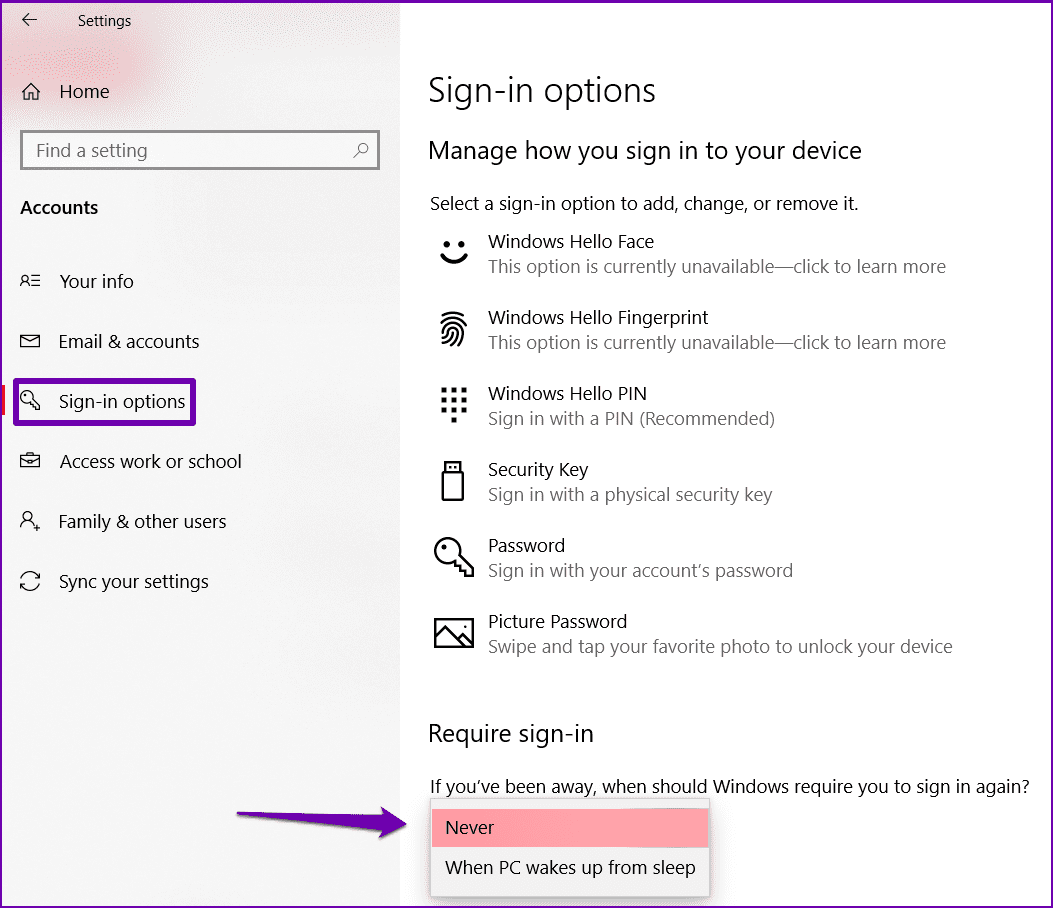
- Go to Settings -> Accounts -> Sign-in options (or run the quick access URL command:
ms-settings:signinoptions ); - Change the value of the Require sign-in parameter from When PC wakes up from sleep to Never;

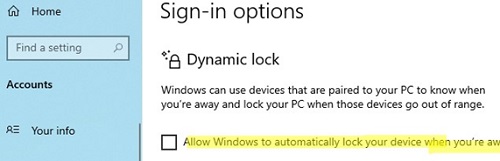
- Then check that dynamic screen lock is disabled here: Allow Windows to automatically lock your device when you’re away;

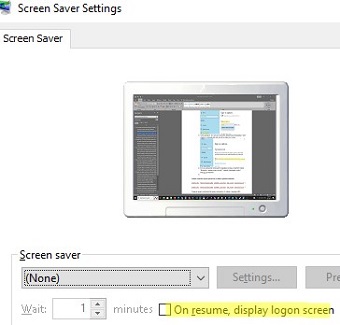
- Disable the ‘On resume, display logon screen’ option in Control Panel if the screen saver is configured on a computer:
control desk.cpl,,@screensaver
You can disable the password when resuming from sleep with the commands:
powercfg /setacvalueindex scheme_current sub_none consolelock 0
 powercfg /setdcvalueindex scheme_current sub_none consolelock 0
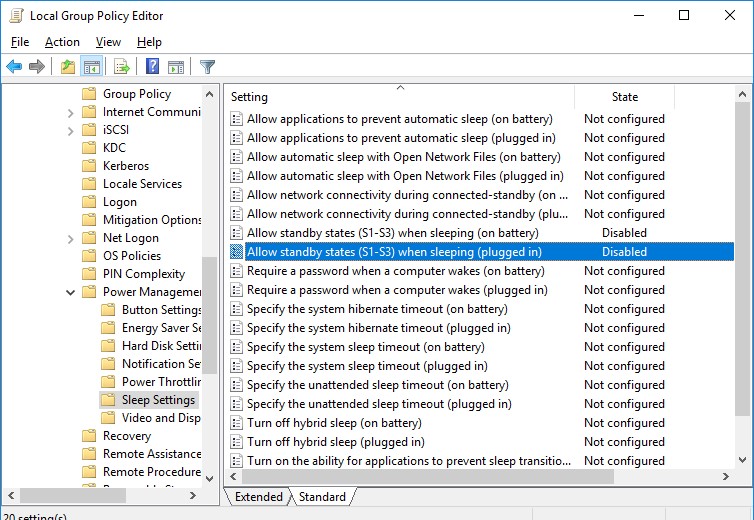
You can disable the password prompt after waking from sleep/hibernation using GPO:
- Open the Local Group Policy Editor snap-in –
gpedit.msc(on Home editions of Windows, you can run the local policy editor as follows); - Navigate to Computer Configuration -> Administrative Templates -> System -> Power Management -> Sleep Settings;
- Disable the GPO parameters “Require a password when a computer wakes (on battery)” and “Require a password when a computer wakes on battery (plugged in)”;

- Now Windows won’t ask for a password when you wake your computer from sleep or hibernation.
You can also turn off the screen lock completely in Windows.:
reg add "HKEY_LOCAL_MACHINE\SOFTWARE\Microsoft\Windows\CurrentVersion\Policies\System" /v "DisableLockWorkstation" /d 1 /t REG_DWORD /f
Enable Auto Sign-in to Windows with the AutoLogon Tool
You can store the user password in encrypted form in the registry using the Autologon utility. This is a more secure way to automatically log on to Windows. The Autologon is available for download from the Microsoft website as part of the Sysinternals toolset (https://learn.microsoft.com/en-us/sysinternals/downloads/autologon).
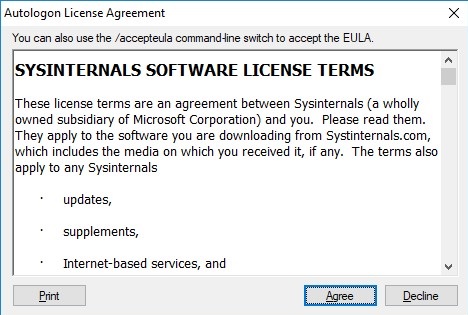
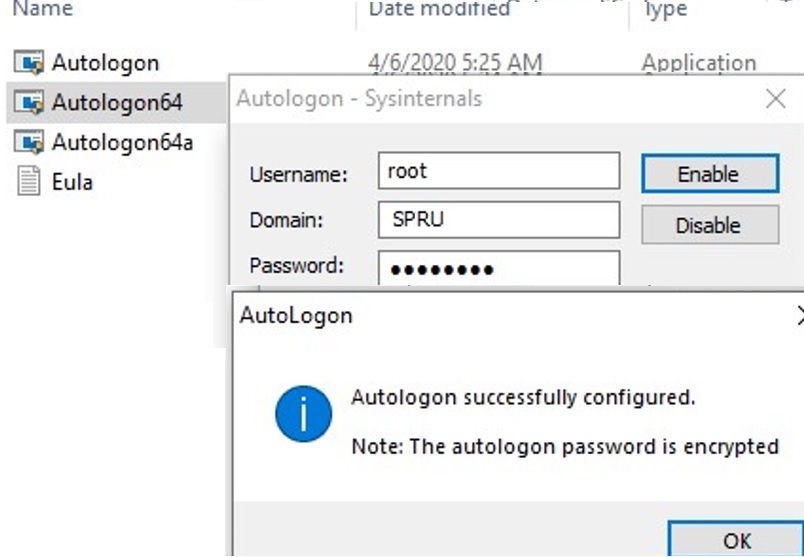
- Download and run
Autologon.exe(orautologon64.exe) as an administrator; - Accept the terms of the license agreement;

- Specify the user account, domain, and password that will be used to automatically log on to Windows. Click the Enable button:
Autologon successfully configured. The autologon password is encrypted.
- An encrypted password is stored in LSA format under the HKLM\SECURITY\Policy\Secrets registry key. In this case, although the password is not stored in clear text, the encryption algorithm is not strong and technically any user with local admin permissions can decrypt it.

You can set user credentials to automatically log on to Windows using the Autologon command-line options. Use the following syntax to enable passwordless logon:
autologon64.exe USER_NAME DOMAIN PASSWORD /accepteula
To disable automatic logon to Windows without a password, simply click the Disable button.
We looked at how to disable the password login on Windows and automatically boot directly to the user’s desktop. Hold down the Shift key when Windows starts up if you want to temporarily disable automatic logon and manually select a user on the sign-in screen.
Automatic login to devices without a password is often used on devices operating in information kiosk mode. When such a device is booted up, Windows should automatically log on to the desktop and start the necessary programs via autorun.
It is not recommended to configure the automatic login to be for the built-in Windows Administrator account or for a user with local administrator permissions.
- To remove password on Windows 10, open “netplwiz” and select the account.
- Then clear the “User must enter a user name and password to use this computer” option and apply the settings.
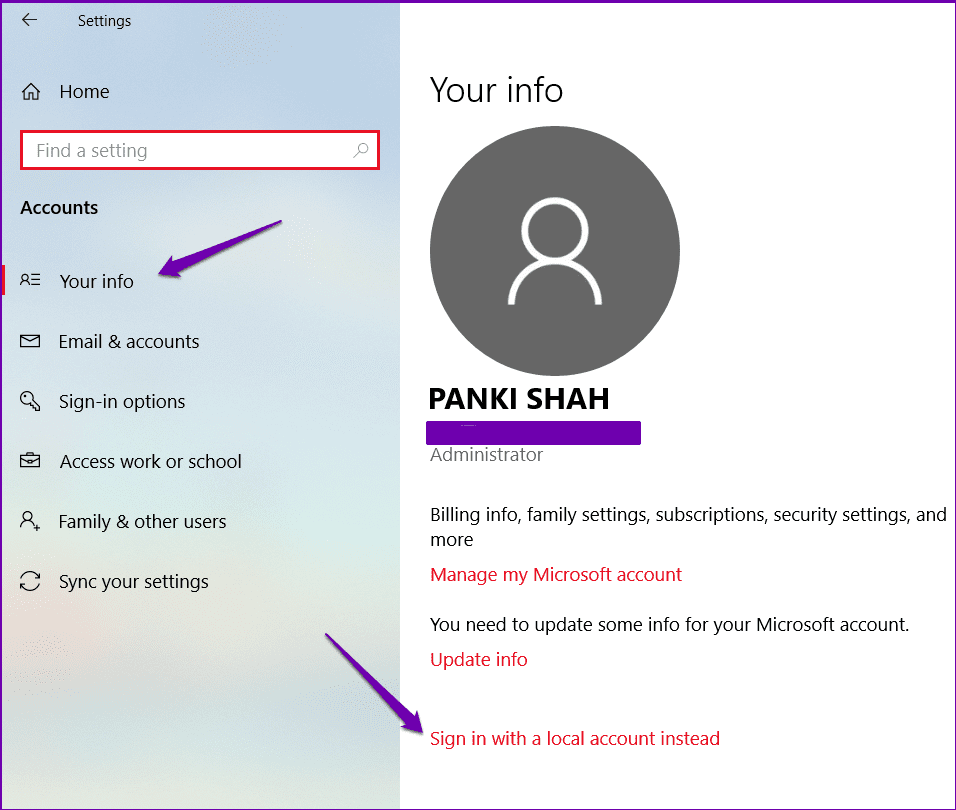
- Alternatively, you can remove the password in a “Microsoft account” by going to Settings > Accounts > Your info and using the “Sign in with a local account instead” option.
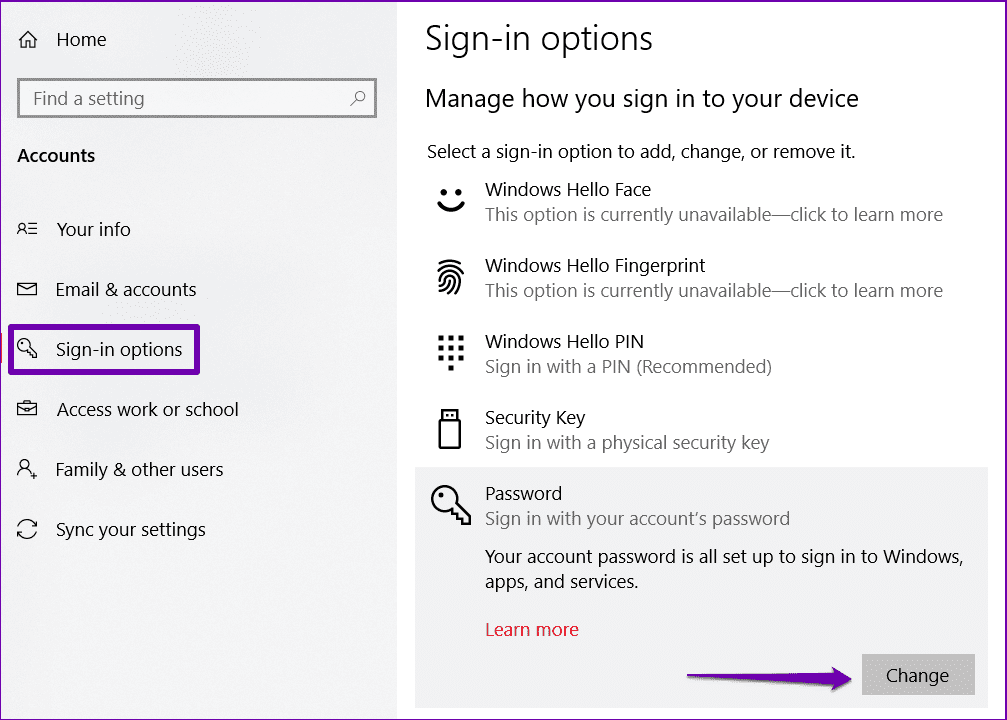
- In a “local account,” go to Settings > Accounts > Sign-in options, select “Password,” click Change, and leave the password blank to remove it.
Although using Windows 10 with a password is always recommended to keep your computer and files safe and secure from prying eyes, sometimes, depending on the situation, a password may add extra steps to the login process.
If you have a device without critical files, and security is not a concern, Windows 10 includes multiple ways to remove the account password.
In this guide, you will learn the steps to sign in automatically (or remove the logon password) from a Windows 10 device, whether you use a local or Microsoft account. Use these instructions on Windows 11.
- Disable password login on Windows 10
- Remove password login on Windows 10
- Remove login password from Command Prompt
If you use a Microsoft account, it is impossible to remove the password entirely because your credentials are connected to your online account. However, you can configure your computer to sign in automatically to mimic an account without a password.
To bypass the login password on Windows 10, use these steps:
-
Open Start on Windows 10.
-
Search for netplwiz and click the top result to open Control Panel.
-
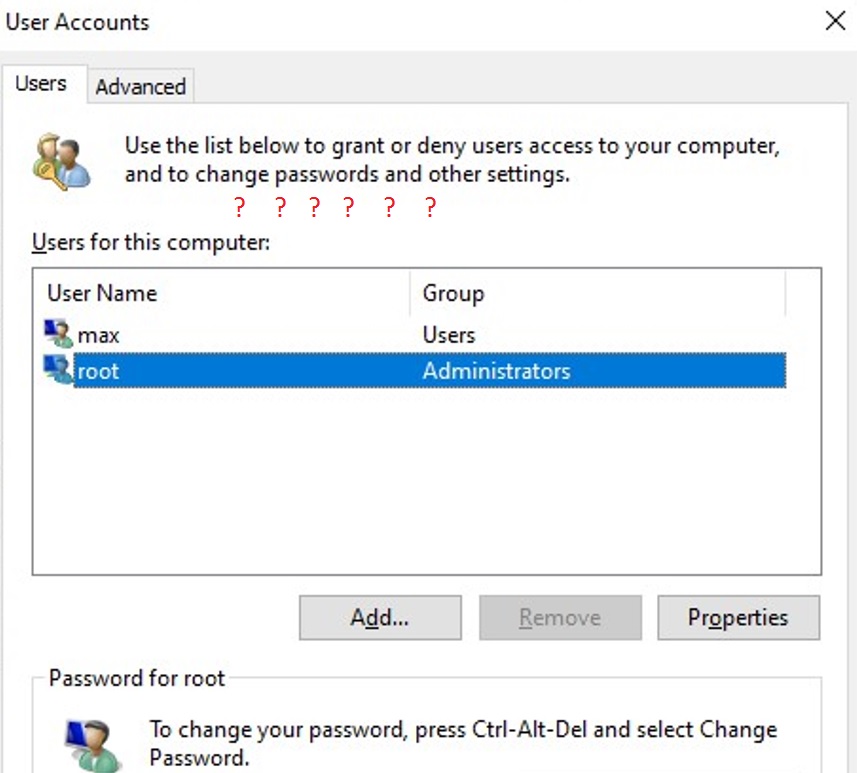
Select the account to remove the password under the “Users for this computer” section.
-
Clear the “User must enter a user name and password to use this computer” option.

-
Click the Apply button.
-
Confirm the Microsoft account information to sign in automatically.

-
Click the OK button.
-
Click the OK button again.


Once you complete the steps, the device will have a password, but it will sign in automatically on every restart.
Remove password login on Windows 10
Alternatively, you can remove the password entirely if you use a Microsoft account, but you have to switch to a local account.
Warning: This is a friendly reminder that removing your account password will make the device vulnerable to unauthorized access locally and remotely.
Remove password for Microsoft account
To switch to a local account and remove the password on Windows 10, use these steps:
-
Open Settings.
-
Click on Accounts.
-
Click on Your info.
-
Click the “Sign in with a local account instead” option.

-
Click the Next button.
-
Confirm your current password.
-
Click the Next button.
-
Create a username for the account.
-
Leave the“New password” and “Confirm password” fields blank to remove the password entirely.

-
Click the Next button.
-
Click the “Sign out and finish” button.


After you complete the steps, the laptop will no longer connect with a Microsoft account and will log you in automatically every time you start the system.
Remove password for local account
To remove Windows 10 password from a local account, use these steps:
-
Open Settings.
-
Click on Accounts.
-
Click on Sign-in options.
-
Select the Password option under the “Manage how you sign in to your device” section.
-
Click the Change button.

-
Confirm your current account password.
-
Click the Next button.
-
Leave the “New password” and “Confirm password” fields blank to remove the password entirely.

-
Click the Next button.
-
Click the Finish button.


Once you complete the steps, a password will no longer be required to access your Windows 10 account.
When you want to remove a password because it is inconvenient, switching to faster and more secure authentication methods is best. For example, you could create a PIN or set up a fingerprint reader that only requires a simple finger swipe.
Remove login password from Command Prompt
To remove the password on Windows 11 with Command Prompt, use these steps:
-
Open Start.
-
Search for Command Prompt, right-click the top result, and select the Run as administrator option.
-
Type the following command to view all the accounts and press Enter:
net user
-
Type the following command to change the account password and press Enter:
net user USERNAME *
In the command, change USERNAME with the standard or administrator account name you want to update.

-
Press Enter twice to remove the password.

After you complete the steps, the account will no longer include a security password to sign in. If you need to set a new password, you can use the same steps, but in step 5, specify a new password.
You can only remove a password with Command Prompt for a local account. If you have a Microsoft account, you must use the online settings or the option available through the Accounts settings page (see above).
Entering a password every time you log in to your Windows 10 computer can get tiring after a while. If it’s a personal computer and no one can access it without your permission, then you may remove the login password screen. To avoid the hassle, you can simply disable the login password feature on Windows 10.

Disabling a password will eliminate that one extra step when you want to use your PC. However, it can also potentially compromise the computer’s safety. We do not recommend removing the login password, and you should read on to know why.
Why Is It Not Recommended
As mentioned earlier, removing a password for logging into Windows may put your data at risk. Anyone can easily use your computer and can access your personal files. Secondly, you might be at a bigger risk if your laptop or PC ever gets stolen.
More importantly, if it’s an administrative account for which you’ll be removing the password, any malicious app running on your device will have enhanced access than before.
That said, removing the password from a personal computer makes sense for some. And if that’s the case, we’ll guide you to remove the login password from Windows 10 entirely.
Let’s check how to turn off the Login Password prompt in Windows.
How to Turn Off Login Password Prompt in Windows
To remove the login password, the first thing you need to do is turn off the login username and password feature so that Windows doesn’t ask you the same every time you login. Here’s how to do it.
Step 1: Click on Start menu, type netplwiz and press Enter. Alternatively, you can open the Run dialog box with the Windows key+R shortcut and type netplwiz in it. Then clicking on OK.

Step 2: In the User Accounts screen that launches, select the account you want to remove the password from if you have multiple accounts.
Step 3: Uncheck the box that says ‘Users must enter a user name and password to use this computer.’ And then, click Apply.
Step 4: Confirm your Microsoft Account Information by entering your password twice and click OK. Hit OK once again.
Windows will then remove your password.
Note: If you mistakenly enter a wrong password during the last step, Windows won’t prompt you about it immediately.
Windows will show you an error message along with two identical accounts the next time you try to log in. And you will have enter password to use either of those two accounts. After logging in, follow the steps mentioned above and enter the correct password.
How to Turn Off ‘Require Sign-In’ Prompt
Even entering password every time your PC wakes up from sleep can get tiring and anyone would prefer accessing the desktop directly. In that case, you can turn off ‘Require sign in’ prompt in Windows 10. Here’s how to go about it.
Step 1: Click on Start Menu again and open Settings. Then, click on Accounts.

Step 2: Click on Sign-in options on your left and then change the settings under Require sign-in to Never from the drop-down list.
After this, restart your computer to check if it will boot up directly without requiring a password.
Alternatively, you can switch to a local account to directly log to Windows 10. Here’s how to do that.
How to Switch to a Local Account
Another way to login directly on Windows 10 is by switching to a Local Account. Note that by switching to a local account you won’t be able to access your personalized settings. If you’re fine with that, here’s how you can do it.
Step 1: Click the Start Menu and open Settings. Then go to Accounts.
Step 2: Click on Your Info on your left, then click on ‘Sign in with a local account instead’ and click on Next. Then you’ll be prompted to enter your existing password.
Step 3: Create a new username and leave the password field blank and hit Next. Then click on Sign Out and Finish.

This way you can create a local account without any password and login directly on Windows 10. Simple, isn’t it?
How to Remove Password From Local Account
If you already use a Local account with a set password, then you need to remove the password from it to login directly. Here’s how.
Step 1: Click the Start Menu and open Settings. Then go to Accounts.
Step 2: Click on Sign-in options on your left. After that, click on Password on your right, and click on Change button.
Step 3: Follow on-screen instructions, and enter your current password to confirm it’s you. After that, hit Next.
Step 4: Now, it’ll ask you to set a new password, but because we don’t want one, just click Next. Then click Finish.
Now you’ll be able to login directly with a local user account. Restart your computer to check if it works.
Forget Your Password
The next time you login on your Windows 10 computer, all you have to do is click ‘Sign in’ for the account. With the above steps, you’ll be able to access your computer without entering a password.
Whether you choose to do it or not completely depends on you. If you ask us, we would not recommend doing it even if it’s your personal computer.
Have you ever thought of disabling or removing the Windows 10 Sign-in password? This does excite a few users who mostly don’t share their PCs with someone else. Well, if you are one such user, read this tutorial in detail as we have outlined all the necessary processes to either disable or delete Windows 10 login password on the computer.
If you love using Microsoft and its services, deleting is not an option for you. All you can do is to disable the current passkey on your device. In case you want to leave Microsoft and all its applications, you may choose to create a local account instead and enjoy unlocking the device with a single click. Let’s explore both scenarios in detail –
If you are logged in to your computer using a Microsoft account, you can’t delete the login password as this is linked to your user-id. However, you may choose to disable the same using the below instructions –
- Launch the Run dialog by pressing the Windows key and R.
- Type “
netplwiz” and press OK.

- When the User Account Control window comes into view, hit Yes to authorize the access.
- Next, pick the account that you no longer want to have a login passkey.
- Unmark the checkbox – “User must enter a user name and password to use this computer“.
- Click Apply then OK to confirm this setting.
- A new pop-up window should appear asking your consent to disable the login password.
- Use your Microsoft credentials to sanction this permission.
- Click OK then OK again to confirm the above changes.
- Lastly, restart your computer.
From the next logon, you may sign in to your device without putting any password on the login screen.
How to Delete Windows 10 Login Password
As stated earlier, you can’t delete the login password while using a Microsoft account. In case, you no longer require this account and want to remove the login password, you may do so by switching to a local account instead. Here’s how to perform this task –
- First of all, navigate to the below path –
Settings > Accounts > Your Info (on the left pane)
- Jump to the right side and scroll down to the “Sign in with a local account instead” link. See the snapshot below –

- Click Next to proceed ahead.
- When Microsoft asks to fill in your current Pin/Password, do the same, and press Enter.
- On the succeeding screen, fill in the user name field only. Leave other details like New password, confirm password, and password hint as it is.

- Click Next and sign-out of the current user account.
- Lastly, hit the Finish button.
Proceeding this way will disconnect your device from using Microsoft and its services. From now onward, you may log into your device without entering any Pin or password on the login screen.
Remove Windows Login Password on the Local Account
If you are already using a local account on your computer, you may remove the login password simply by following the below guideline –
- Press the Windows key alone and hit the gear icon.
- On the Windows Settings page, select Accounts thereafter Sign-in Options.
- Head over to the right pane and scroll down to the Password under the “Manage how you sign in to your device” section.
- Click upon Password once, and hit the “Change” button on its extended pane.
- When your device asks to fill in your current passkey, do the same, and hit the Next button.
- On the “Change Your Password” window, leave all the fields blank and press the Next button again.
- In the end, click Finish to save the above configuration, and reboot Windows.
That’s it, you may now log into your device without bothering of entering any PIN or password on the login screen.
Read Next:
- How to Enable or Disable Hello PIN in Windows 10
- Fix Windows Hello Error while creating PIN on Windows 10
You can login to your computer without entering Local or Microsoft User Account Password. You can find below the steps to Disable or Turn OFF Login Password in Windows 10.

While having a Login Password ensures the security of files on your computer, you may have your own reasons for disabling the requirement to enter Login Password on your computer.
For example, you may want to make it easy for kids and your guests to access the computer by allowing them to Login without entering any Password.
Also, some users temporarily disable the Login Password during busy periods, in order to gain quicker access to the computer during busy periods.
You will find below the steps to Disable or Turn OFF Login Password in Windows 10 for both Local and Microsoft User Accounts on your computer.
Note: Turning OFF Windows 10 Password can make your device vulnerable to Local and remote unauthorized access.
1. Turn OFF Local User Account Password in Windows 10
If you are using a Local User Account, you can follow the steps below to Disable the Login Password on your computer.
1. Open Settings on your computer and click on Accounts.

2. On the Accounts screen, click on Sign-in options in the left pane. In the right-pane, scroll down and click on the Change button located under Password section.

3. On the next screen, type your current User Account Password and click on Next.

4. On the next screen, do not enter anything and click on Next to totally skip the Password setup process.

5. Finally, click on the Finish button.

Once you complete above steps, you will no longer require a password to login to this particular Local User Account on your computer.
2. Disable Microsoft User Account Password in Windows 10
If you are using Microsoft User Account, you won’t be able to Disable the Login Password as your credentials are linked to your online Microsoft Account.
In this case, you will have to switch to a Local User Account and skip the password setup process on the Local User Account screen.
1. Go to Settings > Accounts > click on Your Info in the left pane. In the right-pane, click on Sign-in with a local account instead link.

2. When prompted, enter your current Microsoft Account Password and click on Next.

3. On the next screen, do not enter any Password and click on Next to skip the password creation step.

4. Click on Sign Out and finish button.

After this, your computer will no longer be associated with your Microsoft Account and there won’t be any need to enter the Login Password to access your computer.
- How to Create Password Reset Disk in Windows 10
- How to Change User Account Type in Windows 10