 Всем привет. Значит Fast Startup в Windows 10 это технология, которая по умолчанию включена и позволяет ПК быстрее запустить операционку после выключения (но не после перезагрузки).
Секрет заключается в использовании механизма гибернации: при включенной функции Windows при завершении работы сохраняет ядро и загруженные драйверы в файл hiberfil.sys, а при включении происходит обратный процесс.
Windows 10 Fast Startup — как выключить?
Теперь рассмотрим как выключить этот режим.
Сперва откройте панель управления, в Windows 10 это уже может быть проблемой, поэтому попробуйте так — зажмите Win + R, появится окошко Выполнить, напишите команду:
control
либо такую:
control panel

Теперь проверьте что в правом верхнем углу, там где Просмотр, то там должно быть указано крупные значки — вам нужен значок Электропитание:

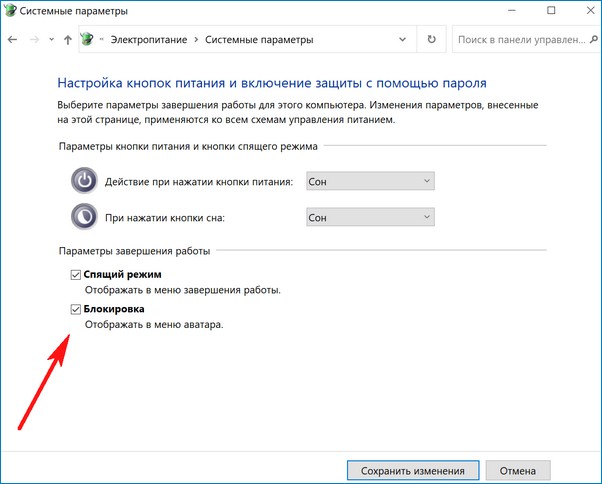
Потом нажмите по Действия кнопок питания:

Далее нажмите по Изменение параметров, которые сейчас недоступны:

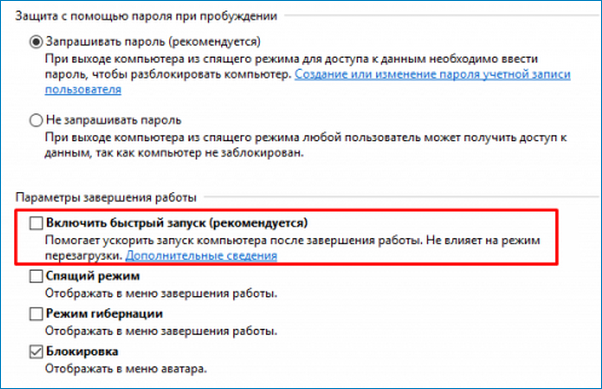
Потом будут галочки — вам нужно снять одну а именно с Включить быстрый запуск:

После этого обязательно нажмите Сохранить изменения!
Все, быстрый запуск отключен, можно и протестировать! Выключите ПК, и через пару сек — включите снова))
Важно: если у вас отключена гибернация, то быстрый запуск будет отключен автоматом.
Windows 10 Fast Startup — отключение через реестр
Возможно что по некоторым причинам вам будет удобнее для отключения использовать реестр. Например при помощи него можно создать файлики reg вкл и выкл быстрой загрузки, но это уже для продвинутых юзеров))
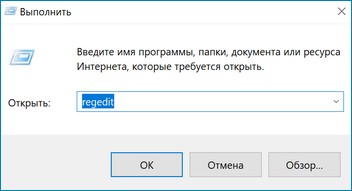
Такс, запустите реестр, это сделать можно так — зажмите Win + R, напишите потом команду:
regedit

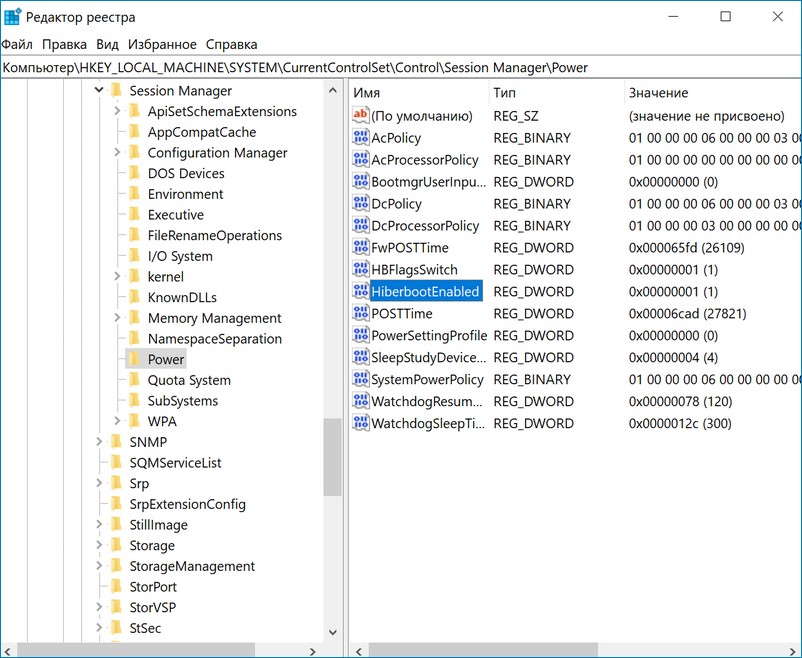
Появится окно Редактор реестра, тут слева — разделы, а справа — параметры (или ключи). Вам нужно перейти в этот раздел:
HKEY_LOCAL_MACHINE\SYSTEM\CurrentControlSet\Control\Session Manager\Power

Там будет параметр HiberbootEnabled, так вот значение его 1 — быстрая загрузка включена, 0 — соответственно отключена. Чтобы изменить — два раза по параметру и потом задаете значение:

Возможно кому-то через реестр будет намного удобнее, так что смотрите)))
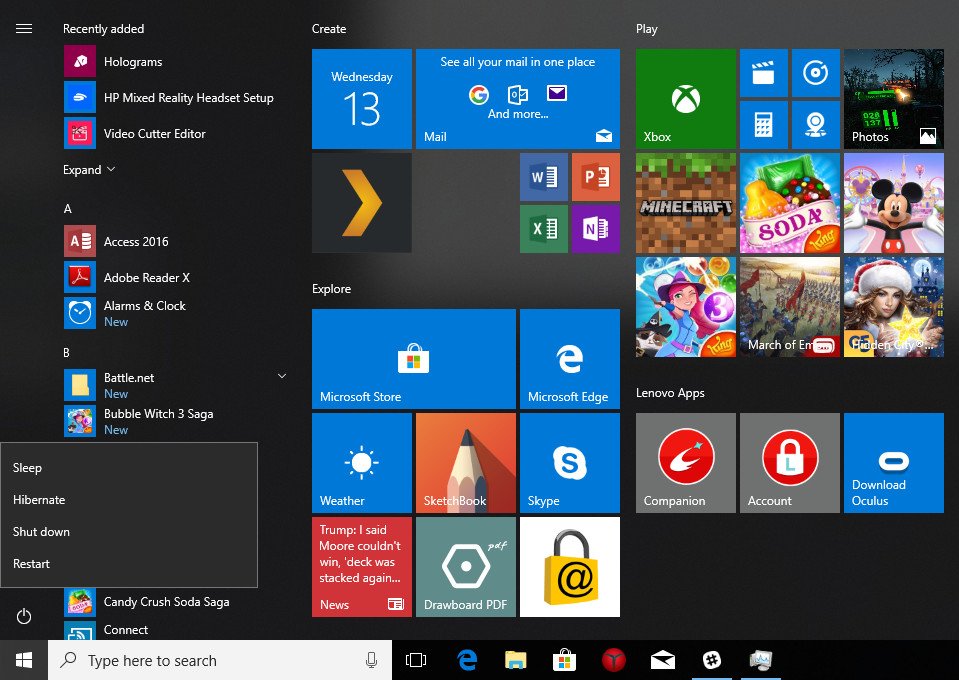
Если у вас нет желания выключать ПК так, чтобы потом был быстрый запуск — тогда в меню пуск Завершение работы нажимайте с зажатой кнопкой шифт.
На этом все, удачи вам и всего хорошего, до новых встреч господа!
На главную!
18.02.2020
- To disable Fast Startup on Windows 11, open Control Panel System > Hardware and Sound > Power Options > Choose what the power button does, click on “Change settings that are currently unavailable,” turn off “Fast Startup,” and click “Save.”
- Alternatively, open Command Prompt (admin) and run the “powercfg /h off” command to disable Windows 11 Fast Startup.
- It’s also possible to disable Fast Startup with the Registry or Group Policy Editor.
On Windows 11 (and 10), you can disable “Fast Startup” in at least two ways through the Control Panel Power Options settings or Command Prompt, and in this guide, you will learn how.
Fast Startup is a power-related feature that allows your computer to boot faster, combining hibernation and regular shutdown to accomplish quicker system startup. In other words, when the feature is enabled, the system saves the kernel, drivers, and system state to the hibernation (hiberfil.sys) file, and then the computer turns off, but without saving your desktop session and running apps. When the computer turns on, the system will load the contents from the hibernation file to resume more quickly.
Although it’s a useful feature to get to the desktop faster, Fast Startup may also cause problems. For instance, it can cause conflicts when installing updates, managing storage devices with encryption, or in dual-boot systems since it won’t allow you to access the drive from the other setup. In some systems, you may not even be able to access the motherboard’s firmware (UEFI or BIOS) if Fast Startup is enabled.
Whatever the problem might be, on Windows 11 or even on Windows 10, you can turn Fast Startup on or off through Control Panel or Command Prompt.
This guide will teach you how to enable or disable the Fast Startup feature on Windows 11 (or 10).
- Disable Fast Startup on Windows 11
- Disable Fast Startup on Windows 11 from Command Prompt
- Disable Fast Startup on Windows 11 from Group Policy
- Disable Fast Startup on Windows 11 from Registry
To disable Windows 11 “Fast Startup,” use these steps:
-
Open Start on Windows 11.
-
Search for Control Panel and click the top result to open the app.
-
Click on Hardware and Sound (in the “Category” view).
-
Click on Power Options.

-
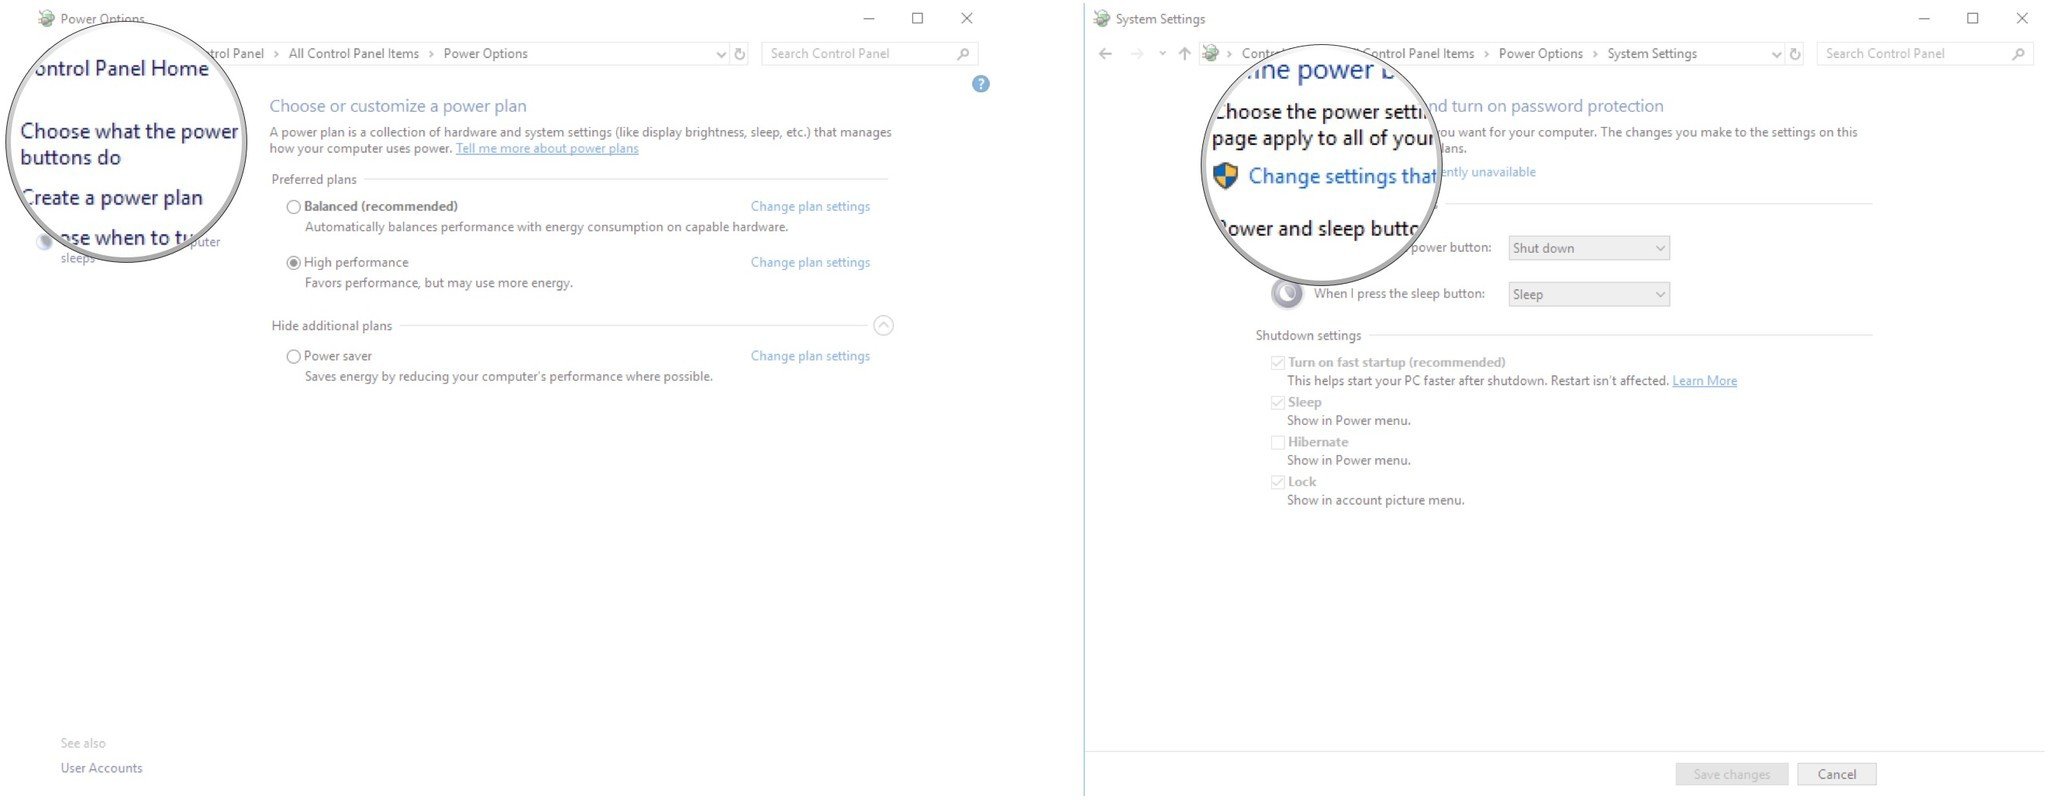
Click the “Choose what the power button does” option from the left pane.
-
Click the “Change settings that are currently unavailable” option.
-
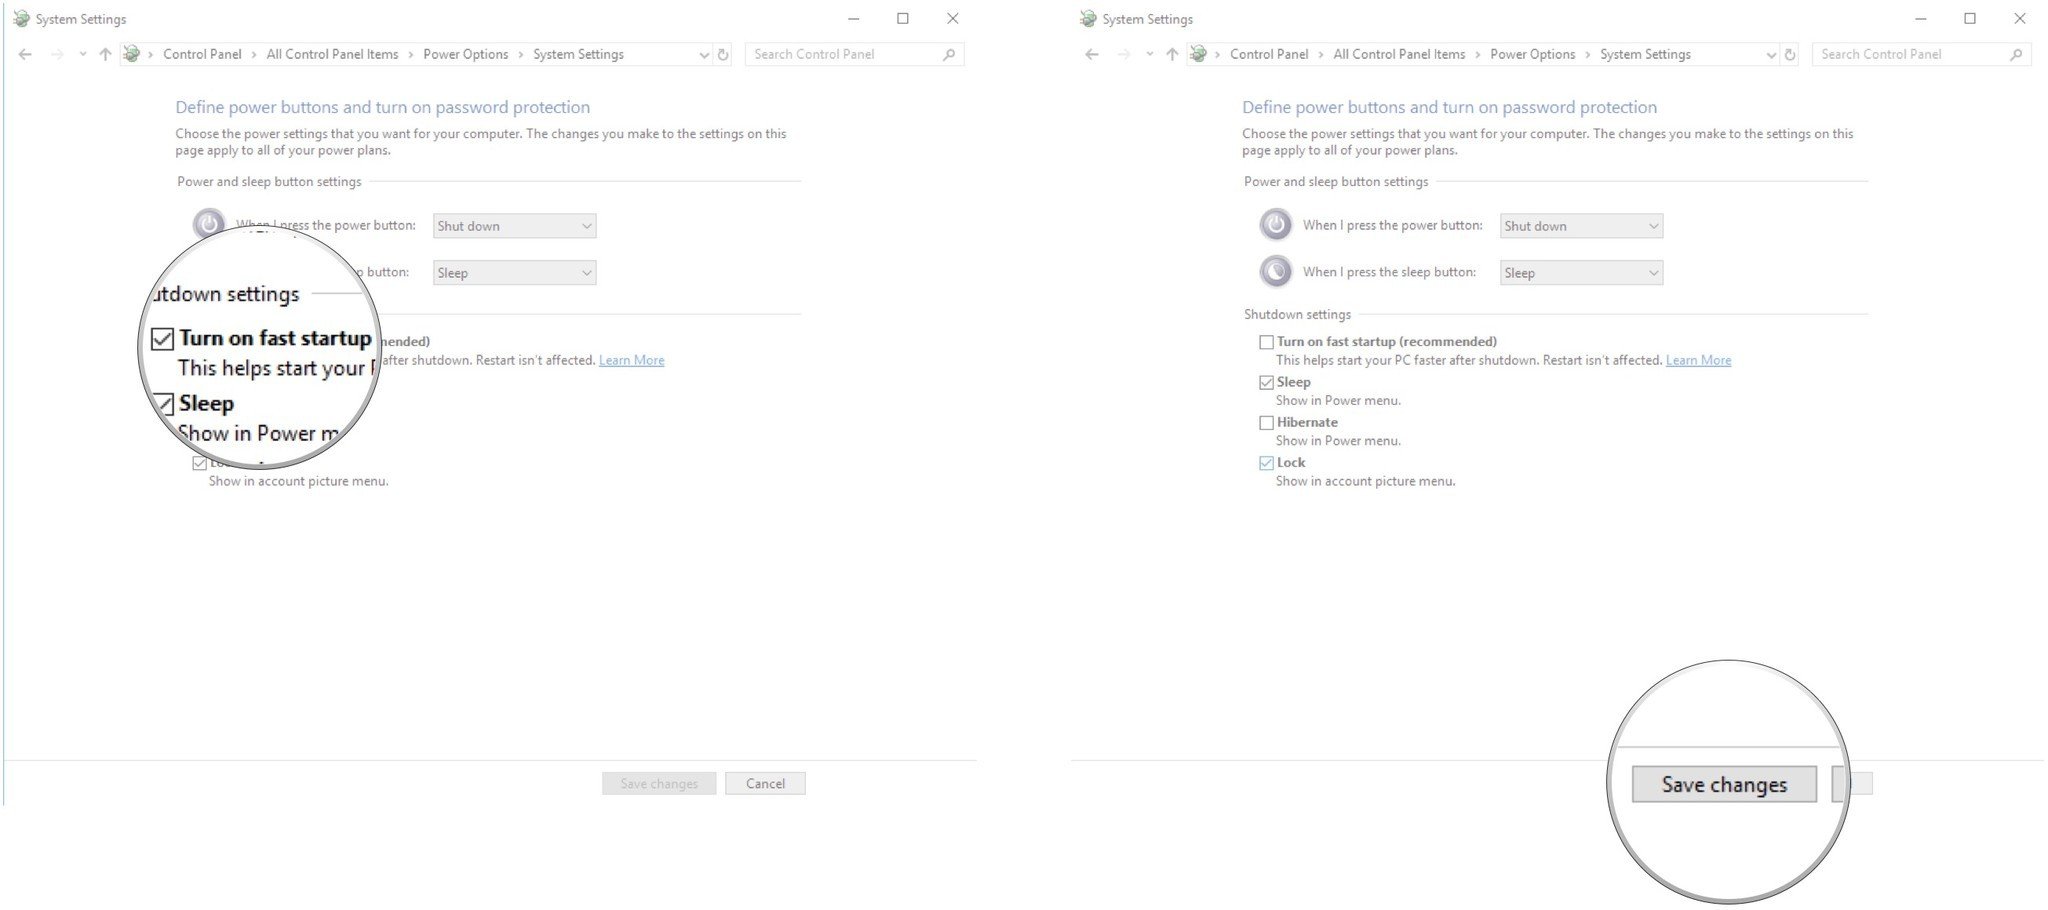
Uncheck the “Turn on fast startup” option to disable the feature on Windows 11.

-
(Optional) Check the “Turn on fast startup” option to enable the feature.


Once you complete the steps, the feature that allows the operating system to boot faster will be disabled.
Disable Fast Startup on Windows 11 from Command Prompt
To disable Fast Startup from Command Prompt on Windows 11, use these steps:
-
Open Start.
-
Search for Command Prompt (or PowerShell), right-click the top result and select the Run as administrator option.
-
Type the following command to disable Fast Startup on Windows 11 and press Enter:
powercfg /h off

-
(Optional) Type the following command to enable Fast Startup on Windows 11 and press Enter:
powercfg /h on

After you complete the steps, the command will instruct the system to disable Fast Startup on Windows 11 (or 10).
Disable Fast Startup on Windows 11 from Group Policy
To disable Fast Startup from Group Policy, use these steps:
-
Open Start.
-
Search for gpedit.msc, and click the top result to open the Local Group Policy Editor.
-
Browse the following path:
Computer Configuration > Administrative Templates > System > Shutdown
-
Double-click the “Require use of fast startup” policy.

-
Select the Disabled option.

-
Click the Apply button.
-
Click the OK button.


Once you complete the steps, the operating system will no longer use Faster Startup.
Disable Fast Startup on Windows 11 from Registry
To turn off Fast Startup from Registry on Windows 11, use these steps:
-
Open Start.
-
Search for regedit and click the top result to open the Registry.
-
Navigate to the following path:
HKEY_LOCAL_MACHINE\SYSTEM\CurrentControlSet\Control\Session Manager\Power
-
Right-click the HiberbootEnabled key and select the Modify option.
-
Change the value from 1 to 0 to disable Fast Startup.

-
Click the OK button.
-
Restart the computer.

After you complete the steps, the Fast Start feature will be disabled on the computer.
FAQ
Should I disable Fast Startup on Windows 11?
You should only disable Fast Start when it is causing problems with updates, conflicting with apps, or you plan to set up a dual-boot system. Otherwise, you should keep the feature enabled.
Is it OK to disable Fast Startup on Windows 11?
Yes, it’s OK to disable Fast Startup on Windows 11. However, you need to consider the performance impact without using the feature.
How do I permanently disable Fast Startup?
When disabling Fast Startup using any of the available methods, you will have to enable it again manually. The easiest way to turn off the feature is from the “Power Options” settings in Control Panel.
Привет, друзья! Если на вашем компьютере установлена ОС Windows 10, то вы наверняка знаете о функции мгновенного запуска. Она отвечает за ускорение ОС при включении устройства. На первый взгляд может показаться, что эта функция очень полезная и её обязательно нужно активировать. Но практика показывает, что многим пользователям ПК она доставляет неудобства и они стараются побыстрее её отключить. Постараемся разобраться, почему возникает необходимость в отключении быстрого запуска и как это правильно сделать.
Технология Fast Startup опирается на гибернацию, у этих процессов есть много общего. В Windows 10 эта функция включена по умолчанию. После выключения компьютера система сохраняет ядро и загруженные драйверы в файл гибернации hiberfil.sys. Когда устройство включается – ядро Windows 10 и драйверы снова загружаются в память. Благодаря включенной функции ускоренного старта системе намного проще выполнить включение, так как ей достаточно направить в оперативку команду загрузки системной картинки (она указывает на запуск ОС Windows 10). Включение и отключение компьютера происходит практически мгновенно. Эта функция очень пригодится людям, которые предпочитают выключать устройство после каждого использования и экономить время на его запуске.
На первый взгляд может показаться, что комп полностью выключается, но это не так. Устройство переходит в промежуточное состояние между отключением и спящим режимом. Но при спящем режиме после включения компьютера пользователю будут доступны отрытые папки, файлы, приложения и т.д. А при использовании функции быстрой загрузки откроется свежая ОС, в которой не будет никаких запущенных процессов и программ. Но ядро ОС при этом загружено и сеанс системы работает.
Быстрый запуск в Windows 10 активируется не всегда, а только при соблюдении сценария включения и выключения ПК. Если пользователь использовал пункт меню «Перезагрузить» − функция не срабатывает, а перезагрузка системы выполняется в том же порядке, как и в Windows 7.
 • Владелец компьютера хочет быть уверенным в том, что устройство действительно отключилось.
• Некоторые версии BIOS не поддерживают ускоренную загрузку. В таком случае у пользователя не получится войти в него.
• Выключение компа может происходить некорректно. Он будет зависать или снова включаться, начнёт многократно проверять жёсткий диск и выдавать ошибку.
• При использовании быстрого запуска устройство полностью не выключается, что создаёт существенные препятствия для шифрования образов дисков.
• Быстрая загрузка будет создавать проблемы в том случае, если на устройстве установлено два жёстких диска с разными ОС. Жёсткий диск будет блокироваться, поэтому загрузиться в другую ОС не получится.
• Из-за включенного быстрого запуска некоторые обновления Windows 10 устанавливаются некорректно.
• Файл, в который записываются данные, занимает много места на диске (приблизительно 75% от установленной оперативной памяти).
Способ № 1
• Нажать на клавиатуре комбинацию Win + R.
• В открывшемся окне необходимо ввести команду powercfg.cpl и нажать «ОК».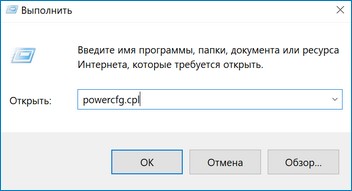 • Откроется системное окно, в левой части которого будут отображаться пункты меню. Среди них надо выбрать раздел «Действия кнопок питания» и кликнуть по нему мышкой.
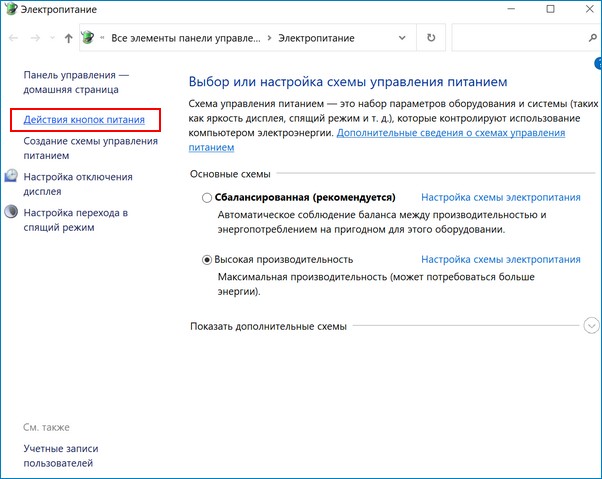 • Откроется раздел с настройками. Если в какие-либо из них нельзя внести изменения – пользователю нужно нажать на пункт «Изменение параметров, которые сейчас недоступны».
 • Теперь надо удалить галочку возле пункта «Включить быстрый запуск» и нажать на кнопку «Сохранить изменения».
 Если в рассматриваемом окне отсутствуют необходимые настройки, следует сделать следующее:
 • открыть окно командной строки от имени администратора («Командная строка» − «Запуск от имени администратора»);
• в командной строке ввести powercfg/hibernate on и затем нажать Enter;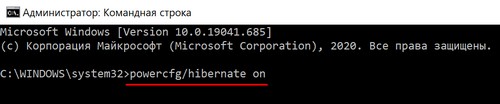 • после этого надо закрыть окно командной строки и заново выполнить приведённую выше инструкцию.
Способ № 2
Его суть заключается в выключении ускоренной загрузки ОС в реестре. Последовательность действий:
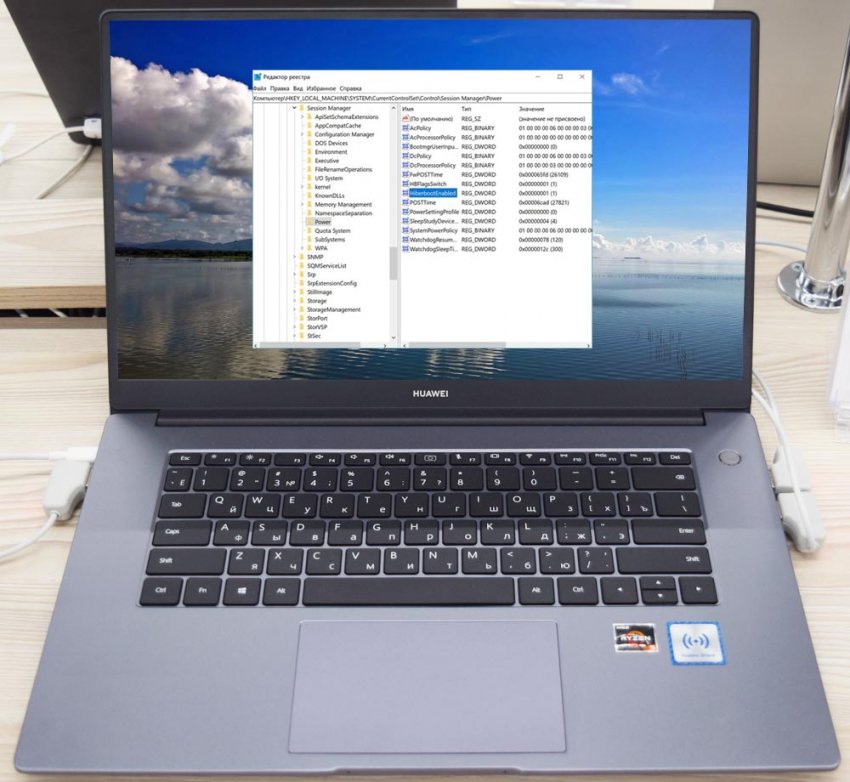
• в строке поиска на панели задач нужно ввести regedit, затем выбрать пункт «Редактор реестра»;
 • перейти в редактор и найти там ветку [HKEY LOCAL MACHINE \SYSTEM\CurrentControlSet\Control\Session Manager\Power] и открыть её;
• затем нужно найти реестровую запись HiberbootEnabled;
 • обратить внимание на последнюю цифру найденного параметра, если это единица – значит, ускоренная загрузка на компьютере активирована;
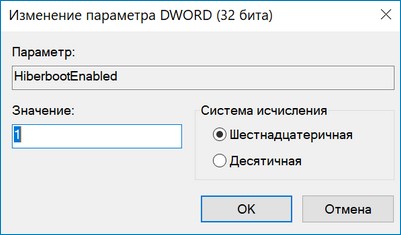
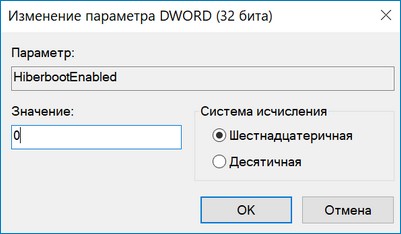 • для деактивации необходимо прямо в реестре удалить «1» и вместо неё поставить «0».
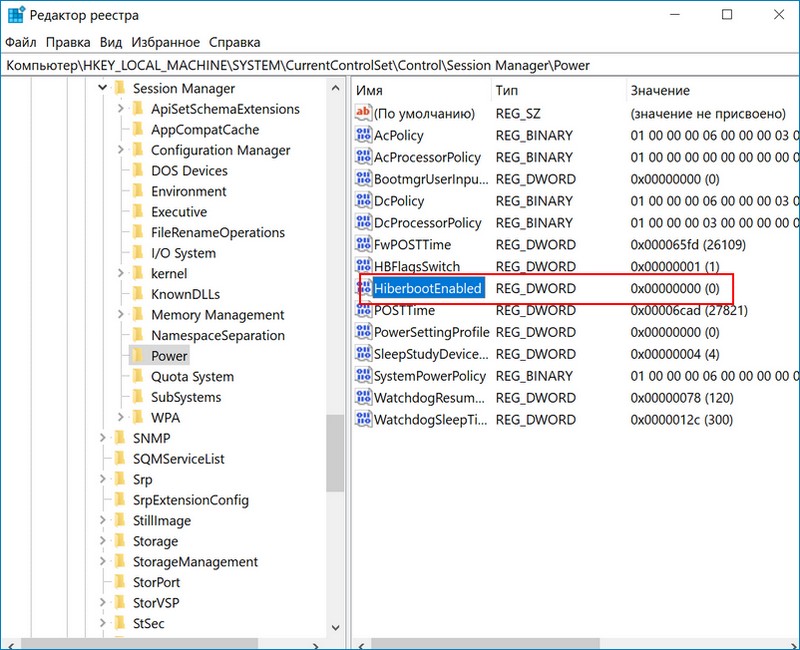 После выполнения всех действий надо перезагрузить компьютер, а затем снова включить.
Вместо послесловия
Быстрый запуск в Windows 10 – это очень полезный инструмент, но он нередко доставляет пользователям море хлопот. При необходимости эту функцию можно легко отключить, это под силу сделать даже людям, которые не обладают глубокими знаниями по ремонту компьютерной техники.

Fast startup is a feature first implemented in Windows 8 as Fast Boot and carried over to Windows 10 that allows your PC to start up more quickly, hence its name. While this handy feature can shave valuable seconds from your PC’s boot time by saving the operating system’s state to a hibernation file, Fast startup may not always work perfectly, prompting many to disable it when they get their hands on a new PC.
Let’s take a look at exactly how fast startup works, why you might want to enable or disable it, and how to do so.
What is fast startup?
Windows PCs typically operate in a number of Advanced Configuration and Power Interface (ACPI) power states. An S0 power state, for example, is when your PC is running and ready to respond to your input. There are a number of sleep states, including S1, S2, and S3, and there’s also a hybrid sleep state where hibernation is used in tandem with a sleep state.
Hibernation is considered an S4 power state. While hibernating, your PC will seem like it’s completely off, but there will be a saved hibernation file ready to be used to boot back to where you were during your last user session. Some power is usually still routed to peripherals so that you can, say, tap your keyboard and have the PC boot.
An S5 power state (soft off) is when your PC is shut down and rebooted completely. There’s no hibernation file and no saved user session. There is also a G3 power state, which is when your PC consumes absolutely no power and is completely turned off.
With fast startup enabled, choosing to shut down your PC might look like you’re completely shutting things down, but in reality, your PC is entering a mix between a shutdown and hibernation. A hibernation file is indeed used, although it is smaller than usual. Why? You’re logged off before the file is created, meaning your session is not recorded. The speed boost comes from the Windows kernel being saved on your hard drive and loaded when booting.
Is your PC truly shutting down?
While fast startup is a pretty harmless tool that can deliver a considerable startup speed boost, especially to PCs using hard-disk drives (HDD), some people prefer to have their PC truly shut down when they click the «Shut down» button on their PC.
In a post on the PC Master Race subreddit, a user pointed out that fast startup was re-enabled in a Windows 10 update following the release of the Fall Creators Update. Following the April 2018 Windows 10 update, Fast Startup was again re-enabled on my own PC, and it seems to have kicked in again following the May 2019 Update.
If you’re among the group of people who disable fast startup on their Windows 10 PC, you might want to recheck the settings to see if it’s still off.
Why disable fast startup?
Leaving fast startup enabled shouldn’t harm anything on your PC — it’s a feature built into Windows — but there are a few reasons why you might want to nevertheless disable it.
One of the major reasons is if you’re using Wake-on-LAN, which will likely have problems when your PC is shut down with fast startup enabled. Others would like to save the hard drive space that is usually taken up with the hibernation file, and Linux users will likely see complications with dual boot and virtualization. Furthermore, some users have even reported that power buttons on their keyboard will not work and fans in their PCs will continue spinning. These problems are by no means across the board, but they can prove to be frustrating. Finally, Windows 10 updates might not install properly if you have fast startup enabled.
And by not fully shutting down the system, fast startup can also interfere with some system updates that require a full shutdown. If you have fast startup enabled, a potential workaround would be to apply the updates by restarting, rather than shutting down, the system.
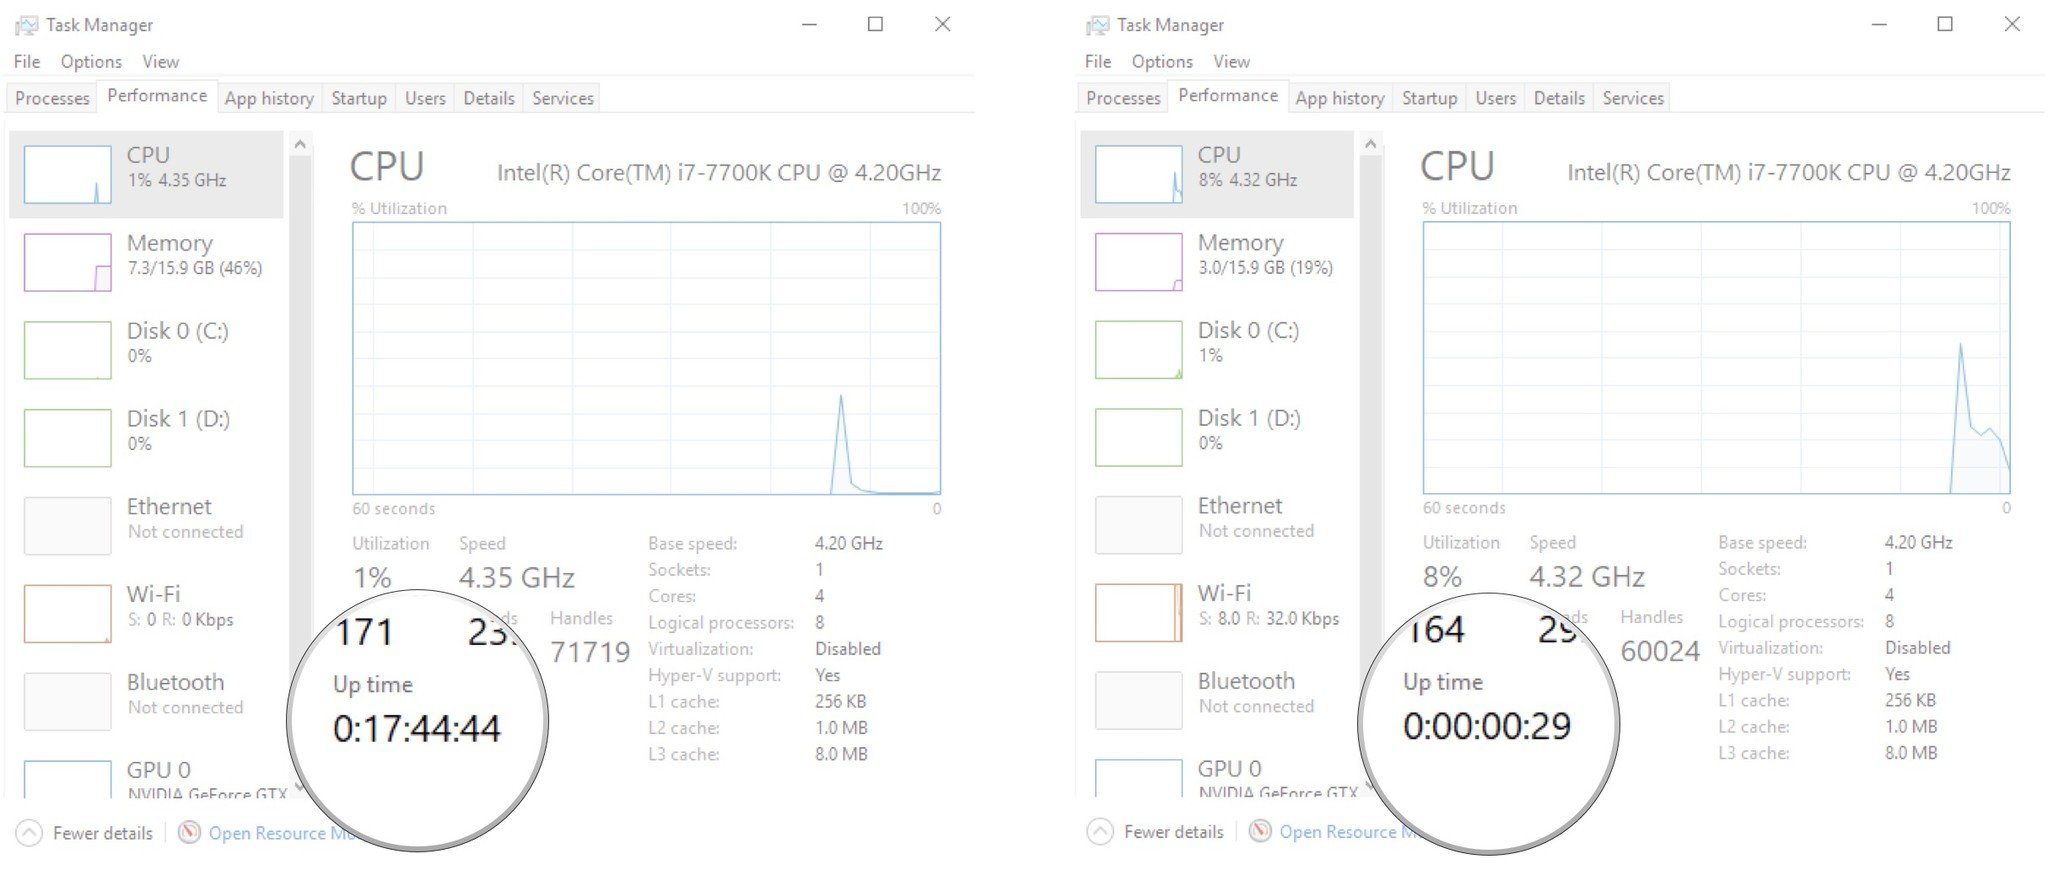
Your reason for disabling fast startup might simply have to do with wanting to see your PC truly shut down when you choose to shut down, especially when working with a speedy solid-state drive (SSD), or to have the processor (CPU) uptime reset after booting.
How to enable and disable fast startup on Windows 10
If you’d like to see how your PC performs without fast startup enabled, you can disable it in just a few steps:
- Right-click the Start button.
- Click Search.

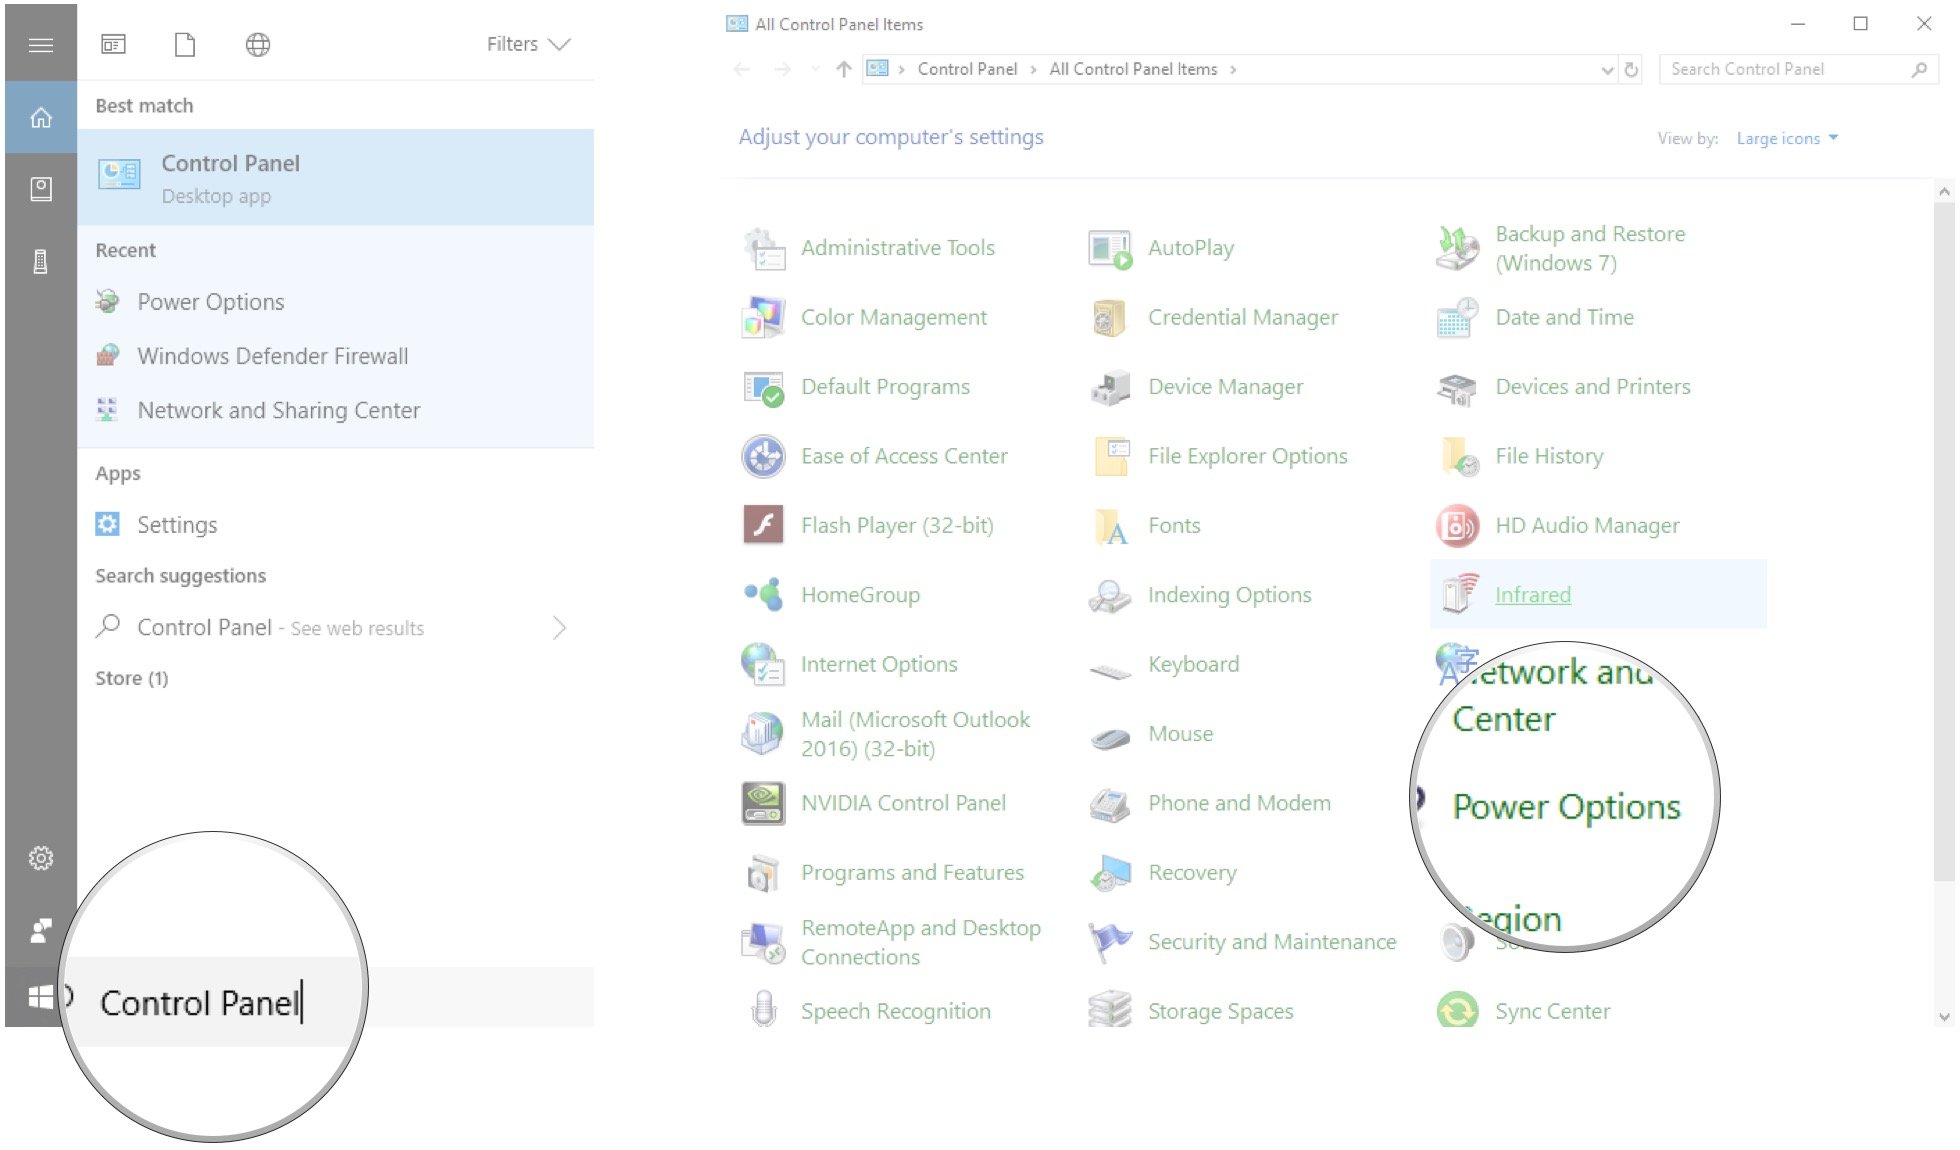
- Type Control Panel and hit Enter on your keyboard.
- Click Power Options.
- Click Choose what the power buttons do.
- Click Change settings that are currently unavailable.
- Click Turn on fast startup (recommended) so that the checkmark disappears.
- Click Save changes.
If you want to re-enable fast startup at any point, simply repeat the steps so a checkmark appears next to Turn on fast startup.
Changing the size of your hiberation file
Alternatively, if you’re more concerned with device storage and not how fast startup may impact your laptop’s performance, you can also change the size of the stored hibernation file. Typically, these files can expand to several gigabytes, and you can reclaim this storage by typing in a simple command prompt by limiting how much space is allocated to the file.
By default, the hibernation file size will vary from system to system, but it is configured to take up to 75% of the installed RAM of your system.
To change the hibernation file’s storage size to about half of that, you’ll want to enter the Command Prompt menu as an Admin by hitting the Windows+X keys.
Once the Command Prompt dialogue appears, type: powercfg /h /type reduced
That will give you a reduced hibernation file size. If you want to reverse your action, you can type powercfg /h /type full
All the latest news, reviews, and guides for Windows and Xbox diehards.
Cale Hunt is formerly a Senior Editor at Windows Central. He focuses mainly on laptop reviews, news, and accessory coverage. He’s been reviewing laptops and accessories full-time since 2016, with hundreds of reviews published for Windows Central. He is an avid PC gamer and multi-platform user, and spends most of his time either tinkering with or writing about tech.
FAQ
Эта информация была полезной?
Yes
No
- Приведенная выше информация может быть частично или полностью процитирована с внешних веб-сайтов или источников. Пожалуйста, обратитесь к информации на основе источника, который мы отметили. Пожалуйста, свяжитесь напрямую или спросите у источников, если есть какие-либо дополнительные вопросы, и обратите внимание, что ASUS не имеет отношения к данному контенту / услуге и не несет ответственности за него.
- Эта информация может не подходить для всех продуктов из той же категории / серии. Некоторые снимки экрана и операции могут отличаться от версий программного обеспечения.
- ASUS предоставляет вышеуказанную информацию только для справки. Если у вас есть какие-либо вопросы о содержании, пожалуйста, свяжитесь напрямую с поставщиком вышеуказанного продукта. Обратите внимание, что ASUS не несет ответственности за контент или услуги, предоставляемые вышеуказанным поставщиком продукта.