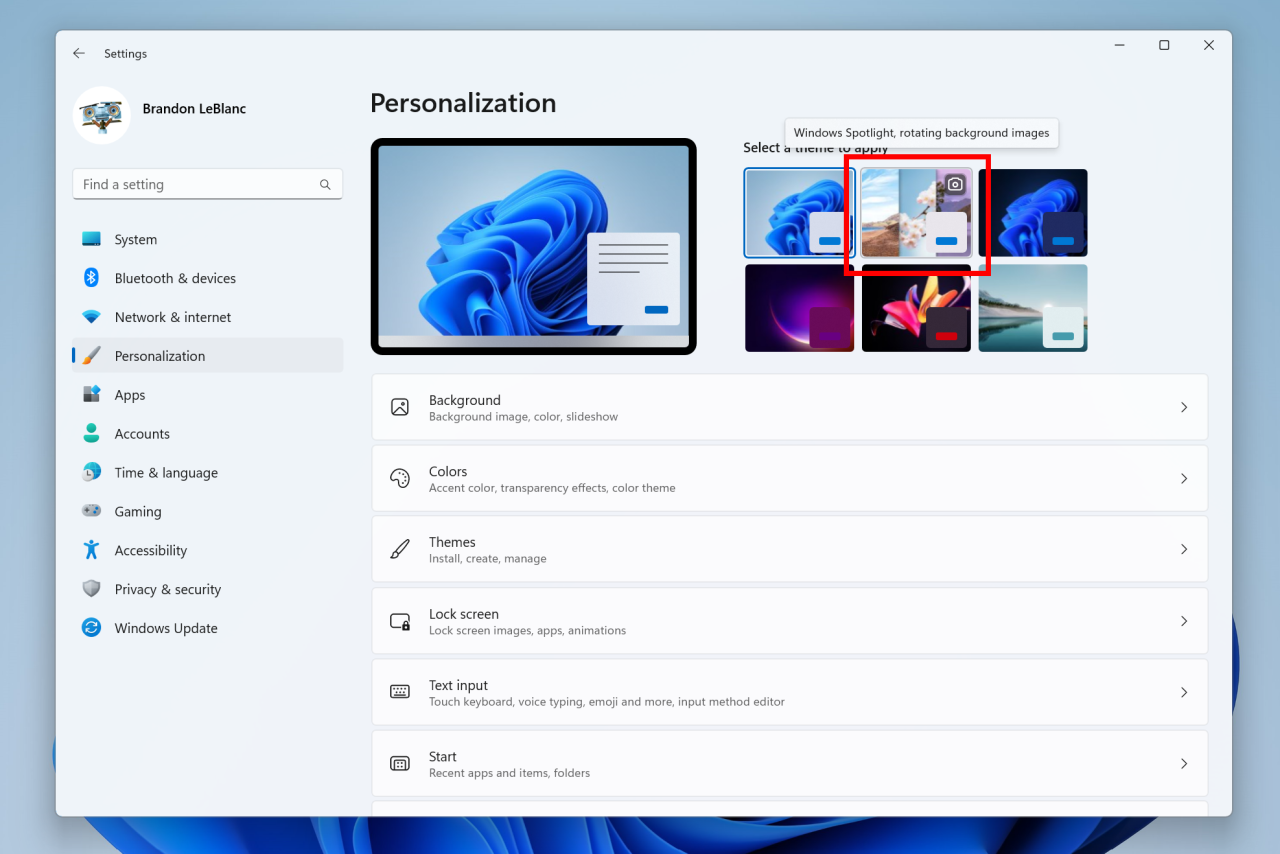
С недавнего времени функция Windows Spotlight в Windows 11 может автоматически обновлять не только изображение экрана блокировки, но и обои рабочего стола. Фактически это бесконечный источник красивых изображений, которые скачиваются с серверов Microsoft. Чтобы функция начала обновлять обои рабочего стола, необходимо зайти в раздел «Персонализация» -> «Фон» и выбрать «Windows: интересное» в пункте «Персонализируйте фон».
К счастью, Microsoft понимает, что это не очень удобный способ включения функции, поэтому начиная со сборки 25169 (канал Dev) в системе появилась новая тема под названием Windows Spotlight. Эта тема отображается на главной странице раздела «Персонализация», так что вам достаточно просто выбрать её из списка.
В своём блоге Microsoft не упоминала, что тема Windows Spotlight проходит A/B-тестирование, так что она должна быть доступна всем участникам программы Windows Insider. Если она у вас не появилась, то вы можете воспользоваться утилитой ViVeTool и принудительно включить тему Windows Spotlight на своём устройстве.
Инструкция
- Скачайте утилиту ViVeTool по этой ссылке. Это новая версия ViveTool 0.3.1, подробности о которой мы рассказали в нашем материале.
- Распакуйте скачанный архив в любое место на вашем компьютере (например, можно создать папку ViVeTool в корне диска C и поместить файлы туда).
- Откройте командную строку от имени администратора (например, набрав CMD в поиске и выбрав соответствующий пункт).
- В командной строке перейдите в папку с ViVeTool с помощью команды cd /d <путь к папке>, после чего нажмите Enter. Например:
cd /d "C:\ViVeTool" - Введите команду
vivetool /enable /id:39258685 /store:bothи нажмите Enter. - Убедитесь, что в командной строке появилось сообщение «Successfully set feature configuration»
- Перезагружать компьютер не обязательно, так как мы воспользовались параметром
/store:both.
Темы для Windows 11 — визуальные решения, способные изменить оформление интерфейса операционной системы. Дизайн, который выбираете Вы, а не компания Microsoft. Вместе с красивыми обоями для рабочего стола, Вы получите новую персонализацию окон: темную, светлую, в разных дизайнерских направлениях (Flat, Fluent, Material) или стилях других OC — Mac OS, Linux, Ubuntu. В нашем каталоге найдутся готовые паки, куда включены дополнительные ресурсы (иконки, курсоры, звуки, скины) и архивы с содержанием исключительно msstyles и theme-файлов. Темы не влияют на работу игр — они заменяют стандартную оболочку explorer, а значит украшение не скажется на производительности компьютера.
С чего начать?
1. Подберите идеальный стиль — скачайте в каталоге лучшие по Вашему мнению работы.
2. Подготовьтесь к установке — прочитайте инструкцию, если Вы впервые сталкиваетесь с оформлением. Процесс не отличается от кастомизации Windows 10.
3. Пропатчите систему UltraUXThemePatcher, а затем распакуйте и примените тему.
Совместимость с Windows 10
Все темы для Windows 10 21H2-22H2 подходят для Windows 11. В некоторых случаях корректно работают также и файлы для более ранних билдов. Помимо этого, присутствует обратная совместимость — многие визуальные стили 11 отлично подходят для 10.
You have various options for desktop customization on Windows 11. Features like a slideshow and using Spotlight images as desktop background are impressive, but they come nowhere close to macOS’s Dynamic Desktop feature.
If you don’t know, the Dynamic Desktop is a macOS exclusive feature that cycles through multiple wallpapers at different times of the day. This cycle of wallpapers creates an effect of the day/night for your desktop.
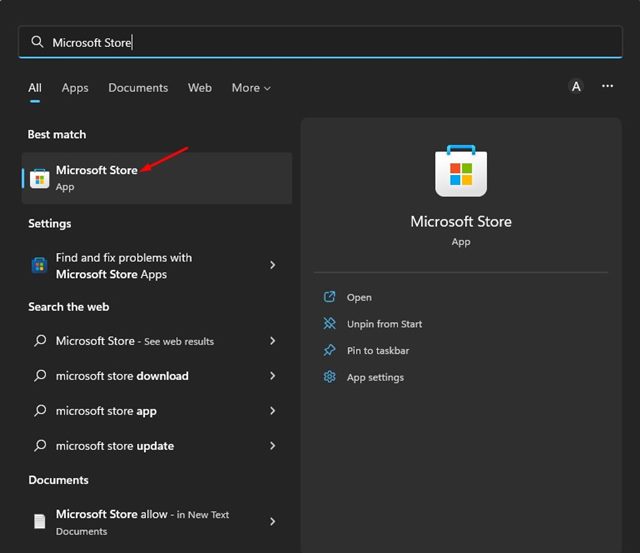
While Windows 11 doesn’t have the Dynamic Desktop feature, you can install the third-party WinDynamicDesktop app to get the same feature. Below, we have shared a step-by-step guide on how to get Dynamic Wallpapers on Windows 11. Let’s get started.
1. First, click on the Windows 11 search and type in Microsoft Store. Next, open the Microsoft Store from the list.
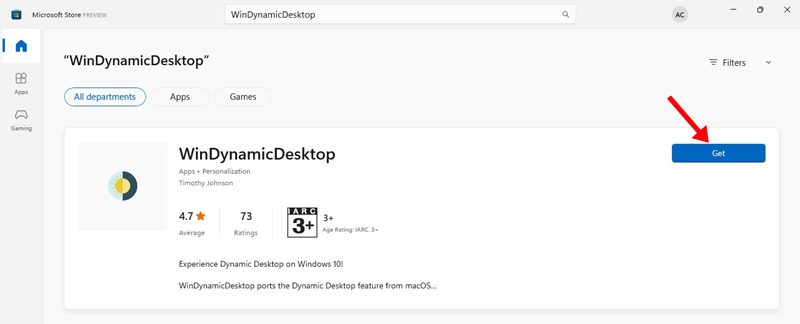
2. On the Microsoft Store, search for WinDynamicDesktop. Next, open the WinDynamicDesktop from the list of matching results and click on the Get button.
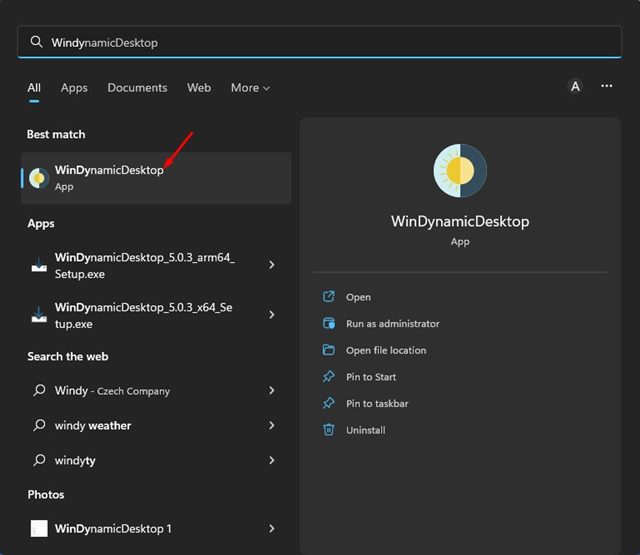
3. Now wait until the WinDynamicDesktop installs on your system. Once installed, open the app from Windows 11’s Start Menu.
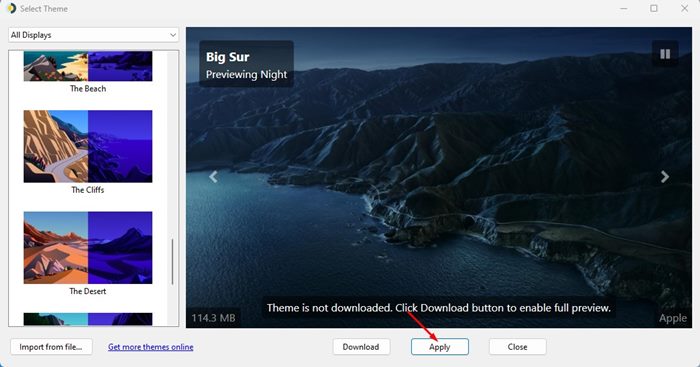
4. Now, you will see a screen like the one below. Here, WinDynamicDesktop will present a few dynamic themes you can apply to your Windows 11.
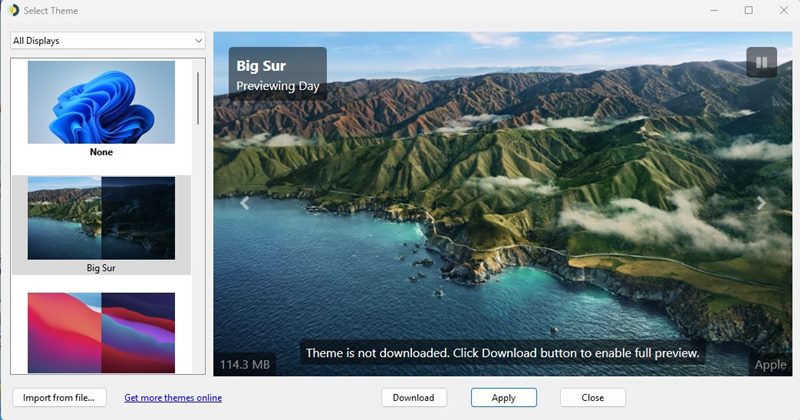
5. To apply the theme, click on the theme on the left pane and then click on the Apply button.
That’s it! This will immediately apply the selected dynamic theme to your desktop screen on Windows 11.
How to Import Dynamic Theme on WinDynamicDesktop
WinDynamicDesktop even allows you to import dynamic themes. You need to grab the .heic file of the theme you want to apply and import it into the WinDynamicDesktop software. You can find many dynamic wallpapers and their .heic files from sites like WDD Themes and Dynamic Wallpaper Club.
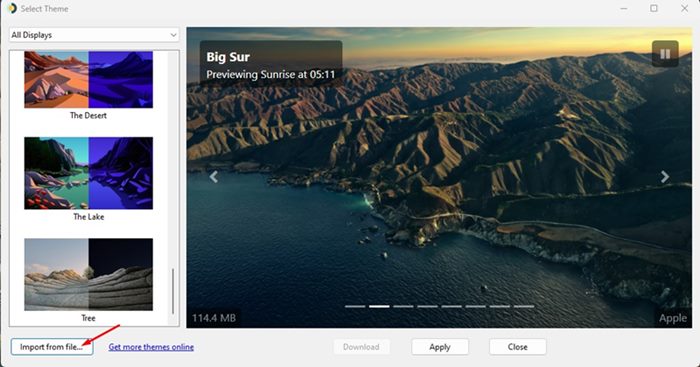
Once you get the theme file, you need to open WinDynamicDesktop and click on the Import from file button, as shown below.
Other ways to customize Windows 11
If you are unsatisfied with the Dynamic Wallpapers, you can apply live wallpapers on your Windows 11. We have already shared an article listing a few best live wallpaper apps for Windows 11. Apart from these, you can also use other third-party apps to customize Windows 11.
So, this guide is all about how to get macOS-type dynamic wallpapers on Windows 11. You can use other alternatives, but WinDynamicDesktop is the best and available for free. And you can follow the same steps to apply dynamic wallpaper on your Windows 10 pc.
05.09.2023 12:30
6318
Комментарии (128)
Когда у меня гости сидят за моим компьютером, то обычно обращают внимание на то, что на десктопе компьютера раз в минуту меняются очень красивые обои — эдакая фоторамка получается. Ну и если учесть, что в качестве монитора у меня используется OLED-телевизор 55″, то смотрится это все очень и очень эффектно.
И я каждый раз удивляюсь, когда меня спрашивают: а это что — программа такая специальная? Как называется?
Да Windows 11 она называется, это штатная возможность операционной системы. Кто хочет себе включить такое же — заходите в «Параметры — Персонализация — Фон«.
Там выбираете «Слайд-шоу», в «Обзоре» указываете папку, где лежат всякие красивые фото, ниже устанавливаете частоту смены изображений. К сожалению, после 1 мин идет сразу 10 минут и, на мой взгляд, тут не хватает еще 2, 3 и 5 минут для разнообразия.

Где взять красивые картинки нужных вам жанров? Ну, например, вот здесь большая коллекция красивых обоев самых разных жанров, разрешенных для бесплатного некоммерческого использования (вы также можете поддержать авторов особо понравившихся снимков).
Также у меня есть архив с моими собственными фотографиями природы, который можно скачать здесь, и эти фото спокойно использовать для личного применения.

Windows Auto Dark Mode
![]()
Switches between the dark and light theme of Windows at scheduled times.
Overview • Features • Download • Release Notes • Wiki • Telegram Group
Overview

Tired of looking at dark content while the sun is shining brightly? But at night everything is suddenly too bright? Auto Dark Mode is the solution for you!
Android, iOS and MacOS already offer the possibility of changing the system design based on the time of the day. We’re bringing this feature to Windows on a larger scale.
Auto Dark Mode helps you to be more productive. Because you shouldn’t care about changing Windows settings several times a day. As soon as the sun goes down, we’ll take care of your eyes.
Because a simple design change would be too boring, Auto Dark Mode is packed with useful functions. For example, we can also change your desktop wallpaper or run custom scripts.
Features

- Compatible with Windows 10 and Windows 11.
- Theme switch based on sunrise and sunset.
- Desktop wallpaper switch.
- Windows .Theme switch, to also change Accent Color, Slideshow and Mouse Cursor.
- Support for accent color on the Taskbar and other system elements.
- Office theme switch.
- Auto Dark Mode can enable the grayscale color filter of Windows.
- Suitable for gamers: doesn’t switch while playing games to avoid stuttering.
- Run custom scripts.
- Automatic Updates.
- Lightweight with clean uninstall. No admin rights needed.
Download and installing
Download from Microsoft Store
If you’re running the new Microsoft Store, you will find Auto Dark Mode on it. Tested and verified by the Microsoft Store team.

Download directly from GitHub
Click here to download the newest version of Auto Dark Mode!
More download options
Click to expand
Via WinGet
Download Auto Dark Mode from WinGet.
winget install --id Armin2208.WindowsAutoNightMode
Via Chocolatey
Download Auto Dark Mode from Chocolatey (unofficial entry).
choco install auto-dark-mode
Via Scoop
Download Auto Dark Mode from Scoop (unofficial entry).
- Via portable
scoop bucket add dorado https://github.com/chawyehsu/dorado
scoop install autodarkmode
- Via non-portable
scoop bucket add nonportable
scoop install auto-dark-mode-np
Installation
Installing is pretty easy, as you only need to run the setup file provided as .exe. If you want to deploy Auto Dark Mode on multiple machines, you can use the argument /allusers /verysilent to skip the installer window.
Sometimes Windows or a web browser will show a security notice while downloading Auto Dark Mode. This is due to our lack of a developer license. You can ignore these messages.
More information
You still have open questions? Check out our wiki!