
Диспетчер устройств – это важный инструмент в операционной системе Windows, позволяющий уточнять информацию об установленных устройствах и драйверах в режиме реального времени и в интуитивно понятном формате. Кроме того, Диспетчер устройств позволяет контролировать все основные компоненты ПК с помощью опций их включения и отключения, а также возможности обновления драйверов. То есть Диспетчер устройств – это действительно полезная утилита, но не все знают, как зайти в Диспетчер устройств. Поэтому в этой статье мы расскажем, как открыть Диспетчер устройств в Windows 10 разными способами. Заодно рассмотрим основные функции данного инструмента.
Содержание
- Как открыть меню Диспетчер устройств в Windows 10?
- Каковы основные функции Диспетчера устройств?
- Заключение
Как открыть меню Диспетчер устройств в Windows 10?
Существует несколько способов открыть Диспетчер устройств в Windows 10. В этом разделе мы рассмотрим наиболее распространенные из них.
1. Открытие Диспетчера устройств через меню «Пуск»
- Нажмите на кнопку «Пуск» в левом нижнем углу экрана или нажмите клавишу Windows на клавиатуре.
- Введите «Диспетчер устройств» в строке поиска и выберите соответствующий результат в выпадающем списке.
Если в меню «Пуск» нет поиска, воспользуйтесь меню поиска (значок лупы) на панели справа от меню «Пуск».
2. Открытие Диспетчера устройств через панель управления
- Откройте панель управления, нажав правой кнопкой мыши на кнопке «Пуск» и выбрав «Панель управления» в контекстном меню.
- В панели управления выберите «Система и безопасность».
- Затем выберите «Система» и перейдите в раздел «Диспетчер устройств».
В некоторых версиях Windows 10 зайти в Диспетчер устройств можно чуть иначе – нажав правой кнопкой мыши на «Пуск», а затем последовательно выбрав пункты «Система» и «Диспетчер устройств» (иногда пункт «Диспетчер устройств» даже доступен сразу).
3. Открытие Диспетчера устройств через командную строку или «Выполнить»
- Откройте командную строку, нажав сочетание клавиш Windows + R, затем введите «cmd» и нажмите Enter.
- В командной строке введите «devmgmt.msc» и нажмите Enter. Диспетчер устройств откроется в новом окне.

Каковы основные функции Диспетчера устройств?
Диспетчер устройств позволяет выполнять различные задачи, связанные с управлением аппаратными компонентами компьютера. В этом разделе мы рассмотрим основные функции Диспетчера устройств и то, как ими пользоваться.
1. Просмотр информации об устройствах и их драйверах
Диспетчер устройств отображает список всех установленных на компьютере устройств, разделенных по категориям. Чтобы просмотреть информацию об устройстве и его драйверах, выполните следующие действия:
- Раскройте категорию устройства, нажав на стрелку слева от названия.
- Щелкните правой кнопкой мыши на устройстве, о котором хотите получить информацию, и выберите «Свойства».
- Во вкладке «Драйвер» вы можете увидеть информацию о драйвере устройства, такую как дата выпуска, версия и производитель.
2. Обновление драйверов устройств
Если устройство работает некорректно или имеет устаревший драйвер, вы можете обновить его драйвер с помощью Диспетчера устройств. Следуйте этим шагам:
- Щелкните правой кнопкой мыши на устройстве с устаревшим драйвером и выберите «Обновить драйвер».
- В появившемся окне выберите функцию автоматического поиска. Windows будет искать и устанавливать последние драйверы для вашего устройства.
3. Удаление и переустановка драйверов устройств
В некоторых случаях, проблемы с устройством могут быть связаны с поврежденными или некорректно установленными драйверами. Вы можете удалить и переустановить драйверы устройства, следуя этим шагам:
- Щелкните правой кнопкой мыши на устройстве с проблемным драйвером и выберите «Удалить «. Подтвердите действие.
- Перезагрузите компьютер. После перезагрузки Windows автоматически установит драйвер устройства заново. Если автоматическая установка не произойдет – установите драйвер из официального источника.
4. Отключение и включение устройств
Иногда возникает необходимость отключить определенное устройство, чтобы произвести диагностику или выполнить другие задачи. Диспетчер устройств позволяет временно отключать устройства без их полного удаления.
Для отключения устройства щелкните правой кнопкой мыши на устройстве, которое вы хотите отключить, выберите «Отключить » и подтвердите действие.
Чтобы включить отключенное устройство, щелкните правой кнопкой мыши на отключенном устройстве и выберите «Включить «. Устройство будет включено и готово к использованию.

Заключение
Диспетчер устройств является мощным инструментом для управления аппаратным обеспечением компьютера в операционной системе Windows 10. В этой статье мы рассмотрели различные способы открытия Диспетчера устройств и основные функции данного инструмента. Овладев этими знаниями, вы сможете эффективно контролировать работу своего компьютера и устранять возникающие проблемы с устройствами и драйверами. Это позволит вам обеспечить стабильную и надежную работу системы, а также оптимизировать ее производительность.
Используйте полученные знания для уверенного и безопасного управления аппаратными компонентами вашего компьютера. В случае возникновения проблем с оборудованием или драйверами обращайтесь к Диспетчеру устройств для диагностики и устранения неполадок.
Теперь вы знаете, как открыть Диспетчер устройств в Windows 10 и как использовать его основные функции для решения проблем и оптимизации работы вашего компьютера. Удачи вам в дальнейшем использовании Windows 10 и освоении всех ее возможностей!
Today, in this digital world, having a PC is a necessity for getting things done. Nevertheless, after prolonged use, our computers occasionally appear to experience malfunctions in the form of crashes. This may seem very annoying, especially if you are in the middle of an urgent task.
The most effective way to manage all of the Windows drivers is by using Device Manager, a built-in Windows driver troubleshooting tool for your Windows computer. Typically, system crashes and hangs are indicative of hardware driver issues. Device Manager can also be used to resolve issues with your graphics card and audio.
You can learn how to access and use the device manager by reading the article below.
What is a Device Manager?
Device Manager, as its name implies, is the most important tool for checking for hardware modifications on your computer. This is crucial for controlling a device’s driver management. The Device Manager becomes useful when you need to troubleshoot the hardware components and drivers on your PC.
However, if you are wondering where you can find this tool, then worry not, as nearly all Windows operating systems, even some of the oldest ones, come with the Device Manager.
Access Device Manager
The simplest way to access Device Manager on any version of Windows computer is through the Run command prompt box. The below steps will guide you regarding the same:
- Hold the Windows key+R key together and press them.
- Input “devmgmt.msc” in the input box, and then press Enter.
- On Windows 7, you can also use the following path to access the Device Manager: Go to Control Panel>Hardware and Sound>Hardware and Printers>Device Manager.
- On Windows 8 and 10, right-click on the Start menu and choose Device Manager.
Also know: How to Fix Camera Missing in Device Manager Issue on Windows PC
View the Installed Hardware
All kinds of system information can usually be found in the Device Manager, starting with the model number of the video card, hard drive, and, even the DVD drive.
- All the hardware installed in your computer can be viewed in the Device Manager categorically.
- To view the hidden hardware, you can click the View tab and choose the “Show hidden devices” option. You can see all the low-level system drivers, drivers from third-party software installations, and many “non-plug and play drivers.”
- Locating Ghosted Devices – This can be done in case of USB devices not connected to your computer but also don’t appear on the list. This is only possible on the Windows version that was released before Windows 8 version. You can run a command in the Command Prompt window as follows:
set devmgr_show_nonpresent_devices=1” start devmgmt.msc The Device Manager will then display all hidden devices that can be removed.
Find all the hardware devices not functioning properly
Hardware devices that are not properly functioning due to driver problems can be spotted with the help of a yellow triangle with an exclamation mark embossed upon the device icon.
- Once you click the right button to go to the Properties dialog, you can see more information about the fault in the device status box.
- If there is a driver issue, then check the driver details and also replace the faulty or outdated driver with an updated version of the driver by installing it from the Driver tab of the Properties dialog.
- Additionally, you can also use Driver Updater tools to update your system’s drivers.
- Using Device Manager Scan for hardware changes: After scanning for hardware changes, an unresponsive USB device connected to a USB port might be recognized, so that the device may be used.
-> In the Device Manager, click on the Computer and then click on Action.
-> Further, click on Scan to detect hardware changes.
-> Investigate to see if the USB device is functioning or not.
Also know: How to Error Code 45 in Device Manager
Disable a device using Device Manager?
If you don’t want to use a certain hardware device or wish to remove some redundant hardware devices, then you can do so by using the Device Manager. When a device is disabled, it is only applicable to the level of Windows.
- For most hardware devices, you can click right on the device name and select the “Disable device” option to stop the functioning of the device.
- If you want to disable hardware, which is listed under the “Non-Plug and Play Drivers” section, then expand the view of that section first.
- Right-click on the selected driver that you wish to disable.
- Choose the Properties option.
- Under the Driver tab, in the Startup section, choose the “Disabled” option from the dropdown of the Startup Type. Select “OK” to set it accordingly.
Manage Windows Device Drivers
All the information and settings pertaining to a specific hardware device can be found in the properties window of that device. You can follow the below path to get to the settings of the device:
Right-click on the device name>Properties>Driver tab.
The entire information about the driver can be found here, along with the control buttons.
- Driver details – You can see the exact location of the driver files in the system.
- Update Driver – You can manually choose an updated version of an obsolete or corrupted driver by searching for it online from the driver’s tab.
- Roll Back Driver – If you want to downgrade the driver version, in case you encounter issues after upgrading it, then you can easily do so with the help of the Roll Back Driver radio button. However, if this button appears to be grayed out, then the driver hasn’t been updated correctly, or there is no roll-back version available.
- Disable – You can do this to stop a device from functioning with the help of the Disable button and re-enable it if and when needed.
- Uninstall – You can uninstall a driver only using the Uninstall button only if you want to purge some of the drivers and reset the device from the initial point again. However, the uninstallation may not happen completely as it may fail to remove all the drivers. Hence, it is better to use the Control Panel to uninstall a device if it needs to be completely removed.
Conclusion
We hope that you have understood what a device manager is and how it works. The tool not only displays every piece of installed hardware that is active on your system, but it also makes it possible to look up the specifics of each hardware driver.
Additionally, with the help of Device Manager, it is possible to update outdated drivers or disable those that are redundant. When using a Windows computer, Device Manager comes in handy if you know how to use it completely.
The Device Manager can also notify you of resource conflicts. But nowadays, resource conflicts are relatively rare.
Device Manager is a Control Panel applet in Microsoft Windows operating systems. It allows users to view and control the hardware attached to the computer. When a piece of hardware is not working, the offending hardware is highlighted for the user to deal with. The list of hardware can be sorted by various criteria.[1]
For each device, users can:
- Supply device drivers in accordance with the Windows Driver Model
- Enable or disable devices
- Tell Windows to ignore malfunctioning devices
- View other technical properties
Device Manager was introduced with Windows 95 and later added to Windows 2000. In NT-based versions, it is included as a Microsoft Management Console snap-in.
Types of icons[]
Disabled device[]
A disabled device has either been manually disabled by a user or by some way of error. In Windows 95 through XP, this is denoted by a red X. In Windows Vista and Windows 7, this was replaced by a grey downward pointing arrow in the lower right-hand corner of the device’s icon.
Hardware not working properly[]
There are many reasons why hardware may not work properly. If Windows recognizes a problem with a device, it is denoted by a black exclamation point (!) on a yellow triangle in the lower right-hand corner of the device’s icon.
Hardware not recognized[]
Hardware may not be recognized if it is not installed properly or not compatible with the system. This is denoted by a yellow question mark in place of the device’s icon.
Device manually selected[]
A blue «i» on a white field in the lower right-hand corner of a Device’s icon indicates that the Use automatic settings feature is not selected for the device and that the resource was manually selected. Note that this does not indicate a problem or disabled state.
Error codes[]
Device Manager error codes are numerical codes, each accompanied by an error message, which help users determine what kind of issue Windows is having with a piece of hardware.[2][3]
| Code | Meaning |
|---|---|
| 1 | This device has not been configured correctly. |
| 3 | The driver for this device may be corrupted, or the system may be running low on memory. |
| 10 | This device cannot start. |
| 12 | Not enough resources for the device. |
| 14 | The computer must be restarted for the device to work properly. |
| 16 | Windows can’t identify all the resources this device requires. |
| 18 | Drivers for this device must be reinstalled. |
| 19 | Configuration information in Windows registry is damaged or corrupted for this device. |
| 21 | Windows is removing this device. |
| 22 | This device is disabled. |
| 24 | This device is not present, does not have all its drivers installed, or is not working properly. |
| 28 | The drivers for this device are not installed. |
| 29 | The firmware of the device did not give it the required resources. |
| 31 | Windows cannot load the drivers required for this device. |
| 32 | A driver for this device has been disabled. |
| 33 | Windows cannot determine which resources are required for this device. |
| 34 | Windows cannot determine the settings for this device. |
| 35 | The computer’s firmware does not include enough information to properly configure and use this device. |
| 36 | This device is requesting a PCI interrupt but is configured for an ISA interrupt (or vice versa). |
| 37 | Windows failed to initialize the device driver for this hardware. |
| 38 | Windows cannot run the driver for this device because a previous instance of the driver exists. |
| 39 | Windows cannot load the driver for this device. The driver may be corrupted or missing. |
| 40 | Windows cannot access this hardware because its service key information in the registry is missing or corrupted. |
| 41 | Windows successfully loaded the device driver for this hardware but cannot find the hardware device. |
| 42 | Windows cannot run the driver for this device because there is a duplicate device already running in the system. |
| 43 | Windows has stopped this device because it has reported problems. |
| 44 | An application or service has shut down this hardware device. |
| 45 | This hardware device is not connected to the computer. |
| 46 | Windows cannot gain access to this hardware device because the operating system is in the process of shutting down. |
| 47 | Windows cannot use this device because it has been prepared for safe removal, but it has not been removed from the computer. |
| 48 | The driver for this device has been blocked from starting because it is known to have problems with Windows. |
| 49 | Windows cannot start new hardware devices because the system hive is too large and exceeds the Registry Size Limit. |
| 52 | Windows cannot verify the digital signature for the drivers required for this device. A recent hardware or software change might have installed a file that is signed incorrectly or damaged. |
Driverquery command[]
| Developer(s) | Microsoft |
|---|---|
| Operating system | Microsoft Windows |
| Type | Command |
| License | Proprietary commercial software |
The driverquery[4] command-line program generates lists of installed devices and drivers, similar to the Device Manager’s output, which the user may view on-screen or redirect to a file. This is useful for note-taking and for reporting problems to remote third parties such as technical support personnel. The program has switches to control the output detail and format, including an /fo switch with csv parameter to generate output in comma-separated values format, suitable for importing into a spreadsheet application such as Microsoft Excel.[5]
From Wikipedia, the free encyclopedia

Microsoft Management Console in Windows 11 with Device Manager snap-in |
|
| Developer(s) | Microsoft |
|---|---|
| Initial release | August 24, 1995; 28 years ago |
| Operating system | Microsoft Windows |
| License | Proprietary commercial software |
Device Manager is a component of the Microsoft Windows operating system. It allows users to view and control the hardware attached to the computer. When a piece of hardware is not working, the offending hardware is highlighted for the user to deal with. The list of hardware can be sorted by various criteria.[1]
For each device, users can:
- Supply device drivers in accordance with the Windows Driver Model
- Enable or disable devices
- Tell Windows to ignore malfunctioning devices
- View other technical properties
Device Manager was introduced with Windows 95 and later added to Windows 2000. On Windows 9x, Device Manager is part of the System applet in Control Panel. On Windows 2000 and all other Windows NT-based versions of Windows, it is a snap-in for Microsoft Management Console.
Types of icons[edit]
Disabled device[edit]
A disabled device has either been manually disabled by a user or by some way of error. In Windows 95 through XP, this is denoted by a red X. In Windows Vista and Windows 7, this was replaced by a grey downward pointing arrow in the lower right-hand corner of the device’s icon.
Hardware not working properly[edit]
There are many reasons why hardware may not work properly. If Windows recognizes a problem with a device, it is denoted by a black exclamation point (!) on a yellow triangle in the lower right-hand corner of the device’s icon.
Hardware not recognized[edit]
Hardware may not be recognized if it is not installed properly or not compatible with the system. This is denoted by a yellow question mark in place of the device’s icon.
Device manually selected[edit]
A blue «i» on a white field in the lower right-hand corner of a Device’s icon indicates that the Use automatic settings feature is not selected for the device and that the resource was manually selected. Note that this does not indicate a problem or disabled state.
Error codes[edit]
Device Manager error codes are numerical codes, each accompanied by an error message, which help users determine what kind of issue Windows is having with a piece of hardware.[2][3]
| Code | Meaning |
|---|---|
| 1 | This device has not been configured correctly. |
| 3 | The driver for this device may be corrupted, or the system may be running low on memory. |
| 10 | This device cannot start. |
| 12 | Not enough resources for the device. |
| 14 | The computer must be restarted for the device to work properly. |
| 16 | Windows can’t identify all the resources this device requires. |
| 18 | Drivers for this device must be reinstalled. |
| 19 | Configuration information in Windows registry is damaged or corrupted for this device. |
| 21 | Windows is removing this device. |
| 22 | This device is disabled. |
| 24 | This device is not present, does not have all its drivers installed, or is not working properly. |
| 28 | The drivers for this device are not installed. |
| 29 | The firmware of the device did not give it the required resources. |
| 31 | Windows cannot load the drivers required for this device. |
| 32 | A driver for this device has been disabled. |
| 33 | Windows cannot determine which resources are required for this device. |
| 34 | Windows cannot determine the settings for this device. |
| 35 | The computer’s firmware does not include enough information to properly configure and use this device. |
| 36 | This device is requesting a PCI interrupt but is configured for an ISA interrupt (or vice versa). |
| 37 | Windows failed to initialize the device driver for this hardware. |
| 38 | Windows cannot run the driver for this device because a previous instance of the driver exists. |
| 39 | Windows cannot load the driver for this device. The driver may be corrupted or missing. |
| 40 | Windows cannot access this hardware because its service key information in the registry is missing or corrupted. |
| 41 | Windows successfully loaded the device driver for this hardware but cannot find the hardware device. |
| 42 | Windows cannot run the driver for this device because there is a duplicate device already running in the system. |
| 43 | Windows has stopped this device because it has reported problems. |
| 44 | An application or service has shut down this hardware device. |
| 45 | This hardware device is not connected to the computer. |
| 46 | Windows cannot gain access to this hardware device because the operating system is in the process of shutting down. |
| 47 | Windows cannot use this device because it has been prepared for safe removal, but it has not been removed from the computer. |
| 48 | The driver for this device has been blocked from starting because it is known to have problems with Windows. |
| 49 | Windows cannot start new hardware devices because the system hive is too large and exceeds the Registry Size Limit. |
| 52 | Windows cannot verify the digital signature for the drivers required for this device. A recent hardware or software change might have installed a file that is signed incorrectly or damaged. |
Device Types[edit]
Windows separates devices and their drivers by class types. Extra hidden and disconnected devices can be exposed through the devmgr_show_nonpresent_devices flag.
- USB Class devices: Peripherals that connect exclusively through the USB bus.
- Human Interface Devices: Devices used by the users to interface with the OS (eg. Touchpads, Pens, Mices and Keyboards)
- Printer devices: Drivers that contain printer information. Hidden category since Windows Vista.
- Imaging devices: Webcams and Scanners. A new webcam class driver was introduced in Windows 10 v1709.
- Biometric devices: Devices that read biometric data using Windows Biometric Framework. (eg. IR Webcams, Fingerprint sensor)
- PCI Class devices: Devices that connect to the PCI bus for high speed (eg. Graphics Card, Network card, Chipset)
- System devices: Peripherals that tie to the system, chipset or have no set category (eg. Intel Management Engine, Disk controller, ACPI events)
- Video and Audio Capture devices: Devices used to route audio/video streams (eg. Audio cards, TV Tuner cards, MIDI devices)
- Audio inputs and outputs: Since Windows 8, audio ports have their own category.
- Non-PnP devices: Mostly software that need a driver installed to interface with the core kernel components. Hidden category since Windows 10.
- DCH devices: A new type of driver introduced in Windows 10 v1709 that can interface with Universal Windows Platform apps. The goal was to separate the core driver from the interfacing app. They are grouped under «Software components» (eg. Audio and Video drivers released post-2018)
- Bluetooth Profiles: Those are listed under «Bluetooth Virtual Devices» and aren’t normally visible. Showing as «Bluetooth Peripheral Device» if no drivers are present.
- Other devices: This is not a category but a section where devices with missing drivers are grouped.
Driverquery command[edit]
| Developer(s) | Microsoft |
|---|---|
| Operating system | Microsoft Windows |
| Type | Command |
| License | Proprietary commercial software |
| Website | docs |
The driverquery[4] command-line program generates lists of installed devices and drivers, similar to the Device Manager’s output, which the user may view on-screen or redirect to a file. This is useful for note-taking and for reporting problems to remote third parties such as technical support personnel. The program has switches to control the output detail and format, including an /fo switch with csv parameter to generate output in comma-separated values format, suitable for importing into a spreadsheet application such as Microsoft Excel.[5]
See also[edit]
- Device driver
- Microsoft Management Console
- Troubleshooting
- systeminfo
- VxD
References[edit]
- ^ «Where is Device Manager?». Windows. Microsoft. Archived from the original on January 25, 2014. Retrieved February 8, 2015.
- ^ «Error codes in Device Manager in Windows». Support. Microsoft. Retrieved February 8, 2015.
- ^ Fisher, Tim. «Device Manager Error Codes». About.com. Archived from the original on September 9, 2008. Retrieved February 8, 2015.
- ^ «Driverquery». TechNet. Microsoft. Retrieved March 12, 2015.
- ^ Bott, Ed; Siechert, Carl; Stinson, Craig (2007). Windows Vista Inside Out. Microsoft Press. p. 157. ISBN 978-0735622708.
isbn:0735622701.
External links[edit]
- driverquery | Microsoft Docs
- The DevCon utility
Device Manager is a Windows system utility that displays all hardware devices installed on your computer. It is a critical tool, you can use to troubleshoot hardware problems, install, uninstall or update drivers, configure, enable and disable hardware among other things. This article teaches you how to use the device manager in Windows 10 PC.
Related: 11 ways to secure your Windows PC.
How to Use Device Manager in Windows 10 PC?
- View installed devices
- Add new hardware
- Remove a device
- Manage driver settings
- Setup device resource settings
1. View Installed Hardware in Device Manager
- To open the Device Manager, right-click the Windows Start button at the bottom-left corner of your screen. Look for “Device Manager” option from the list and click on it.

Open Device Manager
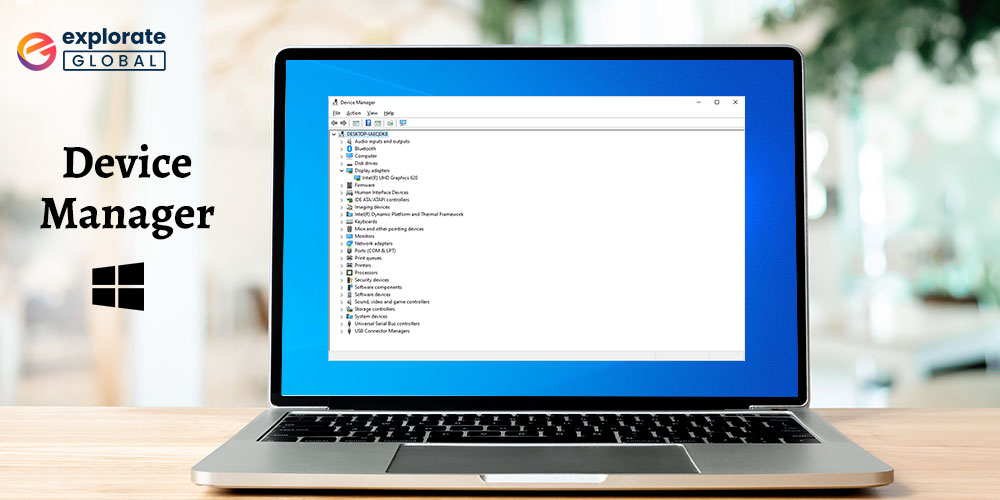
- The Device Manager will open displaying a list of hardware installed on your computer organized by category. You can click the arrow beside each category, see the list of hardware under that category.

Device Manager
- Device manager may hide some devices from the default list. In order to see the hidden devices, go to the “View” menu and click “Show hidden devices”. You can also sort the list by a different value from the view menu.

Unhide Devices
- Right-click the specific device and select “Properties” to view more information about the hardware.

More Info
The Properties window will appear with at the top. The tabs may be different for various hardware but the common ones include:
- “General” tab – display information like the device name, type and manufacturer and the working status.
- “Driver” tab – details and settings options for the device driver.
- “Details” tab – shows more devices properties and their respective value.
- “Resources” tab – shows device configuration settings.
- Others – for some hardware properties you may find other tabs like Power Management, Volume, Settings and Advanced among others depending on the device characteristics.
2. Adding Hardware from Device Manager
Normally Windows 10 automatically detects connected hardware and installs the driver (plug and play) for the hardware. However, you can also manually add hardware that is not recognized by the system. Follow the below instructions to add or remove hardware from your computer.
- First connect the hardware on your computer and follow the instructions on the installation drive that comes with the hardware. If the Device Manage does not detects the hardware then go to the “Action” menu of the Device Manager and select “Add legacy hardware” from the menu options.

Add Device
- You will see a “Add Hardware Wizard” dialog and click “Next” button to continue. Note, if you have installation drive, you need to follow the instructions on it instead of manually adding through this wizard. The wizard also shows this as a warning message.

Add Wizard
- The wizard offers two ways to search the newly added hardware. You can allow the device manager to search for and automatically install the new hardware or select and install the device manually. Choose the first recommended method and click “Next”.

Search and Install
- Windows will search for connected devices and install its driver. Click “Finish” when prompted and restart the computer to complete the process.
3. Removing Hardware from Device Manager
Sometimes you may need to remove the hardware for troubleshooting purposes and reinstall.
- In order to remove a device, right-click on the specific hardware and select “Uninstall device”.

Remove Hardware
- A prompt window will appear with a warning message. Click “Uninstall” to confirm the action.
- The device will be removed from the list.
You can follow the above instructions for adding the device back to Device Manager and check whether it works properly.
4. Manage Device Driver Settings
In Windows operating system, most hardware needs driver files to function properly. Simply put, a driver is hardware-specific software that enables the hardware to function properly. You can use Device Manager to troubleshoot driver problems, update, roll back or disable/ enable hardware drivers.
- Whenever there is a driver error, Device Manager will indicate it by a yellow triangle with an acclamation mark against the hardware device. This shows that the device is not working correctly, and you can fix by updating the driver.

Device Issues
- Right-click the particular device, click “Properties” and go to “Driver” tab.

Driver Settings
- For more information about the driver file such as provider, version and so on, click on “Driver Details” button.
- Click on the “Update Driver” button to update the driver to latest version. You can allow Windows to automatically search for updated drivers online or browse for and install the driver software manually. In order to manually install the driver, you should have downloaded the latest driver beforehand or have the installation CD.

Search for Driver
- If the latest driver for the device is not working you can revert back to the previous version. In order to revert to a previously working driver version, click the “Roll Back Driver” option.
- You can also fix driver issues by restarting (Disable/ Enable) the affected device. Click on “Disable Device” from the Drivers settings window, and confirm the action by clicking “Yes” on the prompt pop-up.

Disable Device
- Device Manager will mark the disabled device with a black down-facing arrow. You can anytime enable the device by going back to driver settings for the device and clicking “Enable Device” option.

Enable Device
5. Manage Device Resource Settings Configurations
- You can configure some devices to use your preferred resource settings. On the Device Properties window, go to “Resources” tab to change the configuration.
- The lower section of the “Resources” tab displays a list of device conflicts if any. For instance, for the device shown in the figure above, there is no conflicting device.
- Uncheck the “Use automatic settings” box, select a resource setting configuration from the “Setting based on” list and click “Ok”.
- If the device doesn’t have basic configurations, click on “Change setting…” to modify the settings.
- Once done, save the settings and click “Ok”. Restart your computer to execute the changes.
Note: For some devices, you will not find the “Resources” tab, while in other cases it may be available but the configuration is locked to a particular setting. In such a case you may not be able to modify the resource settings.
Conclusion
You can view all the devices installed in your system and check their working status using the device manager tool in Windows 10. Moreover, if you experience a hardware problem or error, device manager allows you to fix the error by removing and then adding a device afresh, update or roll back driver for the hardware. Though there are other third-party device management tools, they may be unnecessary as this Windows utility can handle your PC hardware issues effectively.