When using the Add-AppxPackage PowerShell cmdlet to upgrade/install apps on the Microsoft Store, you can receive the “Add-AppxPackage Deployment failed with HRESULT” error message during the process. This error occurs due to corrupted files that prevent the installation from occurring.
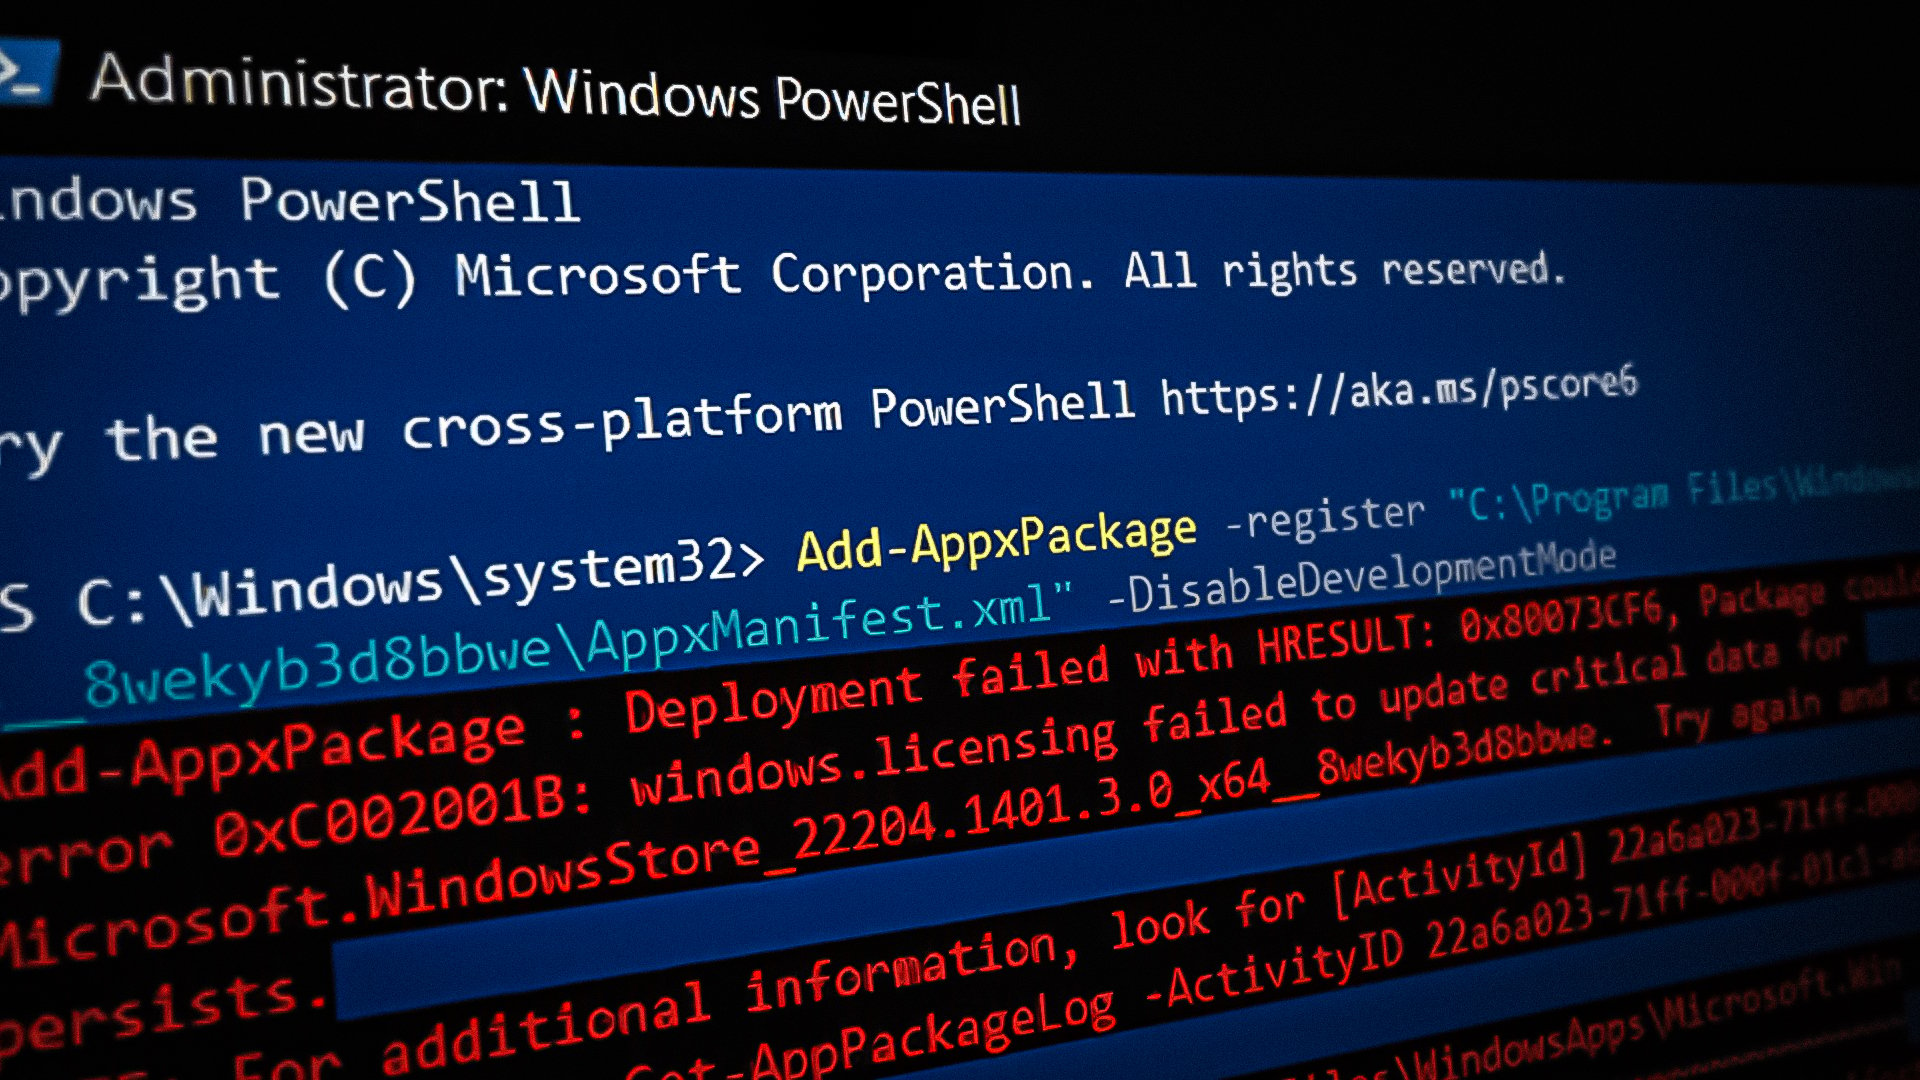
This guide will show you how to fix the “Add-AppxPackage Deployment failed with HRESULT” error.
Workaround: Perform a System Restart
When facing an error with the Windows PowerShell, then performing a simple system restart can be a quick fix. Therefore, as a workaround, you must restart your computer. This way, all the processes, and programs will boot properly and prevent the error from occurring. You can perform the system restart with the step listed below:
- Open the Windows Start Menu by pressing the Win key.
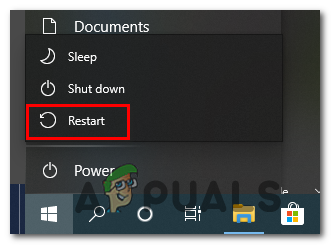
- Click on the Power option and Restart your computer by clicking on the “Restart” option.

Restarting the Windows computer
1. Run the Windows Store Troubleshooter
Troubleshooter is a built-in feature in Windows. This feature enables your system to detect the problems that cause certain errors to occur on your device. Therefore, you must run the Windows Store Troubleshooter to detect and repair the error. The Windows Store Troubleshooter can be performed as follows:
- Open the Windows Settings by pressing the Win + I keys together.
- Navigate to System > Troubleshooter.
- Scroll down and click on the “Windows Store App” option at the end.
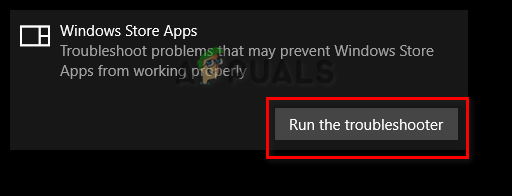
- Run the Windows Store Troubleshooter by clicking on the “Run the troubleshooter” option.

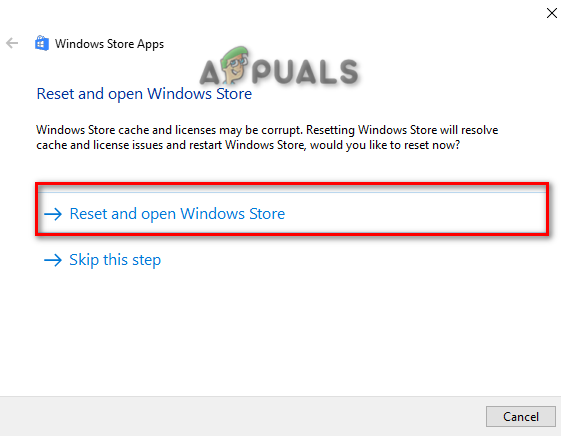
Running the Windows Store troubleshooter - After the problems have been detected, choose the solution as per your choice (For example resetting the Windows Store App to fix the issue).

Resetting the Windows Store
2. Disable the StartMenuExperienceHost EXE File
Although the StartMenyExperienceHost EXE File is used for managing the Windows Start Menu, it is known to interfere with PowerShell commands. Therefore, you must disable this file before running the command at fault in PowerShell. With the steps below, you can disable the StartMenyExperienceHost EXE File:
- Open the Windows Start Menu by pressing the Win key.
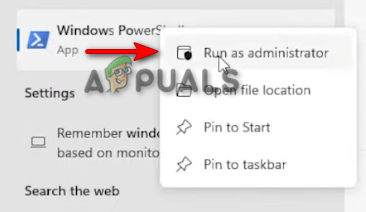
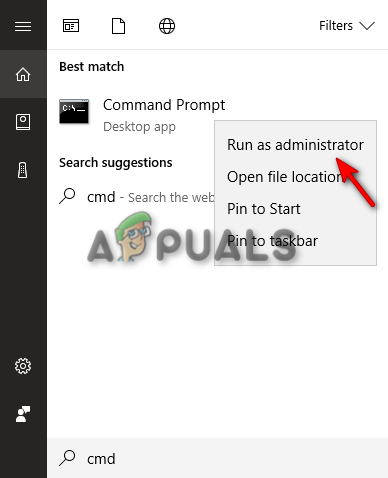
- Type “PowerShell” in the search box.
- Right-click on it and select the “Run as an administrator” option.

Running Powershell as an administrator - Now, copy and paste the following command into the PowerShell and press the Enter key:
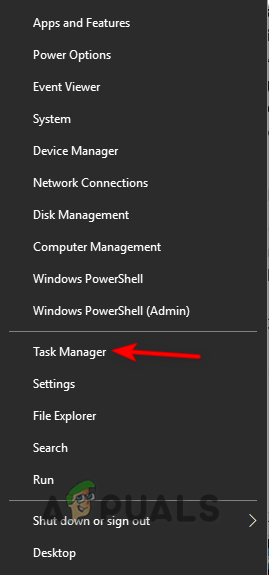
- Right-click on the Windows Start Menu and select the “Task Manager” option.

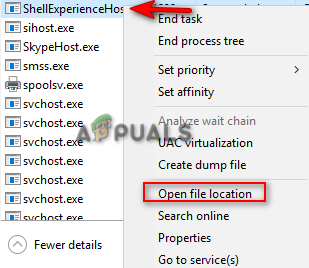
Opening the Task Manager - Click on the “Details” tab and look for the StartMenyExperienceHost EXE File.
- Open its file location by right-clicking on it and selecting the “Open file location” option.

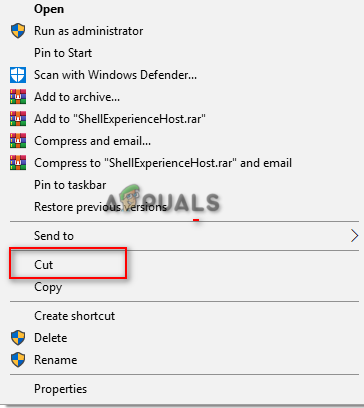
Opening the file location - Right-click on the EXE file and select the “Cut” option.

Cutting the EXE file - Paste the file into a different Folder by pressing the Ctrl + V keys together.
- Right-click on the Windows Start Menu and select the “Task Manager” option.
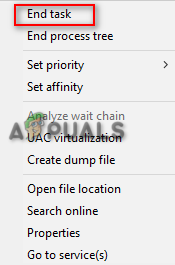
Opening the Task Manager - Right-click on the EXE file and select the “End task” option.

Ending the task - Type the command at fault into PowerShell and press the Enter key.
WARNING: After the command has been completed, you must paste the EXE file back to its default folder where you copied it from. If you are unable to do so, your entire Start Menu and Taskbar will break.
Check to see if the issue is resolved or not.
3. Run the System Scans
System file corruption is one of the major causes of this error. It prevents certain actions to be performed by the programs. Therefore, to make sure this doesn’t happen, you must run System Scans that will detect and repair the error found in the system files. Following the steps below, you will see how to repair damaged files through system scans:
- Open the Windows Start Menu by pressing the Win key.
- Type “cmd” in the Windows Search bar.
- Run the command prompt as an administrator by right-clicking on it and selecting the”Run as an administrator” option.

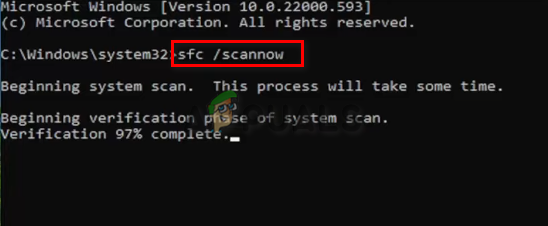
Running the Command Prompt as an administrator. - Type the following command in the Command Prompt while giving a space between “sfc” and “/.”
sfc /scannow

Running system file checker on the command prompt. - the file checker automatically repairs the damaged files after scanning.
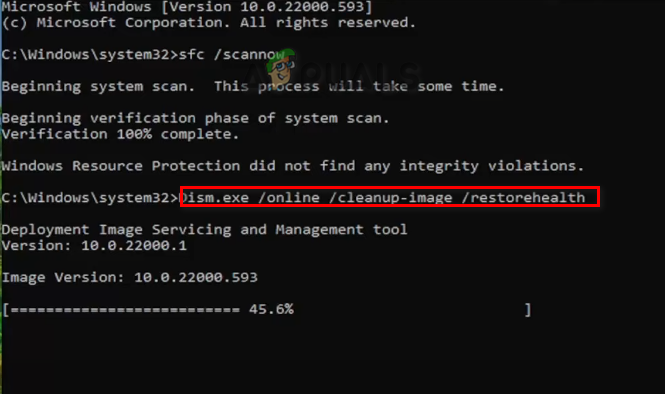
Note: After the System File Checker has scanned the damaged files, you must run the DISM Command. Follow the steps below to run the DISM Command:
- Paste the following command into the command prompt and press the Enter key to perform the DISM scan:
Dism.exe /online /cleanup-image /restorehealth

Running DISM Command on the Command Prompt - Restart your computer and make the necessary changes.
4. Update your Windows
An outdated Windows prevents certain programs from executing properly. It can also be a leading factor in the occurrence of this error. Therefore, you must keep your Windows updated to prevent such errors from taking place. Follow the instructions given below to update your Windows to the latest version:
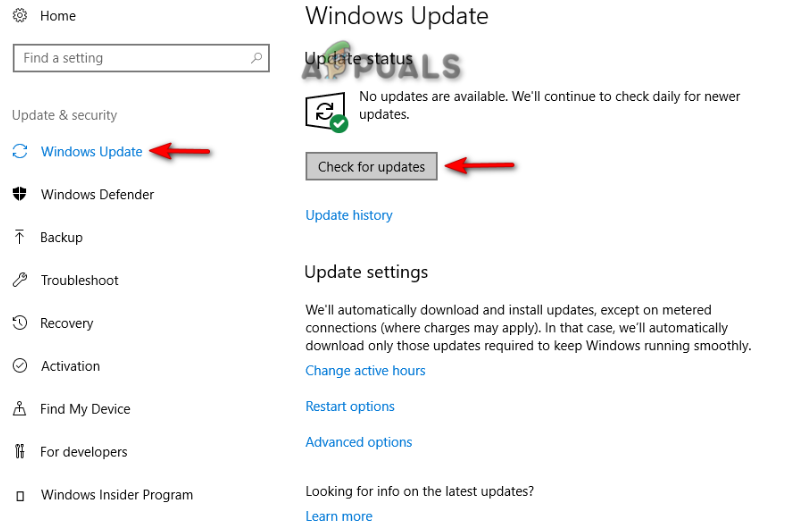
- Open the Windows Settings by pressing the Win + I keys together.
- Navigate to Update and Security > Windows Update.
- Click on the “Check for Updates” option.

Checking an available Windows Update - After the Windows update is found, download it by clicking on the Download option on the page.
- Restart your system to make the necessary changes.
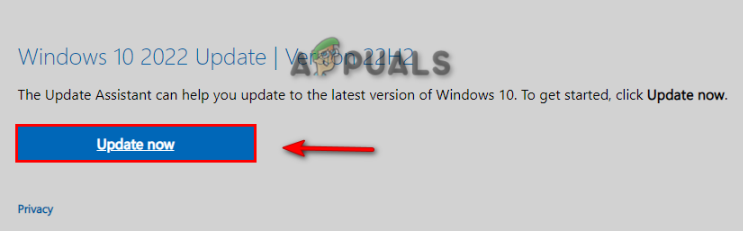
- Go to the Official Microsoft Web Page.
- Download the latest Windows Update by clicking on the “Update Now” option.

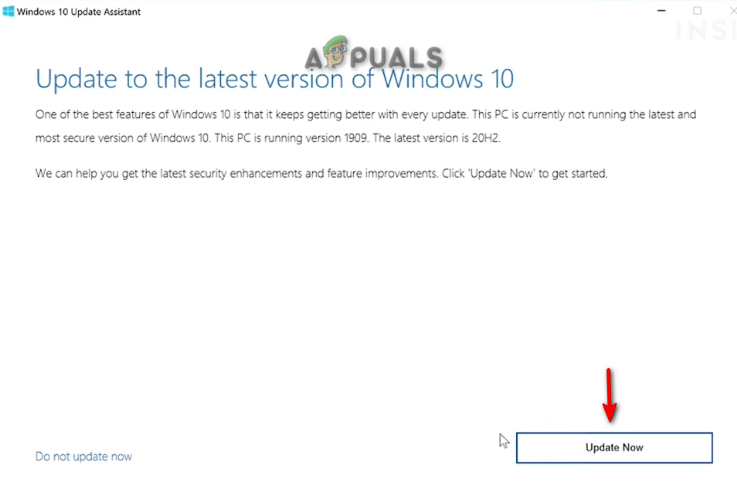
Downloading the Latest Windows Update - Install the update by clicking on the “Update Now” option on the Windows Update Assistant page.

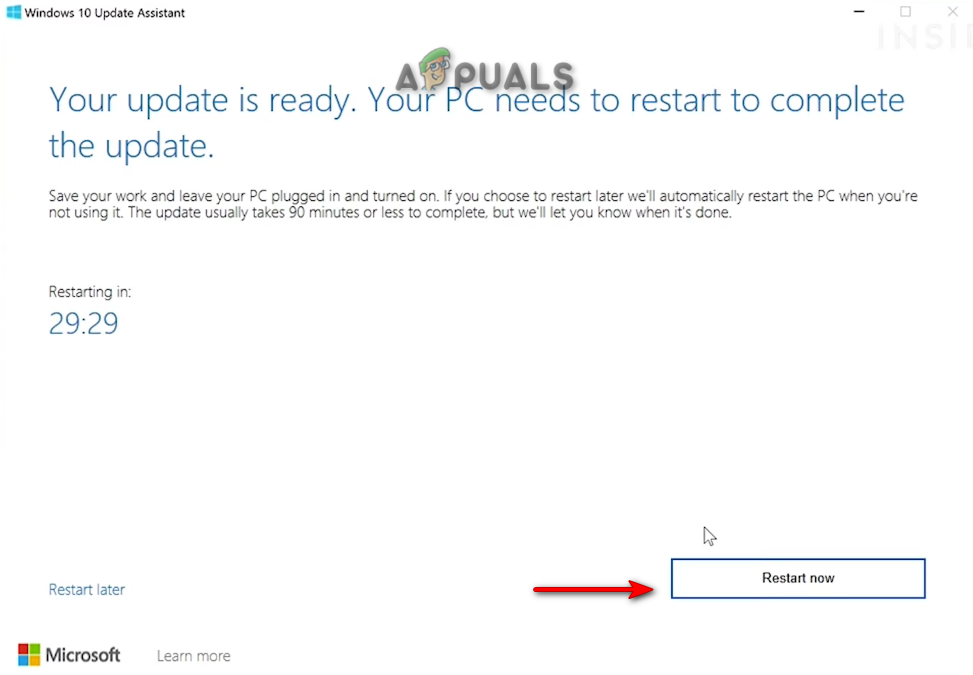
Installing Windows Update - After the installation is completed, restart the computer by clicking on the Restart option.

Restarting the Computer
5. Run the System on Safe Mode
If the error still persists, then you must run the system on Safe Mode. After booting the system on Safe Mode, your system will start with a minimal set of drivers and default programs. You can run the system on Safe Mode as shown below:
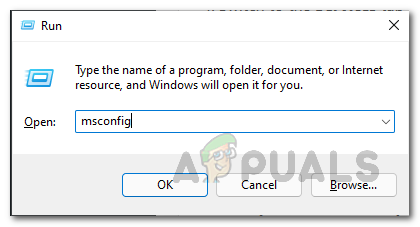
- Open the Run Command by pressing the Win + R keys together.
- Type “msconfig” in the search box and click OK to open System Configuration.

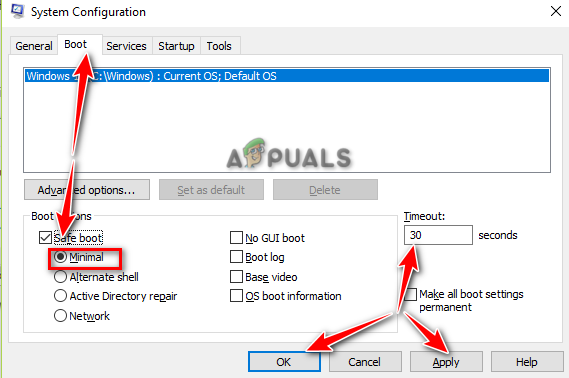
Opening System Configuration - Open the Boot tab and check the “Safe Mode” box.
- Click on “Minimal” under Safe Mode.
- Set the timer as per your choice and Click Apply and OK.

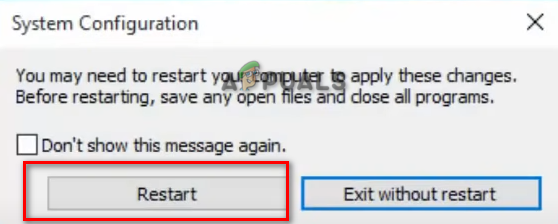
Booting System on Safe Mode - Restart your computer by selecting the “Restart” option on the System Configuration Prompt.

Restarting computer - Once the system is booted into Safe Mode, you must run the PowerShell.
- Open the Windows Start Menu by pressing the Win key.
- Type “PowerShell” in the search box.
- Right-click on it and select the “Run as an administrator” option.
Running Powershell as an administrator - Now, type the command that was facing the error, for example:
$manifest = (Get-AppxPackage Microsoft.WindowsStore).InstallLocation + '\AppxManifest.xml' ; Add-AppxPackage -DisableDevelopmentMode -Register $manifest)
Note: If the error doesn’t occur in Safe Mode, follow the method below.
6. Use In-Place Upgrade
In-Place Upgrade is a tool that allows you to upgrade your Windows while still keeping your files and other data intact. As a last resort, you must use In-Place Upgrade to repair command-line errors.
Disclaimer: Although this tool doesn’t affect your data, you must have a backup copy of your data. Therefore, perform this method as a last resort.
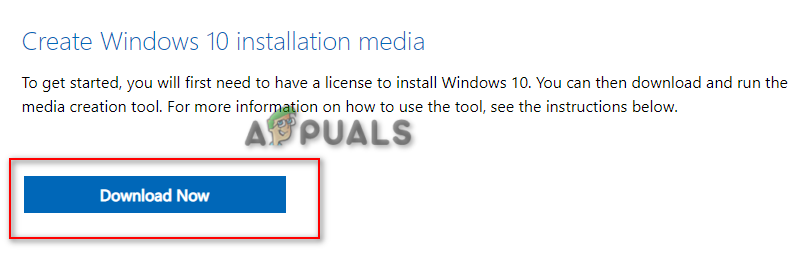
- Open the Official Microsoft Website.
- Download the tool by clicking on the “Download Now” option under “Create Windows 10 installation media.”

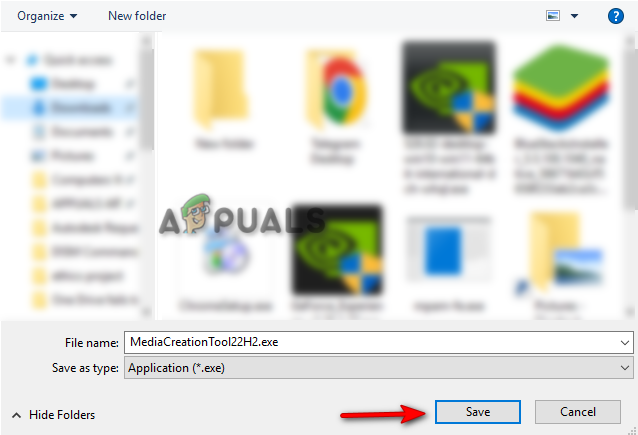
Downloading the tool - Select the folder you want to download the file from and select the Save option.

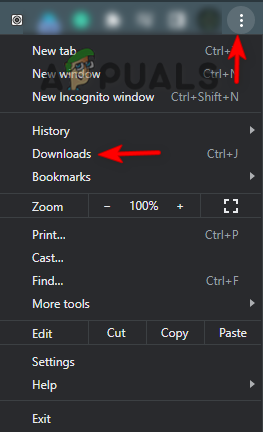
Saving the file in the folder - Click on the Three dots at the top right part of the browser and open the Downloads page.

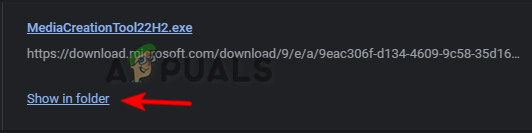
Opening the Downloads tab - Locate the file by clicking on the” Show in Folder” option.

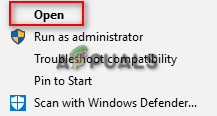
Opening the EXE file location - Open the EXE file by right-clicking on it and selecting the “Open” option.

Opening the EXE File - Click “YES” on the User Account Control Prompt to confirm the actions.
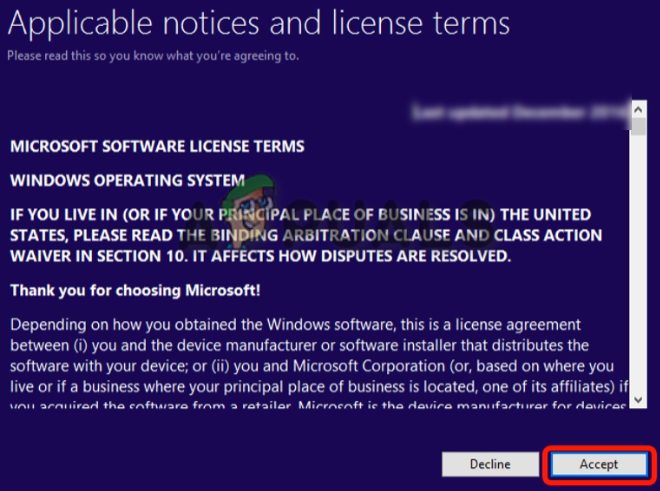
- Accept the terms and conditions by clicking on the “Accept” option.

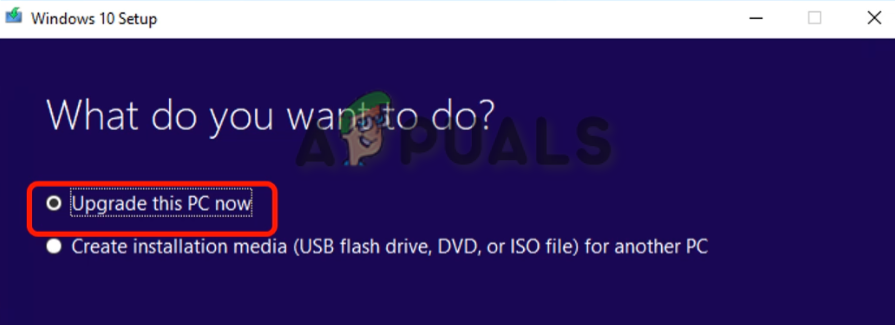
Accepting the terms and conditions - Select the “Upgrade this PC Now” option on the “What do you want to do now” page.

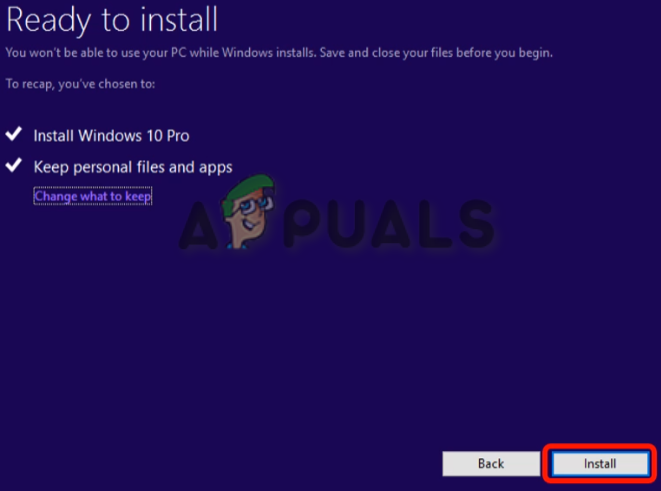
Upgrading this PC now - Install the Setup by clicking on the “Install” option.

Installing the tool - Select your sign-in account after the installation.
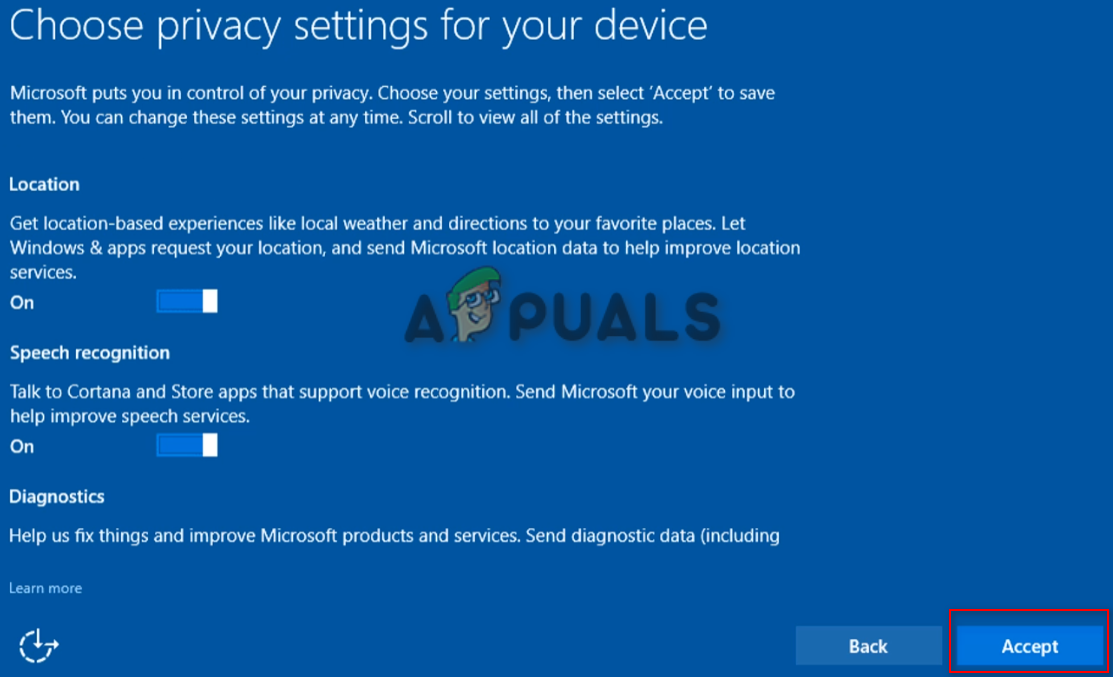
- Choose the privacy settings for your device and click on the “Accept” option.

Choosing Privacy Settings for your device - Use Cortana by clicking on the “Use Cortana” option.

Using Cortana - This will open the Windows Sign-in Screen.


Muhammad Zubyan
Muhammad Zubyan is a certified Google IT Support Professional with over 7 years of extensive experience. He has worked on more than 1500 computers, gaining valuable insights that enable him to detect and troubleshoot any complicated root cause of Windows-related issues and errors. In addition to managing Appuals as a Senior Editor, he is currently developing his own Game Optimization program that caters to both gamers and casual users alike.
I am using the following command in PowerShell to install Truffle’s Ganache on my Windows 10 machine:
Add-AppxPackage -Path "C:\Users\mabel\Downloads\Ganache.appx"
Whenever I run that command I get the following error:
    Add-AppxPackage : Deployment failed with HRESULT: 0x80073CFD, A Prerequisite for an install could not be satisfied.
    Deployment Add operation with target volume C: on Package Ganache_1.0.1.0_x64__zh355ej5cj694 from:  (Ganache.appx)
    failed with error 0x80073CFD. See http://go.microsoft.com/fwlink/?LinkId=235160 for help diagnosing app deployment
    issues.
    NOTE: For additional information, look for [ActivityId] 1e4d6f55-8379-0000-3191-4d1e7983d301 in the Event Log or use
    the command line Get-AppxLog -ActivityID 1e4d6f55-8379-0000-3191-4d1e7983d301
    At line:1 char:1
    + Add-AppxPackage -Path "C:\Users\mabel\Downloads\Ganache.appx"
    + ~~~~~~~~~~~~~~~~~~~~~~~~~~~~~~~~~~~~~~~~~~~~~~~~~~~~~~~~~~~~~
        + CategoryInfo          : NotSpecified: (C:\Users\mabel\Downloads\Ganache.appx:String) [Add-AppxPackage], Exceptio
       n
        + FullyQualifiedErrorId : DeploymentError,Microsoft.Windows.Appx.PackageManager.Commands.AddAppxPackageCommand
I digged a bit deeper for a diagnosis and ran the command Get-AppxLog -ActivityID 1e4d6f55-8379-0000-3191-4d1e7983d301, and got the following log details:
Time                      ID           Message
----                      --           -------
1/1/2018 8:13:38 PM       301          The calling process is powershell.exe
1/1/2018 8:13:38 PM       603          Started deployment Add operation on a package with main parameter: Ganache.appx and
                                       Options: 0. See http://go.microsoft.com/fwlink/?LinkId=235160 for help diagnosing app
                                       deployment issues.
1/1/2018 8:13:41 PM       157          The app package signature was validated for core content of the app package published
                                       by CN=Consensys Inc, O=Consensys Inc, L=New York, S=New York, C=US. Payload won't be
                                       validated until the files are read.
1/1/2018 8:13:42 PM       170          The streaming reader was created successfully for app package
                                       Ganache_1.0.1.0_x64__zh355ej5cj694.
1/1/2018 8:13:42 PM       10002        Creating Resiliency File C:\ProgramData\Microsoft\Windows\AppRepository\edc8d325-87ef-
                                       46b9-93c2-cf029ff3f8f4_S-1-5-21-2104190792-3376611798-3824734217-1001_1.rslc for Add
                                       Operation on Package Ganache_1.0.1.0_x64__zh355ej5cj694.
1/1/2018 8:13:42 PM       607          Deployment Add operation on package Ganache_1.0.1.0_x64__zh355ej5cj694 has been
                                       de-queued and is running for user DESKTOP-8NHB92D\mabel.
1/1/2018 8:13:42 PM       613          Adding uri to the list of Uris: file:///C:/Users/mabel/Downloads/Ganache.appx.
1/1/2018 8:13:42 PM       605          The last successful state reached was BundleProcessed. Failure occurred before
                                       reaching the next state Indexed.
1/1/2018 8:13:42 PM       401          Deployment Add operation with target volume C: on Package
                                       Ganache_1.0.1.0_x64__zh355ej5cj694 from:  (Ganache.appx)  failed with error
                                       0x80073CFD. See http://go.microsoft.com/fwlink/?LinkId=235160 for help diagnosing app
                                       deployment issues.
1/1/2018 8:13:42 PM       404          AppX Deployment operation failed for package Ganache_1.0.1.0_x64__zh355ej5cj694 with
                                       error 0x80073CFD. The specific error text for this failure is: Deployment Add
                                       operation with target volume C: on Package Ganache_1.0.1.0_x64__zh355ej5cj694 from:
                                       (Ganache.appx)  failed with error 0x80073CFD. See
                                       http://go.microsoft.com/fwlink/?LinkId=235160 for help diagnosing app deployment
                                       issues.
The windows forum recommended me to make sure Windows is fully updated, the last time I updated it was an hour ago.
From the link in the error it says «A specified install prerequisite couldn’t be satisfied.» I have all the prerequisites to install and run testrpc/ganache cmd line. Are there any steps I need to take before installing Ganache UI?
Описание проблемы Восстановления Магазина Windows Store
Обновлено 03.07.2022
В далёкие времена (2015 год, когда вышла Windows 10) я совершенно не верил в Магазин Windows Store как в успешный маркетплейс хороших приложений, поэтому по сей день выпиливал полностью его из своих Windows 10 наравне с встроенными приложениями типа игрулек, портала смешанной реальности, Paint3D и остальной bloatware soft, телеметрию, а также всю остальную слежку от скромного парня по имени Билл. Но вот, момент настал и Магазин Windows Store стал годным и мне он стал необходим для скачивания Debian для WSL 2 и Fluent Terminal для красоты консолей и удобства работы с ними в одном окне.
Также его будет интересно поставить на LTSC и LTSB версии Windows 10, где он не предусмотрен.

Магазин Microsoft Store отсутствует
Теперь к сути, как вернуть полностью удаленный Windows Store в Windows 10 21H1 ? Windows Server ? Windows 11 ?
Решение проблемы с Восстановлением Магазина Windows Store
Автоматизированный способ вернуть Магазин Windows Store
Для удобства я сделал всё необходимое, поместил в PowerShell скрипт и закинул в облако, осталось скачать, запустить скрипт и Windows Store будет полностью восстановлен, файлы можно удалить. Если такой вариант не подходит, то сразу идем к ручному способу.
1) Вот этот архив нужно скачать и распаковать
2) Скопировать путь к папке, куда был распакован скрипт (пример: C:\Users\User\Downloads)
2) Найти в меню Пуск PowerShell, запустить от имени администратора, перейти в директорию с распакованным скриптом с помощью команды внутри PowerShell: cd путь, вместо слова путь вставить значение из буфера обмена
3) Запустить скрипт bringShopBack.ps1, можно набрать первые пару букв (br) и нажать клавишу Tab, PowerShell сам допишет название файла и нужные слэши, потом нажать Enter
Если PowerShell ругается на ExecutionPolicy, вводим команду Set-ExecutionPolicy Unrestricted, а после восстановления магазина, возвращаем значение по умолчанию с помощью команды: Set-ExecutionPolicy -ExecutionPolicy Default
4) Готово, Магазин Windows Store полностью восстановлен и работает 🙂

Магазин Microsoft Store восстановлен
Проверка установки Debian 11 WSL + Fluent Terminal
Процесс установки

Запуск Fluent Terminal
Первый образ подсистемы linux станет дефолтным и если хочется переназначить, как например в моём случае с Docker на Debian пишем команды
wsl --list --allЧтобы посмотреть список установленных подсистем и
wsl -s DebianДля назначения Debian по-умолчанию.

Всё прекрасно установилось и работает 🙂
Ручной способ вернуть Магазин Windows Store
Перейдите на сайт https://store.rg-adguard.net/ (сайт позволяет получить прямые ссылки и скачать установочные APPX файлы приложений магазина с сайта Microsoft), вставьте в строку поиска ссылку на Microsoft Store (https://www.microsoft.com/store/productId/9wzdncrfjbmp), в выпадающем списке выберите Retail;
Для корректной работы Windows Store вам нужно скачать шесть APPX файлов c зависимостями для вашей версии Windows (x64 или x86):
- Microsoft.NET.Native.Framework.1.7,
- Microsoft.NET.Native.Framework.2.2,
- Microsoft.NET.Native.Runtime.1.7,
- Microsoft.NET.Native.Runtime.2.2,
- Microsoft.VCLibs,
- Microsoft.UI.Xaml.2.4;
Теперь аналогичным образом скачайте пакет Microsoft.WindowsStore с расширением AppxBundle:
- Microsoft.WindowsStore_12107.1001.15.0_neutral___8wekyb3d8bbwe.AppxBundle
Скопируйте все пакеты в одну папку и установите их следующими командами PowerShell в режиме Администратора:
$Path = 'C:\PS\Store'
Get-Childitem $Path -filter *.appx| %{Add-AppxPackage -Path $_.FullName}
Get-Childitem $Path -filter *.appxbundle | %{Add-AppxPackage -Path $_.FullName}
Магазин Microsoft Store восстановлен
На этом всё, Магазин Windows Store восстановлен и работает.
Если Вам было полезно или есть вопросы, оставляйте комментарии, всем удачи 
Description
Main page states DevToys has a Prerequisite Windows 10 build 1903+ or later.
My computer has 20H2 (10.0.19042) (Get-ComputerInfo | select OSVersion)
When running «Add-AppPackage» to install the MSIX manually, I get an error of Add-AppPackage : Deployment failed with HRESULT: 0x80073CFD, A Prerequisite for an install could not be satisfied. Windows cannot install package 64360VelerSoftware.DevToys_1.0.2.70_x64__j80j2txgjg9dj because this package is not compatible with the device. The package can only be installed on the following device families: Windows.Xbox
Searching on this reveals, this error is poorly created often by applications that require a newer version of Windows then the MSIXbundle is compatible. However, while not the latest release, my corporate laptop has version 20H2 which is newer then 1903 which documentation states is required.
Any ideas?
Steps To Reproduce
- Install MSIXbundle manually as my corporate device doesn’t have MS store
- Add-AppPackage -path .\64360VelerSoftware.DevToys_1.0.2.70_neutral___j80j2txgjg9dj.Emsixbundle
- Add-AppxPackage -Path .\64360VelerSoftware.DevToys_1.0.2.70_neutral___j80j2txgjg9dj.Emsixbundle
Expected behavior
Application to install without failure
DevToys Version
1.0.2.0
Relevant Assets/Logs
Add-AppPackage -path .\64360VelerSoftware.DevToys_1.0.2.70_neutral___j80j2txgjg9dj.Emsixbundle
Add-AppPackage : Deployment failed with HRESULT: 0x80073CFD, A Prerequisite for an install could not be satisfied.
Windows cannot install package 64360VelerSoftware.DevToys_1.0.2.70_x64__j80j2txgjg9dj because this package is not
compatible with the device. The package can only be installed on the following device families: Windows.Xbox
NOTE: For additional information, look for [ActivityId] 6f2a5a3d-112d-0002-d0e7-39702d11d801 in the Event Log or use
the command line Get-AppPackageLog -ActivityID 6f2a5a3d-112d-0002-d0e7-39702d11d801
At line:1 char:1
-
Add-AppPackage -path .\64360VelerSoftware.DevToys_1.0.2.70_neutral___ …
-
  + CategoryInfo          : NotSpecified: (C:\users\xxxxx...9dj.Emsixbundle:String) [Add-AppxPackage], Exception

  + FullyQualifiedErrorId : DeploymentError,Microsoft.Windows.Appx.PackageManager.Commands.AddAppxPackageCommand
Add-AppxPackage -Path .\64360VelerSoftware.DevToys_1.0.2.70_neutral___j80j2txgjg9dj.Emsixbundle
Add-AppxPackage : Deployment failed with HRESULT: 0x80073CFD, A Prerequisite for an install could not be satisfied.
Windows cannot install package 64360VelerSoftware.DevToys_1.0.2.70_x64__j80j2txgjg9dj because this package is not
compatible with the device. The package can only be installed on the following device families: Windows.Xbox
NOTE: For additional information, look for [ActivityId] 6f2a5a3d-112d-0003-0549-e86f2d11d801 in the Event Log or use
the command line Get-AppPackageLog -ActivityID 6f2a5a3d-112d-0003-0549-e86f2d11d801
At line:1 char:1
-
Add-AppxPackage -Path .\64360VelerSoftware.DevToys_1.0.2.70_neutral__ …
-
  + CategoryInfo          : NotSpecified: (C:\users\xxxxx...9dj.Emsixbundle:String) [Add-AppxPackage], Exception

  + FullyQualifiedErrorId : DeploymentError,Microsoft.Windows.Appx.PackageManager.Commands.AddAppxPackageCommand
If when you try to install/update an app from Microsoft Store using the Add-AppxPackage PowerShell cmdlet on your Windows 11 or Windows 10 computer, and you get the output stating Add-AppxPackage Deployment failed with HRESULT 0x80073CFF or 0x80073CFD. then this post is intended to help you with the most suitable solutions.

This Microsoft Store error symbolic name and description are as follows;
ERROR_INSTALL_POLICY_FAILURE
To install this app, you need a developer license or a sideloading-enabled system.
Debugging: You may get this error if the package doesn’t meet one of the following requirements: The app is deployed using F5 in Visual Studio on a computer with a Windows Store developer license,
The package is signed with a Microsoft signature and deployed as part of Windows or from the Windows Store, The package is signed with a trusted signature and installed on a computer with a Windows Store developer license, a domain-joined computer with the AllowAllTrustedApps policy enabled, or a computer with a Windows Sideloading license with the AllowAllTrustedApps policy enabled.
When you encounter the error on your device, you will receive the error message along the following similar lines.
Add-AppxPackage : Deployment failed with HRESULT: 0x80073CFF, To install this application you need either a Windows developer license or a sideloading-enabled system. Package <NameOfApp> with Windows Store origin cannot be sideloaded or installe using developer mode option. NOTE: For additional information, look for [ActivityId] 4d02cd87-927a-0006-31cf-024d7a92d101 in the Event Log or use the command line Get-AppxLog -ActivityID 4d02cd87-927a-0006-31cf-024d7a92d101 At line:1 char:1
If you get the Add-AppxPackage Deployment failed with HRESULT 0x80073CFF or 0x80073CFD when you try to install/update an app from Microsoft Store using the Add-AppxPackage PowerShell cmdlet on your Windows 11/10 computer, then you can apply our recommended fixes below to resolve the issue.
- Initial checklist
- Turn on Developer Mode to enable SideLoading of apps
- Create a new User Account
- Configure Group Policy to allow all trusted apps to install
- Perform System Restore
- Reset PC or In-place Upgrade Repair Windows 11/10
Let’s look at the description of the process as it relates to each of the listed solutions.
1] Initial checklist
Before you proceed with the solutions below, you can complete each of the following tasks, and after each task see if you can be able to install the app using the Add-AppxPackage PowerShell cmdlet without issues.
- Install the app using alternative means. Assuming there’s no particular reason why you need to install an app available on the Microsoft Store using the Add-AppxPackage PowerShell cmdlet, you can as well get or deploy the app directly from Microsoft Store app on your Windows 11/10 device. Alternatively, you can use the Winget command-line utility to download/install apps on your device from Microsoft Store.
- Update Windows. In some cases, problems do occur due to a bug and the software vendors or developers will usually release updates for their software. These updates contain fixes for the bugs reported by the users. So, it’s recommended to always make sure Windows is updated to the latest build/version as and when due to get rid of already known bugs that might present on the OS. This also ensures you’re running the latest version of PowerShell. After installing the latest Windows update, check if the issue persists.
- Edit the AppxManifest file. You should do this after you have updated Windows to the latest build. Inside the referenced app folder, you need to edit the AppxManifest’s “TargetDeviceFamily” line as follows and make sure to replace the WinBuild placeholder with your current Windows build number. Afterward, run the Add-AppxPackage command.
<TargetDeviceFamily Name="Windows.Desktop" MinVersion="10.0.WinBuild" MaxVersionTested="10.0.WinBuild" />
- Run Windows Store Apps Troubleshooter. The inbuilt Troubleshooters are designed to help PC users automatically fix some common problems that they may encounter on their Windows devices. In this particular case, running the Windows Store Apps Troubleshooter would be helpful. It’s a good idea and we recommend running the troubleshooter for Microsoft Store apps-related issues.
Read: Fix Microsoft Store error code 0x80073CF3
2] Turn on Developer Mode to enable SideLoading of apps

As already indicated in the error message, the Add-AppxPackage Deployment failed with HRESULT 0x80073CFF due to the device the app in question is installed not being registered with a Windows developer license for side loading applications. In this case, to resolve the issue, you can turn on Developer Mode to enable SideLoading of apps on your Windows 11/10 device using the following steps.
- Open Windows Terminal as an Administrator.
- In the PowerShell console, type or copy and paste the following command and hit Enter:
Show-WindowsDeveloperLicenseRegistration
- In the For developers page that opens in the Settings app, toggle the button to On for Developer Mode.
- Click Yes on the prompt.
- Exit Settings app.
You can now attempt to download the application again. But keep in mind that this action is not ideal to keep on or as a workaround, as it loosens restrictions on symlinks and a few other things. So, as a precautionary measure, you can turn off Developer Mode once you have the app installed on your device.
Read: How to sideload Android apps using WSA on Windows 11
3] Create a new User Account

Every other thing being equal, in some cases problems like the issue you’re currently facing can occur in a specific user account especially if the account/profile is corrupted. In this case, you can create a new user account and then see if you can successfully install the app from that user account. If everything is working properly on the new account and there are other issues with the old account, you can transfer your files/data to the new user profile and then delete the old account/profile.
Read: Advantages of creating separate User Accounts on a Windows PC
4] Configure Group Policy to allow all trusted apps to install

If you’re encountering this issue in an enterprise environment, you can configure GPMC on the local device to allow all trusted apps to install. To perform this task, follow these steps:
- Open the Group Policy Management Console.
- Navigate to the following path:
Computer Configuration > Policies > Administrative Templates > Windows Components > App Package Deployment
- At the location, on the right pane, double-click the Allow all trusted apps to install policy to edit its properties.
- In the policy’s properties window that opens, select the radio button for Enabled.
- Click Apply > OK to save changes.
Note: Before the app package is a trusted app package, the (root) certificate, that is used for signing the app package, has to be trusted. So, to configure Group Policy to correctly import the root certificate for all computers, follow these steps:
- Open the Group Policy Management Console.
- Navigate to the following path:
Computer Configuration > Policies > Windows Settings > Security Settings > Public Key Policies
- At the location, on the right pane, right-click Trusted Root Certification Authorities.
- Select Import.
- In the Certificate Import Wizard that opens, do the following:
- On the Welcome page, click Next.
- On the File to Import page, Browse to the certificate and click Next.
- On the Certificate Store page, click Next.
- On the Completion page, click Finish.
- Exit GPMC when done.
Read: How to Install or Update Group Policy Administrative Templates (ADMX)
5] Perform System Restore

Some affected users reported they were previously able to deploy applications on their Windows 11/10 devices by running the Add-AppxPackage PowerShell cmdlet. In this case, aside from having updated Windows recently, it could be your system has undergone some changes that you might be unaware of. So, to resolve the issue, if this scenario applies to you, you can uninstall any newly installed system update by following the instructions in this guide. Otherwise, since you do not know what changed that might have broken this PowerShell functionality, you can follow the steps described in this guide to perform System Restore to revert your system to an earlier point in time when you know you weren’t having the issue you’re currently facing.
Read: System restore failed while copying, restoring, mounting Registry
6] Reset PC or In-place Upgrade Repair Windows 11/10
As a last resort, if nothing else works, you can reset the PC and choose the option to keep personal files. If the issue persists, you may be dealing with severe system corruption, in which case you can perform an in-place upgrade repair of Windows 11/10.
Hopefully, any of these fixes should work for you!
These posts might interest you:
- Fix Deployment Failed with HRESULT 0x80073D02 error
- Deployment failed HRESULT 0x80073cf6, Package could not be registered
- PowerShell Get-Appxpackage Not working or Access Denied
How do I install Appxbundle on Windows 11?
To install an APPX or APPBUNDLE file on your Windows 11 computer, simply double-click the file in File Explorer. Since the system will identify the file type and let you install the application, you shouldn’t encounter too many issues.
How do I fix deployment failed with HRESULT 0x80073CF6?
To fix the deployment failed with HRESULT 0x80073CF6 error on Windows 11/10 PC, you need to run the Windows Store apps Troubleshooter first. If it doesn’t fix, you can check for Windows Update and install all the available updates. However, you can also reset the Microsoft Store, and perform an in-place upgrade to troubleshoot the error.
Read: Fix Package could not be registered on Windows.