Wondering how to disable the Start menu on Windows 10?
The Windows Start menu is a big deal. It is probably the first thing that you think of when it comes to launching applications, searching for important files, or simply shutting down your PC. This iconic Start menu is so intertwined with the identity of Windows, that it is hard to imagine using Windows without it, but it might not be as convenient for some as it is for others.
Luckily, Windows allows its users to disable the Start menu and if you are one of those people who do not find it handy, you are in the right place.
In this guide, we will walk you through the steps of disabling the Start menu on Windows 10 in detail.
Let’s get started!
1. Use Windows Registry.
If you have always wanted to get better control over your operating system, then Windows Registry is something you should know about.
Windows Registry is a database of low-level information about Windows programs and processes. The information in the Registry Editor is stored in the form of Registry keys, and advanced users modify the relevant keys to customize their operating systems.
Here is how you can disable the Start menu on Windows 10 using Windows Registry:
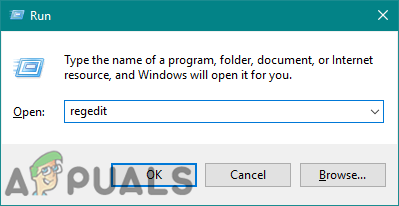
- Press Windows + R keys on your keyboard simultaneously to open a Run dialogue box.
- Inside the text field of the dialogue box, type ‘regedit’ and hit Enter. This will open Registry Editor on Windows.

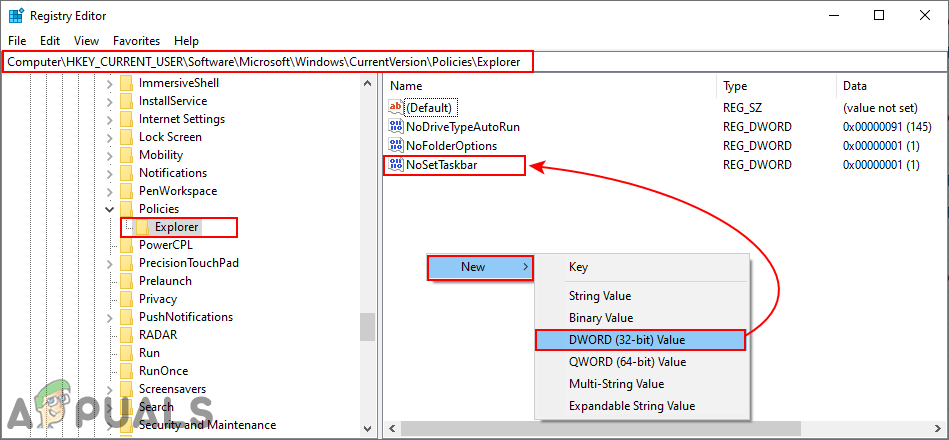
- Inside the Registry Editor window, navigate to the location mentioned below.
HKEY_CURRENT_USER\Software\Microsoft\Windows\CurrentVersion\Policies\Explorer
- In the right pane, right-click anywhere and select the New > DWORD (32-bit) Value option and name this value as NoSetTaskbar.
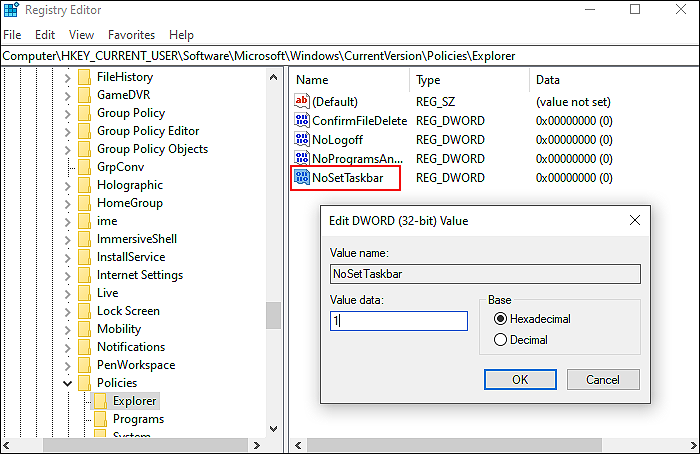
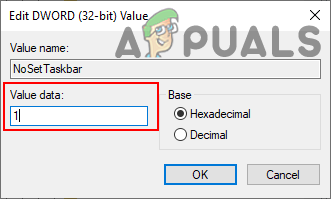
- Double-click on this value and under Value data, type 1.
This should disable the Start menu on Windows 10 without any issues.
2. Try Using CleanMyPC.
In the event that none of the suggested solutions work for you, there is a possibility that your system is infected with bugs or corrupt files that are hindering these operations. In this case, the best course of action would be to remove the junk files before attempting to troubleshoot.
Cleaning your computer from clutter is best done with a professional PC cleaner. If you want a recommendation, we like CleanMyPC.
Apart from removing junk files, CleanMyPC also offers an array of system maintenance tools that are designed to address other PC problems. When you install the tool and run an initial scan, it will automatically identify and fix problems without the need for extensive user input.
It is also quite easy to use, so even if you have never used a PC cleaner before, you will have no problem using CleanMyPC!
Try CleanMyPC Now!
3. Use Group Policy Editor.
Another easy way of disabling the Start menu is via Group Policy Editor.
Group Policy Editor is also an administrative-level tool that allows you to customize the operations of Windows, as the Windows Registry. Information here is stored in the form of policies, and we will be modifying the relevant policies to make our desired changes.
Here is what you need to do:
- Press Windows + R keys on your keyboard simultaneously to open a Run dialogue box.
- Inside the text field of the dialogue box, type ‘gpedit.msc’ and hit Enter. This will launch Group Policy Editor.

- In the newly launched window, navigate to the location mentioned below.
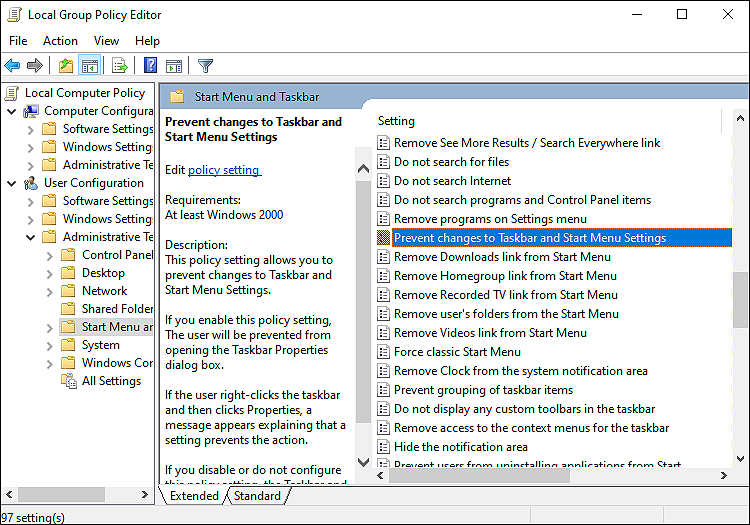
User Configuration\Administrative Templates\Start Menu and Taskbar\
- In the right pane, locate Prevent changes to Taskbar and Start Menu Settings and double-click on it.
- Click on Enabled and hit Apply to save the changes.
That’s it.
Hopefully, doing so will make desired changes in no time.
This brings us to the end of our guide on disabling the Start menu on Windows 10. We tried walking you through all the steps in detail and hope that one of the methods mentioned above did the trick for you. In case you still have any confusion about the methods, please let us know in the comment section below!
If this guide helped you, please share it. 🙂
-

Zainab Falak is a staff writer for Saint and an expert in Microsoft Windows, having authored more than 200 posts. She has a Bachelors in Actuarial Sciences and her passion for computers extends to exploring various aspects, from UI customization to the Windows registry and exploring error codes. Twitter
LinkedIn

Основная: Windows 10 изменила макет меню «Пуск», чтобы пользователи могли получать доступ к установленным приложениям, указанным в меню «Пуск». Однако некоторые люди, которые раньше запускали приложения с помощью сочетаний клавиш, могут захотеть отключить меню «Пуск». Итак, сегодня в этом посте с практическими рекомендациями будут предложены практические способы скрыть или удалить меню «Пуск».
Содержание
Что такое меню «Пуск» в Windows 10?
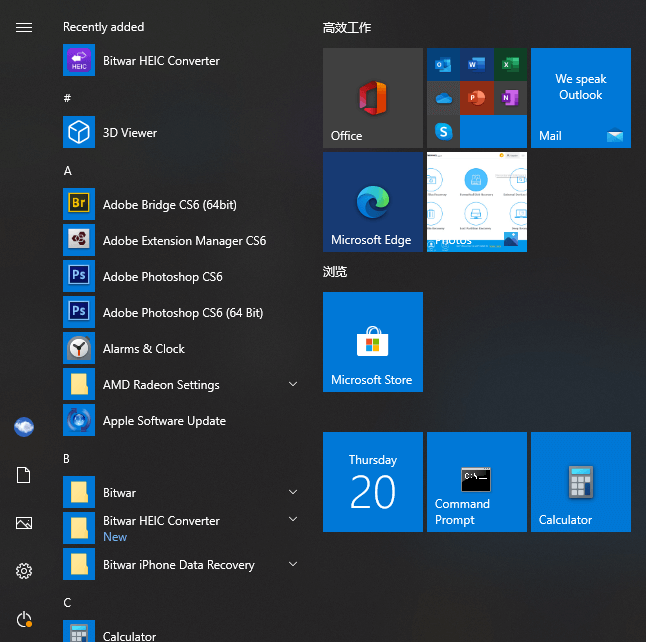
Меню «Пуск» Win10 — это каталог всех программ, папок и контактов, которые вы часто используете. Это основная точка доступа к приложениям на вашем ПК. Пользователи могут нажать кнопку «Пуск» или клавишу с логотипом Win, чтобы получить доступ к меню «Пуск».
В меню «Пуск» Windows 10 есть две панели и поле поиска. Пользователи могут найти все приложения на левой панели и соответствующие живые названия приложений на правой панели. Любое приложение в списке «Все приложения» на левой панели можно скопировать как плитку справа.
Как скрыть меню «Пуск» в Windows 10?
Скрыть меню «Пуск» с помощью StartIsGone
StartIsGone is a portable program that helps users to hide the Start Menu on the taskbar. It is fully native to Win 8.1 and Win 10.
- You should first download and run StartIsGone. Then its icon will appear in the system tray.
- Щелкните правой кнопкой мыши его значок в области уведомлений, чтобы получить доступ к загрузке при запуске и скрыть параметры значка в области уведомлений. Это требует ничтожных 1,7 МБ памяти.
- Если вы хотите показать или вернуть меню «Пуск», закройте программу SatrtIsGone.
Скрыть меню «Пуск» с помощью Start Killer
Начать убийцу это бесплатная программа для скрытия или отключения меню «Пуск». С помощью Start Killer легко скрыть кнопку «Пуск».
- Сначала вы должны загрузить и установить Start Killer.
- Запустите его из меню «Пуск» и щелкните его значок правой кнопкой мыши, чтобы открыть или выйти из «Настройки».
- Если вы хотите, чтобы Start Killer запускался автоматически, вы можете включить опцию «Загружать при запуске системы».
- Так же, как StartIsGone, вы можете закрыть Start Killer, чтобы вернуть меню «Пуск».
Hide the Start Menu With Registry Editor
- Open a Run command dialog box by pressing Win + R keys on your keyboard, then type regedit and press the Вводить key to open Registry Editor.
- Choose the Yes button for UAC (User Account Control) prompt.
- In the Current User hive, navigate to the following key: HKEY_CURRENT_USER\Software\Microsoft\Windows\CurrentVersion\Policies\Explorer
- In the Explorer key, right-click on the right pane and choose the New > DWORD (32-bit) Value option. Name this newly created value as NoSetTaskbar.
- Double-click on the NoSetTaskbar value to open it and then change Value data to 1.

- Lastly, you need to restart your system to apply the changes to the system.
- If you want to enable it back, you need to open the NoSetTaskbar value again and change Value data to 0.
NOTE: We always recommend users create a backup before making any changes in their Registry Editor.
Заключение
The Start Menu позволяет запускать приложения или программы, настраивать параметры Windows, обращаться за помощью в сложных ситуациях, выключать Windows и на время оставлять компьютер. Пользователи могут легко скрыть или удалить его, если он им не нужен. Они также могут легко вернуть его.
The Windows 10 Start Menu is not as customizable as it used to be in Windows 7. While the part on the right (the tiles) can be easily removed and added by right-clicking them, the traditional part on the left (folders and shortcuts) is not customizable any more. In Windows 7, you could right-click on a shortcut and then delete or rename it. Not any more in Windows 10.
There are tricks to modify the Windows 10 Start Menu shortcuts anyway. Find the instructions to do so below:
Traditional Applications
The traditional applications (like Word) still create their Start Menu items in the file system under:
C:\ProgramData\Microsoft\Windows\Start Menu\Programs
and
C:\Users\UserName\AppData\Roaming\Microsoft\Windows\Start Menu\Programs
So you can go there in File Explorer and delete or rename stuff.
Modern Apps
Unfortunately, Modern Apps don’t store their shortcuts in the file system. They store it in the registry and databases. The best way to get rid of a Start Menu item is to uninstall the program. So if you don’t want to have «Calculator» in the Start Menu, uninstall it.
But some Modern Apps cannot be uninstalled as this is blocked by Microsoft. For some of those, you can use Power Shell or you can at least disable them by renaming the folder in the SystemApps directory. Renaming the folder does not remove the Start Menu item, though.
For 3 items in the Start Menu, none of the above methods worked, I could not get them removed from the Start Menu:
Connect (Miracast)
Mixed Reality Portal
Wireless Display Media Viewer
So the solution I found is the following:
- Change a flag in the Apps database for those packages to make them uninstallable
- Uninstall those packages with Power Shell
This will remove the items from the Start Menu. Here are the steps in detail.
- Download the tool PSEXEC from Microsoft/Sysinternals: https://technet.microsoft.com/de-de/sysinternals/bb897553.aspx
Unzip it to your hard disk - Download the tool SQLLite Browser from: http://sqlitebrowser.org/
Choose «Portable App» and install it - Start a cmd box as Administrator
- CD to the directory where PSEXEC.exe sits
- Type
psexec.exe -i -s -d cmd.exe
to start a second cmd box with system rights - In that second command box, CD to the directory where SQLLiteDatabaseBrowserPortable.exe sits
- Type
SQLiteDatabaseBrowserPortable.exe - Once SQLLite is open, click on the “Open Database” button at the top
- Choose the following database:
C:\ProgramData\Microsoft\Windows\AppRepository\
StateRepository-Machine.srd - Now, click on the “Browse Data” tab, and change the table to “Package”
- Look under the PackageFullName column for the following 3 packages
Windows.MiracastView _6.3.0.0_neutral_neutral_cw5n1h2txyewy
Microsoft.Windows.HolographicFirstRun _10.0.15063.0_neutral_neutral_cw5n1h2txyewy
Microsoft.PPIProjection _10.0.15063.0_neutral_neutral_cw5n1h2txyewy - For all 3 packages, set the column IsInbox to 0
- Click on «Save changes»
- Now start Power Shell as Administrator
- Run the uninstallation for the 3 apps
get-appxpackage -allusers | where {$_.name -like “*mira*”} | remove-appxpackage
get-appxpackage -allusers | where {$_.name -like “*holographicfirstrun*”} | remove-appxpackage
get-appxpackage -allusers | where {$_.name -like “*ppiprojection*”} | remove-appxpackage
Now all three entries in the Start Menu should be gone. Of course, you can also uninstall other non-uninstallable apps with this method.
Remember, that this is not an official way supported by Microsoft, but it worked fine for me.
My experience with servers, networks and gadgets.
You are here:
Home » Windows 10 » 2 Ways To Hide Or Remove Start Button In Windows 10
Windows 10 finally brought back the Start menu. The Start menu or Start screen (turned off by default for desktops and laptops) can either be accessed by clicking on the Start button or pressing down the Windows logo key on the keyboard.
Most users open the Start menu by clicking on the Start button on the taskbar. However, many keyboard shortcut lovers use the Windows logo key to open the Start menu.
If you always use the keyboard to open the Start menu or configured Windows 10 to center taskbar icons, you might want to hide the Start button. Hiding the Start button frees up an icon’s space on the taskbar!
In this guide, we will take about the two ways out there to hide the Start button in Windows 10.
Note that hiding the Start button will not hide or disable the Start menu. You can access the Start menu by pressing the Windows logo key on the keyboard. Likewise, you can also access the Win + X menu using the Windows logo key and X keyboard shortcut. So, you will not miss out on any features when you hide the Start button.
Tip: Change the default Windows 10 Start button as well.
Hide the Windows 10 Start menu with Start Killer
Start Killer is a free program designed to disable or hide the Start menu. With Start menu Killer, hiding the Start button is easy. Just download the program, install the same, and run it. Alternatively, there is a portable version of the program also on offer. We prefer the portable version.
If you want to use the portable version, just download and run it to hide the Start button.
To see the Start button again, close the Start Killer program by right-clicking on the Start Killer icon in the system tray and then clicking the Exit option.
Download Start Killer
Remove the Start button using StartIsGone
StartIsGone is a portable program out there to help you hide the Start button on the taskbar. Downloading and running StartIsGone will hide the Start button immediately.
When running, its icon will show up in the system tray. Right-click on its tray icon to access load at startup and hide the system tray icon options. It takes a negligible 1.7 MB of memory.
Just like the Start Killer, closing the program (right-click on its tray icon and then exit) or via Task Manager will bring back the Start button.
Download StartIsGone
The Start Menu in Windows is used to locate all the installed applications on your system. All of the application icons will appear in an alphabetical list on the left side of the Start Menu screen. The Start Menu settings in the Settings app provide options that the user can show or hide from the Start Menu. However, as an administrator, you can also keep the settings permanently the same and disable the access to the Start Menu settings for the standard users. In this article, we will tell you the methods that you can use to achieve this specific task.
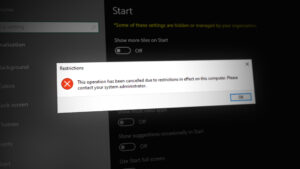
Preventing Users from Changing Start Menu Settings
This setting will disable and gray out the settings for the Start in the Settings app. It will also disable the Taskbar settings (Taskbar properties) context menu option that you can access by right-clicking on the Taskbar.
However, it will not disable the Taskbar settings from the Settings app. The reason that it has a Taskbar included in this setting is that in the previous version of Windows, a user had to open the Taskbar and Start Menu settings by right-clicking on the Taskbar and choosing the properties option. By disabling that context menu through the previous version of Windows would have completely disabled the Taskbar and Start Menu settings.

Whereas in Windows 10 the settings appear in the Settings app, so it does disable the Start Menu settings but not the Taskbar settings. You can use it to at least disable some of the Start Menu settings. Some of the settings in the Local Group Policy Editor were designed for previous versions of the operating system, but it can still work on the newest versions.
Method 1: Using the Local Group Policy Editor
The settings for disabling the Start Menu settings can be found in the Local Group Policy Editor. It is listed under the User Configuration, and it’s not available for the Computer configuration. The policy settings in the Local Group Policy Editor also show the details about that setting that you clicked.
However, you can skip this method if you are using the Windows Home Edition because the Local Group Policy Editor isn’t available in that operating system.
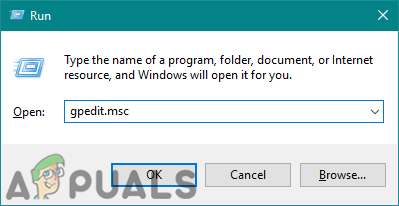
- Open a Run command dialog box by pressing Windows + R keys on your keyboard, then type “gpedit.msc” and press the Enter key to open the Local Group Policy Editor.

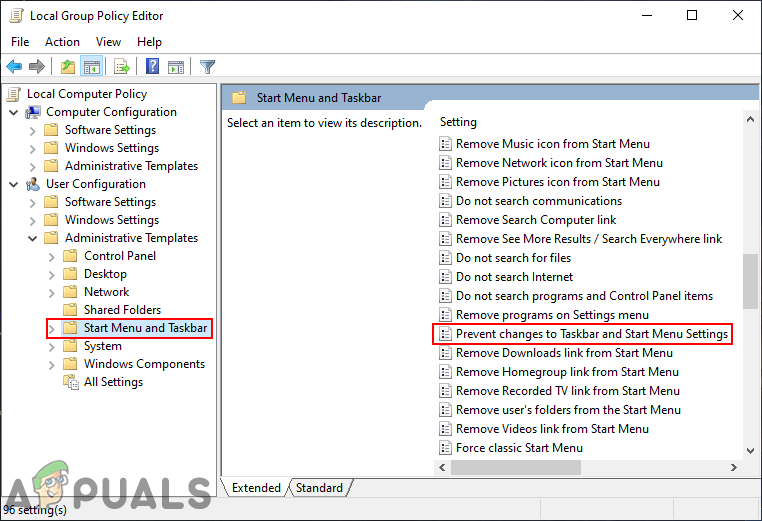
Opening the Local Group Policy Editor - In the Local Group Policy Editor window, navigate to the following category path:
User Configuration\Administrative Templates\Start Menu and Taskbar\

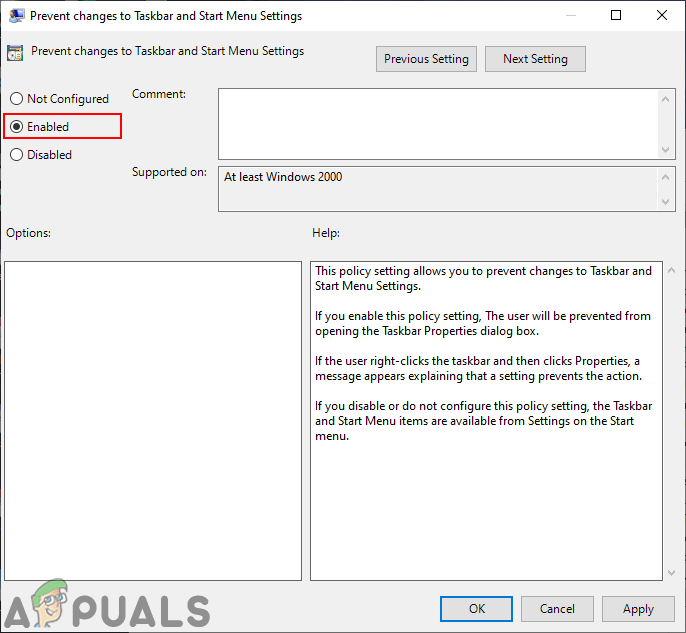
Navigating to the setting - Double-click on the policy-setting named “Prevent changes to Taskbar and Start Menu Settings” and it will open up in another window. Now change the toggle option from Not Configured to Enabled.

Enabling the setting - Finally, click on the Apply/Ok button to save the changes made. This will prevent users from changing the Start Menu settings.
- To enable the settings for Start Menu again, you need to change the toggle option back to Not Configured or Disabled.
Method 2: Using the Registry Editor
The Registry Editor is connected with the first method. Whenever you change the policy setting in the Local Group Policy Editor, it will automatically update your Registry. However, if you are using Windows Home Edition, then this may be the only method available for you. It requires a bit more steps than the first method, but it is not that hard. You can easily disable the Start Menu settings by following the below steps:
Note: We always recommend users to create a backup before making any changes in their Registry Editor.
- Open a Run command dialog box by pressing the Windows + R keys on your keyboard, then type “regedit” and press the Enter key to open the Registry Editor. Choose the Yes button for UAC (User Account Control) prompt.
Opening the Registry Editor - In the Current User hive, navigate to the following key:
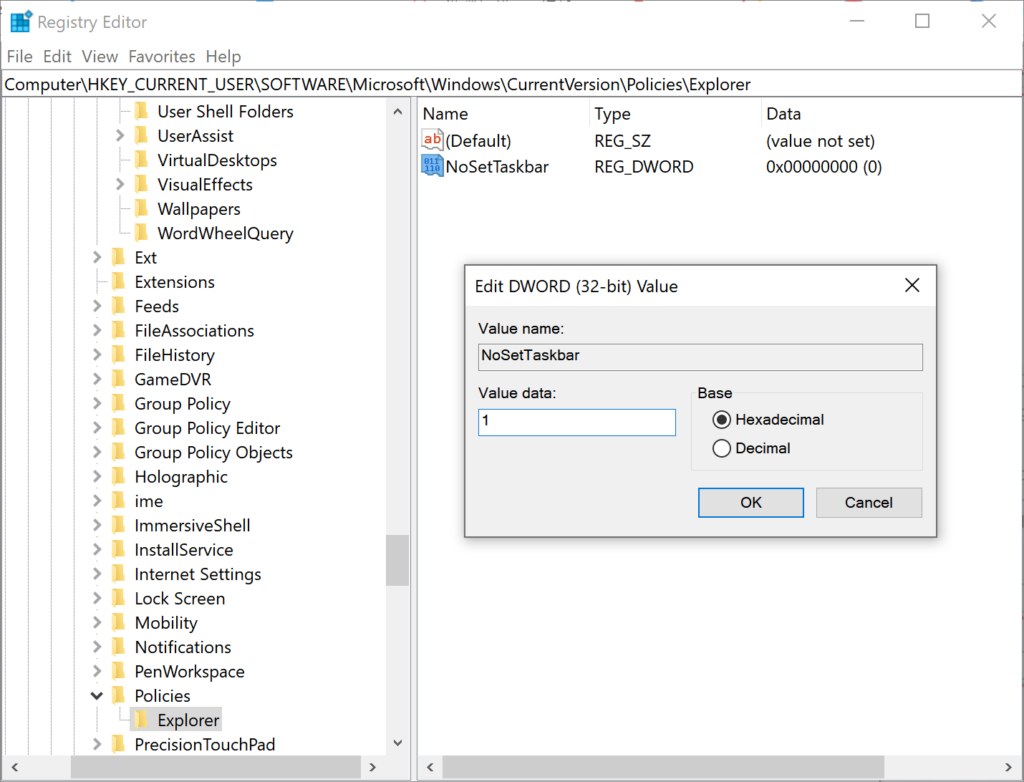
HKEY_CURRENT_USER\Software\Microsoft\Windows\CurrentVersion\Policies\Explorer
- In the Explorer key, right-click on the right pane and choose the New > DWORD (32-bit) Value option. Name this newly created value as “NoSetTaskbar“.

Creating a new value in Registry Editor - Double-click on the NoSetTaskbar value to open it and then change the value data to 1.

Enabling the value - Lastly, you need to restart your system to apply the changes to the system. This will disable the Start Menu settings for that specific user account.
- To enable it back, you need to open the NoSetTaskbar value again and change the value data to 0. You can also simply remove the value from the Registry Editor.

Kevin Arrows
Kevin Arrows is a highly experienced and knowledgeable technology specialist with over a decade of industry experience. He holds a Microsoft Certified Technology Specialist (MCTS) certification and has a deep passion for staying up-to-date on the latest tech developments. Kevin has written extensively on a wide range of tech-related topics, showcasing his expertise and knowledge in areas such as software development, cybersecurity, and cloud computing. His contributions to the tech field have been widely recognized and respected by his peers, and he is highly regarded for his ability to explain complex technical concepts in a clear and concise manner.