Common Open Research Emulator (CORE) on Windows
Notice: This is just an image created to lauch the CORE GUI from the CORE Git Repository using Docker and Phusions Passenger Docker.
Requirements
VcXsrv X Server
Install Chocolat (see https://chocolatey.org/install) using PowerShell:
Set-ExecutionPolicy Bypass -Scope Process -Force; iex ((New-Object System.Net.WebClient).DownloadString('https://chocolatey.org/install.ps1'))
Run choco install vcxsrv
Run XLaunch from your Start Menu and follow the wizard. Make sure to check Disable access control or create a file named config.xlauch and paste the following content:
<?xml version="1.0" encoding="UTF-8"?>
<XLaunch WindowMode="MultiWindow" ClientMode="NoClient" LocalClient="False" Display="-1" LocalProgram="xcalc" RemoteProgram="xterm" RemotePassword="" PrivateKey="" RemoteHost="" RemoteUser="" XDMCPHost="" XDMCPBroadcast="False" XDMCPIndirect="False" Clipboard="True" ClipboardPrimary="True" ExtraParams="" Wgl="True" DisableAC="True" XDMCPTerminate="False"/>
Or download file from the Github repo.
By using the wizard, the Server should run in the system tray. By using the file method, open the file with XLaunch.
Docker
Download and install Docker Desktop from the Official Docker Webiste.
Start the image
- Type
ipconfigto get the current IP address assigned to the vEthernet switch adapter. - Use this IP address instead of
YOUR_IPin the following command (powershell) but leave the:0.0:
Set-Variable -name DISPLAY -value YOUR_IP:0.0
- Start the container by running
docker run -ti --rm -e DISPLAY=$DISPLAY --name core reineltdev/core
You can add the :<VERSION> tag if neccessary.
Versions
:latestalways contains the latest build of this repository.:devalways contains the latest development build of this repository.:1.0followed the installation instructions of the CORE website and embedds the passenger-full image from phusion (ruby, nodejs, etc. installed):1.1removed the usage of offline files and reduced image size by compressing packages and excluding unused features like ruby, nodejs, …)
Disclaimer
I do not own any of the used softwares. All rights go to their creators or owners.
The Common Open Research Emulator (CORE) is a tool for emulating networks on one or more machines. You can connect these emulated networks to live networks. CORE consists of a GUI for drawing topologies of lightweight virtual machines, and Python modules for scripting network emulation.
License
Other License, GNU General Public License version 3.0 (GPLv3), GNU Library or Lesser General Public License version 3.0 (LGPLv3)
GiveForms lets you seamlessly embed a form on your website, allowing visitors to donate using credit card, PayPal, Google Pay or bank transfers. With a focus on intuitive, human centered design, GiveForms goal is to help you increase your online donations.
User Ratings
5.0
out of 5 stars
★★★★★
★★★★
★★★
★★
★
ease
1 of 5
2 of 5
3 of 5
4 of 5
5 of 5
5 / 5
features
1 of 5
2 of 5
3 of 5
4 of 5
5 of 5
4 / 5
design
1 of 5
2 of 5
3 of 5
4 of 5
5 of 5
5 / 5
support
1 of 5
2 of 5
3 of 5
4 of 5
5 of 5
5 / 5
Additional Project Details
Operating Systems
Linux
Languages
English
Intended Audience
Education, Telecommunications Industry, System Administrators, Testers
User Interface
X Window System (X11)
Programming Language
Python, C++
Related Categories
Python Networking Software,
Python Exam Software,
Python Router Firmware,
Python Live USB Distro,
C++ Networking Software,
C++ Exam Software,
C++ Router Firmware,
C++ Live USB Distro
Introduction
CORE (Common Open Research Emulator) is a tool for building virtual networks. As an emulator, CORE builds a
representation of a real computer network that runs in real time, as opposed to simulation, where abstract models are
used. The live-running emulation can be connected to physical networks and routers. It provides an environment for
running real applications and protocols, taking advantage of tools provided by the Linux operating system.
CORE is typically used for network and protocol research, demonstrations, application and platform testing, evaluating
networking scenarios, security studies, and increasing the size of physical test networks.
Key Features
- Efficient and scalable
- Runs applications and protocols without modification
- Drag and drop GUI
- Highly customizable
Меня часто спрашивают, какие еще бывают бесплатные симуляторы/эмуляторы сетей (кроме GNS3, Cisco Packet Tracer и UNetLab)? Решил привести небольшой список:
1) Huawei eNSP — эмулятор сетевого оборудования Huawei. Можно эмулировать коммутаторы, роутеры и даже межсетевой экран. Ну очень похож на GNS3 (китайцы…). Софт бесплатный, но требует регистрации на сайте.
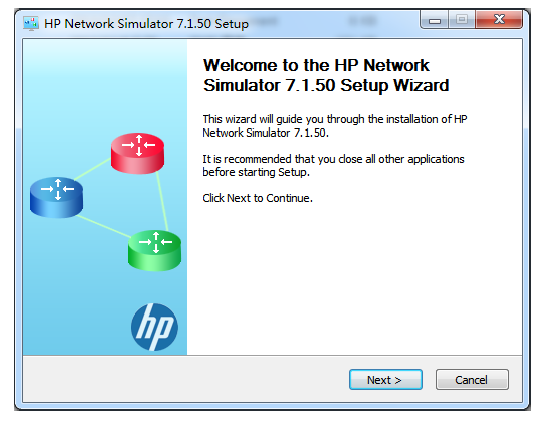
2) HP Network Simulator — эмулятор сетевого оборудования HP. Продукт основан на новой сетевой операционной системе HP Comware v7 и предназначен для сетевого моделирования и изучения пользовательского интерфейса и функциональных возможностей ОС HP Comware. Так же бесплатен. Подробнее здесь.
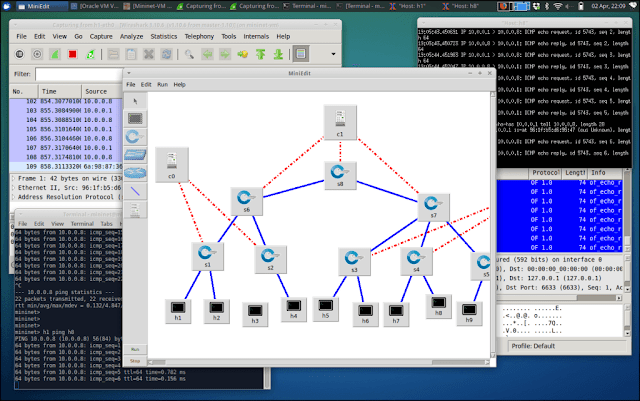
3) Mininet — эмулятор компьютерной сети. Под компьютерной сетью подразумеваются простые компьютеры — хосты, коммутаторы, а так же OpenFlow-контроллеры. Применяется чаще всего для изучения основ работы с SDN сетями (Open VSwitch). Подробнее здесь.
4) Core — Common Open Research Emulator. Эмулятор сетей c графическим интерфейсом. В качестве технологии виртуализации используется LXC. Является форком эмулятора IMUNES, но более «продвинутый», поэтому отдельно рассказывать про IMUNES я не буду.
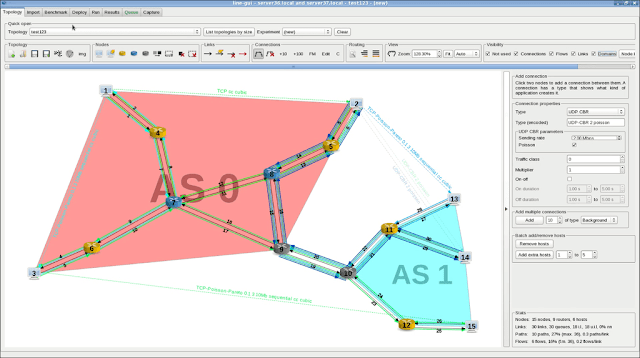
5) Line Network Emulator — очень мощный эмулятор сетей основанный на Linux-е. Очень гибкий в настройке. К сожалению мало документации.
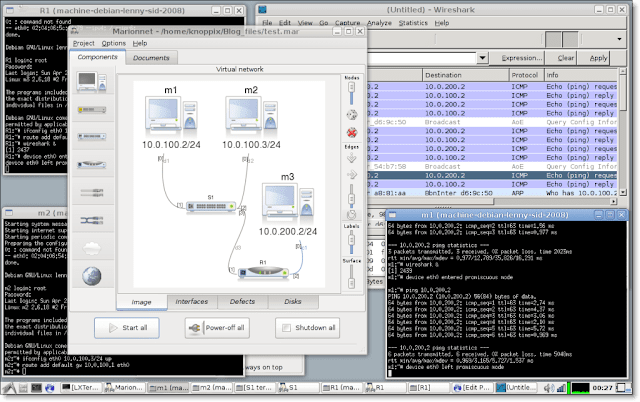
6) Marionnet — довольно интересный проект, предназначен для обучения. Эмулировать можно свичи, компьютеры, роутеры. Мануалов не нашел, но интерфейс весьма простой.
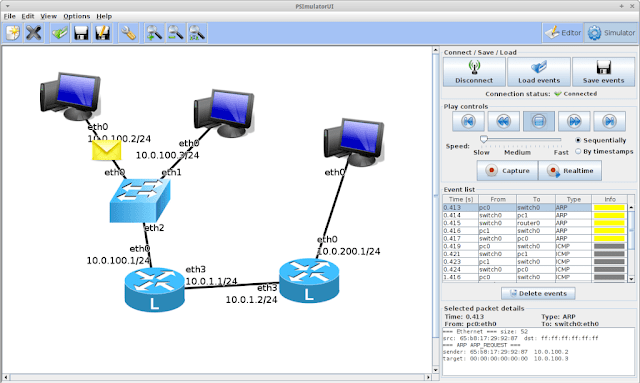
7) Psimulator2 — графический симулятор сетей. Позволят собирать в схему Linux и Cisco устройства.
The Common Open Research Emulator (CORE) is an open-source network simulator developed by Boeing’s Research and Technology division and supported, in part, by the US Naval Research Laboratory. It is a fork of the IMUNES Network Emulator project and it was developed as a tool to support a mobile data networking research project. It can also be used to emulate fixed link networks, which is the use-case we are investigating.
Common Open research Emulator running on VCORE virtual machine
CORE uses Linux Containers (LXC) as its virtualization method. It provides a GUI tool for creating networks and offers useful functions for inspecting the status of virtual network elements and for running applications and creating traffic in the network.
To test-drive the CORE Network Emulator, I will use CORE to create a simulated network of host computers, switches, and routers. I will run the simulation and show some of the interesting features available in CORE.
The VCORE virtual machine
The CORE project provides a virtual machine disk image called VCORE than can run in VirtualBox. This is a simple way to evaluate CORE. The file is very large – almost 600 megabytes – but it provides a fully-functional lubuntu system running CORE in a virtual machine on your PC. This allows us to quickly test CORE.
Download the VCORE appliance. Under the CORE Downloads section of the CORE web site, click on the vmware-image directory link. The click on the latest version of the VCORE ZIP archive which, in this case, is vcore–4.4.zip.
Unzip the vcore–4.4.zip archive to a directory on your computer. The unzipped files will be in a directory named vcore–4.4.
Start VirtualBox. Use the VirtualBox menu command, Machine → Add to select the vcore–4.4.vbox file. Virtualbox will load the virtual machine into its list of available virtual machines. In the VirtualBox virtual machine manager window, click on the virtual machine named vcore–4.4 and press the Start button. The VCORE virtual machine will start up.
VCORE virtual machine desktop
The VCORE virtual machine is running a version of Ubuntu 12.04 with the LXDE desktop. The VirtualBox Guest Additions are already installed.
Start CORE
Click on the CORE icon on the desktop to start the CORE network simulator. This will open the CORE graphical user interface, which is a window with a graph paper-like canvas, a toolbar on the left side, and a menu bar on the top.
CORE blank canvas
Edit mode
The CORE Network Emulator has two modes of operation: the Edit and Execute modes.
By default, the CORE GUI starts in Edit mode, which presents a blank canvas and a toolbar on the left side of the canvas. The user will draw a network scenario using the Edit mode tools and then run the simulation by pressing the green Start button.
Adding nodes to the CORE network simulator, in Edit mode
Create a test network
We will create a small test network that should allow us to demonstrate a simple routing example. In this example, we will create a network of the routers that are connected together in a triangle. This should allow us to demonstrate routing and re-routing caused by changes in the network. Around the network we will create access networks consisting of PCs and servers connected to the routers.
First, we add the three routers to the network. When the simulation starts, the router is configured to run Quagga with OSPFv2 and OSPFv3, and has IP Forwarding turned on. To create routers in CORE, click on the Network-layer virtual nodes tool and, in the tool’s the callout menu, select the Router tool. Then, move the mouse pointer to the canvas and click once in each spot where you want a router to appear.
Then, we want to add some PCs to the network. When the simulation starts, the PCs will be simply configured with only a default route. To add PCs, click on the Network Layer virtual nodes tool again and, in the callout menu, select the PC tool. Then, click on the canvas in each spot where you want a PC to appear.
Next, we want to add some switches so we can try out link-layer networking in the simulation. When the simulation starts, the switches are brctl processes that run on the your host operating system. Click on the Link-layer node tool and select the Switch tool. Then, click on the canvas in each spot where you want a switch to appear.
Then, we want to some other virtual computers on the far side of the network that will represent servers in a data center so, just for display reasons, I chose to use the Host node type for these PCs. When the simulation starts, the Host node functions the same as PC node. The only difference is that the Host node also has SSH started by default. To create the Host nodes, click on the Network-layer nodes tool and select the Host tool. Click on the canvas in each spot where you want to create a Host node.
Then, we need to create links between nodes in the network. To create links, click on the Link tool. Then, click and drag between nodes on the canvas to create links between the nodes.
Configure displayed information
By default, CORE displays the following information on the canvas next to each network-layer node:
- IPv4 address of each link connected to the node
- IPv6 address of each link connected to the node
- Node name
You may wish to change the information displayed, either to clean up the network diagram or to add even more information. In my case, I wanted to display only the IPv4 address and the port name for each link connected to a network-layer node. To change the information displayed, click on the Menu Bar and select the menu commands:
View → ShowThen, check or uncheck the type of information you would like to see displayed. You can perform this action in both Edit mode and Execute mode.
Configuring information displayed on each link
Execute mode
Pressing the Start button changes CORE to Execute mode and the toolbar changes to show a new set of tools available in this mode. The virtual machines in the network scenario are all created and started.
To quit the Execute mode, click on the red Stop button. This will kill all the virtual machines and return CORE to Edit mode.
Start the simulation by clicking on the Start button. The CORE network simulator will run commands that start up all the virtual machines in the simulation and connect them together in the manner specified on the canvas. The running network simulation we created is shown in the figure, below.
CORE network simulator in Execute mode
Inspect node status
CORE provides tools for inspecting the status of each virtual machine in the simulated network. You can start an xterm for each node and run shell commands to check the status of routing tables and to check the node configuration. But, CORE provides a simpler tool for checking some specific information on each node.
The Observer Widgets Tool provides a method for seeing information about any node simply by hovering your mouse pointer over that node in the canvas. Click on the tool in the Execution Toolbar and then select the widget you want to use. For example, you could select the IPv4 Routing Table widget or the Running processes widget. Then move your mouse pointer over the nodes in the canvas and see the results.
Selecting a widget in the Observer Widgets Tool
When you hover your mouse pointer over a node, the selected widget automatically executes a shell command on that node and returns the results to a pop-up window on the CORE canvas. It only works on Network-layer nodes. You can create new widgets and add them to the Observer Widgets Tool.
Viewing a node’s IPv4 routing table using an observer widget
Run network test tools
CORE provides some tools that start processes on virtual machines without opening an xterm and entering shell commands. One of these tools is the Two-node tool.
The Two-node tool will run either traceroute or ping commands. Click on the Two-node tool in the toolbar, then select the source node and destination node. Click on the Run button. This will execute the traceroute command on the source node, using the IP address of the destination node.
Running traceroute using the two-node tool
The results of the traceroute command are displayed in the text window in the tool. The path through the network identified by the traceroute command is also highlighted on the CORE canvas. Click the Clear button to remove the highlight and clear the text window.
In this example, we see that the path that data will take when sent between the source and destination nodes follow the shortest path through the network. This is because all links in the network have equal costs, which is the default settings for the OSPF routing configuration on each router.
Generating and visualizing traffic flows
CORE provides a tool for generating traffic between nodes. The Traffic Flows dialogue box provides a range of configurable options. To create a new traffic flow, click on the menu command:
Tools → Traffic...Then click on the New Traffic Flow button. The Edit Traffic Flow dialogue box will appear. Choose the source and destination nodes and select the traffic parameters. Click on the Start All Flows button in the Traffic Flows dialog box to start the traffic flow.
In this example, I created one traffic flow going in one direction between two nodes. I chose the same source and destination nodes I used in the previous traceroute example.
Configuring traffic flows between nodes
To visualize the traffic flow, you can configure CORE to display the Link Labels, using the Show command in the View menu. This will show the bandwidth of traffic passing on each link. To visualize the links where traffic is passing, configure the Throughput Widget to highlight a path that is passing more than a certain amount of traffic. For example, if you have configured a traffic flow of 100 kbps between two nodes, set the throughput widget to highligh paths that have a 50 kbps or higher traffic rate. To configure the thoughput widget, use the menu command:
Widgets → ThroughputIn this example, the links running traffic will be highlighted as a wide red line, while other links carrying no traffic or low levels of traffic (from peroidic routing protocol updates) will show as thin red lines.
Network reroute caused by change in link cost
To test that the routing protocols are operating, let’s change the network routing by changing the cost of links between the routers. We will increase the cost of the link over which traffic is flowing to force the network to reroute the traffic flow over the other links, instead.
Right click on the router, n1. Select Shell Window → vtysh. Do the same on router n3. This opens two xterm windows, one on router n1 and the other on router n3, both running the Quagga VTY shell. The default OSPF configuration on each node set the cost of every link to 10. If we change the cost of the link between n1 and n3 to 30, we should see OSPF converge on a lower-cost path between toutes n1 and n3 by passing through router n2.
On router n1, execute the following configuration changes:
n1# configure terminal
n1(config)# interface eth2
n1(config-if)# ospf cost 30
On router n3, execute the following configuration changes:
n3# configure terminal
n3(config)# interface eth0
n3(config-if)# ospf cost 30
Now the cost of the direct link between router n1 and n3 is 30, while the cost of the path from routers n1 to n2 to n3 is 20. The OSPF routing protocol will reconverge and routers n1 and n3 will start passing traffic along the route that goes through router n2.
Rerouted traffic flow after link cost changed
Change link configurations
The CORE Network Emulator also provides a tool to change link configurations. Double-click on a link to open the Link Configuraion dialogue box. You can change link parameters to limit maximum bandwidth on a link, set the link delay, introduce errors on the link, and change how the link is displayed on the canvas.
To see this work, you could open an xterm on one of the simulated nodes and ping another node on the network. Then, change the delay on one of the links between the two nodes and watch the ping times increase. You could also change the maximum bandwidth on the a link that is running traffic to a value smaller than the running traffic rate and watch the traffic on the link drop to the value you configured.
Other functions
The CORE Network Emulator offers a lot of functionality. The user can save the network configuration to a file and open saved configuration files. Also, the simulation can be connected to a physical Ethernet port to be connected to other computers running CORE simulations or to live equipment. This is called distributed CORE.
There are many functions available under the Menu tools that can be explored. However, when trying out the other tools in the CORE Network Emulator, I started encountering problems.
Problems
I don’t want to be negative. CORE looks like a great tool. The basic functionality provided by the CORE Network Emulator for setting up and running virtual machines in a simulated network works well. But, CORE offers many menu options and tools that do not appear to work as expected. Here is a list of some of the issues I encountered while taking a first look at this tool.
- The VCORE virtual machine does not appear to have all the software installed that CORE requires. For example, the tool has a menu command to launch Wireshark to monitor traffic on a specified link but Wireshark is not available in the VCORE virtual machine so the command fails. Also, the DHCP server software is not installed. XORP is not installed.
- The Linux Containers virtualization system has some incompatibilies with launching software services in virtual machines. For example, after I installed the DHCP server software, I could not start it in an LXC virtual machine.
- Some functions do not operate as expected. For example: the switch nodes do not have spanning tree enabled so it you connect switches in a loop, the resulting packet storm will consume 100% of your CPU. Also, the bit-error rate option in the Link Configuration dialog box appears to have no affect.
- You cannot modify key elements during Execute mode. For example, you cannot add or delete switches, virtual machines, or links.
- Performance is poor. I saw odd results when running traceroute, such as many timeouts. The CORE documentation suggests that performance will be poor when running CORE in a virtual machine, so this may improve when CORE is installed on a native Linux host computer.
- Bi-directional traffic flows do not work. I set up two flows between two nodes: one in each direction. Traffic only passed one way.
- If you start a ping command using the Run Tool or the Two-node Tool, you cannot stop it. You need to manually kill the process on the virtual node.
In summary, the VCORE virtual machine does not provide all the functionality that one would expect the CORE Network Emulator to provide, based on the tools and menu commands shown in the user interface. Where the functionality does exist, I found numerous bugs and performance issues.
Conclusion
The CORE Network Emulator offers an attractive graphical user interface that facilitates setting up a network of virtual machines. The tool offers a lot of advanced functionality but not all of that functionality works as expected. While the tool looks great and has good potential, my first impression is that it currently suffers from quality problems that need to be resolved.
In a future post, I will try to install CORE and all its prerequisite software on a Linux host computer, either by installing available CORE packages or by installing from source code, and see if that resolves some of the problems I encountered while taking a first look at the CORE network emulator running in the VCORE virtual machine.

