Большинство архивов, с которыми приходится сталкиваться пользователям Windows, имеют формат ZIP, поддерживаемый операционной системой из коробки. Почти столь же часто встречаются архивы RAR, открываемые обычно с помощью сторонних архиваторов. Но может случиться такое, что вам попадется файл TAR.GZ, TGZ или GZ. Архивы этого типа являются столь же популярными как RAR и ZIP, только в среде пользователей Unix-систем, в частности, Linux и MacOS.
Если у вас установлен сторонний архиватор (подойдет даже WinRAR), для просмотра и распаковки unix-архивов можете воспользоваться им. Однако в систему Windows 10 поддержка TAR включена по умолчанию, так что наличие дополнительного ПО в принципе не требуется. Кроме того, в «десятке» есть встроенная подсистема Linux, и если этот компонент активен, то ничто не мешает задействовать его.
Итак, у вас есть архив TAR (или его модификация), из которого необходимо извлечь содержимое. Откройте от имени администратора классическую командную строку и выполните в ней команду следующего вида:
tar -xvzf [путь к архиву] -C [путь к целевой папке]
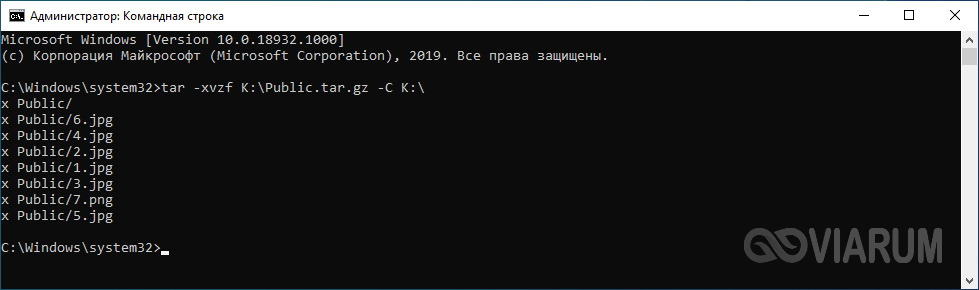
Путь указываем полный и без скобок. Архив будет распакован в указанное расположение, а список содержащихся в нем файлов отобразится в консоли. Приведенный здесь способ, однако, работает не во всех версиях «десятки», а только в сборках начиная с Windows 10 1809 и далее.
Если у вас включена подсистема Linux, можете использовать для распаковки TAR.GZ, TGZ и GZ-архивов установленные дистрибутивы Linux. Рассмотрим пример с Ubuntu. Запустив ее из меню Пуск, выполните в открывшейся консоли такую команду:
sudo tar -xvzf /mnt/[путь к архиву] -C /mnt/[путь к целевой папке]

Похоже, не правда ли? Нужно только добавить sudo и /mnt/ к началу пути, конечный результат будет тот же, что и при распаковке архива в среде Windows 10. Кстати, для отключения вывода списка извлекаемых файлов достаточно убрать аргумент v из набора ключей -xvzf. И еще одно маленькое, но важное замечание. В путях Windows допускается использовать как строчные, так и прописные буквы, ничего от этого не меняется. В Linux так делать нельзя, поскольку эта система чувствительна к регистру, а, значит, c/User и c/user в ней будут разными путями.

Эксперт по ремонту и настройке ПК с более чем 5-летним опытом работы. Имеет профильное образование по специальности оператор ЭВМ.
Задать вопрос
Если у вас есть файлы .tar.gz, .tgz или .gz, вы можете использовать шаги ниже, чтобы использовать инструмент командной строки tar для извлечения его содержимого в Windows 10.
Файл в формате.tar.gz — это файл, который был создан с использованием tar -архива приложения на основе Unix, а затем сжат с использованием сжатия gzip. Эти файлы часто вы можете найти с двойным расширением (.tar .gz), расширение также можно сократить до.tgz или.gz.
Обычно tar-файлы используются пользователями Ubuntu и macOS для архивирования данных и резервного копирования, но иногда пользователи Windows 10 также могут столкнуться с этими типами файлов и могут нуждаться в извлечении их содержимого.
Хотя вы можете использовать ряд сторонних приложений, таких как 7-Zip, иногда эти приложения плохо работают с файлами, созданными на другой платформе, и медленно распаковывают большое количество файлов. К счастью Windows 10 включает встроенную поддержку tar, вы можете использовать командную строку (CMD) для распаковки этих файлов. Кроме того, вы даже можете использовать подсистему Windows для Linux (WSL), которая обеспечивает встроенную поддержку Ubuntu, Fedora и SUSE, следовательно, вы также можете получить доступ ко многим инструментам Linux, включая tar, для быстрого извлечения содержимого из tar-архивов.
В этом руководстве вы узнаете, как использовать собственные команды tar в Windows 10 с помощью командной строки и Ubuntu для извлечения содержимого файла .tar.gz.
- Содержание
- Как извлечь tar-архивы .tar.gz, .tgz или .gz, используя tar в Windows 10
- Как извлечь tar-архивы .tar.gz, .tgz или .gz, используя tar в Linux на Windows 10
Как извлечь tar-архивы .tar.gz, .tgz или .gz, используя tar в Windows 10
Используйте эти шаги для извлечения .tar.gz, .tgz, .gz и .zip файлов с использованием tar в Windows 10 без необходимости установки подсистемы Windows для Linux:
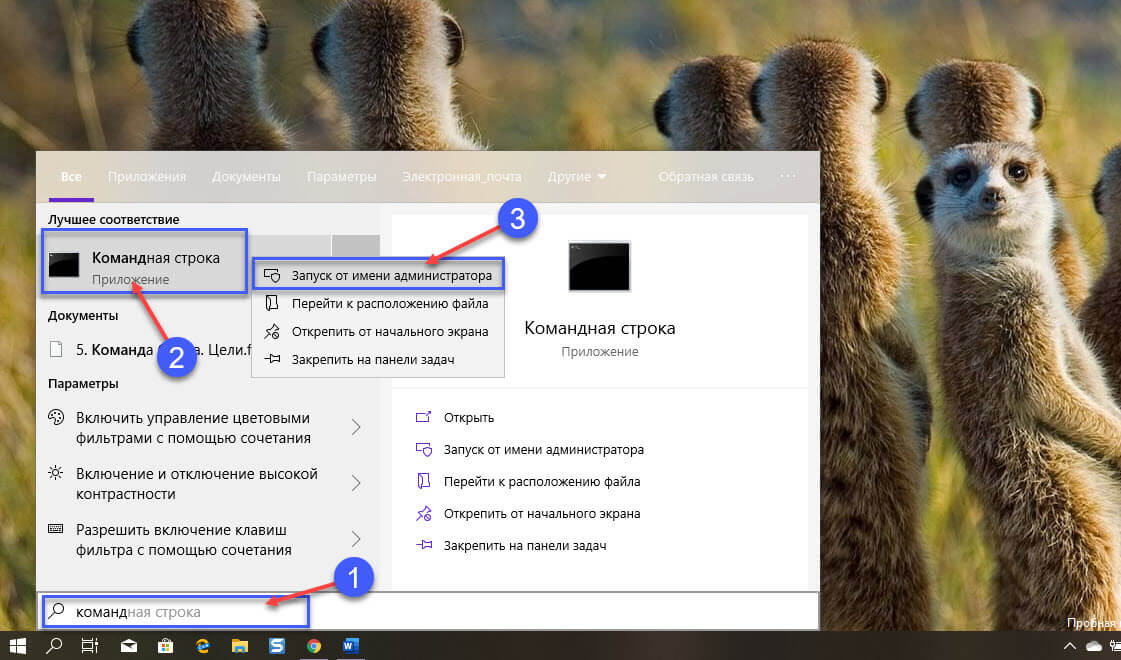
Шаг 1: Откройте меню «Пуск». Начните набирать Командная строка, кликните правой кнопкой мыши первый результат в поиске и выберите параметр «Запуск от имени администратора».
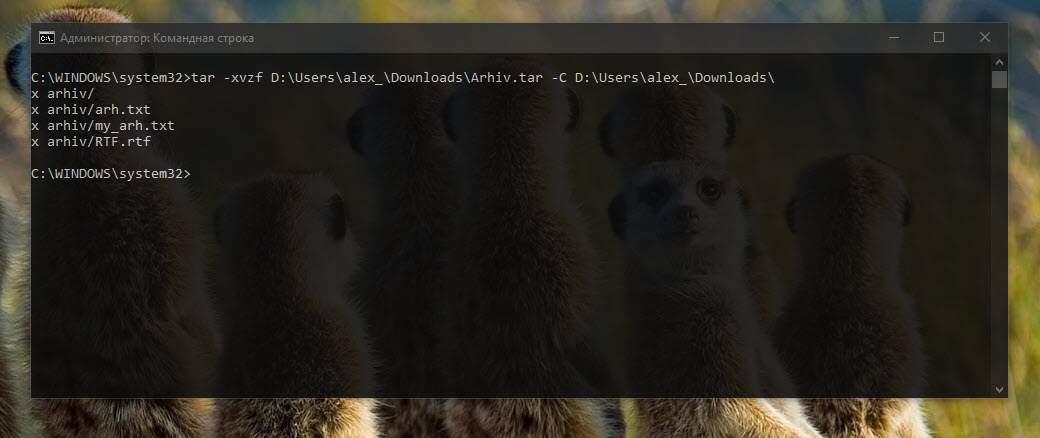
Шаг 2: Введите следующую команду, чтобы использовать tar для распаковки файлов, и нажмите Enter :
tar -xvzf C:\путь_к_архиву\имя_архива.tar.gz -C C:\путь_к_папке\где_будет_распакован_архив
*Встроенная поддержка tar в Windows 10
Совет: поскольку вы используете tar в Windows 10, вам не нужно указывать путь, как если бы вы работали в Linux. Вы можете просто использовать формат пути, используемый Windows.
После того, как вы выполните эти шаги, через несколько секунд все файлы и папки будут извлечены по указанному вами пути назначения.
Предполагается, что вы распаковываете архив, созданный в другой системе, поэтому пропускаем некоторые аргументы, обычно необходимые для сохранения разрешений, которые в Windows 10 не нужны для доступа к файлам.
Как извлечь tar-архивы .tar.gz, .tgz или .gz, используя tar в Linux на Windows 10
Чтобы использовать tar в Linux, вам нужно включить подсистему Windows для Linux (WSL), а затем установить Ubuntu из магазина Microsoft Store.
После того, как вы установили Ubuntu в Windows 10, выполните следующие шаги, чтобы извлечь файл .tar.gz :
Важное замечание: Начиная с версии 1803, инструмент управления командами tar входит в состав Windows 10, что означает, что для использования средства больше не требуется использование подсистемы Windows для Linux.
Шаг 1: Откройте меню «Пуск». Найдите Ubuntu и откройте приложение.
Шаг 2: Введите следующую команду, чтобы извлечь содержимое файла.tar.gz, и нажмите Enter :
sudo tar -xvzf /mnt/c/PATH/TO/TAR-FILE/Downloads/FILE-NAME.tar.gz -C /mnt/c/PATH/TO/DESTINATION/FOLDER

*Команда tar в Windows 10
Замените «c/PATH/TO/TAR-FILE/Downloads/FILE-NAME.tar.gz» — на путь и имя вашего архива
Замените «c/PATH/TO/DESTINATION/FOLDER» — на путь куда будет распакован архив
В приведенной выше команде мы набираем sudo для запуска приложения от имени администратора, tar для вызова приложения, а затем передаем ему несколько аргументов, в том числе:
- x — указывает tar, что вы хотите извлечь содержимое.
- v — Это необязательный аргумент для отображения процесса извлечения. В противном случае вы увидите только мигающий курсор, пока процесс не будет завершен.
- z — указывает tar распаковать содержимое файла.tar.gz с помощью gzip.
- f — указывает tar имя файла, который вы собираетесь извлечь.
Затем вам нужно указать путь к архивному файлу, который вы хотите извлечь. Вы заметите, что путь начинается /mnt/c/, а не c:\ потому, что мы на самом деле работаем в Linux.
- -C — (дефис и заглавная C ) используется, чтобы указать tar сменить папку.
Когда вы выполняете команду, вы начинаете с исходной папки, а затем вам нужно указать папку назначения куда будет распакован архив. Вы можете извлекать файлы в любую папку, которую хотите, но не забудьте начать путь, /mnt/
Очень важно обращать внимание на прописные и строчные буквы при вводе команды в Linux, так как Downloads отличается от downloads
В этом руководстве мы рассмотрели основные шаги для выполнения конкретной задачи. Если вы не являетесь пользователем Linux, и хотите узнать больше о инструменте WSL ознакомьтесь с нашими руководствами:
- (WSL2) Что такое подсистема Windows для Linux 2?
- Как установить подсистему Windows для Linux 2 в Windows 10
- Установите Linux из Магазина Microsoft в Windows 10.
- Доступ к файлам WSL Linux с помощью Проводника Windows 10
- Как запустить Ubuntu Bash в Windows 10.
- Как запускать приложения Linux GUI в Windows 10.
- Как Выполнить команды Linux из Командной строки Windows 10.
- Проверьте погоду в Windows 10 с помощью Linux Bash
- Новый Windows Terminal в магазине Microsoft.

.tar.gz files are commonly known as tarballs.
The term “tarball” is derived from two components: “.tar” representing the Tape Archive format and “.gz” denoting the gzip compression algorithm.
.tar.gz files are widely used for source code Distribution & Web Server Deployment due to their versatile nature and efficient compression.
First, let’s understand what the difference between .tar & .tar.gz file format and the benefits of it.
Then we’ll jump into the step-by-step process of unzipping on both Linux and Windows platforms.
Let’s get rolling!
.tar Files

The .tar extension stands for “tape archive.”
A .tar file is an archive that does not undergo any compression.
It just bundles files & directories together while preserving their file structure and metadata. This means it takes all the specified files and puts them together into one container.
But it does not compress the data, which results in a larger file size compared to compressed formats.
.tar.gz Files
These files are a combination of two steps: Archiving and Compression.
The .tar.gz extension indicates a file that is a .tar archive and compressed using the gzip utility.
Gzip compression reduces the overall file size, which makes it more efficient for distribution, backup, and storage purposes.
This format is common in the Unix/Linux world and is widely used to create compressed archives.
This compression is lossless – that means no data is lost during the compression process, and the original files can be fully restored upon extraction.
Also read: tar Command Examples for Sysadmin and Developers
.tar vs .tar.gz Files
Both these file archives are used for binding multiple files and directories into a single file, but they just differ in their compression methods. Here are some general differences between the .tar and .tar.gz files.
| Feature | .tar Files | .tar.gz Files |
| Compression | No compression, files are stored as it is. | Compressed using gzip |
| File Extension | .tar | .tar.gz or .tgz |
| Compression Ratio | None | High compression ratio |
| Ideal Use | Archiving only | Distribution and Archiving |
| File Size | Larger | Smaller |
| Extraction | Quick | Slower (due to decompression) |
| Use Case | Archiving files, creating backups | Efficient data transfer, software distribution |
Benefits of .tar.gz Files
These files offer several benefits that make them a popular choice for archiving and distributing files. Here are some of the key advantages:
Preservation of File Attributes
.tar.gz files retain important file attributes such as permissions, timestamps, and ownership information. When the archive is extracted, these attributes are restored. That means they maintain their original characteristics.
File Organization
As already discussed, The .tar format allows bundling multiple files into a single file which makes it easier to organize related data or complex directory structures into a single archive.
This simplifies file management and reduces the risk of data loss during transfers.
Checksum Integrity
gzip compression uses a checksum to make sure data integrity. When you extract files from a .tar.gz archive, the checksum is automatically verified to detect & handle any potential data corruption.
Open Source Standard
The .tar.gz format is an open-source standard. That means it is not tied to any specific proprietary software.
Incremental Backups
These files can be used in incremental backup strategies – where only new or modified files are added to the archive.
To unzip the .tar.gz files, you’ll need to use specific commands and tools depending on your operating system. Let’s explore the extraction process for both Linux & Windows platforms.
Linux systems come with built-in tools that can extract .tar.gz files easily. The most commonly used command-line tool for this purpose is tar. Follow these steps:
Method 1: Using the Command Line
Step 1: Open a terminal.
Step 2: Navigate to the directory where your file is located using the ‘cd” command. For example, To navigate to the “Downloads” folder:
cd ~/DownloadsStep 3: And the next step is to unzip the .tar.gz archive format. For that, just use the following command
tar -zxvf your_file.tar.gzThe options used here are:
z: Use gzip to decompress the file.
x: Extract the files.
v: Verbose mode (optional but provides detailed output).
f: Specify the filename to be extracted.
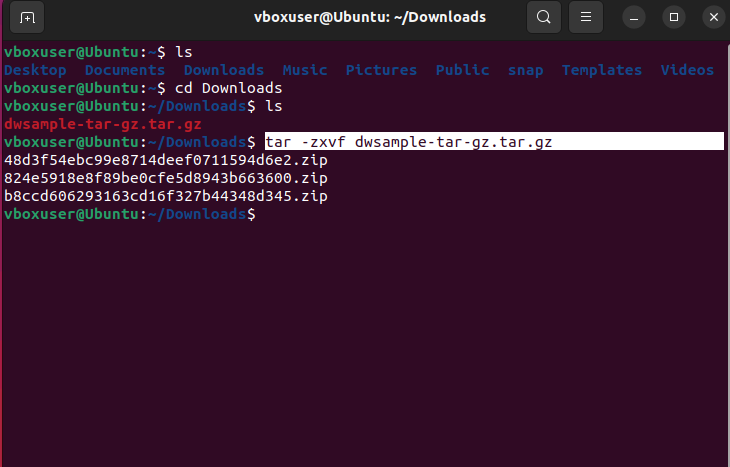
You can notice in the above image that the archive files are extracted in the same working directory.
Method 2: Using File Manager (GUI)
Step 1: Open the file manager (e.g., Nemo, Nautilus, Dolphin).
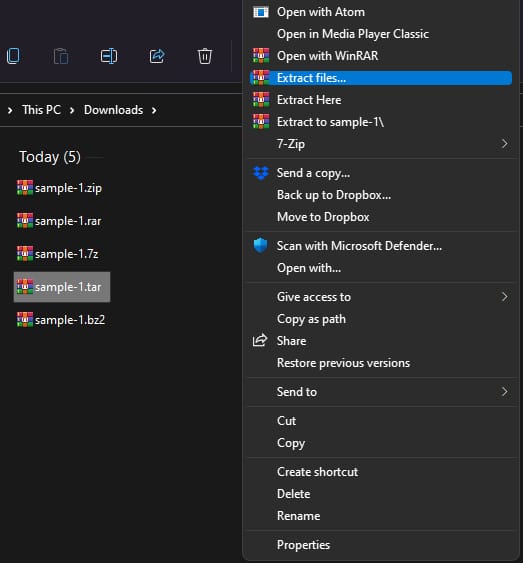
Step 2: Right-click the .tar.gz file.
Step 3: Select the “Extract Here” or “Extract to” option – depending on whether you want the files to be extracted in the same location or a different folder.
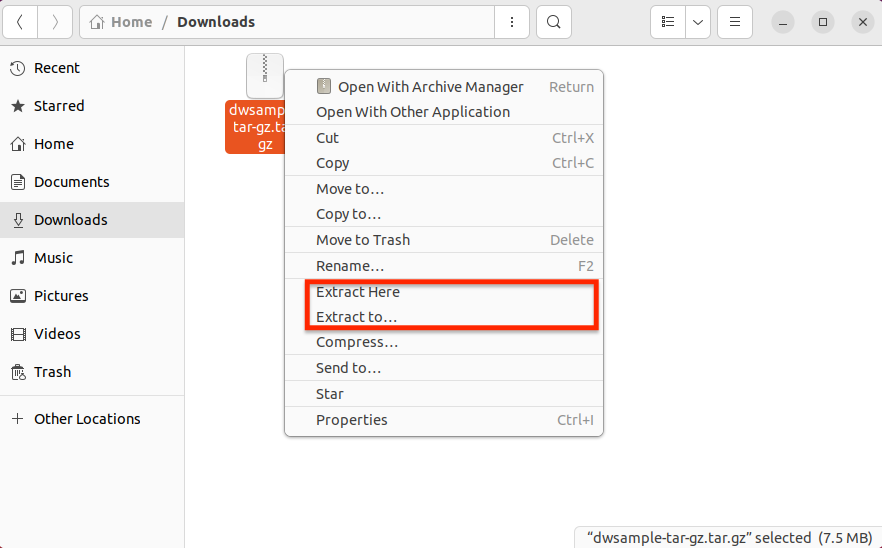
The files will be extracted to the selected location.
You can easily extract .tar.gz files using third-party tools like 7 zip and Winrar on the Windows system.
Method 1: Using 7-Zip
7-Zip is a free and open-source tool with high compression ratios & supports a wide range of archive formats. It offers AES-256 encryption to protect sensitive data within archives. Users can utilize the 7-zip command-line interface for automated & scripted extraction tasks.
It also integrates with the Windows Explorer context menu, which enables users to create and extract archives directly from the right-click menu.
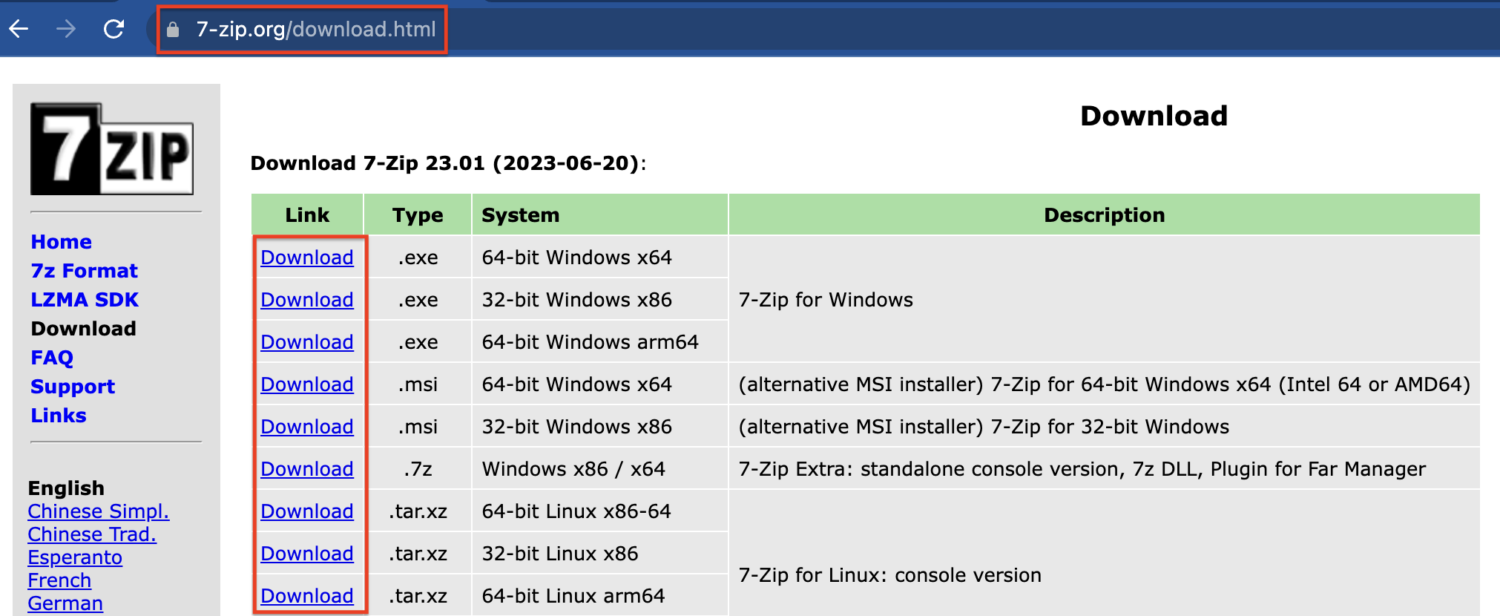
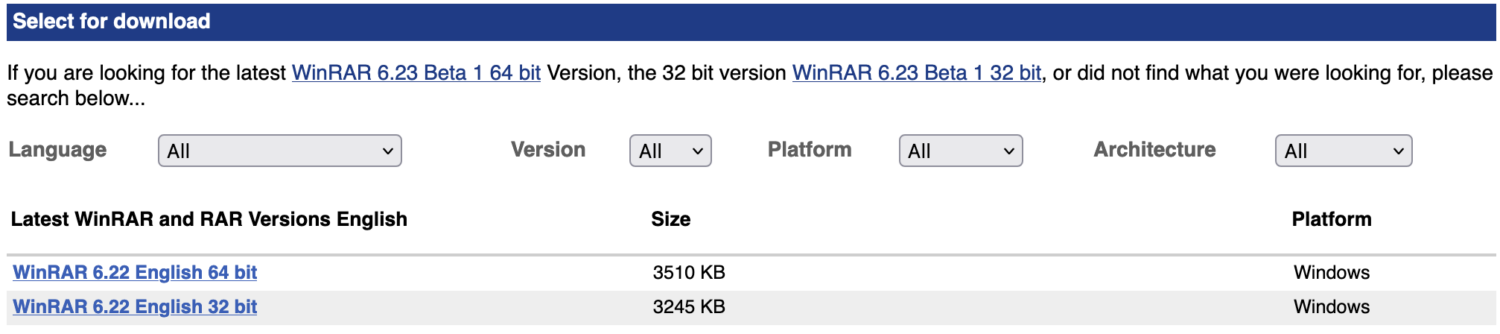
Step 1: Visit the official website & download the suitable version for your Windows OS.
Step 2: Install 7-Zip by following the on-screen instructions.
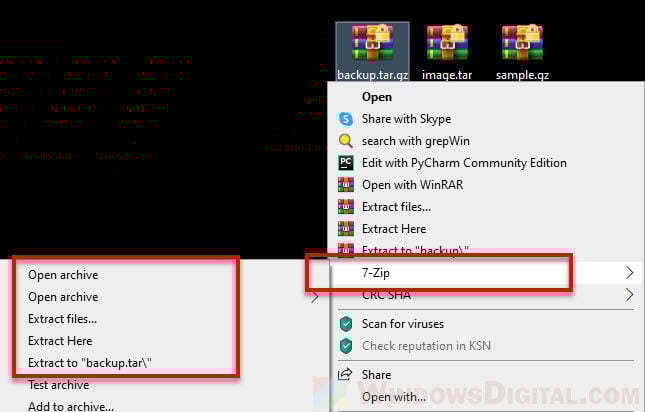
Step 3: Navigate to the directory and right-click on the file you want to extract.
Step 4: Hover over the 7-Zip option, and choose “Extract Here” from the context menu.
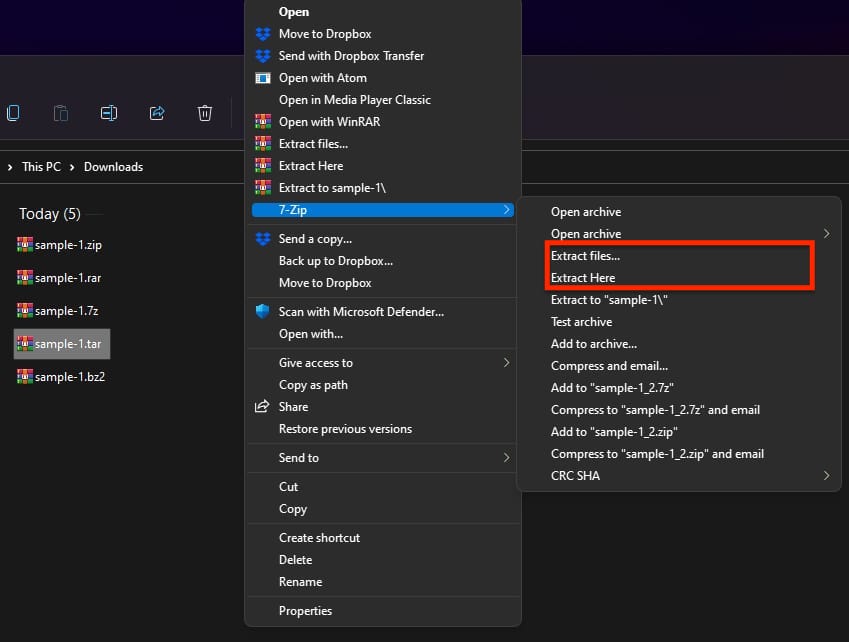
The extraction method is precisely the same for tar files that have compression, such as.tar.gz,.tar.bz2, and others.
Method 2: Using WinRAR
WinRAR is a popular file compression & archive utility software. It allows users to create, view, and extract files in various archive formats, including its native .RAR format as well as other common formats like .ZIP, .7z, ISO, .TAR, and more.
Step 1: WinRAR comes pre-installed on almost every Windows system. In case it’s missing, download and install from the official website.
Step 2: Right-click on the file and then select “Extract Here” to extract the contents of the archive into the same directory or you can also choose the desired location.
WinRAR is distributed as shareware. That means users can download and use it for free during a trial period. Also, its trial version does not have time limitations, and users can still use it even after the trial period has expired, with occasional reminders to purchase the license.
Author’s note✍️
.tar.gz files offer an organized way to store & distribute multiple files while saving disk space.
Whether you prefer command-line tools or graphical file archivers, the extraction process is pretty simple.
In Linux, users have multiple ways to extract .tar.gz files – through the terminal and graphical file archivers. The terminal method is only recommended for those comfortable with command-line interactions, while graphical file archivers provide a user-friendly experience and are good for beginners.
On the other hand, Windows users can rely on third-party file archiver tools like 7-zip or WinRAR to effortlessly extract files.
You may also be interested in learning about the best WinZip alternatives to compress files.
From videos to entire software packages, many files are compressed and stored using the .tar.gz format. While extracting a .tar.gz file isn’t quite as easy as unzipping a .zip, it’s still pretty straightforward.
As software becomes more powerful and media becomes more data-rich, file sizes continue to grow at exponential rates. As a result, it’s becoming increasingly common to store and send files in compressed formats as .tar.gz.
Compressing and extracting these files, however, isn’t always intuitive. In this guide, we’ll provide basic guides to unzip .tar.gz files in Linux and Windows, as well as a few helpful tips and tricks.
What Are .tar and .tar.gz Files?
A “.tar” file is a collection of files compressed into a single file or archive. Short for “Tape ARchive,” the name “TAR” is a throwback to when files were stored on magnetic tape drives.
Thankfully, you don’t need to be a 1960s computer technician to use and extract .tar files – nor do modern .tar files even have anything to do with old computers.
Just like the more familiar .zip files, .tar files compress large files into a single package, making it easier to store and send them through email, servers, and so on. As a result, it’s become a common file extension for many open-source software packages and other resources.
But with .zip being the easier of the two to use, why use .tar in the first place? As we’ll see in the next section, .tar comes with a few extra features that make it the better compression format for certain files and applications.
Compressing and extracting files isn’t always intuitive. 😅 Learn how to unzip .tar.gz files in Linux and Windows with help from this guide 🚀Click to Tweet
.tar vs .zip
Where most operating systems make it easy to extract and create .zip files, the same can’t really be said for .tar files — at least not in ways that are easy to notice.
Of course, that’s not to say .tar files are some kind of “lesser” format than .zip. Rather, they both accomplish the same task (file compression) in the same way. Here’s a breakdown of how it all works.
- A .tar file is a collection of uncompressed files, sometimes known as a tarball. Since .tar doesn’t compress anything, it requires a separate compression utility for compression. As we’ll see later, one popular compression utility is gzip, which compresses a .tar into a .tar.gz file.
- A .zip file is a collection of compressed files. Rather than use a separate compression utility to compress the entire collection, .zip automatically compresses each file within the collection.
By now, you’ve probably noticed the major difference between .tar and .zip files: compression methods.
Where .zip files consist of many individually compressed files, .tar files are compressed as a single package, leaving its files uncompressed. In other words, .zip files are a collection of compressed files, while .tar files are a compressed collection of files.
But does the compression method really matter, especially if both methods technically produce compressed files?
It depends. For sending and storing, both .zip and .tar.gz files will allow you to send relatively large packages as a single file. However, there are some pretty major differences when it comes to accessing data within the files and the compression efficiency.
- .zip files are more accessible. Since data in a .zip are compressed individually, they can also be accessed individually. By contrast, data in a .tar.gz is only accessible after extracting the entire file.
- .tar.gz files are more space-efficient. Since .tar files are compressed as a single entity rather than a group of individually compressed files, compression utilities can group similarities between files and cut down on space. In other words, compressing files as a single group allows for more efficient compression methods, thereby saving space and reducing the overall size of the file.
If that’s not entirely clear, don’t worry. Technical details aside, all you need to remember is that .zip files are more accessible but less space-efficient, while .tar files are less accessible but more space-efficient. As a result, one isn’t necessarily better than the other — it’s all a matter of application.
What’s The Difference Between .tar and .tar.gz Files?
While both .tar and .tar.gz refer to file archives, a .tar.gz file is a .tar file that’s been compressed or “zipped” using the gzip utility. Using gzip for compression is what gives the file a “.gz” double extension.
Though gzip is the most common compression utility, it’s not the only one. As you might imagine, using a different compression utility on a .tar file will result in a different double extension. Some common examples include .tar.bz2 (bzip2), .tar.br (Brotli), and .tar.zst (zstd), among many others.
As we’ll see later, different compression utilities may require different methods for extracting and unzipping files. Though we’ll mostly focus on .tar.gz files, check out the end of the article for some quick tips on extracting .tar files in other formats.
Otherwise, keep reading to learn how to unzip .tar.gz files in Linux, macOS, and Windows.
How Do I Unzip a .tar.gz File in Linux Terminal?
Most Linux distributions and macOS include built-in tools for zipping and unzipping .tar and .tar.gz files. While the tar utility is enough for most purposes, you’ll need the gzip utility to create .tar.gz files.
Unzip .tar.gz in Linux
You can unzip most .tar.gz and other compressed .tar files using the tar utility.
For the simplest method, begin by opening the terminal (CTRL+ALT+T) and navigate to the directory of the .tar.gz file you want to unzip. Then enter the following command:
Extract .tar.gz file to current working directory:
tar -xf filename.tar.gzThis command will extract (-x) the file (-f) specified (in this case, filename.tar.gz) to the current directory. Note that this command also works with other common compression formats such as .tar.bz2.
The tar command also comes with several other options. Like many Linux commands, one of these is a verbose output (-v) that prints the extracted files to the terminal window:
Extract .tar.gz file to current working directory and print output:
tar -xvf filename.tar.gzAgain, the above commands will extract to the current working directory by default. You can use the -C option to extract to a different directory (in this case, /home/user/files).
Extract .tar.gz file to a different working directory:
tar -xf filename.tar.gz -C /home/user/filesOnly Extract Specific Files or Directories From .tar.gz in Linux
The tar command also provides support for extracting only specific files or directories from a .tar.gz file. Simply add a space-separated list of the files you want to extract.
Extract file1 and directory1 from .tar.gz file to current working directory:
tar -xf filename.tar.gz file1 directory1Note that this command will throw an error unless you specify the exact filename listed in the .tar file. As we’ll cover more in the next section, you can verify file names by listing contents with the tar -tf filename.tar.gz command.
You can also use --wildcards to extract all files with a certain extension or name.
Extract all files ending with “.txt” from .tar.gz file:
tar -xf filename.tar.gz --wildcards '*.txt'Unzip .tar.gz From stdin in Linux
You can also extract .tar.gz directly from the standard input stream (stdin) by piping it into the tar command using the decompression option (-z).
For example, if you wanted to extract the .tar.gz file located at “https://kinsta.com/filename.tar.gz” (there’s not actually a .tar.gz file here, but bear with us), you’d use the wget command piped into tar.
Extract .tar.gz file from a URL:
wget -c https://kinsta.com/filename.tar.gz -O - | sudo tar -xzList Contents of .tar.gz File in Linux
It’s often useful to list the contents of a .tar.gz file without having to unzip the entire archive. The -list (-t) option will output a list of filenames.
List contents of a .tar.gz file:
tar -tf filename.tar.gzYou can also add the verbose output option (-v) to provide detailed listings, including dates, securities/permissions, and more.
List detailed contents of a .tar.gz file:
tar -tvf filename.tar.gzMany compression utilities also offer their own commands for listing the contents of compressed files. For example, gzip allows you to list the contents of a .gz file with the following command:
List detailed contents of a .gz file with gzip:
gzip -l filenameZip and Unzip .tar and .tar.gz in Linux with gzip
You can create your own compressed .tar files using compression utilities such as gzip. Gzip is one of the most popular and available options, especially since it comes built in to most Linux distributions and macOS.
In the terminal, navigate to the working directory of the .tar file you want to compress and simply enter the following command:
Compress .tar file with gzip:
gzip filename.tarYou can just as easily unzip the resulting .tar.gz file with the decompress (-d) option.
Decompress .tar.gz file with gzip:
gzip -d filename.tarIf you want to keep the original file after compression, there are two options. The first is the -k option, and the other uses the -c option to output the compressed file to a different file, preserving the original.
Compress .tar file and keep original copy:
gzip -c filename.tarCompress .tar file and store as a different file:
gzip -c filename.tar > newfilename.tar.gzLike the tar utility, gzip also allows you to zip and unzip multiple files or entire directories at a time.
Compress multiple files:
gzip file1 file2Decompress multiple files:
gzip -d file1 file2Compress all files in a directory:
gzip -r directory1Decompress all files in a directory:
gzip -dr directory1How Do I Unzip a .tar.gz File in Windows 10?
Like Linux and macOS, the Windows 10 operating system also includes a built-in tar utility.
Unlike Windows’ convenient graphical user interface (GUI) for unzipping .zip files, you’ll need to use the tar utility through the command line. However, there are also many third-party tools you can install for a more user-friendly experience.
Using the Command Line (cmd)
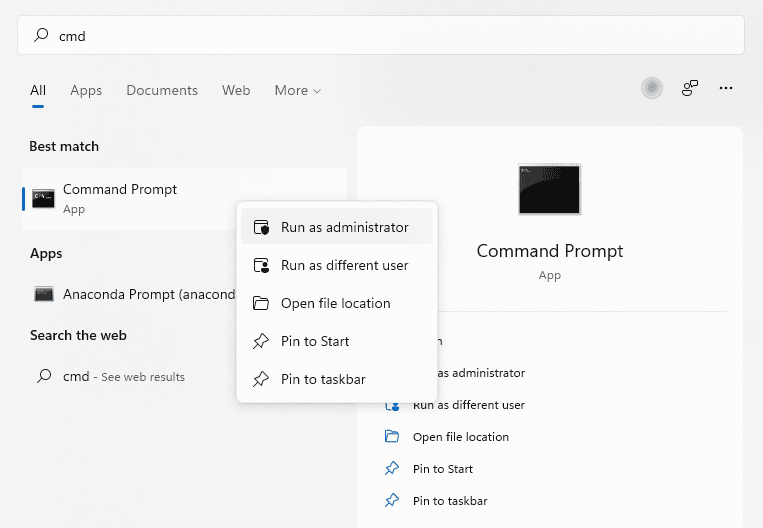
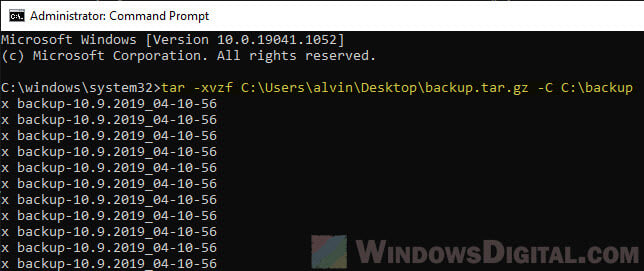
To access the Windows command line, search for “command prompt” or “cmd” in the search bar. Right-click the first result and select the “Run as administrator” option.
With the command prompt open, use the appropriate commands to change the current working directory (cd) to the location of the .tar.gz file you want to unzip. Alternatively, you can also specify a source and destination file path when using the tar utility.
Type one of the following commands and press “Enter.”
Extract .tar.gz file to current working directory:
tar -xvzf filename.tar.gzExtract .tar.gz file from source path to destination path:
tar -xvzf C:\PATH\TO\SOURCE\filename.tar.gz -C C:\PATH\TO\DESTINATIONNote that the tar utility in Windows has nearly the same syntax as it does in Linux and macOS. Here we’ve used the extract (-x), verbose (-v), decompress with gzip (-z), and file (-f) options for a complete extraction with decompression and detailed output.
Using Third-Party Tools
If the command line isn’t your thing, there are plenty of user-friendly tools available to unzip tar.gz files.
While there are many tools to choose from, the most popular include 7-Zip and WinZip. While slightly different, they are quite lightweight and offer a much simpler alternative to using the command line.
Some third-party tools also offer extended flexibility for converting between file types, saving more time if you want to change between compression formats. Many are also available for Linux and macOS.
However, while tools like 7-Zip are free, many more “robust” solutions are only available for a price after a trial period. As a result, we recommend sticking to free (but trustworthy) tools or simply using the command line.
Troubleshooting Common Errors
Not every .tar.gz extraction is seamless — especially if you’re using the command line!
Where commands have little (if any) room for typos or omissions, many common errors are the result of small mistakes, misspellings, or incorrect formats. Thankfully, unless you’re somehow missing your tar or gzip utility, most common errors are very easy to fix.
tar: README: Not found in archive
This error occurs when trying to extract specific files or directories from a .tar.gz file using tar.
Error Input:
tar -xf filename.tar.gz FILEError Output:
tar: FILE: Not found in filename
tar: Exiting with failure status due to previous errors
In this example, the user tried to extract the file titled “FILE” from filename.tar.gz. However, tar was unable to find FILE within .tar.gz, meaning that the user either misspelled the name or that the file simply doesn’t exist in filename.tar.gz. Another common cause of errors is case sensitivity, where Linux treats “FILE” and “file” as two separate entities.
Solution: Check the spelling and/or verify that the file exists in the .tar.gz archive by listing the contents with tar -tf filename.tar.gz.
tar: Archive is compressed. Use -z option
This error occurs if you try to decompress a file without specifying a decompression utility, specifically -z for gzip.
Error Input:
wget -c https://kinsta.com/filename.tar.gz -O - | sudo tar -xNotice that the “-z” is missing from what should be sudo tar -xz on the far right.
Error Output:
tar: Archive is compressed. Use -z option
tar: Error is not recoverable: exiting now
Solution: Specify a decompression option such as gzip (-z) in the tar command.
gzip: stdin: not in gzip format
Many users report running the “right” commands only to find that their .tar.gz is “not in gzip format” – despite the .gz extension.
Error Output:
gzip: stdin: not in gzip format
tar: Child returned status 1
tar: Error exit delayed from previous errors
This error usually occurs when a .tar has been saved as a .gz despite having never been compressed using the gzip utility. It may sound like a silly mistake, but it’s surprisingly common in situations where users directly rename files and their extensions (such as .tar and .gz) in the process.
Solution: Find a new copy of the .tar.gz file, or simply extract it as a .tar file using tar -xf filename.tar instead. If this command also throws an error, the next solution might help.
tar: Unrecognized archive format
Similar to the previous error, this error occurs when an archive was saved as a .tar despite not being a .tar archive.
Error Output:
tar: Unrecognized archive format
tar: Error exit delayed from previous errors.
Solution: Find a new copy of the .tar or .tar.gz file, or try extracting with gunzip filename.tar.gz instead. If the gunzip command doesn’t work, try listing the contents with verbose output with tar -xvf filename.tar.gz and see if there’s a specific file causing the problem. However, it’s more likely that the file was never properly zipped as a .tar file in the first place.
FAQs
It’s easy to get confused when navigating between .tar, .tar.gz, and .gz – not to mention zipping and unzipping them. Here are a few frequently asked questions we commonly hear from users working with .tar.gz files.
How Do I Open A .tar.gz File?
You can open most .tar.gz files using the tar command built in to Linux, macOS, and Windows 10. If you’re not comfortable with the terminal or command line, third-party tools such as 7-Zip offer a more user-friendly alternative.
Is .gz a .tar File?
While every tar.gz file is a .tar archive, not every .gz is a .tar file. The .gz extension represents the gzip compression format, which can be applied to almost any file format to compress data and save space.
Is .tar.gz The Same As .zip?
Though both .zip and .tar.gz archive and compress files, they do so in different ways. Where .zip archives and compresses individual files, .tar only archives individual files, leaving a separate compression format such as .gz (gzip) to compress all of them as a single file/archive. In other words, .zip is a collection of compressed files, while .tar.gz is a compressed collection of files.
Is .tar.gz More Efficient Than .zip?
Yes. Since .tar.gz compresses multiple files all at once, it can take advantage of similarities between individual files to save on space. Generally speaking, a collection of files archived and compressed as a .tar.gz will be more space-efficient (i.e., smaller) than the same collection compressed as a .zip.
Need a little help extracting files? This guide is here to help ✅Click to Tweet
Summary
With Linux, macOS, and Windows 10 offering a built-in tar utility, it’s easier than ever to unzip tar.gz files through the command line. Usually, the only command you’ll really need is:
tar -xvzf filename.tar.gzLike many archive and compression formats, .tar.gz is an effective way to save storage space and make it easier to send large amounts of data. If you plan to distribute and store .tar.gz files on your website, Kinsta’s managed hosting services can help make the most of your space.
For more information and to schedule a live demo, contact a hosting expert from Kinsta today.
To clear things up, the .tar extension is a file format that archive multiple files into a single file without compression. The .gz (Gzip) is a compression method in which the logical size of the files is reduced to save disk space. The .tar and .gz are usually used together to archive multiple files into a single file that is also compressed significantly, thus, with the combined extension of .tar.gz.
To open or extract a .tar, .tar.gz or .gz file in Windows operating system, the most common approach is to simply use a compression software that supports both Tar and Gzip such as 7zip and WinRAR.
You can also quickly extract a .tar or .tar.gz file in Windows 11/10 using command line in CMD without the need to install any software.
Open .gz, tar.gz or .tar file using file archiver tool
7-Zip – supports both .gz and .tar
7-Zip is one of the most popular file compression software widely used by majority of users around the globe due to its simplicity and user-friendly GUI. It is also free to download and use.
7-Zip can work with most compression methods and extensions including .gz, tar.gz and .tar. You can use it to archive and compress files using any supported methods you prefer, or to open and extract any compressed file.
To open and extract a .gz, tar.gz or .tar file using 7-Zip in Windows 11 or 10:
- Download and install 7-Zip from https://www.7-zip.org/.
- Once installed, right-click on the tar or gz file that you want to open.
- In the context menu, select 7-Zip, then “Open archive“.

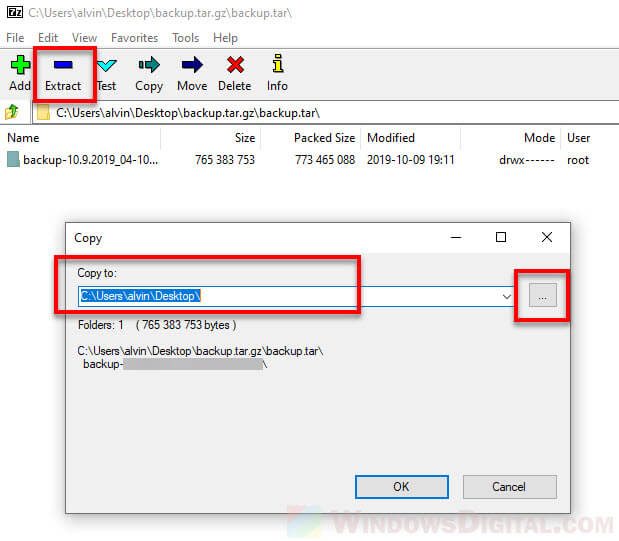
- In the 7-Zip window, select the file you want to extract and then click on “Extract“.
- Enter the location or browse to the destination where you want the files to be extracted to.

- Click OK to begin the extraction.
If it’s a .tar.gz that you’re opening, you may need to double-click the .tar file when it’s opened in 7-Zip in order to browse and extract the archived files.
WinRAR – supports both Tar and Gzip
WinRAR is yet another popular file archiver tool widely used by users around the world to compress and uncompress files. WinRAR also supports both tar and gz extensions. You can use it to easily open, view and extract any .gz, tar.gz or .tar file.
To open and extract a tar.gz, .tar or .gz file using WinRAR in Windows 10 or 11, follow the steps below.
Download and install WinRAR from https://www.win-rar.com/download.html.
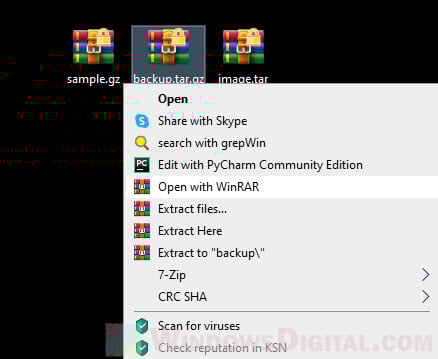
Once installed, right-click on the .gz or .tar file you want to open and extract. Select “Open with WinRAR” from the context menu.
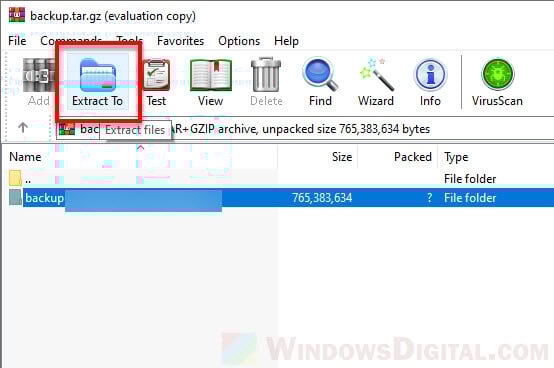
Doing so will open the compressed file in WinRAR. To extract any or all files, select the files you want to extract, then click on the “Extract to” button.
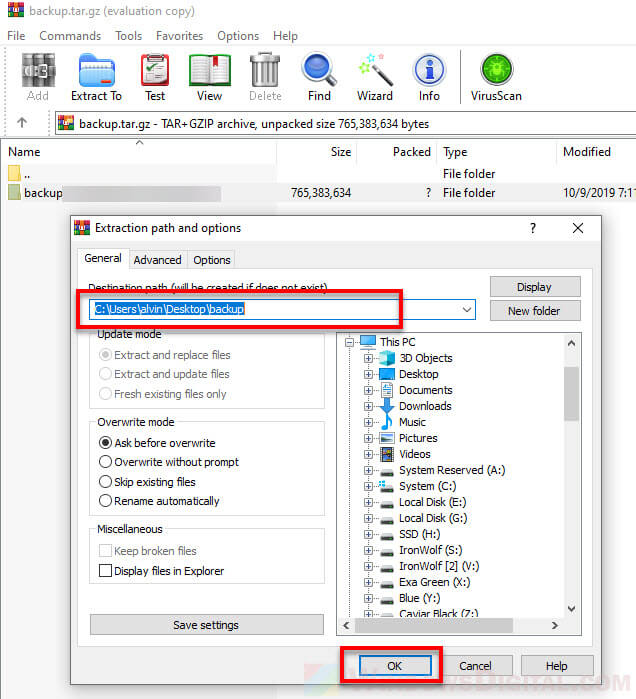
Enter or browse to the extraction destination path (the location where you want to extract the files to), then click OK to begin the extraction.
Extract tar.gz, .gz or .tar using CMD in Windows 11/10
If you don’t want to install any file compression software, you can quickly extract .gz, tar.gz or .tar files using the Tar command in command prompt on Windows 11 or 10.
To extract tar.gz or tar file using command in Windows, follow the steps below.
Firstly, open an elevated command prompt by search for “cmd” on the Windows 11 or 10 search bar. Right-click “Command Prompt” from the search result and select “Run as administrator“.
In the command prompt window, enter the following command.
tar -xvzf "Path to the archived file" -C "Path to the extract destination"
For example:
tar -xvzf C:\Folder\Sample.tar.gz -C C:\Anywhere\
The example above will extract the sample.tar.gz file from C:\Folder\ to C:\Anywhere\ folder. Note: Make sure the -C parameter before the path to destination is uppercase letter.
The parameters used are explained as below.
- x — to tell the tar command to extract the archive file.
- v — Optional: to show the progress of the extraction by showing the list of files as they are extracted. Otherwise, you will see nothing except a blinking cursor until the extraction is completed.
- z — to tell tar to extract through gzip.
- f — to tell tar that the next argument is the file name of the archive.