In this blog, we are going to explain how to change server name in server 2022. This article was automatically translated, if you have feedback concerning its feature please use the comment form at the bottom of the page.
In this today’s blog, I will explain to you how to change your server name in Windows Server 2022 using the server settings menu, Control Panel, Server Manager, Command Prompt, and PowerShell. You can return your computer back to default by noting down the name and following these steps again. Let’s get started.
Prerequisites
Virtual Machine, Hyper-V, or a dedicated server with Windows Server 2022 installed.
Logged in with administrator account.
Changing the Hostname
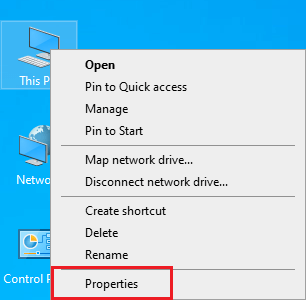
Right mouse clicks on This PC and then click on Properties.
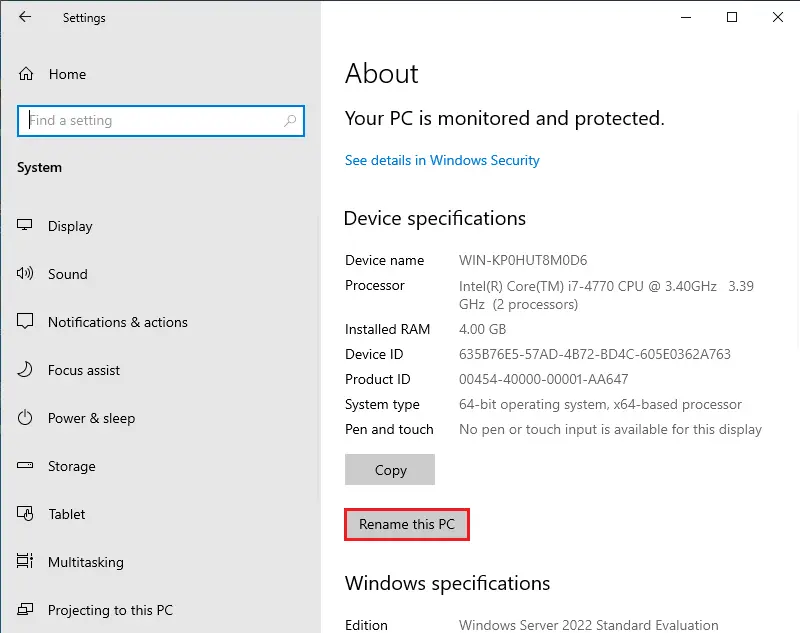
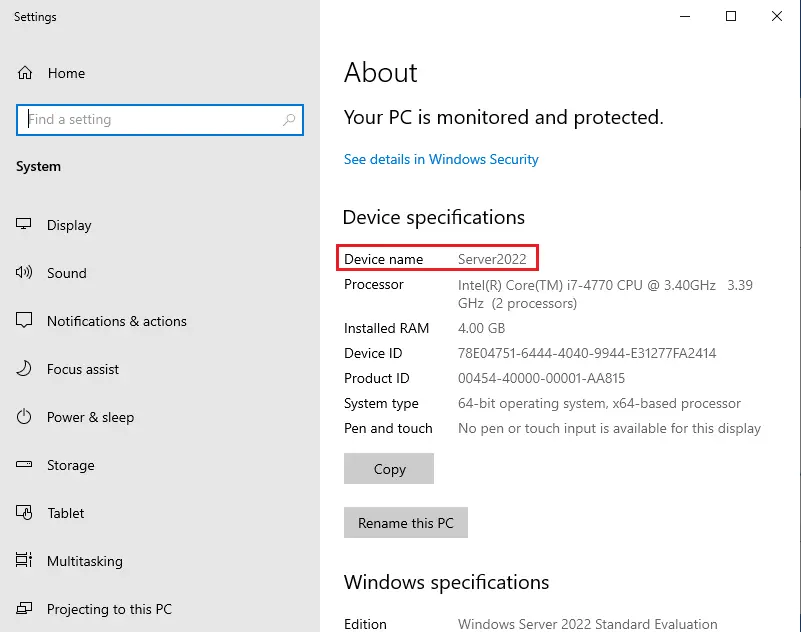
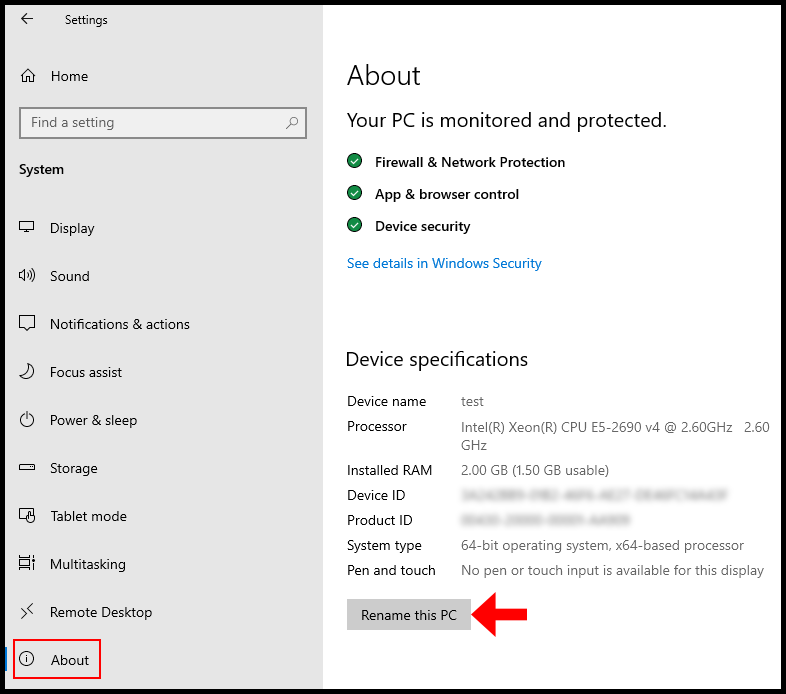
Under About, click on rename this PC.
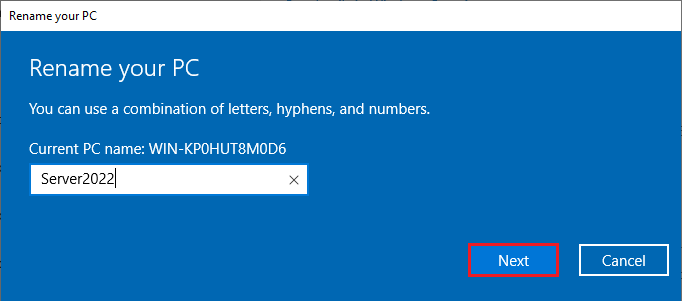
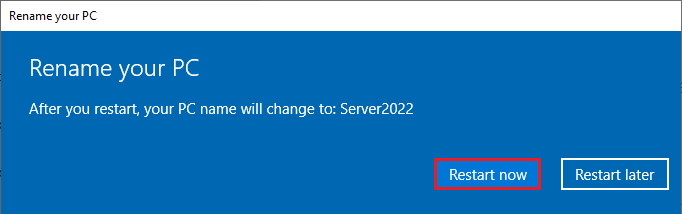
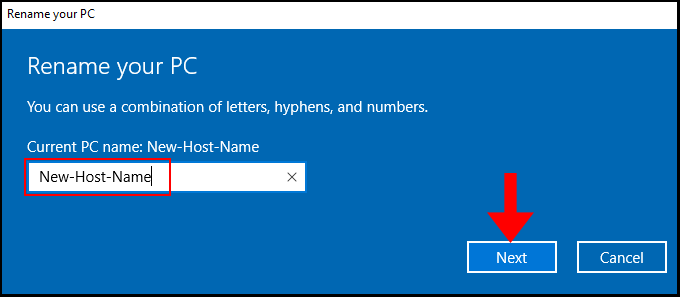
Rename your PC window, type a name (Server2022) and then click next.
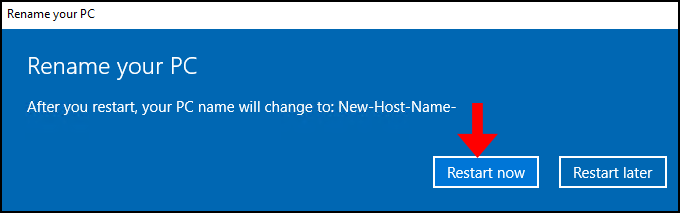
Select restart now
Choose a reason to describe the reboot and then click continue.

Change Server name using Server Manager
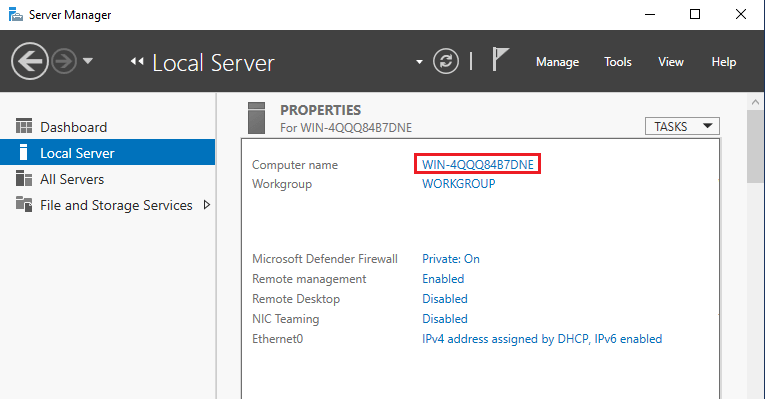
Launch Server Manager, from your left side, click on local server and then click on computer name.
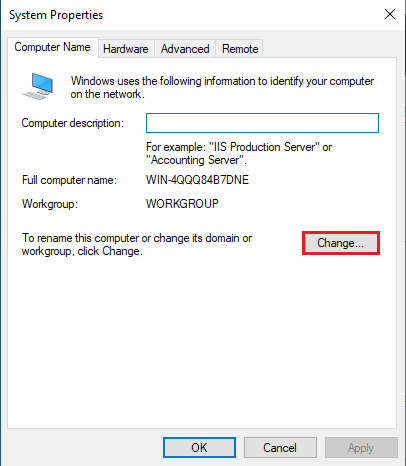
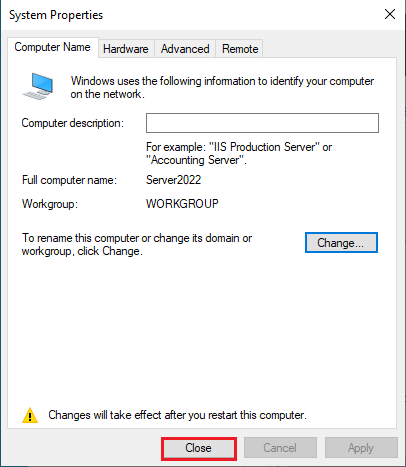
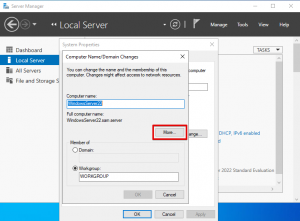
System properties, click on the change button.
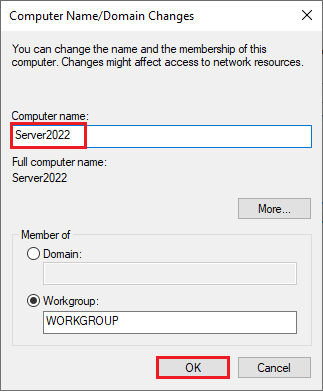
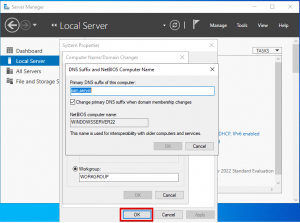
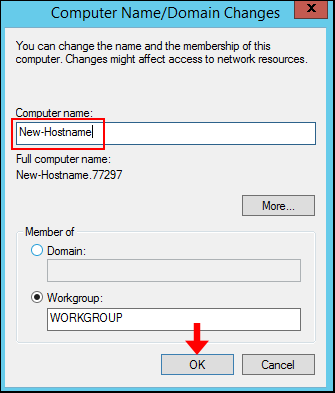
Now insert the server name under the computer name you wish to change it to and then click ok.
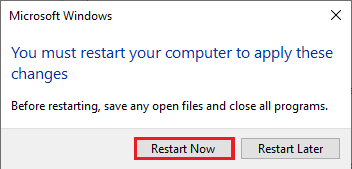
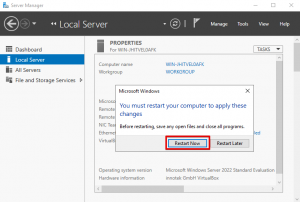
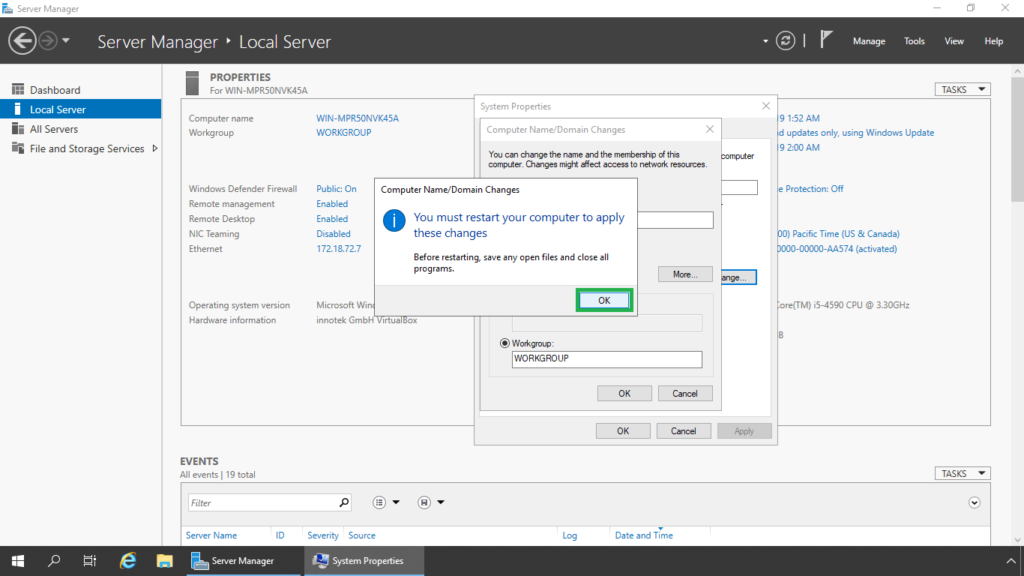
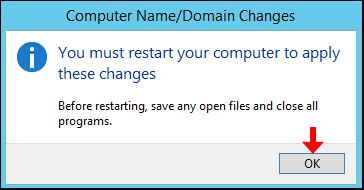
To apply the changes you need to restart your system. Click on ok to restart your computer.

Select ok
Click on Restart Now
Now your server name is changed after restarted.
How to Change Server Name using CMD
If you’d prefer to change the server name using the command line, CMD is also an option. This way is easier, quicker, and is helpful if you have no access to GUI, on a Windows Server install for an instant.
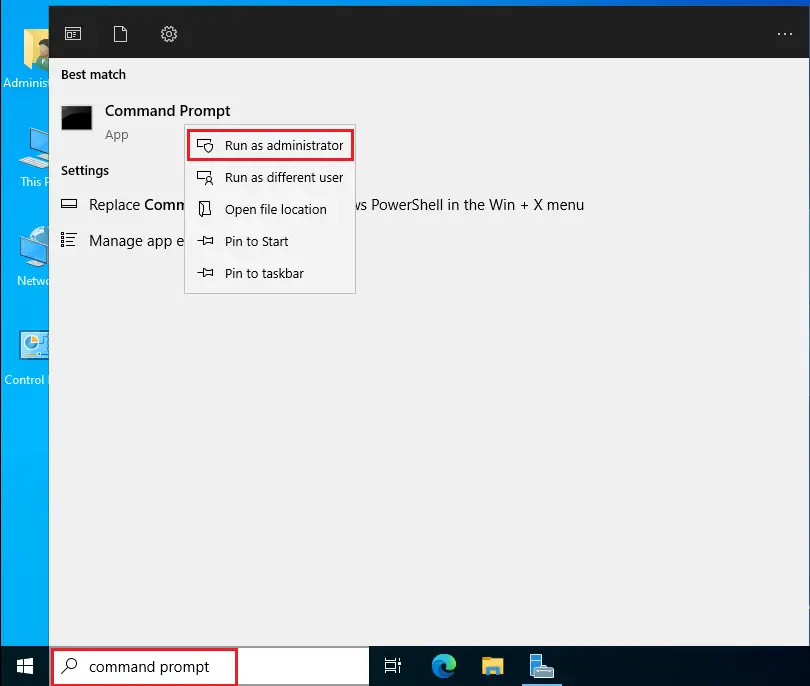
Type Command Prompt in the Server search bar, right click on command prompt, and then select Run as administrator.
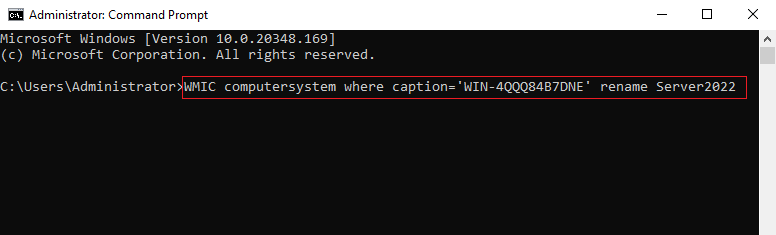
We can rename a server computer from the command prompt using WMIC computersystem command.
WMIC computersystem where caption=’currentname’ rename newname
For example: If the current server name is random, to change it to Server 2022, we can run the following command.
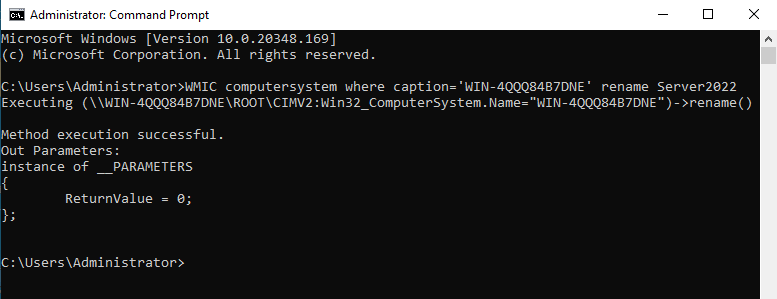
wmic computersystem where caption= WIN-4QQQ8487DNE’ rename Server2022
After applying this command, you need to restart the server to make the changes effective.
How to Change Server Name using PowerShell
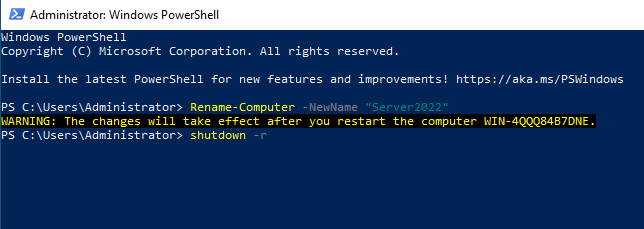
Additionally, you can use a PowerShell command to change the server name if you are more comfortable with the PowerShell.
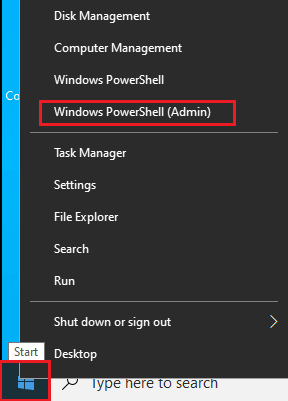
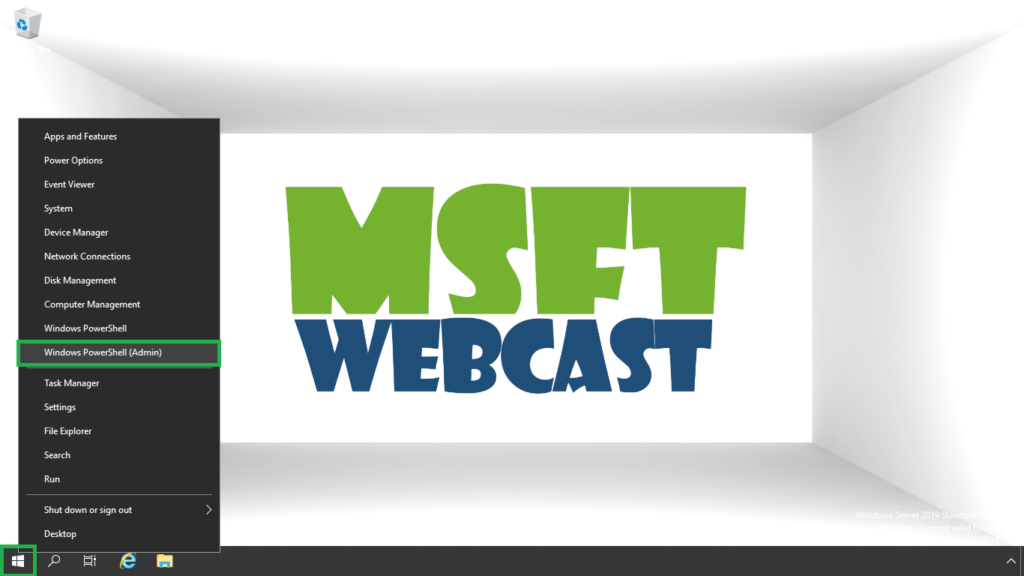
Right-click on the server Start button, then select Windows PowerShell (Admin).
Type the PowerShell change server name command
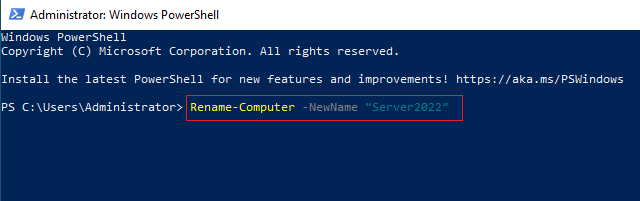
Type the following PowerShell command in the PowerShell window and then hit enter, substituting Server2022 with your preferred name.
Rename-Computer -NewName “Server2022”
Server restart required changes to take effect.
Conclusion
That’s all, you have learned how to change the hostname on Windows Server 2022.
Jamil Parvezhttps://www.xpertstec.com
Jamil Pervez works as a Network Administrator, based in Kuwait with a Primary focus on Microsoft technologies. Microsoft Certified MCSE, MCTP, MCITP, CCNP, CCIP, CCVP with 20 years of experience in administering Windows Servers, Exchange, VMWare, Veeam B&R, Veritas BackupExec.
Change the server name.
A computer or hostname is a unique label assigned to a machine or device connected to a computer network in Windows. The hostname is automatically assigned by default. However, the server name can be changed at any time. Most Windows users don’t know how to change the Hostname in Windows Server. Changing the server name is a very easy and simple process. It does not require learning advanced skills.
Today, in this article, I want to teach you how to change the server name or computer name in Windows Server 2022 using two different possible methods.
The change server name in Windows Server
We can change the server name using the following two methods:
Changing the server name using the server manager (graphical user interface)
Rename Server Using PowerShell (Command Line)
Method 1: Changing the server name using Server Manager (graphical user interface)
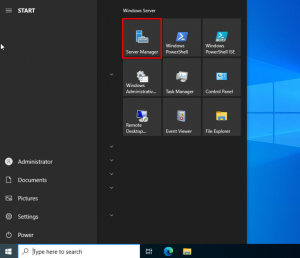
Using the “Server Manager” graphical user interface, you can easily change the computer’s name. When you start your system, it will automatically run on your desktop. Alternatively, you can launch Windows Server Manager from the Start menu of your Windows server.
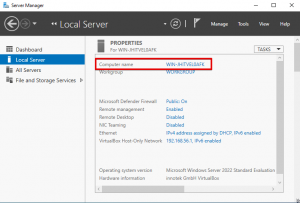
From the left sidebar menu, click Local Server and then click Computer name.
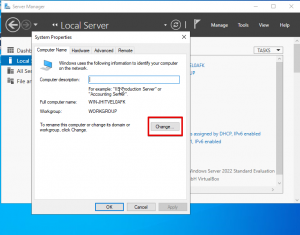
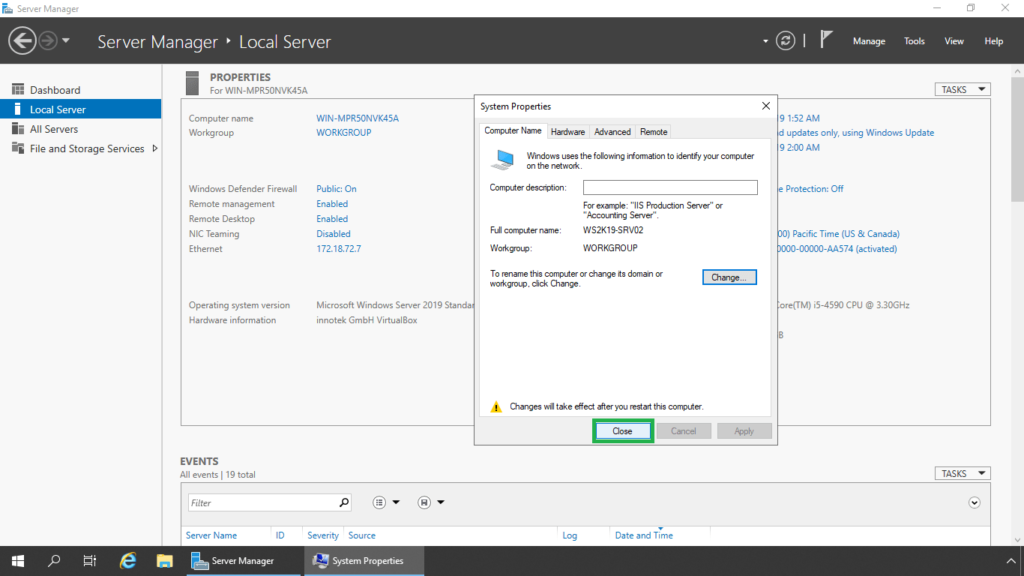
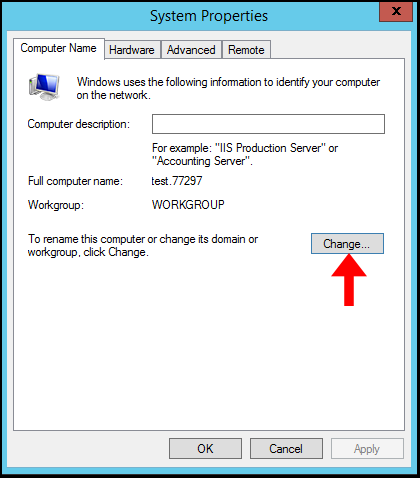
The System Properties window appears on the screen. Click the Change button on the Computer Name tab.
Enter the server name in the Computer name field that you want to use as the server name. Next, click on More.
Enter the default DNS extension for your computer. Click on “OK.”
You must restart your Windows server to apply the above changes at this stage.
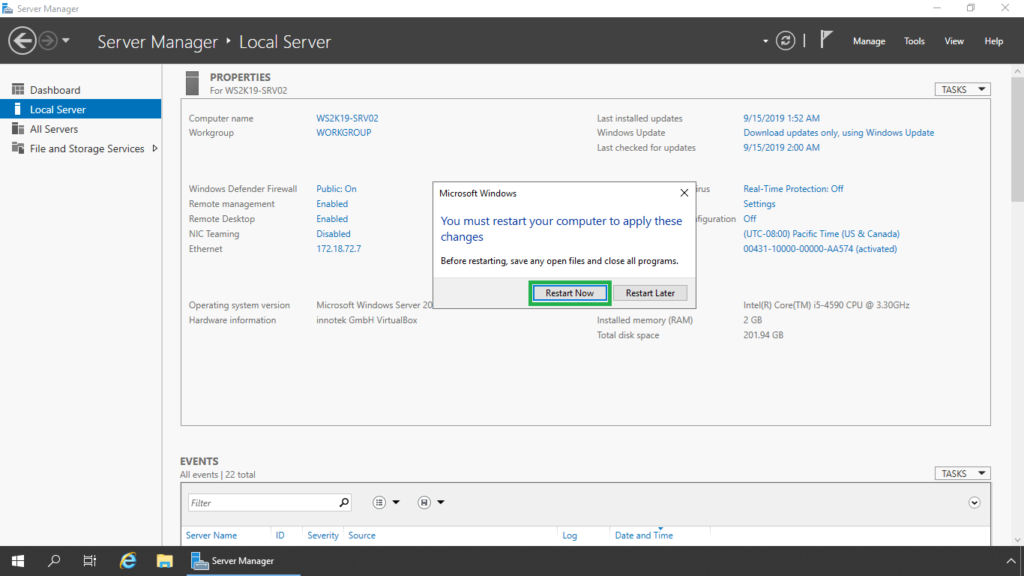
Now click on “Restart Now” to restart your computer immediately.
Open Server Manager again to see the changes, and you will notice that the computer name has been successfully changed or updated.
Method 2: Change the Server name using the command line
You can change the server name using command line commands. Most Windows users prefer to use PowerShell when working on Windows Server. Therefore, to change the server name in the Windows server through PowerShell, you must do the following steps:
Open a command line PowerShell window from the Windows Server Start menu. Now use the following command to change the server name:
> Rename-Computer -NewName [Server-name] -Force -PassThru
Replace the server name with the name you want to set for your computer. For example, here, we choose the name “Win-Server2022”. Now run the following command with admin access:
> Rename-Computer-NewName “Win-Server2022”-Force-PassThru
After executing the above command, the following output will be displayed in the PowerShell terminal:

It would help if you restarted your computer for the changes to take effect. So, restart your system using this command:
Restart-Computer
Conclusion
In this article, we have shown how to change the computer name in Windows Server 2022 using both graphical user interface methods and using the command line. I hope you can easily change your server name by following the mentioned steps.
In today’s blog, I will explain how to change server name 2022 Windows Server using the server settings menu, Server Manager, Control Panel, PowerShell, and Command Prompt. You can get your computer name back to default by noting it down and following the below steps again. Let’s get started.
Table of Contents
Prerequisites
Dedicated server, Virtual Machine, or Hyper-V with Windows Server 2022 installed
I logged in to the Server with an administrator account.
Change Server name via Server Manager
In the Server Manager, from the left side, select the local server and then click on the computer name.

For system properties, select the change button.

Now enter the server’s name you wish to change it to and then select OK.

You need to restart your server to apply the changes. Select OK to restart your computer.

Click ok

Click on Restart Now.

Change Hostname Name Server 2022
Right-click on This PC’s name and then select Properties.

Under About, select Rename this PC.

Enter your new Server name (DC2022) and then select Next.

Select restart Now.

Select a reason to describe the reboot of the server, and then click Continue.

Change Server Name 2022 using PowerShell
In addition, you can change the server using a PowerShell command if you are more comfortable with PowerShell. Search for Windows PowerShell, Right-click on the PowerShell app, and then select Run as administrator.

PowerShell Command to Change Server Name
Enter the below PowerShell command in Windows PowerShell and then the presenter. Substituting DC2022 with your preferred name.
Rename-Computer -NewName “DC2022”

A server reboot required changes to take effect.

Change Server Name 2022 using Command Prompt
If you would prefer to rename the server using the command line, the command prompt is also an option. This is much easier, quicker, and more helpful if you don’t have access to the server GUI. Type CMD in the Windows Server search bar, right-click on the command prompt app, and then choose Run as administrator.

We can rename a server using the command prompt by typing the below command.
WMIC computersystem where caption=’currentname’ rename newname
For instance, if the current server’s name is random, to rename it to DC2022, we can run the following command.
wmic computersystem where caption= WIN-JOVLQ79SNQJ’ rename DC2022

Now you need to reboot the server to make the changes effective.

The server name has been changed after restarting.
Read this article to learn more about How to change the server name.
Conclusion
That’s all. We have learned how to change the hostname in Windows Server 2022.
In this post, we will learn the different ways to rename a Windows Server 2019.
In a manual operating system installation, the Windows Setup program assigns a unique name beginning with WIN-<Something> to the windows server.
Logon to Windows Server 2019 with an administrator account.
Method:1 Rename Windows Server 2019 using the System Properties:
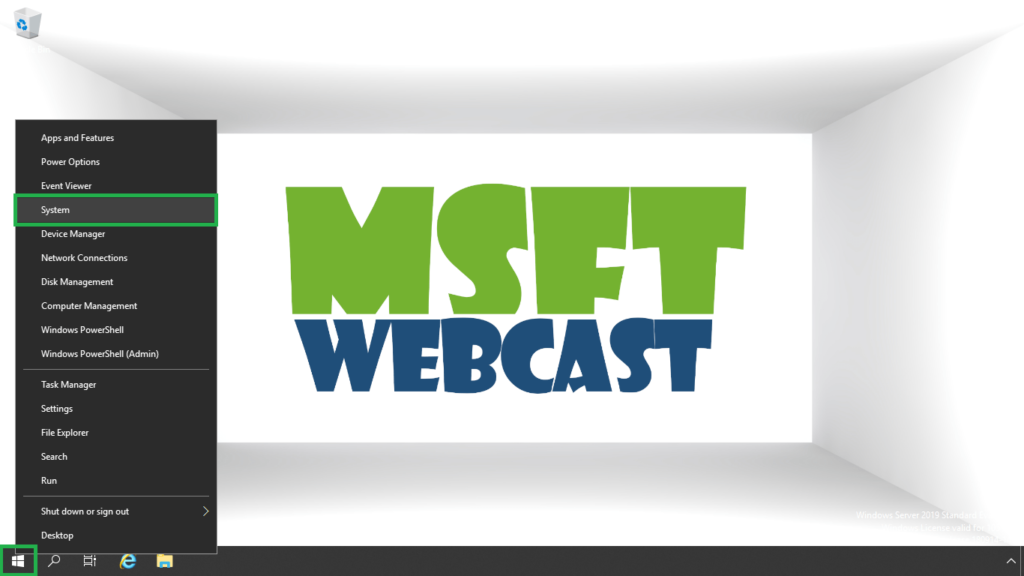
1. Right-click on the Start icon, and then click System.
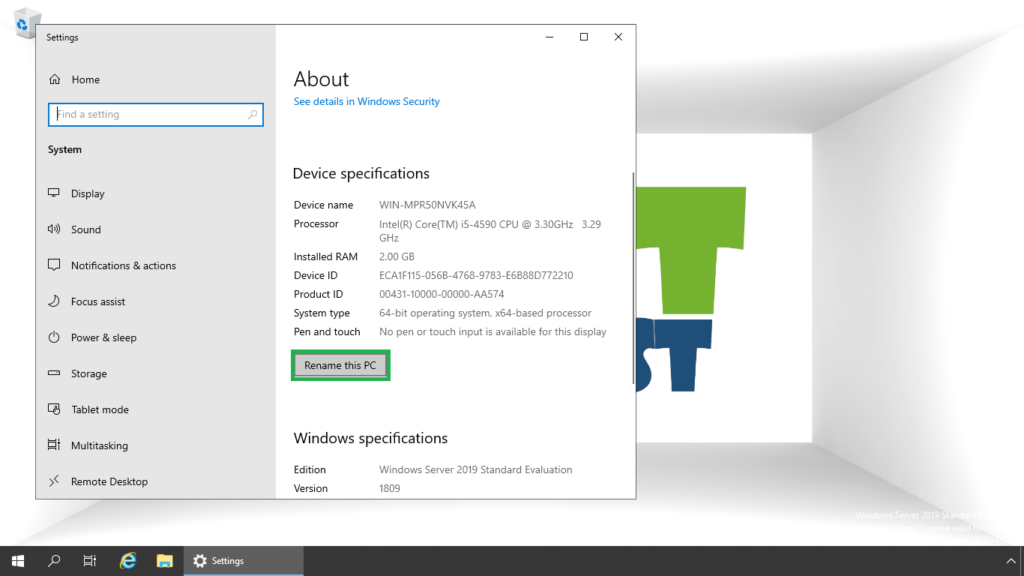
2. In the settings window, click Rename this PC.
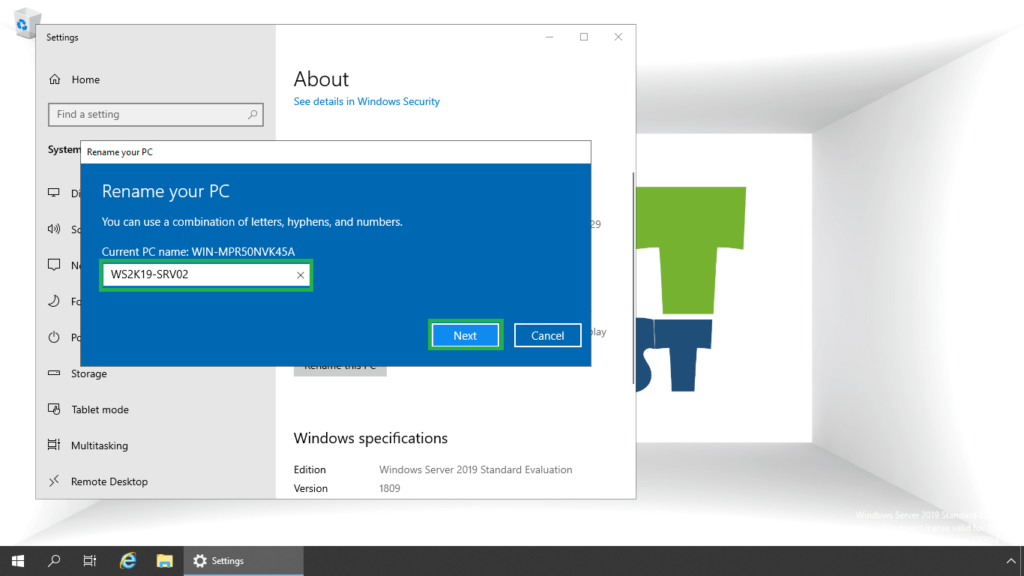
3. Type the new computer name you want for your server and click Next.
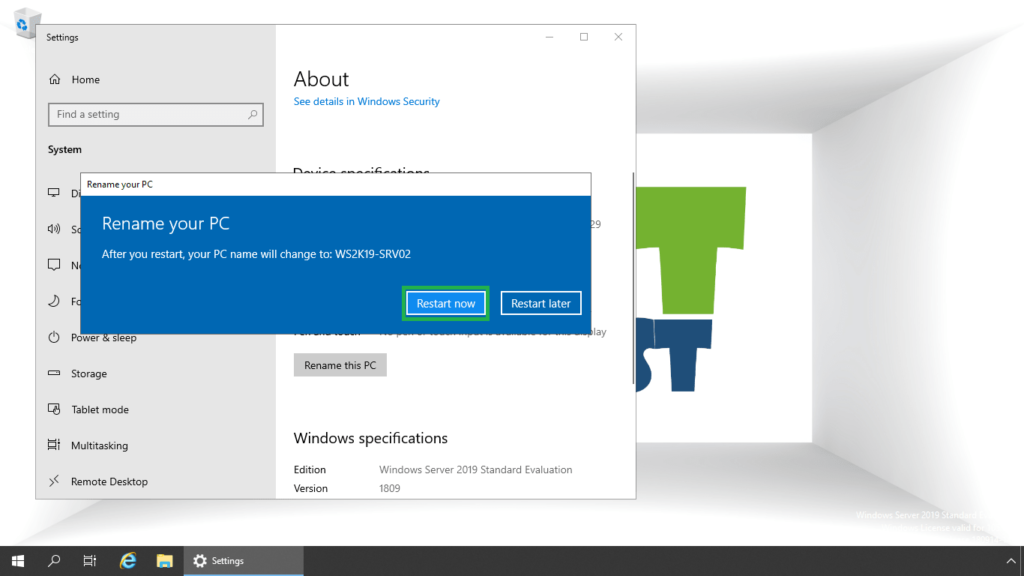
4. To complete the renaming of the server 2019, we will need to restart it. Click on Restart Now.
5. Select Operating System: Reconfiguration (Planned) as a reason to restart the server. Click on Continue.
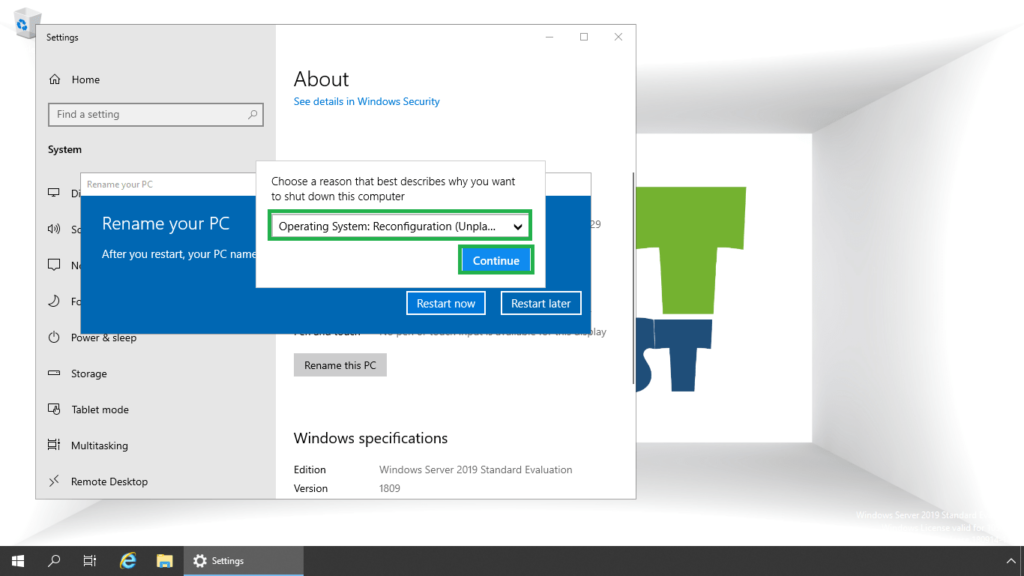
We can also restart the server later on.
Method:2 Rename Windows Server 2019 using the Server Manager Console:
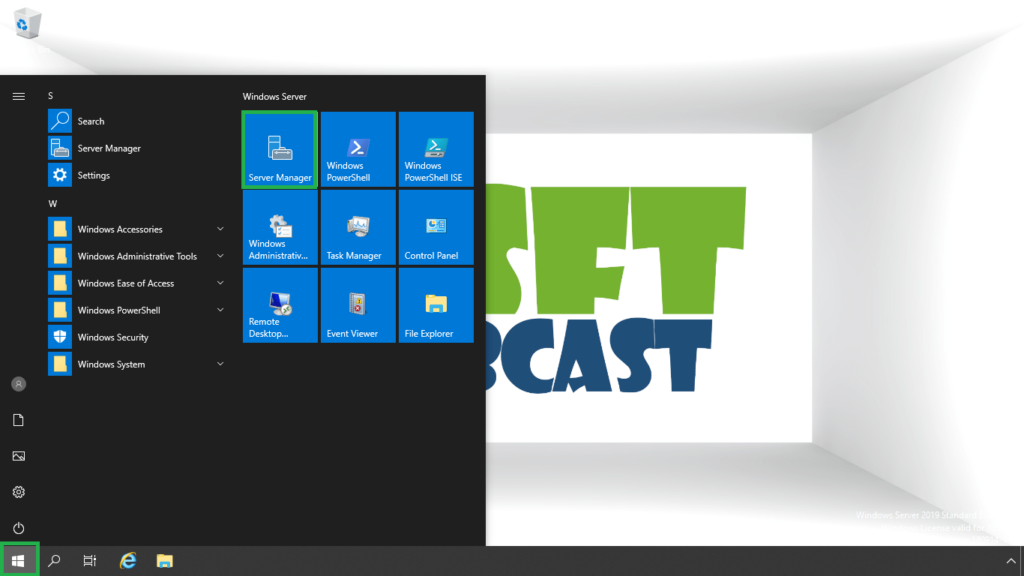
1. Click on the Start button and then click on the Server Manager.
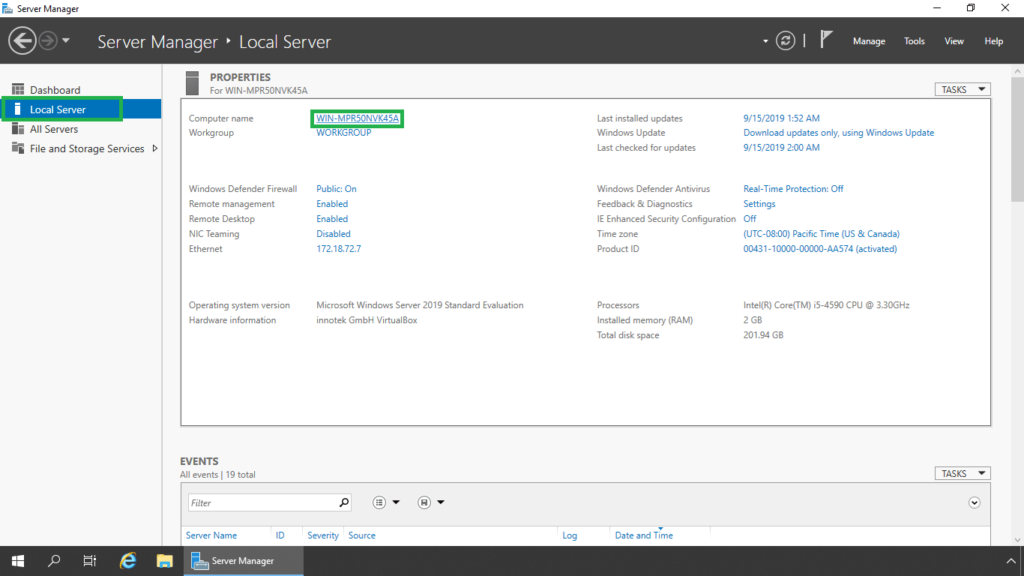
2. On the Server Manager console, click on Local Server. Under Properties and click the computer name link. That will open the system properties window.
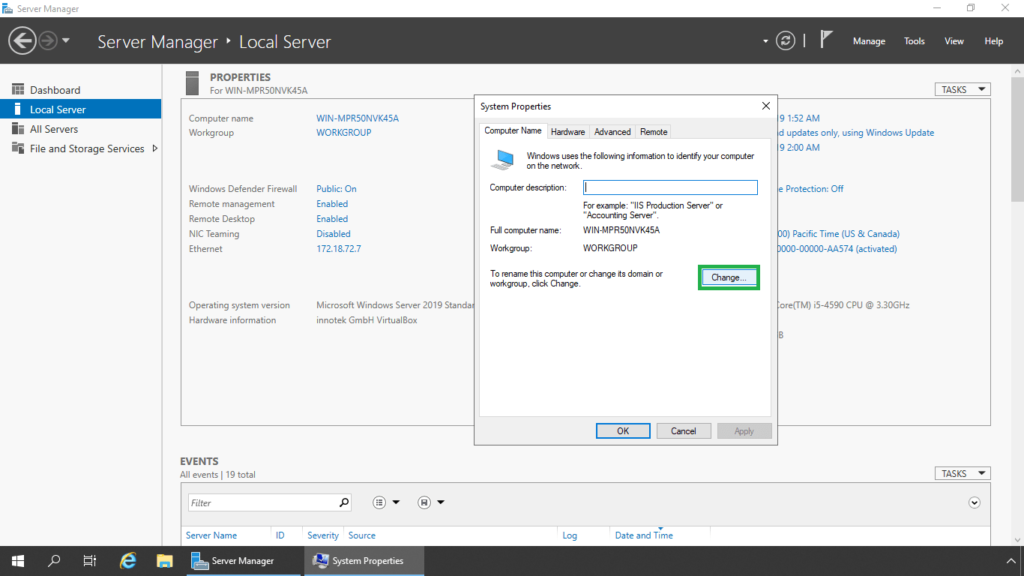
3. Click Change.
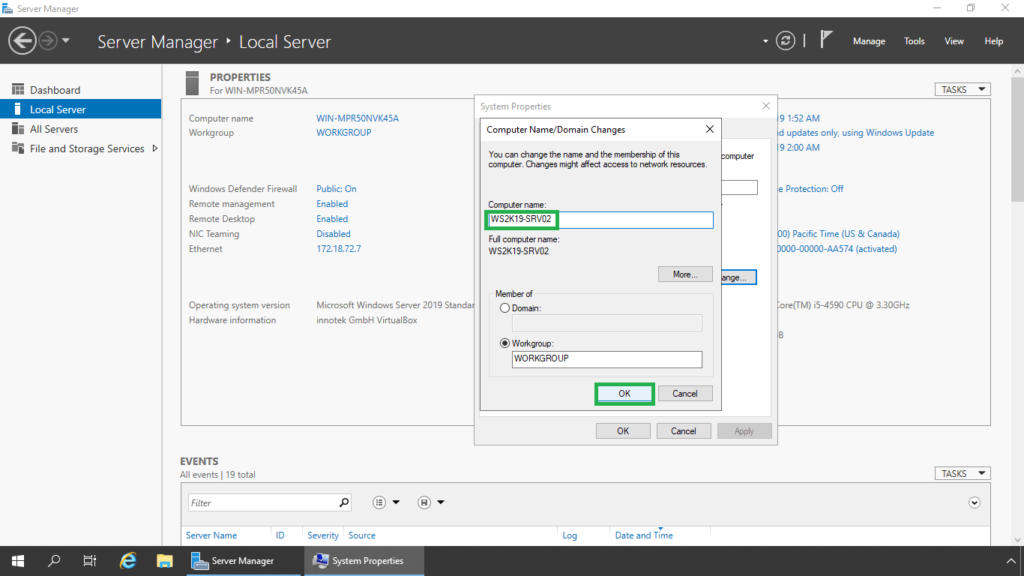
4. Enter the new computer name in the Computer name field.
5. A new dialog box will appear, prompting you that the server will need to be restarted for the changes to take effect. Click OK.
6. Click Close.
7. Click Restart Now.
Method:3 Rename Windows Server 2019 using the PowerShell:
1. Right-click on the Start icon, click on Windows PowerShell (Admin).
Here, we will use the Rename-Computer cmdlet to rename the server 2019.
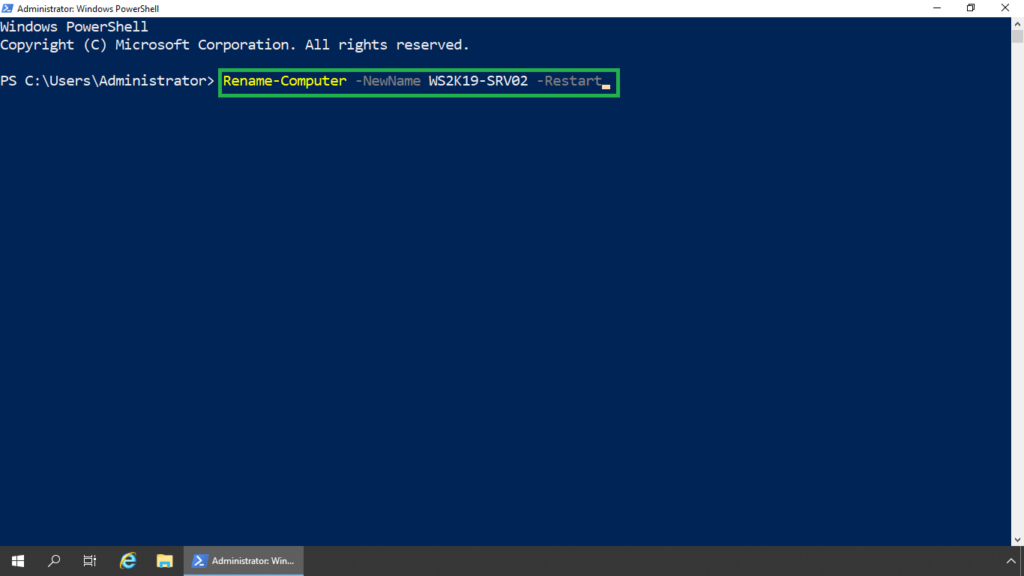
Syntax: Rename-Computer -NewName <new computer name> -Restart
2. In our case, the cmdlet will be,
Rename-Computer -NewName WS2K19-SRV02 -Restart
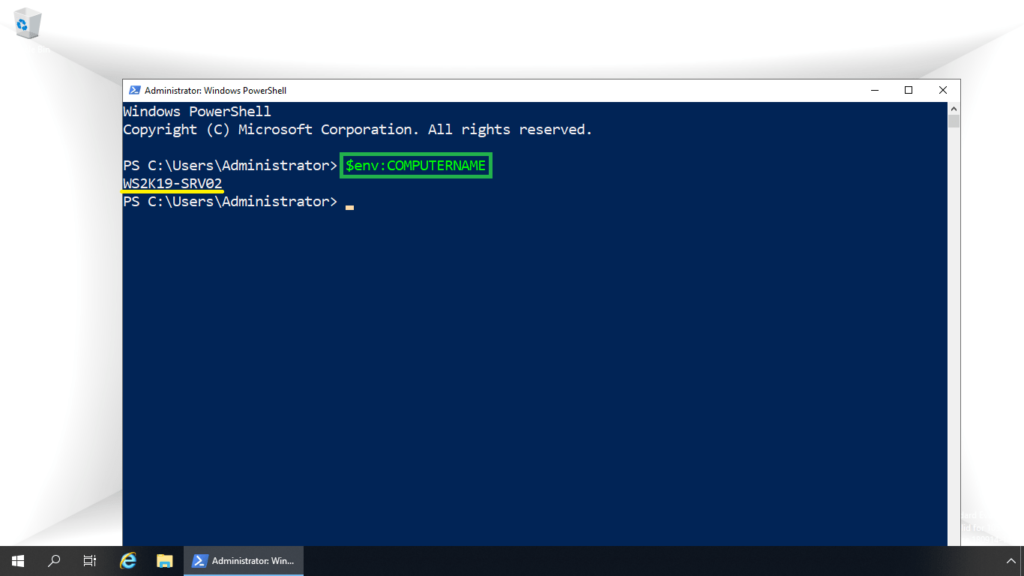
Verify the new name of Windows Server 2019 using Windows PowerShell using cmdlet $env:COMPUTERNAME.
We can also use netdom command to rename Windows Server 2019 as well, but we are not covering it since it is a very old method to rename the server.
In this post, we have learned the different methods to rename Windows Server 2019.
Thank You for reading this post.
Related Articles:
- How to Install Windows Server 2019 in Virtual Box
- Post-Installation Configuration of Windows Server 2019
- Step By Step Guide: How to Setup Active Directory Domain Service on Windows Server 2019
Post Views: 5,021
Auto-deployed Windows servers most likely come with random hostnames configured by the deployment system. If you’d like to change it, then you’ll need to change it manually. Learn how to change Windows Hostname for Windows Server 2019, 2016, and 2012 with our comprehensive guide in this article.
Windows Server 2019
1. To start, log in to your Windows server 2019 and open Windows Settings.
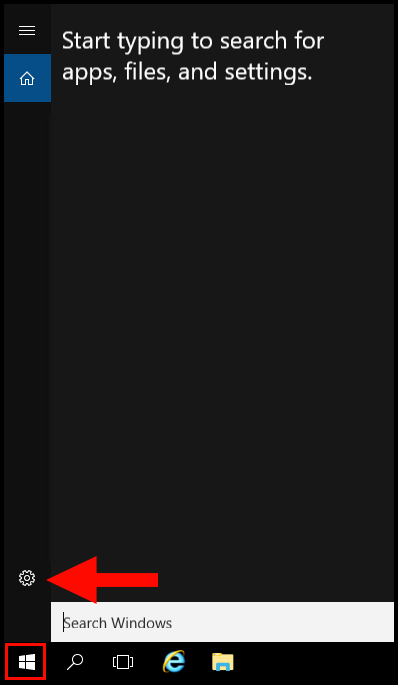
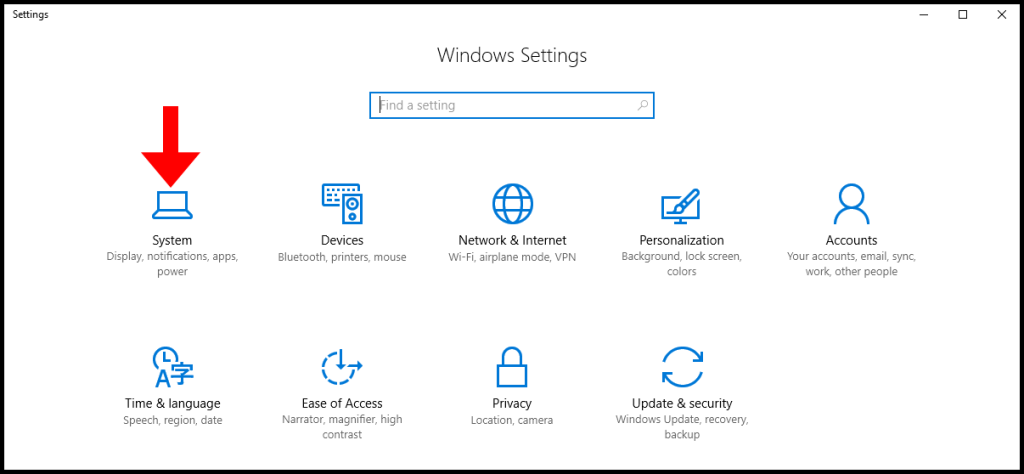
2. Then on the Windows Settings page, click on System.
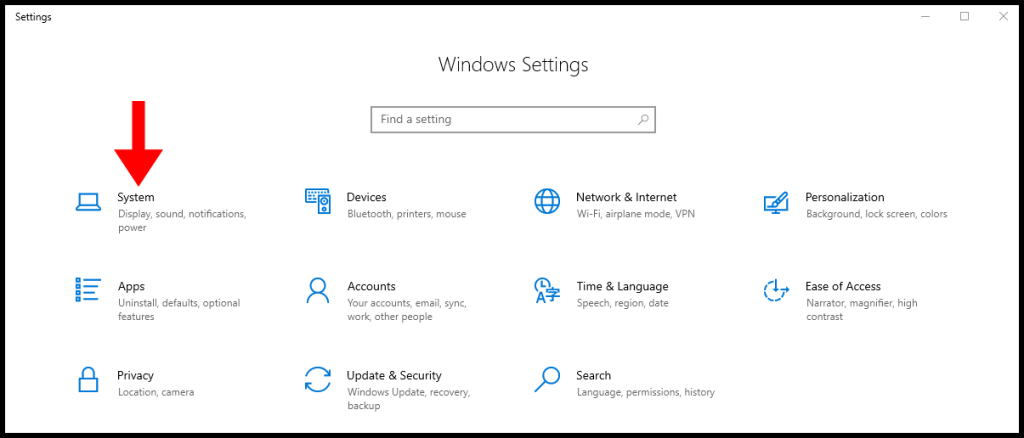
3. Then on the System page, navigate to the About tab on the left menu and click Rename this PC.
4. Then in the pop-up, enter the new PC name in the text field and then click Next.
5. To save the changes, click Restart now on the next screen. We have successfully changed the Hostname on Windows Server 2019.
Windows Server 2016
1. To start, log in to your Windows server 2016 and open Windows Settings.
2. Then on the Windows Settings page, click System.
3. Next, navigate to the About tab from the left menu and click Rename PC.
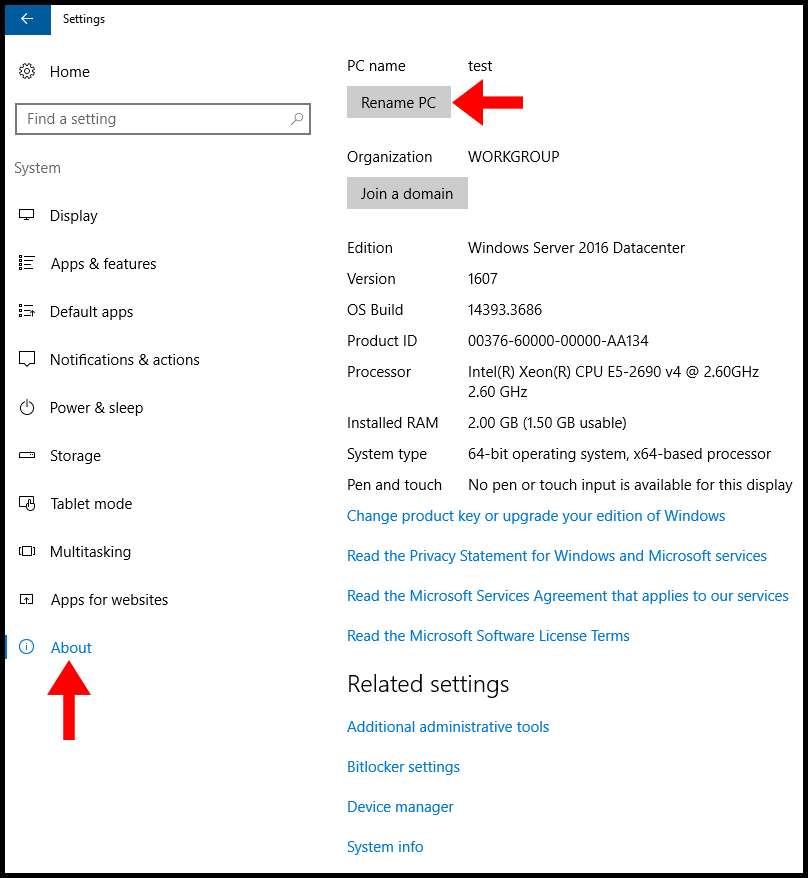
4. Then in the pop-up, enter the new PC name in the text field and then click Next.
5. To save the changes, click Restart now on the next screen. We have successfully changed the Hostname on Windows Server 2016.
Windows Server 2012 R2
1. To start, log in to your Windows server 2012 and open Windows Settings.
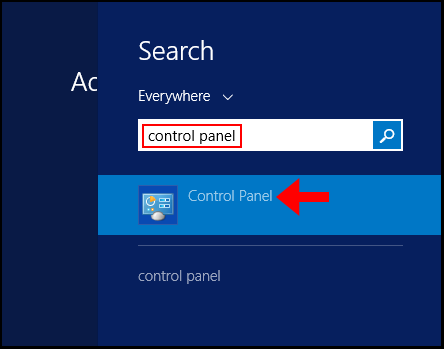
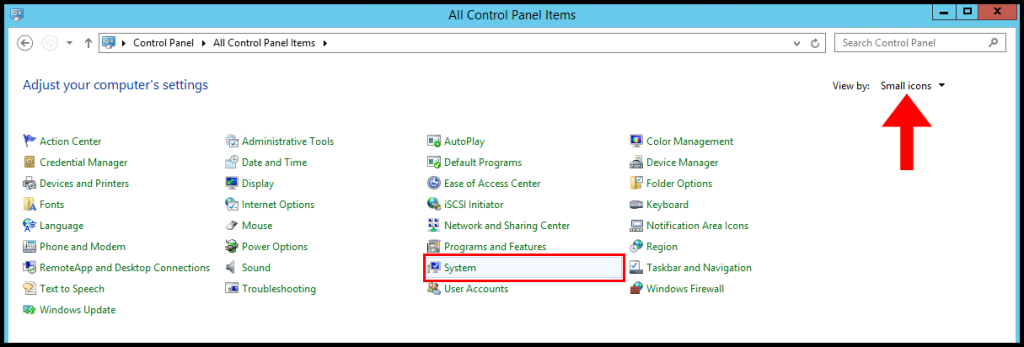
2. Then change the View by option to Small icons and then click System as seen below.
3. Next on the System page, click Change settings as seen in the image below.
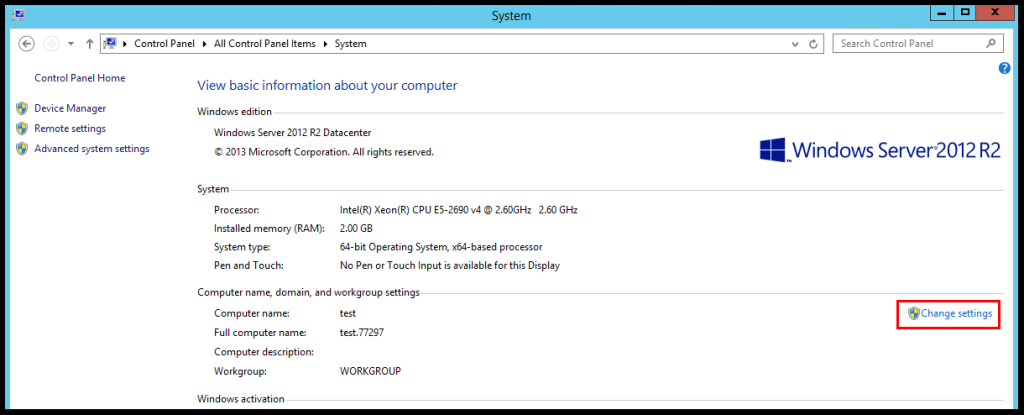
4. Then on the System Properties window, click Change to configure the Hostname.
5. Enter the new hostname in the text field under Computer Name and click OK.
6. A pop-up will appear asking you to restart and then click OK.
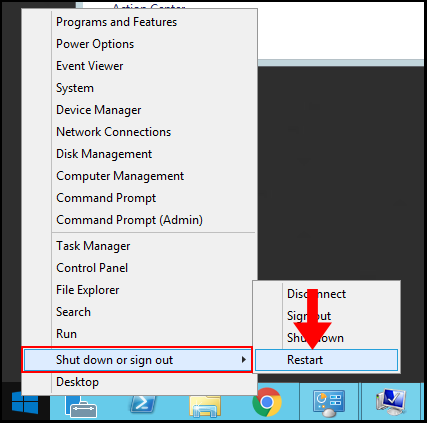
7. Lastly, right-click the Windows button at the bottom left and hover over Shut down or sign out and click Restart to complete the changes. We have successfully changed the Hostname on Windows Server 2012.